Close that gap up between your catch barrel and the unit. It only needs an 1 inch or so to breath and you want to limit how much air gets into the catch container. As the charcoal degasses it keep the air from sinking down there and new charcoal then layers the old and keeps that degassing process constant.
4 Likes
I plan to sink the feet into the ground so that will play out well.
I did notice that in the test run. It had too far to fall and sometimes hit the rim of the catch can and instead going on the grass.
2 Likes
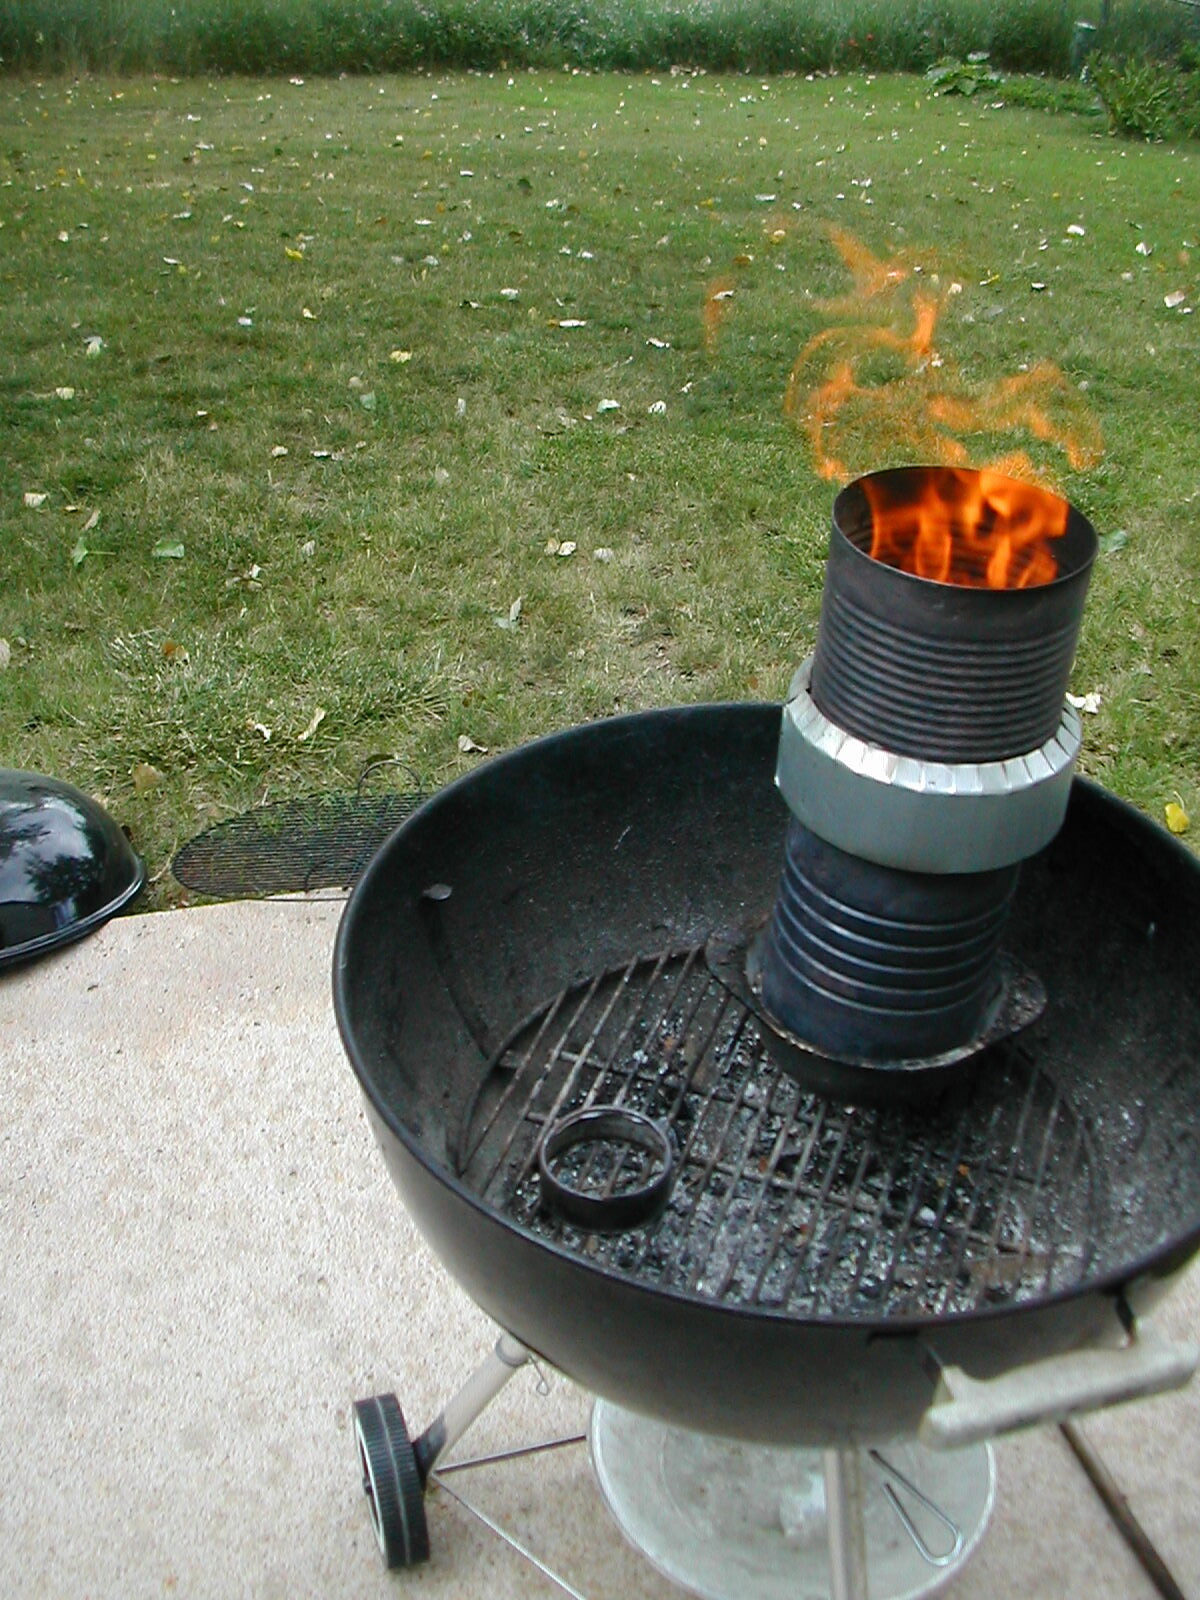
Are you putting a lid on top of your fire tube and venting out the to the outer barrel or are you just getting this fired up here in the pic?
2 Likes
Also besides the grate and the legs, nothing is welded together. I cut the hole for the central tube so it nests in the hole against the grate. Works pretty well. I can take it apart if I need to expand the air holes or replace the outer drum.
Also when i cut good sized pieces I’ll use the lid and see if that helps.
It worked good without the lid but I think it would work better with the lid. I don’t have air pipes coming in from the bottom yet, when I get some spare pipe I’ll weld those in for secondary air.
2 Likes
I was too excited and just used scrap wood I had laying around. Some were ideal sized and others just too long. Still fed reliably but I’m sure I got a good bit of brands mixed in.
2 Likes
In our down drafts I think this is what we want. Any drop through should still be torified. Ideally if we can figure out how to do this reliably with consistency might have a really efficient conversion process if it will work in the machines. This is the end goal for me to do a partial charcoal torified wood mix. My gasifiers are basically just like like what Jacob is building except with a side nozzle. Im going to have to try just running chips them have not tried that yet.
5 Likes
I think the real test for this retort is how well can it handle rough cut limbs and split down trunks. I have tons and tons of deadfall oak that I have barely gotten into and I need to start chunking them up.
Going to cut maybe 5" or 6" long discs of these big oaks and try to split them into a manageable size. Whenever I tried to use the flame cap method I had bad timing and got brands galore, so I personally think this design will work with them. The char will drop when it’s ready to drop.
Also I need to get a new chop saw. Cutting down these pallet boards with a handheld circular saw is for the birds!
4 Likes
I fixed one of these. As I see prices, you might buy it as well.
We get a lot of pallets and to get rid them , we take it apart and cut the pieces to the right lenght. If you get organised it is no work at all. Saves a lot of money on waste and saves the gasbill, two birds story. For not cleaner the boiler to many times, we take out the nails by a denailer. That is the most work (unnessecary but I like a clean bed if I lite the boiler).
4 Likes
I already have a pallet puller, I just mean my handheld circular saw is just not good enough and my mitre saw is broken.
2 Likes
I’ve been thinking about Matt’s design, and wondering if it could be built as as a rectangle and used as to power a florid style aboveground pig roast.
I’m imagining a 4 drawer file cabinet laid on its face, the drawers removed.
Fabricate a grate that will lay across the 4 openings left by the drawers.
Six inches up from that, cut holes down both sides and what used to be the top of the cabinet.
Cut a slot in what used to be the cabinets bottom for loading long branches and pallet wood, fabricate a door
Screw 6 pieces of steel framing track onto the cabinet for legs.
Screws steel studs into the tracks and use it to screw sheet metal to the sides, creating the shroud.
Fabricate or scrounge grill grates for the top.
This iteration would burn only along two long sides and one end, to make reloading simpler.
Close the whole thing in with cement block on three sides and craft your catch container from a second file cabinet, laid on its back and cut down to size.
Craft a grill surface and butterfly that pig!
Obviously this is mostly useful for someone who wants to be in the woodfired BBQ business.
It might not even be good for that, because of the intensity of the heat!
If that’s the case it should heat a couple of pizza ovens nicely.
I’m mostly skybluing, but I do have a lot I grow things on, and I am looking for a way to make charcoal there and use the heat at the same time, so chime in if if this seems unfeasible.
1 Like
I check my tlud by spraying the side with water, it evaporates where the burning coals are,but dribbles below that.
I’ve also heard of drawing a grease pencil line from the top to the bottom will.let you monitor the burn.
Your sides are insulated, so neither of these ideas would be useful.
I wonder if a digital BBQ thermostat would work.
Just tuck the lead in a hole in the very bottom of the tlud, set the alarm as high as possible.
One really neat low tech idea is shown here in this video:
Btw,it is a tlud , not a gasifier as we speak of it here.
5 Likes
You can generally tell by the flame color and how lazy the flame gets when it’s all coals. Doesn’t help me much because I make fuel in the daytime.
3 Likes
I like the idea. I just don’t like old file cabinets. Even the old 1960’s ones are a bit thin, the newer ones would just be a frustration, falling apart on you. Build a frame out of structural shapes (angle iron). You can use the file cabinet flat panels for side covers, etc. Just my humble opinion, having to had to move / handle too many 4 drawer file cabinets. I still use a couple at work, saved the very oldest ones. (1957-ish)! The last thing you want is your perfectly roasted hog going rolling away on the ground… 

5 Likes
Good point!
Well, Mike’s basic design that surrounds the fuel with the chimney could work even if you made it out of masonry.
That also frees up what shape it can take quite a bit.
I might size the firebox to fit 40" pallet boards and build around that.
2 Likes
I see a few hot coals fall out of the grate when the burn gets to the bottom. That’s one clue. But what I go by is the color of the flames coming out of the after burner. Tar makes red and purple flames. When it make pure yellow flames it’s time to stop the burn.
Rindert
5 Likes
Rindert,
I am confused. I thought yellow was an indication of tar burning, so I have waited until the yellow was about gone before ending a charcoal making burn using the direct top down burn in a drum with afterburner on top. Also, the flare from my charcoal gasifiers is mostly purple with red mixed in. Can you explain this?
4 Likes
Hi Steve,
Obviously I have no experience with your setup. My yellow flame experience started with my charcoal gasifier. I knew I had good charcoal because my gen set ran well on it and I wasn’t seeing any tar in the whole system, engine valves and throttle were not sticking on cold start ups. Just zero tar.
So then I started observing the gasifier. At certain engine speeds a flame would pulse back out of the nozzle. Once I disconnected the gas outlet hose, blew air into the nozzle with a vacuum cleaner and flared the gas at the outlet. A tar free gas flame always looked yellow to me.
Sooo… I learned to recognize a tar free gas flame. Perhaps our perception of colors is different. I suspect you went through a similar series of events that taught you to recognize a tar free gas flame. Do what works for you. Experience is everything.
Rindert
An example of a tarry gas flame.
2 Likes
Steve, your setup sounds exactly like mine. I wait until all the dancing yellow flames die dow to glowing coals before dumping and shoveling into the airtight barrel. And my flare is also purple with some red.
3 Likes
Good evening William. I monitor the color of the flames coming out the bottom of my reactors. When they change from orange to blue means there is nothing left to burn than charcoal and I shut it down. Next day all is left is charcoal. Simple and it always works, just eyes needed.
7 Likes
Rindert,
As I find every time I try to photograph a beautiful sunset using my phone camera, the man-made digital camera lens / optical pickup can not duplicate the subtle colors the human eye can discern.
God is Great! Our Creator makes Masterpieces! 

8 Likes