Wow this looks so nice. My eyes were jumping on leaf blowers today in the store l can tell you that.
2 Likes
Here is a little longer video:

5 Likes
Hi Bruce, the video is set in private mode,unable to view it.
Bob
Bob,
I think I just now made it public. Let me know.
1 Like
Jim,
I posted a couple of short videos in this topic.
Works now! 20 characters
Hi Bruce , During the winter we used our large cone to burn pretty wet wood and set up a fan blowing across it and got the same intense red embers and much much less smoke so its a great way to char wet and damp wood , now all we need to do is run the engine on charcoal to produce electric for charging our batteries and to run the fan / blowers at the same time and then its running for free .
How do you feel about the amount of charcoal you produced and time it takes doing it this way ? compared to your other retort
Dave
3 Likes
The air curtain method produces about 10 gallons per hour in this little 30 gallon system with more or less constant attention. My 30 gallon retort inside of a 55 gallon shell produces about 15 gallons per batch with only 30 minutes of attention at the beginning of a run. The curtain kiln turns a little more of the feedstock to ash than does the startup fire in the retort. My retort with afterburner still produces more smoke than the curtain kiln. The retort is harder to build and requires a stainless internal flue. The kiln requires stainless steel or insulating lining.
7 Likes
I believe that one can make charcoal without smoke. The following is my theory which I am planning to put into practice. The theory was based on countless videos seen and articles read on the subject.
- Your car burns fuel without sending out smoke. Use the same combustion theory to burn fuel to carbonize wood in an airtight metal box.
- Create a vent from the airtight metal box to let out water vapour and when gas is produced channel it to your combustion chamber.
- Your combustion chamber must be so designed that the exhaust pipe falls below the inferno created by the combustion. In that way all gases leaving the combustion chamber will be burnt on exit without creating smoke.
- Use furnace plaster to keep as much heat around the charcoal box. You don’t want the heat to be transfer out of your kiln. The hotter your combustion chamber/furnace the less likely would unburnt gas (smoke) escape.
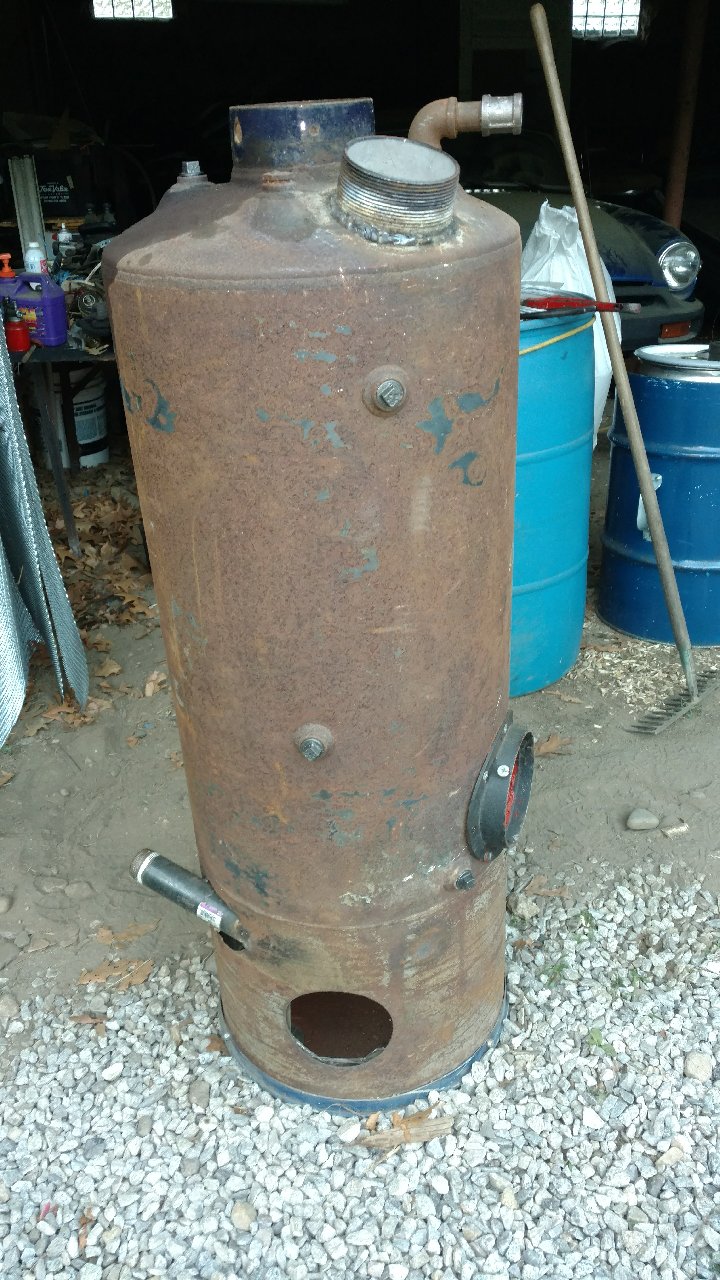
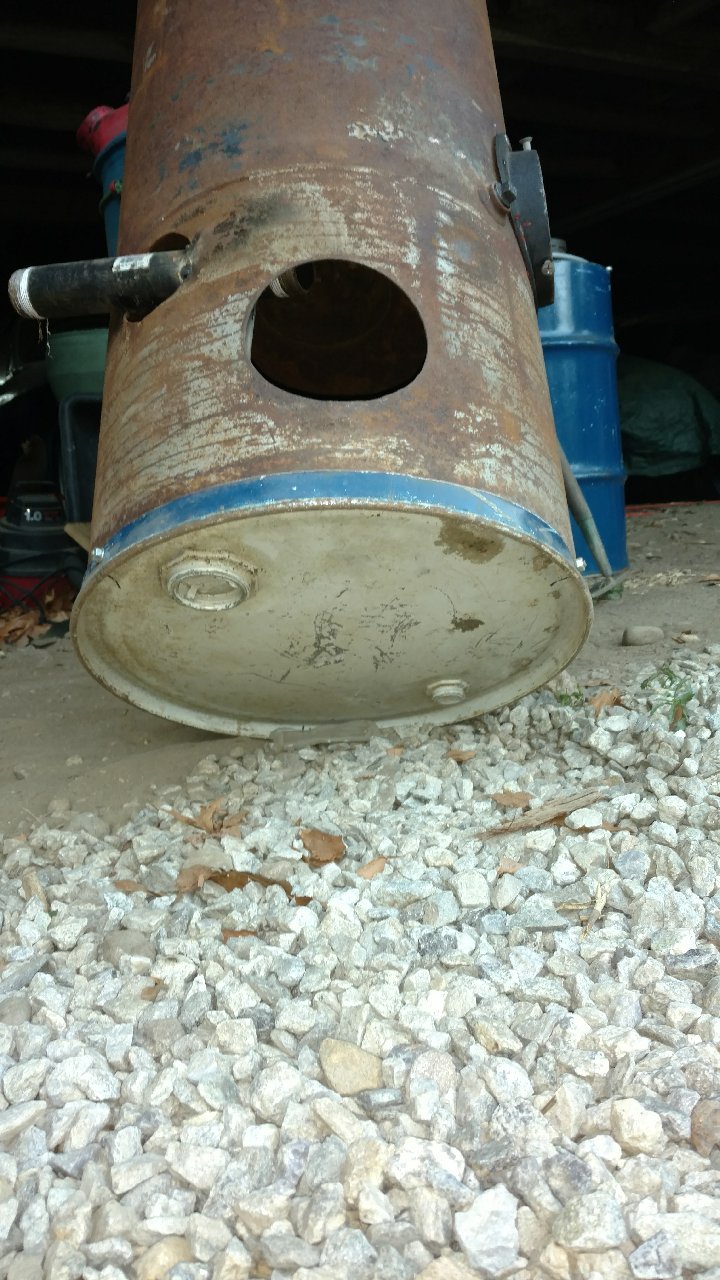
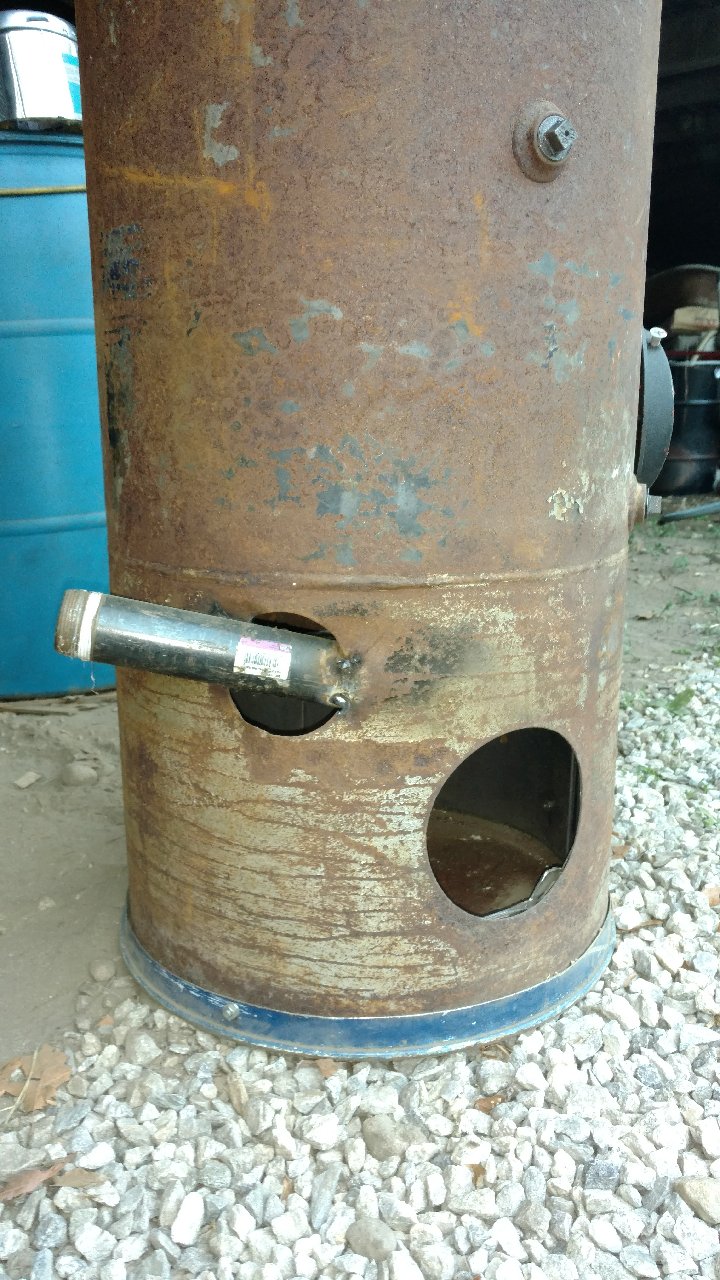
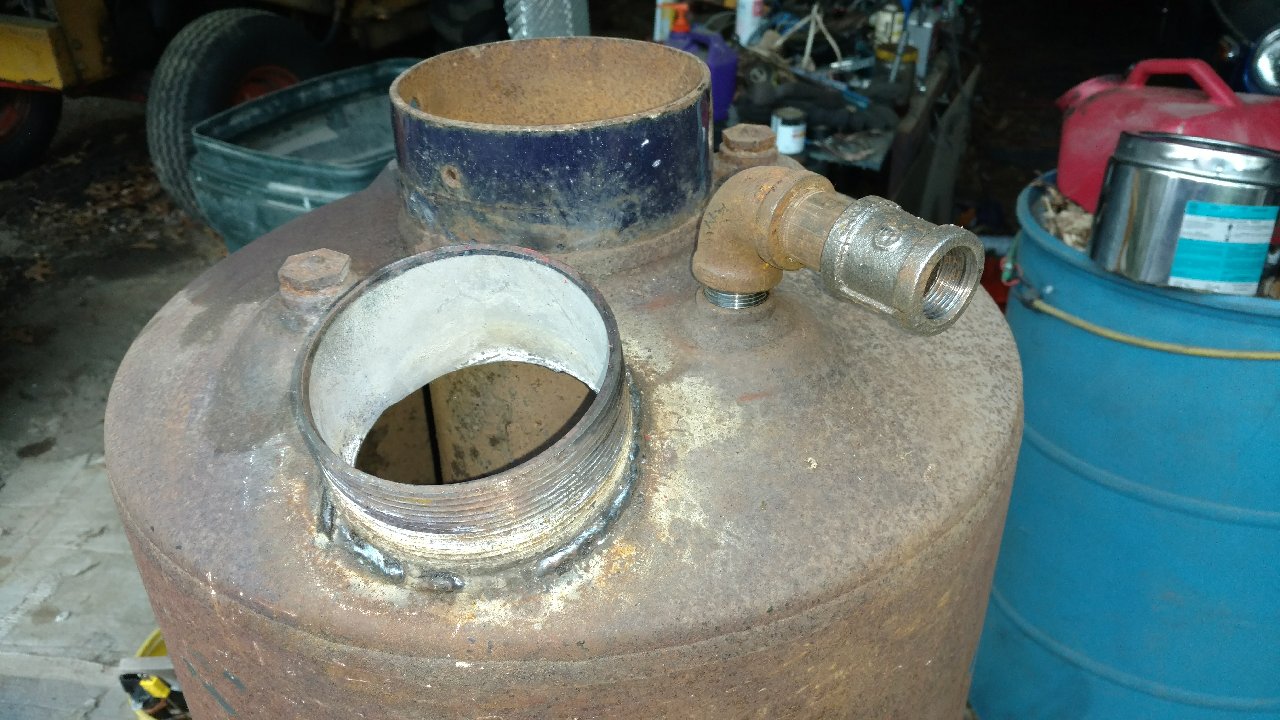
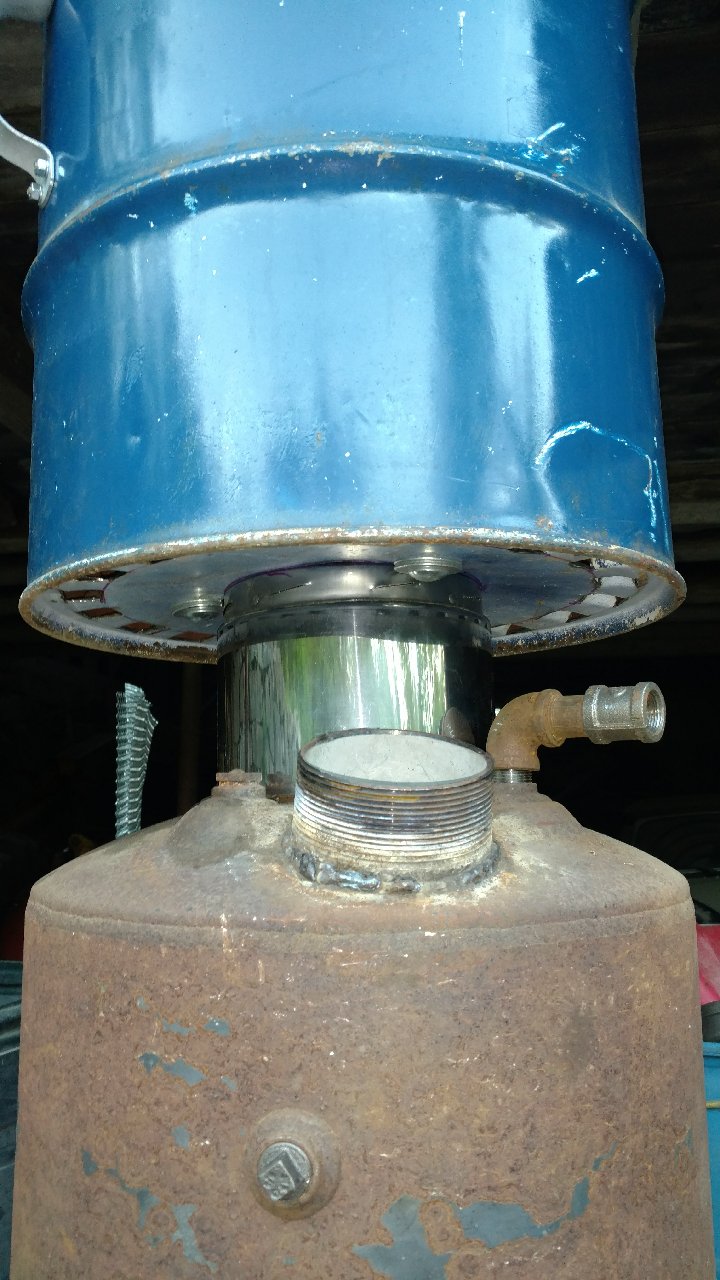
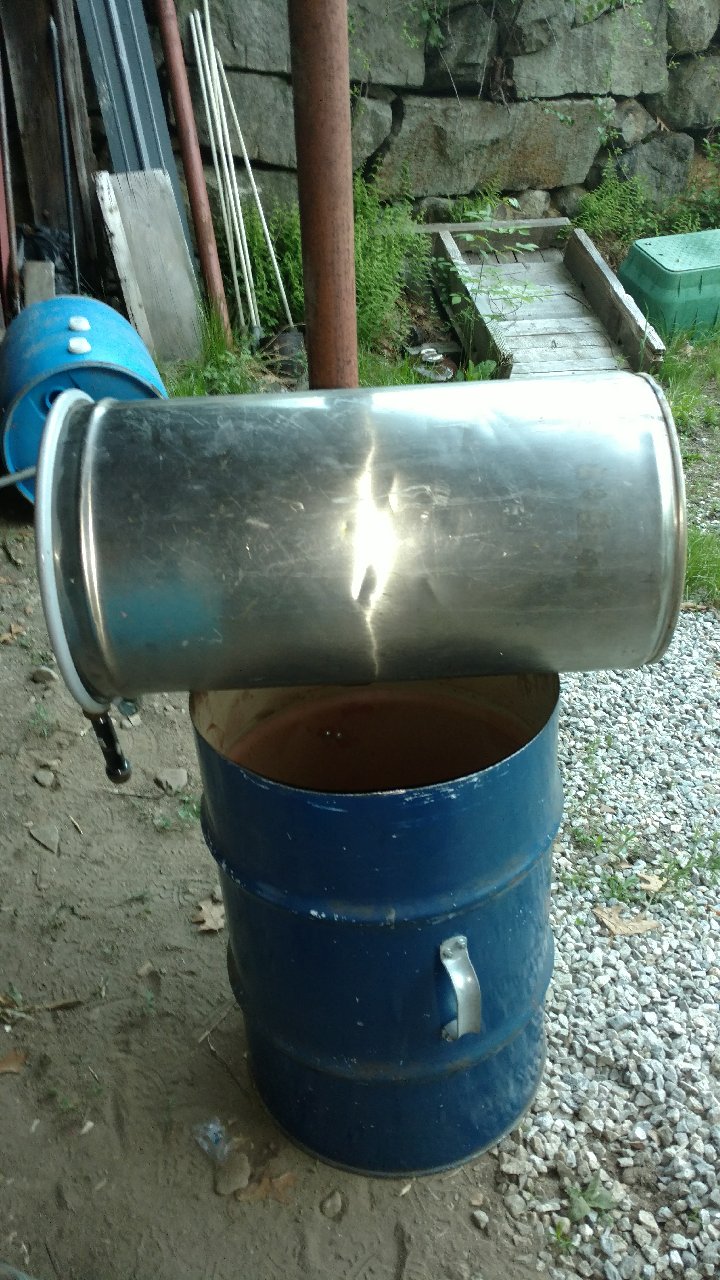
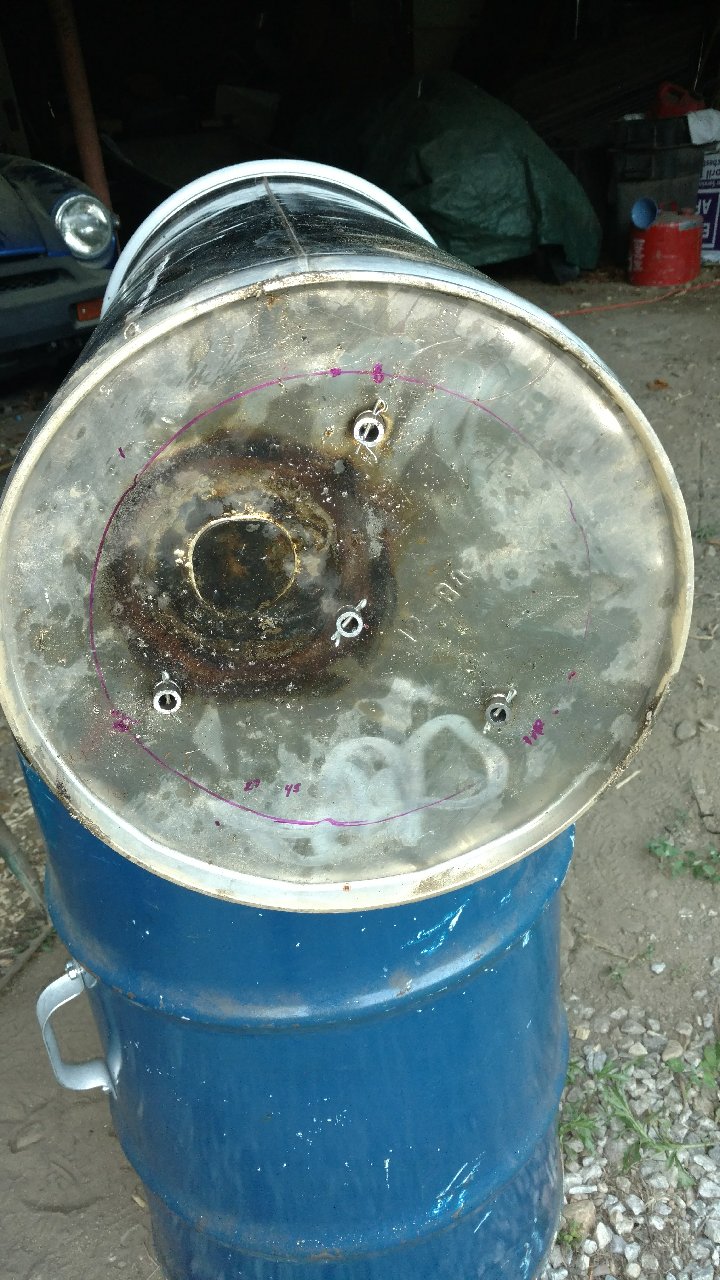
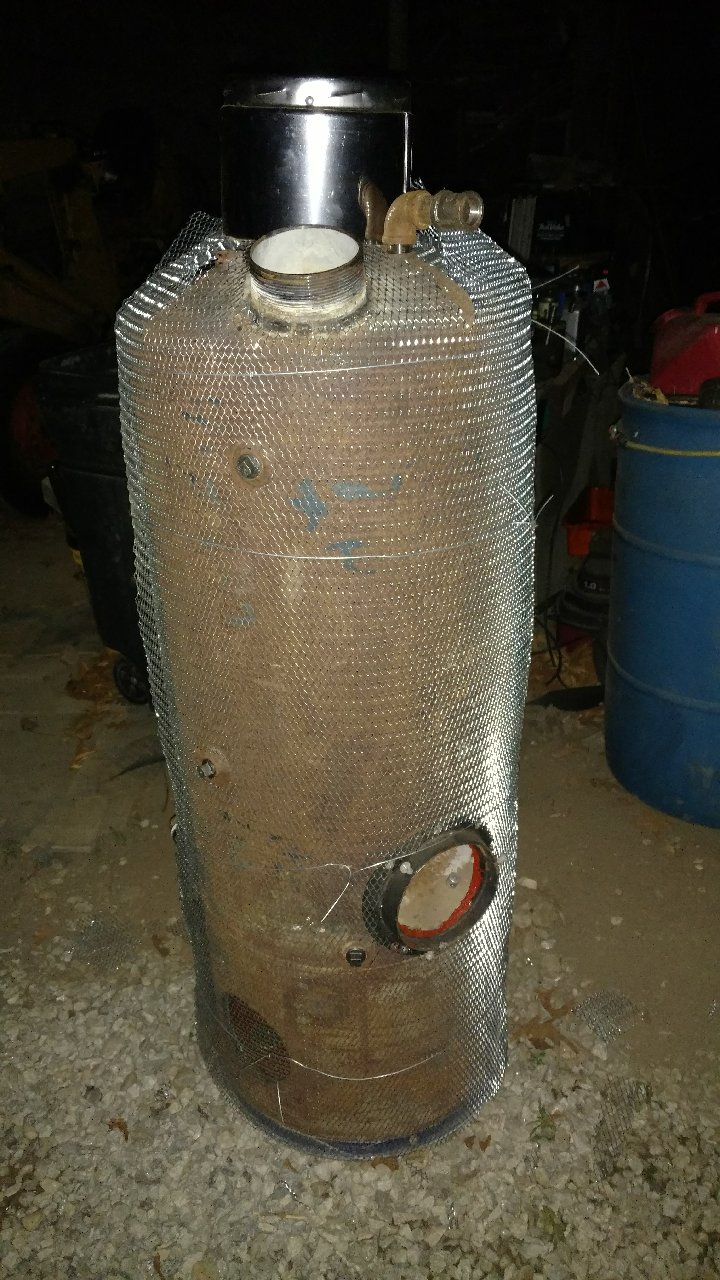
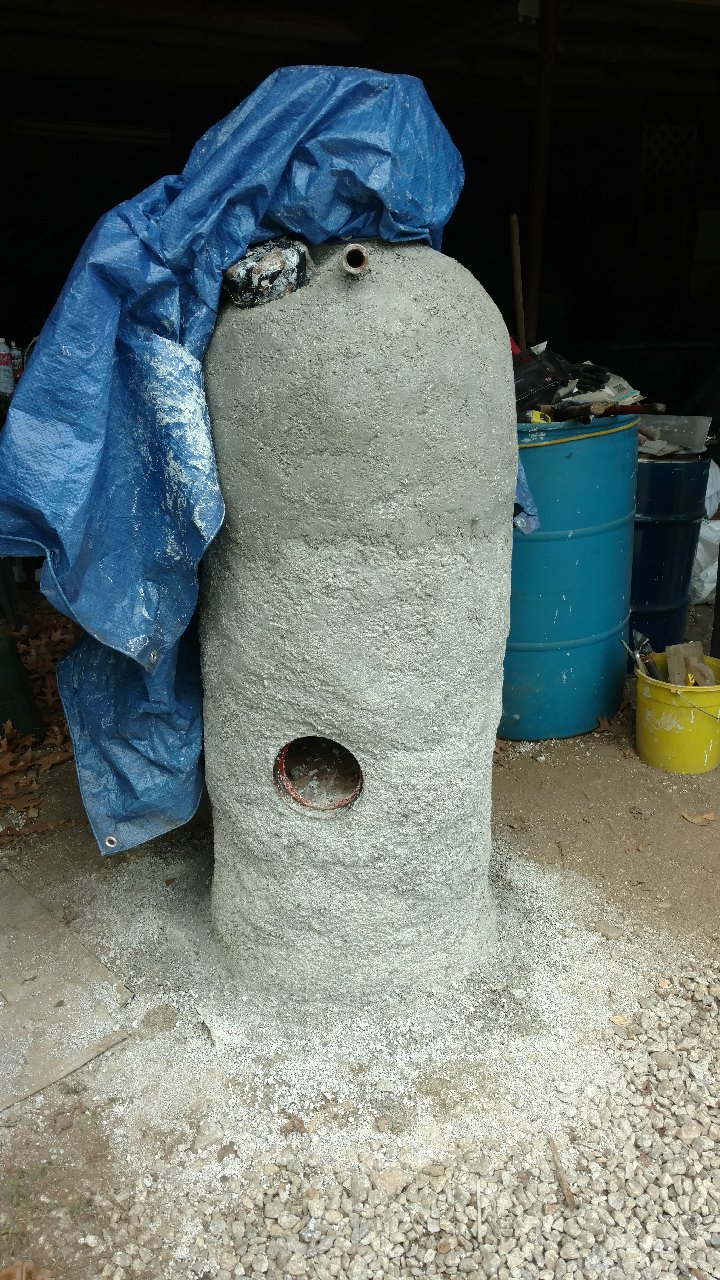
Ava got me thinking about furnace plaster and feed stock for charcoal. I live in NH which is the second most tree covered state. Tree trimming and tree removal are going on everywhere all of the time. Wood chips are free for the asking. tree companies will gladly deliver them to you just to get rid of them. The problem with making charcoal from wood chips is how densely the chips pack. The little chips fill in around the big chips which makes it hard for the pyrolysis gas to pass through freely. An advantage to chips is that they are almost the right size for charcoal gasifier fuel so need little processing. I decided that classifying the chips by sifting through 3/4" expanded metal and through 1/2" hardware screen would give me large chips which would pyrolyze in a primary retort and chips between 1/2" and 3/4" that would pyrolyze in a secondary retort. I had an oil fired hot water heater tank, 16 gallon stainless steel drum and a 30 gallon barrel. The pictures which follow show my progress on this two stage retort. All that remains is to coat the lower water tank retort with 1 inch of 1 part cement/1 part lime/ 12 parts perlite insulating stucco plaster.


9 Likes
Interesting design, lots of clever ideas! I haul home chips from the city park to use in my compost pile, and usually pick out several wheelbarrow loads of thin branches, strips of bark, and some long stringy pieces. These all end up in the charcoal making barrel, usually at the very beginning when I am trying to build that char bed on top of the load.
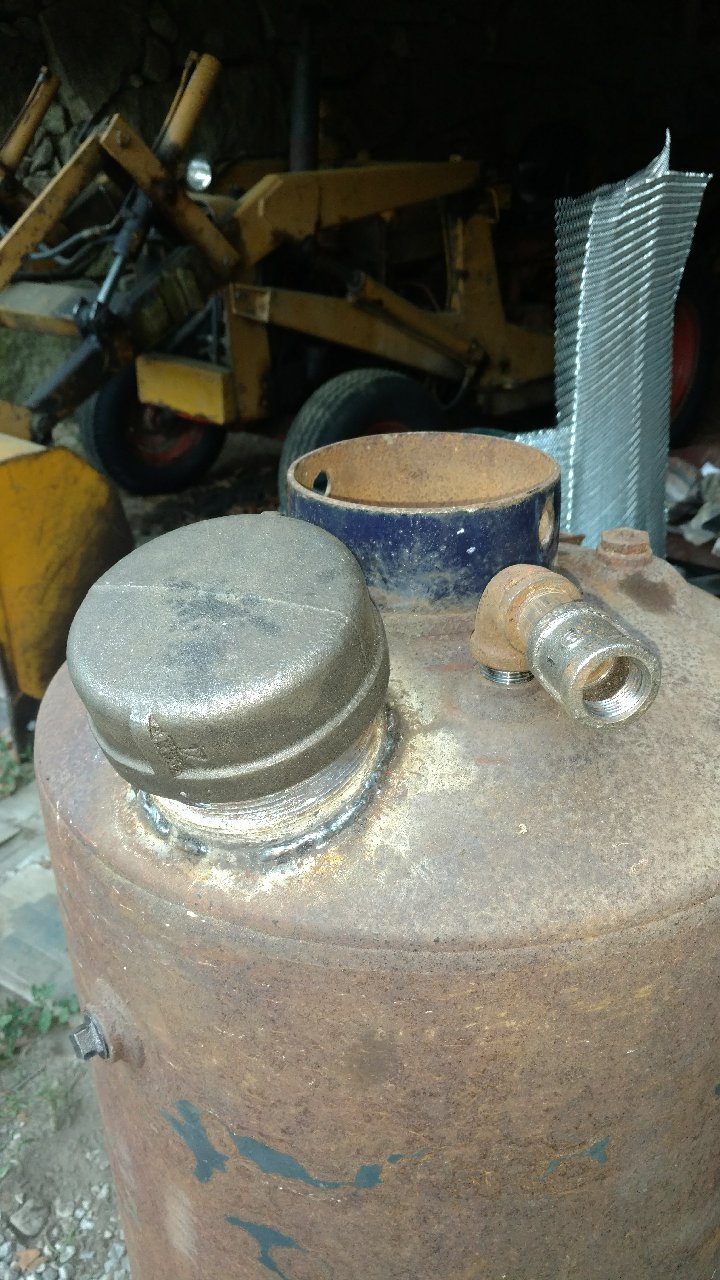
Where do you get those large threaded nipples and caps like what you used for the fuel fill? What size are they?
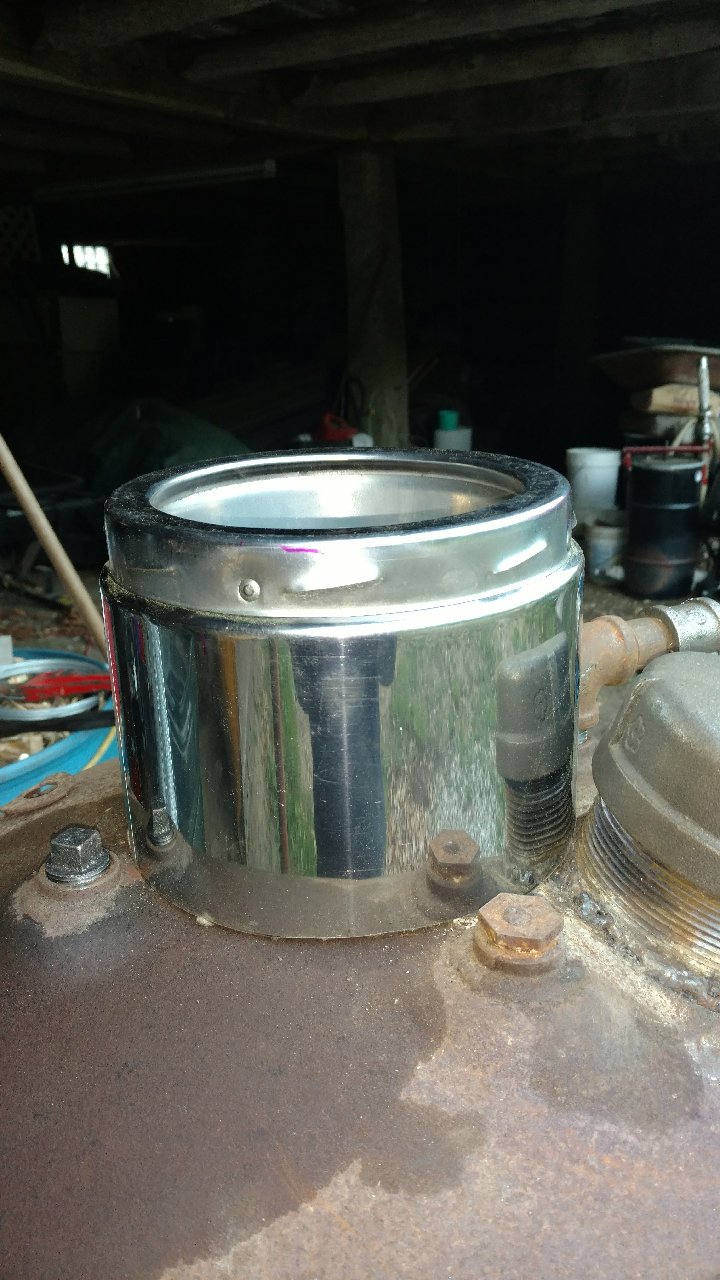
Do you think those flue heat fins might choke the air flow somewhat, but I guess you are using some forced air coming in at the lower side of the retort.
I once tried an upper sealed retort over my lower barrel, supported by some 1/2" rebar, which got so hot it sagged. Even larger rebar deformed, too. My lower retort finished in the usual 90 minutes, but the upper retort needed 4 hours to make good bell-ringing charcoal, and not torrified wood. I eventually abandoned that plan.
“All that remains is to coat the lower water tank retort with 1 inch of 1 part cement/1 part lime/ 12 parts perlite insulating stucco plaster.” Be sure to let us know how you install this plaster, and how well it holds up to the heat. My recent experiments with plaster/perlite/ground glass have been working well, but the mix is cast into a large round oil pan with a center hole, and acts as a cover for my large charcoal making TLUD stove, and a support for the bricks holding the pots. The plaster doesn’t have much strength, so the steel pan keeps it from cracking. Also, I store it in the house, out of the rain, when not in use.
I just came in from making another barrel load of charcoal, with never even a whisp of smoke!
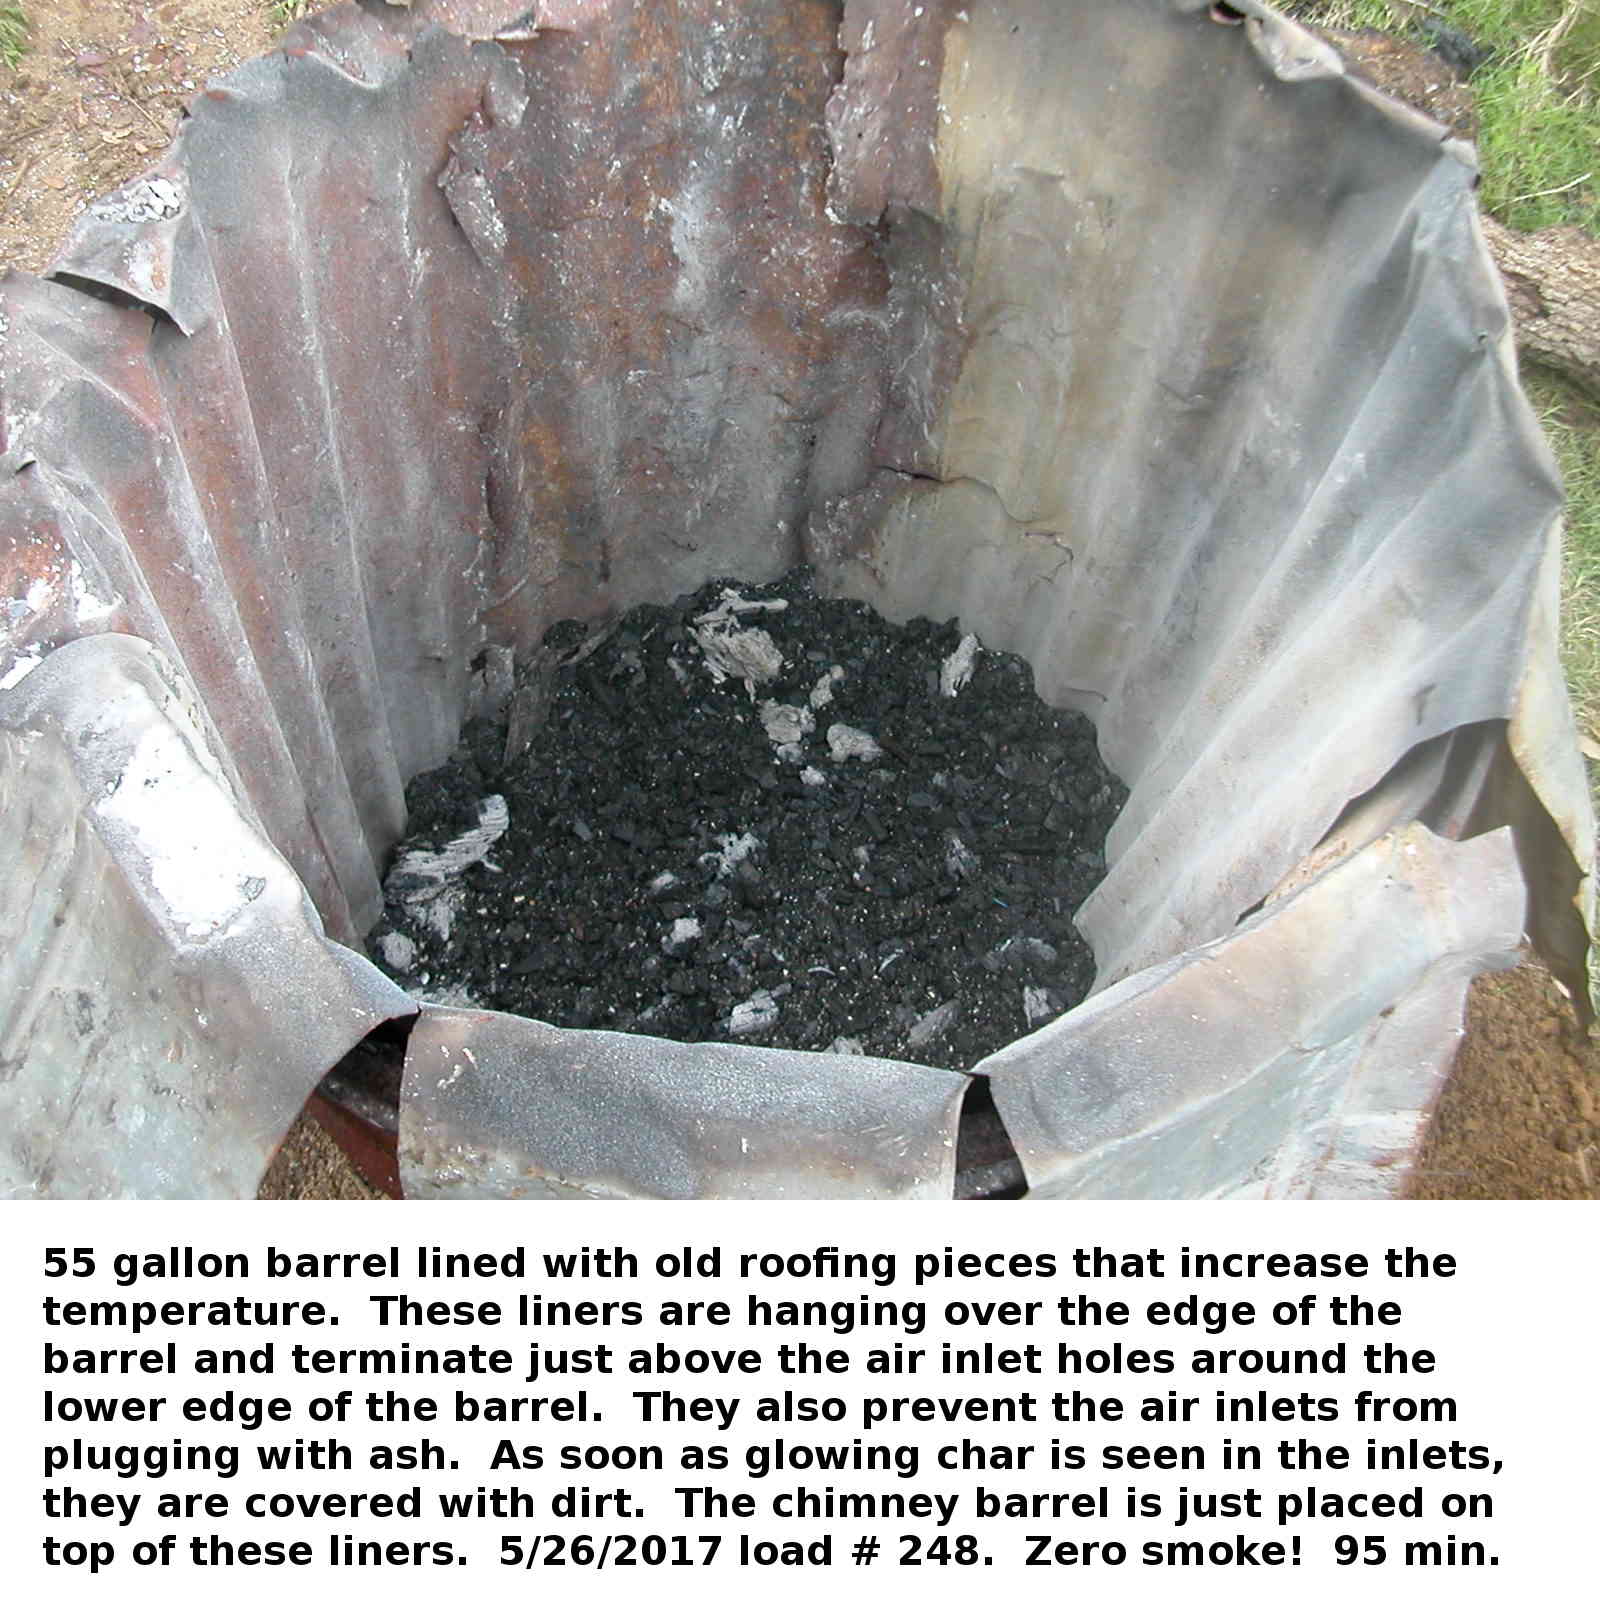
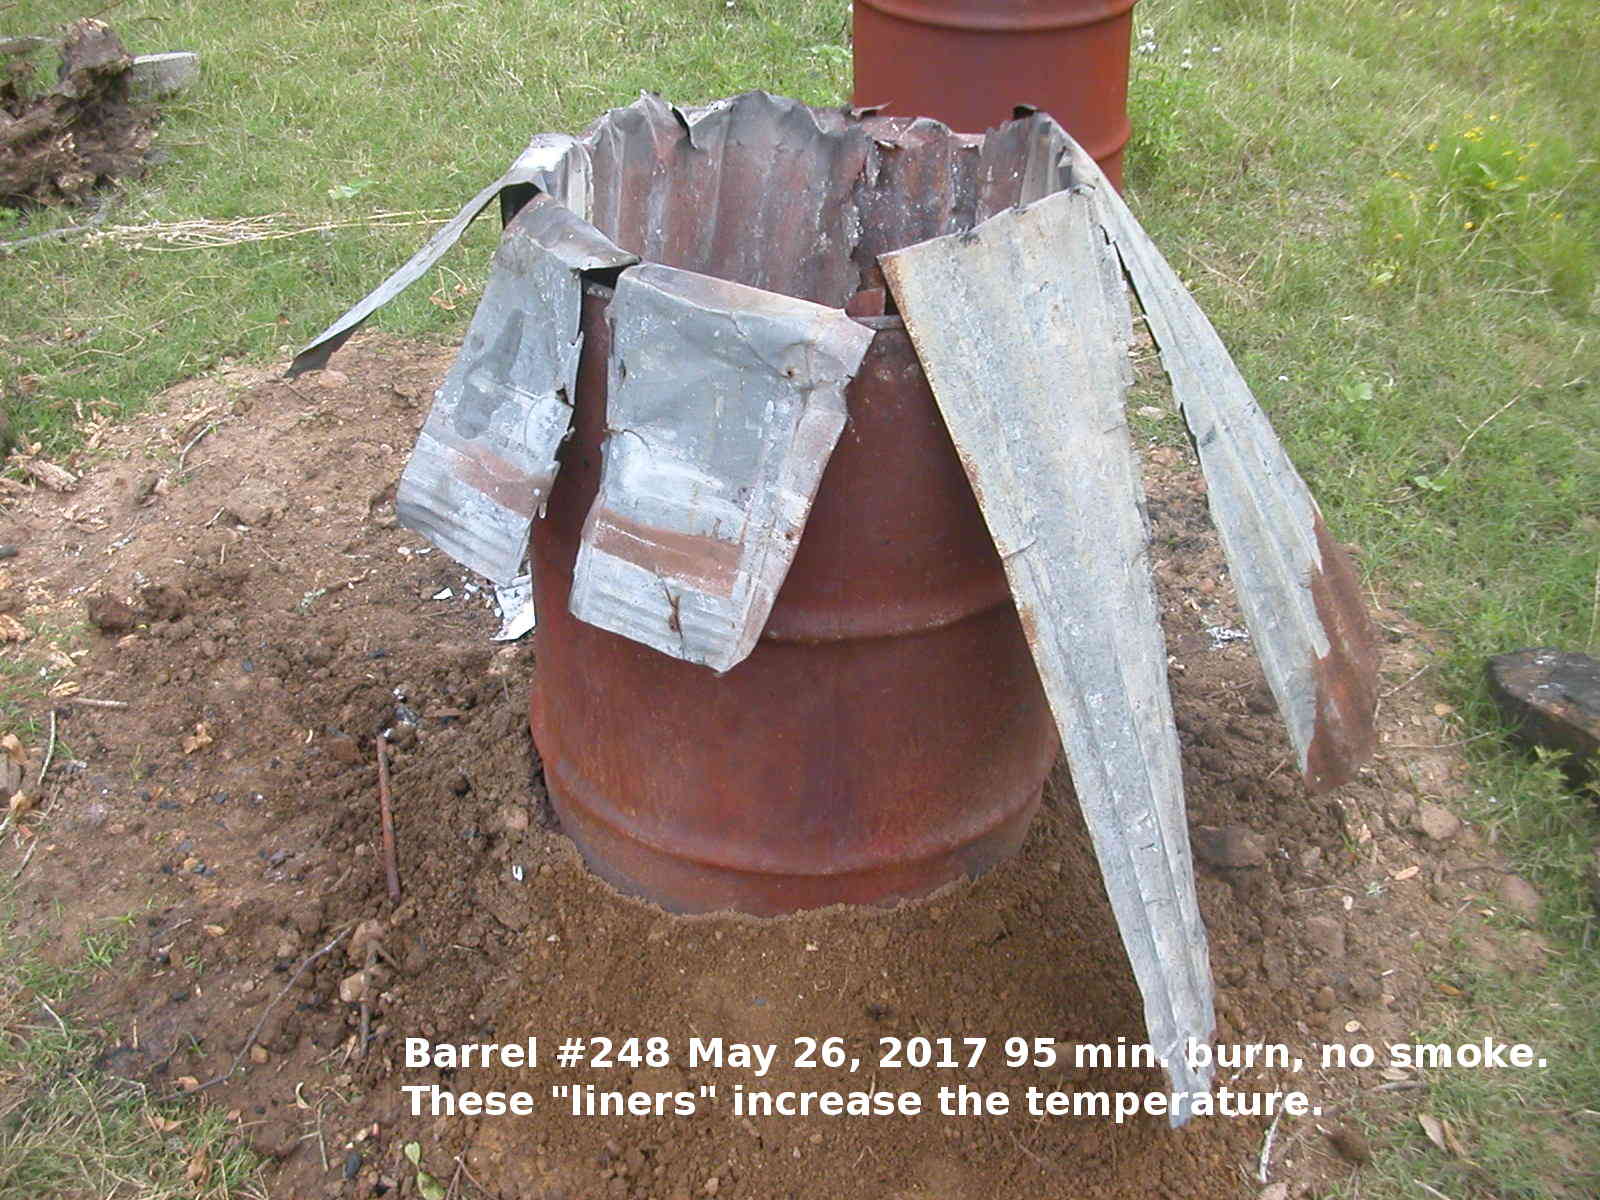
I am still using the method Gary Gilmore shows in his videos, and after 248 barrel loads, it works well. Here is a photo of the dirt around the bottom air holes. To dump this, I will remove the steel liners, and tip the barrel over.
It sure does look crude, compared to your system, and that of K. Van Looken.
Can’t wait for the next update on your progress.
The pipe nipple and cap are standard plumbing supply 4 inch.
I too was wondering about the flue fins. They are in a spiral and the disc in the center is removable if I need a little more exhaust flow. I hope they don’t clog up with tar. My other retorts run hot with a roar once they start pumping pyrolysis gas into the combustion chamber so I hope it will burn clean.The forced air is just to create turbulence for a hot start up fire.
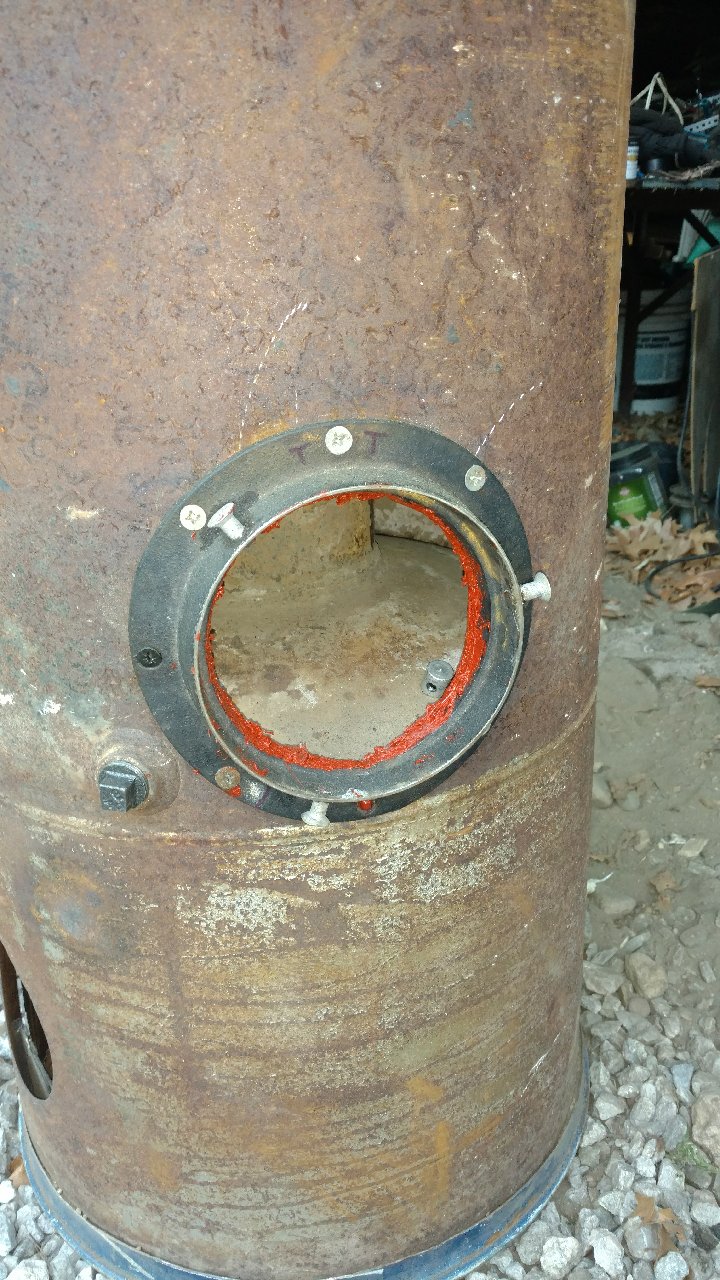
I lined the walls of the fire chamber with pieces of stainlessI steel scrap to protect the tank from the intense “forge” blast. I will add a layer of cement/lime/clay/perlite in the bottom as a hearth.
My other retorts can take a couple of hours to get going with just a natural draft fire. Using a fan reduces startup to about 20 minutes. We will see.
I hope to plaster tonight or tomorrow.
2 Likes
Coating with perlite mix was a pain. 1:1:10 cement:lime:perlite. Started out just slapping on by hand at bottom. Used trowel near the top. I could only go up about 14 inches or so without it wanting to fall off so did it in several sections. Covered each section with plastic for 24 hours. Then supposed to keep it out of the sun for another 48 hours. Then I’ll build small fire to remove moisture to prevent steam problems. It can be skimmed with lime after a few more days of curing. Looks like rain for a few days so I’ll have to wait a while before my first run of charcoal.
5 Likes
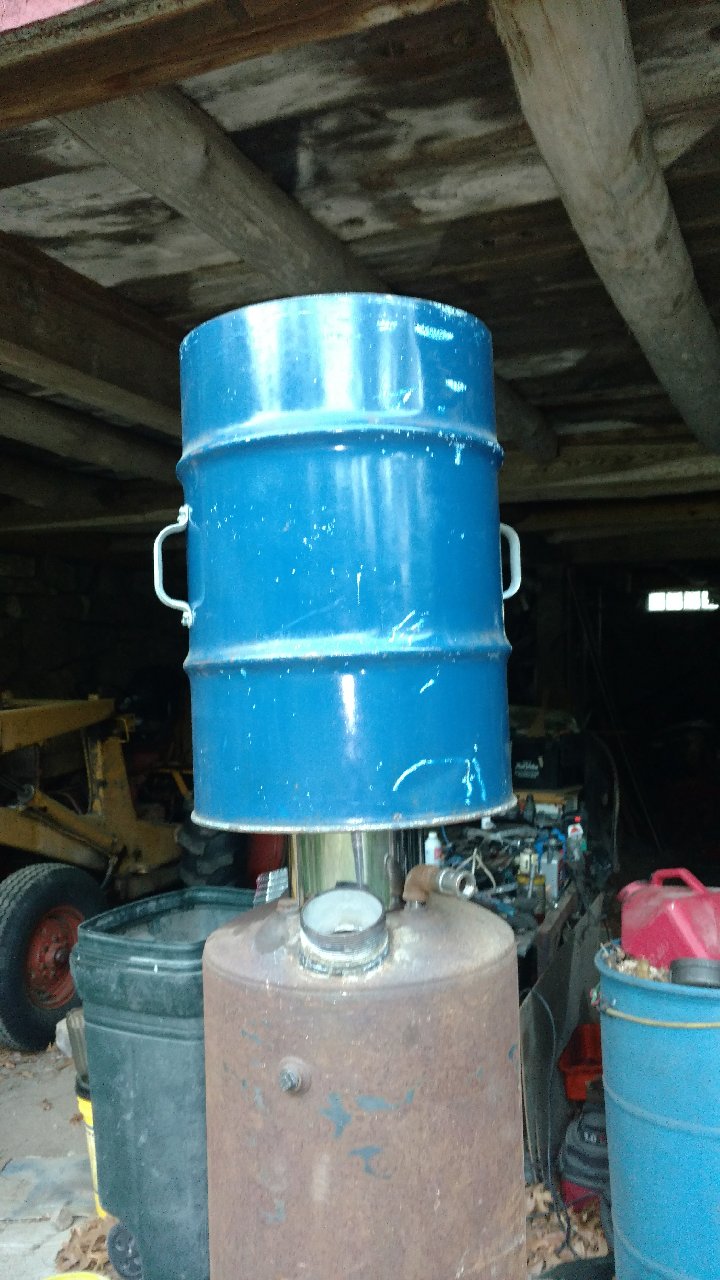
Nice Bruce. Do you have a guesstimate of the weight?
Heavy. Maybe 200 pounds?
1 Like
Very pretty Bruce. When is the grand launch?
Yes Bruce I am also waiting for the lift off video cant wait to settle back in my chair for some charcoal moments .
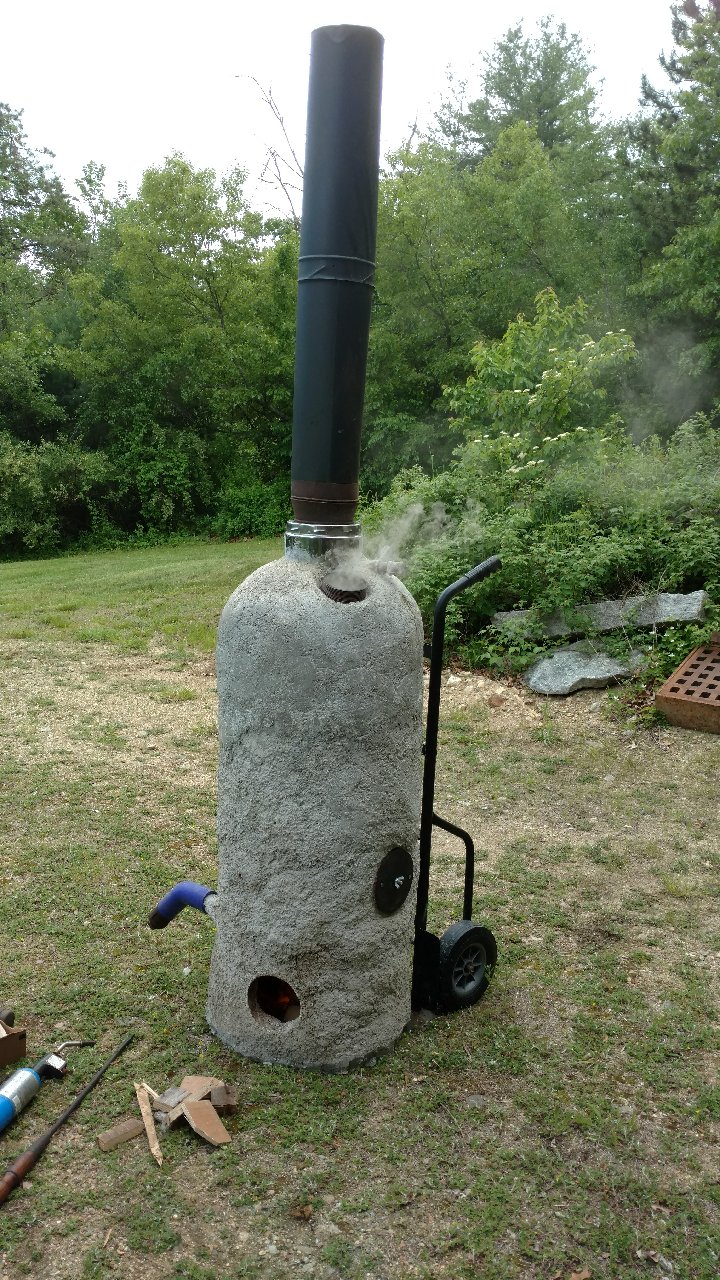
Most of the stuff I have read about curing insulating plaster on outdoor pizza ovens suggest either gradually increasing the temperature over several burns or waiting several weeks before making a really hot fire. This thing may reach 1000F so I am a little nervous about trapped moisture causing bad cracks. But, I’m getting impatient so maybe I’ll fire it up on Sunday evening. I expect a roar and a giant flare when the second stage kicks in.
1 Like
OK, I couldn’t wait. So here is the video:

and here:

I had to drop pieces of wood into the upper barrel to get the secondary retort to generate enough gas to produce a roaring, sustainable reaction.
Lots of cracks and steam coming out through the insulation.
The primary firebox kept burning on its own for two hours.
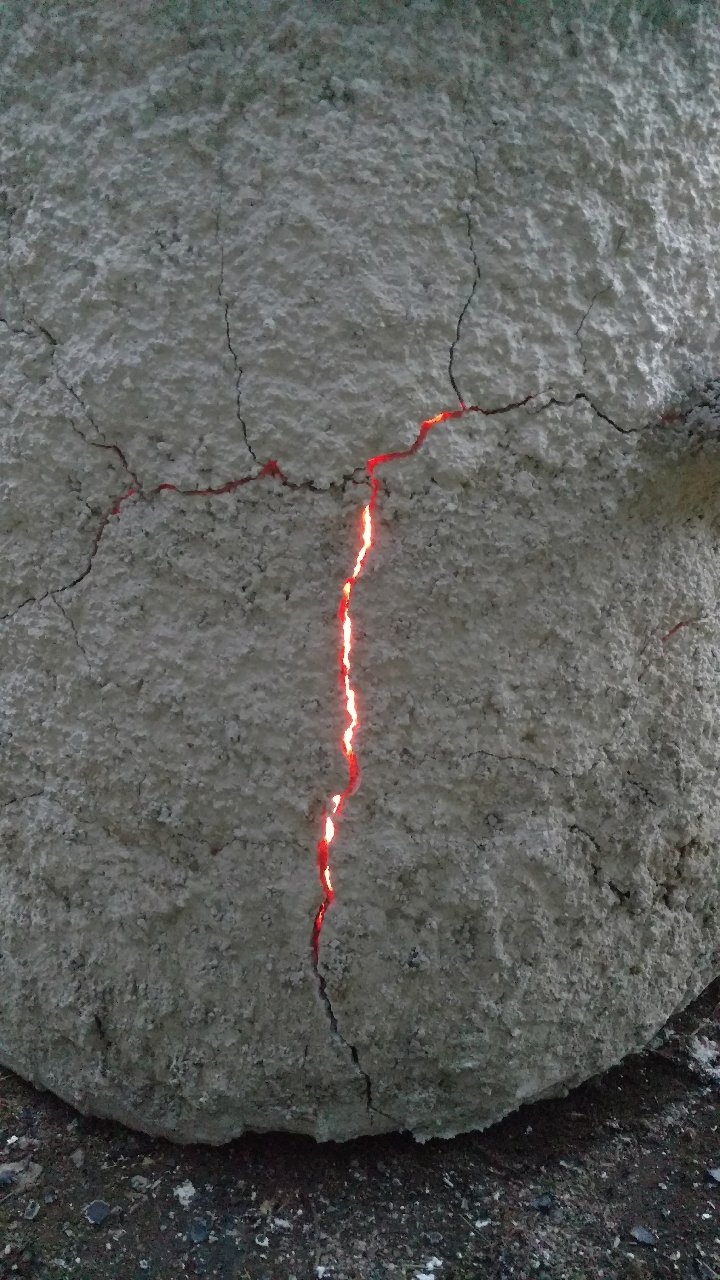
The thermocouple read 1600F against the internal flue and 400F near the outer wall of the tank under the insulation. The insulation worked great. Never got hot on the outside. Maybe 100F. Only hot spots where steam was escaping through a crack.
Here is a pic of the metal firebox glowing through an insulation crack:
10 Likes