The electronics of the throttle body still works. Very touchy with a PWM. But that makes sense due to lack of a TPS or any other computer stuff controlling how open the throttle is.
Looks like it uses fewer volts than 12. Maybe not even 5 volts. My 18650 battery could smoothly open the throttle.
1 Like
Going to see how much a low voltage PWM with voltmeter would cost me. I would really like to be able to control this electronically for the option of maybe metering based on lambda at a later point.
Found some really inexpensive ones on Amazon. Goes as low as 1.8v.
the PWM I have for DC is only as low as 7V input voltage but they obviously can output lower than that.
I will try to see if I can fiddle up an 18650 powered controller for this.
The location where I want to insert this in the Sierra, if I have a serious malfunction I can just disconnect the air filter from the intake tube and drive like that. Worst case scenario.
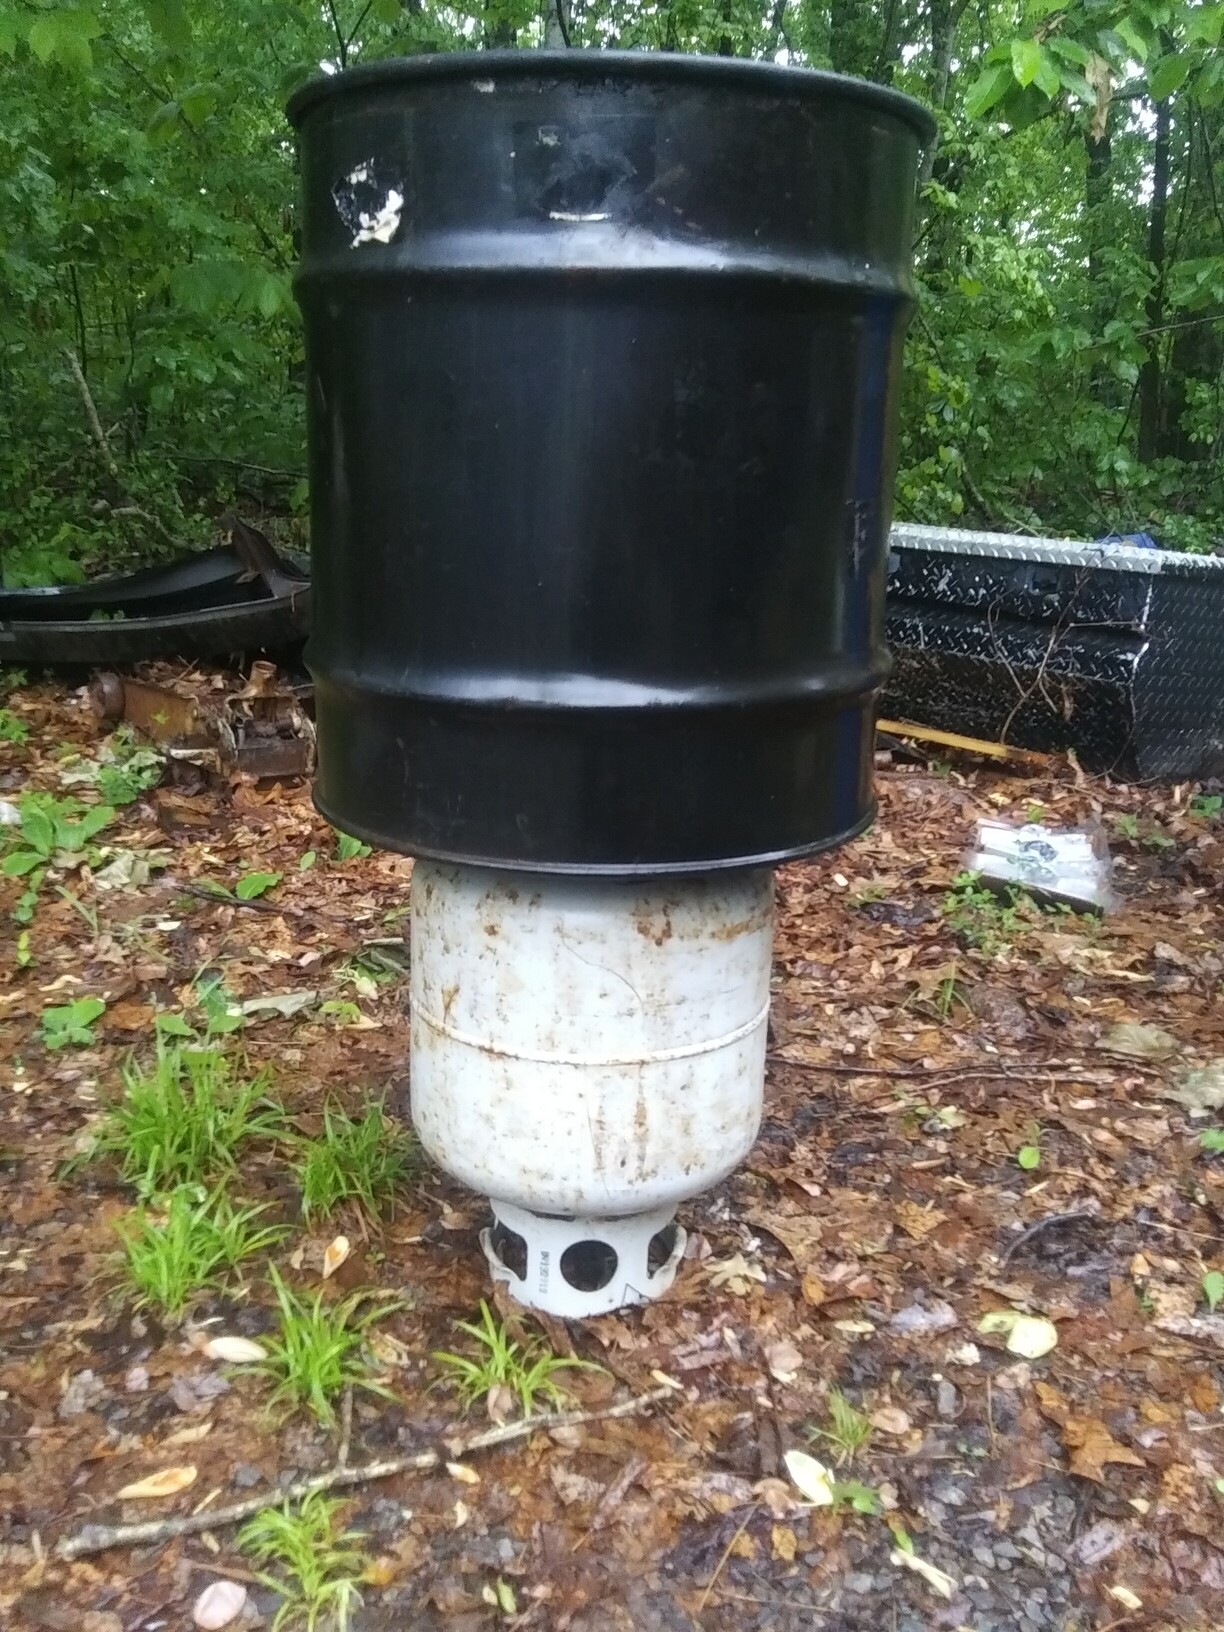
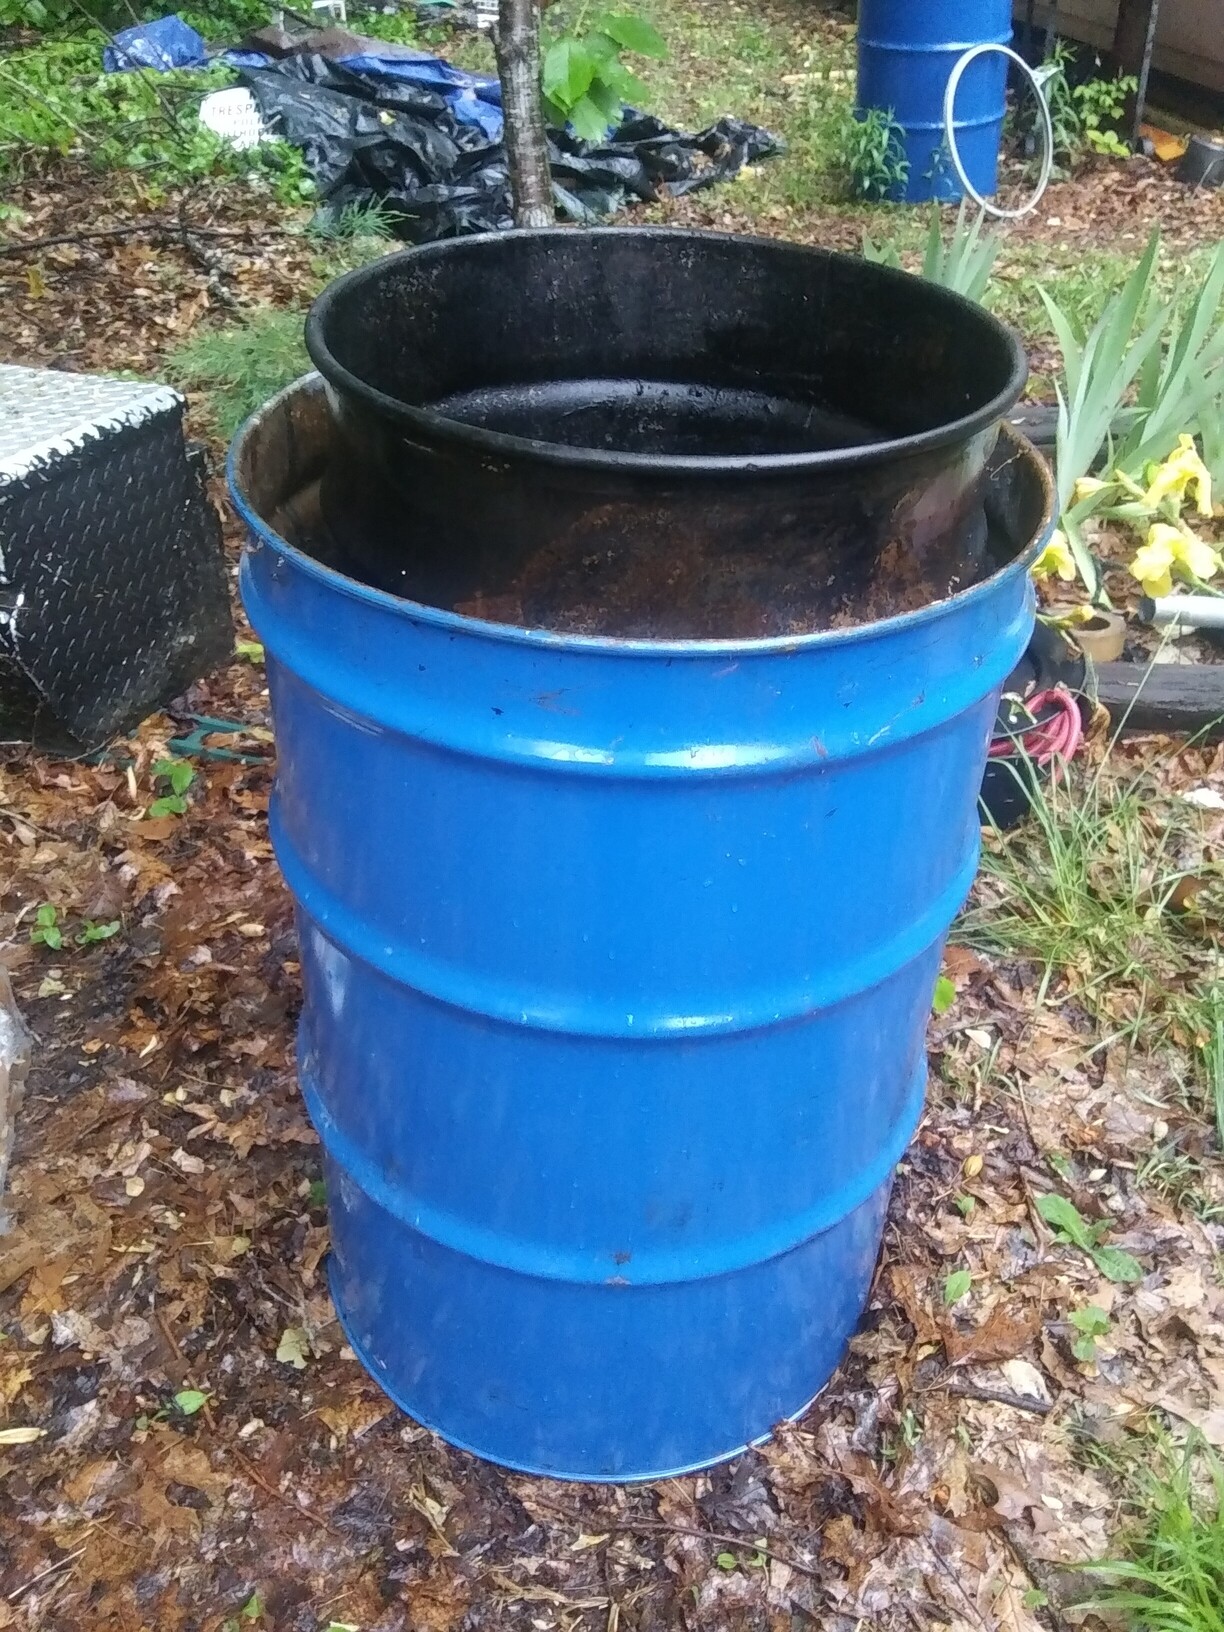
I keep looking at the Wisco gasifier made for Opels. And I keep looking at my oddball 20 gallon drum and propane cylinders. And my pipe benders. And those piston wrist pins.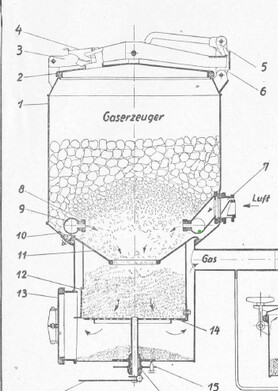

V shape indicates inverted angle iron grate, the lines indicate jet angle in an upwards fashion as Joni has prescribed to others before.
The air will come in a pipe ring like I had imagined before. I’ll just have to do it in sections with my less elegant plumbing pipe hydraulic bender instead of my ring roller. I plan to make the pipe ring fit as far away from the active lobe as possible using those wrist pins as nozzles. I noticed very stable temps in an upward direction as well.
I would really like to see how much wood I can mix in with this design not only to keep the reaction cooler but also add hydrogen without the need of a drip.
I will most likely weld heat sinks to the burn tube not necessarily for preheating air but to protect it some. I don’t have another 20 gallon barrel or similar sized cylinder to preheat and I want to maintain the 12" burn tube diameter that the propane tank has.
I also would like to make use of thermal energy by placing my drop box inside this aluminum truck toolbox. I could double up the use by preheating my intake air inside the dropbox and also maybe preheat any wood or dry out charcoal that I would store in here to keep moisture away.

2 Likes
I guess in this design it’s less of a Charcoal Gasifier and more or less using charcoal as a Tar Catalyst. I like the way that sounds but in reality it means I’m lazy at design 
1 Like
Cody you seem to switch back and forth between what wants to be wood gasifiers and want wants to be charcoal gasifiers.
Here are three plates of dimensions for your internal air-ring type:
I think pure charcoal would heat kill your air-ring.
Actual charcoal gasifiers use internal charcoal to radiant heat shield the system metals from active charcoal energy release damage.
Wood gasifier use the woods humidity to heat moderate.
Hundreds of pictures and system diagrams have been put up on this topic by Chris Seymour and Francois Pal and others.
S.U.
2 Likes
I’m just throwing my ideas out so I can look back at it. I will attempt to build this with 100% charcoal in mind but I would like to at a later point see how much wood I can blend in for emergencies.
I’m one of those kinds of people that can’t get their idea out without having to say it to someone else even if they don’t respond to it.
It still boggles me how the Mako could survive with their air ring. Their jets face downward a little so maybe it is blasting the heat away as much as possible as well. But that doesn’t add up with my results from the double flute and it’s downward jet angle testing. They only had kanthal on the tips of the nozzles as well.
This random idea could just be a side project for when I’m stumped on other things.
I eyeballed a donut rim that looks like a really close fit on the 20 gallon drum, could use that as the air inlet.
I just don’t know if this idea would warrant making a new topic, I’m just using this one I made as a containment unit for my madness 
Bigger priority is my Svedlund adaptation, it will be much more simple to make.
What are the advantages of a charcoal gasifier against a for wood?
I understand that it is better for small engines and if you do not have space, for cooling and cleaning.
I would say the main advantage that I can think of is the lack of tar. The only cooling you need for a charcoal unit is to actually cool down the gas to save the filter instead of dropping the temp down to dew point to drop moisture.
Also the cooler the gas is the more of it will fit in the engine. that tends to be the limiting factor on power is getting enough gas in the engine.
3 Likes
Cody I don’t understand why the ring has to be pulled away from the fire tube? I definitely missed something !
only the tips of the nozzles are exposed to extreme heat
If this were for a 100% charcoal build then during shutdown the pipe ring might be subject to too much heat. That’s my thinking at least I am probably dead wrong.
1 Like
It’s just a one-off idea that I had. Something to tinker with while I’m waiting for other resources or inspiration on the Svedlund build.
But surely once you shut off your system and starve the gasifier of the air the system will cool down anyway , its how every system works in my eyes , i sort of understand what your thinking here about the blast will keep the heat away from your ring/nozzles while running , but then once there is no blast your ring and nozzles will get extreme temps and start to oxidize , but once shut off and with no air leaks the system should start to cool down pretty well and maybe if you were to lower your demand on gas just before you were about to shut down anyway you might be able t drop the core temps anyway.
Dave
2 Likes
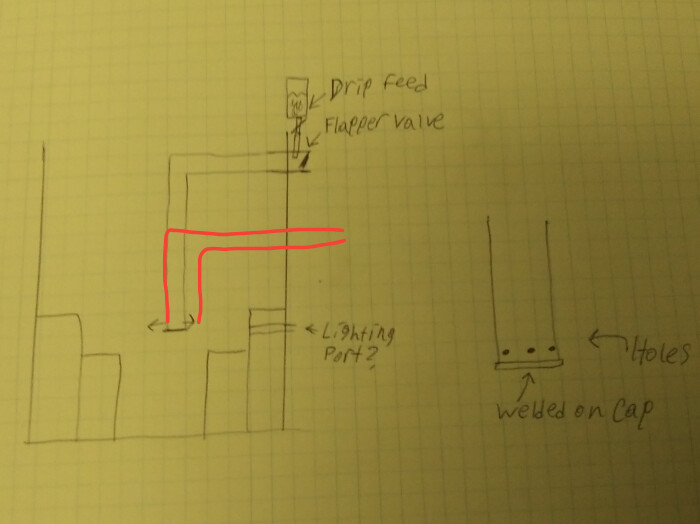
Like I said earlier this two barreled idea is just a side project so I am headed back to my other charcoal reactor. Going to try to build my Svedlund idea using side exiting holes and a welded on cap on the end of the pipe. I still have a good bit of ceramic wool so I will use that as my hearth and insulation. I’ll try to go with two rows of five 5/16" holes making ten total holes. Hopefully this will give me enough air volume to run one of my engines. The jets will just barely enter at the top of the wool burn tube. I won’t be able to make an hourglass shaped hearth like the original Svedlunds did but hopefully that won’t matter.
In my original drawing i set the air pipe to stand way too tall. It was just a rough sketch but hopefully it didn’t give the wrong impression.
I’m thinking that 2"npt would be fine for testing purposes. I will be adding a water drip to this unit to keep it cool, which is the main reason why I decided to cap off the nozzle end. Would give a hot plate effect for the water to evaporate off of.
I’ll try to get the plumbing I need tonight and come up with more intelligible representation.
1 Like
The construction of the nozzle will be a 2" coupler at the wall welded to the barrel, then a nipple, then elbow pointed downwards and another nipple. I wanted to use a screw together system for easy replacing and I also wanted to see if i could lower the blast effect that the open nozzle Svedlunds had via EGR since EGR seems to cool reactions down.
Hi Cody[
I can’t wait to see a central nozzle like the Svedlunds. A one piece pipe would surely be a better heat conductor to extract heat from the nozzle tip. But I understand that an assembly of plumbing parts is easier to achieve 
1 Like