The picture is just the design that I am building and not the actual boiler itself. I wish I was that far along! I think the log length will be somewhere around 3ft total. The storage tank should be around 250 gallons, Those boxes on the front and back will be the cleanout doors. The gas flow will be up, left, right, out with a removable baffle between the 2nd and third pass for ease of cleaning and a start up bypass. I recently bought 41/4 sheets of stainless 4x10 for a good deal. (prices are low right now) so I may be doing mine in stainless.
Right now the logistics are the big issue. I am going to have to build a hoist in the barn. I have a few steel I-beams that I will be using for the frame with a come-a-long attached to the top. As far as moving the finished unit out to its pad outside, I will use my tractor with forks.
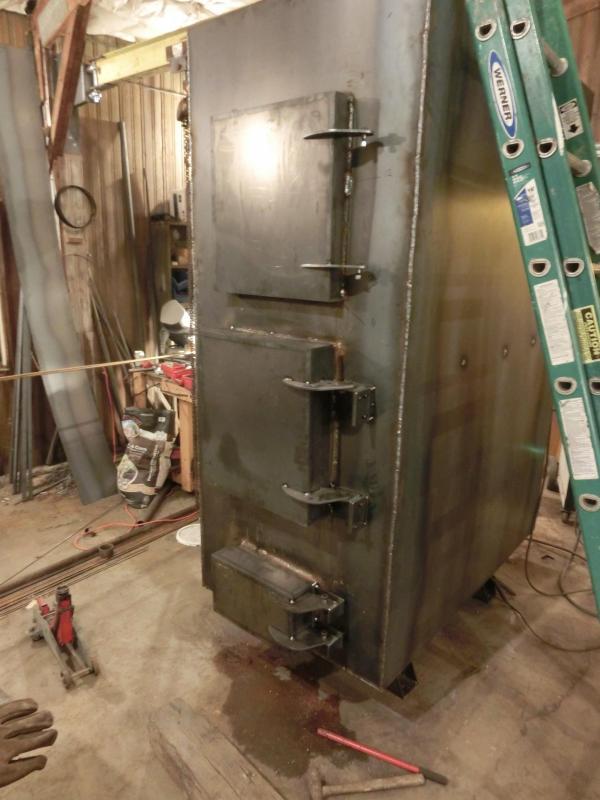
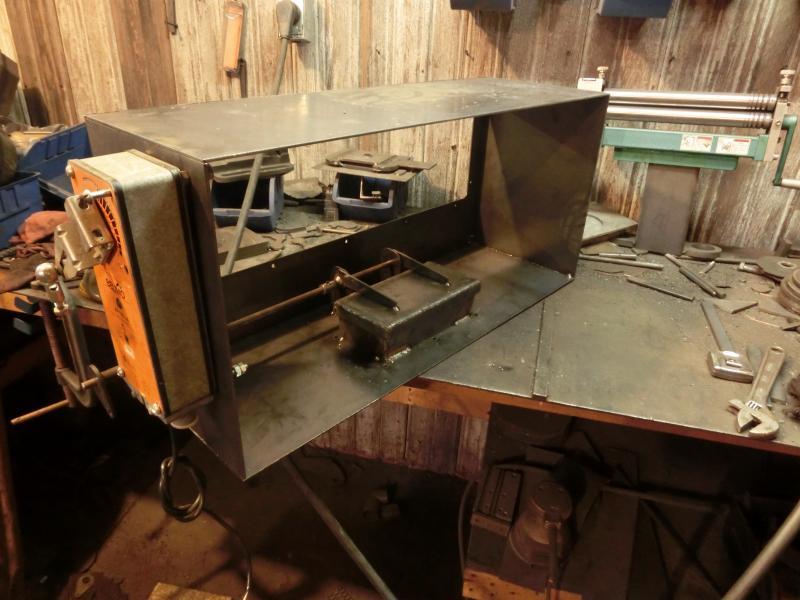
Here are a few picks of what it should look like. There will be a insulated shed also built around the boiler. The tubes in the firebox are for the primary burn air, and the nozzles for the secondary burn air will be found in the refractory in the secondary chamber.
It looks as if the water jacket is all around the inner burn tank container? and the top door is for ash clean out of top two seperate exoust tube heating, is this correct,? THANKS for explainations
Thats right Kevin. The whole thing will be filled with water. The doors in the front from top to bottom: Top: Fire Tube brush access for the last 2 passes. Middle: Firebox loading door Bottom: Ash cleanout and window for secondary burn chamber.
I am thinking of asking mr Matt R. to make me the hinges
Allso the one i seen looked not as good as this design, except it had a flip plate door up at top back of main burn tank too bypass the heating tubes untill the fire gets good and hot from cold start,too lesson the exoust heating dirt from warm up. I think some units only use water in the back area tubes, and no water around the main burn tank,i dont know if that will help or hinder the the gasification effect, it would have too keep the gas clean and dry or the tubes would need frequent cleaning, or it could be built with water around top and back heating tubes,and not around the burn tank itself,Hope this gives another perspective trade off factor.And less leaks too have later on, as most end up with and hard too fix areas.
Leaks are the biggest concern I have. Going to double weld each seem. And Corrosion. I am the guy at my facility however that is in charge of the boiler water quality testing and know a thing or two about keeping corrosion and scale at bay. The boilers we have, have been in operation since 1995 so far without any hiccups.
Looks good on the link above,i gess they are keeping the water on the top and back area too minus some of the condensation in the burn box for gasification. Thanks for the design photo clarification, i could build from that design,same as the one you posted above the link.sounds like they are drawing some preheated air from the unit there somewhere,probably from the hot air space on bottom around the ash clean out tube area.
The water is actually on the sides and bottom as well, it just does not depict that in the picture. The bottom would be used for the cold water return, and the top would be the hot water output (to the house) As far as preheating goes, since the secondary burn tubes are cemented into the firebrick, once the firebricks builds temp it is very stable, being that it hold heat for a long time. The air has to go though that first so it wicks off some heat. The primary air tubes are 100% removable from the back. They are roughly 1.5 inch diameter that fit through a 3 inch diameter pipe that protects them from the water. They are also adjustable to be able to aim the nozzles towards the desired area.
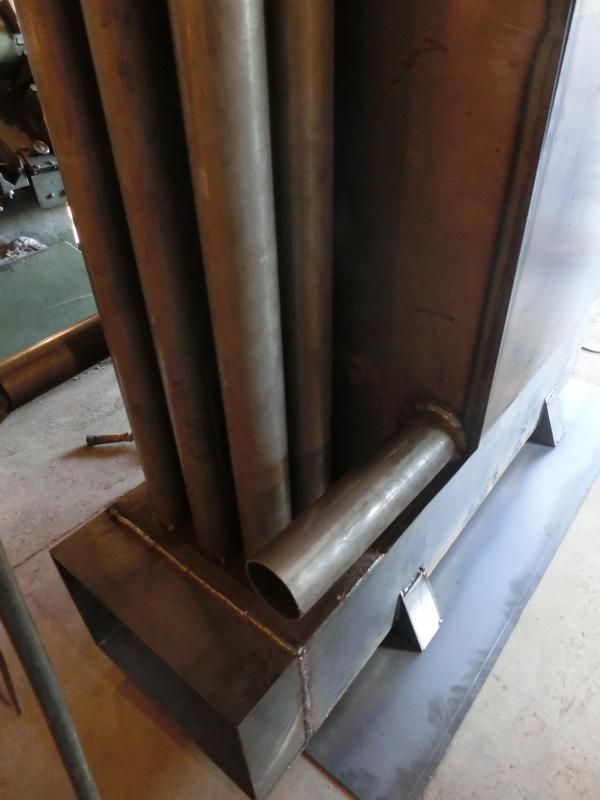
Here is the back of the primary air tube, that is a welded flange on the end with adjustable slots to aim the nozzle holes.
I think this design can be simplified by not using the bends on the firebox, he says he keeps the price under 5k. That is including the finished shed housing, paint, hardware.
Financing a brand new one will run around 12k shipped. That is about 220 bucks a month for 5 years!!! Building one yourself can save you about half the money if you have the logistics to pull it off.
My father once said, “God gave you the skills to do it, so use them!”
I´ve mentioned them before but worth repeting. 2 X 2 cents:
Cold water return should not be really cold. Moist exhaust will condense towards those surfaces and they will rust (and make a mess). Mix in some hot water from top in your returnpipe and your boiler will outlast you.
Firebox/hopper inside water will of course result in tary walls, but that is a good thing. They shuold not be raked or cleaned. That tar protects from rusting.
I just remembered you mentioned ss. I would save it for future mobile gasifier projects
My cold water return hits the top of the water tank away from the hot water feed line,only so i could use cloths washer electric water pump.when feeding cold water at bottom the little pump i useing, wouldent push from the bottom,easyer from the top, too save watts with the smaller pump when needed. Real nice design gasifier boiler,Thanks for posting the details.
Nice boiler, should be very efficient. I guess since your blowing primary & secondary air into the unit, a really tall chimney is not required?
It might cost a little more, but to have a ‘sight glass’ in the front, lowest cleanout hatch…might be a lot of fun monitoring the flame in the burn tunnel.
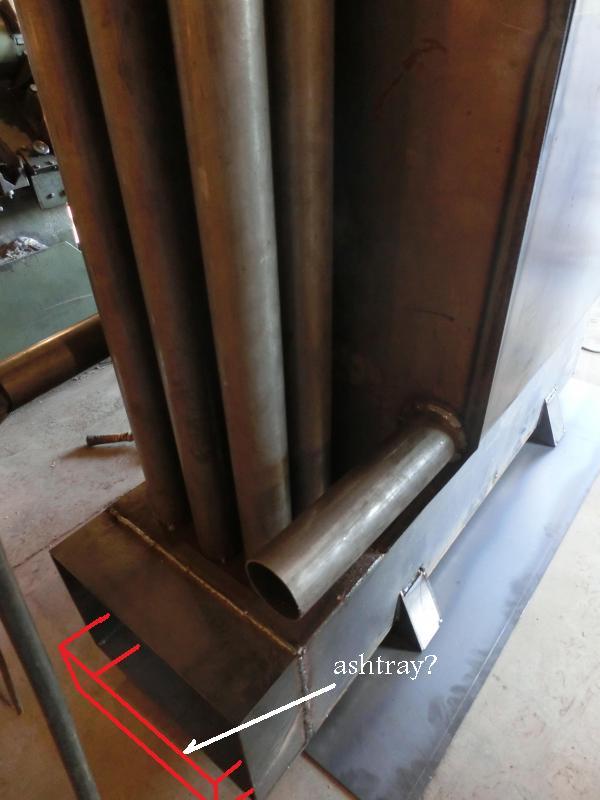
I guess you will have an ashtray & access hatch in this area?, probably want to protect the hatch with firebrick, or maybe I’m completely wrong and this area is a bypass area directly to the chimney?
Yep, That is the rear ash clean out in the picture. This area will be completely covered in firebrick. I think that the taller the chimney the better. The amount of air going into the primary and secondary however is much more important then a drafty chimney, My thoughts anyways could be wrong! I think the boiler in the pics has a 4 or 6 foot chimney, so its not crazy. There will be ways to control how much air goes where.
You might try Sketchup, a free download from google software, but you gotta have the latest windows operating system(as far as I know) for it to work properly, my windows Vista won’t work with it anymore. If you can take the time to learn how to use that program (might require days, even weeks)…it works very well as a sophisticated drafting program.
[quote=“josephhauler, post:1, topic:2066”]
unit to heat my house, my barn, and my pool
[/quote] Quite a lot of water it seems, and I think you said something about being a boilermaker…will you use coolant and an anode to avoid metal corrosion?
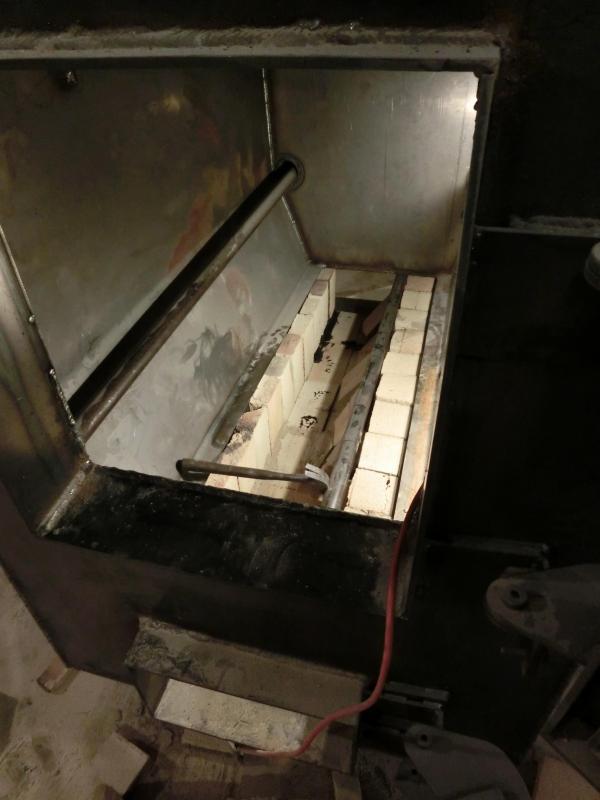
Also in your build pictures of the prototype, I guess the bottom of the Primary chamber is a flat brick floor, that covers the burn tunnel area, and allows a port in the brick floor somewhere along the way to let the gases flow into the burn tunnel, did you get a picture of that?
I think a metal grate of any kind, would probably not last very long.
HI Joseph H, I see what you mean about the water all the way around top and bottom,and both ends, it makes more sense after looking at the burner design,it would be a big waist of heat at the bottom, if water was not around the bottom burn channel.Nice burner Design,Thanks for posting.
Hello Joseph I couldn’t find another way to get in touch with you so I thought I would comment on here I have been looking into wood boilers for a while and had fully designed one and was ready to start creating a full cad model in Solidworks and was just trying to figure out common dimensions for key parts of wood boilers but then came across your boiler which is very close to what I had drawn up so I would love to get in touch with you.
Thankyou [email protected]