On my lawn tractor gasifier I welded the center ring of a inch pipe union to the side of the hopper. The outer 1/3rd of the union turns in to hold the inner 1/3 of the union in place which in turn holds the nozzle assembly which is removable by turning out the outer part. Not sure my description makes sense but it works.
10 Likes
I get it very nice Don!!
2 Likes
Thats some interesting stuff for sure! Im nor sure how it would react in agasifier, but fun to try.
3 Likes
Steve Bowman messaged me about our Kristijan (flute-style) nozzles and I wanted to capture my reply/thought somewhere so I could find it on DOW:
Steve,
Yes, cleaning from the top of the barrel is no problem. I have not opened the stove pipe flange at all. If I were to do it again, I would use a piece of 1-1/2" schedule 80 pipe that fit snuggly inside the barrel and fasten to the barrel with 1-1/4" to 1" reducing bushings threaded into both ends through a 1-1/2" I.D. flat washers. I like having 2 inlets for air cooling, clean out with vacuum cleaner and separate water inlet.
4 Likes
I have posted a nozzle update to the Charcoal Toyota Corolla project thread and am repeating it here.
Nozzle Update: Today I cleaned out the gasifier in the Toyota. It has been 10 months and 255 miles since the last cleanout. It now has a total of about 600 miles on it. I was pleased to see that the nozzle still shows no deterioration. Take a look:

There was a lot of porous clinker material over the smallest hole on the right which is opposite the air and water intake end. I suppose that means that the reaction was hotter on that end. Any thoughts? Perhaps the steam is all sucked up through the first three holes?
The gasifier continued to perform well through the last run yesterday. The only odd thing, which I reported on another thread, has been that I have had to close the air valve more the last few months. It may be that the small hole nozzle was not functioning. I’m hoping the air adjustment will be back to normal now. We’ll see. One recent change in operating procedure is that I have increased the water drip slightly and stopped using exhaust gas. Next cleanout, we’ll see if that has had any long term effects on the condition of the nozzle.
6 Likes
I dont know nuthin! But pretty sure klinkers are a product of high heat. Is it possible that the smalleat hole equals the highest velocity, equals the highest heat, and the most klinker?
Anyway, no visible deterioration of the nozzle, so thats a win.
8 Likes
Andy,
I was thinking air and water was cooling the pipe and reaction more on the end opposite the small hole. I can add velocity to that—makes sense. But it seems that when lighting the small nozzle the flame is not sucked up with the velocity as when lighting through the other, larger holes. Maybe it is just more volume of flame being sucked up and not velocity I am seeing in the larger holes. I wonder if drilling that hole larger would reduce the clinker production?
7 Likes
Great news , on the nozzle Steve certainly seems to have survived the punishment that charcoal throws throws at it that’s for sure .
On the hole’s what size are the first 3 and can you remind me the size of the 4th hole and why you made it smaller ? also the pipe nipple looks like a standard 1 inch dia was it galvanized , i have plenty of that but its only a few mm wall thickness so never used it .
Dave
3 Likes
When l first installed the flute nozzle inside my Seat gasifier l noticed the last nozzles had way more slag and the čhar burned down faster on that side. It seemed like the air rushing in the flute wuld slam in the back wall and create bigger pressure/air flow on the last nozzle/s. I wealded the last ones a bit tighter and it did the trick. This is why l advised Steve and others trying out the flute nozzle to step the nozzle diameter down towards the end.
8 Likes
Dave & Brian,
The hole sizes are 3/8, 1/2, 5/8, 3/4 inch and as Kristijan indicated, I followed his experience and suggestion in varying the hole sizes with the smallest hole on the capped end. Koen, based on his calculations, suggested 1/2 inch for each of the four holes if they were all going to be the same size. The pipe is 1.5 inch schedule 80 black iron. This thick wall pipe is referred to as “steam” pipe. The pipe wall is 3/16 inch thick.
5 Likes
How do we figure out the total area for a certain size engine? Is 4 holes important? I first want to try it with a 15 hp single cylinder Kohler.
1 Like
Bill,
Koen set up this downloadable file help calculate nozzle size:
https://drive.google.com/open?id=0B4CL3bqit0osdHU3OVMyeE1yeHM
I asked him to calculate it for me. Koen may give some guidance if needed. Number of nozzles is not important. I think the example shows 2 nozzles.
4 Likes
Inconel 600
Resistance to oxidizing and reducing environments; for severely corrosive environments at elevated temperatures. Good oxidation resistance to 2150°F.
The Inconel series of super alloys were developed in the 1930s for turbo chargers and jet turbine blades. High heat high stress oxidzing enviroemnts. There are others like Hasteloy, but I am biased towards anything with the name of INCO in it…
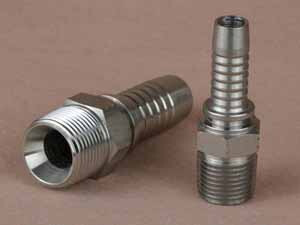
Since these are stainless steel alloys ( some have very little iron in them ), they can be welded, but some tinkering with these barb fittings for the chemical industry have been promising. They seize like a SOB in anything you screw them into that is not a similar alloy. I found the high temperature nickel based anti-sieze pastes helps a little . Assume after a few runs in the gasifier they are not going to come out.
The important take away here is they do not burn and they don’t crack.
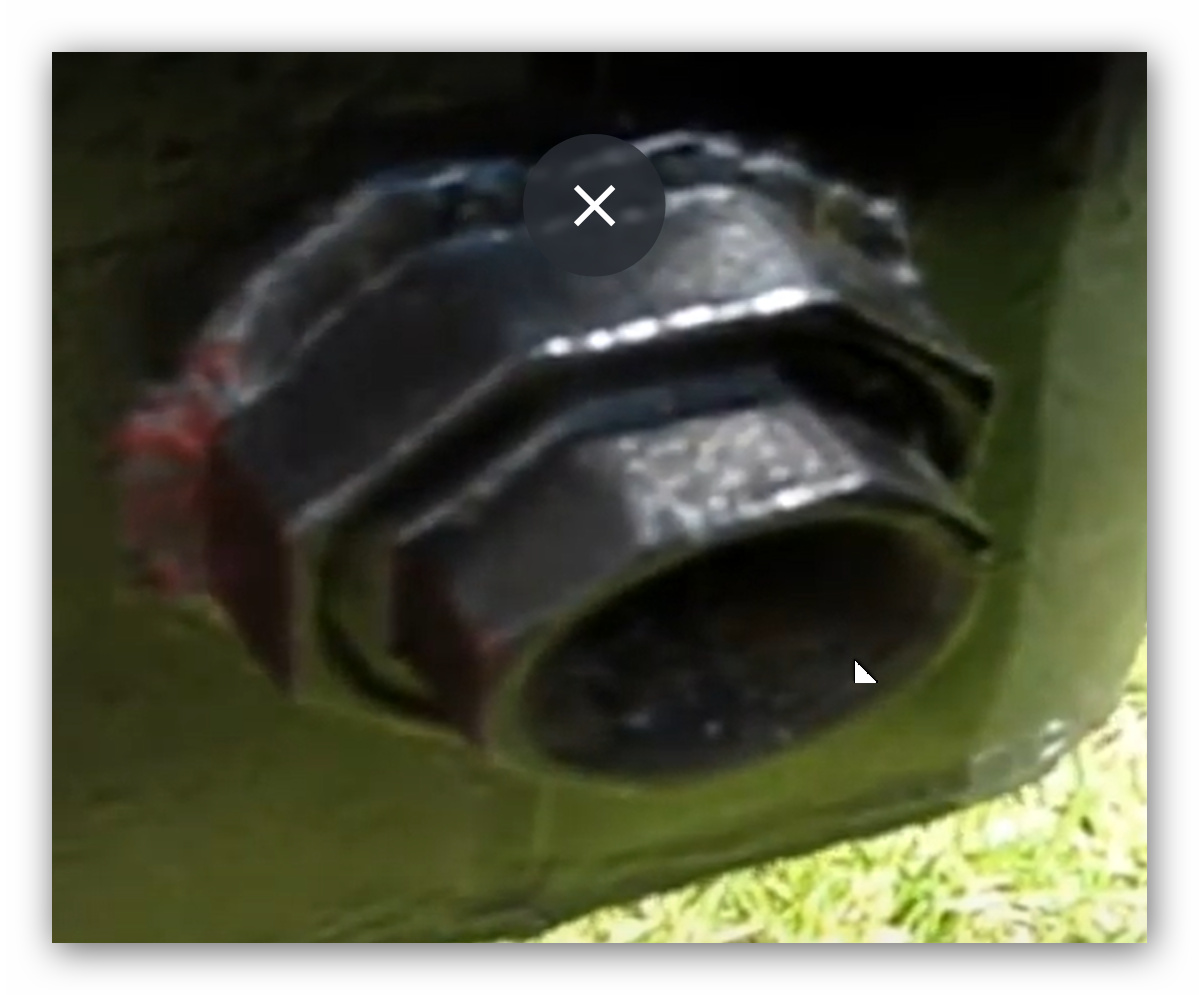
I came up with another solution:
Steel armoured cable connectors…
Remove the rubber seal and replace with a graphite packing rope for a good seal.
Advantages include making the air pipe depth adjustable for setting the distance between the oxidation zone and grate in down draft or cross draft simpler.
As the tip erodes it can be cut, ground or replaced by pulling the whole unit out.
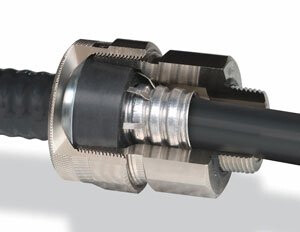
Nothing even needs to be welded now its all threaded and can be sealed with graphite packing rope and exhaust manifold gasket material.
… returning to stalker-stealth mode now…
8 Likes
I wonder if you could wrap it in fiberglass thread like you do teflon tape. They make a ptfe coated fiberglass sewing thread. It might not completely work, but it might only seize like an sob. ![]()
2 Likes
Never ever try to remove SS without first apply penetrating oil or some sort of lubricant. Once you move that fitting the threads will fire and seize… If you first apply a little penetrating oil and smack her good with a hammer it should unscrew with out too much difficulty. Thats unless its been there while in that case it might be permanent part of the other fitting lol.
Are any of you guys putting a shroud around your nozzles? I have not had any of the issues with degradation.
2 Likes
Just getting caught up on this thread now, I haven’t read the thread in it’s entirety because I think I would need about a month to do so, so I apologize if it’s already been brought up. But has anybody looked into plasma thermal coating? I remember seeing jay lenos steam car, the coated the inside of the burner with this plasma coating and apparently it won’t melt until 5000-6000 degrees!
1 Like
Nope never heard of it and doubt you could get it to work on a nozzle , ok just googled it and came up aerospace soon as i saw that you are talking mega money so wont bother .
let me save you some time as you said it will take you a month to read that post the 3 nozzles i know work and work well .
1 Tungsten carbide or silicon / boron i have used all of these and they work real well with no sign of erosion, this is what i have been using since 2017 the same one is still in my gasifier .
scroll up to post number 131 for my nozzle and post number 159 for Don Manns version of Gary Gilmores nozzle
or post number 260 for Steve Bowman version of Kristijan’s thick walled flute nozzle .
At the moment the in thing seems to be downdraft cross draft gasifiers like Matt R’s lovely unit and a few other people are experimenting right now as well , but like i said before you don’t need complicated or expensive to get your feet wet and fingers black , don’t over think it and start simple and you will be running in no time at all , by the way if you heat your home with a wood stove then thats a great place to start collecting charcoal from to start off with .
Dave
2 Likes
I have been thinking that perhaps a simple circuit that would open/close a solernoid valve so you can switch nozzles before they heat to melting i recall in the days when carbon ark rod projectors
had a switch that after 20 minutes of running would switch on a cue mark on the film
then the “hot prodjector” was cooled a new rod and the next roll/part of the movie was loaded
those days a 3-4 hour film was hell in a hot room with many change outs if i recall terminator 2 was a 4 roll set but yeah if a nozzle could be switched say 2 or more entrances and switched off/on at intervals a star pattern or even a slow rotating disk or drum/shaft
the circuit would be easy to rig or even an old ac clock motor from a microwave turn table
many auto door locks use linear solenoids a lever system could open one close the other so a basic on/off circuit…
I thought about that, but you would end up with two nozzles close to the center, and it doesn’t change the heat/oxidation for the area.
however if you extend that idea to say 10 nozzles so you can rotate them around in a circle even 2+ at once, use a counter rotate them say every 15 seconds. then it is like you are puffing on it from multiple angles. It might end up to be more efficient because it is only getting minimal oxygen for every section. It would eliminate most of the bridging/pocketing.
Unless you are getting solenoids for free, then it is probably cost prohibitive.
Personally, I wouldn’t go analog with the circuit, I would use a microcontroller until I tested several variations of patterns and timings. Once you know what you need then you can use a 555 and a counters if you want something more analog. Unsoldering and reassembling it is a lot more of a pain, then swapping around 5 lines of code and uploading it.
2 Likes