Great to see responses from so many of you. I would say it this way, "I have installed a Leitinger Nozzle in the Gilmore Simple Fire. As has already been mentioned, I too think that the mass of metal absorbing and radiating the heat away from the holes as well as the velocity pushing the glowing charcoal away from the pipe are what makes this work so well.
I have had more heat being pushed into the top of the gasifier wtih this nozzle. I’m thinking that is partly due to the increased velocity. Koen calculated that I needed a 1 inch nozzle, which divided by four became about 1/2 inch each. Due to the suggestion that the hole sizes should be stepped up in size, with the smallest being at the stopped end of the pipe, my sizes started at 3/8 inch and went up to 1/2. So, I actually had less area than calculated.
I may have made a mistake, but while the nozzle was out, I decided to drill the holes larger in the hopes of keeping the reaction zone lower in the barrel allowing me to run longer before overheating. That may result in deterioration of the nozzle pipe—we shall see. The new holes sizes are 7/16, 1/2, 9/16, and 5/8 inch. I wish I had just made them all 1/2 inch, but it is done now. That 5/8 inch hole looks BIG–maybe too big.
In my next “long distance run” with the modified nozzle I will be using premium fuel in the car for the first time (oak charcoal)–also with the hope of extending the run time and distance.
My son and I demonstrated charcoal lawn mower at a local tractor and engine show last weekend. Before the end of the day we started up the Corolla and drove it around the grounds on charcoal for a while. I took my camera, but forgot to take pictures–sorry. One guy looked at me like, “You expect me to believe that you are running an engine on charcoal?” I think everyone enjoyed the show. SWEM.
I went for a ride today with 100% Oak charcoal and Leitenger nozzle with larger holes to see how far I could go before overheating. I shut down at just over 32 miles with reactor lid temp climbing above 400F and gas temp leaving the final filter 125F. The previous distance record was 21 miles.
Since I refilled the barrel with fresh charcoal before this run, I’m thinking that settling in the drum may have thrown off my miles per pound calculations. I filled the reactor back up after the run with just over 15 pounds which would be 2.16 miles per pound, not as good as what I got on the previous 21 mile run which was 2.8 miles per pound.
Everything appears to have survived the heat OK. I’m thinking of adding more 2 inch flex exhaust pipe between the cyclone and filters to provide some relief for the plastic buckets which felt rather warm. I ran the charcoal down about 10 inches from full which left about 10 inches of charcoal above the nozzle when I shut down. Previously, I had to shut down when the charcoal level dropped 7 inches. After 30 miles I noticed the power beginning to decrease. After a few more trips, I’ll check the nozzle out to see how it is holding up. It appears that the larger nozzle holes did lower the reaction zone as anticipated.
After the last post, I ran into ignition system problems, eventually replacing the ignition module or igniter. I added the additional flex exhaust for cooling and replaced the 2 plastic buckets with a 7 gallon steel one with a lever lock lid so the filter housing would be more heat resistant. Today was my first run since Oct 15th. It worked fairly well, but I clearly had less power than previously. I may need to increase gas flow through the filtering system.
A few days ago when researching on the internet, I made a discovery some might find interesting:
For probably a year I have wondered about the origin of a term used for charcoal gasification in the movie which inspired my project, “The Longest Hundred Miles.” In referring to charcoal gasification in the movie the priest said, “We call it the ipopi.” I searched for the meaning of the term ipopi several times, but only recently discovered its origin. I found a piece on-line written by Larry Henares, a well-known personality in the Philippines, who wrote that his father, Hilarion G. Henares, “developed the famous IPOPI charcomobile which ran cars and trucks on coconut charcoal, solved the transportation problem during the war, and saved the cities from starvation. IPOPI stood for Industrial Products of the Philippines Incorporated, but everyone claimed it meant in corrupted Visayan Tagalog, ‘Itulak Para Omandar Pag ‘Into’ ” (Push to start when it stops). Another source, familiar with IPOPI, wrote, “IPOPI vehicles were also known to be under powered. Every time it reached an uphill road or an arced shaped bridge, all its passengers had to get off the vehicle and push it up the hill or over the bridge.”
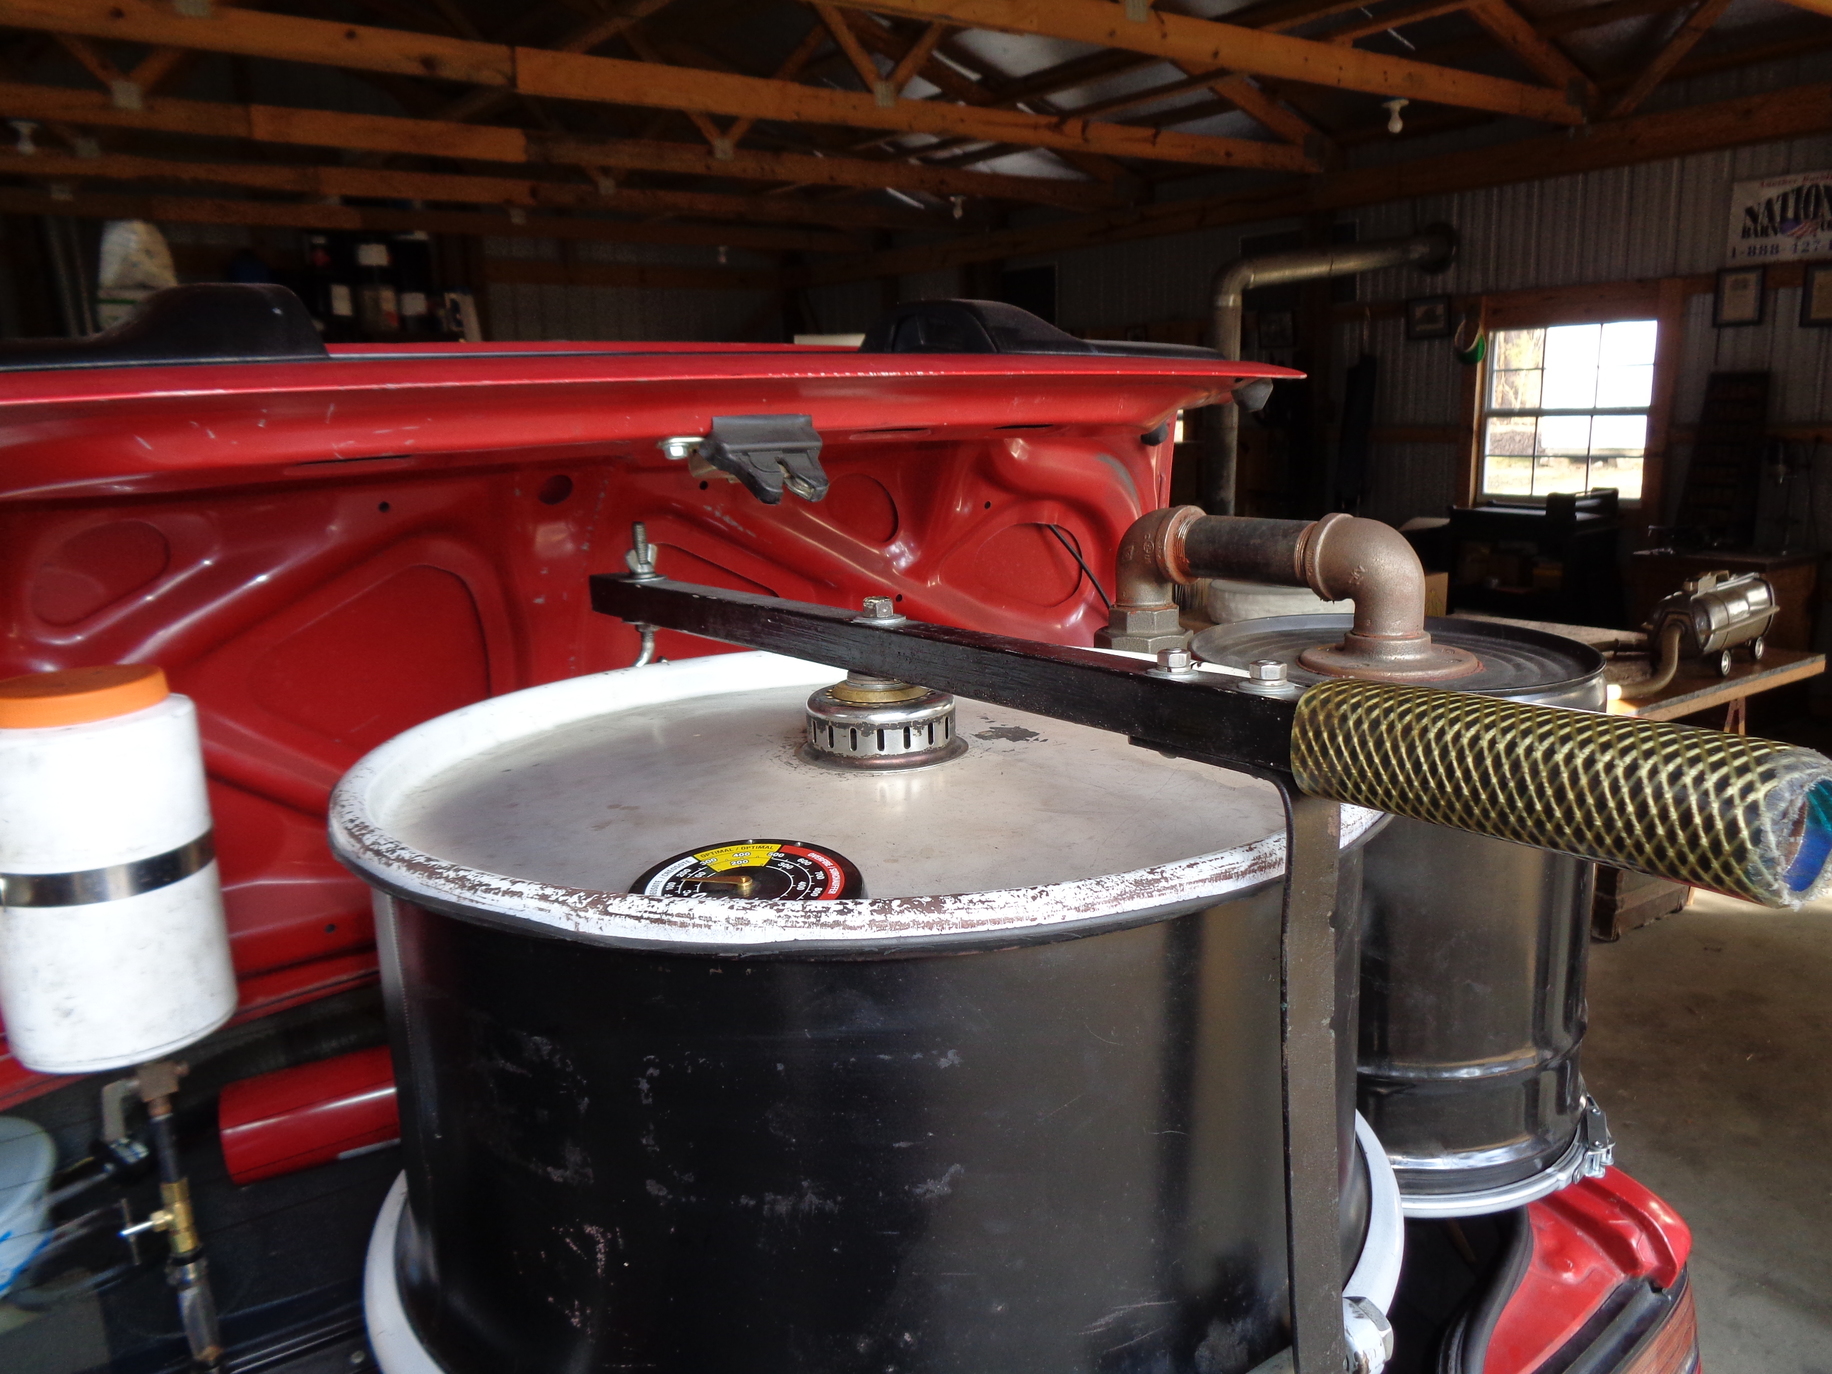
My gasifier includes a little bit of everything, even part of the kitchen sink. In the center of the photo is the original drain strainer from my kitchen sink, which I replaced a few years ago. I thought I’d find a use for it some day and I am NOT a “pack rat,” in case you were wondering! The Metamucil “water drip tank” makes a nice conversation (or constipation) piece, too.
Another milestone today for me—actually a 12 city-milestone. I drove the CharCar to town for my usual mid-week errand trip. Stopped at CVS, Family Dollar, went through the PNC Bank drive-through, visited my former workplace, dumped the trash, and stopped at Dollar General–going through 15 stop lights on the trip. I flared-off and started the engine at about 9:40 a.m.—arrived back home and shut-down about 11:00 a.m. I was more concerned about having enough power than running cool, so I didn’t use any exhaust gas and only about one drop-per-second of water. I was pleased with the power, the idle, and the ease of stopping and starting. I used the blower to start initially. I plugged the intake and closed the air mixture valve at each stop. To start again, I removed the plug, set the mixture valve, and started the engine on the gas remaining in the system. It worked like a charm. Since my water drip attachment fits in place of the air intake plug, I had to remove and replace that also with each stop and start. I’m still using Kristijan’s flute nozzle and Bruce’s poking rod to clean it out. Thanks guys for your contributions. The reactor lid was 300 degrees F when I got home which is about what I expected. Once it gets above 350 degrees F, it seems to go up quickly. No miles per pound records here, but I was pleased to use only about 7 pounds in 12 miles of mostly “city” driving. No gasoline was used for today’s adventure. I was smiling with every mile.
It’s always good to hear from you, and thanks again for creating the Simple Fire. My “stock” Simple Fire with the addition of Kristijan Leitinger’s “flute” nozzle works so well as a vehicle gasifier. I am very pleased with its performance. I think it is about in its final form now. I may experiment a little more with the filter setup. I might possibly make the drip control accessible from the driver’s seat and possibly make a variable timing adjustment. Some additional monitoring devices would be nice, but I do like simple. So, I may just leave it like it is. It has proven its usefulness and is certainly an attention getter. It seems whenever I go out, if I stop somewhere, someone will want to know what I’m up to. It has been a lot of fun.
The first time I heard “smiling with every mile” was in your Ranger road trip video and of course, I smiled, too. I was wondering if SWEM originated with you or if you were just carrying on the tradition?
Here is a question for anyone listening. I had never done a leak test until last Friday when I discovered a number of small leaks between the reactor gas outlet plumbing and the filter housing. I’m curious to know what sort of change I might experience in the performance with these leaks now eliminated?
Hi Steve, when it comes to air leaking into your charcoal gas that you have made, it means a lot. Especially into your gas line leading up to your engine where you are mixing it with air. I have found with no leaks you have a richer chargas to your mixing spot of air and chargas, this will give you more power for the higher speeds for driving with the same vaccum being pulled from your gasifier. You will definitely see improvements.
Looking forward to a video of you driving by a gas station and a SWEM on your face.
Also a walk around video of your final design installed on the Toyota Corolla.
Bob
I was just checking out Kristijan’s latest Mercedes posts. It appears that my operation has become old technology in light of Kristijan’s advances. I am always eager to see what he has come up with.
Anyway, Bob Mackey asked about a walk-around video so here it is. I do not have a YouTube account, but since I maintain my churches website, I’m able to upload videos to the web hosting server and share the link with you. I had trouble getting it small enough for viewing with no buffering on my slow DSL internet connection, but it is working fine for me now. I’m not sure where the m4v suffix came from. I had it set for mp4. If you have trouble viewing it, let me know and I’ll see what i can do. Here is the link:
EDIT: This has been moved to YouTube at last!
And here are a few comments about the video: I did not mention the exhaust return valve, but you can’t miss it and most of you will know what that is all about. Even though my system is a “nuclear reactor looking thing” as Kristijan once said he was trying to avoid in his designs, it does make it easy to show people because you can view all the components clearly from one position. In the video I called my fuel pump a “fuel filter.” I don’t know much, but I do know better than that. You will notice, but I did not comment on the wood stove thermometer with a magnetic back which is stuck to the reactor lid. That is the only sensor in the system. Also, I noticed that my tools really don’t show up well. I should have gotten closer. Otherwise, I was pleased with how it turned out. I have had many good teachers, thanks to you all. Next maybe a startup video . . . .
Wow, that’s the kind of videos we like, Steve. Obviously a lot of thought into this build. Very impressive.
Since pickups are rare here I was actually looking at old Corollas when I stumbeled on the Rabbit pickup.
What kind of top speed do you reach? It’s a 1.6 liter, right?
Can’t wait for a lightup video
Wow Steve, so many great ideas you put into your build. This should be very encouraging to people that have car or small truck they want to convert to chargas. You did a great job on the walk around. Thank so very much. SWEM
Bob
I like your filter. Nothing nasty goes trugh that buty thats for sure!
Hope you get to make a startp video!
How often do you need to change the air fuel valve? I ask becouse when l used this kind of a updraft system the gas was so steady l didnt even have a a/f vale connected to the cabin. I adjusted it once and it stayed like that forever. I just checked it occasionaly.
Had hoped to post a startup video today, but will wait for better weather.
Bob, thanks for input on the result of fixing leaks. I look forward to seeing the results when I’m out driving again. Wayne and others, I’m glad you enjoyed the video. If I showed any ideas in my video which anyone can use, that is great, I surely have gotten ideas from the DOW crew. An idea from here and one from there is what made it. As I’ve mentioned before, I do like simple. Thanks Gary for that inspiration. I wouldn’t have been able to do if it had been otherwise. JO, yes, it is 1.6 liter and average speed is about 45 mph, but I’ve been up to 60, if going down hill counts. The hills aren’t all that big around here.
Kristijan, the filter is still a work in progress. Recently, I have rigged up a vacuum testing system to give me some idea of how much restriction I am getting in my filter. First, I inserted a T-fitting in the gas line near the engine with the third connection going to a manometer. I ran the engine on gasoline with the air mixture valve positioned as when running with the gasifier and the plug out of the reactor, and noted the manometer reading to give me an idea of how much vacuum I might be drawing on the gasifier when driving. Then, I connected a vacuum cleaner in place of the engine, similar to what you suggested recently to provide the vacuum while I compared the vacuum readings with no filter and with various combinations of filter media. I did most of my tests at about 5 inches of water which seemed reasonable with what I was getting with the engine running. The filter added about a half inch difference with pretty much no change with the various combinations of filter media I tried.
Regarding the air mixture valve—it idles better when I close it some and gives more power for driving when opened a little more. It would probably work OK with one setting, but I find myself fiddling with it when stopping and starting again seeking the best results.
Here is the promised start-up video. I left off a couple of steps at the end—I stow the stand-alone blower in the back seat and close the hood. Then I’m ready to go. Hope you enjoy it.
Thanks Bob, Wayne, Kristijan, and Jeff. It looks like I will have to do a drive video now. Somewhere up above Kyle posted one from his visit here which you can view until then. Kristijan, what is your 75% referring to?