Okay everyone, I have placed this project here, even though my truck is a WK Gasifier but I am working on the cooling rails and tree parts. So please no questions on the WK Gasifier internal working parts, just keep it related to the subject.
Thank you.
4 Likes
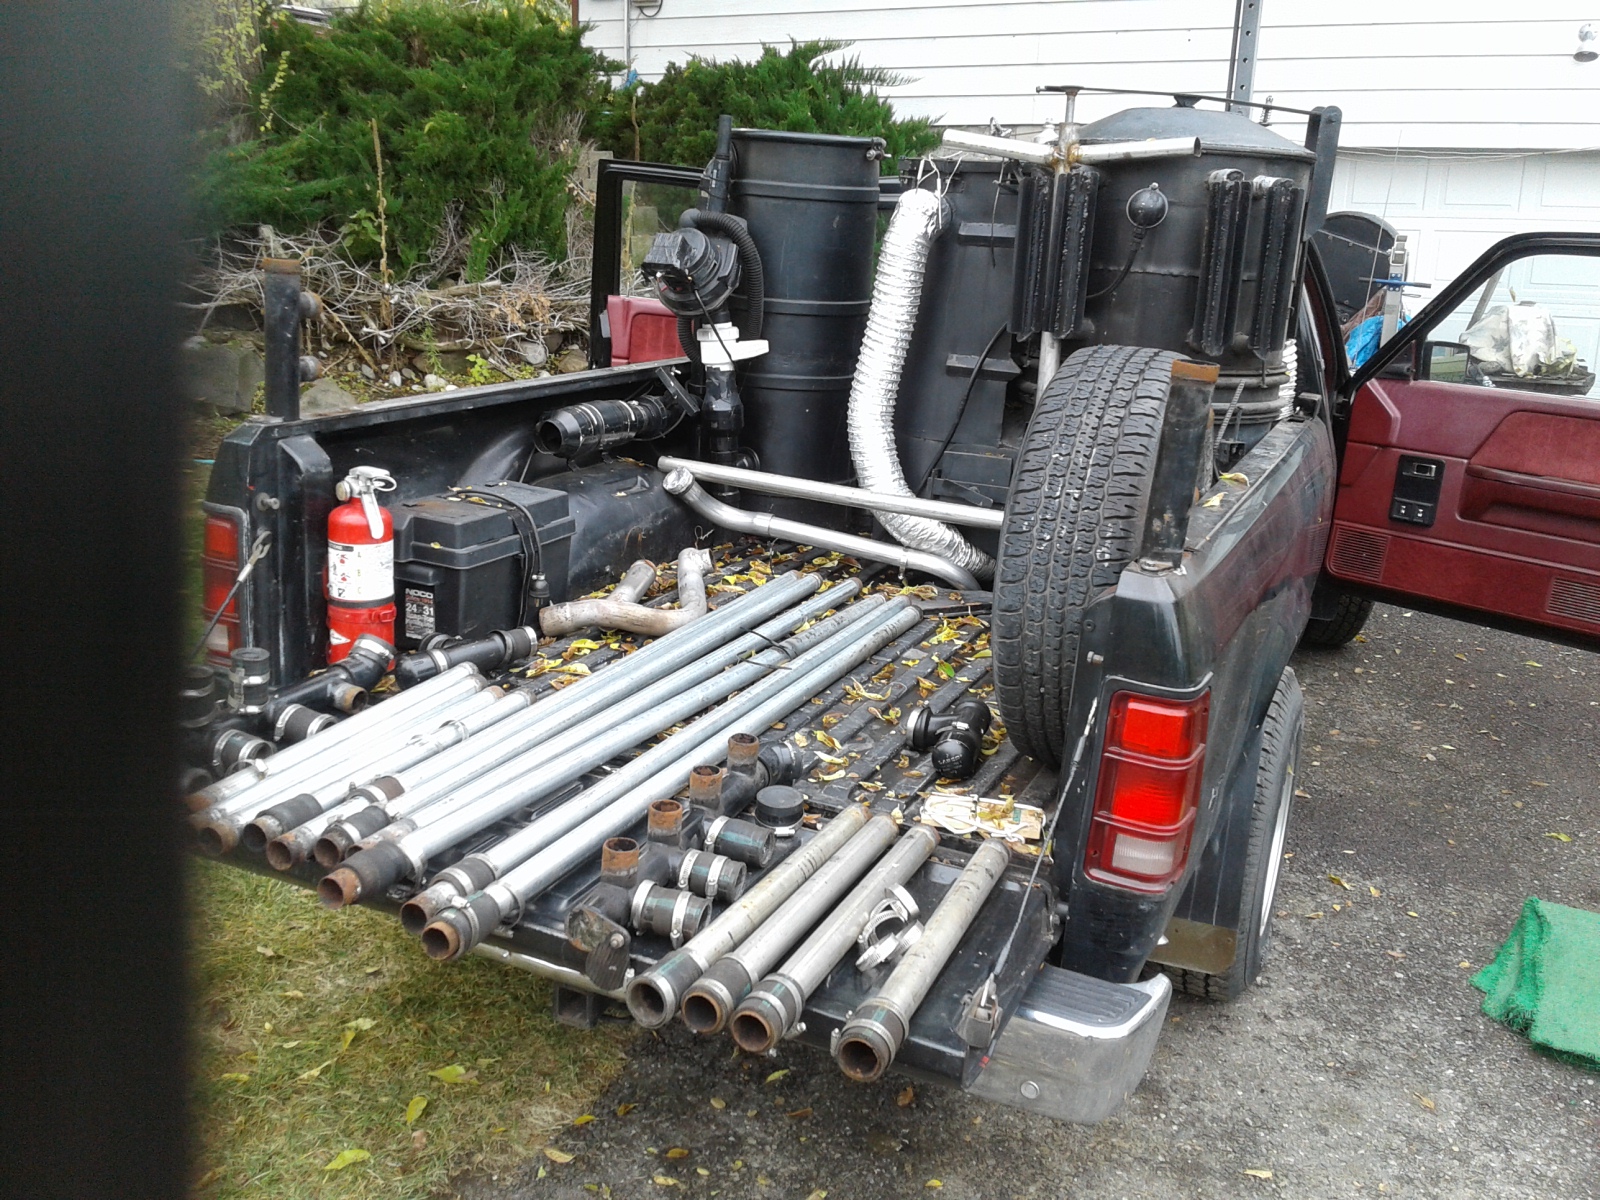
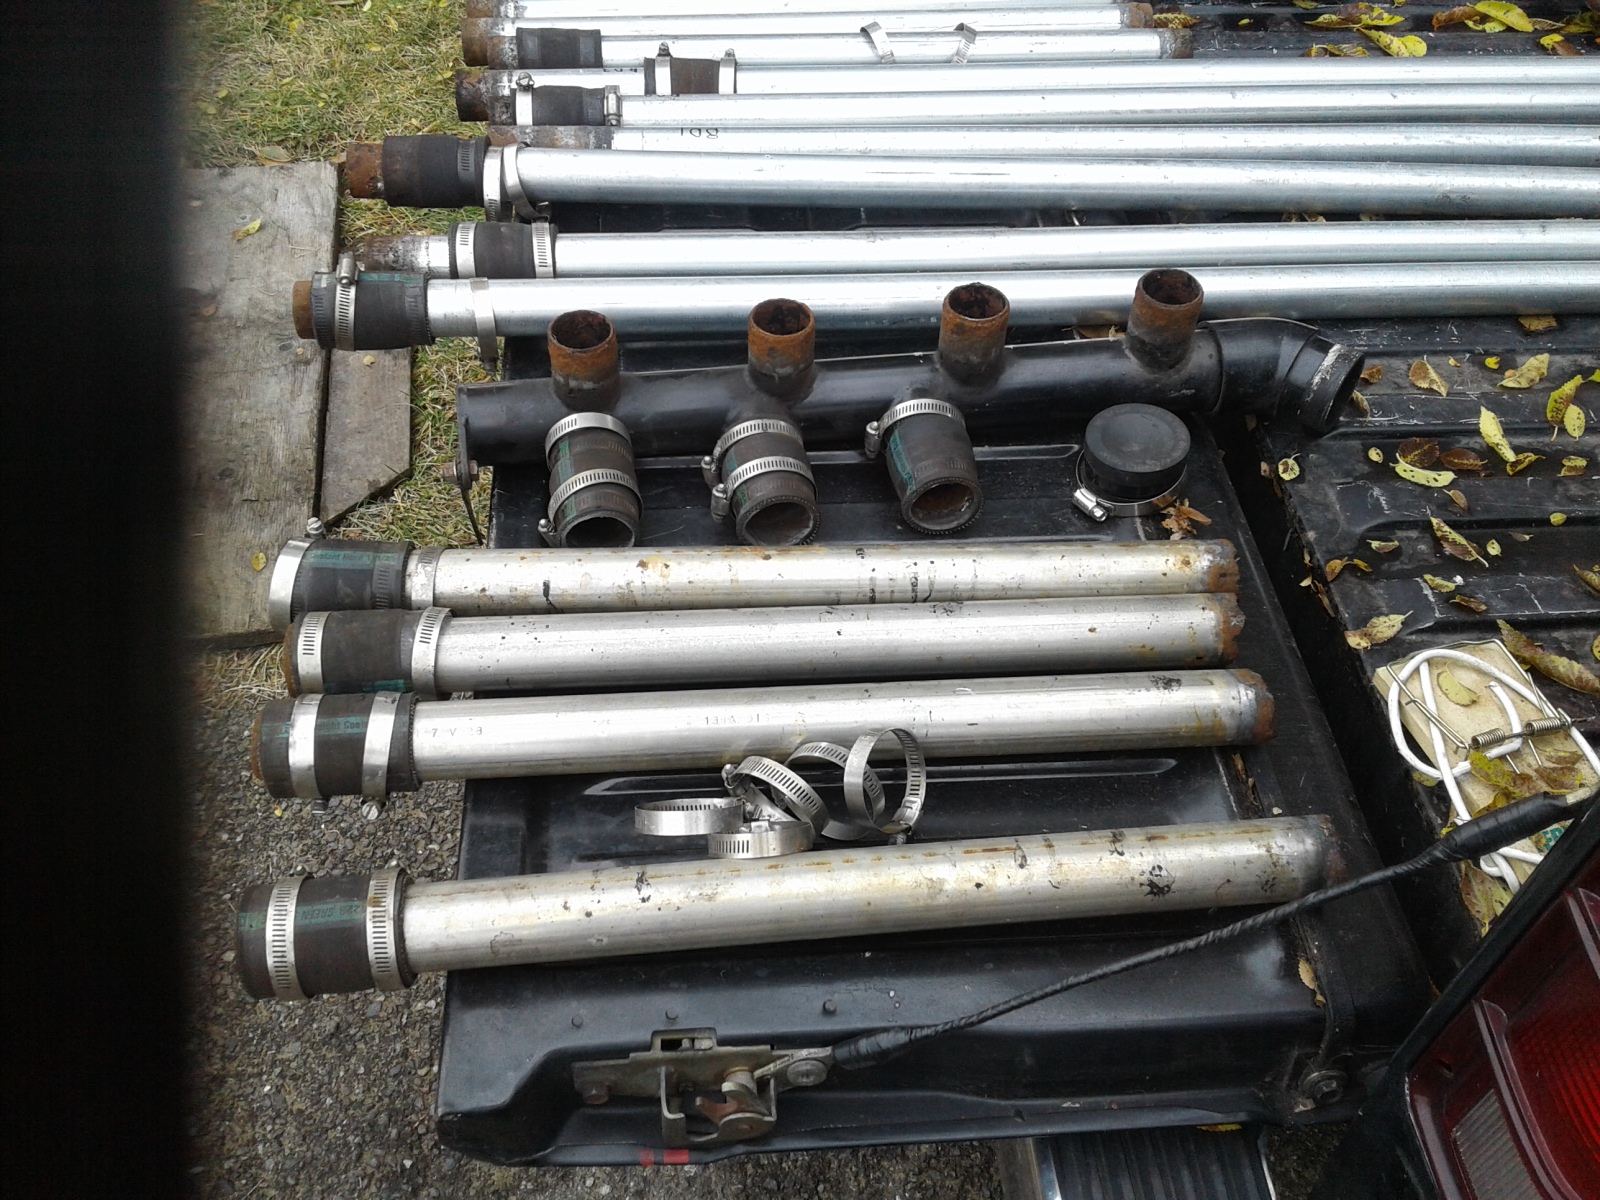

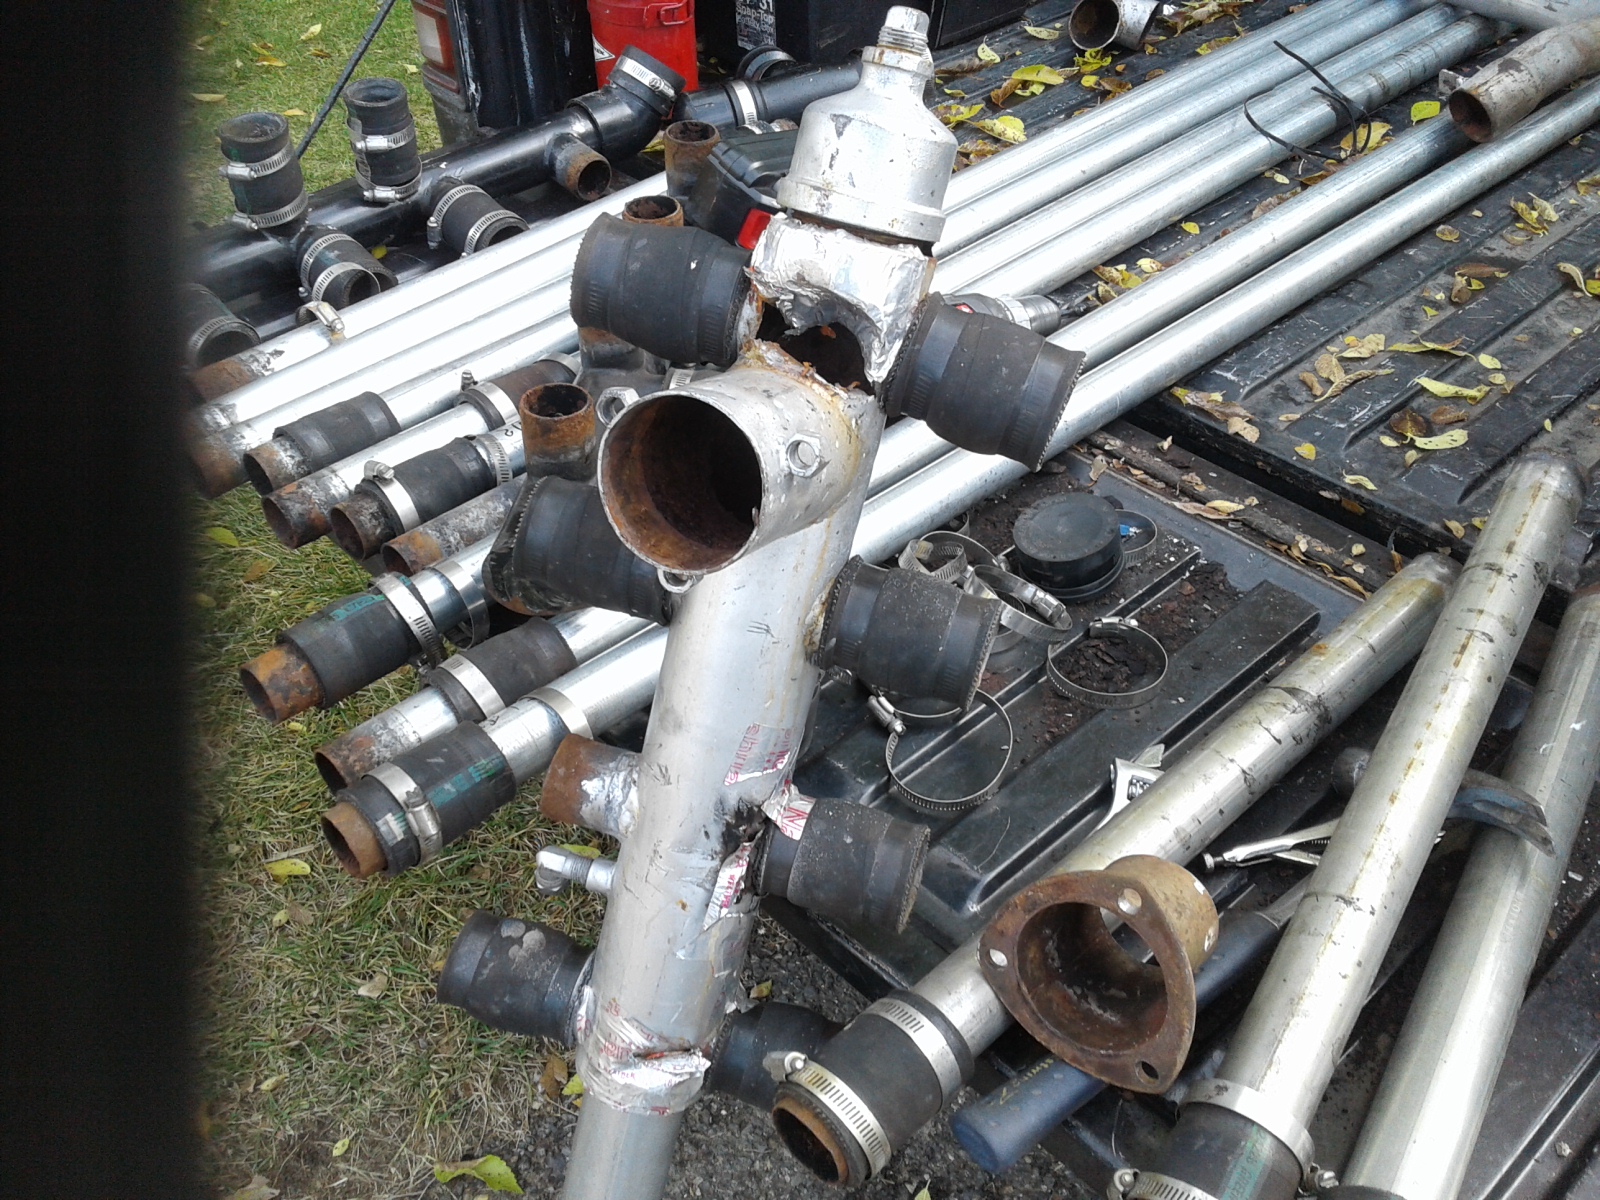
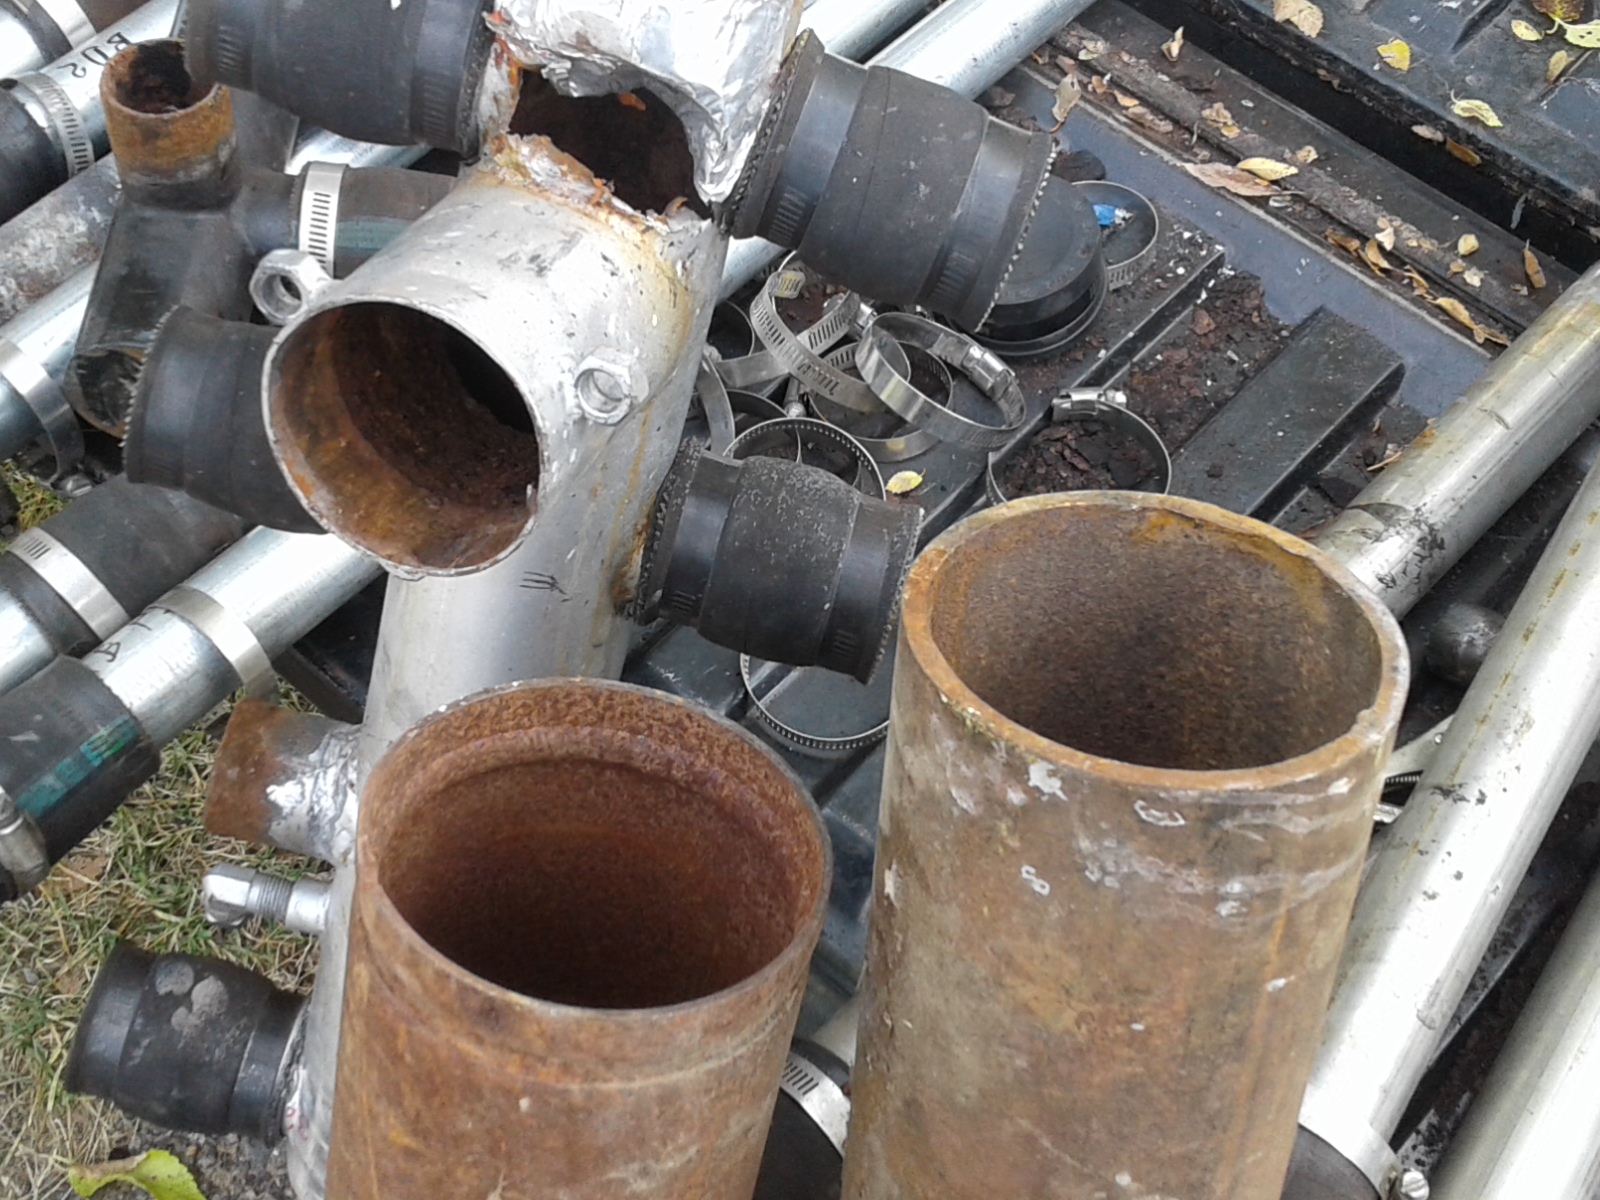
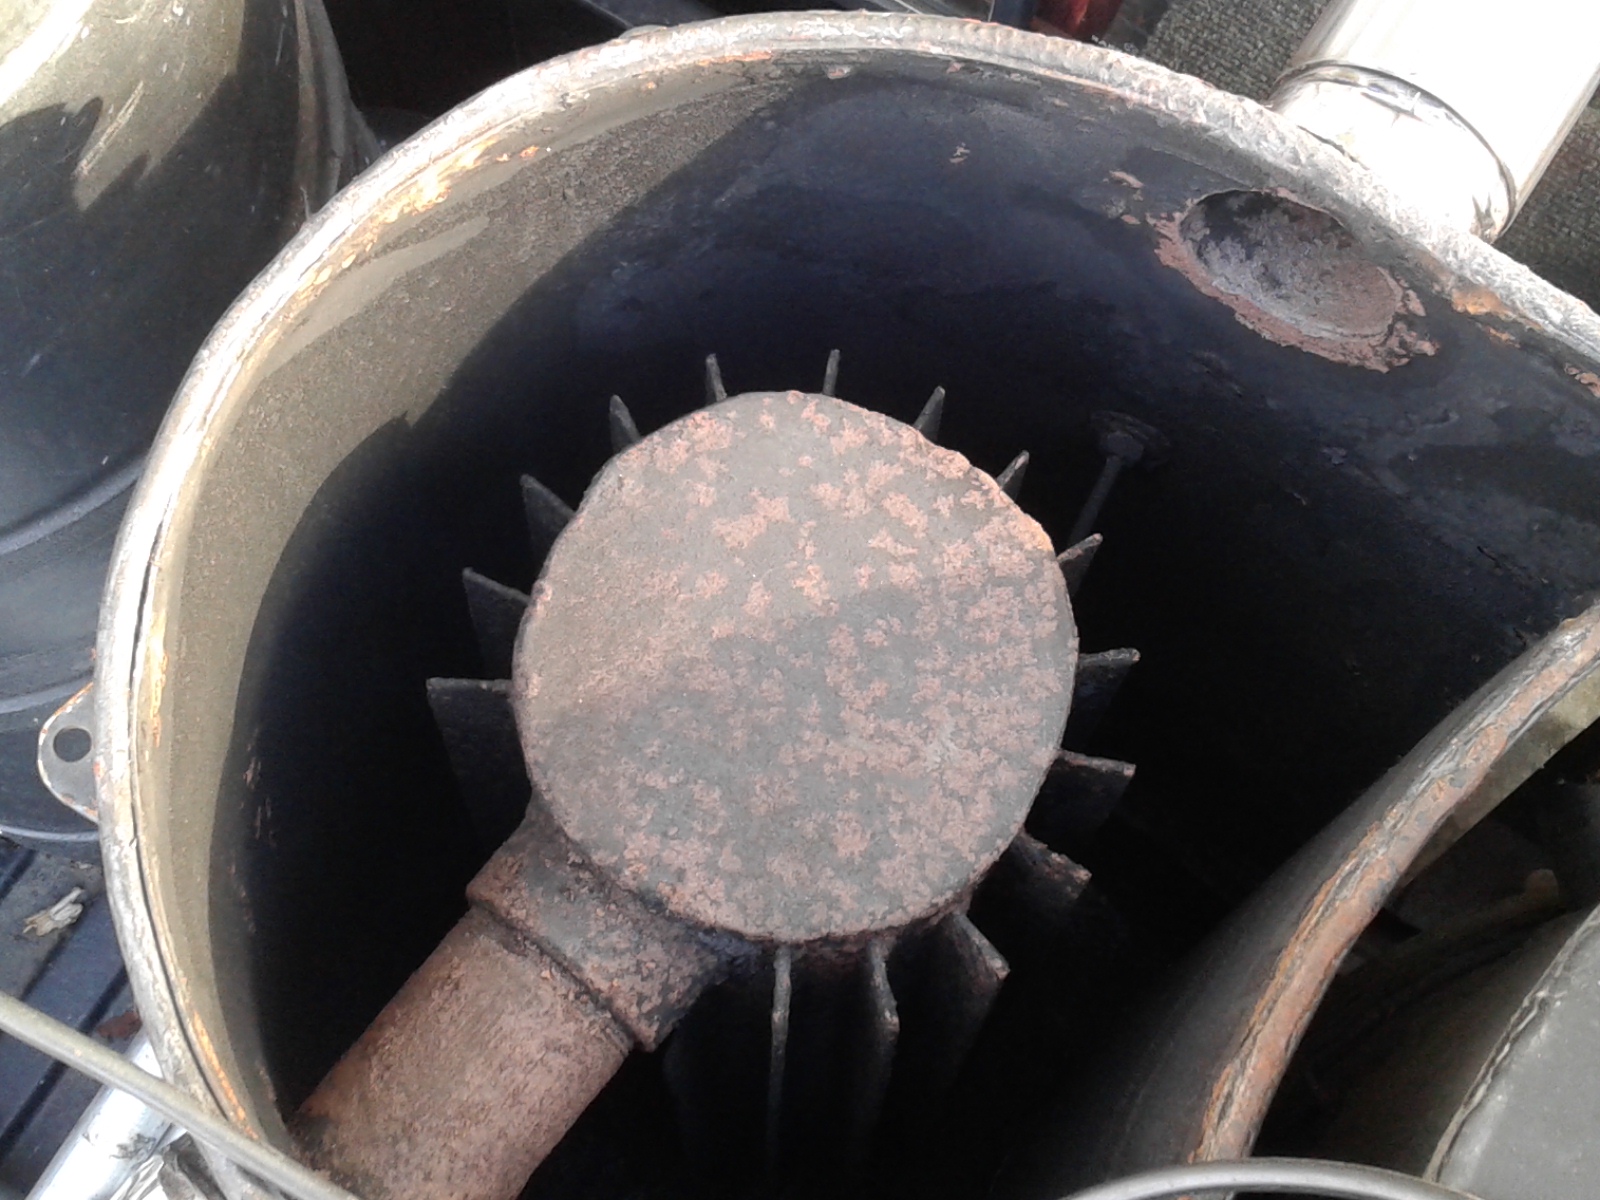
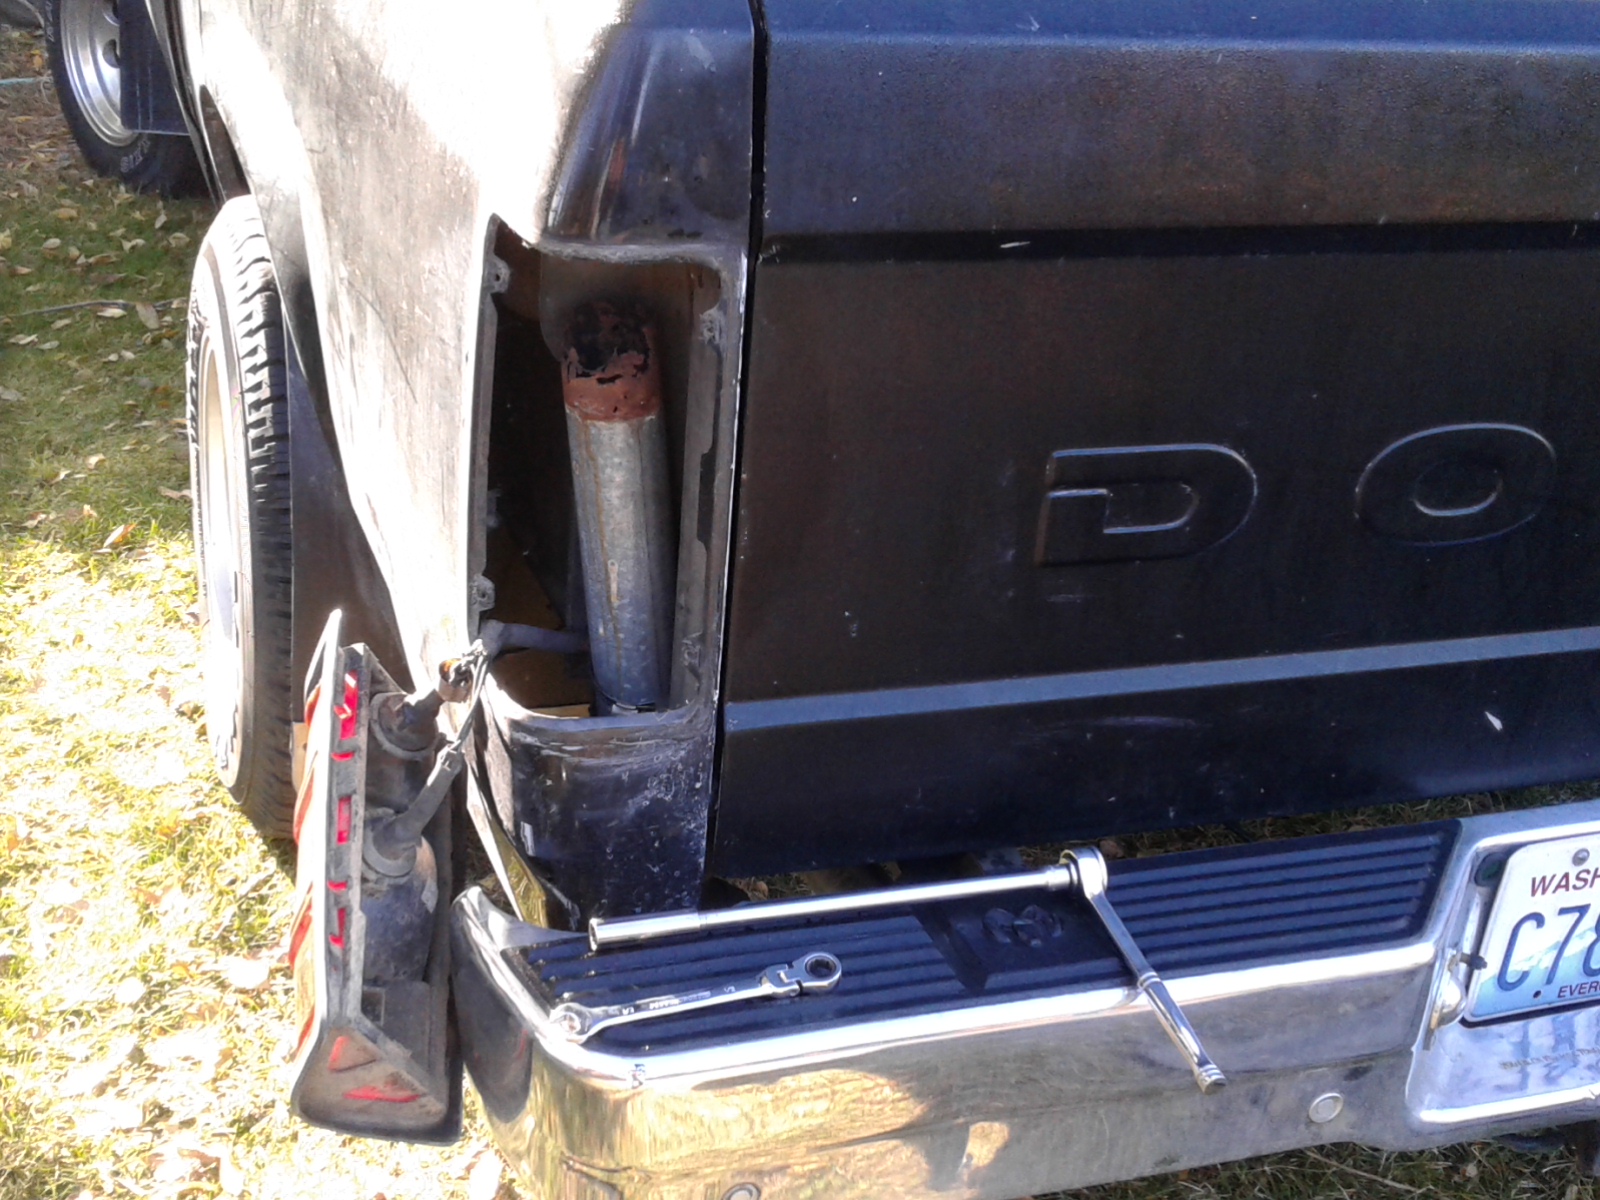
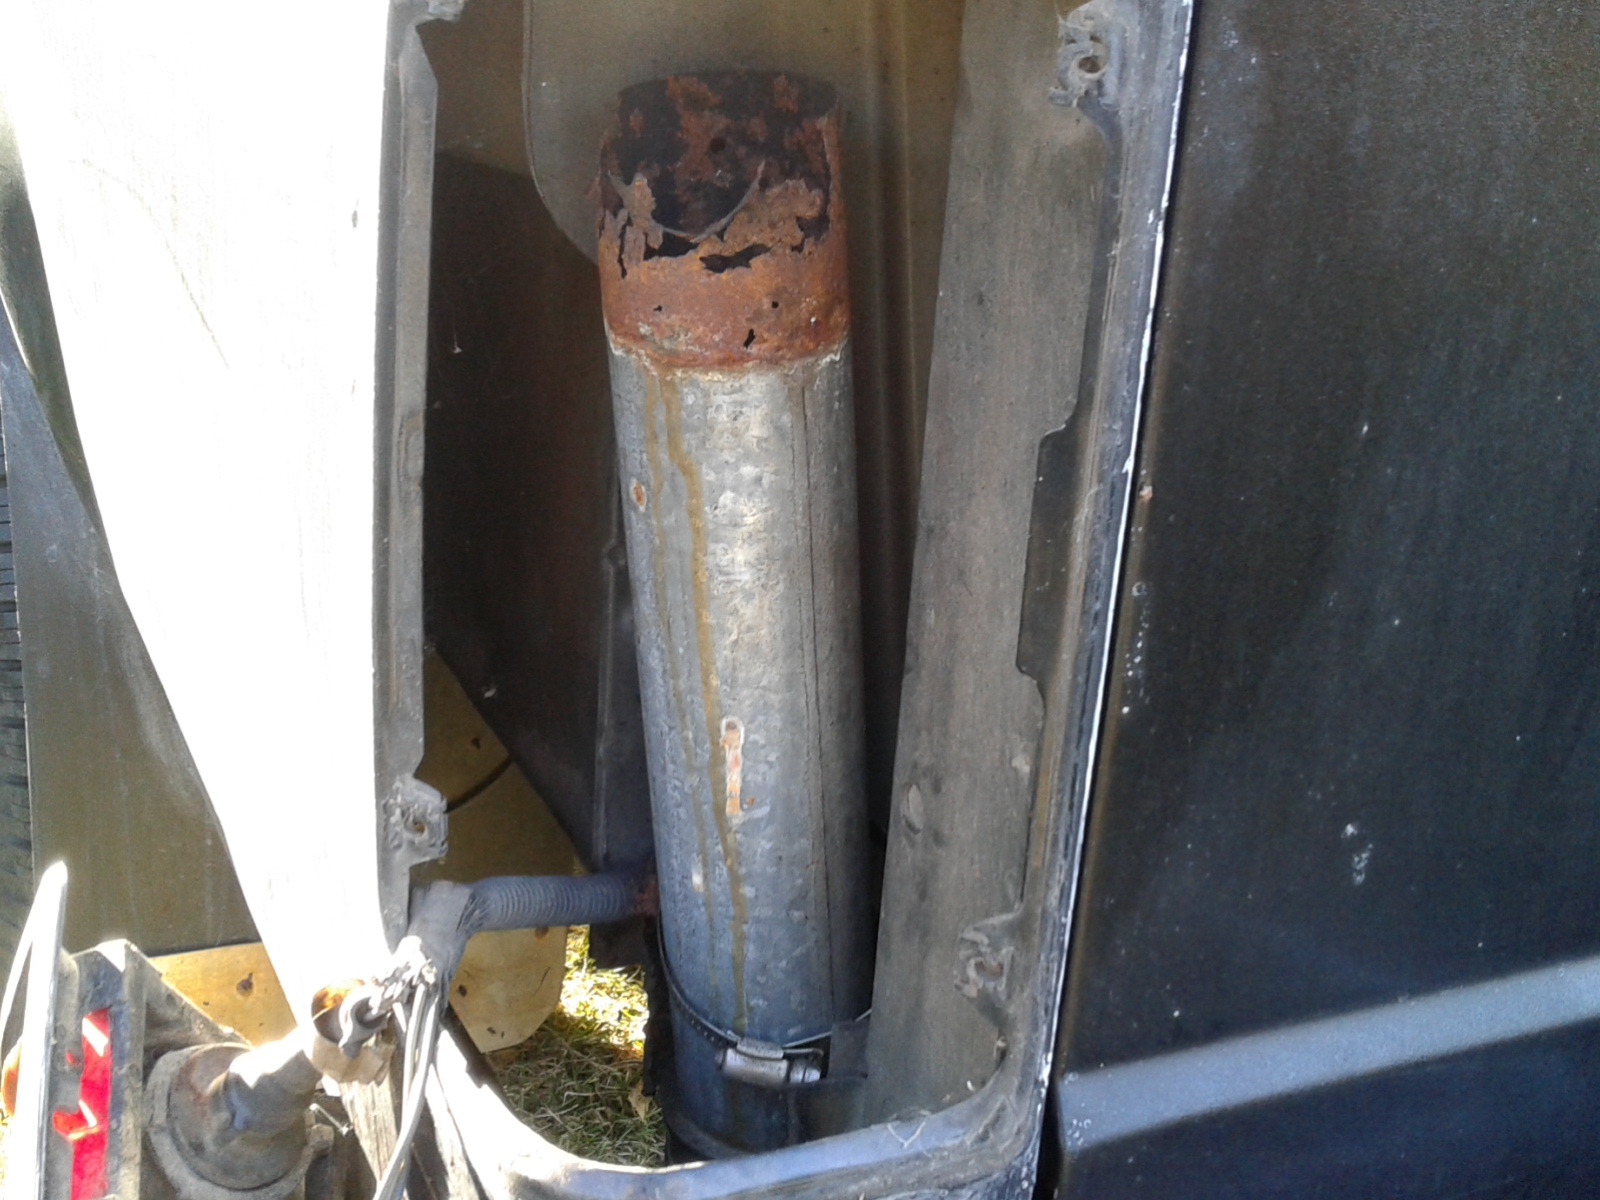
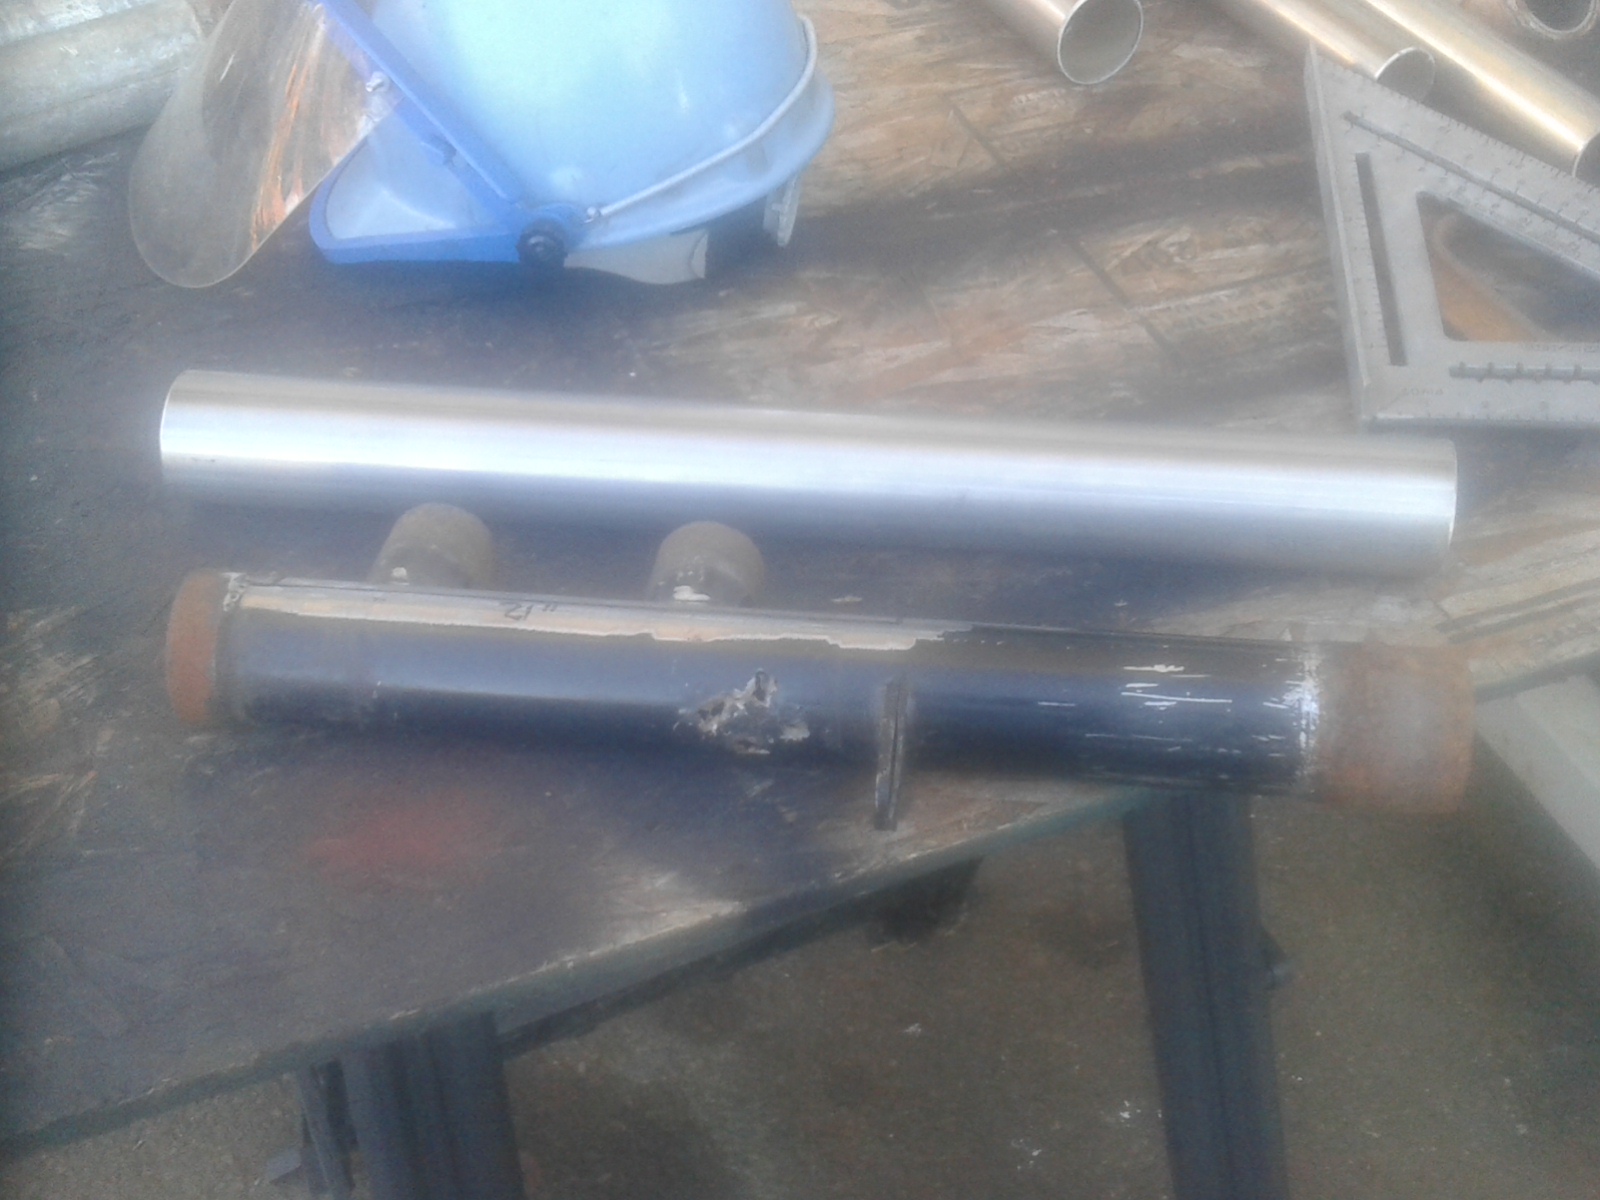
Removed cooling rails and the 3 cooling rail trees for inspection. The 4 cooling rail pipes that are darker in color are the original rails that Chris S. put on when he built the modified cooling rail. I think he did the modification in 2014. So the trees and 4 rail lasted a long time. The high temperatures going into the center cool rail tree needs to be addressed. This is what rusted out and started to develop air leaks. Thicker walled piping is in order here.
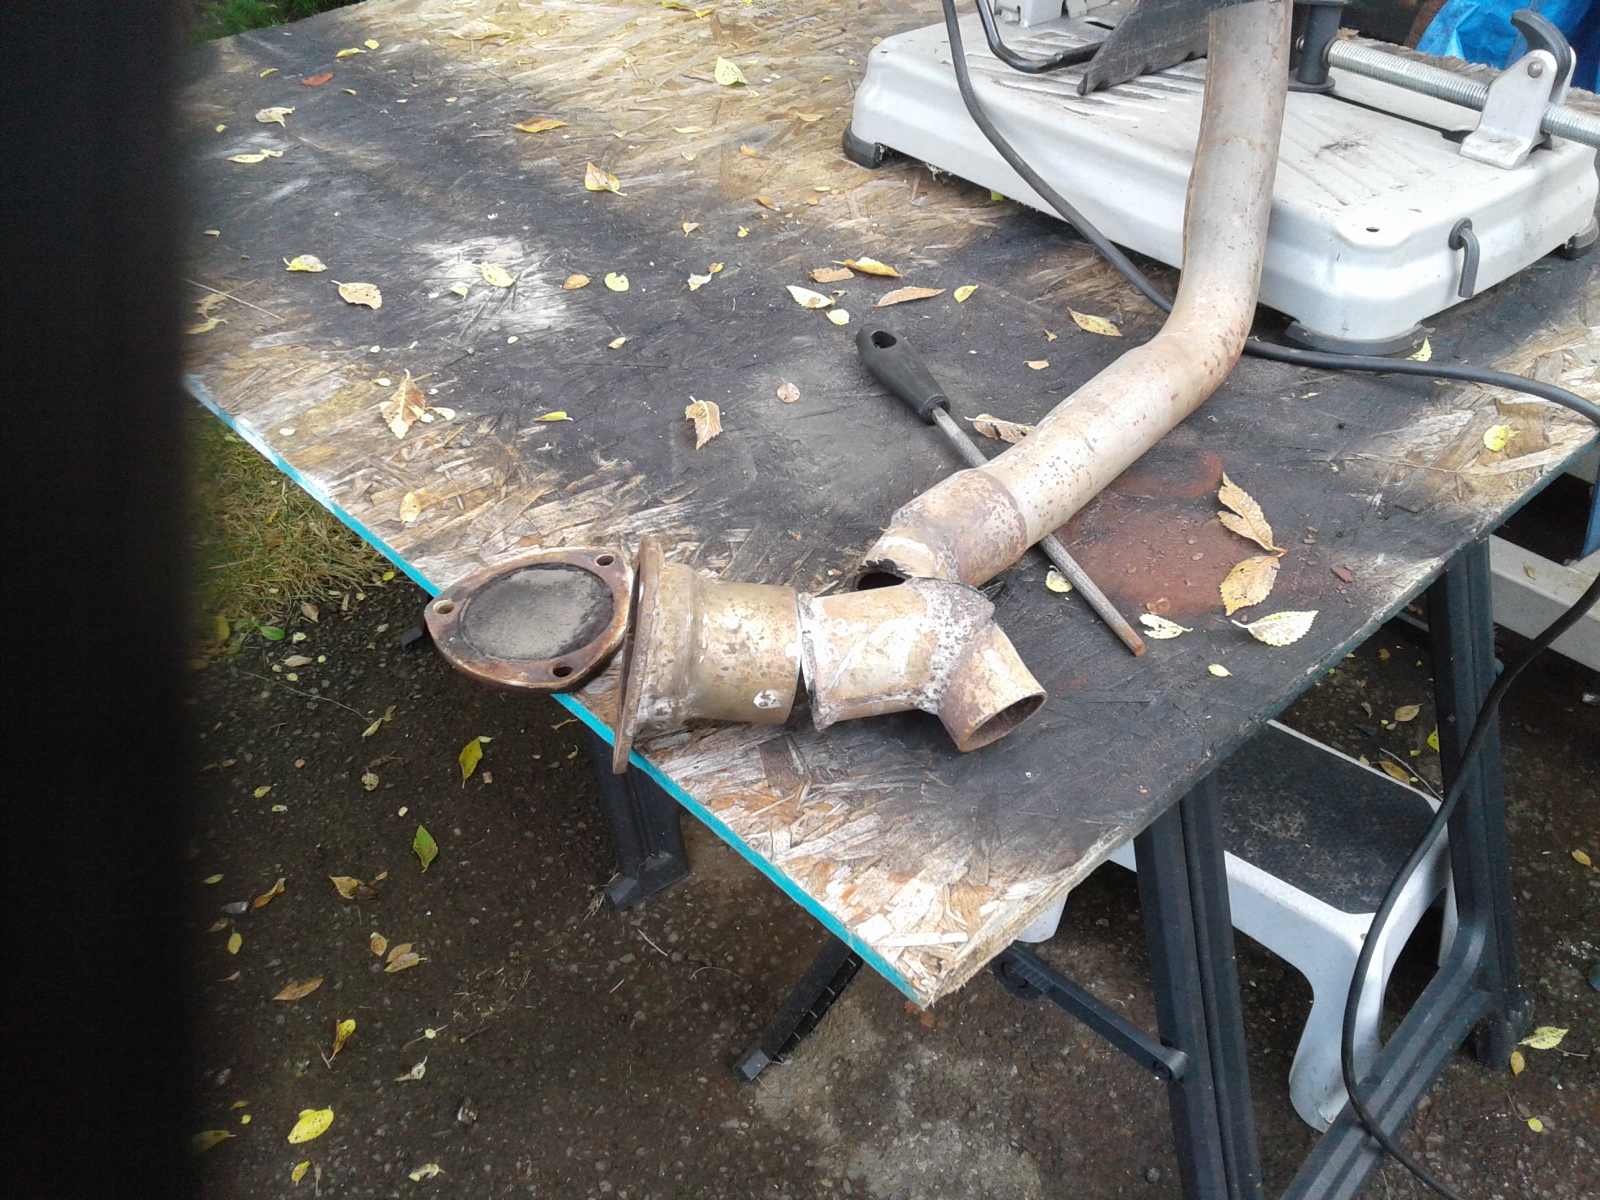
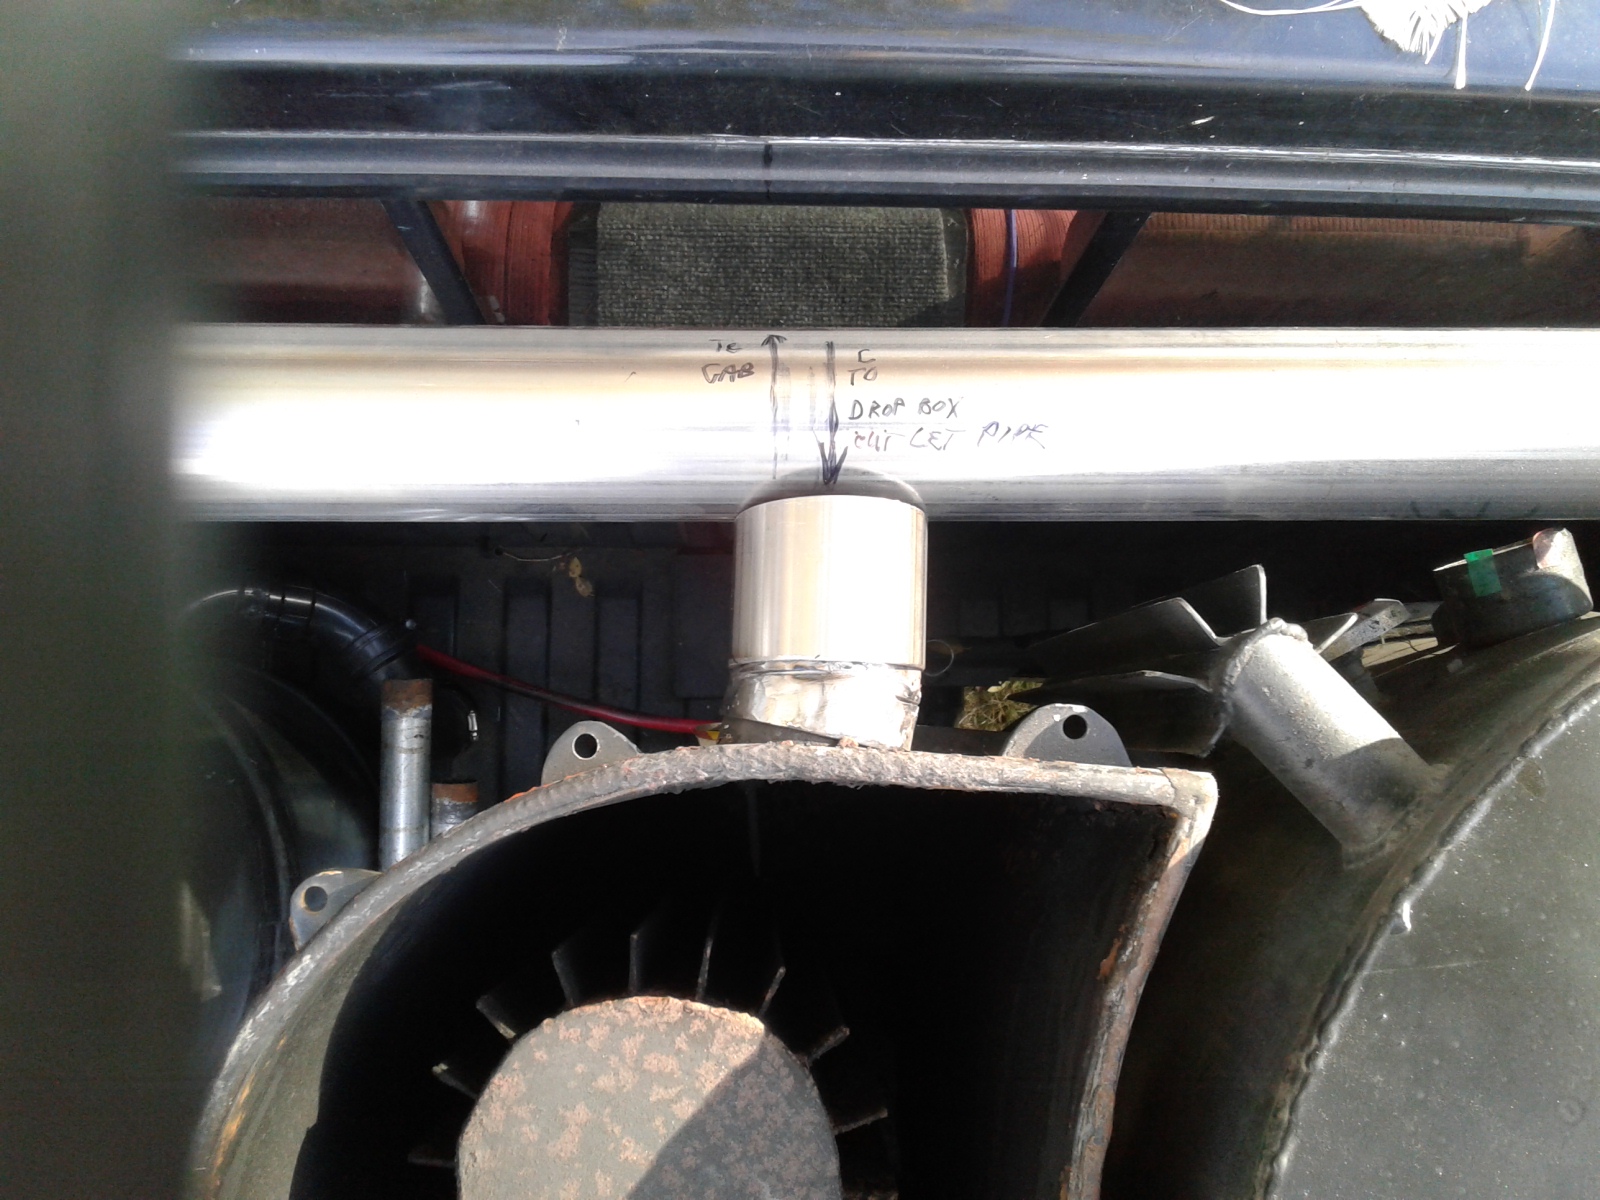
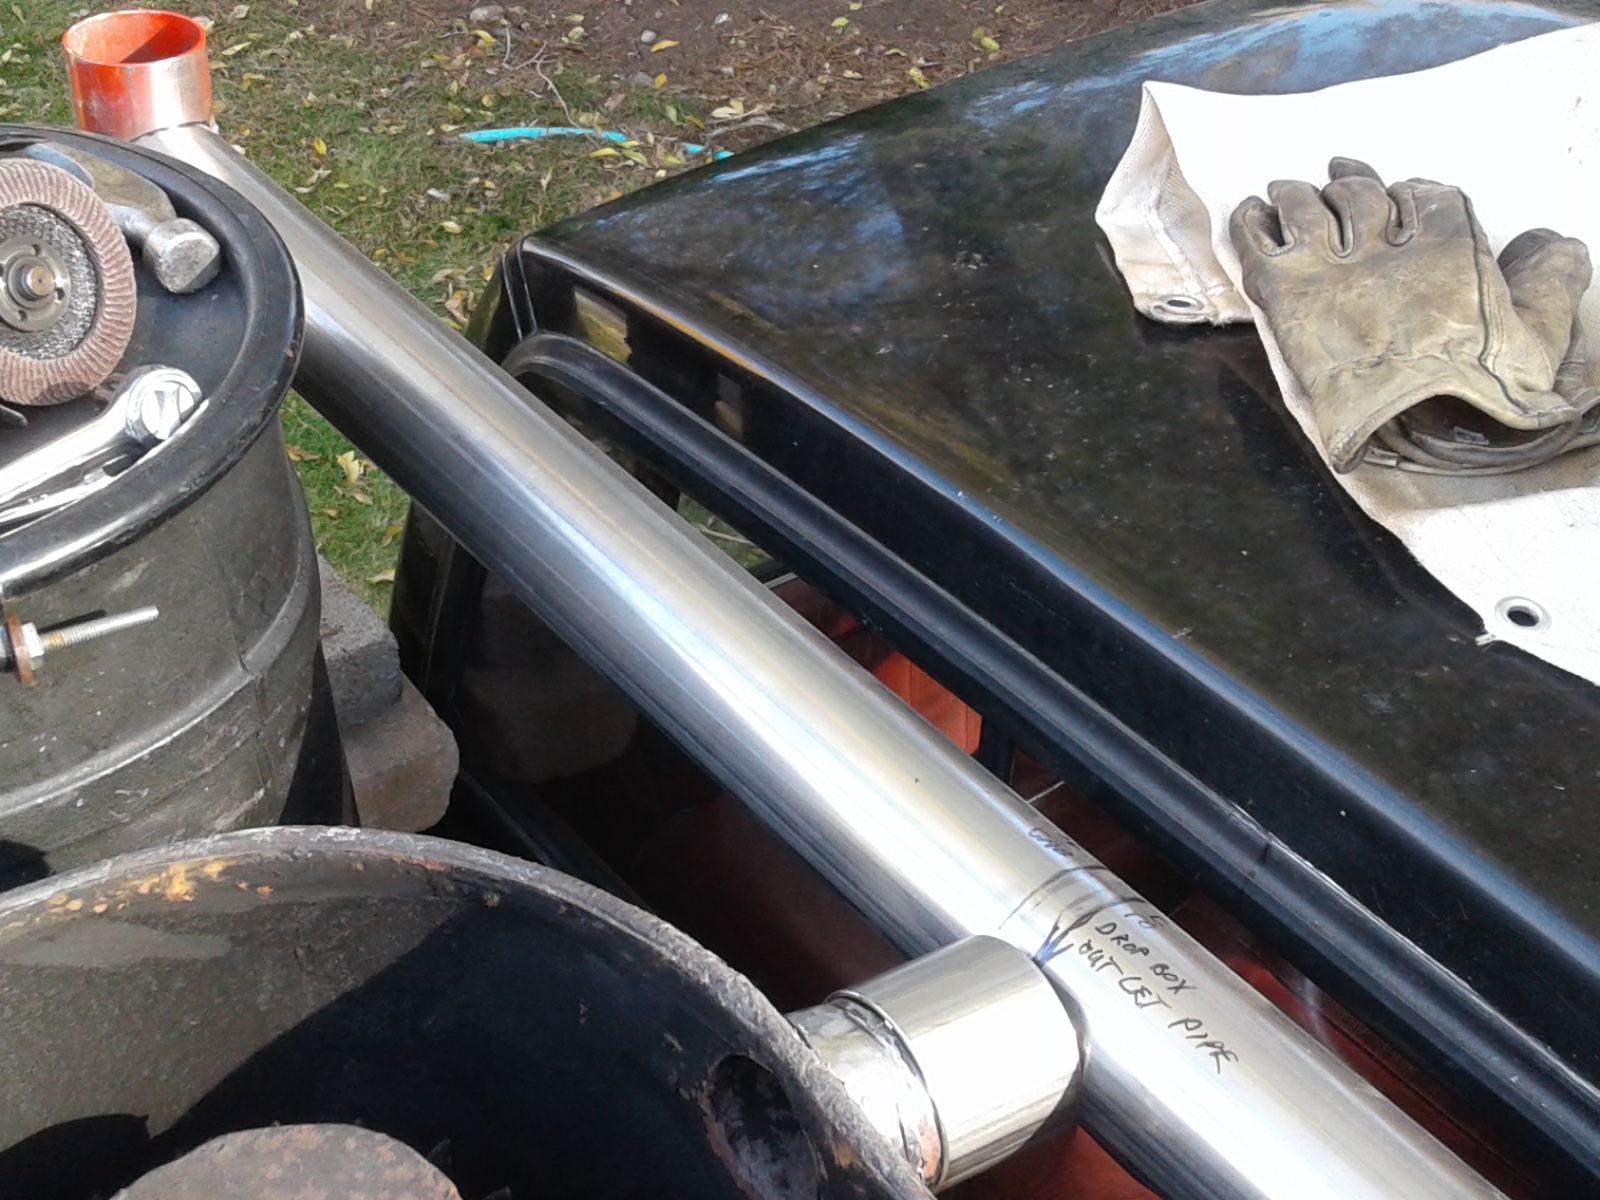
I need to come up with a new way to couple the drop box to the cooling rail center tree. This is the cut out that came off of the old exhaust pipes that I replaced on the 92 Dakota. Thanks Wayne K. for the extra parts. I think it will work great. Now to come up with a new way to flush the cooling rail system with out having to disconnect cooling rail piping. I think by putting more angle drop in the piping this will help in moving ash and soot to the big condensation tank in the back.

I am thinking the 1/4" thick wall piping, it is twice as thick as the water main pipe it is some good steel and is twice as thick as the piping that was used, and much larger diameter. Need to find some thick walled 2" piping. I am build this to last a long time, and ease to flush out the ash and soot.
Bob
6 Likes
Hi Bob,
Super important update, thanks. I’m not a vehicle\gasifier yet,
but I am sure those that are certainly appreciate your\super
informative updates. Keep up the great work.
Pepe
3 Likes
Bob, I’ve said ever since I built that rack, I wish I’d built the trees from stainless steel. If anything justifies the cost of stainless it’s those. They’re just too much work to cut/fit/weld properly to just have them rust out a few years later. I will never build a cooling rack from plain steel again.
You will need a way to weld it, TIG is best but you can MIG stainless with the right wire and gas.
As a funny aside, that main connection is like George Washington’s axe. Of course Wayne built the original, and the connection was made to fit a driveshaft end I believe. Then when the cooling rail side was replaced in 2012, it was a real pain to match the connection angle of the original rack. Then the heat exchanger side was replaced in 2014-ish, again matching the old angle. Now the tree will once again be replaced, perfectly matching the original angle. Both sides replaced numerous times, but that @!*%&$!! odd angle is preserved perfectly! 
5 Likes
Lol, yes Chris I have been looking at that pipe angle and scratching my head think how can I make it go straight. That thick pipe is still in good shape. I have been looking for stainless steel piping at the scrap yard. People just do not throw it away around here. I have thought about useing stainless steel muffler piping but it is not the same as 316L. I think it will still rust and corrode at the welded joints because of the high acid of the wood vapors. Engine exhaust is a lot different than the corrosive wood gasifier gas vapor.
Your work lasted 5 years, make the pipe 4× thicker might get 15 plus years before problems arise. I know the Lowes fence post will last 3 years, they are still looking good.
Bob
3 Likes
Okay the cooling rail tree problem is solved. I am not going to build another tree.
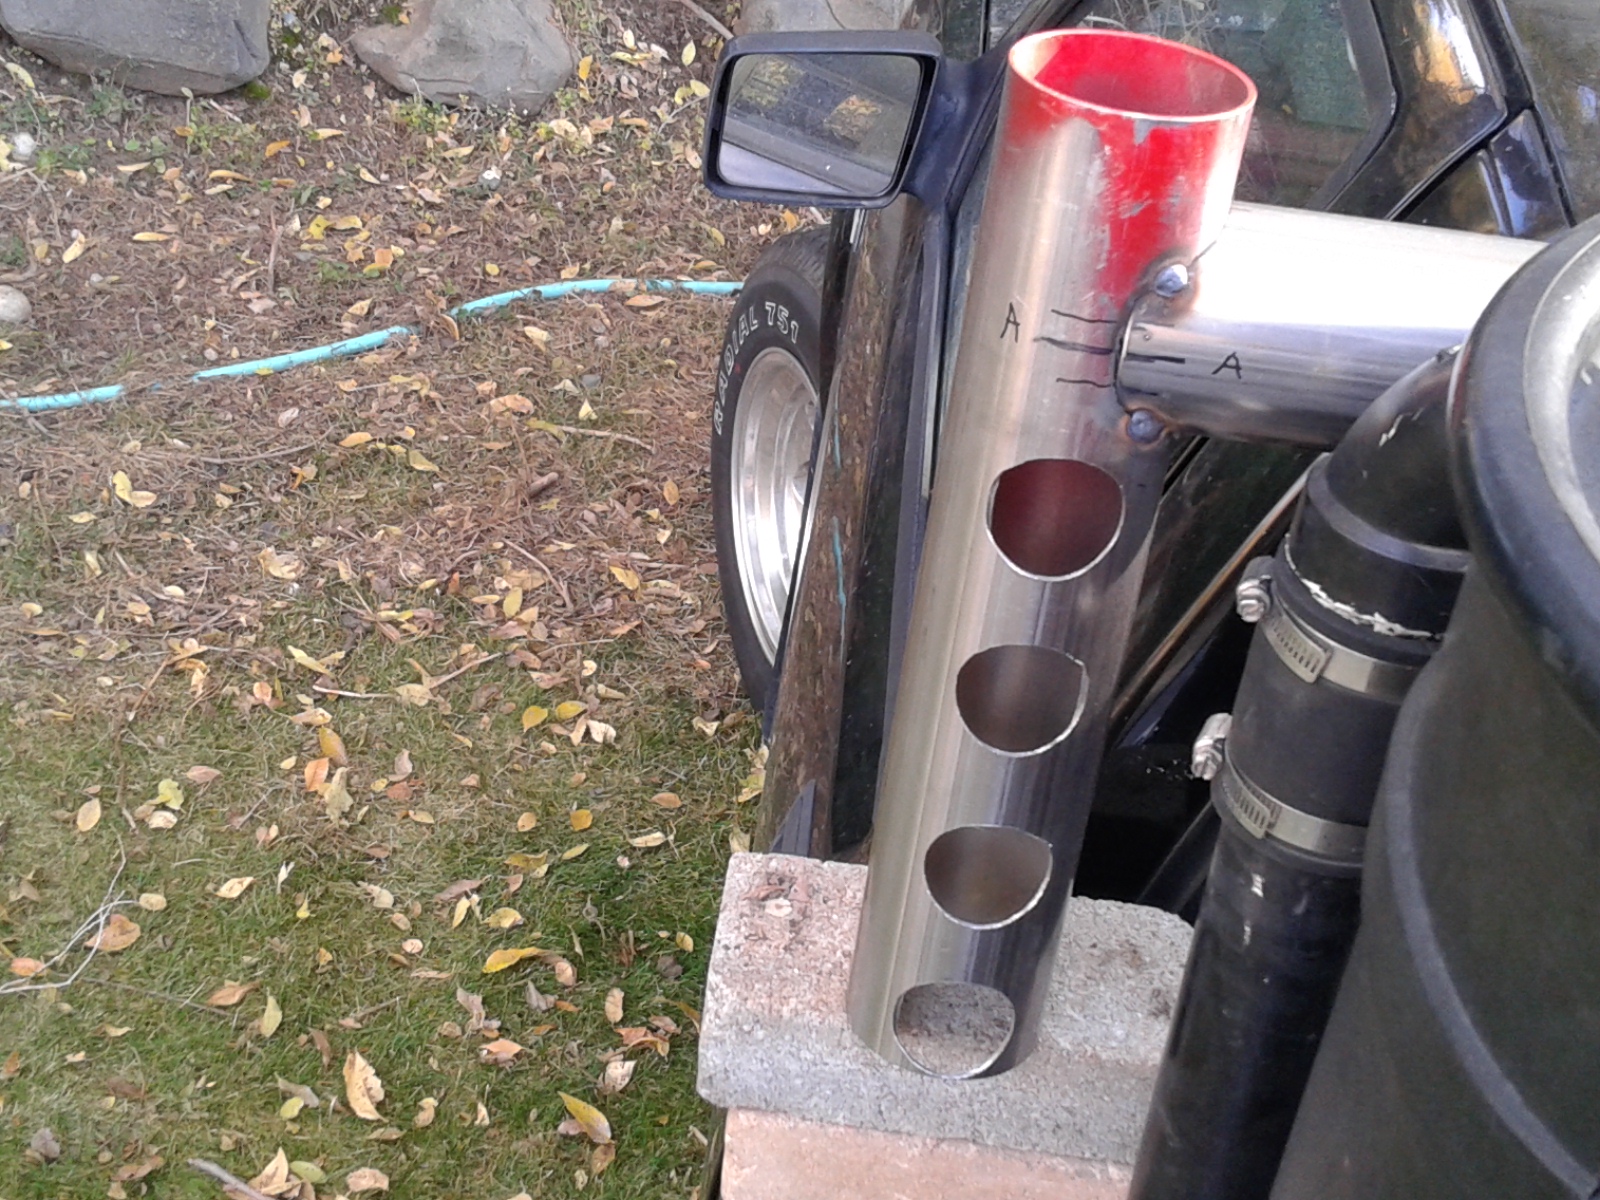
Coming out of the gasifier drop box the thick 2 3/4" pipe will be connected to the thick 4 1/2" pipe that will be sloped both directions to the sides and into two 5" pipe vertical pipes one on each side. With flare tube/clean out on top. I will now have 4 cooling rails on each side that will come out the two 5" pipes. With 2" pipes for connecting the cooling rails and sloping down to the back pipe tree. No place for water to build up and puddle.
It will look like I have a roll bar behind the cab. It will all be welded into one piece. The side pipes will connect the same way as before for replacement when needed. I have noticed that the 2 trees on both sides and the 2 in the back of the bed are just fine.
I think the soot build up and no heat blasting them has help with the corrosion problems. Soot is good stuff!
The other advantage is when looking in my rear veiw mirror I will not have to look for my gauges in between the cooling tubes to read them. Also with adding the 4th cooling tube on each side I will still have the same cooling surface if not more effective surface because of air flowing down the side of the truck. The best thing is I will be able to clean my back window so much easier now. I felt like I was looking though a cage in my rear veiw mirror, seem like there is more room now.
Also I will place the vaccum line in a new location with less heat and water contamination. I might even put a after the hay filter vaccum line in with a gage.
With the new wood gas header pipe being below the out flow of the drop box there will be a less chance of water getting into my drop box when cleaning the cooling rails with water flushing them out.
Bob
7 Likes
I like your thinking, Bob.
It’s amazing how much work laying awake at night can save you
7 Likes
Yes JO, some times it is hard to stop thinking so I can get a good night sleep. Lol
Bob
5 Likes
Okay one more up date. CHRIS S. is right, it is going to be made of stainless steel. The mild steel thick wall piping is just to much weight.
I am also going to use a 3" exhaust coupler like I used in my rebuilt m
Muffler Exhaust Heatexchanger.
Like the ones shown here in the picture and the it will be welded on to come straight out of the drop box and 90* to the new stainless steel Wood Gas 3" cooling header that connects to the side cooling rails. If it lasts 20 years that will be just right with me.
Now I will be able to get a good night sleep.
Bob
8 Likes
Good evening bob mac, i was going too say the ss steel not too bad at steel pipeing store, and lighten the rails up. what little heat gets too the tree wont hurt the light wall ss pipe anyway. Well we will see the rails when done. Are you running one big bar between the rails , or makeing it removable.!!!
3 Likes
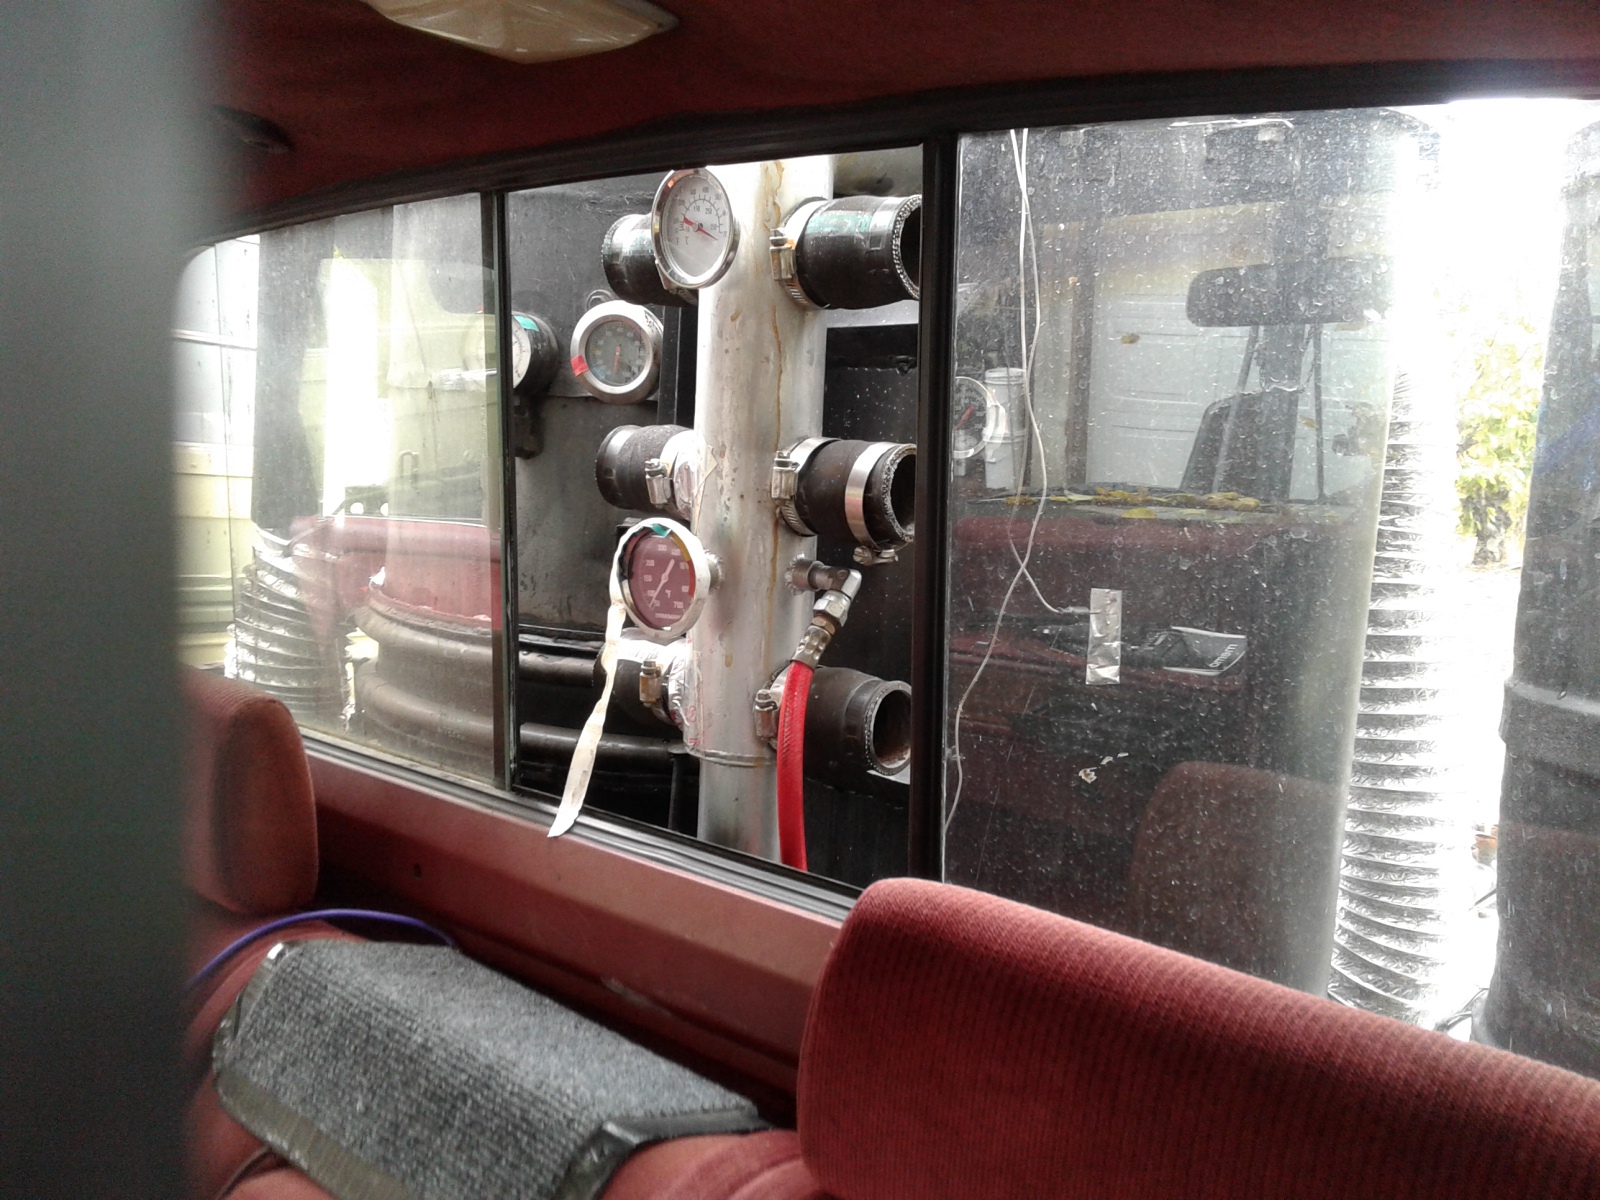
Hi Kevin, the 3" pipe header will be attached to the truck bed on each side and connected to the Drop Box gas outlet. This will be all one piece that the rails will then be attached to. It will eliminate 12 pipe connections. Less is better.
Bob
5 Likes
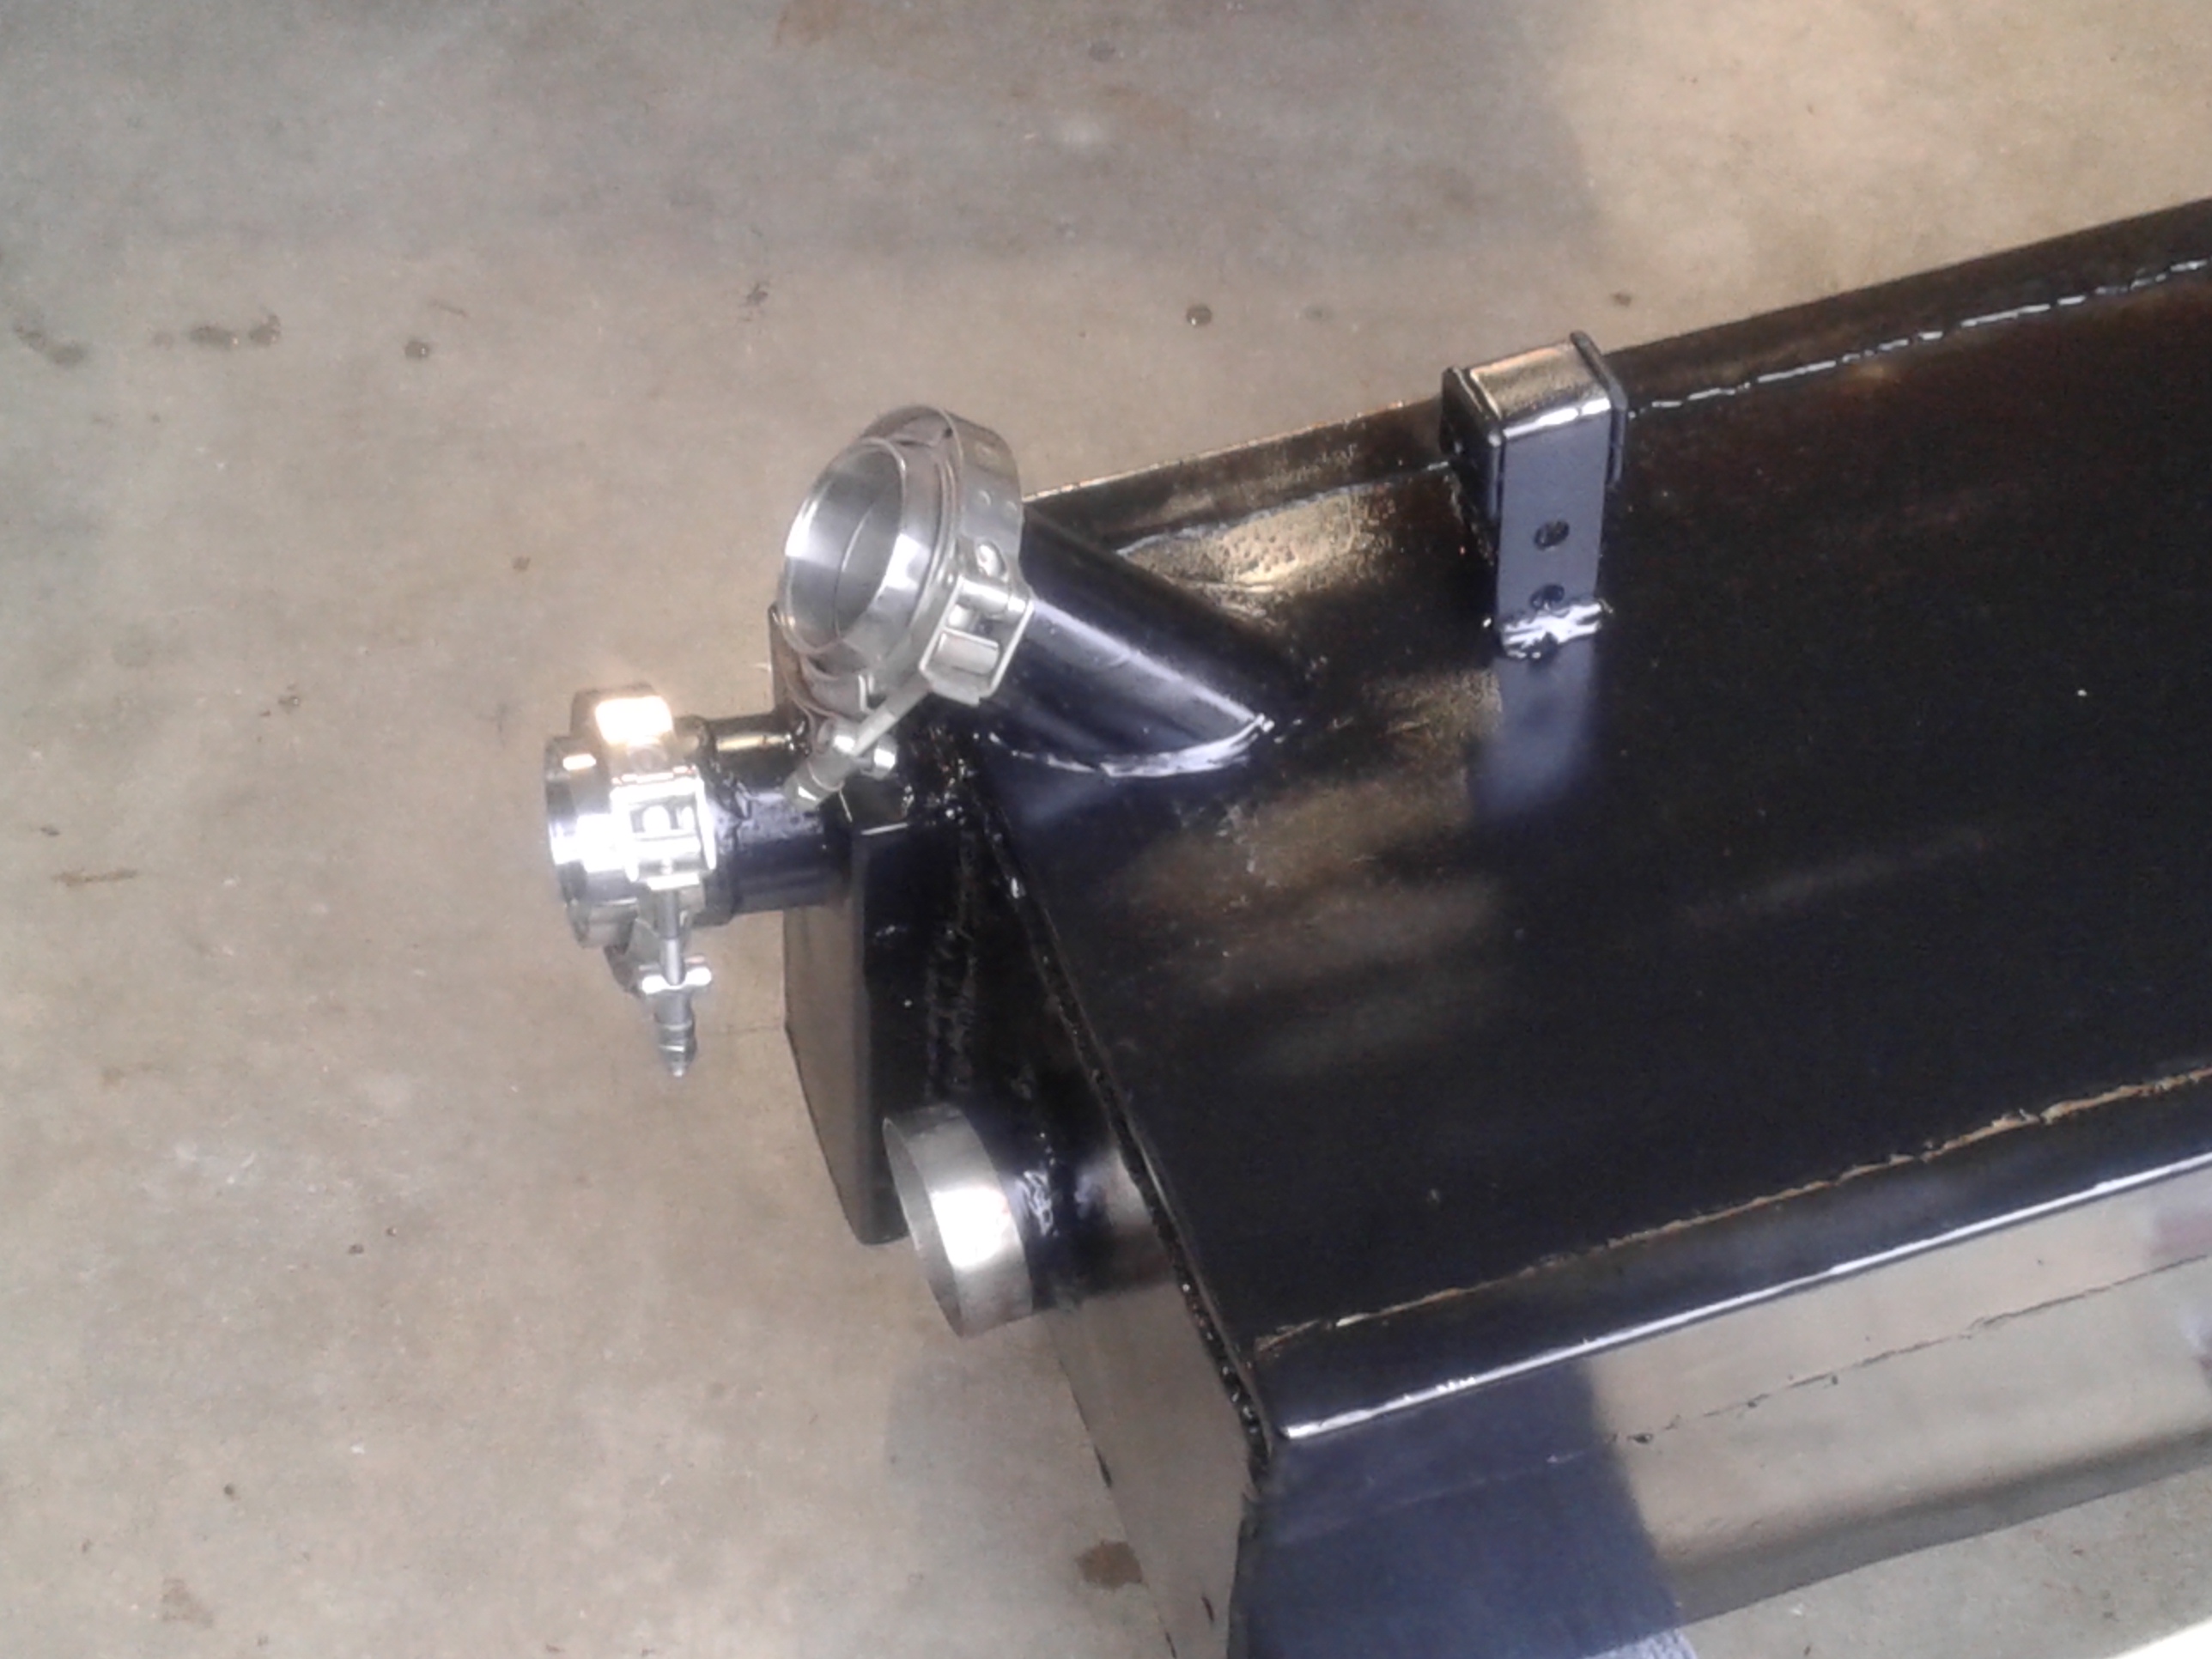
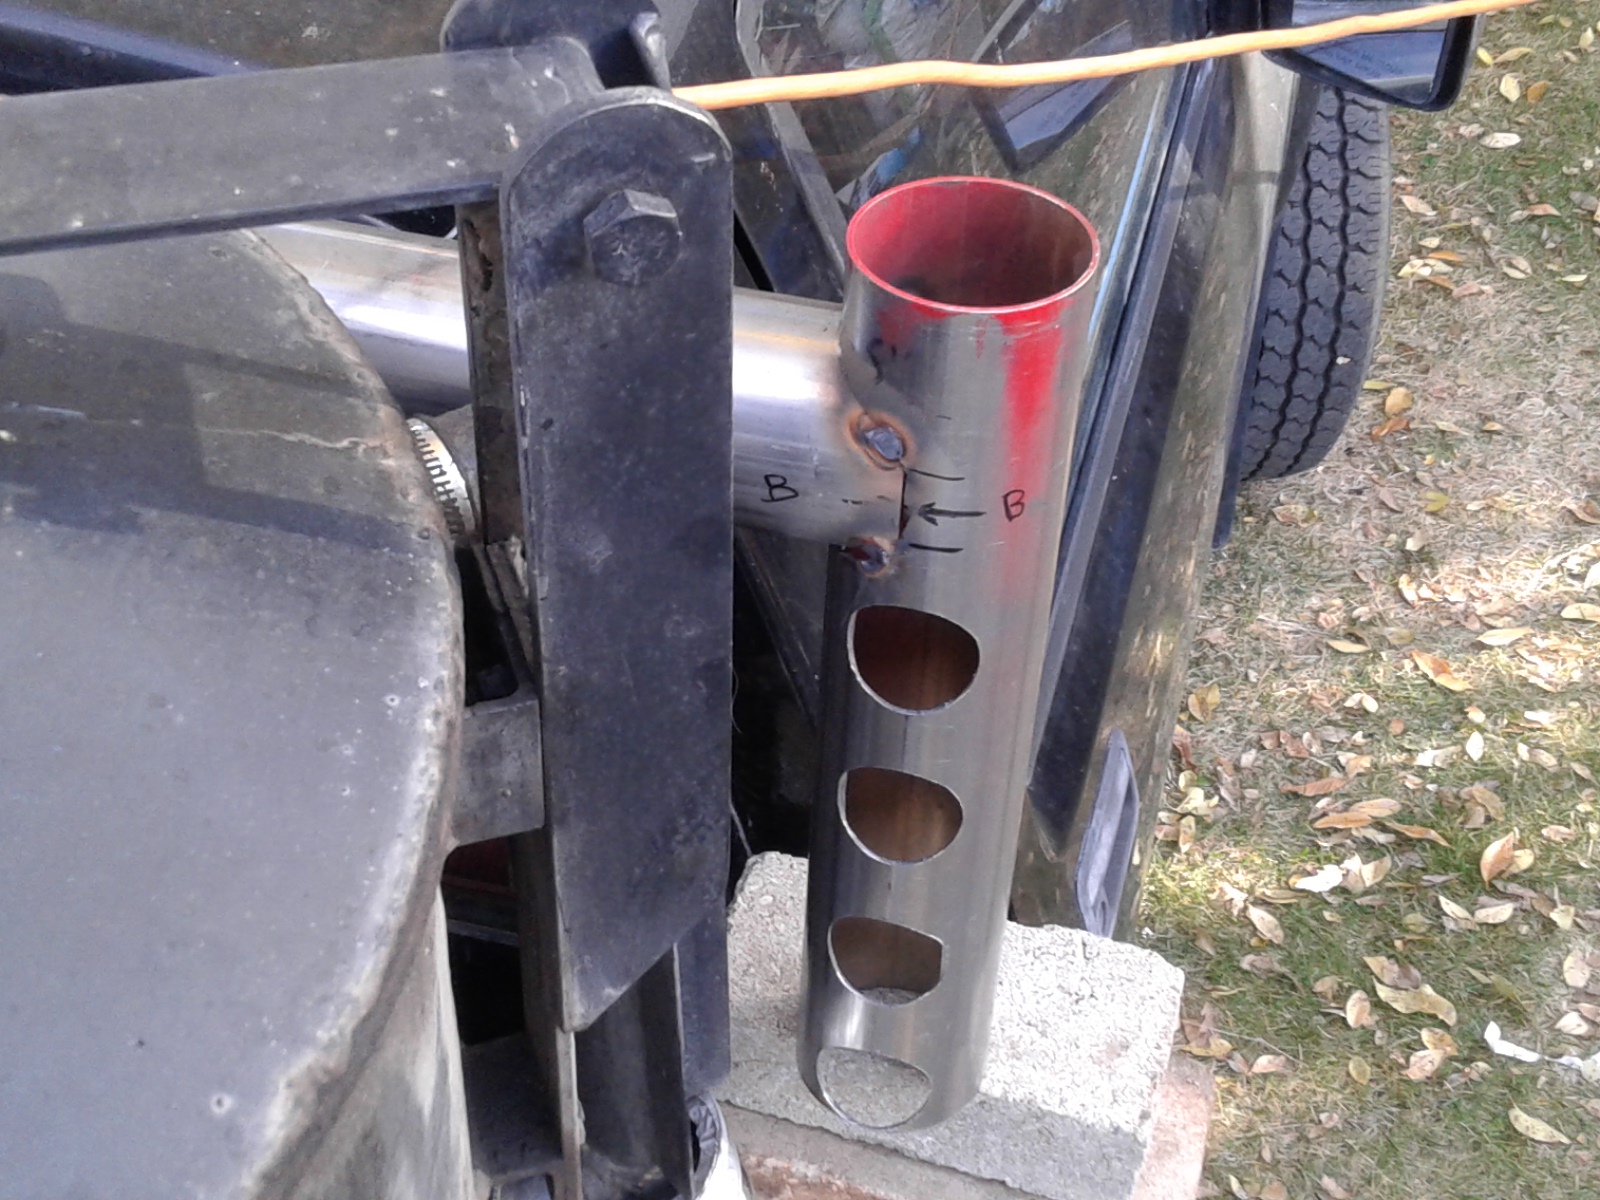
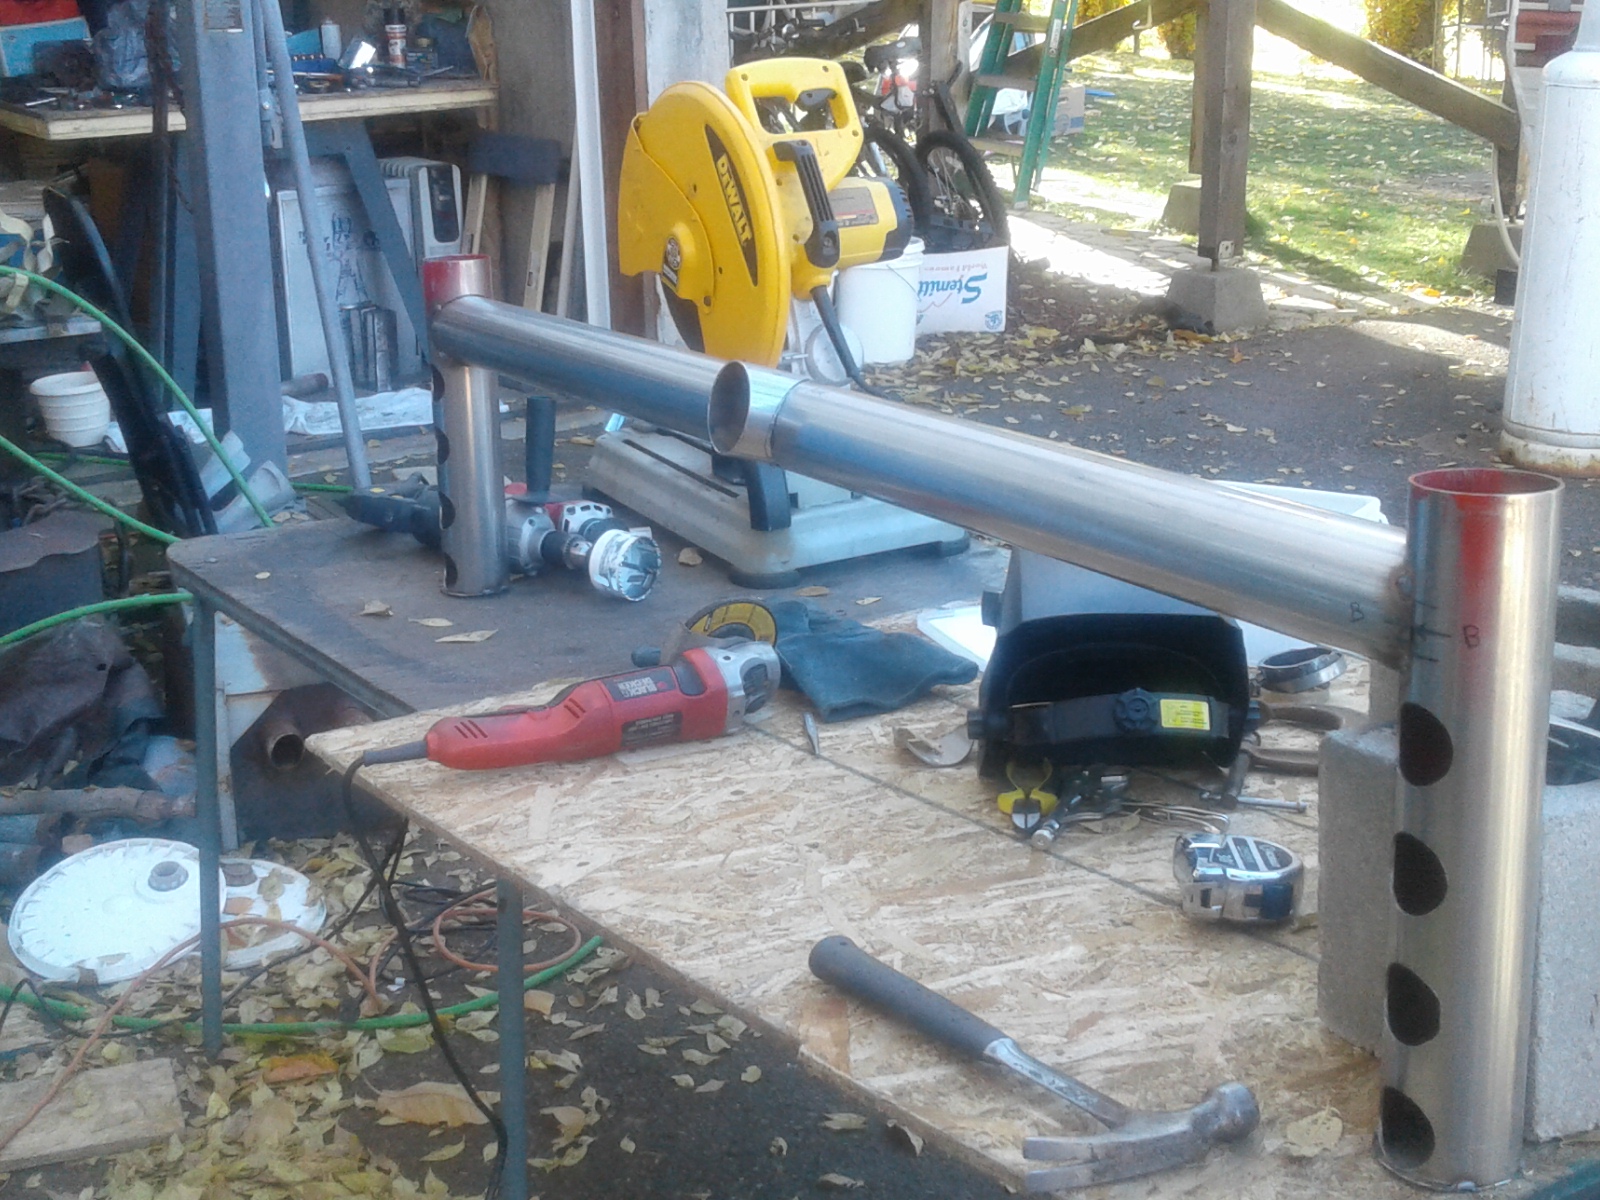
Picked up the stainless steel piping today and started on putting some holes in it. Two 3" diameter holes to put the header assembly together. The side nipples holes 1 3/4" diameter, four on each side that will holding the side rails to the Wood gas header.
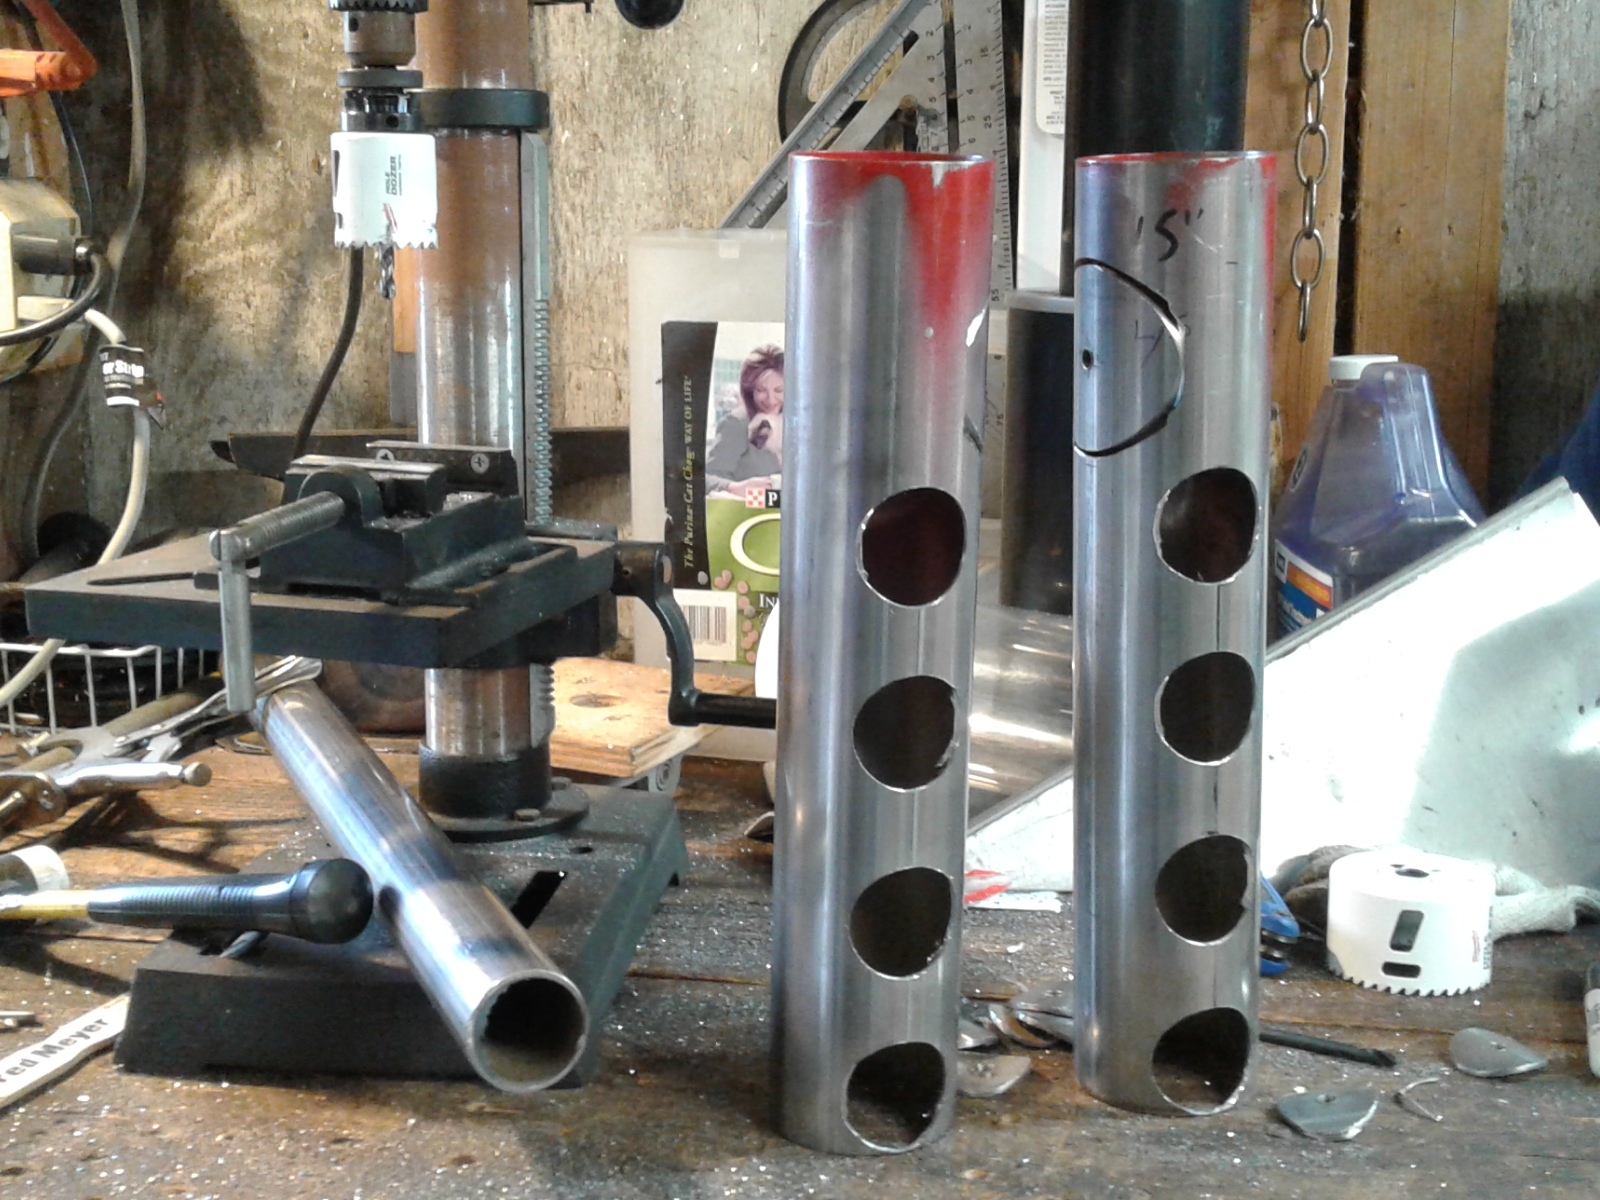
I got a late start on it today. These shorter day light hours really cut into my work time. It was 06:00 pm and getting dark.
Bob
7 Likes
Darn, Bob, that makes me want to start another project!
3 Likes
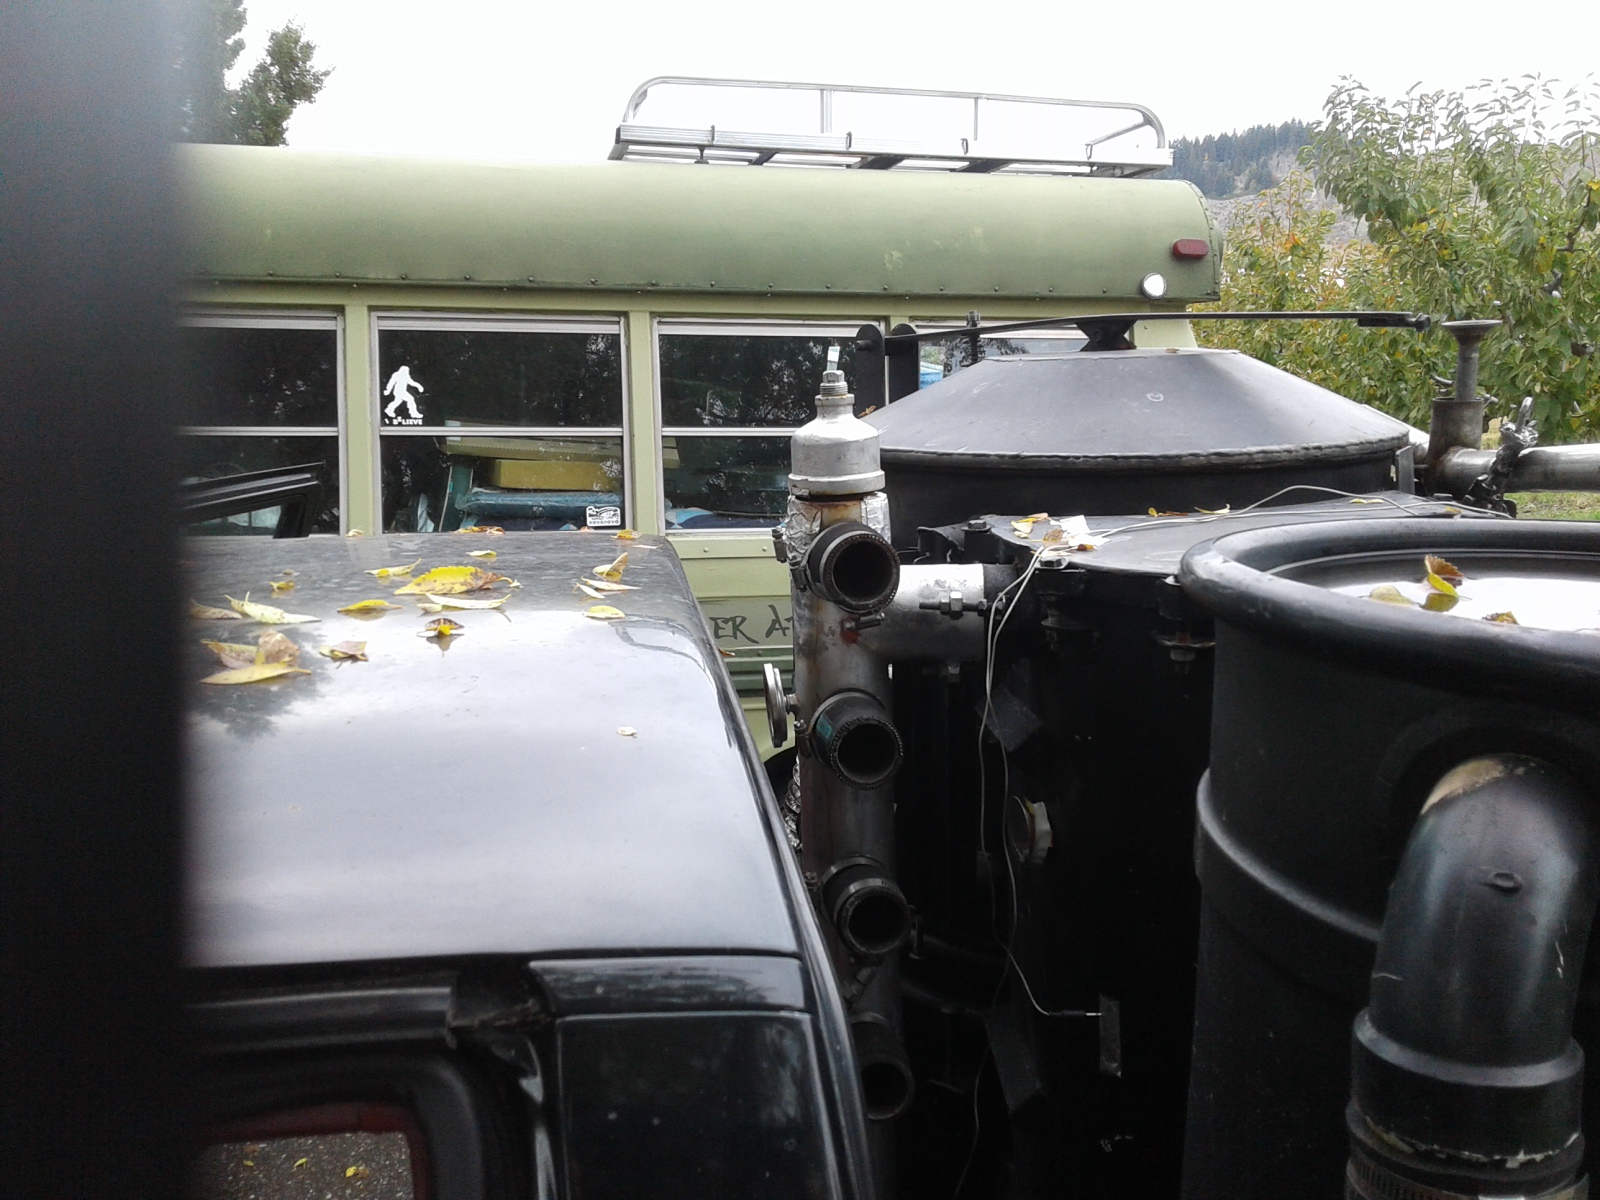
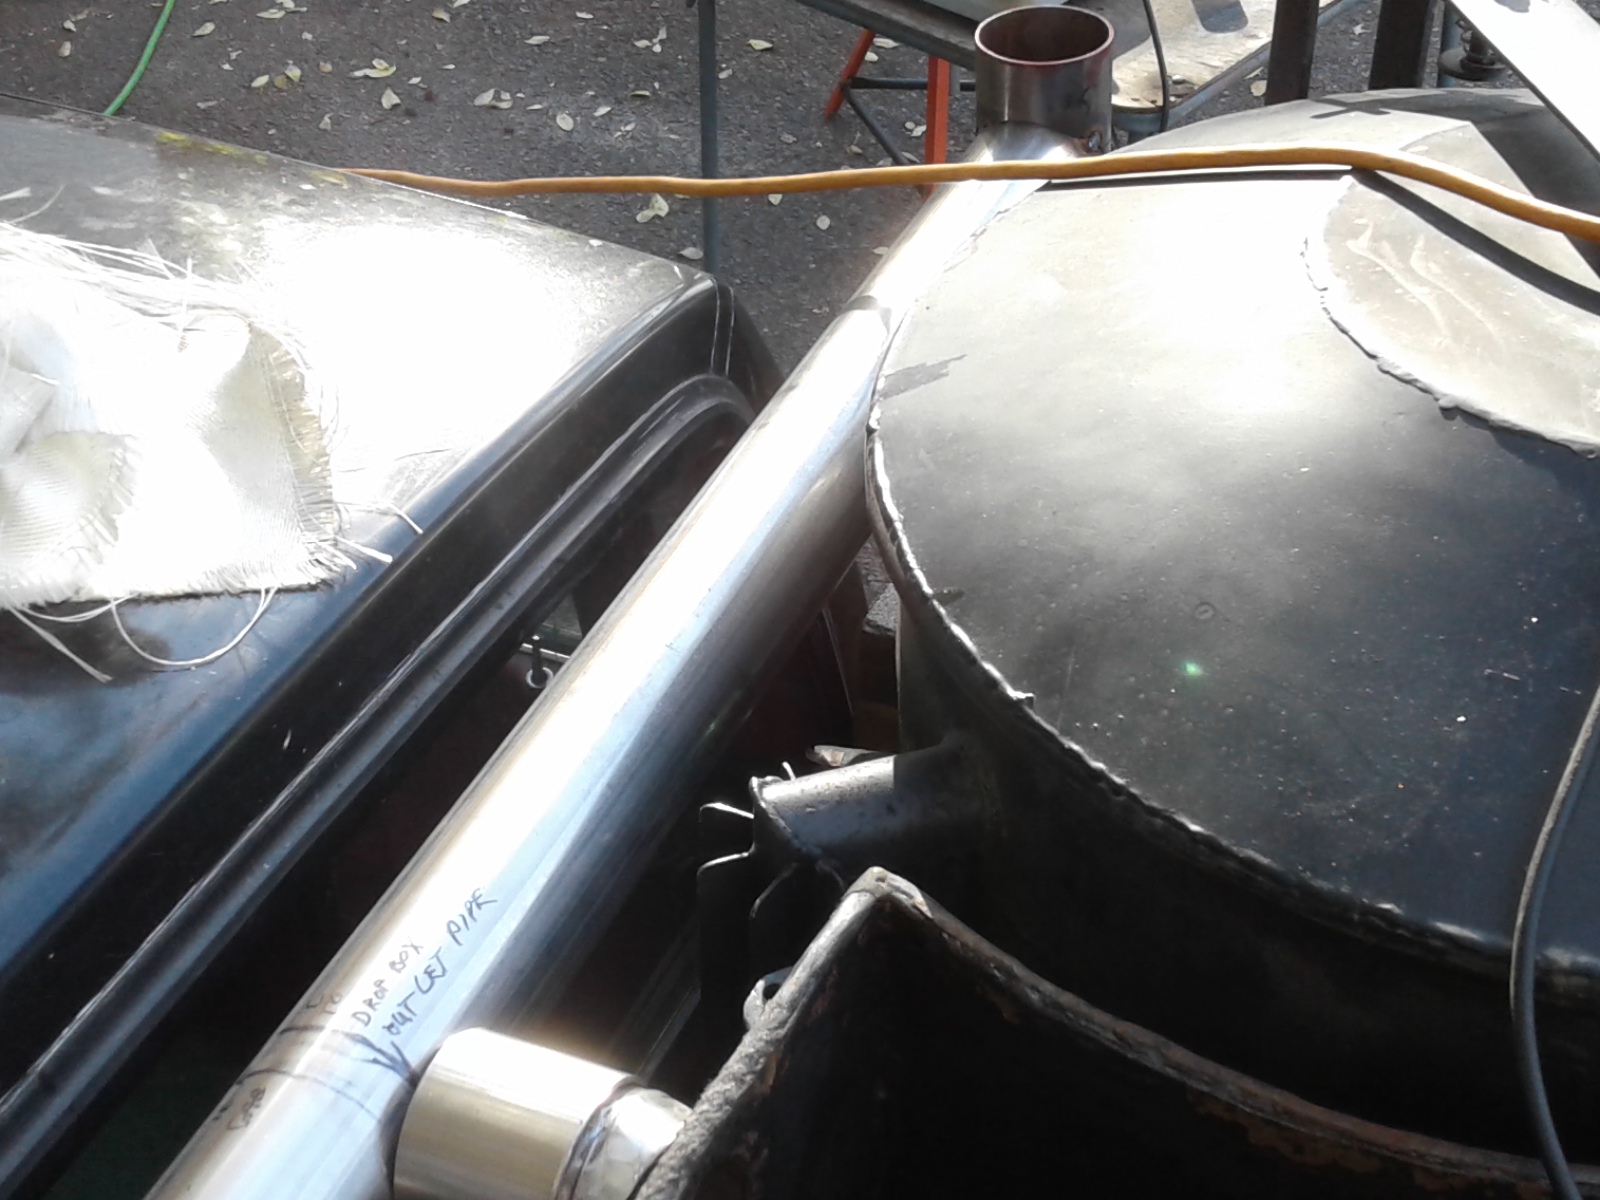
The Cooling Header is starting to take shape. I spent a couple of hours trying to figure out how to cut pipe for the 2 3/4" pipe that comes out in a angle and weld it to the Cooling Header pipe. With the side supporting plates that will be on each side, I realized that the only solution would be make it come out straight. In between the short 3" pipe and the 2 3/4" pipe coming out of the drop box will be a V- Clamp it will make it so easy to remove the Cooling Head in the future for maintenance work.
The hard part is done, and so is the day again.
I removed the drop box lid and was surprised how clean it was inside the drop box, all I have been doing is blowing it out with compressed air in though the lower inspection hatch.
The larger 3" pipes are not going to effect my vision on my side mirrors which is good.
Break time is over, time to clean up my tools and put them away.
Bob
11 Likes
Bob, You are one busy beaver, looking good. Love the
step by step. Pepe
4 Likes
More up dates.
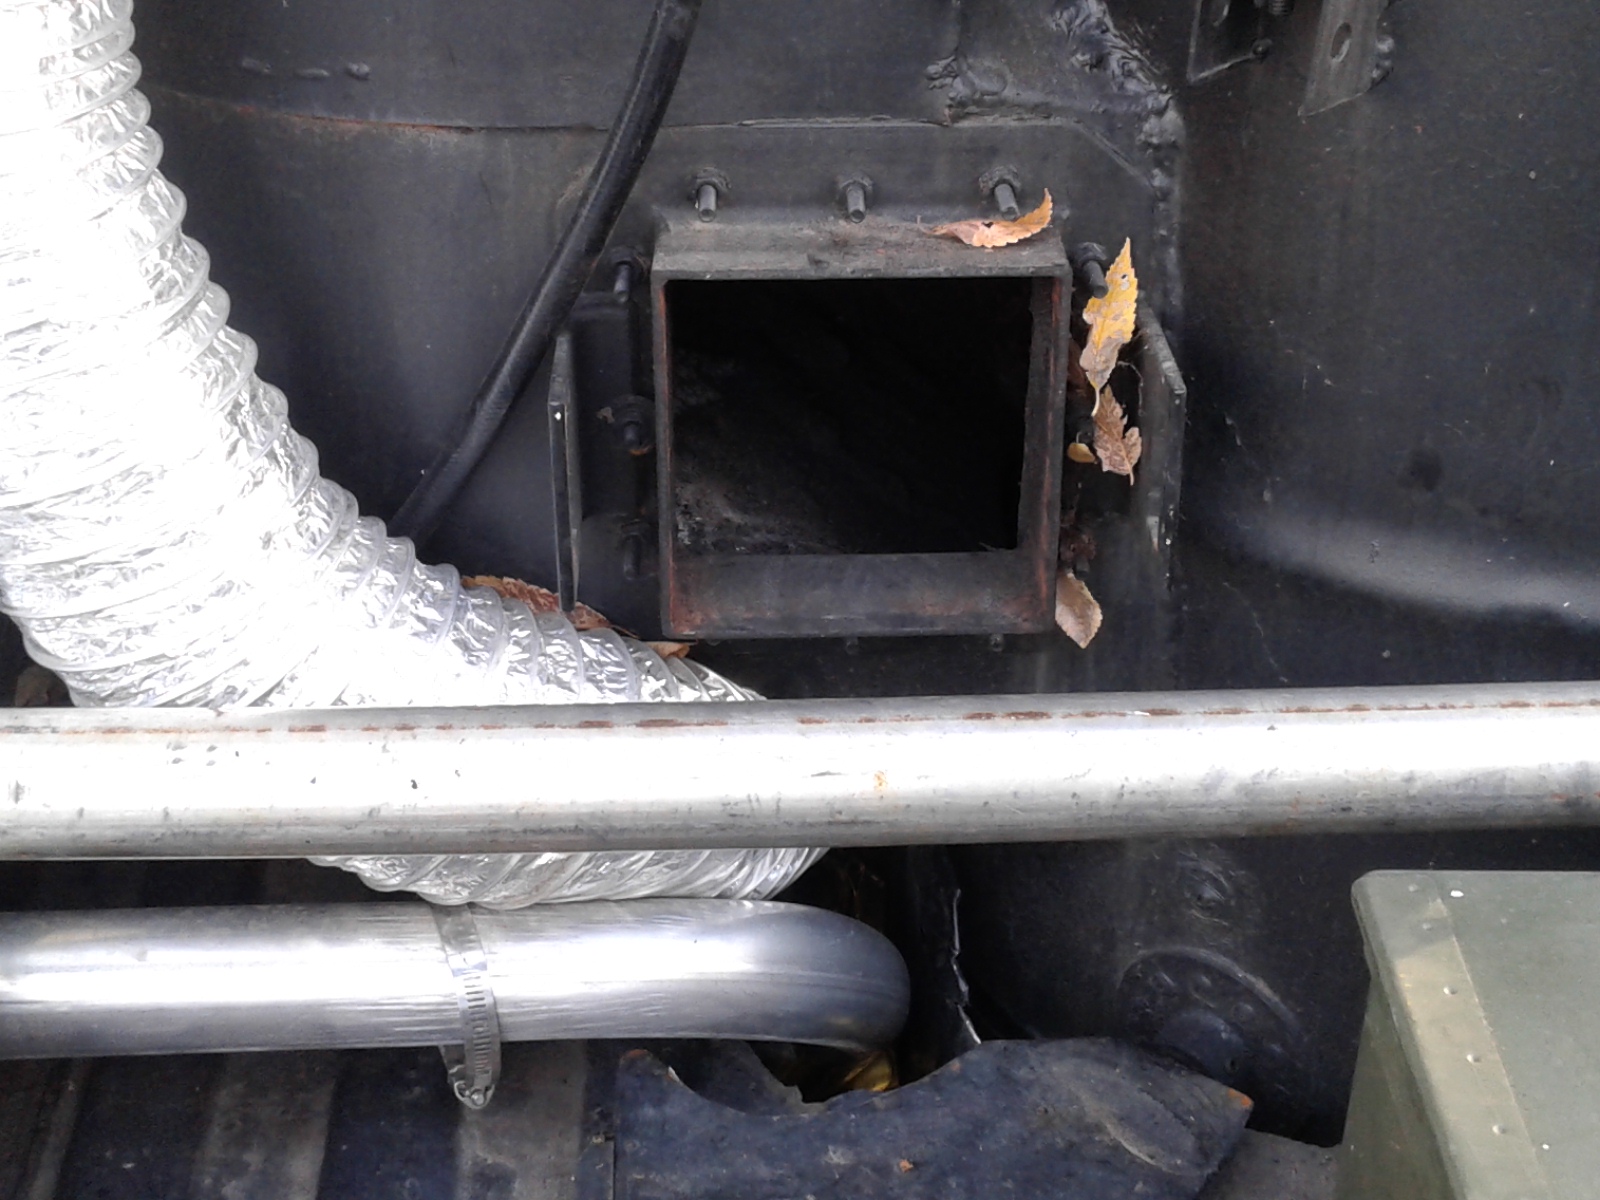
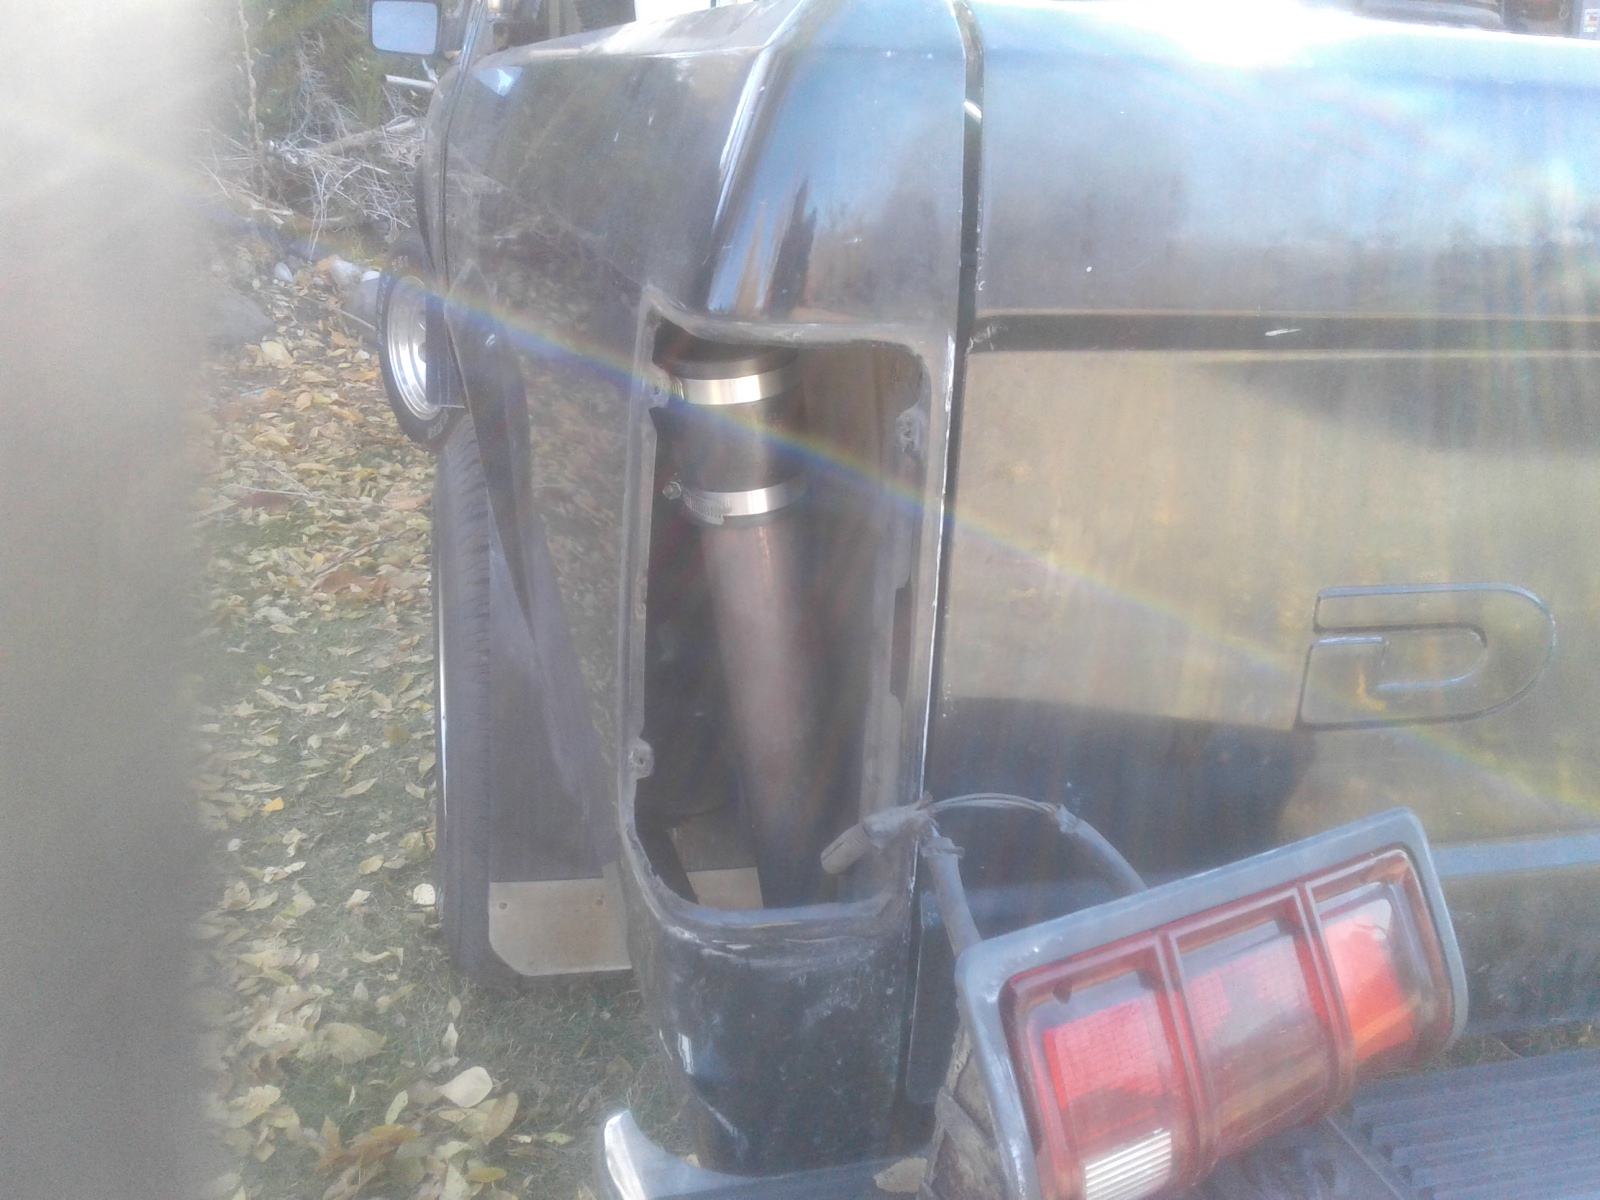
Checking out the piping behind the tail lights and found more piping that needs to be replaced more rusting pin holes and harden cracked rubber couplers. It is all being replaced with stainless steel and new couplers.
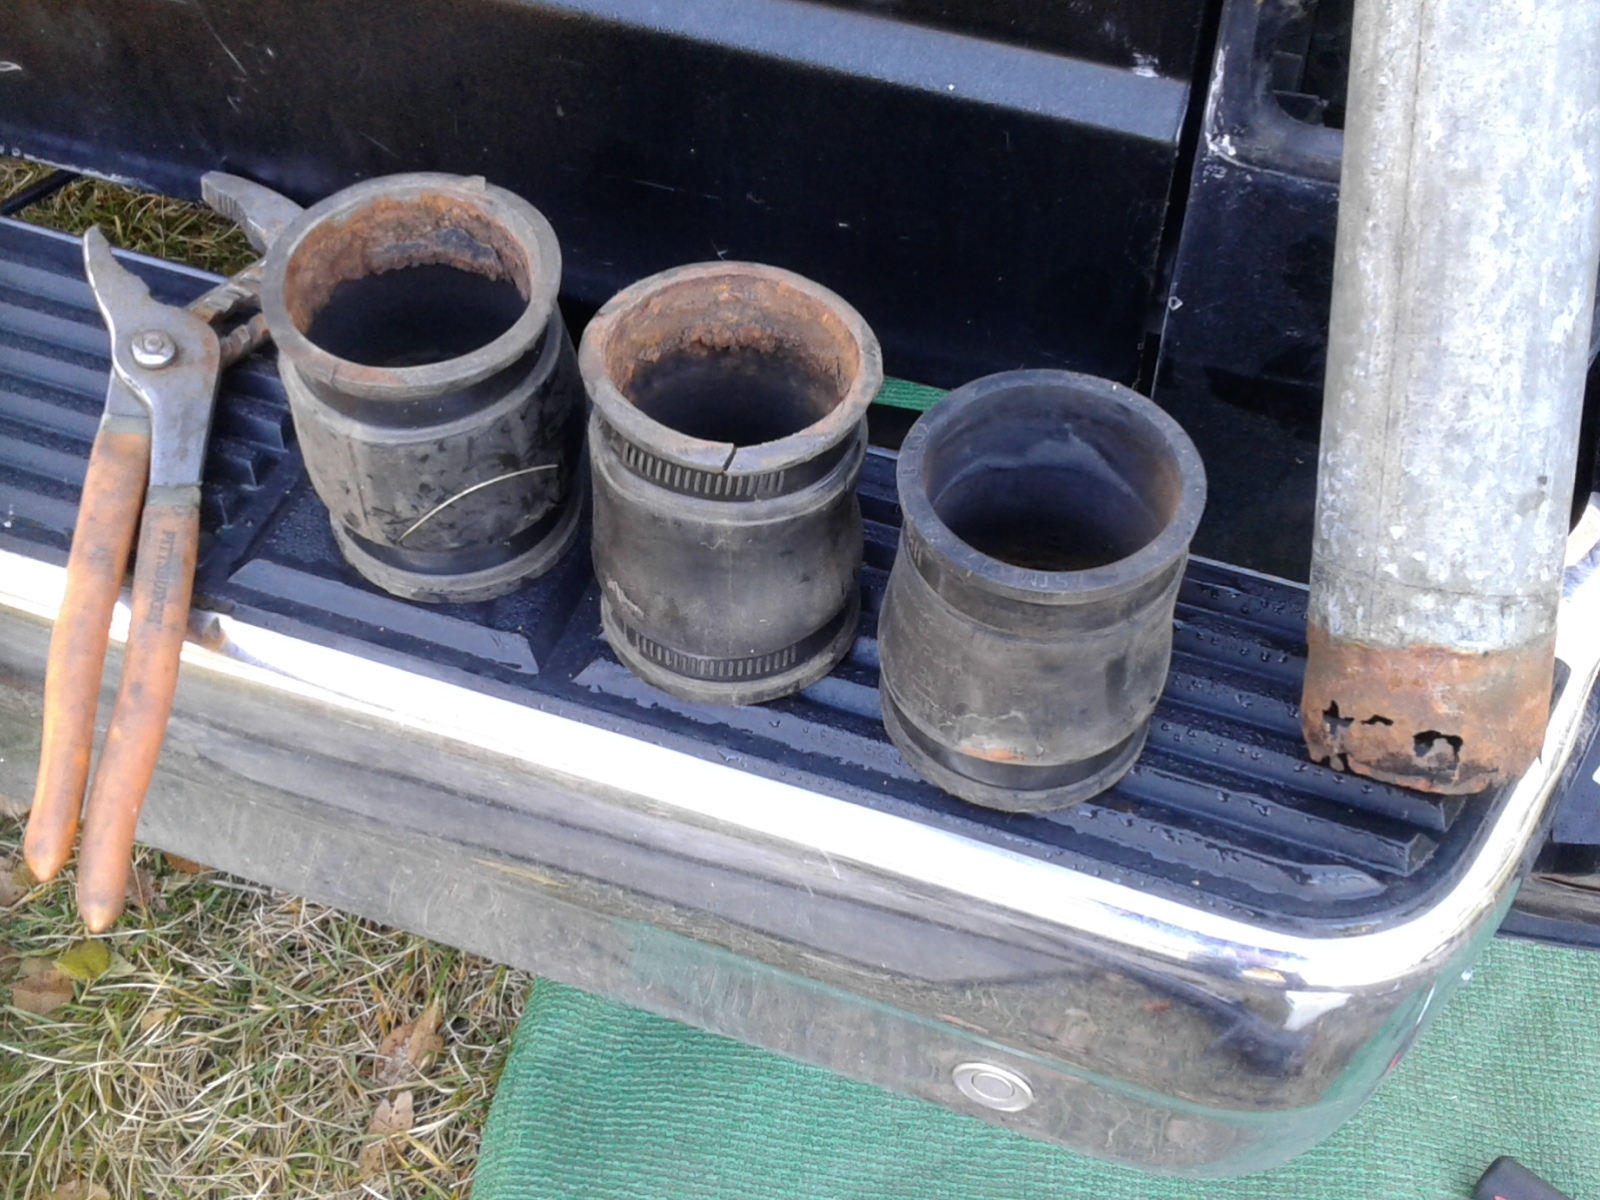
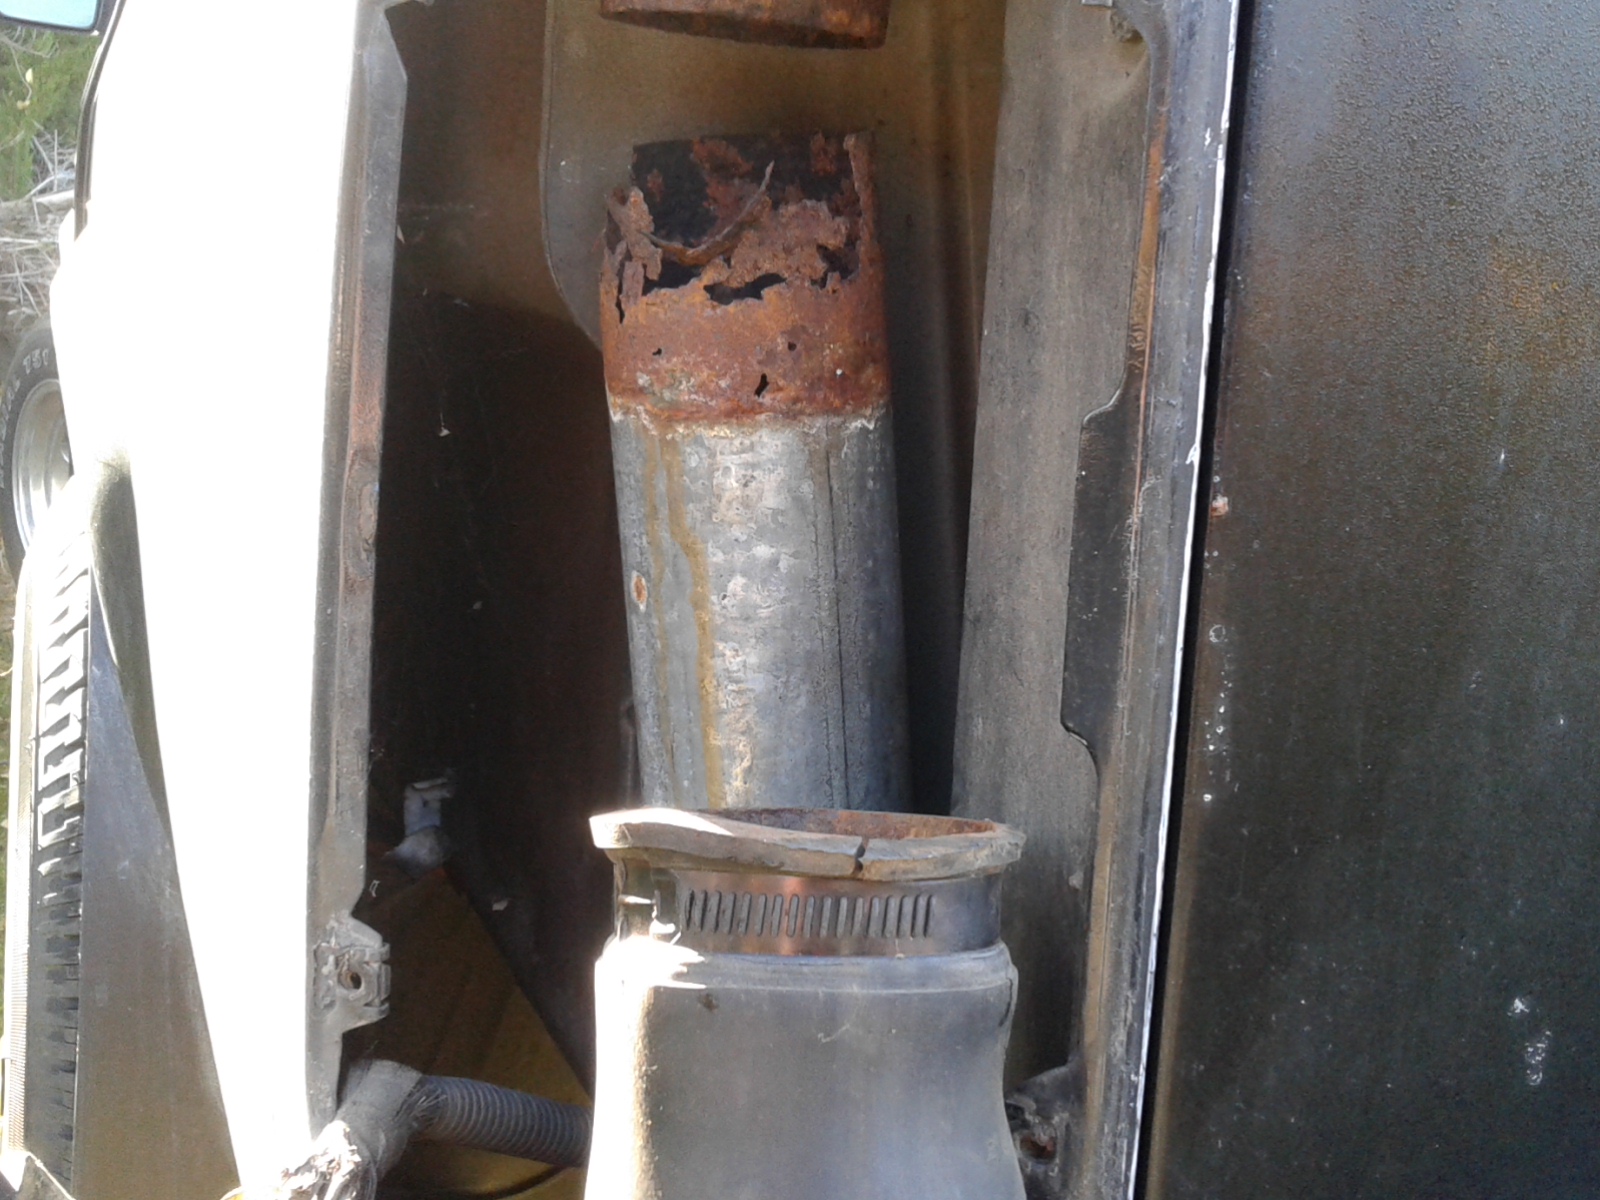

It will be nice having all new pipe and connections. The only thing that will not be stainless steel is the 8 long side rails but when they wear out they will be replaced with stainless.
The wind came in to the valley with force, had to stop working it was time for a break any ways. I still have to drop the back condensation tank and fix the bottom that is rusting out. If I replace it with stainless there will be no more rust coming out when I drain the tank except from the cooling rails.
Bob
11 Likes
Bob, These are great builder “be aware” posts. Reminds
us all to pay attention to these results and go the extra
time and cost step first. The resulting redo has got to be a
real pain. Darn, I should be driving. Many good lessons for all
prospective builders. Thanks for these constructive posts.
We can’t wait to see the next one. Pepe
4 Likes
That’s what I did. I’m lucky to have free access to short cutoffs of ss from the paper mill. However the long side rails are $10 galvanized exhaust pipes. I think I’ll keep it that way. With rubbers and clamps they are easy to replace. Just saying.
9 Likes
There is one thing about the pipes behind the tail lights, they are now stainless steel. But thinking about how long they lasted. Like other parts I have replace now they are original WK built parts. There have been Wayne’s original cooling rack, Chris’s cooling rack, and my rebuild rack. Now my new cooling rack build. Those pipe have been in use sense 2012, great wear life if you ask me. But the new parts are going to last longer.

The cooling header is moving along, should have all the parts tacked weld up by tomorrow. Got a late start to day the temp drop down into the low 20 * f. I didn’t expect that had to finished up winterizing the motorhome and blow out water lines. Winter is coming and you can’t stop it. It is 02:00 pm and it has warmed up to 43 *f. Take the coat off and get back to work, there are a lot of leaves that need to be raked up. Maybe I should just mulch them with the lawnmower, that would work.
Bob
8 Likes
Looking good Bob Mac, That truck will probly serprize you how well it runs with all the leaks fixed, HOW did you cut them tree holes for the rails.? i caint think a hole saw would hold up too ss pipe, Did you find a cheaper place for ss pipe.? NICE REBUILD GOING.
5 Likes