I heard a lot of words that I understand but the way he puts those words together, I have no idea what he was talking about. The part about the “timer” interested me, because recently, I had been asking some of the more astute electric folks how to remove a timer from my HF meter. That is when I first learned it isn’t something that is wired separately into the meter.
A little side note; In 1964 my company sent me to classes to learn Fortran. They started off by telling us how “one day all of the knowledge of the world will be on computers”. Then they started teaching us to make flow charts where we ask question and the answer was “yes” or "no’. That answer took us off on another leg of the flow chart. Just to add a few numbers together took pages and pages of sheets of flow charts. I went to my boss and told him this was a pipe dream. The original bibles were hand written by monks. There weren’t enough monks in the world to program all the information into these computer. TomC
Hi Jeff, you are coming along great on your Air Carbon Solar-Fuel Cell. Looking forward to seeing it run a engine. Solar-Fuel, onward! to your accomplishments on this project. It is a very important project. With no or very little welding being done.
Bob
Fortran, wow, that struck a chord with me, Tom!
When I got out of the Seabees on 04Sep1970, I was back in class
at Clarkson to finish my graduation requirements starting 07Sep1970.
Those reqs, were 4 credit hours of computer programming in Fortran.
Well, Fortran 1 was only 3 credit hours. Darn!!! So, I took Fortran 1 and
Fortran 2 at the same time. No problem for this math nut! Aced them both.
Graduated with the class of 71, 11 years (fall 1960) after I started. Don’t ever
give up or listen to the loser nay sayers. You alone determine the
course of your life. My parents( whose sacrifices I finally realized and am eternally grateful for)
smiled from ear to ear along with a few tears, yeah, me too! It was one
of the proudest days of my life. Excuse me I have to dry my eyes!
I was the first one in both families to graduate college. Still am.
JUST DO IT!!!
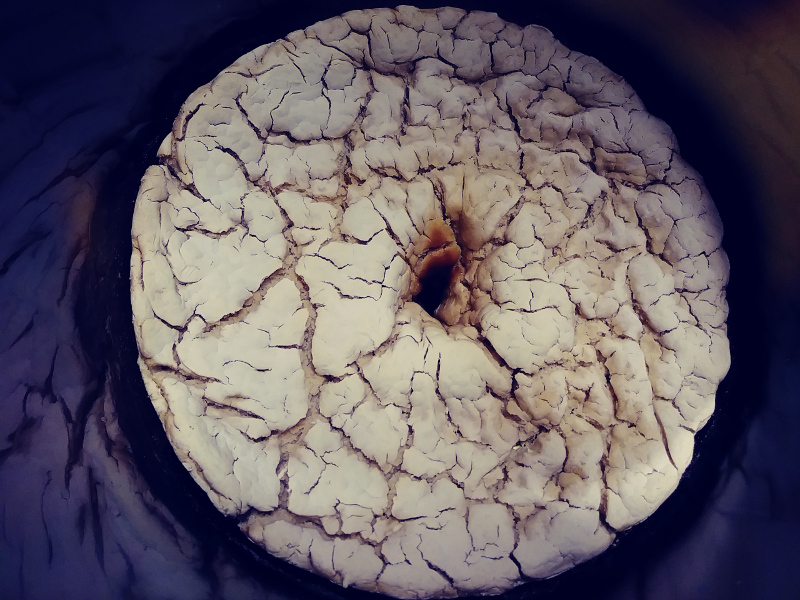
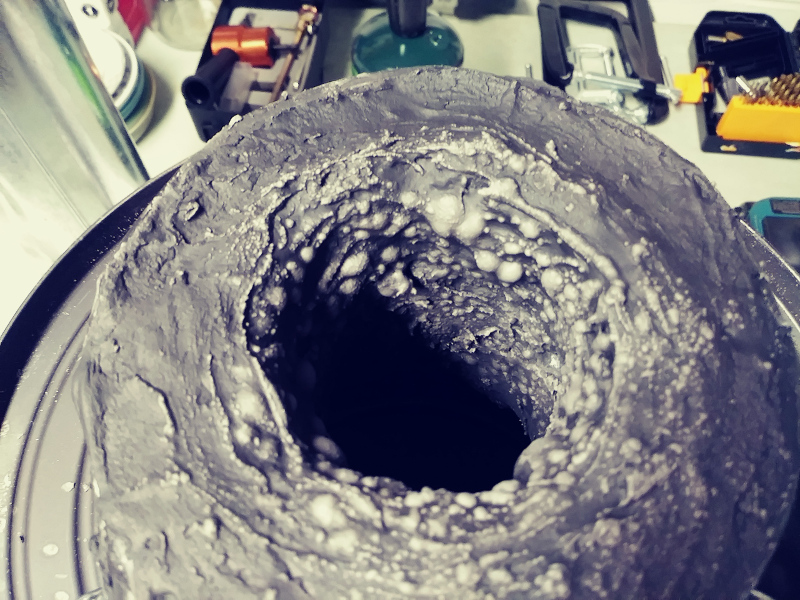
I’m 99% sure that the carbonized bread insulation will fail and here is the start of the failure.
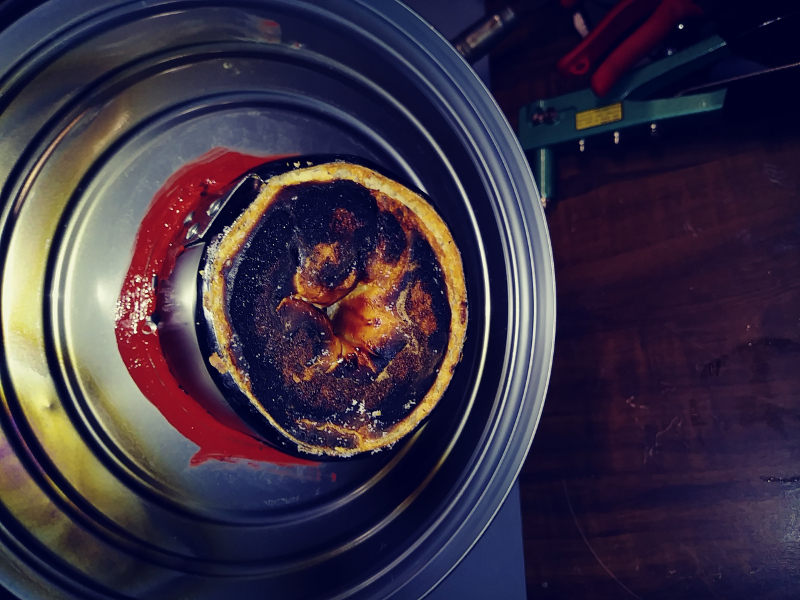
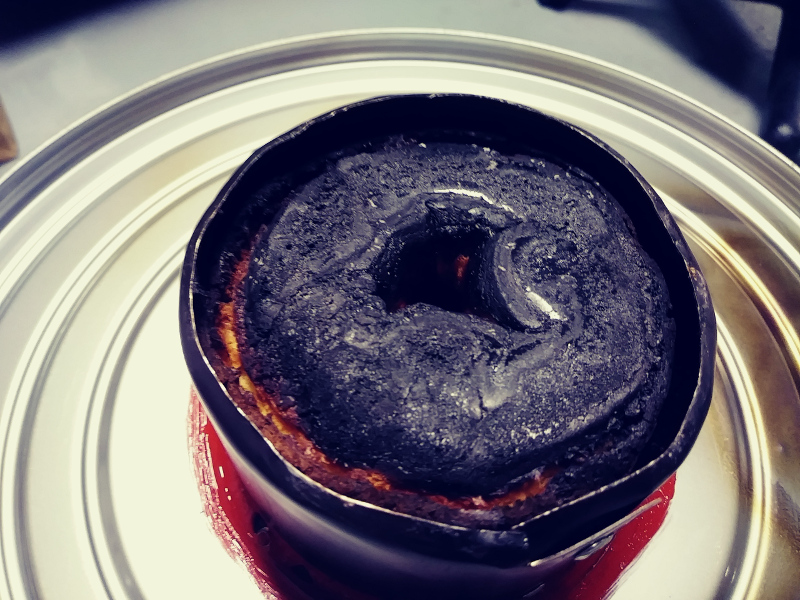
I’ll post the first recipe later. Put the dough in the bottom of the ACFC and tried to bake just below 400F. Hit 640F at first but started to understand the oven later in the bake. I will loose access to this oven soon and will need to build some kind of curing oven, assuming the experiments continue. Any oven builders out there? After 30 minutes it was removed. Needs more baking, will return later. It would be nice to weigh the dry ingredients before adding water. Next time. A weight on top of the dough might be helpful. Have not formulated a carbonize plan as of yet. As the bread dries it seem to shrink away from the pail wall.
Interesting material to work with. Don’t mind the heat marks on the pail, that was me with a torch trying to burn off the labels and probing the pail coating.
Hi Jeff ,is this a version of the starlite insulation ? as i don’t think you need to bake the dough to make it work , in fact i had thought of maybe sprinkling the top with ash before the dough goes hard as a sort of protective coat .
Dave
Hi Dave, it is a version of Post #210, above. Foam carbon scheme that I think is related to starlite. Yes, it will need surface protection. I can think of many more things to try than I will have time for!
Below is recipe version 02/07/2019:
#1.
Assemble your ingredients.
Qty. 6 cups of all-purpose white flour
warm water
Qty. 3 tsp. or 1 package active dry yeast
#2.
Activate the yeast. In a cup mix your yeast with about a 1/4 cup of warm warm (100-110˚F) water. Mix for a minute or two.
If you use “Rapid Rise” or self-activated yeast, you don’t have to activate the yeast before adding it to the flour. Skip this step and go to the next.
#3.
Mix the flour and yeast together thoroughly in a large mixing bowl. The bowl needs to be big enough to hold all your flour and water together at once. I used one hand to mix and another hand to add warm water. Not too wet, think molding sand or a tiny bit wetter. As soon as the bread starts coming together in the bowl, you should stop adding water.
#5.
I did the kneading in the bowl by hand only. I let the dough rest for about 20 minutes. It will produce small gas pockets in the dough. I think many small gas pockets are better than lesser larger gas pockets.
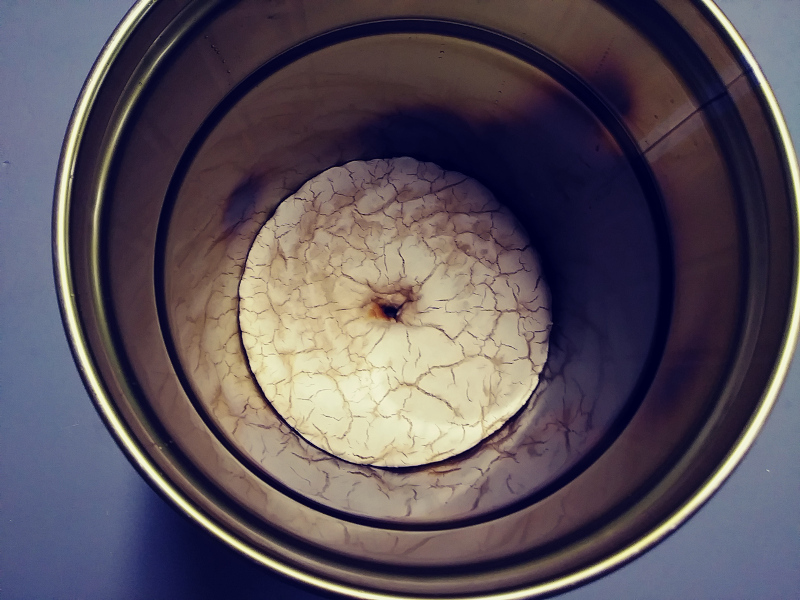
Did some more baking and also wore out my welcome at this oven.
The large diameter shrunk about a 1/4" on the radius or a bit less. The bottom small diameter also shrunk a slight amount. Now it is loose in the bottom of the ACFC. I think it will be much better to make this in two parts and in two molds and use a small oven that would be much easier to find. Even an electric small counter top oven and then the air could be blocked off so not to burn up the charred bread. Of course I am not too sure if a kitchen oven can reach high enough temperature to carbonize the bread.
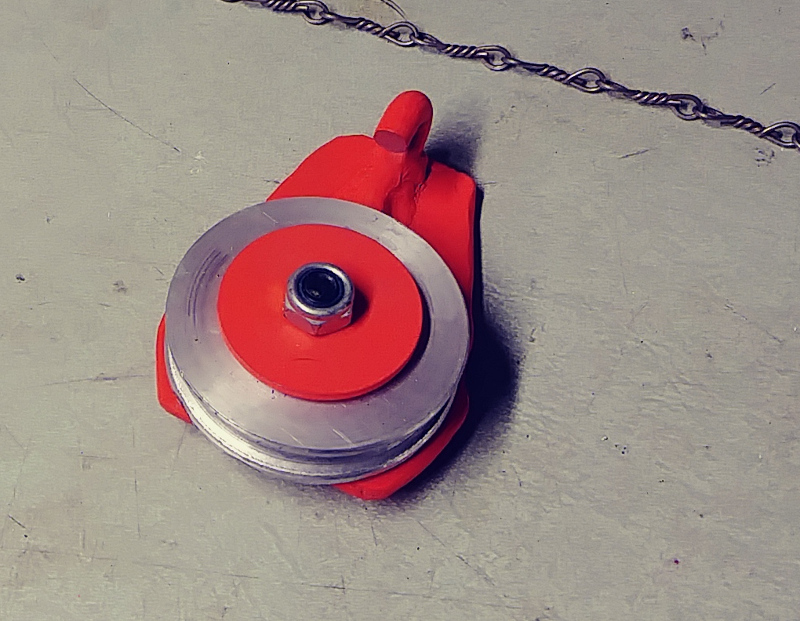
Here is a video on how I made the easy to rig snatch block for the machine that is half skidder and half forwarder. Easy to place rope over the pulley.
Bruce, interesting stuff. I now have my own small oven. I plan on changing how I make the carbon bread foam. The last design has the carbon bread foam removed. The lower oxidation cylinder is removed and a larger hole for a larger diameter cylinder has been cut. This will allow for more insulation. This first bottom pail will be built with ceramic blanket, original plan. A second bottom pail will be assemble for carbon bread foam. This way the bread testing will not delay the new ACFC much.
It is neat, it is just an ARM microcontroller chip like on the microbit and there are some ARM arduino compatible ones. The atmel/arduino is a microcontroller as well. It varies from the ARM chip in the raspberryPi because it has real-time clock like the arduino.(arm has IP for both microcontrollers and applications processors.) However, the Raspi, can be made into more real-time system with a RT kernel patches or with the quad cores, you just dedicate a core to the application you want. The rest of it is just the goodies they added with the exposed headers. For instance, you can get an i2c can-bus chip, or DAC /ADc for fairly cheap to add on. The software looks pretty neat as well.
I do not like this toxic ceramic blanket any but it might buy me some time while working on the carbon foam. I bought a quart of the expensive rigidizer and applied it to the blanket. It becomes more fragile, I believe, then the carbon foam made from bread. Easy to put your finger through.
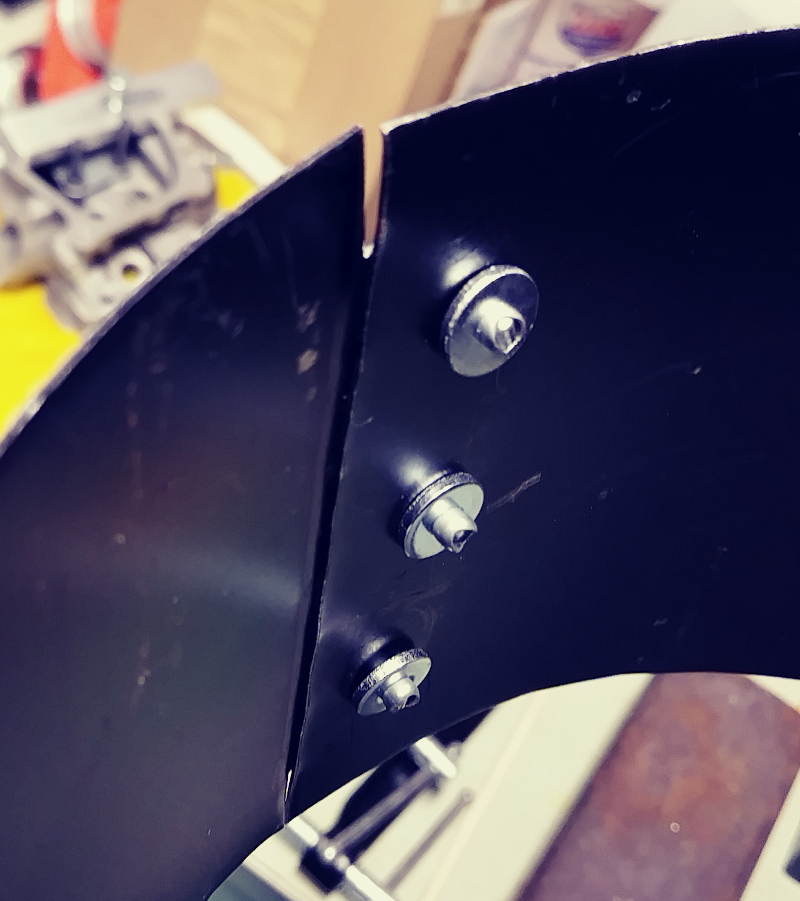
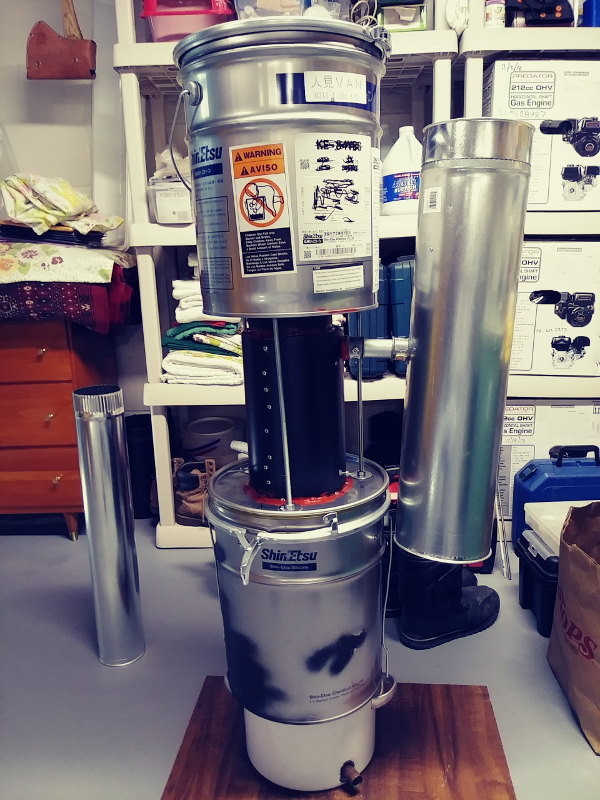
Becoming a sheet metal junkie. I see myself joining the stainless steel gasifier group. A lot of sheet metal can be stored in a small area as compared to tanks. Surely there will still be a use for some old tanks.
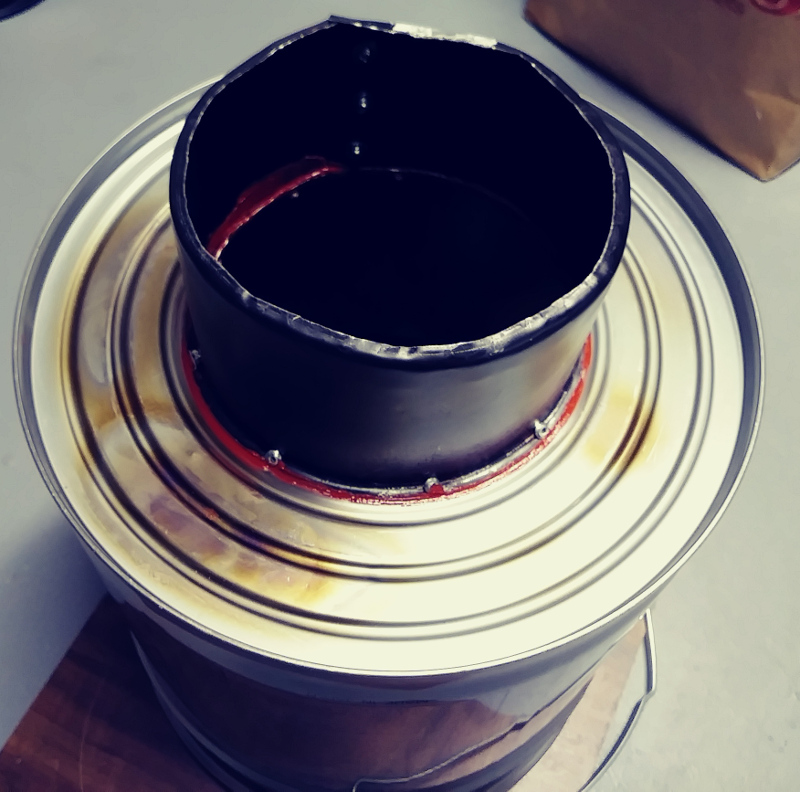
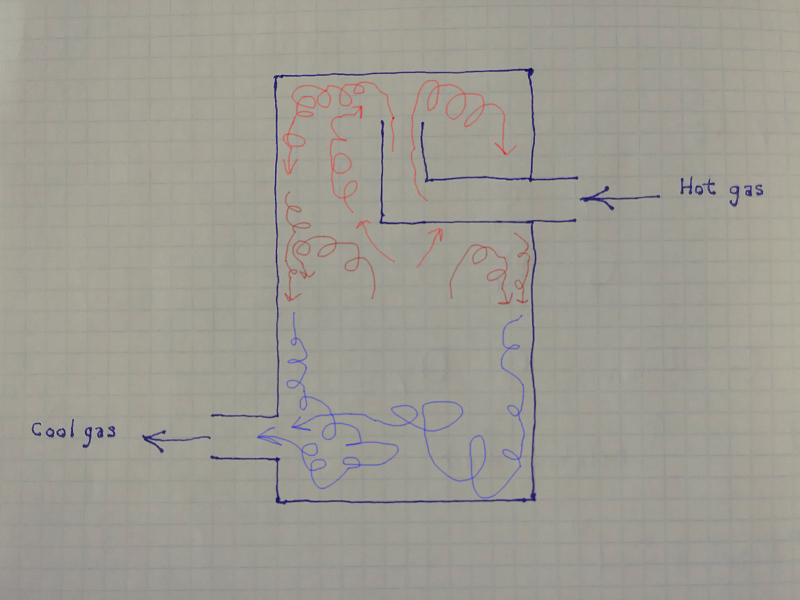
The cooler is stolen from the wood stove people. They call this design a bell or stratified flue gas heat exchanger. The idea is that the hot gas will rise to the top and as the walls of the cooler cools the gas this cooled gas will sink to the bottom.
Reading through Bob’s build I found a link that Garry, @taitgarry00, posted. Gives some hope for the stratified gas heat exchanger. Possibly, as the moist hot gas looses some of the moister to the walls of this thing this gas will be displaced to the bottom a long with water running down the sides.
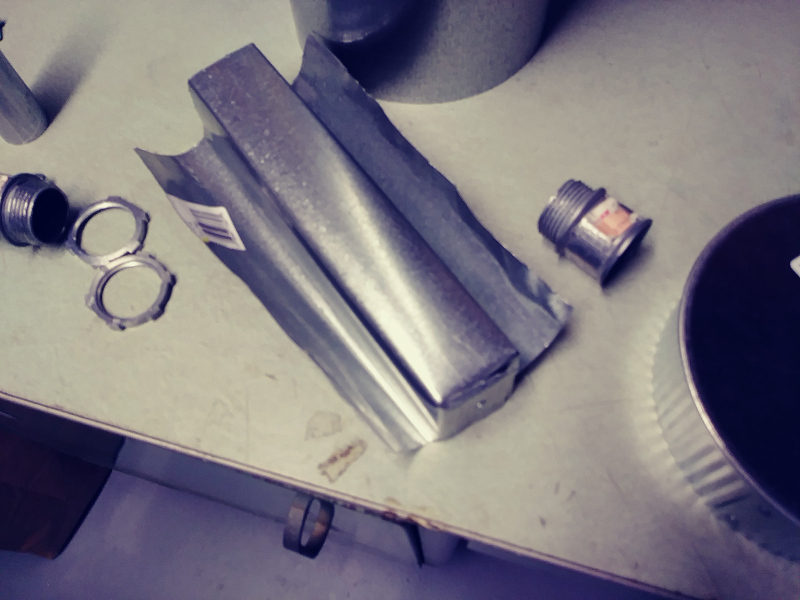
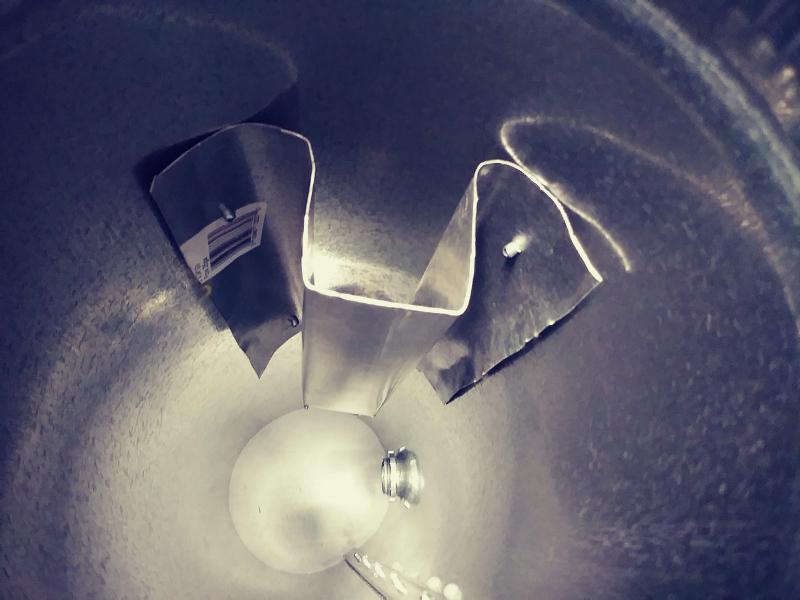
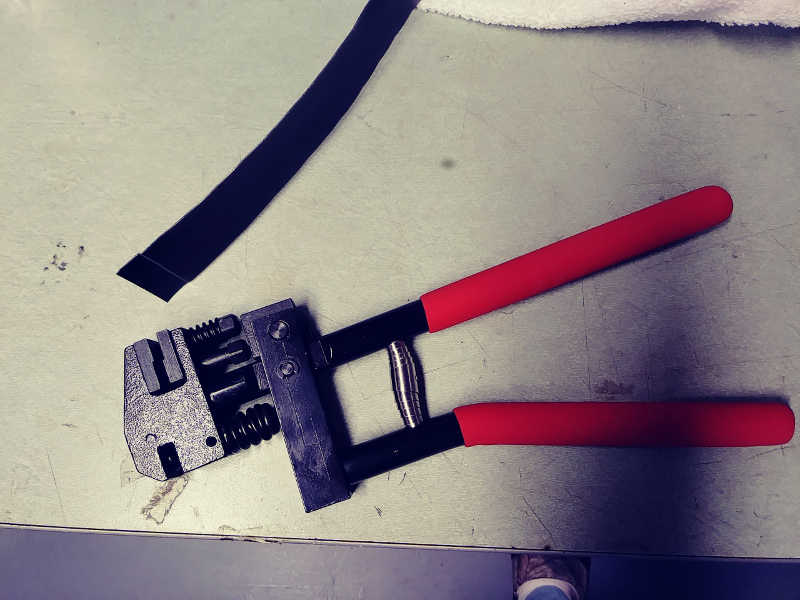
Giving a band seal a try. The pipe seams are a pain in the butt but for now that is all I have. Decided to order (later) a small 24" slip roll and go with stainless steel.