Wow! That is big!
One question though.
Why the small casters for wheels?
Wouldn’t be easier to move around with bigger wheels?
Ok that was two questions
Looks good I like it😀
Jesse
Hi Jesse,
the wheels are only for mantaniance, it´s going to rest on two rails and the wheels permit us to pull it out for modifications of the output or burner (burners are extractable). The rails will permit us to pull it out of the fire brick tunel it will be in. It´s so heavy (355 kilos!!) that whithout wheels it would be impossible. We will make a final video with details.
We apreciate very much that you liked it.
Abner
Very cool!
Well thought out system
Jesse
Fired the New Retort
this evening, with mixed results.
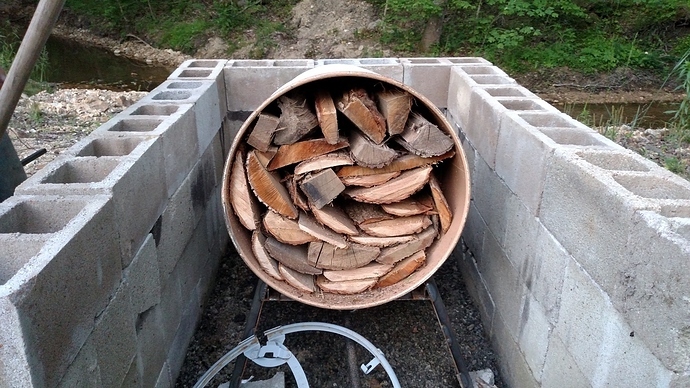
Here is the 55 gallon drum, positioned on the stand, inside the retort walls, and loaded with slab wood.
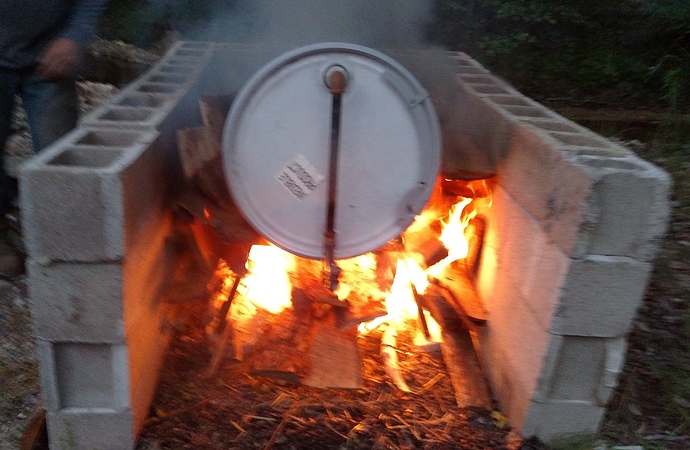
Here, we have placed the lid on the drum, with the burner pipe carrying the gas underneath the barrel. We have kindled a fire around the drum.
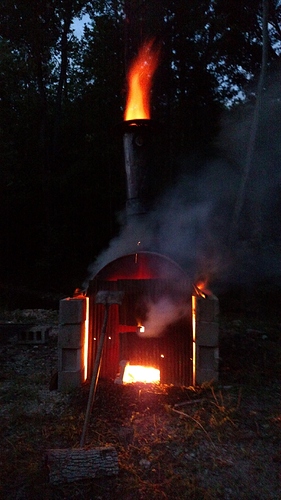
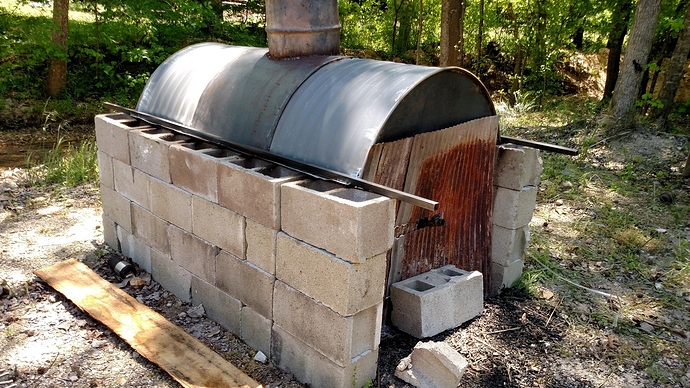
Here, we have placed the “Quonset hut” style lid (with chimney) on the retort, along with the front heat shield. As you can see, it is already getting very hot.
Although it is difficult to see in this picture, there is a pipe that extends out through the front heat shield about 6 inches, with a valve on the end. The idea was that we could leave this valve open until the wood started making good gas, then close it to divert the gas to the burner pipe. Also, the valve provided a means of manual pressure relief, in case we felt that the vessel was becoming over-pressured.
Things did not go exactly according to plan.
First of all, the fire became very fierce very quickly. This made it very difficult to approach the valve and operate it, even from outside the heat shield.
Second, we were expecting that the inner retort would just vent steam for the first several minutes, so we started the run with the valve full open (no use pumping water vapor back into our fire). However, we were very surprised that we started making gas that wanted to flare almost immediately. The very first time I tried to flare the gas, it gave a “whoosh,” but thankfully did not sustain the flame. If it had actually sustained the flame, then it would have become almost impossible to approach the valve again, because the gas was coming out much more energetically than we had anticipated.
Now, we had a difficult decision to make. Should we close the valve, divert all of the gas to the jets, and risk over-pressuring the vessel, or should we leave it open and dissipate most of our gas to the atmosphere? We opted for a compromise, and closed the valve half-way. This definitely energized our burner, but still left a large quantity of gas venting very energetically to the atmosphere. At the retort was getting so hot that I was concerned that the gas coming out of the flare valve would auto-ignite even outside the fire shield. While this would not have been catastrophic, it would have made it impossible to approach the front of the retort. Fortunately, it never ignited.
At some point, the barrel either ruptured, or the lid began to leak. We could see a that a bunch of gas was being burned near the front of the barrel. After the reaction had cooled somewhat, we went ahead and closed the valve all the way, since we now reasoned that there was no further danger of explosive over-pressurization.
Also, it appears that at some point, the back portion of our barrel stand collapsed, and that the back of the barrel was resting on the coal bed. We were surprised by this, since we had beefed up the stand with some 1 inch square tubing to prevent such an occurrence.
Anyway, it was much too hot to study the situation any further this evening. However, it will be fascinating to have a closer look tomorrow.
But from what we have seen so far, we can already draw some conclusions:
-
The 3/4 inch pipe may be inadequate. Or, if it is adequate, it is barely adequate, and the burner tube needs more jets and larger jets in order to prevent the pressures from building up excessively in the system.
-
The stand needs to be beefed up even more.
-
The flare valve and pipe arrangement is totally inadequate. It would need to be longer and better protected in order to operate it safely and conveniently.
-
The front heat shield is inadequate given the surprising ferocity of the fire. Now, it is just some tin sheet. It should be replaced with at least 16 gauge steel and arranged more securely.
-
The “Quonset hut” lid and chimney arrangement worked very nicely, and appears to have held up well. It has handles on both ends that make it easy to put on and off, and worked out just as we had hoped.
Learning by doing Kyle…
Any weight on glowing metal will deform that metal… (rule of thumb)
Been there, done that 
No need for adjusting valves, only a vent pipe if you want to collect the vapors or expell the steam in case of humid wood.
Another rule of Thumb: by my observation, i need about 20% by weight to have the fire outside sufficient heated up, before the gas from the inside takes over.
But very sure, you are doing great… Love it…
That is a great looking thing! Cant wait to see how it works!
I agree that there should be no need for adjusting valves, once we have determined the correct design of the burner pipe.
However, I was concerned that if I made the jets in the pipe too big, or too numerous, the gas would all escape near the front of the pipe, and not reach the rear of the pipe to heat the rear of the barrel.
I started with 17 3/16 inch holes in the pipe.
Based on my experience last night, I think that this is not enough area for the gas to exit, and would let the pressures rise too much, so I am going to drill them out some more.
Of course, if we are going to keep a flare / vent pipe at all, it will have to have a valve on it to turn it on and off.
Hi Kyle,
there is no risk of explotion because pressure will always be liberated; also no need to use any valve, only for cuting air to go back to the kiln when it stops liberating woodgas and all you have is char in the kiln, this to avoid having only ashes next mornig. Our system is a slot burner (see the video at the end of this coment), it starts thin and thikens towards the end, this will mantain a uniform pressure in the burners. Notice that in our Giant Kiln (THE BEAST) we have a manifold from wich three burner come out. The outgoing tube is a square (10x10 cms) -it has to be wide ID- to insure good ougoing gas, yours is to small. We have a similar system like yours and the outgoing pipe is 2" ID. Hope this helps. I´ll make a full video of our Beast and post it, This week we start masonry.
HERE´S THE VIDEO OF THE LINE BURNERS AGAIN
Hope this was of help.
Retort Post Mortem
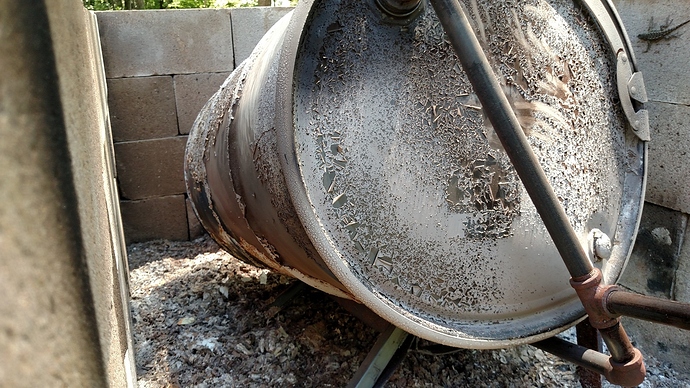
Here is the retort in the light of day.
Here it is with the top and heat shield removed.
As you can see, the cradle collapsed. Also, if you look closely, you will notice that the lid is bulged out. There was also a similar bulge on the back end of the barrel. This indicates that the barrel definitely became over-pressured. We are fortunate that we did not have an explosion. However, presumably because the metal was so hot, it failed before very high pressures developed.
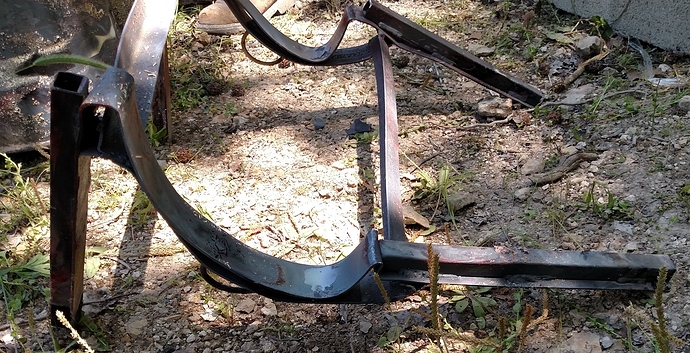
Here is a closer look at the cradle. The legs on one side folded over.
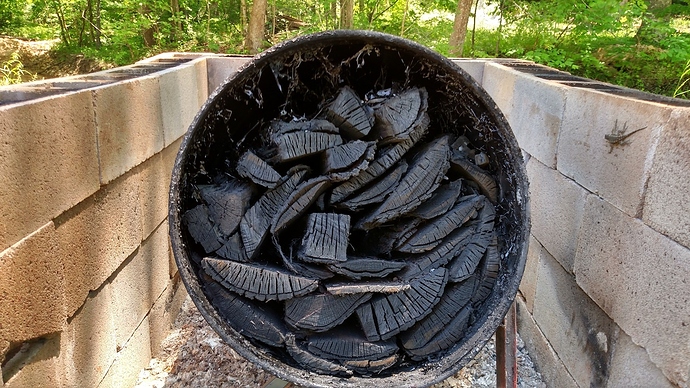
Here is what the inner retort looked like when we removed the lid.
Although the wood looks charred, most of it is just torified. Although disappointing, this is not surprising, since we vented over half our gas to the atmosphere, and because the total burn time was only about an hour.
Conclusion
Although we like the idea of the horizontal orientation and the external burner pipe in theory, our experience is making us rethink this design.
When we were just making charcoal in a 16 gallon drum inside a 55 gallon drum, the display was impressive but not especially threatening. Now that we are dealing with a much larger charcoal vessel, a much larger outer retort, more woodgas, and a much bigger fire, the display is rather awe inspiring and is making us more conscious of the fact that we are dealing with a potentially dangerous process.
In particular, despite Abner’s assurances, I am still concerned about the possibility of an explosion. Even if we only experienced a “steam explosion” rather than a gas explosion, this could still be a catastrophic event, as many 19th century pioneers discovered with wood boilers.
While I think that it is certainly possible to make a safe and well functioning system along these lines, I am now doubting that, with our limited materials and budget, that it would be worth it. I am especially concerned about having a single point for the gas to exit, as this represents a potential single point of failure.
At this point, we are inclined to merely turn a 55 gallon drum upside down in our new outer retort, with holes in the lid, like our old smaller system. This seems to be more “idiot proof.” Also, if that works, we would actually have room for at least 2, and possibly 3, 55 gallon drums in our retort at the same time. That would be a large amount of charcoal.
Kyle, I have a barrel stove in my shop that had some really hot fires in it and the barrel deformed also because of the heat and not pressure. Maybe that happened here too?
Do you stick around while you make charcoal or is your goal to come back when it is done? If you are around and can throw more wood in every ten to fifteen minutes, you ought to try making a tapered cone retort with a dump gate at the bottom. They make huge amounts of charcoal with slim to none brands or torrified chunks because you can watch it and monitor it as you go and you can quit the process with 15 minutes notice. Just dump and shovel the contents in air tight barrels.
Don - In this case, I am pretty sure it was a pressure issue since both ends of the barrel were bulged out, with the front one bulging until the gasses could escape around the rim.
When I started into all this, it was my goal to make an unattended process, so it would be convenient to fire off in the evenings and go to bed.
However, if you can make a lot of charcoal with the tapered cone method, maybe that would be fun to try for a weekend project.
I think that the Hookway, and possibly GGilmore’s double-barrel, retorts are the only ones that are likely to work this way with minimal danger of burning the wrong things down.
I have tried most ways to make charcoal and I have to say that if its a walk away type system your wanting then I think the Hookway or simular type system would be the way to go , the double barrel and cone are good if your going to be very close to hand .
Dave
The details of the Hookway system are not clear to me.
However, it looks like it is very similar to my original method, except that it has a chimney up the middle to more evenly heat the inner retort chamber.
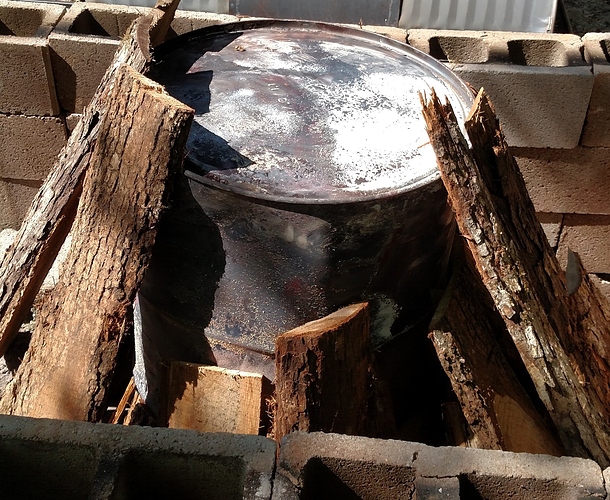
Anyway, after my (ahem) “learning experience” the other day, I decided to just poke holes in the lid of the barrel and sit it on bricks (holes facing down) as in my original, smaller, retort. Here is what it looks like after I stacked the firewood around it.
Then, I just lit the fire, replaced the lid, and let it cook.
This seemed to work pretty well.
I started sorting through the charcoal last night.
At this point, I would estimate that I got about 25-30 gallons of usable charcoal and about 7-10 gallons of torified wood that needs to be re-fired.
I have not found any method yet which gives me 100% charcoal with no torified wood (except possibly my 2nd run on my smaller retort, which I fired twice).
When making charcoal in these larger quantities, it sure would be nice to be able to have confidence that 100% of the wood is converted. Hand sorting these larger quantities is time consuming, and represents a bottle-neck in the process. It would be great if it could all just go straight into the crusher.
Maybe a Hookway style central chimney would help with this.
I have an old gas hot water heater that has a central chimney. It would make a good vessel to try. I also notice that it had a baffle arrangement within the chimney which I assume helps capture more of the heat energy and transfer it to the vessel.
I also determined that I could place 2 55 gallon drums in my new outer retort, oriented vertically. This would let me fire 110 gallons of wood at a time. I might try that, just to see what happens.
Yes Kyle I found making and grading charcoal to be a real hassle as well. I mowed a whole summer with it and this summer I plan to generate all my power and hot water with the waist heat. I used the two barrel method last time. I think I am going to try A TLUD this time with a gas water heater for my chimney. Probably going to be a few weeks before I can devote the time I need to get set up, Anbody making charcoal from chips? I think I read it is hard to get full conversion due to the density but it may work with the chimney in the center as you have described.
I wish I had room to take my cone retort to Argos to demonstrate. That makes 100 percent charcoal every time when operated correctly.
EDIT: I should not say 100% because burning in a cone uses some of the wood for heat but probably less than the wood used for external heat around a closed barrel.
Don - I would like to hear more about your method.
The reason I shied away from it in the first place was because I wanted an unattended process, but also because it looked to me like it would require good management and judgement about when the charcoal was ready. Since I was new to all of this, I felt that I lacked the skill to manage the process properly.
Jim,
I will be doing chips this summer because I have a lot of them. I will do the first few runs in small quantities because it’s already set up for chips except for the pipe in the middle. The chips I have will be green so it’ll take me longer but all have is time. 
Kyle here is a video of my setup. I started out using just twigs and branches and used the charcoal without grinding but since I made my grinder I now use bigger pieces of wood. The key to quick batches of charcoal without brands is to not have large chunks or logs. I try to keep the largest pieces less than 3 inches thick, 2 inches is better. The process is visible at all times and when yellow flames are no longer present that means the volatiles are all cooked out.
