Thanks Max, for the recognition. I assume you are referring to my doghouse coffee cup nozzle arrangement where I wrapped the steel nozzle in stainless sheet stock and high temperature ceramic wool material and then stuffed the whole thing into a ceramic coffee cup with a hole cut in the end. Yes, it worked. It is still attached, but last time I inspected it the outside end of the cup was covered with a glassy slag, and when I removed some of this slag, I cracked/chipped part of the cup. I put it back into the tank, and buried it in charcoal. It is important that the ceramic wool insulation tightly fills the cup, else air goes out the back side and burns the paint off the tank.
Or perhaps you are referring to the Tig nozzle cups I bought? My plan with those is to roll out a 1 cm thick slab of high grog pottery clay, and wrap the steel nozzle and the TIG cup with the clay. A piece of heavy paper will go between the two parts and the clay to allow room for expansion. This will have to air dry, and then I’ll fire it in one of my TLUD charcoal making stoves.
1" - 16tpi The threaded section isn’t very long, Much less than the diameter. I can measure later.
Look at the 2nd picture here
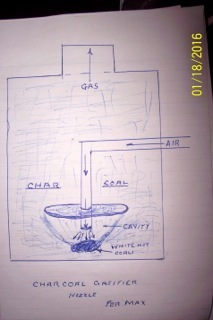
I think maybe Max is referring to his idea of a down pointing nozzle under a bell that keeps the char from touching the nozzle that nobody dares to try out yet?
@ray_menke didn’t you do the Tuyere-less charcoal gasifier by putting refractory in the bottom/top of an upside-down propane tank? If so, I think that might have been what Max was referring to.
:EDIT: No, that wouldn’t have made sense with the wording…
Hi, Ray!
04.21.2016
No, those are older and “well consumed”…
The one I have in my mind is drawn 08.25.2015
and reshuffeled 02.27.2016.
The one you collected pipes for, and were about to build.

Is the bell ringing now?
Max
Now I remember! If I was 70 years younger, today, people would probably say, “that kid has attention deficit disorder”. Lots of ideas that need to be finished. Many distractions. My latest distraction was caused by buying and hauling almost a ton of “AG Char” home from a place that bags and distributes hardwood lump charcoal (Ironwood and Mesquite) from Northern Mexico. After screening, the larger pieces are great for BBQ, and totally unusable for use in a charcoal gasifier, so my goal has been to convert these pieces of very hard torrefied wood into finished charcoal. Wife recently mentioned that soon there will be no place to put all of this charcoal. My shop is almost 500 quadrat meter. (Over 5000 sq. feet.)
Hi, Ray!
04.21.2016
Same here! Join the club! 80 is unpleasantly approaching…
Rig up the bell!
Max
Max it may not have rung his bell but I have had this picture sitting on my table for so long that I forgot what it was for. Evidently you mentioned this nozzle and as usually I didn’t get what you were “saying” so I tried to draw a picture of what I though you had said. I missed the upside down cone. I thought it was just a plate and created a vacant cone. I keep trying to understand. Just a little dumb. TomC
Hi, Tom!
04.21.2016
It’s evident, that describing something without an accompaning picture is “high risk” to become a disaster concept. This one is a school example of how it can turn out.
Max
That is why I believe I have asked for a drawing or I guess as you call it a skis (?) I for one try very hard to learn from you but as you can see from the several pictures I have posted of “what I thought” you were saying, words come up a little short. Did you ever get a digital camera? You mentioned you are too busy with woodgas to get involved with charcoal gas. What are you working on?.TomC
Made a few changes
I was getting ready to do another gasifier test run this evening, and made a few changes.
-
Patched the hole in the bilge blower where the wires exit.
-
Decided to add a shield made out of shim stock to the alumina nozzle, just to see what would happen. The shield is floating about 1/4 inch outside of the alumina nozzle.
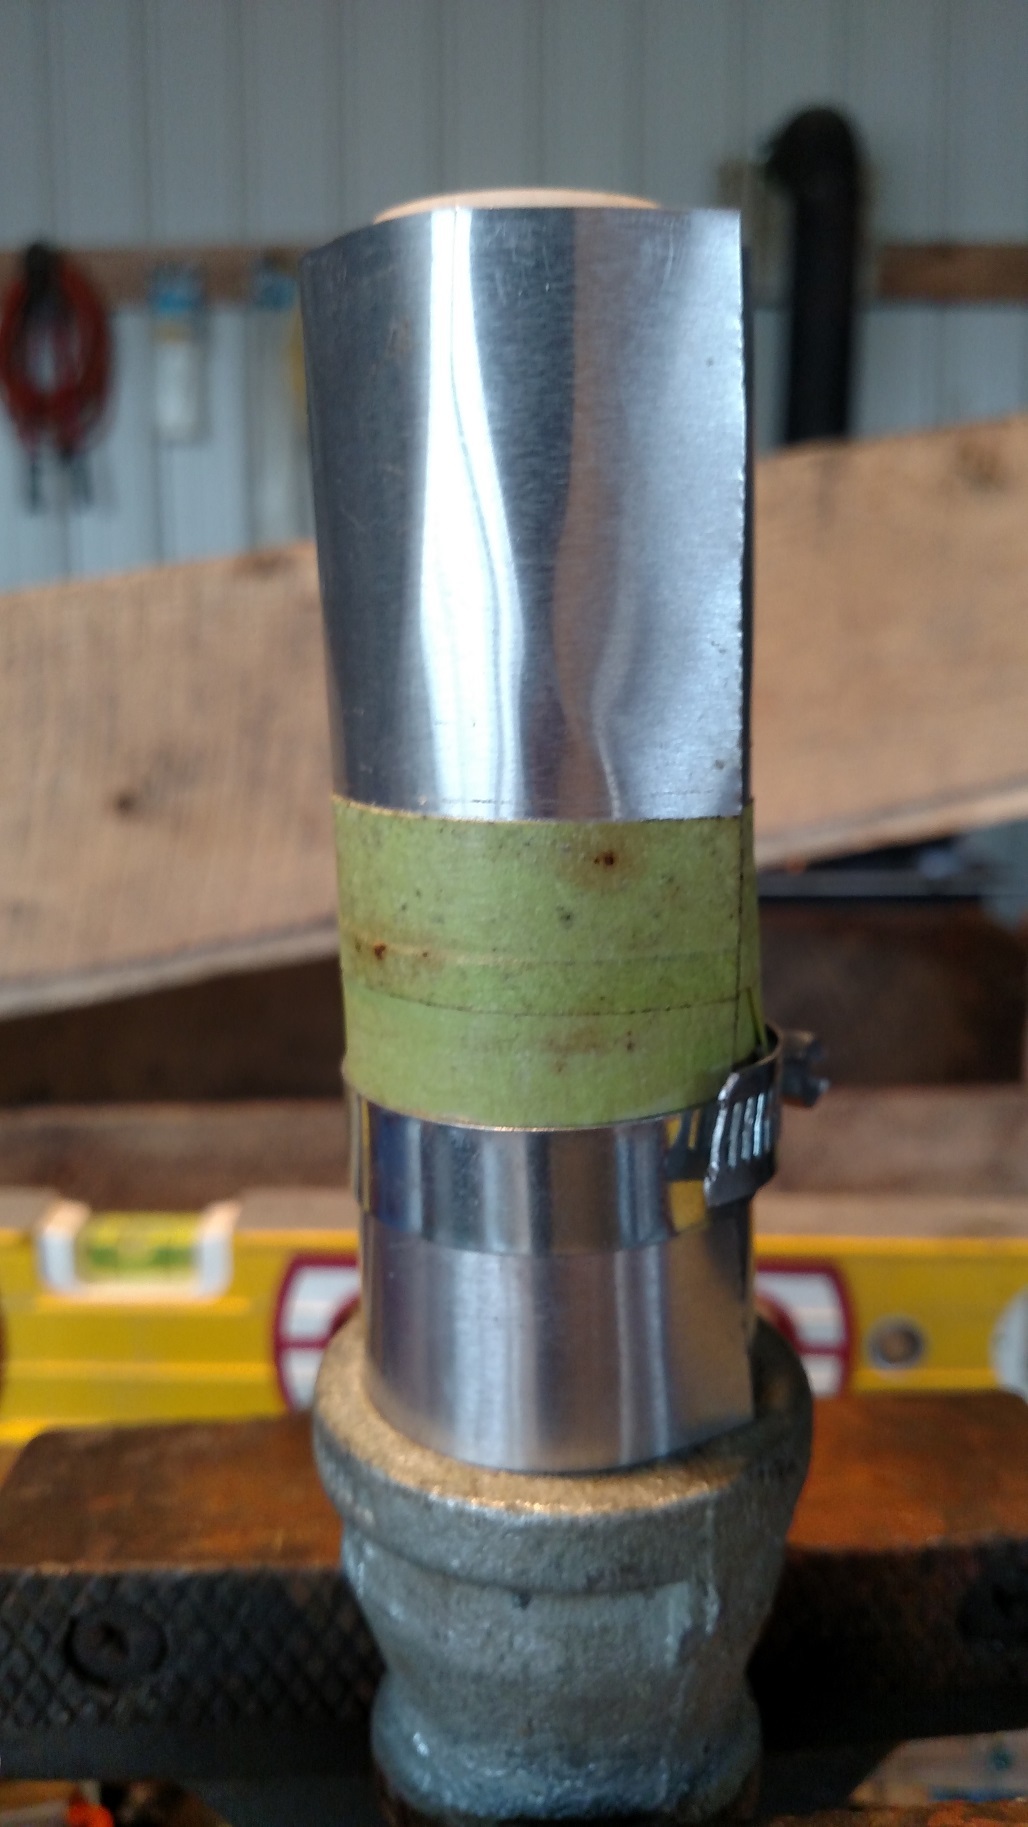
- Installed the Alumina nozzle in the gasifier. It is definitely too long. But is it so long that it will burn out the back of the gasifier?
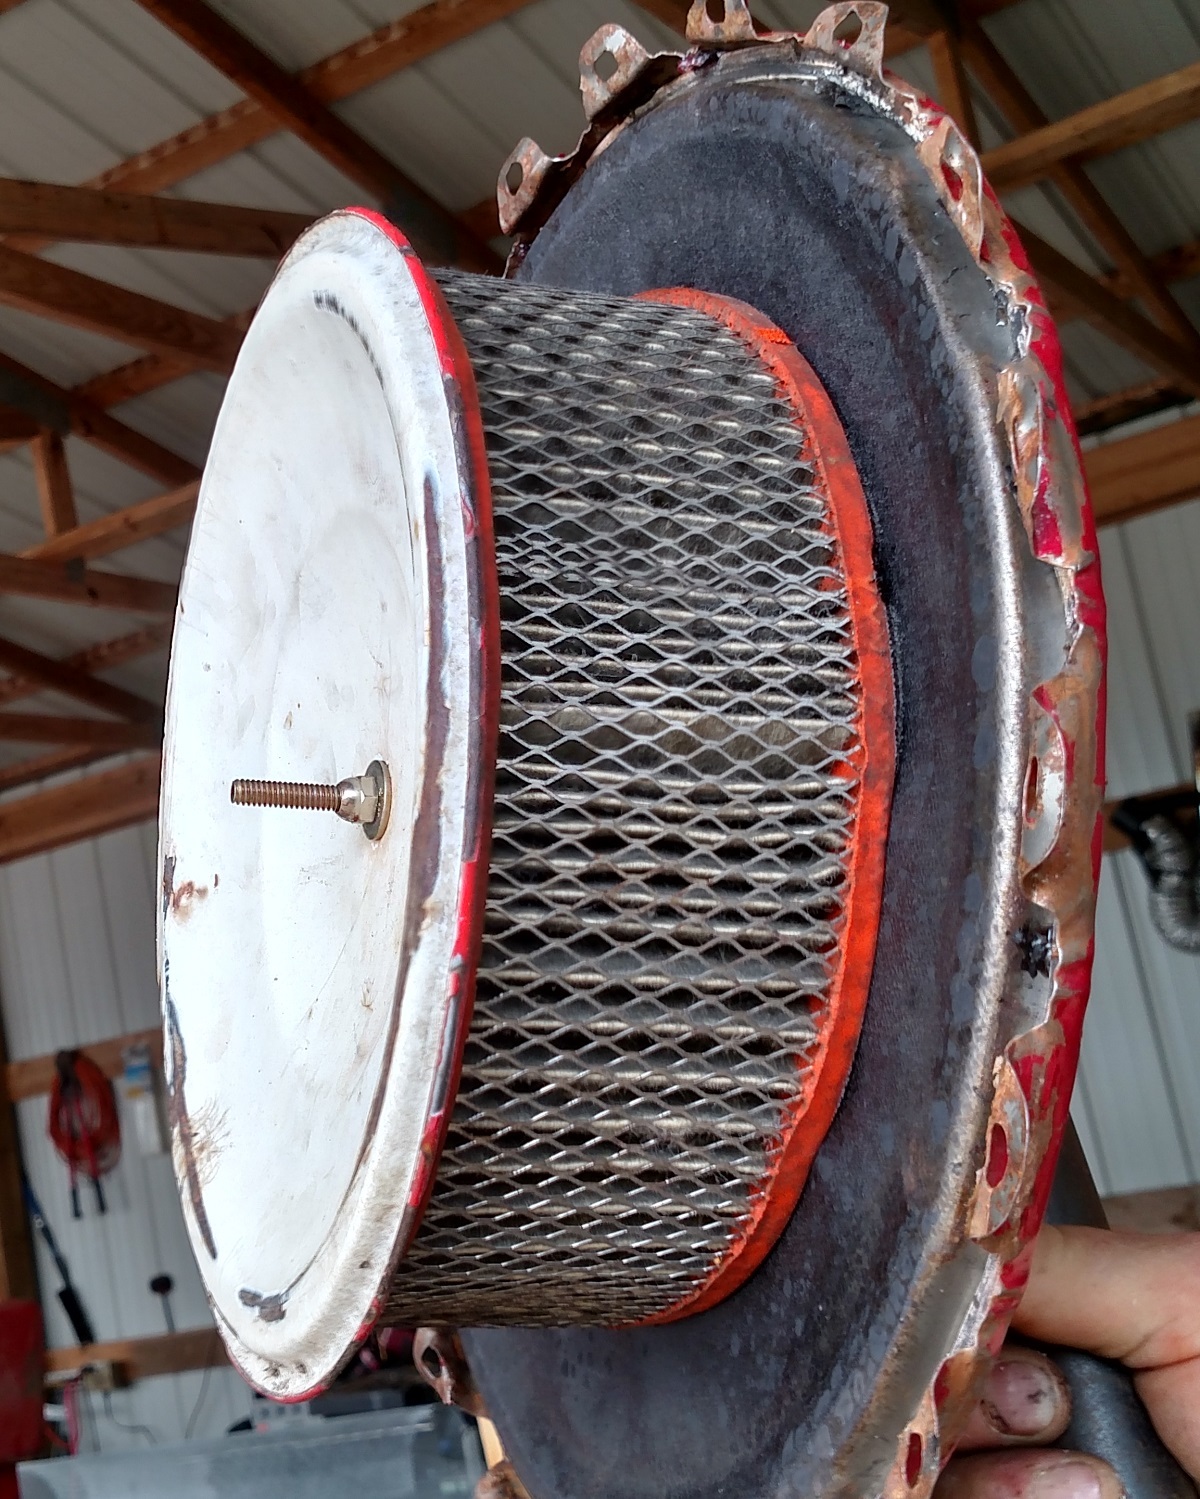
- Removed the small screen filter from the inside of the reactor lid, and added a big honking chrome breather (that was Hoss’s idea).
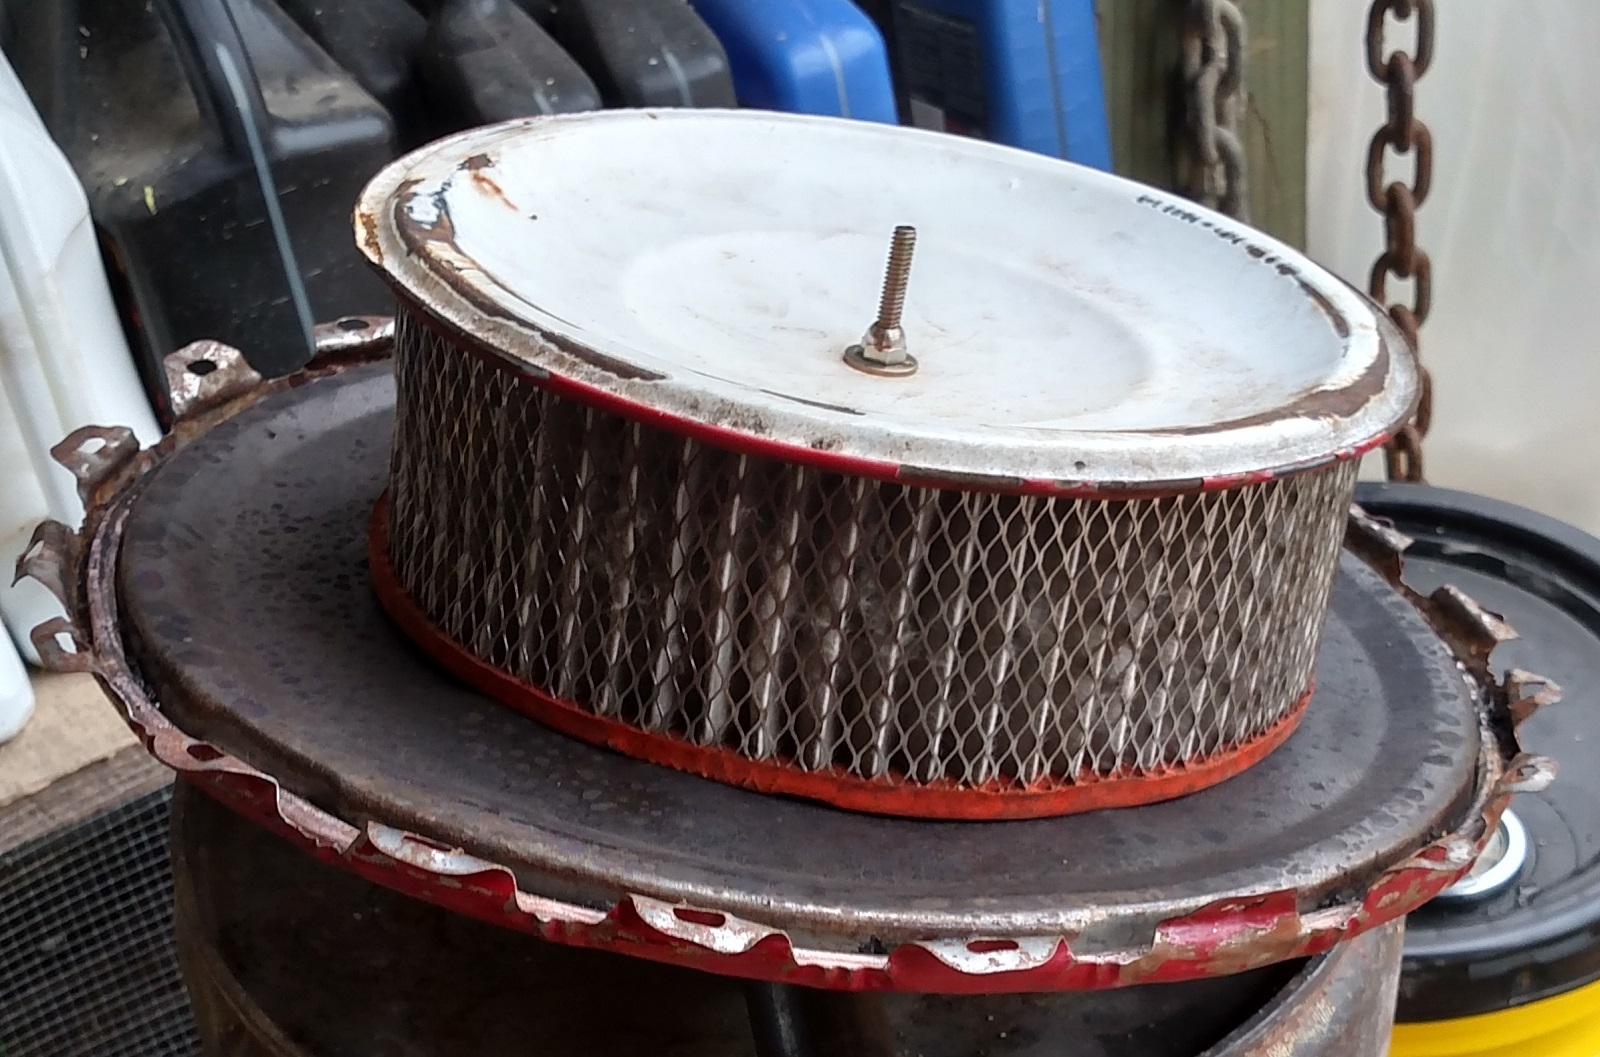
Kyle, the car air filter is a fantastic idea and will certainly help the system breath I bet .
I think the nozzle is supposed to be just over a 3rd of the way in normally but I cant see a big problem as long as your charcoal is small enough to help insulate your drum , yours looks to be just a little past centre , guess you will have to try it and see and keep an eye on that side .
Hope to see the video or photo’s soon .
Dave
I’ve seen mentions of a “skiz”, which could be a slang shorthand for “schematic”.
But yes, not everyone thinks in words and frequently words might mean different things to different people, especially half way across the globe.
I really like that filter Kyle. As for cutting the alumina when I cut the end off the tig nozzle I used a diamond blade on my grinder. There are several kinds I found the continuous rim ones more smooth. I have them for cutting porcelain tiles so sort of in the same family…
Best regards David Baillie
Skizz according to google translate is Luxembourgish for sketch. I think it has a nice ring to it, so I may have to start using that word.
Had to Screen Some Charcoal
before the next gasifier test run. So, I got to test out the screen shaker. Here’s a short vid.

Looks like it works very well. Can you put something to catch the “cleaned” charcoal at the end. ( Sure is a dirty job) TomC
Yea. I originally built these boxes with manual screening in mind. But I think I can easily add a throat at the hinged end and let it dump into a 5 gallon bucket. That’s my plan.
4th Gasifier Run
Did a 4th gasifier run last night. I tried to take more video this time, to show the starting process, etc. I will post that when I get it edited. But I will give a report for those of you without video playback.
The three new things this time were (1) having the wiring hole in the bilge blower plugged, (2) having the alumina nozzle installed, and (3) having the car breather on the inside of the reactor lid.
This was the first true “cold start” from charcoal gas only. The generator had not been run for about a week, the petrol line was unhooked, and there was no residual petrol in the system.
As you will see in the video, starting took a few minutes. But, as already noted, this generator is often very hard to start even on gasoline. I would say the effort is comparable.
This time, we had a problem with the motor outrunning the drill and twisting it out of Hoss’s hands a couple of times. We need some sort of slip clutch or ratchet to prevent that. We are thinking about using the “coast mechanism” from an old bicycle.
After starting, the generator ran like a top. Although we played with the mixture and exhaust return a little bit, this was really unnecessary after they were set. We were just experimenting.
I watched the temps pretty closely, because I was concerned about the nozzle being too long. The back of the reactor got up to about 550 F and stabilized.
We added some additional load this time. In total, we were pulling about 1800 watts. Our goal is to get up to about 2500 watts (this generator is rated at 5500 watts). We could have added more this time if we had some predictable loads.
We had hoped to do a 1 hour run. However, we started with less charcoal than we thought we had on hand (only about 9 gallons, or slightly less than 2/3 full). About 40 minutes into the run, I noticed that the upper barrel was heating up rapidly (already up to 180 F when I noticed it) so we shut it down.
Very Pleased with this test.
Post Mortem
This morning, we decided to break the system down and see how the components performed.
The secondary filter media looked good. Just a little charcoal dust on the end facing the intake. It was completely clean on the end facing the outlet.

The primary filter inside the reactor also still looked good. We just blew it off with the compressor after taking this picture.
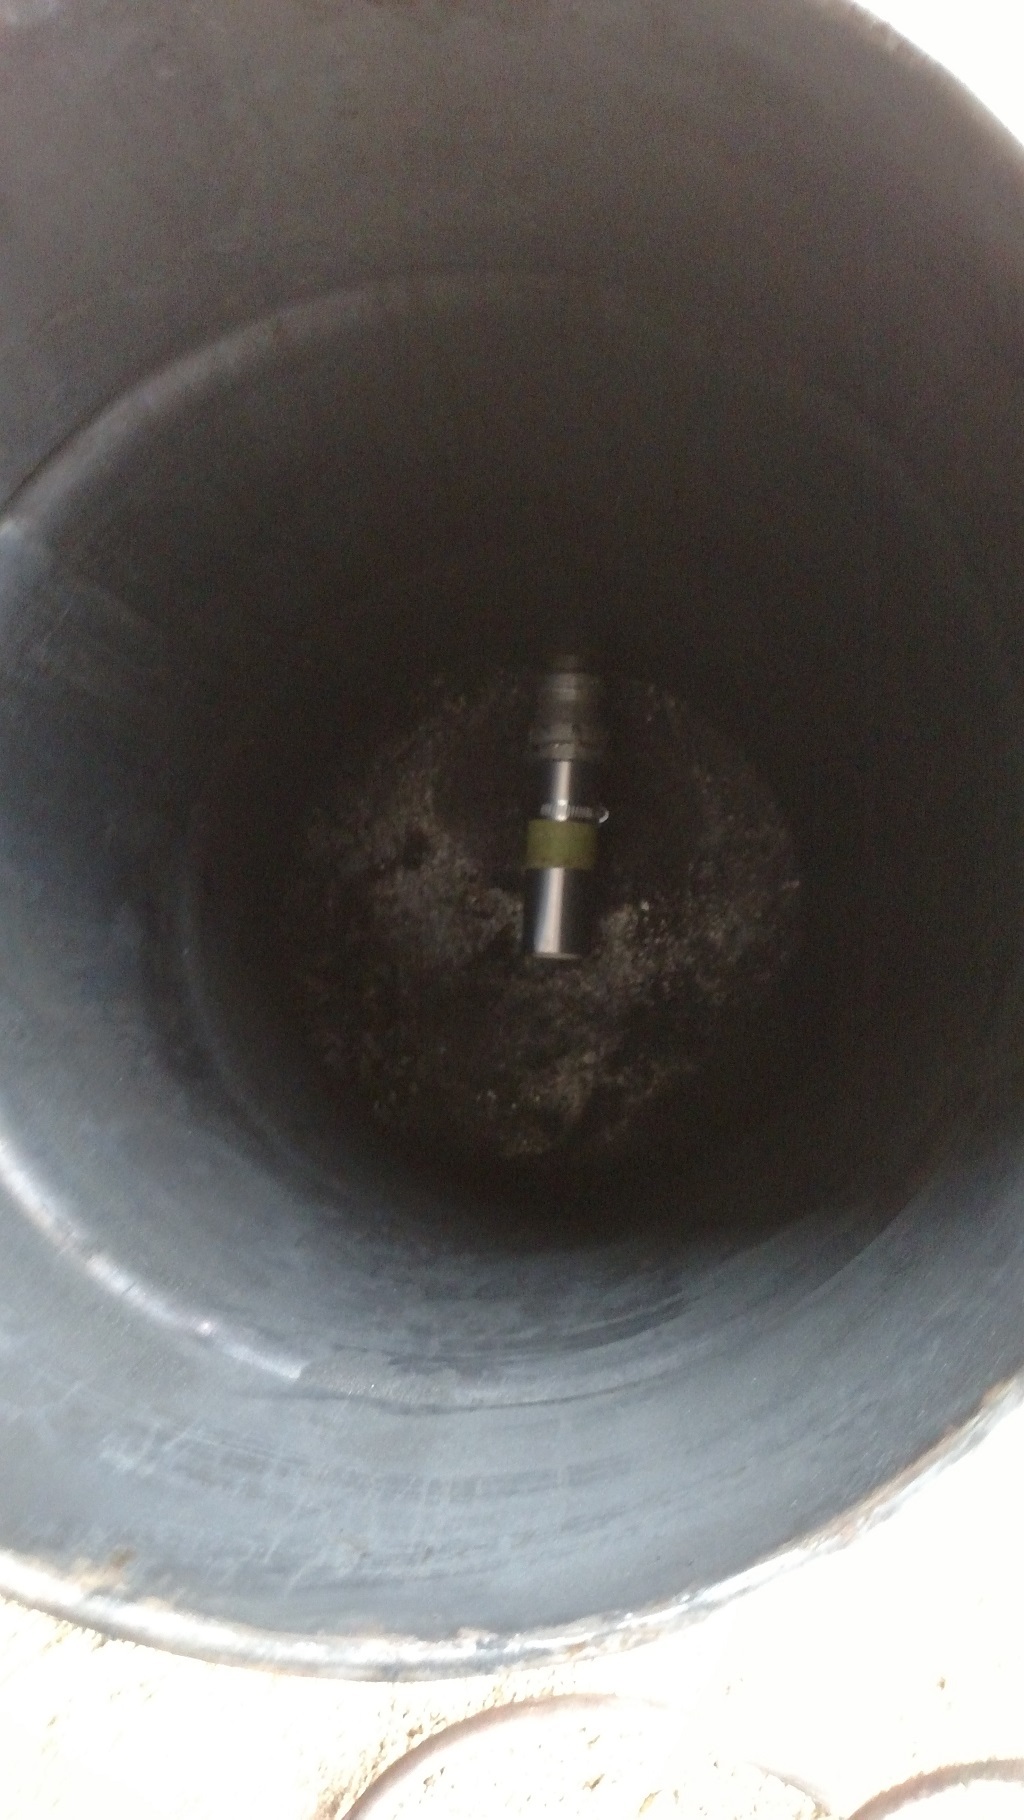
Of course, we were most interested to see what the nozzle looked like. Here it is.
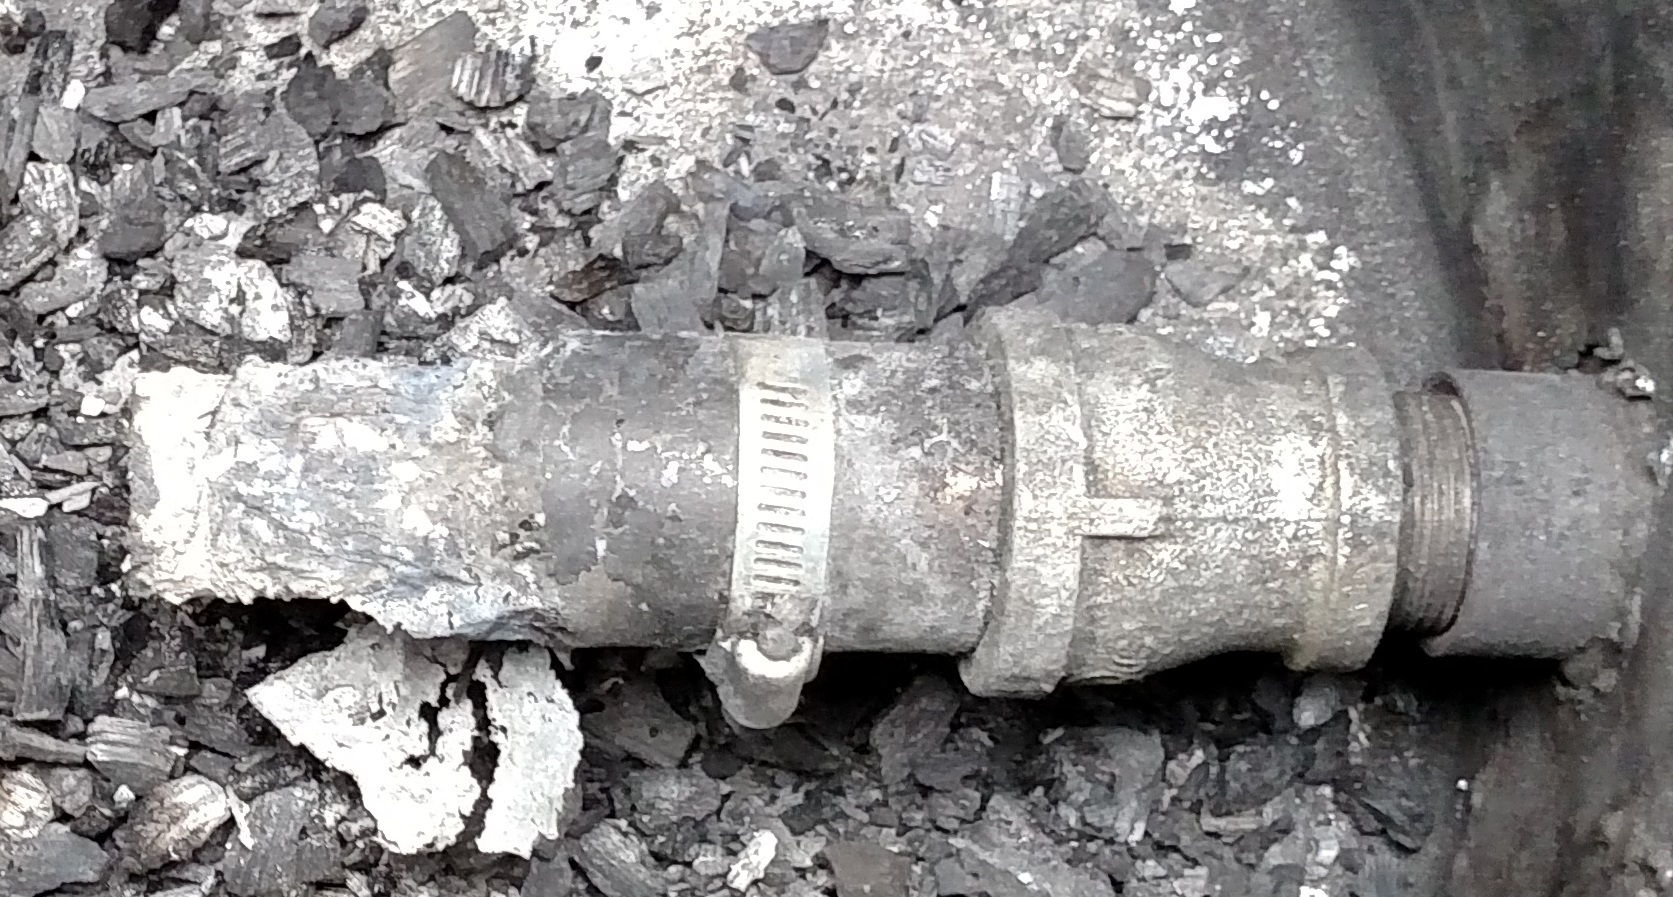
As you can see, the shim stock heat shield burned off up to the end of the pipe nipple. We expected that would probably happen. However, from that point back, all of the metal components were in good shape.
I lightly wiped the alumina nozzle off with my fingertips.
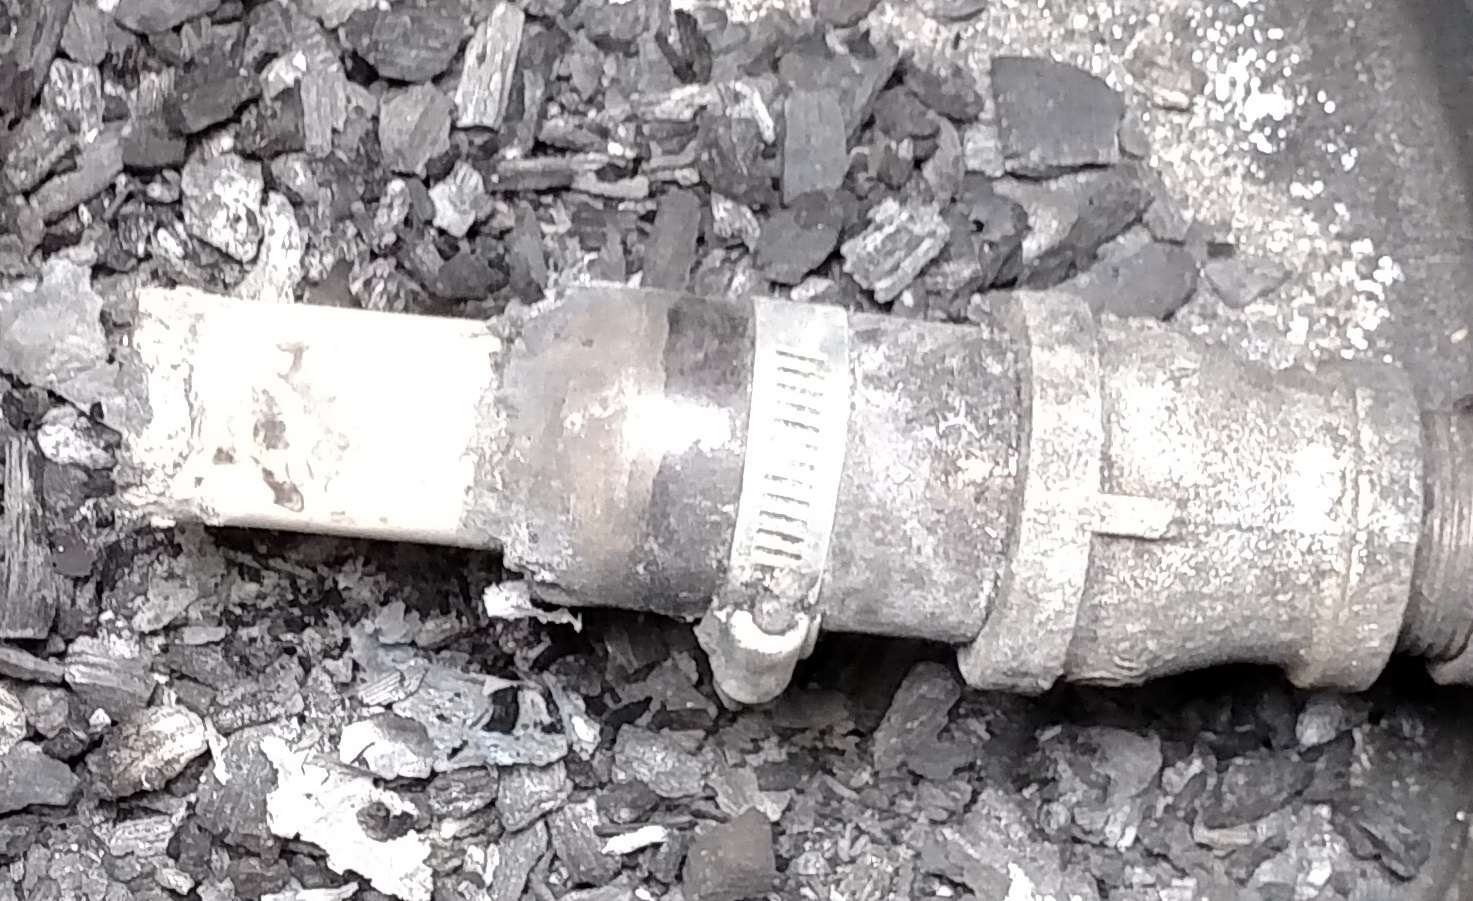
It cleaned up nicely. Only the last quarter inch of the nozzle, plus the flat end of the nozzle, were slagged up enough that I couldn’t easily wipe it off with my fingers. The inside bore felt smooth.
Conclusions
This first run of the new nozzle turned out OK. We will stick with it for a while, to see how long it will last. I think we are receiving some benefit by having it protrude from the steel a couple of inches. To shorten up the overall length, I am going to install a new 1 1/4 inch coupling in the sidewall so that we can screw the 1 1/4 inch nipple directly into that and eliminate the reducer and short nipple. This should put the end of the nozzle near the optimum position.