Here is the 4th run video. This is a much longer video (about 10 minutes). We try to cover all of the operational steps from start-up to shut down.
As you might expect, now that we were videoing, we had the hardest time ever starting the generator. But I left all of that footage in so you guys could see the whole process.
Love these updates kyle. For starting with the drill I rounded over the front edges of the nut on the flywheel. I found you can pull back easily and it slips off better… keep it up.
2 Likes
ray_menke
(Ray Menke (Lytton Springs, Texas))
#303
Kyle, thanks much for these blow-by-blow updates. Very informative! I believe the engine will be easier to start if you add an air mixing valve right up close to the engine intake. (A quick spray of starting fluid though the valve, then close the valve to “the mark” you make when it is running good.) The valve to the flare would then be left completely closed until you are ready to flare next time. Check out this video by Gary Gilmore at minute 8 or so:
At minute 13 you will see how Gary pre-sets the valve. The air valve can be much smaller than the woodgas line. I use one inch gas hose, and my air valve is only 1/2". (Cheaper valve, too.) Your engine sounds really good once it gets going.
Everybody seems to use ball valves for air control on small engine setups.
I submit for your consideration my air mixer. Simple, Cheap, and very effective in making precise adjustments.
At the end of the video when you started shutting off the valves you also said fan off and I could hear it slowing down to a stop , but on start up when you were spinning with the drill I couldn’t hear it running then , so does this mean you were running all that time with the fan on once you got it started ?
I agree with what Ray mentioned about the air mix valve as close as possible to the engine , the response will be instant so you get a much better feel of the engines needs , I also heard a few blow backs from the engine when you were spinning it up , and it also coincided with the socket flying off the nut , I think maybe the reason its a little hard to start on petrol or gas might be that the valves might need a little lapping in and the compression is down slightly and at low speed will show that up more than it does at running speed .
I would also put a mesh guard of some sorts to help stop blow backs of charcoal and hot embers flying out of the air intake , just in case the engine ever did back fire .
Fantastic build and I bet you cant wait to get more play time in !
No. The fan was not running when the generator was running. Only during the flare.
The exception was right at the end. We turn the fan on before turning the generator off, so that flames don’t shoot out the intake port of the gasifier. You can hear this right at the end, when it sounds like the generator is about to quit because the gas has become richer from turning the fan on. Then, after the generator is off and the valves are closed, we turn the fan off.
I will think about what you guys have said about moving the air mixing valve closer to the engine.
But honestly, I think you are on the right track with your diagnosis of valve issues.
When this generator was new, it started easier than any generator of this size I ever had.
But that didn’t last more than a season. It then became the hardest generator to start.
The backfires and hard starting are routine with this generator, and the fact that it behaves similarly with woodgas tends to eliminate a carb. problem.
It’s crazy how smoothly it runs once it’s going though.
I seem to remember back a few years it was suggested that the air mixing valve should be about 16" from the carburetor. This is due to the pulses generated by a single cylinder engine. The incoming charge moves both ways up to this distance. Please correct me if I am wrong but I am almost certain I read that here. That being said I don.t think I have ever had mine that far away due to the junk I used to build mine was never more than a few steps away.
For what it’s worth, the engine seems to respond petty quickly when I adjust the air valve, and it is probably around 12 to 16 inches away from the carb.
I don’t find myself waiting for a delayed reaction.
Usually, I am just waiting for my brain to catch up to what the engine is telling me.
Ray - Thanks for posting that video. I hadn’t seen it before.
I can definitely see the benefit of having the air mixing valve separate from the flare valve. When we get our system a little more refined, maybe we will try that.
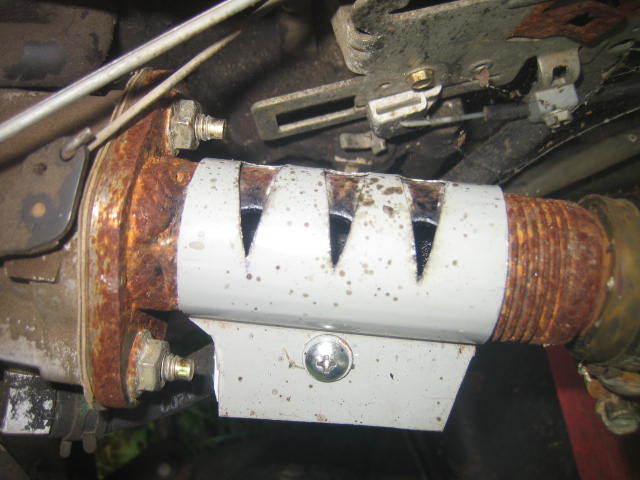
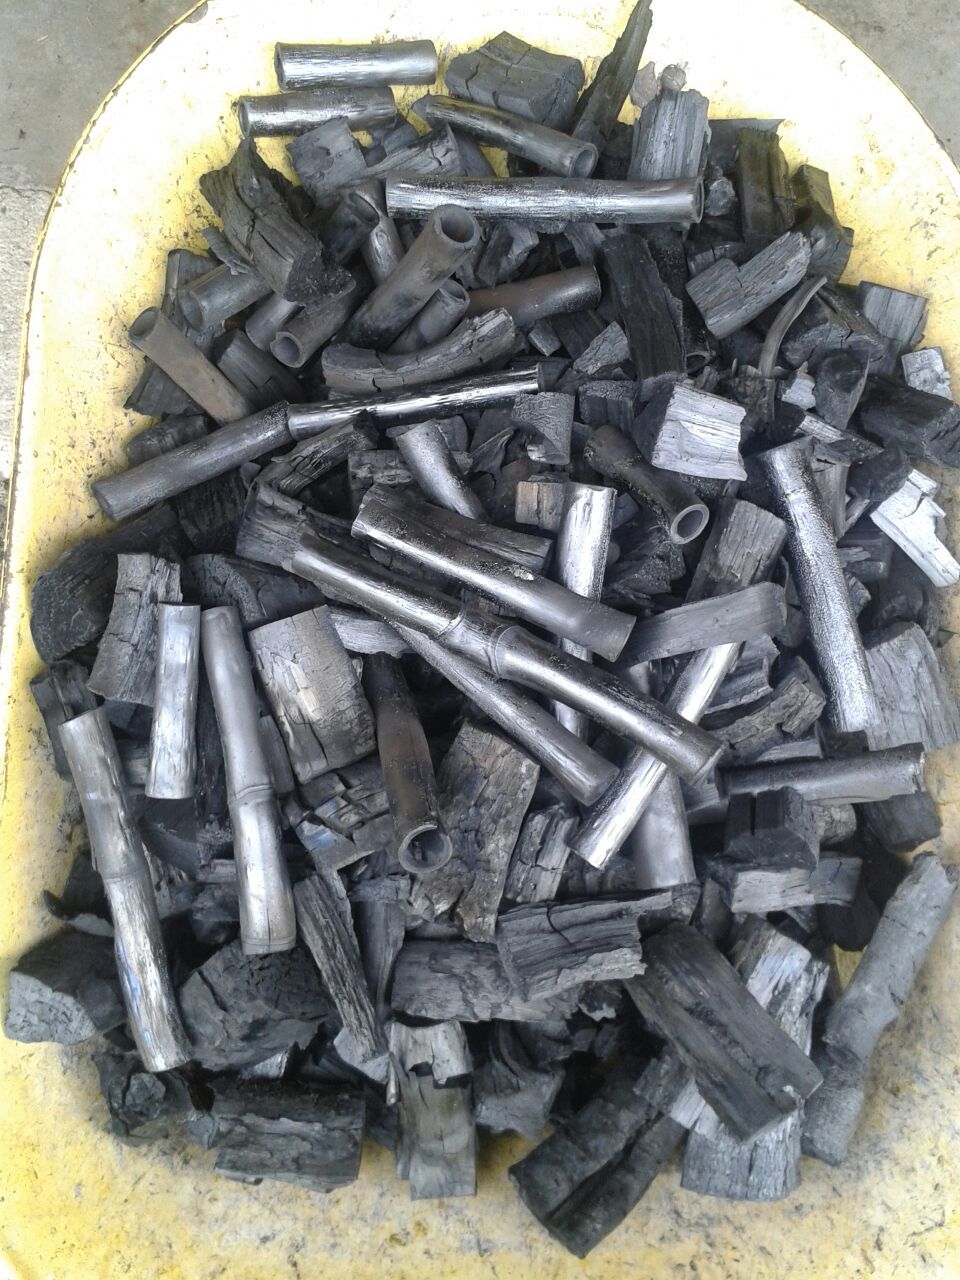
As you can see, we removed what was left of the heat shield.
I am not certain, but I think I can see a tiny hairline crack about an inch back from the tip. It is so fine, that I can’t even feel it with a fingernail. But this might be a sign of things to come. We will run it for a while and see what happens.
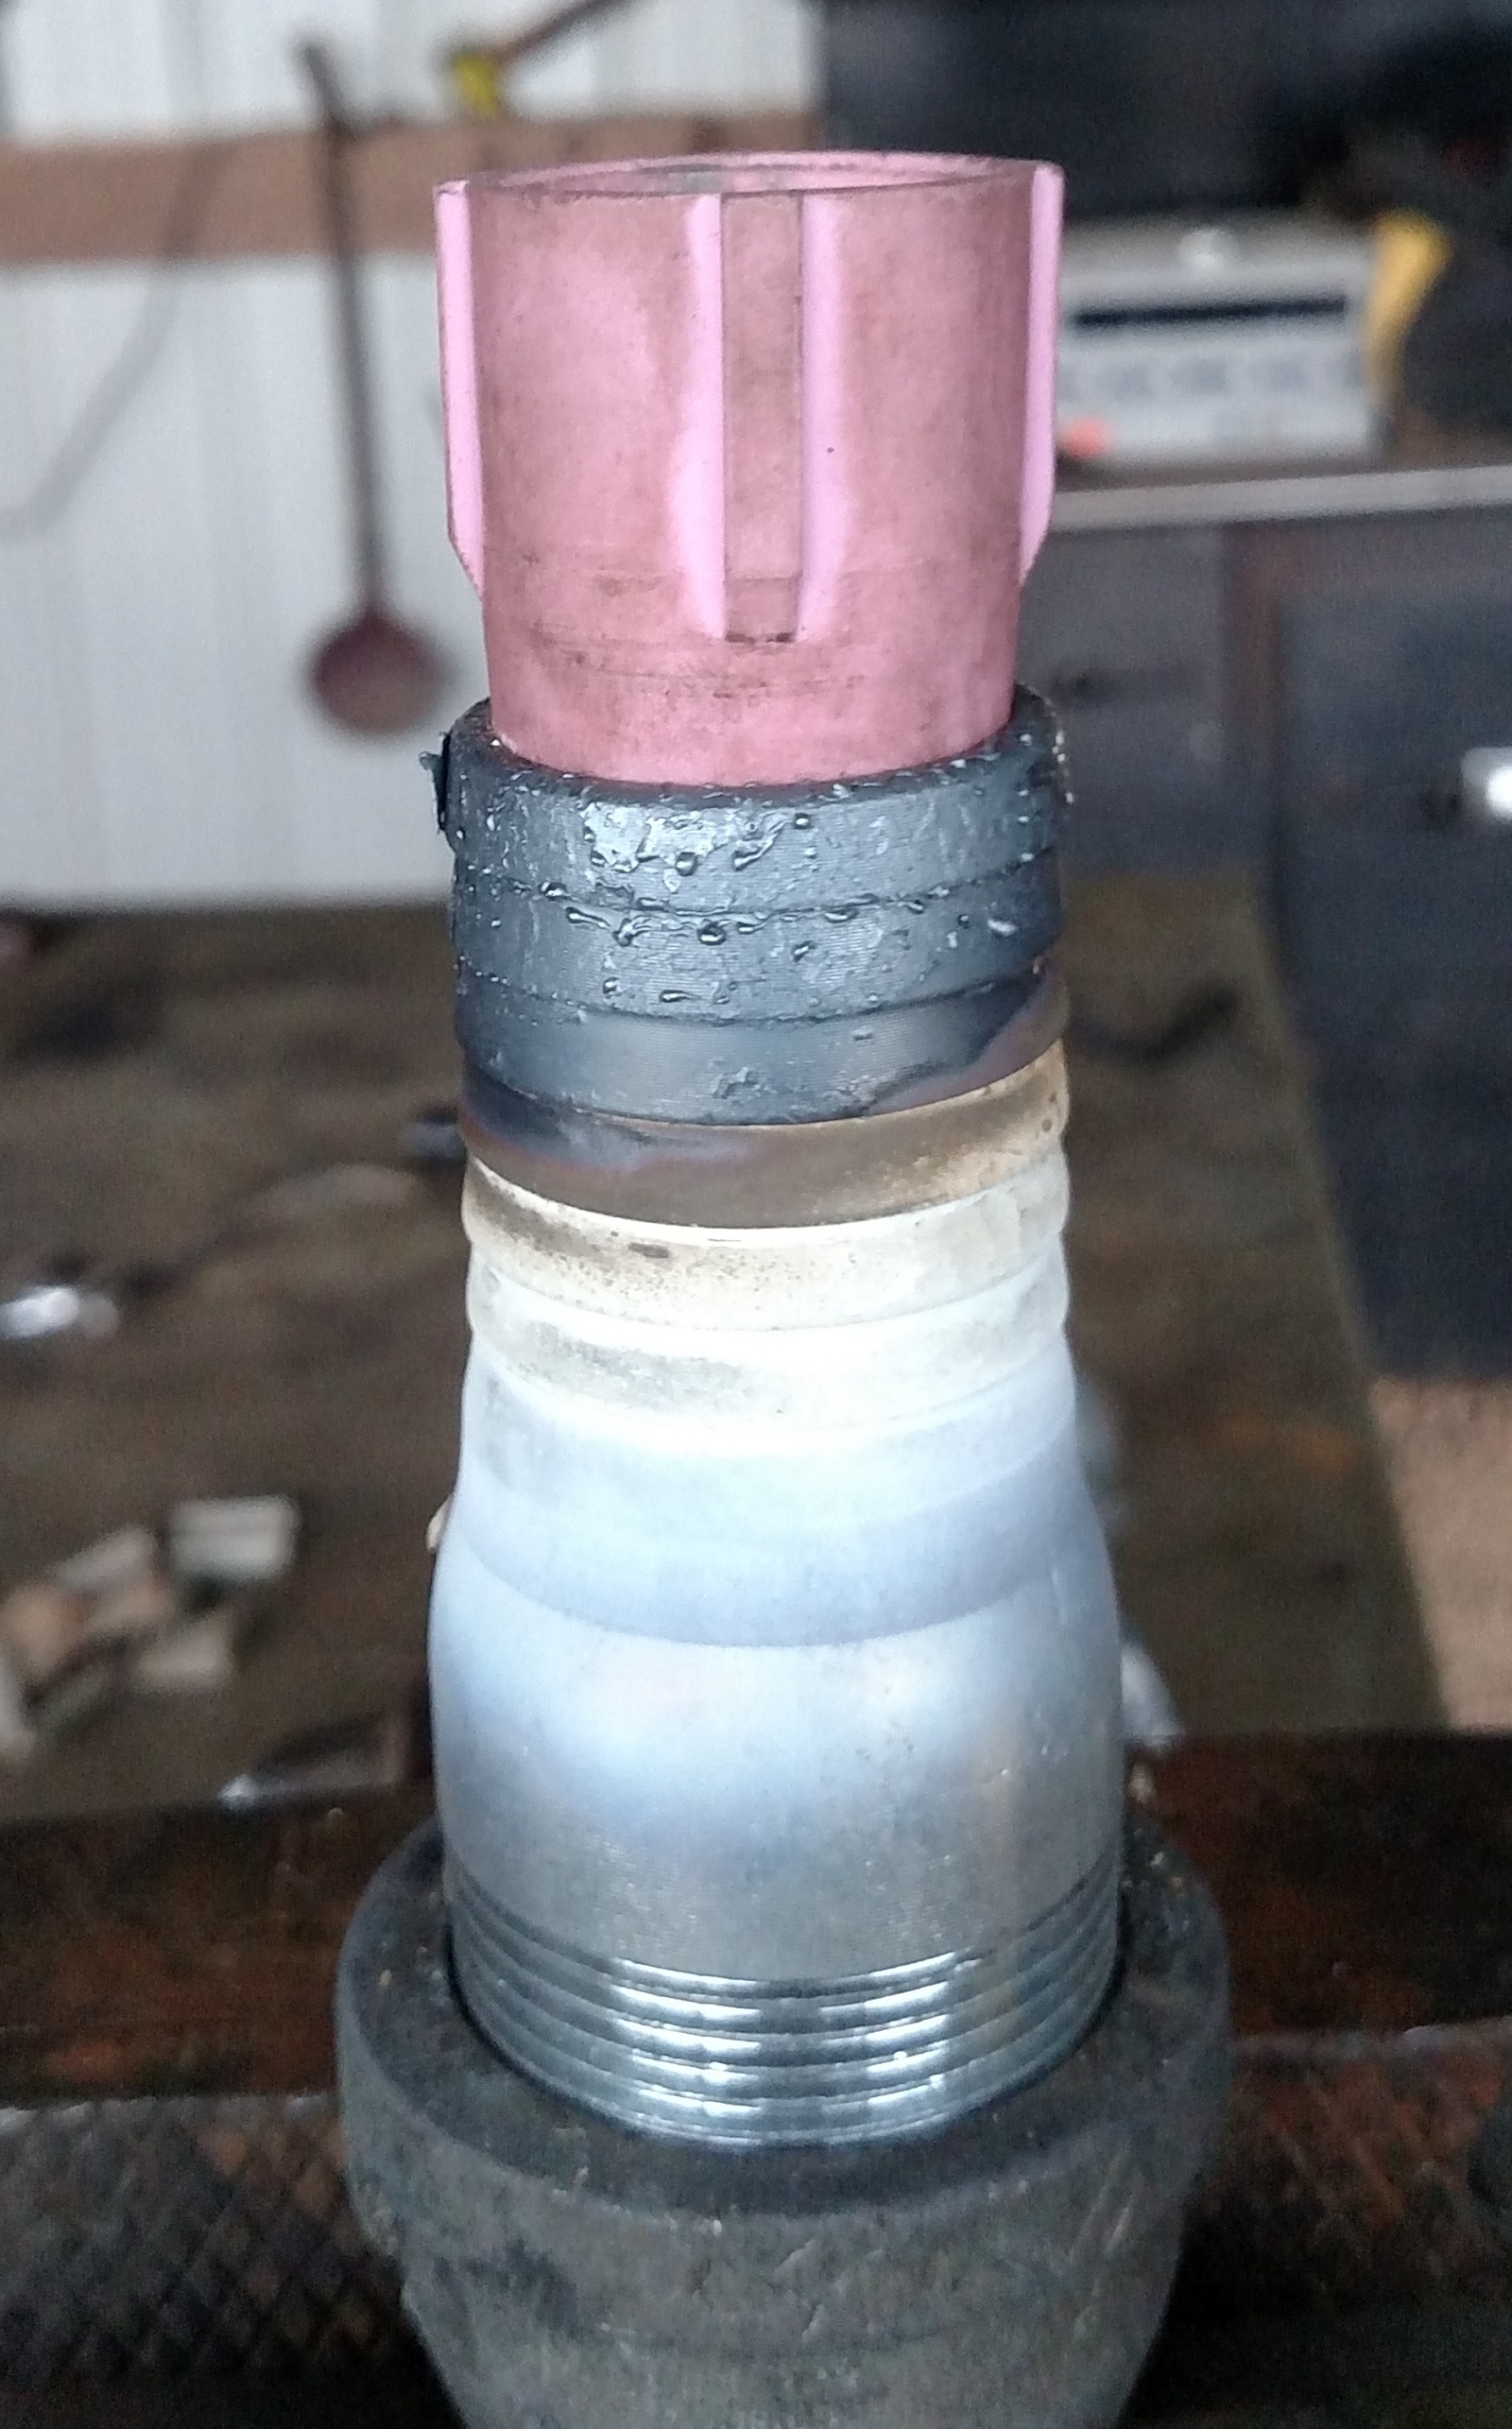
In the mean time, my TIG nozzles came in. I wouldn’t even go so far as to call this a prototype. We were just sitting there staring at the TIG nozzle, and seeing what would either fit inside it, or outisde it.
We found that it would almost slip into the end of this hoze barb. So, Hoss heated the hoze barb up to glowing red with a torch, and slipped the tig nozzle into it. It was still a tight fit We figured it might crack when the hoze barb cooled, but it looks like it held together.
Might try running this. But what will happen when the whole thing heats up? Will the TIG nozzle just fall out? Inquiring minds want to know.
Hi Kyle ,
yes hair line cracks also appeared on my tubes , I just decided in the end because of the cost of the tubes to move onto the tig nozzles .
It will be interesting to see if the nozzle holds into the hose barb, it would certainly make replacing the nozzles a lot easier sort of old one out new one in .
Dave
Looks brilliant Kyle , keep your eyes open for a small dust extractor and I think you will have one hell of a system .
I noticed you managed to get a hold of a truck load of 55 gallon drums and they should be useful for your projects , keep an eye out for some plastic drums as well so you can store a supply of charcoal in them for when its not possible to burn , I stored a lot of charcoal in steel drums once and the condensation from them was terrible .
Good morning Kyle and others. The slot´s width is that of a fine cuttinng grinder disc, we start wih this size and the length is going to progress on the assay of the process. I was lucky that the first time we cut made it and no more adjustements were made. But that´s the idea until you have it just right for your dimentions. My giant kiln is not ready yet, probably next week and I´ll post pictures. It´s good to notice that sense the gases come out of the kiln from the top, trough the tube and goes to the bottom, you have to put a chokeing sleeve on the tube over the slice to choke it, once the gases from wood cease to flow (no more fuel) and avoid the charcoal to reignite and turn to ash (look out for this or you will loose your charcoal in a very digusting manner, I ashure you will cuss). It´s simple, just slice a piece of pipe all along the middle of the pipe and you have 2 sleeves. Abner
Dave - Thanks for the warning. I had actually planned to use some of the steel lock-ring drums for charcoal storage. It would have never occurred to me that the charcoal would produce condensation inside a sealed drum. I would have assumed that it would be very dry, and that no more moisture could be driven out of it without heating it.
The same place I got the steel drums also had plastic drums. I had planned to go back and get a couple of those anyway. However, I don’t think they would be suitable for charcoal storage, because the lids are not removable (just have bungs).
I might just have to use 5 gallon buckets until I can come up with a better plan.