Hi Don
From where comes this beautiful small tank with a very practical locking mechanism?
You do not have a pressure relief valve on your generator?
Thierry
Hi Don
From where comes this beautiful small tank with a very practical locking mechanism?
You do not have a pressure relief valve on your generator?
Thierry
Hi Thierry
The tank was a gun powder container from the military and no I don’t have a puff back lid on this unit but I never had a puff back either. The governor and throttle linkage were not working right on the video. I have that fixed now and it starts right away and runs good now.
I saw that you tried to get on the hangout Friday night but I guess something was not working right for you because you did not stay long. Too bad, because it would have been nice to talk to you.
Don
Don
I do not speak English . I’m too slow for some direct conversation
Me too I 'd like to exchange more with you but I am not good at languages
A day I would follow the English course and I 'go to Argos salute you
Thierry
Kyle,
No need to reduce either side just place the valve between the T and the reactor inlet to control the amount of exhaust being drawn in by the suction at the air inlet.
Also, you may prefer to bypass the filter and go straight to the flare until the moisture is driven off. This will keep a lot of water out of the hses and filter media. I use a three-way valve for this diversion, but you could just hook the two ends of the hose together. When the moisture is gone and you get a flare, shut off the flare valve and reconnect the hoses to the filter. Restart the fan to purge the air and fill the system with gas.
Don’t forget to extinguish the flare by closing the flare valve before opening any part of the system. If you turn off the fan with the valve still open, the flame can travel down the hose. Very dangerous if the flame meets up with a gas and air mixture somewhere in the system. CO+O2+fire=Kaboom!
And the first time I did a few other things (grin), but I have to say that running a generator for the first time on wood gas is right up there with them. Smiles a mile wide. 
Details to follow.
Congratulations Kyle!
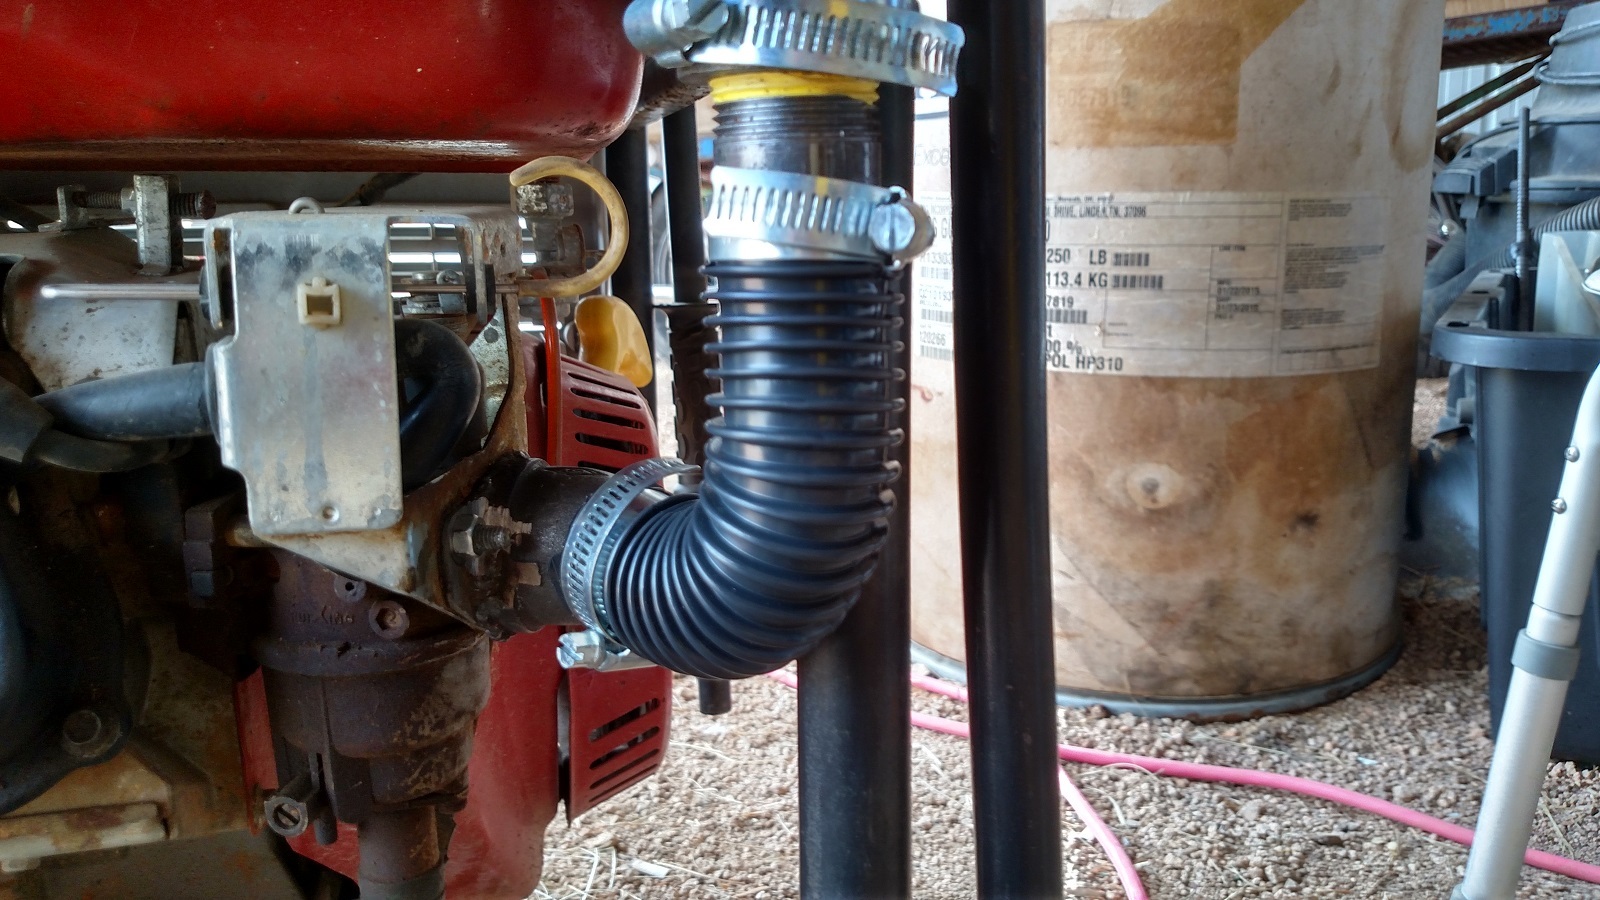
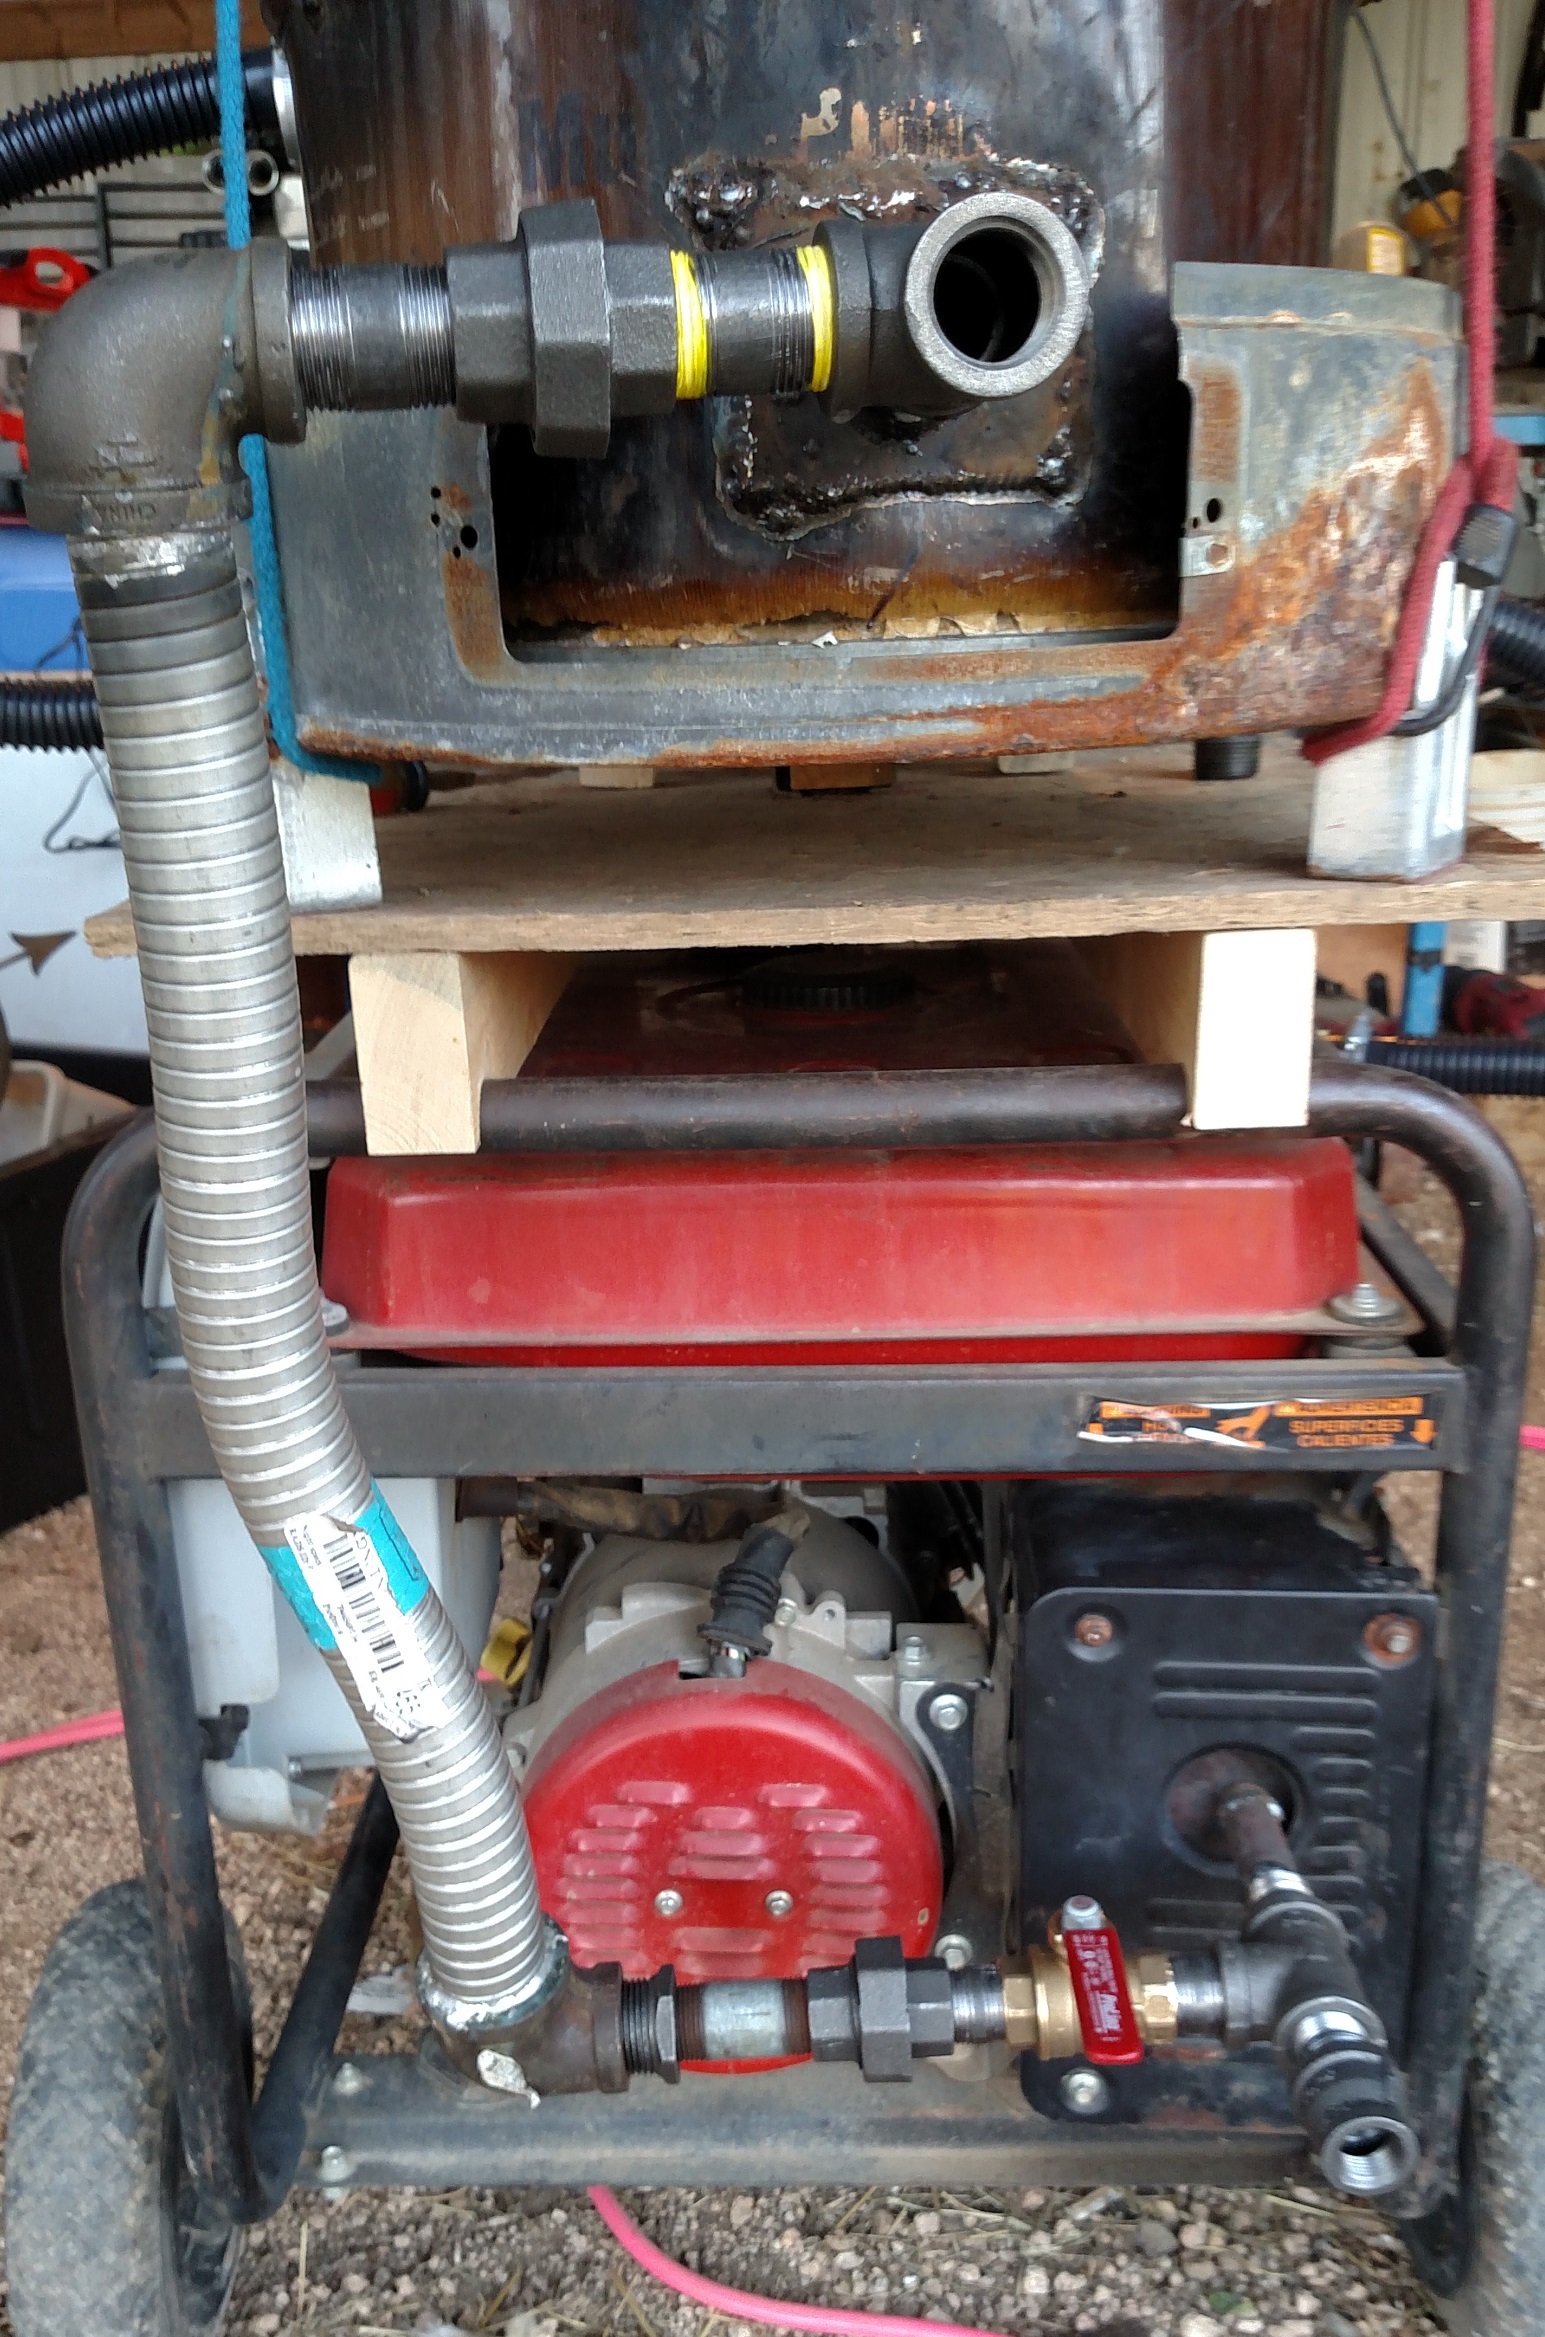
As I was saying this morning, I decided to change a few things up.
Here is the new carb. setup, to isolate it from vibration.
While I was at it, I shifted the rest of the assembly up higher, and added a longer pipe up to the flare can, to get it above the filter. Didn’t want to toast anything.
I also changed up the exhaust, by moving the valve to the return line, and adding a 3/4" to 1/2" reducer to create a little back pressure on the main exhaust exit.
Other than that, I pretty much spent the afternoon leak checking with a bottle of soapy water (using the blower in fwd/rev to pressurize various parts of the system), rechecking connections, and sturdying things up.
I found about 3 leaks.
The carb plate was leaking a little. I RTV’d it.
The Gamma Lid was still leaking. I just torqued down on it harder, and that stopped it.
The gas outlet from the top of the gasifier was leaking. I wrenched down the band clamp. (But I think I need to add some RTV or something, because I saw a whiff of smoke from there later on).
I was really just hoping to get to the point that I could flare it today. But the flare turned out to be a no-brainer. I just turned the blower on, opened the flare/intake valve, and stuck a torch in the gasifier air intake. The charcoal lit almost immediately, and a couple of minutes later, I could light a sustainable flame at the flare tube. I didn’t take a picture since you couldn’t really see the flame (but you could sure feel it).
Anyway, that went so smooth I figured, what the heck.
We cranked up the generator and let it run about 5 minutes on gasoline. On the best day, this thing is a major pain to start. Hoss and I have both exhausted ourselves taking turns yanking the rope in times past. Today, it started without too much trouble.
Given the ornery nature of the generator, we decided to try transitioning from gasoline to gas in real time.
We shut off the petrol valve, and used the air intake valve to regulate the transition.
We tried this a couple of times.
It would seem like it was working, but we would end up with the air intake valve all the way closed, and then the thing would die out.
Then, I remembered I had a can of ether (I know, don’t say it).
So, anyway, as you can imagine, we tried it again, and would give it a shot of ether whenever it started dying out This went on for a few minutes.
Finally, everything just smoothed out, and it was running under its own power.
The air valve was almost all the way closed (but not quite).
After a couple of minutes of quiet amazement, I dashed in the shop and grabbed a set of boom lights. Plugged them in, and turned them on. Not a huge load. But still 1000 watts. The generator barely noticed.
Played with the exhaust return valve a little bit. Toned the color down from blinding bright to red-orange.
Everything still ticking along.
A few people happened to show up about that time.
They were amazed, just like we were (30 seconds of fame).
Then, about 7 minutes into the run, something hiccuped, and it died out.
I would post a picture, but it just looks like the thing sitting there turned off. And you have already seen that. I took a short video with my phone. I will have to figure out how to post that.
Smiles all around.
PS: Somewhere in there, we pulled the petrol line completely loose, just to prove to our spectators (and ourselves) that the thing was really running on charcoal gas.
Hey Kyle, Thanks for the story. It brings back memories of the very first time I got an engine running on charcoal gas. Yep, very few people understand, but that is OK. Now you will start fine tuning the process and figuring out how to get it working better.
Congratulations!!!
Gary in PA
After about 10 minutes of jaw flapping about how awesome it was, we decided to try it again.
Now that we were “charcoal gas experts,” we figured it would go real smooth (or not work at all).
Started on petrol and made the transition to gas without any ether at all.
But that didn’t last.
It would start dying out, and we would have to give it a shot of ether.
Somewhere in there, we figured out that if we manually shook the gasifier, everything would smooth out for a little while.
This went on for about 9 minutes.
But the time between shakings seemed to get shorter, and we were getting more violent with our shakings.
I was keeping an eye on temps with an infrared thermometer.
The upper barrel never got over 95 degrees.
The lower flange got to about 500.
Anyway, it finally died out again, and we decided to call it a day.
But there is definitely something going on inside the gasifier.
Either the structure of the charcoal in the reactor is causing this (size, bridging, etc?), or maybe our little screen at the top is plugging.
We will have to do a post-mortem to see.
Thanks Gary.
Honestly, this is pretty amazing to me.
That it is possible to go from nothing to a (semi) working system in about 3 weeks of “piddle time.”
That is all thanks to you, and others on this forum, who have been so generous in sharing their knowledge.
I can’t imagine what it would take to get to this point by simple trial and error. I doubt that I would have ever had the patience.
Thanks to all of you who have blazed the path.
Congratulations Kyle, It is a great feeling that won’t leave you soon because you will have to show everyone you know. Then the worst part. You run out of charcoal. Making charcoal is no fun until you get to do it driving your truck on wood. Your hooked now , you will never look at fire the same again.Enjoy
Well done Kyle ,the small runs are always better than no runs at all and leaves you wanting more and more run times , I always smile when I see rain clouds coming over late afternoon, that’s my excuse to run outside and fire up the charcoal battery charger .
If I may suggest something that will save a lot of arm ache ,petrol and either , take off the pull start and use a socket and battery /electric drill to spin up the engine if you don’t have electric start on your machine , I find that turning it at speed you will never really need petrol or either to start it , in fact most times it starts easier on char gas than petrol .
Dave
Great idea Dave.
I have been wondering how I might put electric start on this thing, but it never occurred to me to just use a drill. I like it.
I wonder if some of you more experienced operators could suggest the likely causes for the behavior I was experiencing (generator would start running poorly, we would shake the gasifier barrel, and it would improve).
Here is a little more information on the charcoal and the setup.
When I made my charcoal processing rig, I just used the screens I had on hand. My coarse screen is one-half inch by one inch. My fine screen is one quarter inch.
Since then, I have not been able to find any one-eighth inch screen locally, but plan to order some.
Anyway, before the burn, we noticed that there was quite a bit of good looking charcoal in the dust bin, so we decided to screen it with a piece of screen door wire. I didn’t measure it, but I am certain it is smaller than an eighth of an inch.
The first five gallon bucket of charcoal I put in the gasifier did not contain any of the re-screened fines.
The second five gallon bucket had the fines mixed in.
We made a token effort to mix them up in the gasifier a little bit.
All total, the gasifier was loaded with about 9 gallons of charcoal, which filled it slightly less than 2/3 full.
I should also mention that the first bucket of charcoal was from my second batch of charcoal. This was the best batch. When grilling, the charcoal lights to a perfectly blue flame with no hint of any other color.
The 2nd bucket was from my first batch. When grilling, it lights to a flame with more yellow in it. It looks more like regular commercial lump charcoal when burning. I am guessing this means it still has some torified wood in it. We tried to pick through it fairly carefully before putting it in the grinder, and again when it came out of the grinder. I feel that we probably eliminated the vast majority of any torified wood, but some could have slipped through.
I have described the setup pretty thoroughly in previous posts.
About the only thing different about it is:
(1) the little filter screen I installed underneath the gasifier lid.
(2) The fact that I am using fiberglass batting for the filter.
On the first run, it took several minutes of ether spraying to get things running correctly. But once it was running correctly, we pretty much left it alone. We got so cocky that we walked away from it some distance to get some things. That is when it died out. The sweet spot for the air valve was about 7/8 closed.
On the second run 10 minutes later, it started easy, but we had more trouble achieving stability. We had a sustained period of two minutes where it ran pretty good (after the first time we shook the gasifier manually). During this period, we had the air valve nearly half open.
I always thought that when the charcoal goes down to about 1/2 full was when it would not run as well so I fill mine always to the top and refill when it gets down to 1/2 full. I also found that when the engine first starts to not start at wide open throttle but at 1/2 throttle or less for 15 to 30 seconds before full throttle works best for me.
Kyle it has been awhile since I have run mine but I seem to remember my first runs being similar. Started with and ran great on first attempt. Was a short run. When I tried again a short time latter it did not want to start so easy. I did like you shook it ,poke it and whatnot. I don’t think it helped. The air was damp and a bit of rain. I think high humidity was more of the problem than anything else. I think it was the short run and the high humidity putting moisture in my charcoal . Once the mower was ready to work and my runs were longer I had no more problems. I think it is very important o keep he charcoal dry if you live in a humid area and keep the tank full. I would fill it up and run it for an hour see if it don’t get better with time. I think short runs will build condensation in the char. longer will help keep it dry.
Hi Kyle for smaller screening take a second layer of 1/4 inch mesh and offset it from the first layer and nail it on you should get much less fines. For what’s wrong I would empty it and check for slagging at the nozzle or maybe nozzle meltdown or the screen closing off with fines. Good luck hunting it down…
I. Love the sequence you have described, and the thrill of the first flight and gasifier run
I have yet to build a simple fire, and my first efforts at making charcoal were mostly sabotaged by wet wood and experimentation
Back in late 70’s I built a modified MEN gasifier and mounted it on a 1965 1 ton GMC dualey with the V6 300ci Ran it for about 1000 miles and after the 3rd tar caused stuck valves bent push rods parked it
Before I found the DOW site I built a modified FEMA 8" gasifier and ran a 4kw generator. What a thrill
I am a 4000 hr VFR PILOT WITH A 1969 C172. And just retired after 47+ years with a large engineering co
Hi Kyle , did I read correctly that the first screen is a inch and a half by 1 inch , if so I would look for 3/4 inch mesh , if you are having to shake the gassifier to get good gas after a while it would probably mean you have rat holes , did your upper temps rise before you gave it a shaking ? anyway if you could get the largest bits of charcoal around the size of your thumbnail I found that runs the best also fill up your gassifier as much as you can to start with , they don’t like starting so well when they are only half full .
I would have a quick look inside before the next run and check all is well with your nozzle and have another quick check for air leaks , , in my experience its always one of these , air leak , fuel size or volume in tank or slagging round the nozzle .
Dave