Yup when the power goes out these are a great back up. I use mine all the time but yeah they need a bit of user input.
3 Likes
Chris brought up a good idea to use the gasifier for a controlled burn under the pan. There’s no way I could do it with my current design but I think it can be done. Maybe a year of thinking will inspire a design for next year.
Steve is right, it would take too much babysitting time with a rocket stove. When reducing sap, evaporator pan size is everything with volumes of sap. Maybe a rocket stove could be used when finishing the syrup like Michael Gibb did. I hope to evaporate 8 gallons per hour with my setup.
I will take @DanNH 's suggestion with the secondary air for this years production.
Pictures to follow.
4 Likes
Make sure to let us know how the secondary air works. I suspect it will save you alot of wood.
1 Like
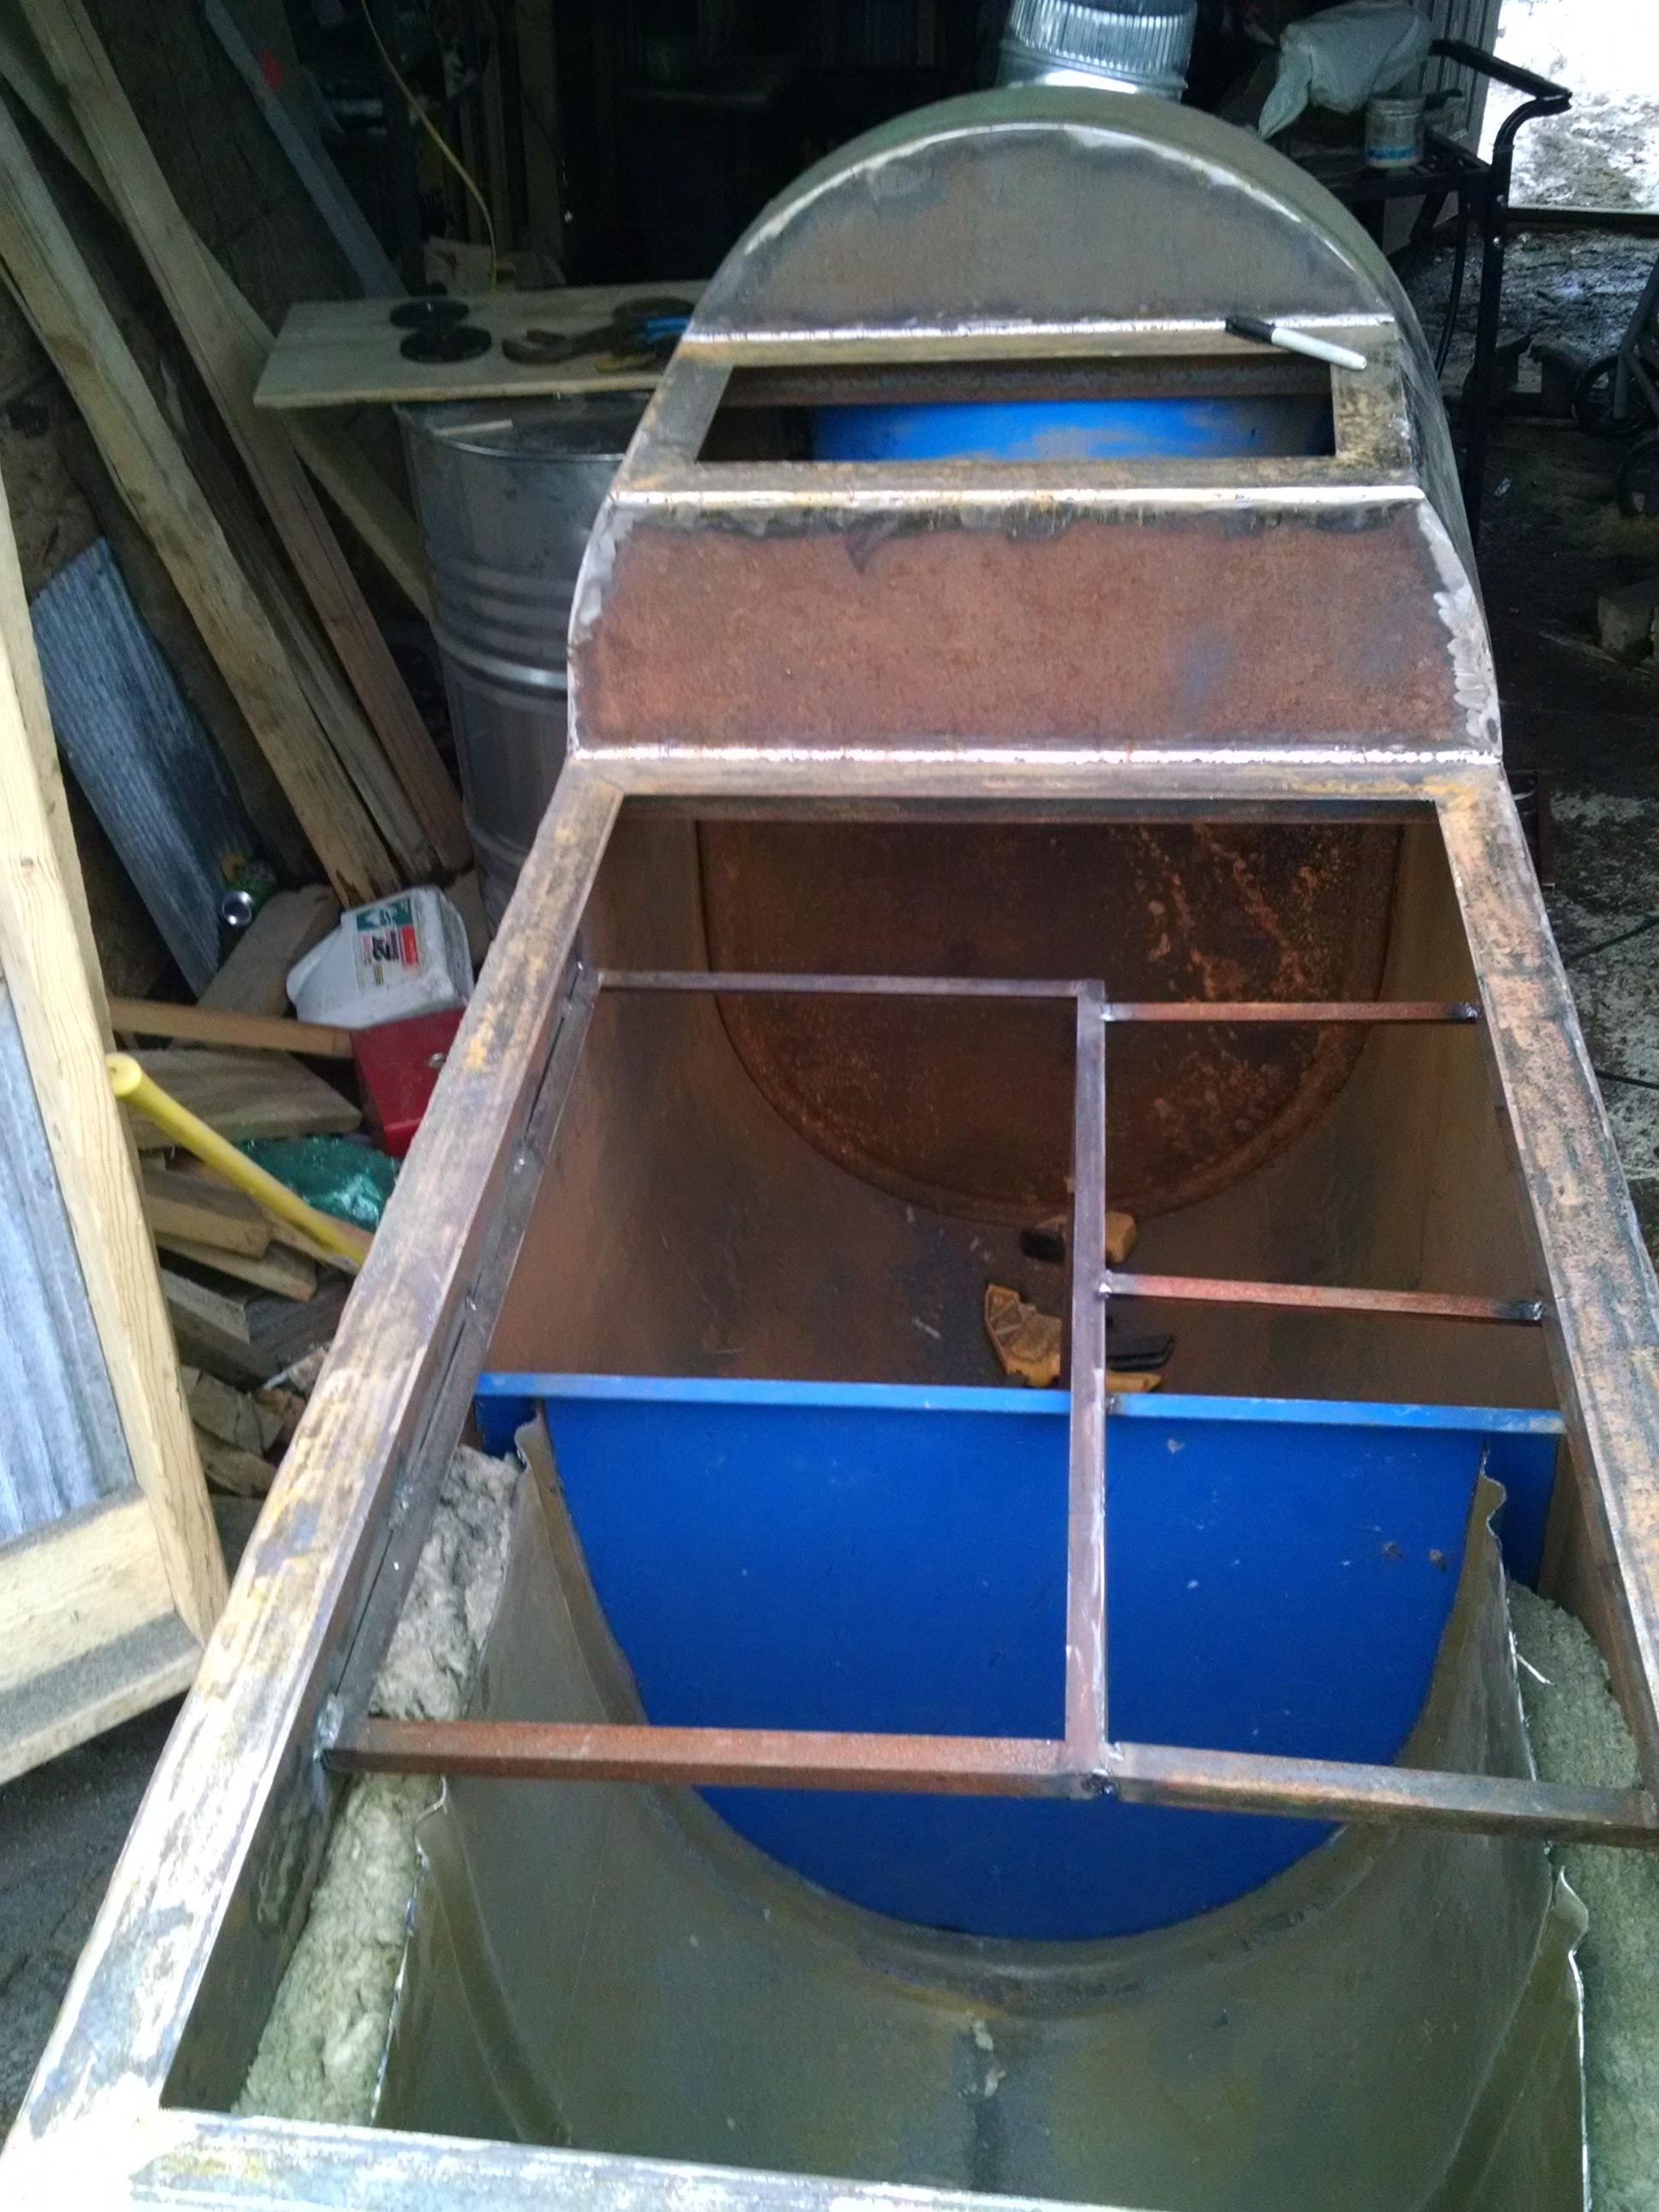
My progress so far.
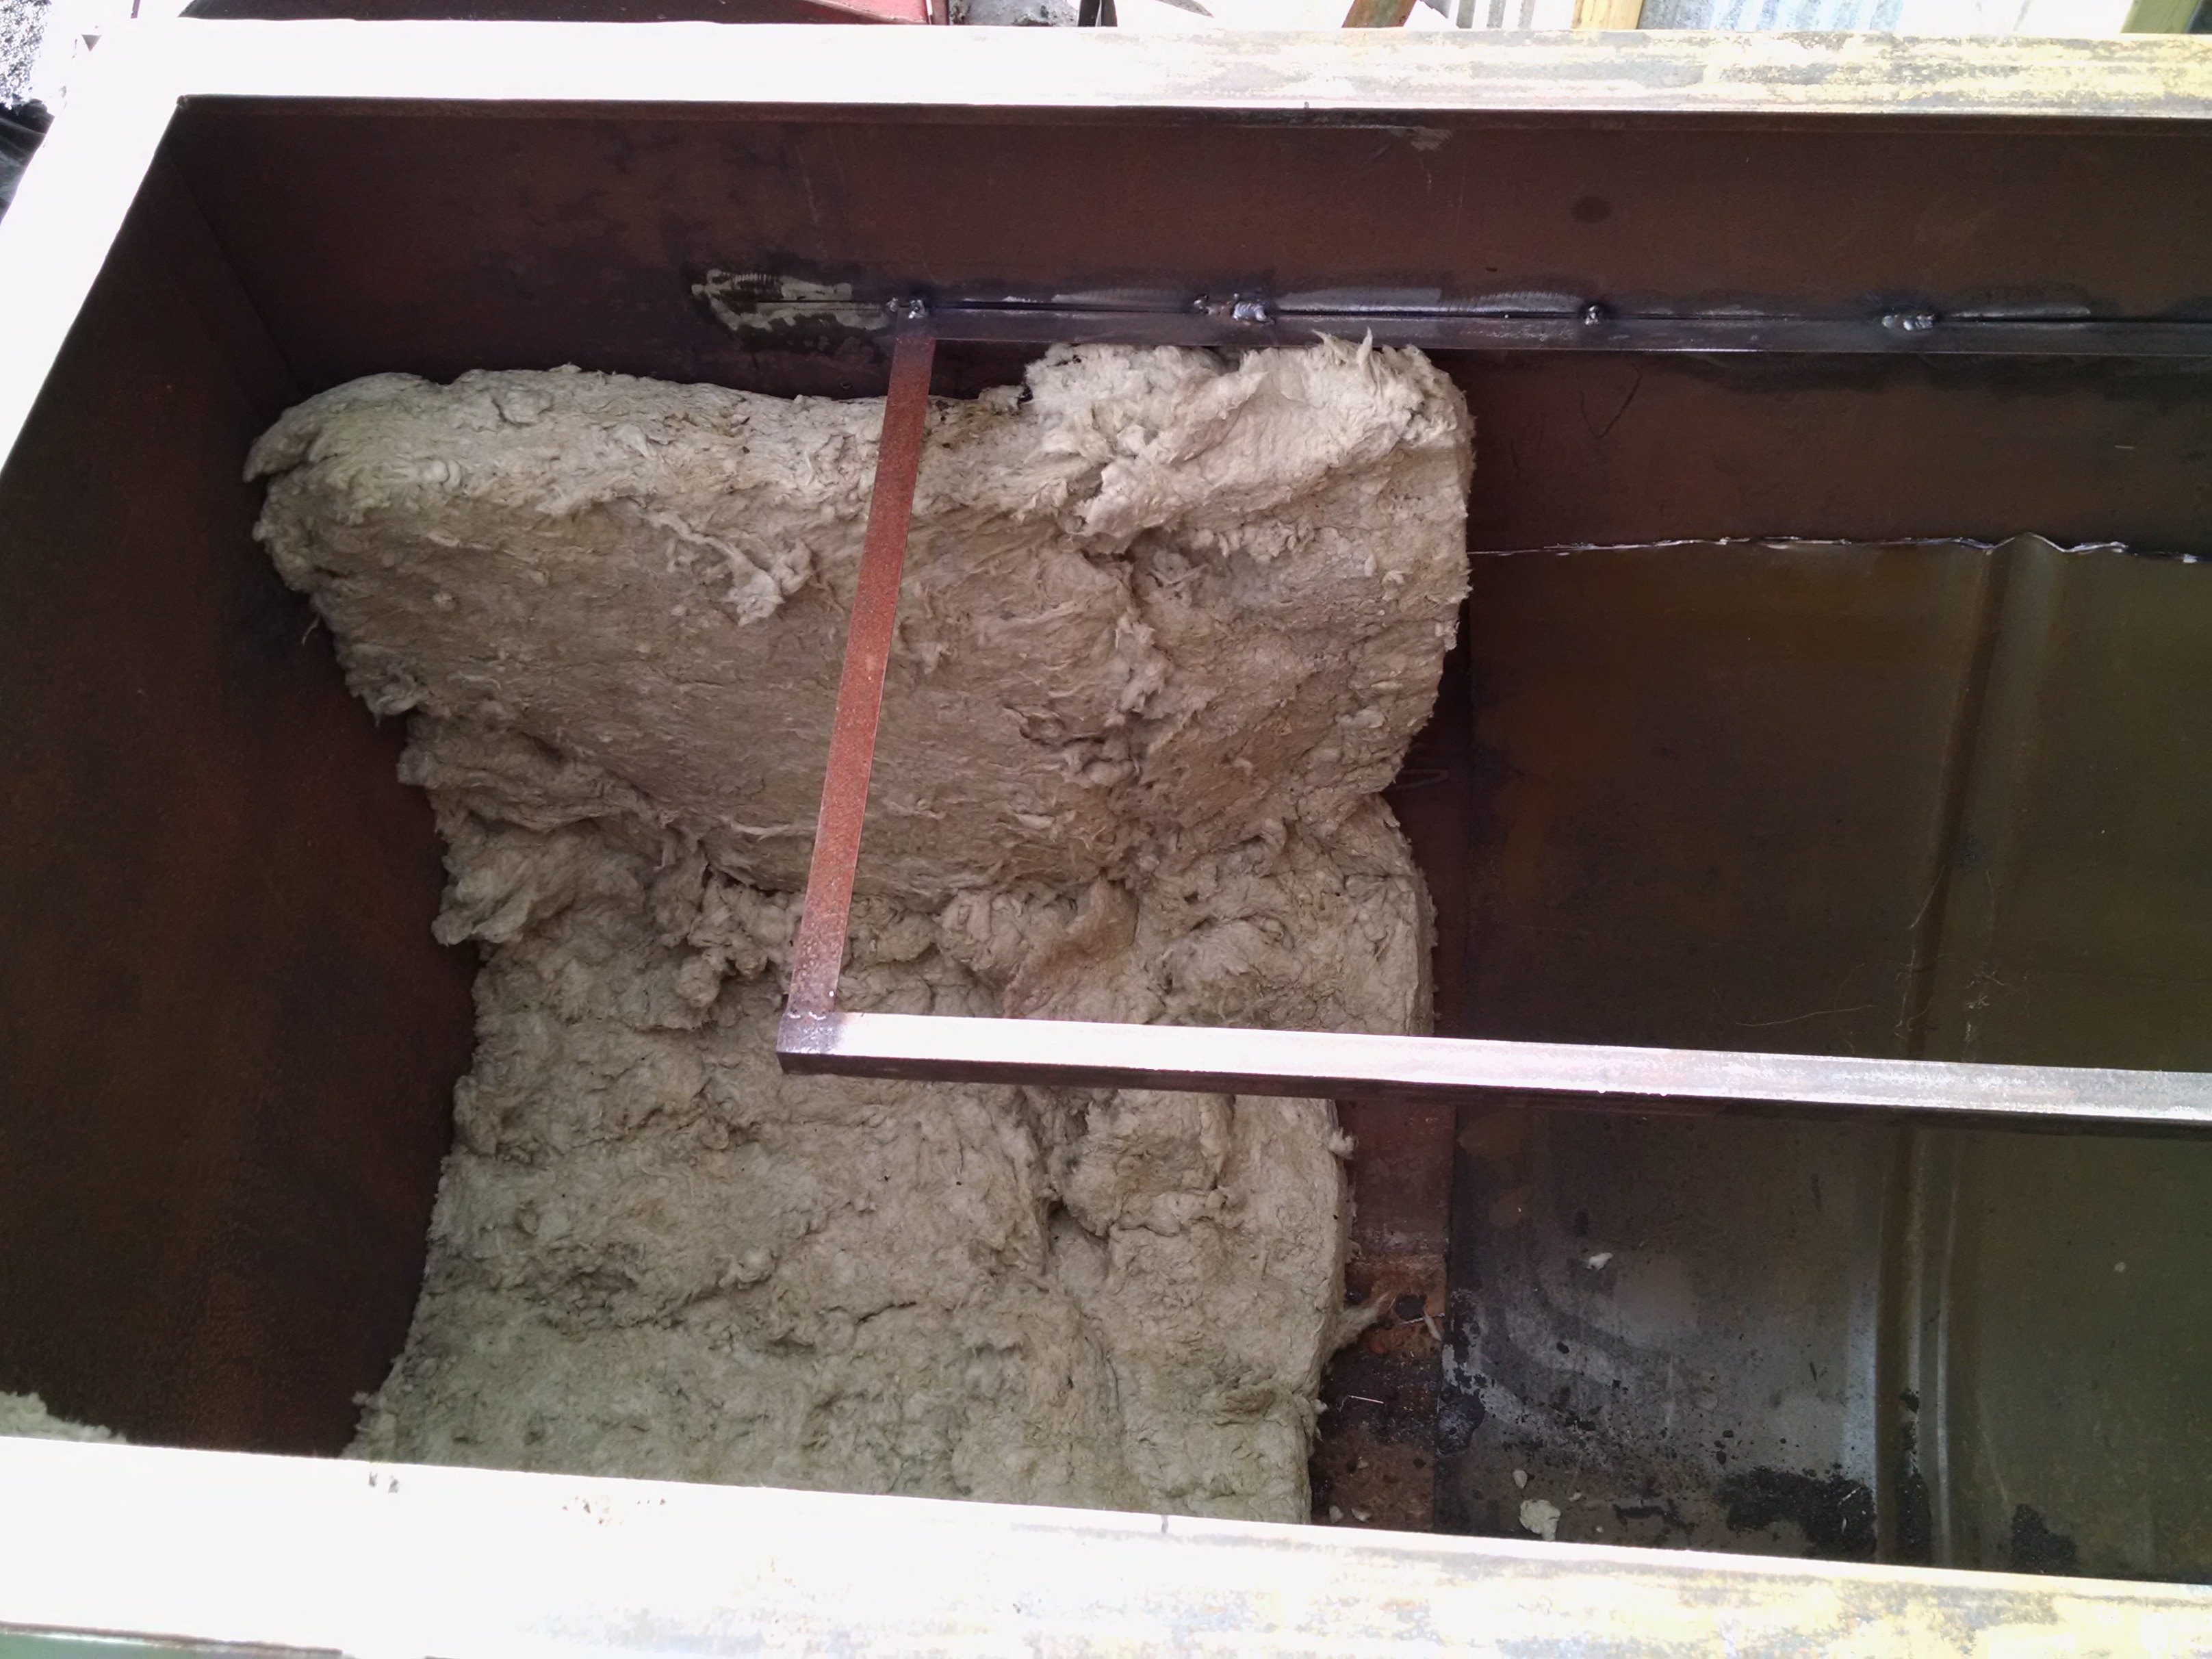
I used 16 penny nails to maintain space for the Rock wool. The firebox will also be line with firebrick.
I still need to add secondary air

10 Likes
Do you think the insulation will withstand the heat of the fireplace?
The ash or perlite would not it be more appropriate?
Thierry
It says rockwool has a temperature rating to 1200 degrees F. There will be a layer of ceramic Firebrick between the fire and the rockwool. So I’m hoping all will be good. I’m pretty new at this and always willing to learn by experience. I have about 2-4 weeks of burning. Most of it is able to be easily taken apart of which I will have to do to store the firebrick when I’m done. I too am curious where the weak spots are.
2 Likes
The rockwool will be fine with temp. Just try to minimize it’s exposure to ash because it will never clean up and will be dusty as you take the boiler apart.
I keep watching this wondering if you will get done in time to boil. We are a full month early here this year and the weather looks to be warming up too fast doesn’t look good here at all. I keep a close eye on maple syrup because adding it into my mix is on my long term project wish list.
1 Like
We had 55 degrees yesterday, rain in the afternoon and by 6:30 last night, it was snowing. By 11 PM the snow stopped and we have 3" of the white stuff. I looked at the forecast this morning and someone totally rewrote the script from yesterday. Looks like Mother Nature put off syruping for another week…but…that too can change by tomorrow.
4 Likes
Crazy but it is working for you buying the time you need good to hear that.
1 Like
Maple syrup season usually starts somewhere in mid March to mid April.
I have observed that rockwool becomes friable and loses flexibility when exposed to high heat. As long as it isn’t disturbed or expected to flex much it should be fine. There must be some threshold temperature where those changes occur, it withstands heat pretty well
1 Like
Ours is done. The trees budded already. yucky syrup.
I am not totally following your hearth design, usually you slope about 30 degrees up from the firebox for the hearth to the chimney. I thought there was a technical reason for it. It was explained to me at one point, but I have forgotten. 
If you put fluting in the pan, you will get more surface area, which will speed things up considerably. It isn’t -hard- but you do need a big metal brake to do it, and the old copper pans we had, they just soldered them together. They come apart or at least warp if there is nothing in the pans though.
You have to be careful to make sure when you shut it off there is enough sap in the pan to boil off what heat you have left in your bricks or else you will burn it.
It is trickier starting and stopping wood then it is fuel oil.
5 Likes
I have seen them angled up and I’m sure there’s reason. The whole tray is tack welded and can easily be adjusted if needed. When I get my evaporator pan back, I will fill it with water for a test run.
I wanted a fluted pan but a guy is bending and welding it up for me for syrup. I wasn’t about to push it. What I’m thinking of doing is buying a bunch of SS angle iron and welding them together and flute it that way. Or if production goes well this year, I can make another next year.
So you’re going to learn TIG welding next? 
Stainless MIG is possible but you need the tri-mix gas, and special wire.
Honestly I’d just get the metal formed at a shop with a brake. It won’t take long or cost much. Or build your own brake, if you’re so inclined…
1 Like
The goal is to learn how to TIG but I do have the wire and straight Argon for welding SS. Either way, if I fluted the pans, the ends need to be welded. TIG would be a better weld I imagine.
In my experience stainless will weld with ordinary rod / wire, I guess it alloys. For non critical welds not sure how much it matters.
Regular wire on SS will hold a joint, but it will rust. Bill is doing food grade welding, which needs to be pure SS and very smooth for easy cleaning. TIG is your best option but MIG works too.
Bill, I’m not sure what all the best gas mixes are, I always heard tri-mix for stainless. Here’s LIncoln-Electric:
Short-circuiting transfer welds on stainless steel made with a shielding gas of 90% He, 7-1/2% A, 2-1/2% CO2 show good corrosion resistance and coalescence.
1 Like
It is 61 here today. Very not normally. I think if the pan comes back and will work at all I would just focus on getting it into production you can refine it next year. Better to run what you have then to miss a short season.
3 Likes
I made a SS evaporator pan years ago. With brake bends and wire welding from the outside, plus the alloying, I haven’t had significant issues with corrosion or rough edges. I know that’s a crude approach, and not up to standards, but it’s workable.
In making another I would certainly corrugate the bottom, both for strength and heat exchange.
1 Like
Yeah, I really don’t know what I’m doing, just putting together how I understand it should be done.
Please if you see something that should be changed, say so.
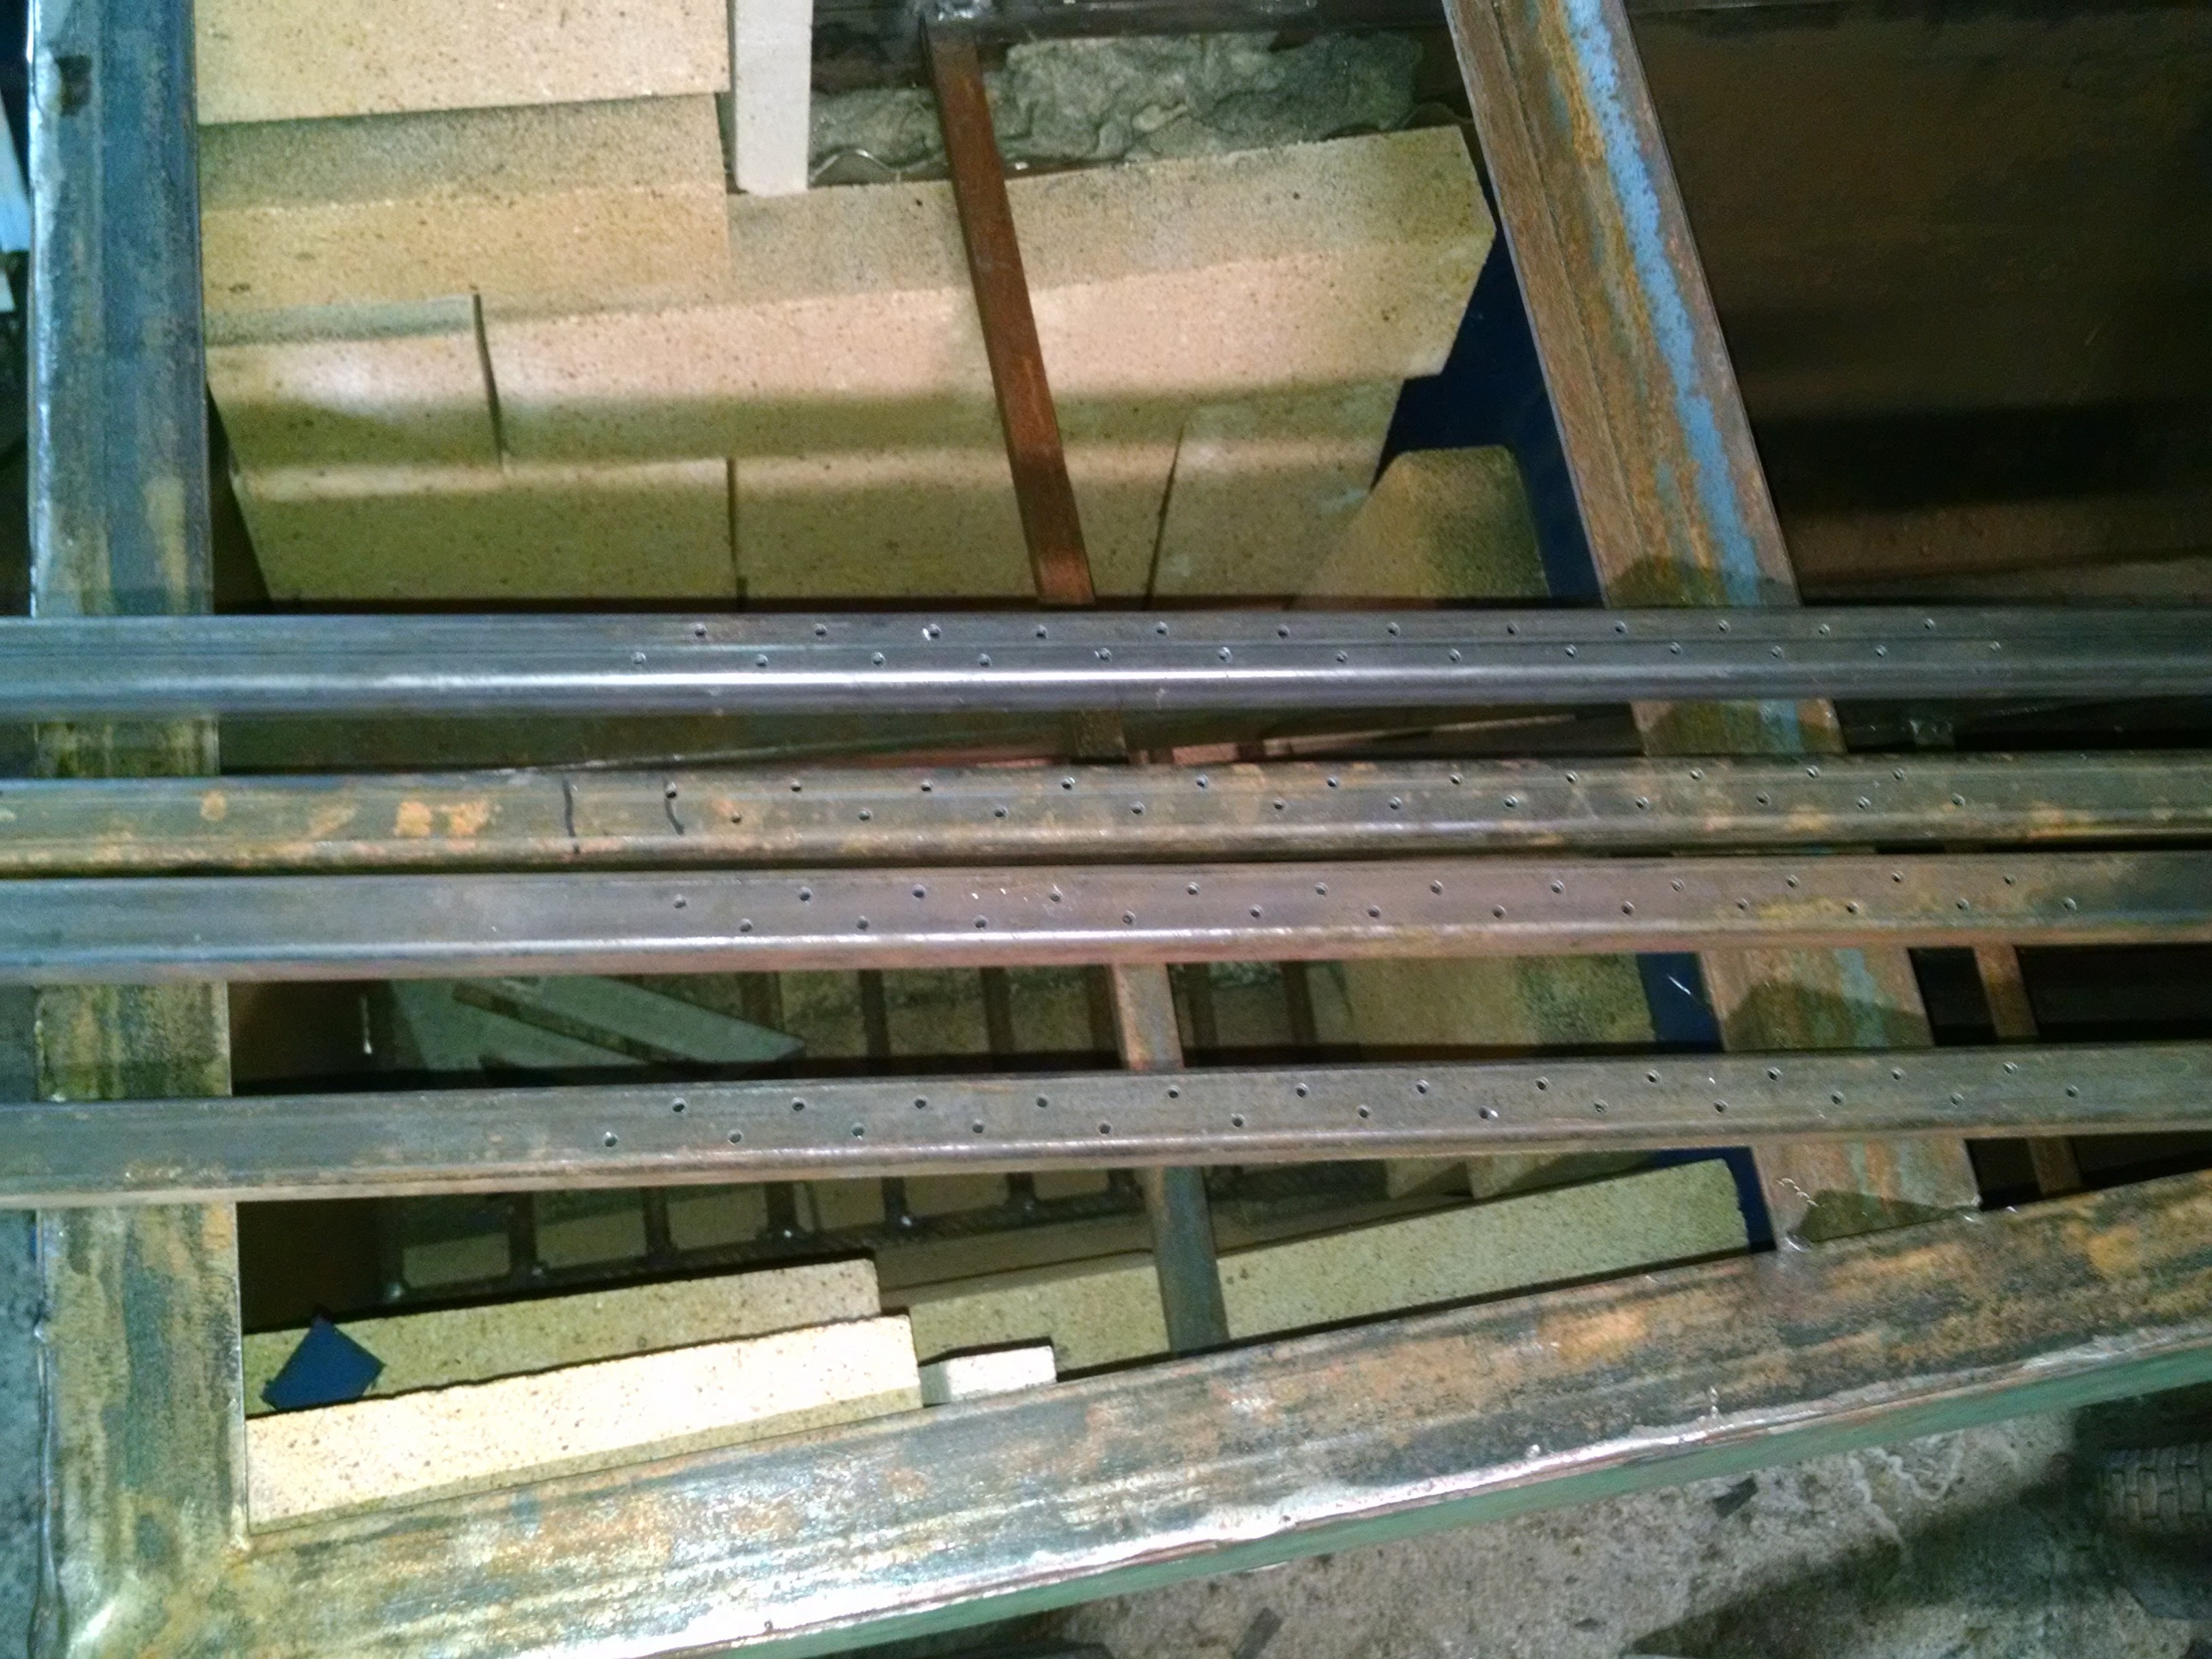
I put secondary air through the 1½" square tube and brought four 1" tubes back through the firebox with a bunch of ⅛" holes for the air to come out of.
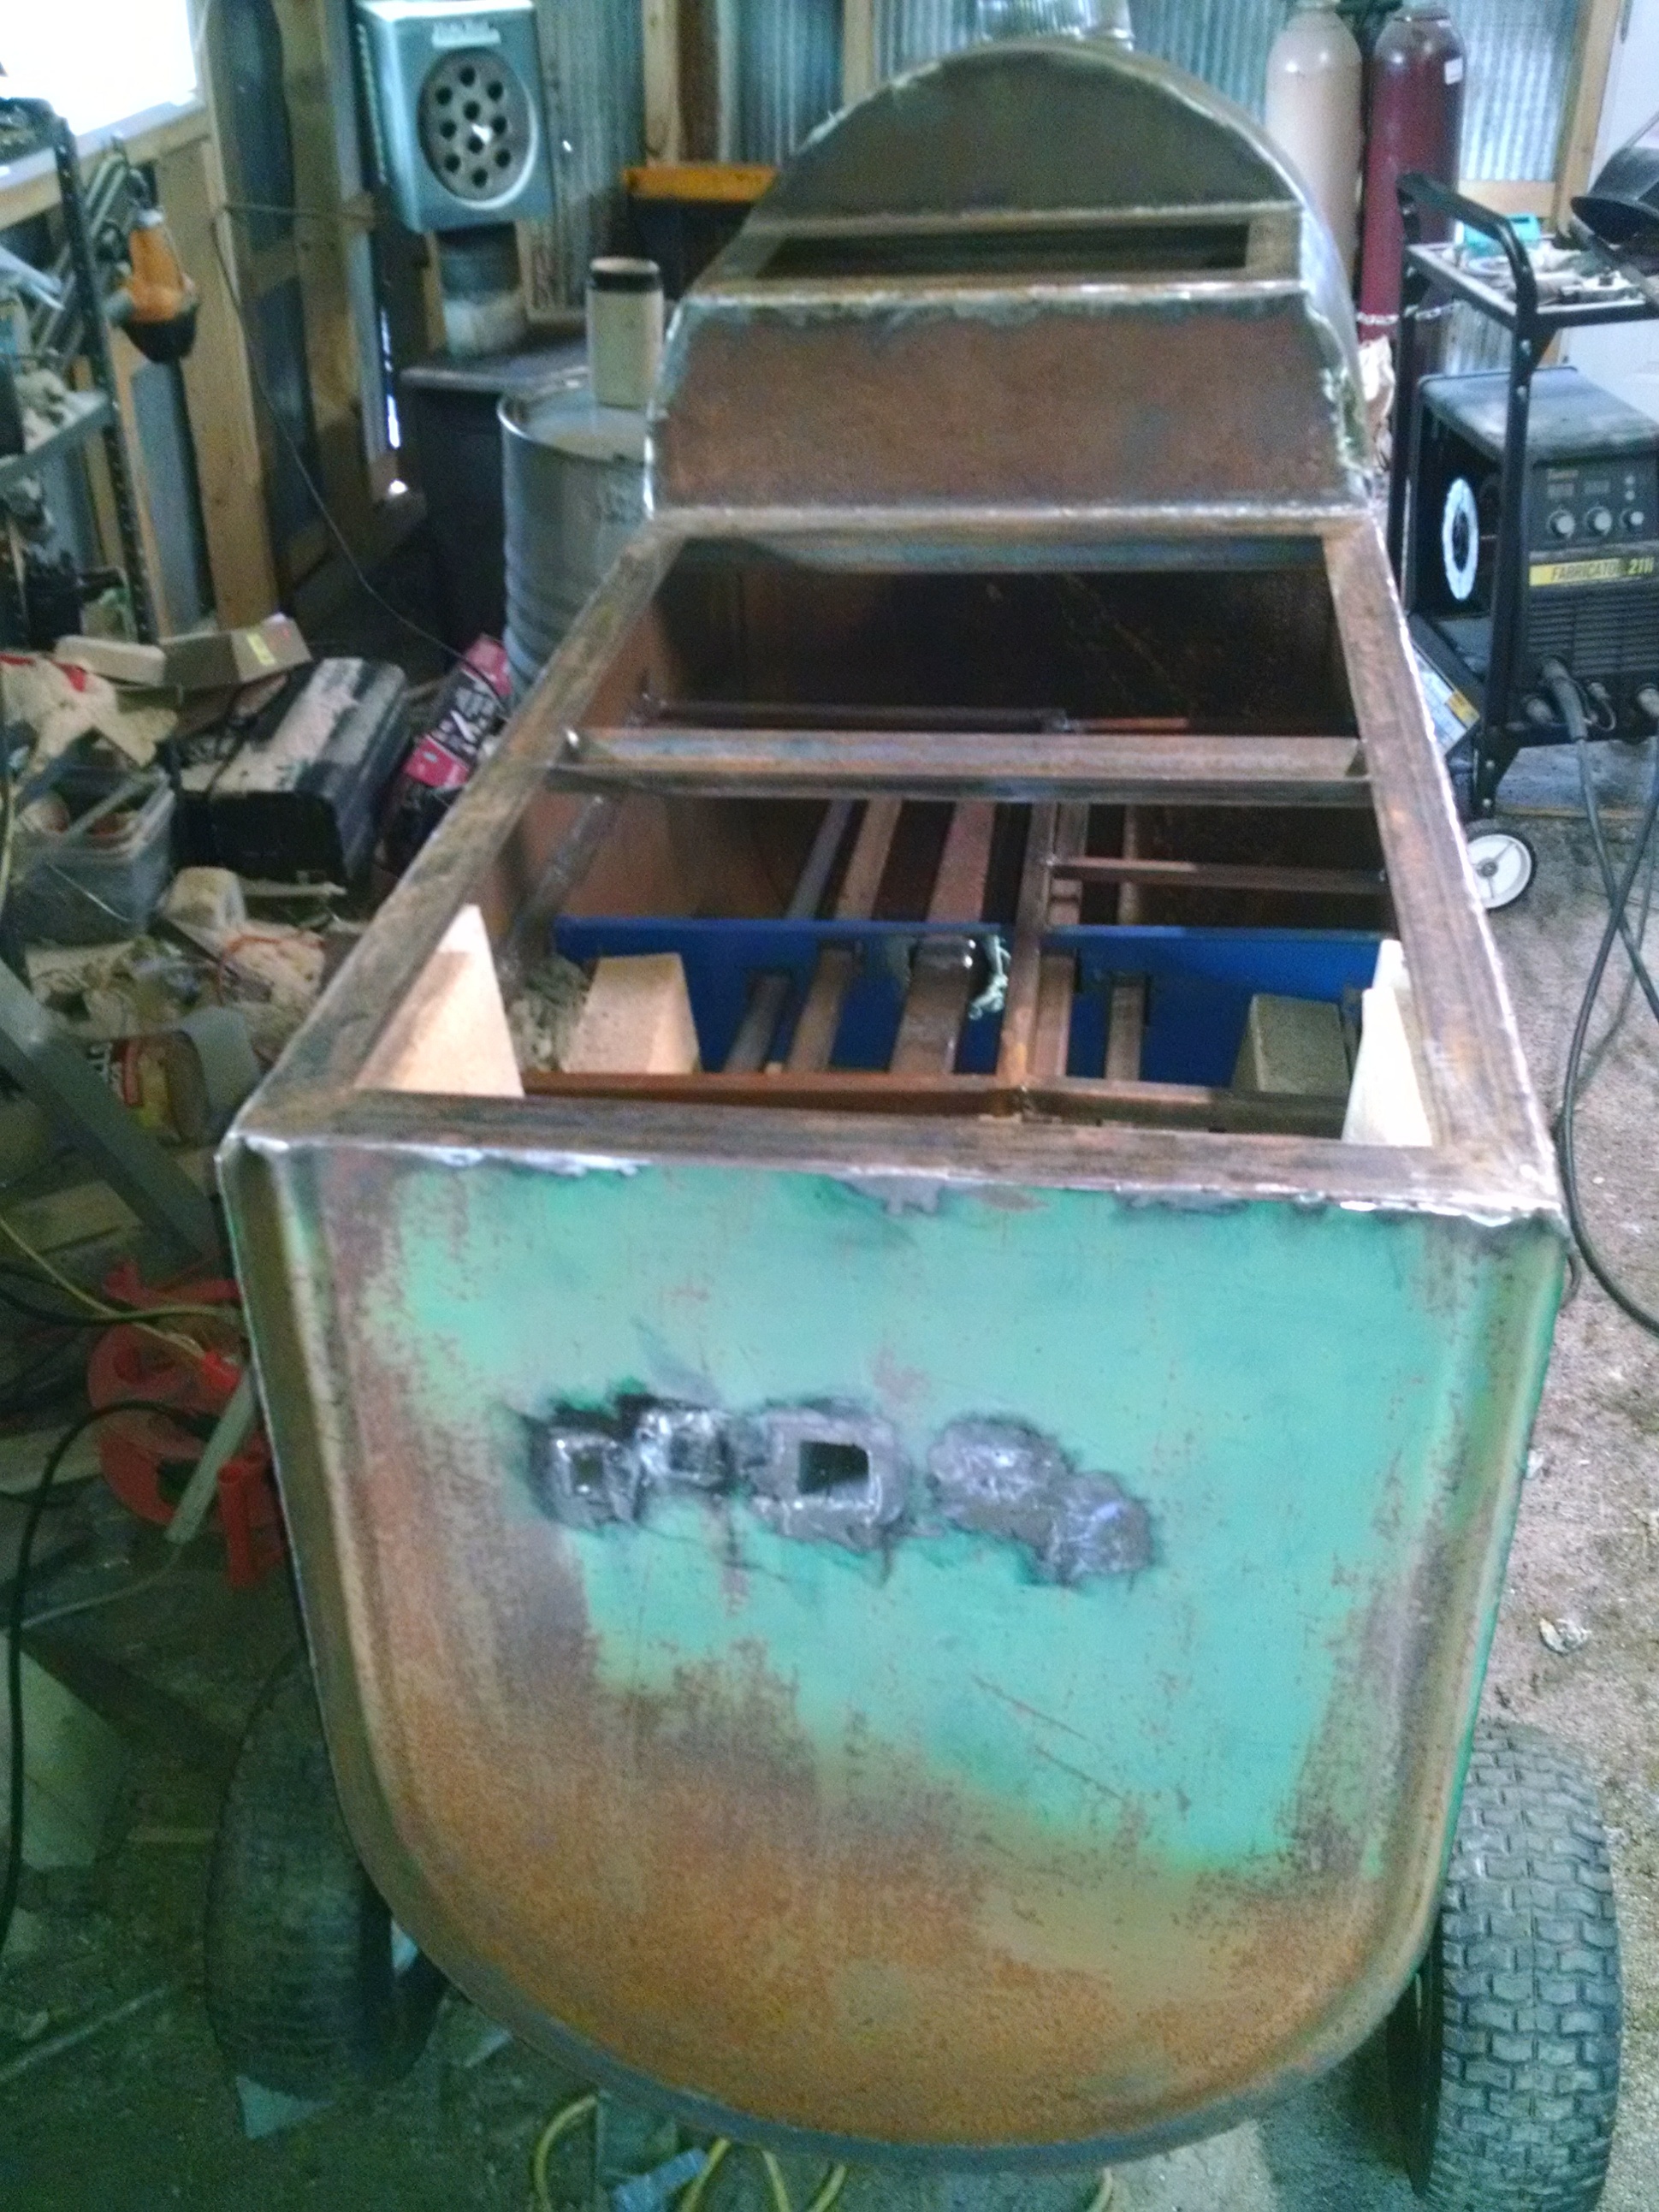
Tomorrow I will make a door and vents
4 Likes