Let me start by saying what a wonderful resource this forum is. I only discovered gasification a few months ago, and after an inadequate amount of reading I purchased Ben Peterson’s book and was gathering materials to begin a build following his schematics; a fairly expensive, involved project. After coming here to hopefully find answers to some questions I had, and reading a good deal more, I’m instead going to begin building one of Gary Gilmore’s Simple Fire units (hopefully this weekend). Most of the parts have arrived; I only have to stop by a supply house to pick up a steel coupling and some valves. However, I had a few questions:
1.) Will stepping down to 3/4" for valves have an appreciable impact on flow?
2.) Additionally, what about stepping down to 3/4" for the nozzle tip? The pdf suggests a 1" nipple, but I’m fairly keen on the alumina oxide TIG tips some fellows have been using to mitigate oxidation and slag buildup.
(Edit) 3.) The plans say to have the inlet 3" from the floor of the vessel. Is that 3" to the center of the inlet, or 3" between the bottom of the inlet and the bottom of the vessel?
For reference, I plan to use this initial build to power a 13hp, 7250w Predator brand generator, at most.
Hi Marshal,
Welcome. I don’t pretend to be a great brain in gasification, but I will say its not that hard to just get an engine running.
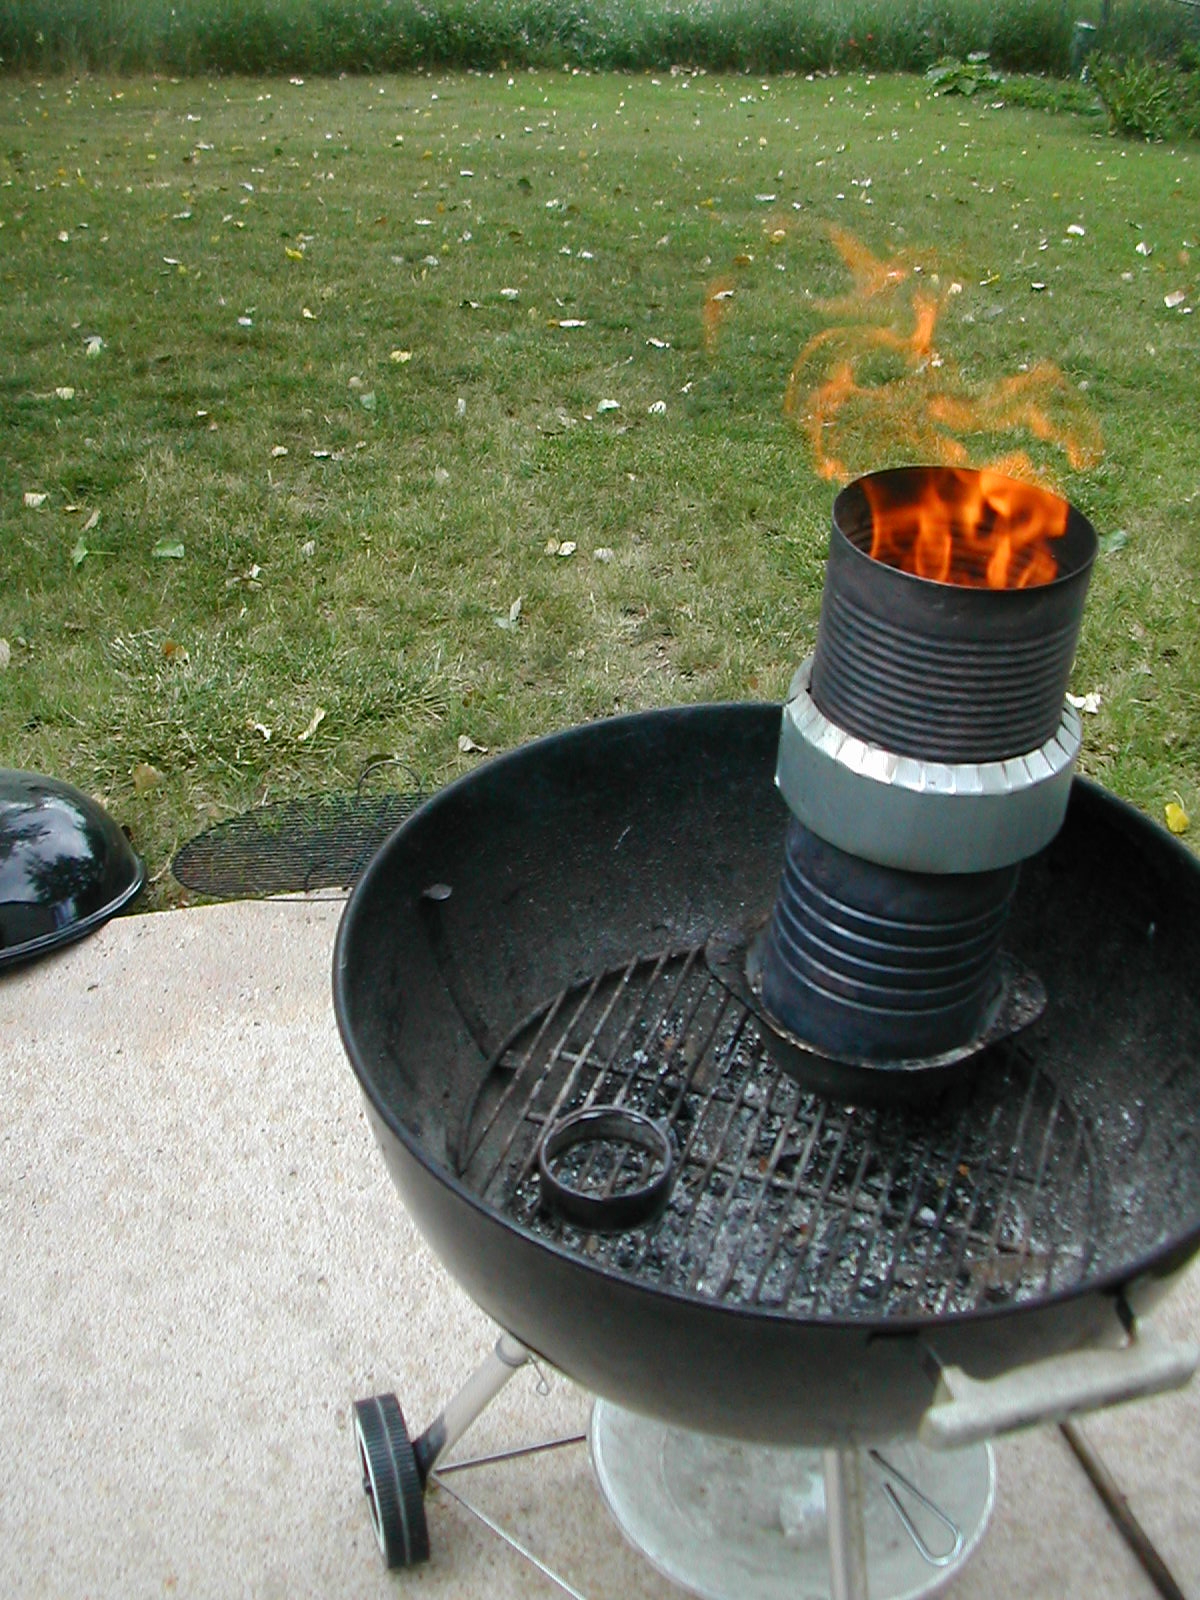
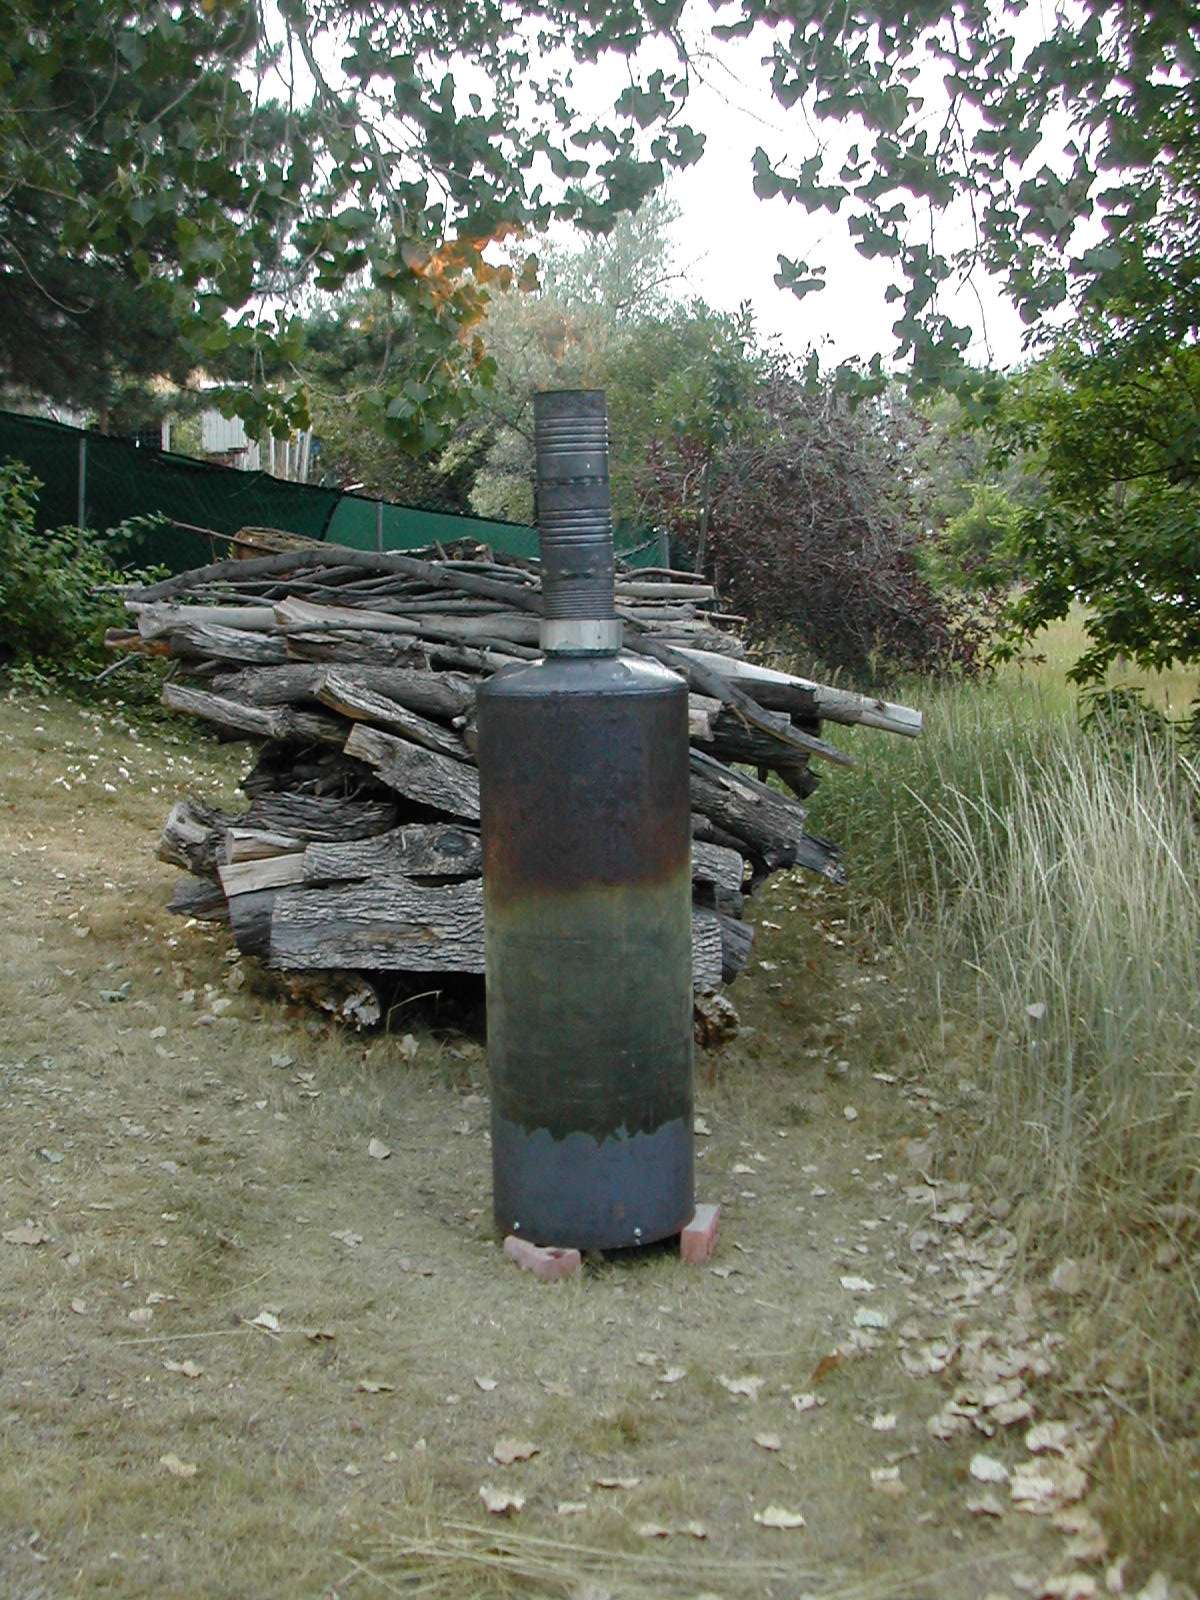
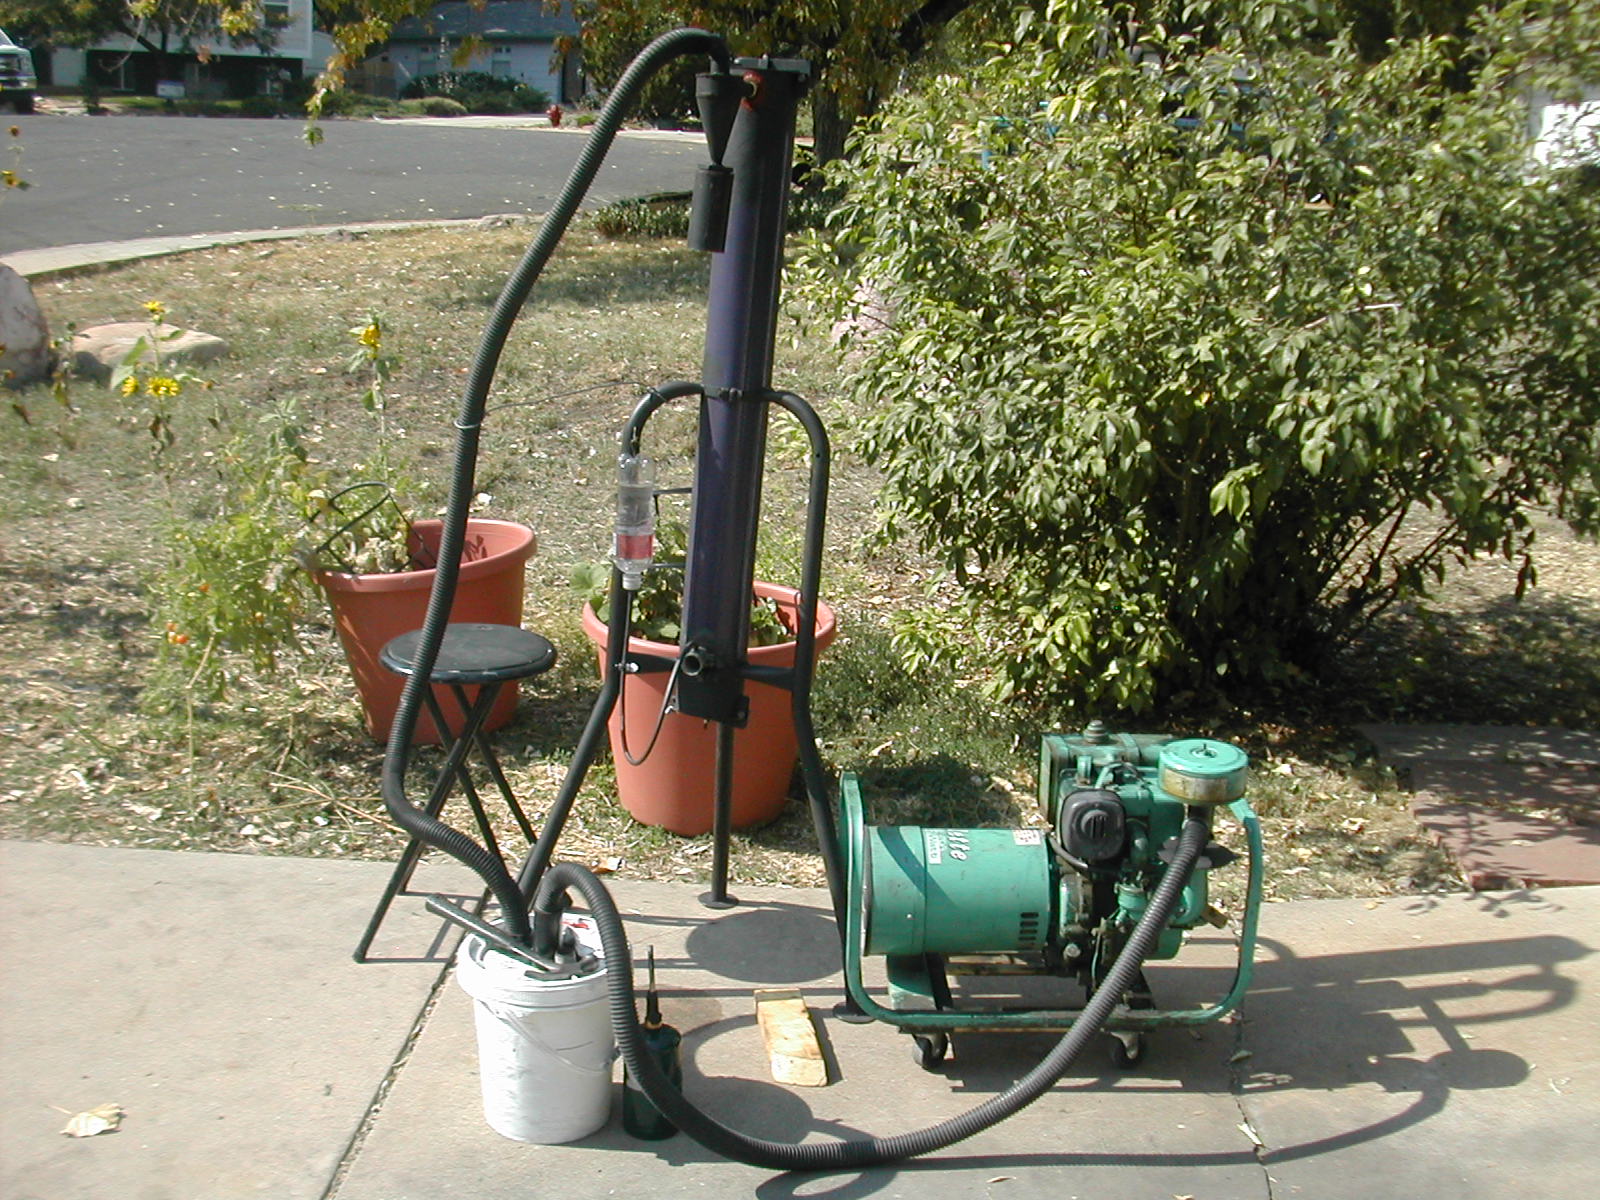
I have this ancient Gillette 3000 watt generator. I finally made something out of an old pipe.
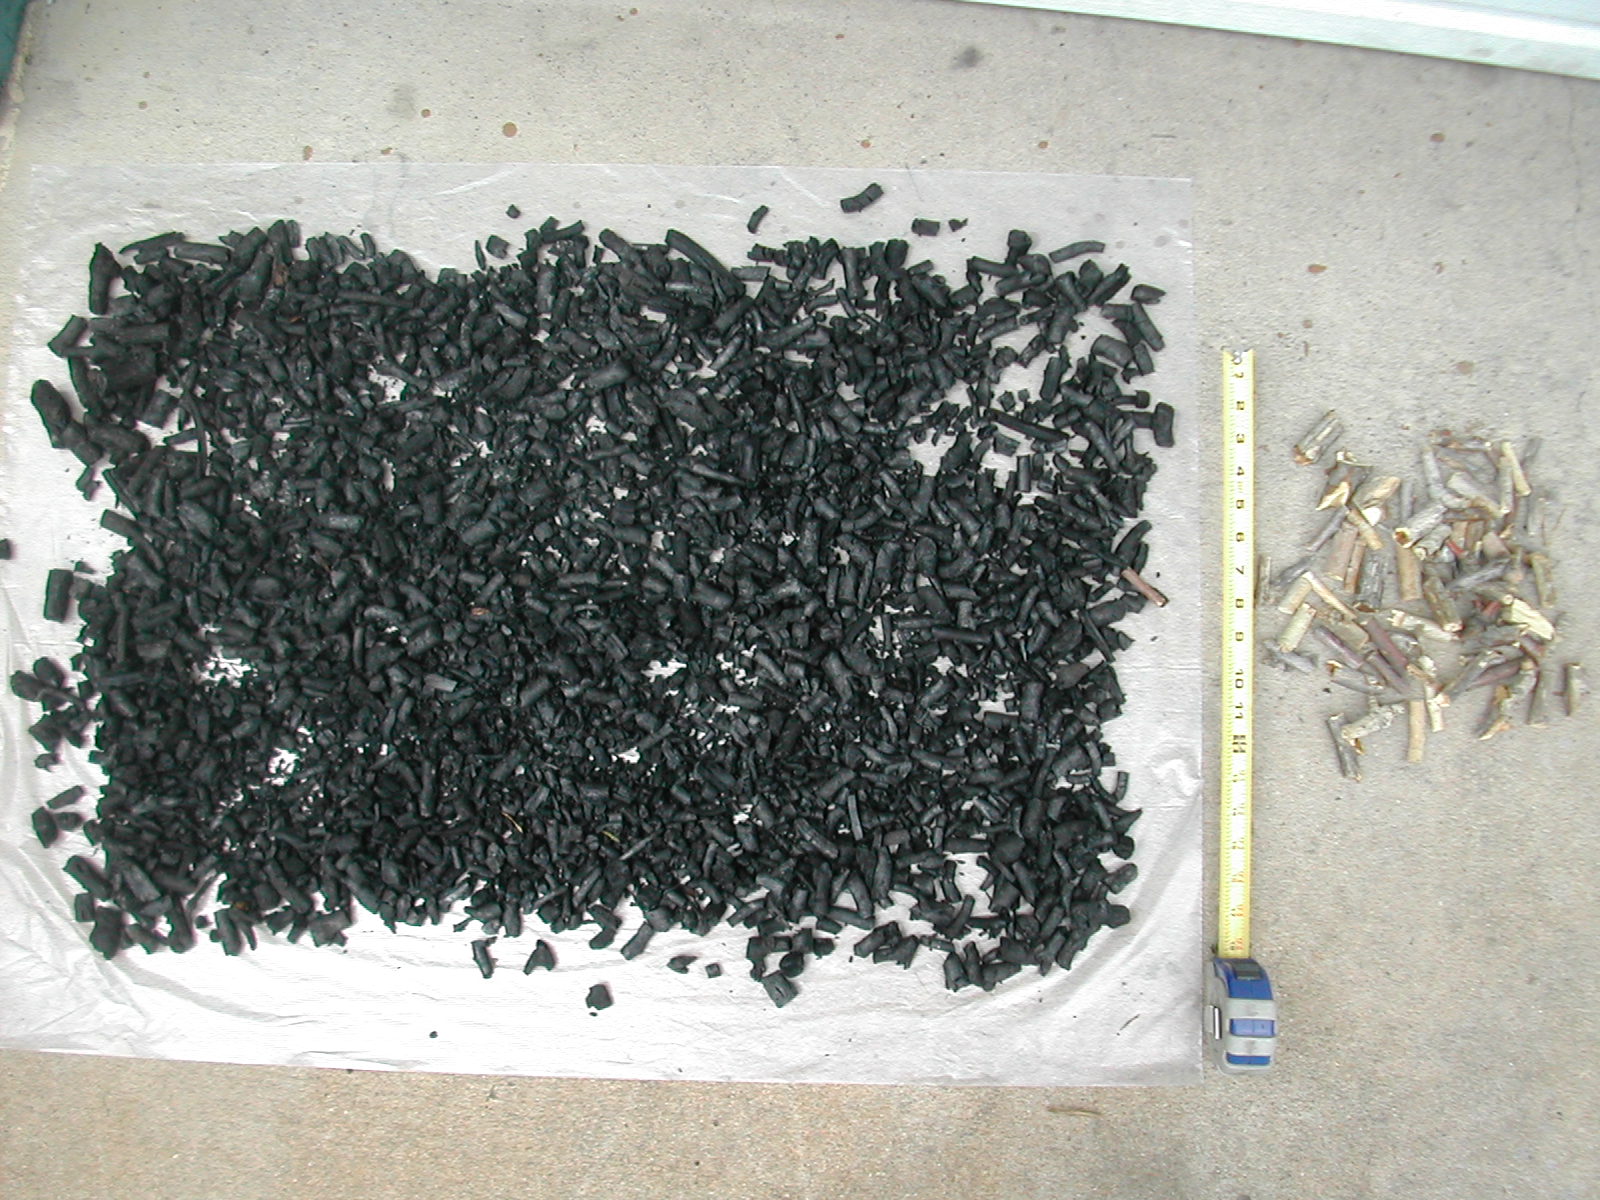
The one thing I did right was learn to make good charcoal first. My neighbor has a decripit old apple tree that he said I could have all the dead stuff from just for cutting it off and getting rid of it. So I started making charcoal for my barbque. I make pretty good charcoal if I do say so myself. I have learned to make and use TLUDs. The first time I went and stupid lit it from the bottom. Then I went back and read where it said Top Lit Up Draft. Duh. The main thing is these things need is DRY wood. Not hard to find here in Colorado, but people in other climates seem to have more difficulty.
Rindert
Yeah, charcoal production and processing is something I’m still trying to lay the groundwork for. I’ve ordered two drums, one 30 gal and one 50 gal, with which I plan to make a charcoal retort. The last major hurdle on my way to producing gas is building a grinder/mill similar to others posted on this forum.
The decision I made was to NOT grind charcoal. Much too dusty. I don’t want to breathe it. I cut my wood chunks to produce appropriate sized charcoal. I’m in process to make a wood chunker that will produce small chunks to be turned into charcoal and eventually larger ones to go in my wood gasifier for my pickup truck.
Rindert
I too, no longer grind charcoal. I get free hardwood chips from a tree trimming company. I screen them between 1 inch and 3/8 inch screens. Solar/air dry them on a rack with a screen shelf and a sheet of plastic on top of the rack. Turn them into charcoal in a water tank TLUD with a variable speed air supply. The water tank pivots on a central rod for easy tipping to empty charcoal.
I have a grinder but I never use it I only ever use my screen setup. The maple cabenet scraps I cook into charcoal almost always ends up being the right size. It you grind charcoal be sure to wear a good (cartridge style) breathing mask. Like others have said it is very dusty.
Nobody answered any of his questions. I would if I knew the answers. About charcoal. I have made over almost two 55 gallons barrels full in the last month just by throwing it in a barrel will a hole in the bottom side and just keep filling the barrel. Only smokes for a minute or so when you throw in a new bunch of wood. As for grinding. I wait for a good breeze to carry away the dust. When I’m sifting it I put a box fan along side me to blow away the dust. Mainly don’t overcomplicate things. I have that area pretty well covered.
Good Morning TomH.
MarshallM has not been given specific answers because he is fudging.
When you use another fellows published information; you hare off the exprences lined out trail at your own risks.
So . . . O.K. #1. YES going down from 1" to 3/4" will make a difference. He wished to gas fuel supply a LARGER loaded engine than GaryG typically uses. Expect slower coming up to good gasifing heat. Expect even much more than a typical 1/2 power loss as compared to gasoline. #2, YES going down from a 1" nozzle to a 3/4" nozzle will make differences. See above.
Alumina oxide tips HAS NOT prevented slag building up. Read the latest on the charcoal systems nozzles findings. Read all of the working and in-building charcoal efforts currently active and all of their responses.
Be keen all you want . . that is wishful thinking. Gasification does not respond well to wishful thinking. Just does not listen, eh.
#3. I do not know. Ha! I have only limited charcoal experiences. I’ve never had enough of the proper hardwoods to make durable, handleably wood charcoals. Much of want I’ve made in the past gets stolen by my wife for her yard BBQ grill.
Wait for GaryG to respond on in. PM him thru the DOW directly.
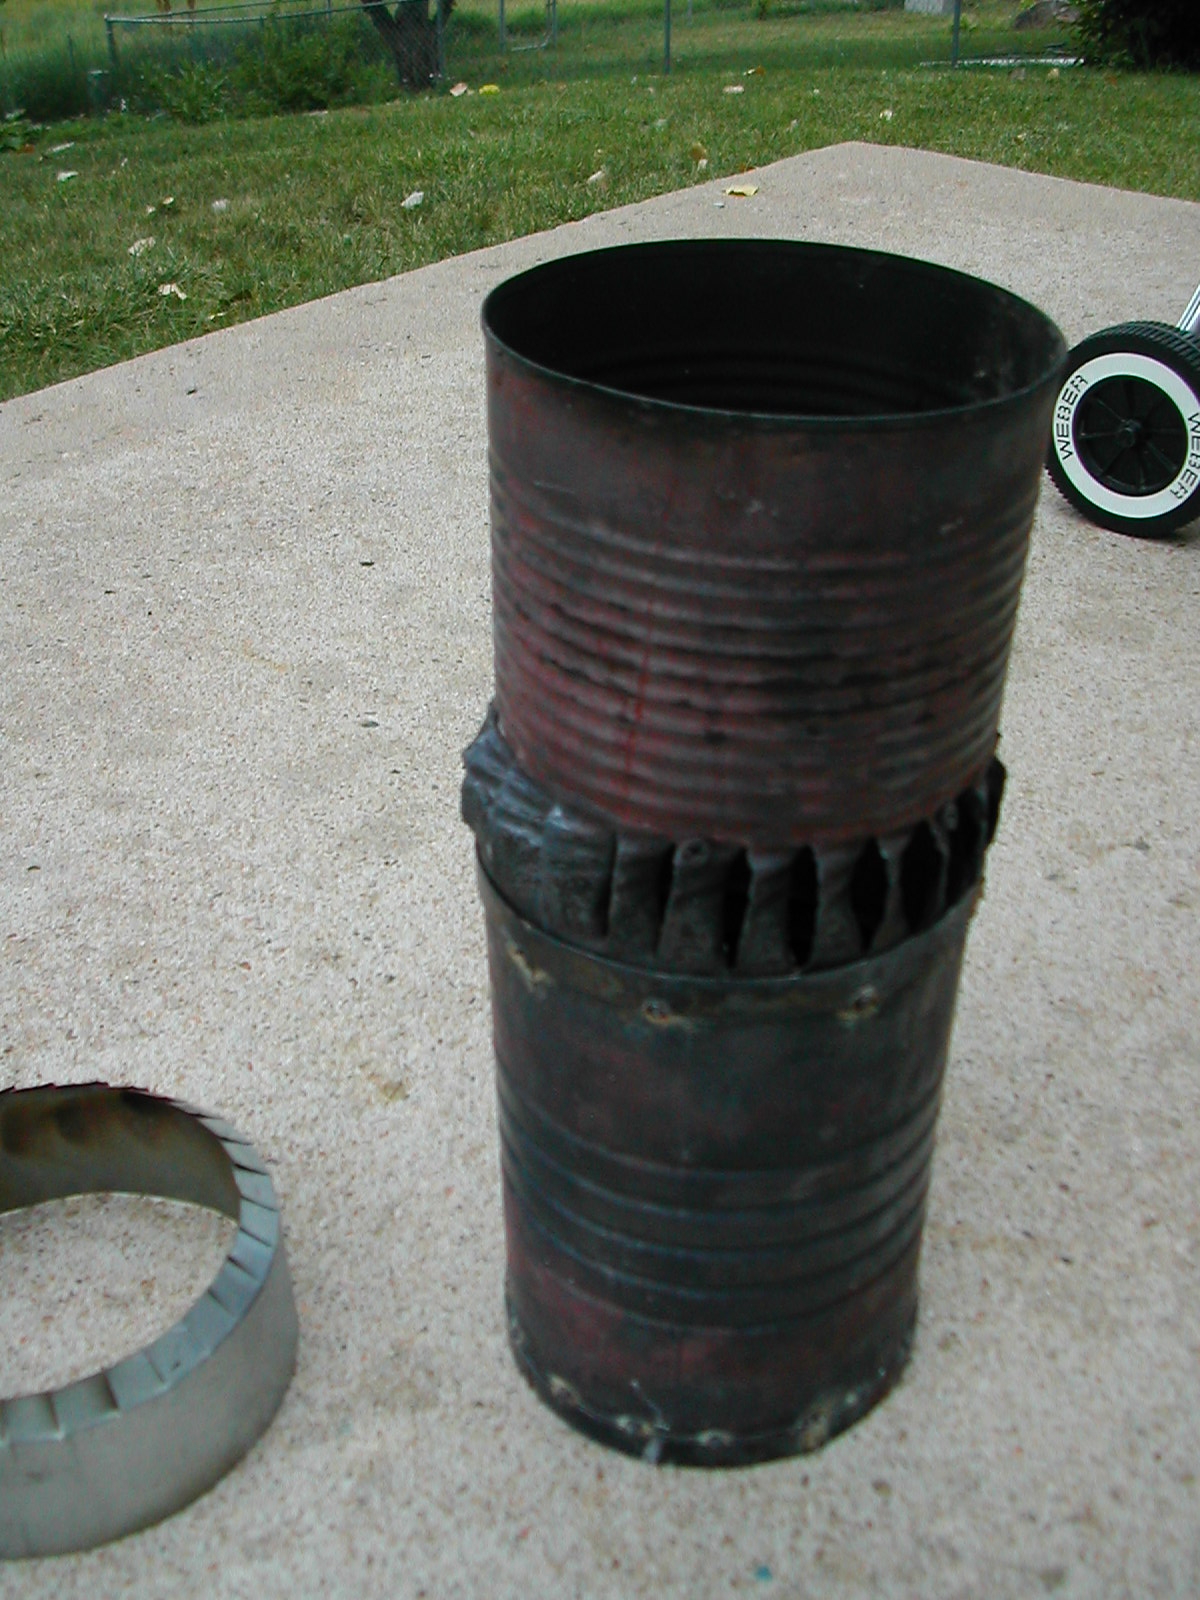
Keep passage from gasifier to engine intake equal to or greater than the minimum diameter of the intake port on the block of your engine. My opinion is that a 3/4 nozzle in the reactor is adequate for the 11hp engine. The smaller D will increase superficial velocity on the reacting charcoal and the pressure differential will balance before exiting the reactor into your supply plumbing to the engine. I would locate a horizontal nozzle 3 inches above the bottom of the vessel and 2 inches for a vertical nozzle/tuyere. I have used high temperature insulation to reduce these distances. If using a horizontal nozzle, I would allow three inches between the end of the nozzle and the center line of the reactor vessel.
I didn’t address Marshal’s questions about nozzles and pipe sizes because I think there are a lot people here that know that subject better than me. However, this is what I did. I just used what I had on hand which happened to be 3/4" fittings and 1.25" I.D. plastic vacuum cleaner hoses. The 3/4 inch straight piece of pipe nozzle was too big I think. I going to try and use a 17/32 inch hole aimed straight up next for a nozzle. The 3/4 inch outlet may be too restrictive for 274 cc running at 3600 rpm. I am going to take the pipe out of the half coupling I welded on there and just squeeze the hose over the coupling. If that works well I have a 1" coupling I can weld on and then a 1" nipple.
But hey, 3/4 inch stuff got me up and running and I’m confident they’ll do the same for you. And I forgot to say HAVE FUN! And don’t let analysis paralysis get to you.
Best,
Rindert
Hi Marshall,
Welcome to the “dark side” of wood gasification. Once you refine wood into engine grade charcoal, it is amazing how easy it is to turn that into carbon monoxide to run an IC engine. It is easy to over think things but a charcoal gasifier can be very simple and does not require real critical sizing. The only really critical thing you HAVE to keep in mind is NO AIR LEAKS. Now to your questions.
Do the math, of course it will impact flow, but I think you really want to ask whether going with a 3/4" pipe is too small for your engine. Is this the valve for mixing air with the chargas at the engine carb? If so, 3/4" should be fine.
Go for it. 3/4" should also be fine for the nozzle and put that TIG tip on. The important thing right now is to get this unit working. Then you can play with different nozzles and other things like fluid injection or exhaust gas supplement.
The lobe of oxidizing charcoal can reach temperatures of nearly 3000F. Keeping the nozzle off the bottom of the gasifier allows charcoal or ash to act as an insulator. Heck you can put down a layer of sand if you want. Be aware that the bottom of the gasifier may still get hot enough to burn your deck if you have it sitting on it during a run. Place the gasifier on some non combustable surface. The other thing about putting the nozzle at least 3" off the bottom is to keep it as low as possible with as much charcoal above it as possible. This depth of charcoal above the nozzle is very important and with your engine I’ll suggest a minimum of 12". This depth is needed to make sure all the hot carbon dioxide has a chance to react with hot charcoal to convert to CO. If your charcoal depth is too low, not all the CO2 will react resulting in weak chargas and a sudden rise in chargas temperature.
I still grind my charcoal and have some batches to put through the grinder. I do not consider the dust a problem since my machine is a batch system. Once it is filled, I walk away until the hopper is empty and then come back and refill it. I’ve seen more than one person come away from grinding charcoal looking much like the proverbial tar baby but this is something I have not experiance. Some dust, yes, but not unto being blackened. I also do not wear a face mask as charcoal dust is easily removed from the body. Nothing like coal or rock dust that causes black lung. That is a story for another time.
Good luck and glad you got to this site before venturing into Bens wood gas build. He does nice work, but it can be over engineered.
Let us know how you make out.
Gary in PA
Thank-you all for the words of welcome and advice. Admittedly, I am basically winging it with this first build. I initially came to DOW looking for some insight into math concerning gasifier sizing that could help me modify some dimensions on Ben Peterson’s hearth to better suit the engine on my generator (single cylinder), but now feel that would be folly. Ben’s design is perfectly well thought-out already, and if I do elect to tackle that build in the future I’d like to make sure I have an engine that can provide adequate draw. Truth be told, I really do like his design, but it’s a bit much for initial experimentation/getting my feet wet.
The idea of stepping down to 3/4" for valves was mostly a cost-saving measure due to sticker-shock when shopping for brass ball valves. All of my plumbing is 1", so to get things off the ground I’ll see about some 1" PVC fittings for the time-being. With any luck I’ll have the gasifier completed mid-week; next weekend at the latest. Still waiting on the 55 gal drum for my retort, and I’ve yet to make any inroads on the charcoal grinder (aside from sourcing a motor), but I did find a fair deal on some cutoff slabs for which I’ve scheduled a delivery.
The additional labor cost of charcoal was off-putting at-first, but after considering my own experiences as a plant operator it seems like a no-brainer. I like my work-day to be boring and for my equipment to be as predictable as possible; charcoal is much more predictable, being a refined fuel. I spent a good deal of time inside the furnaces of coal boilers as an apprentice, so I can stomach a bit of dust.
!
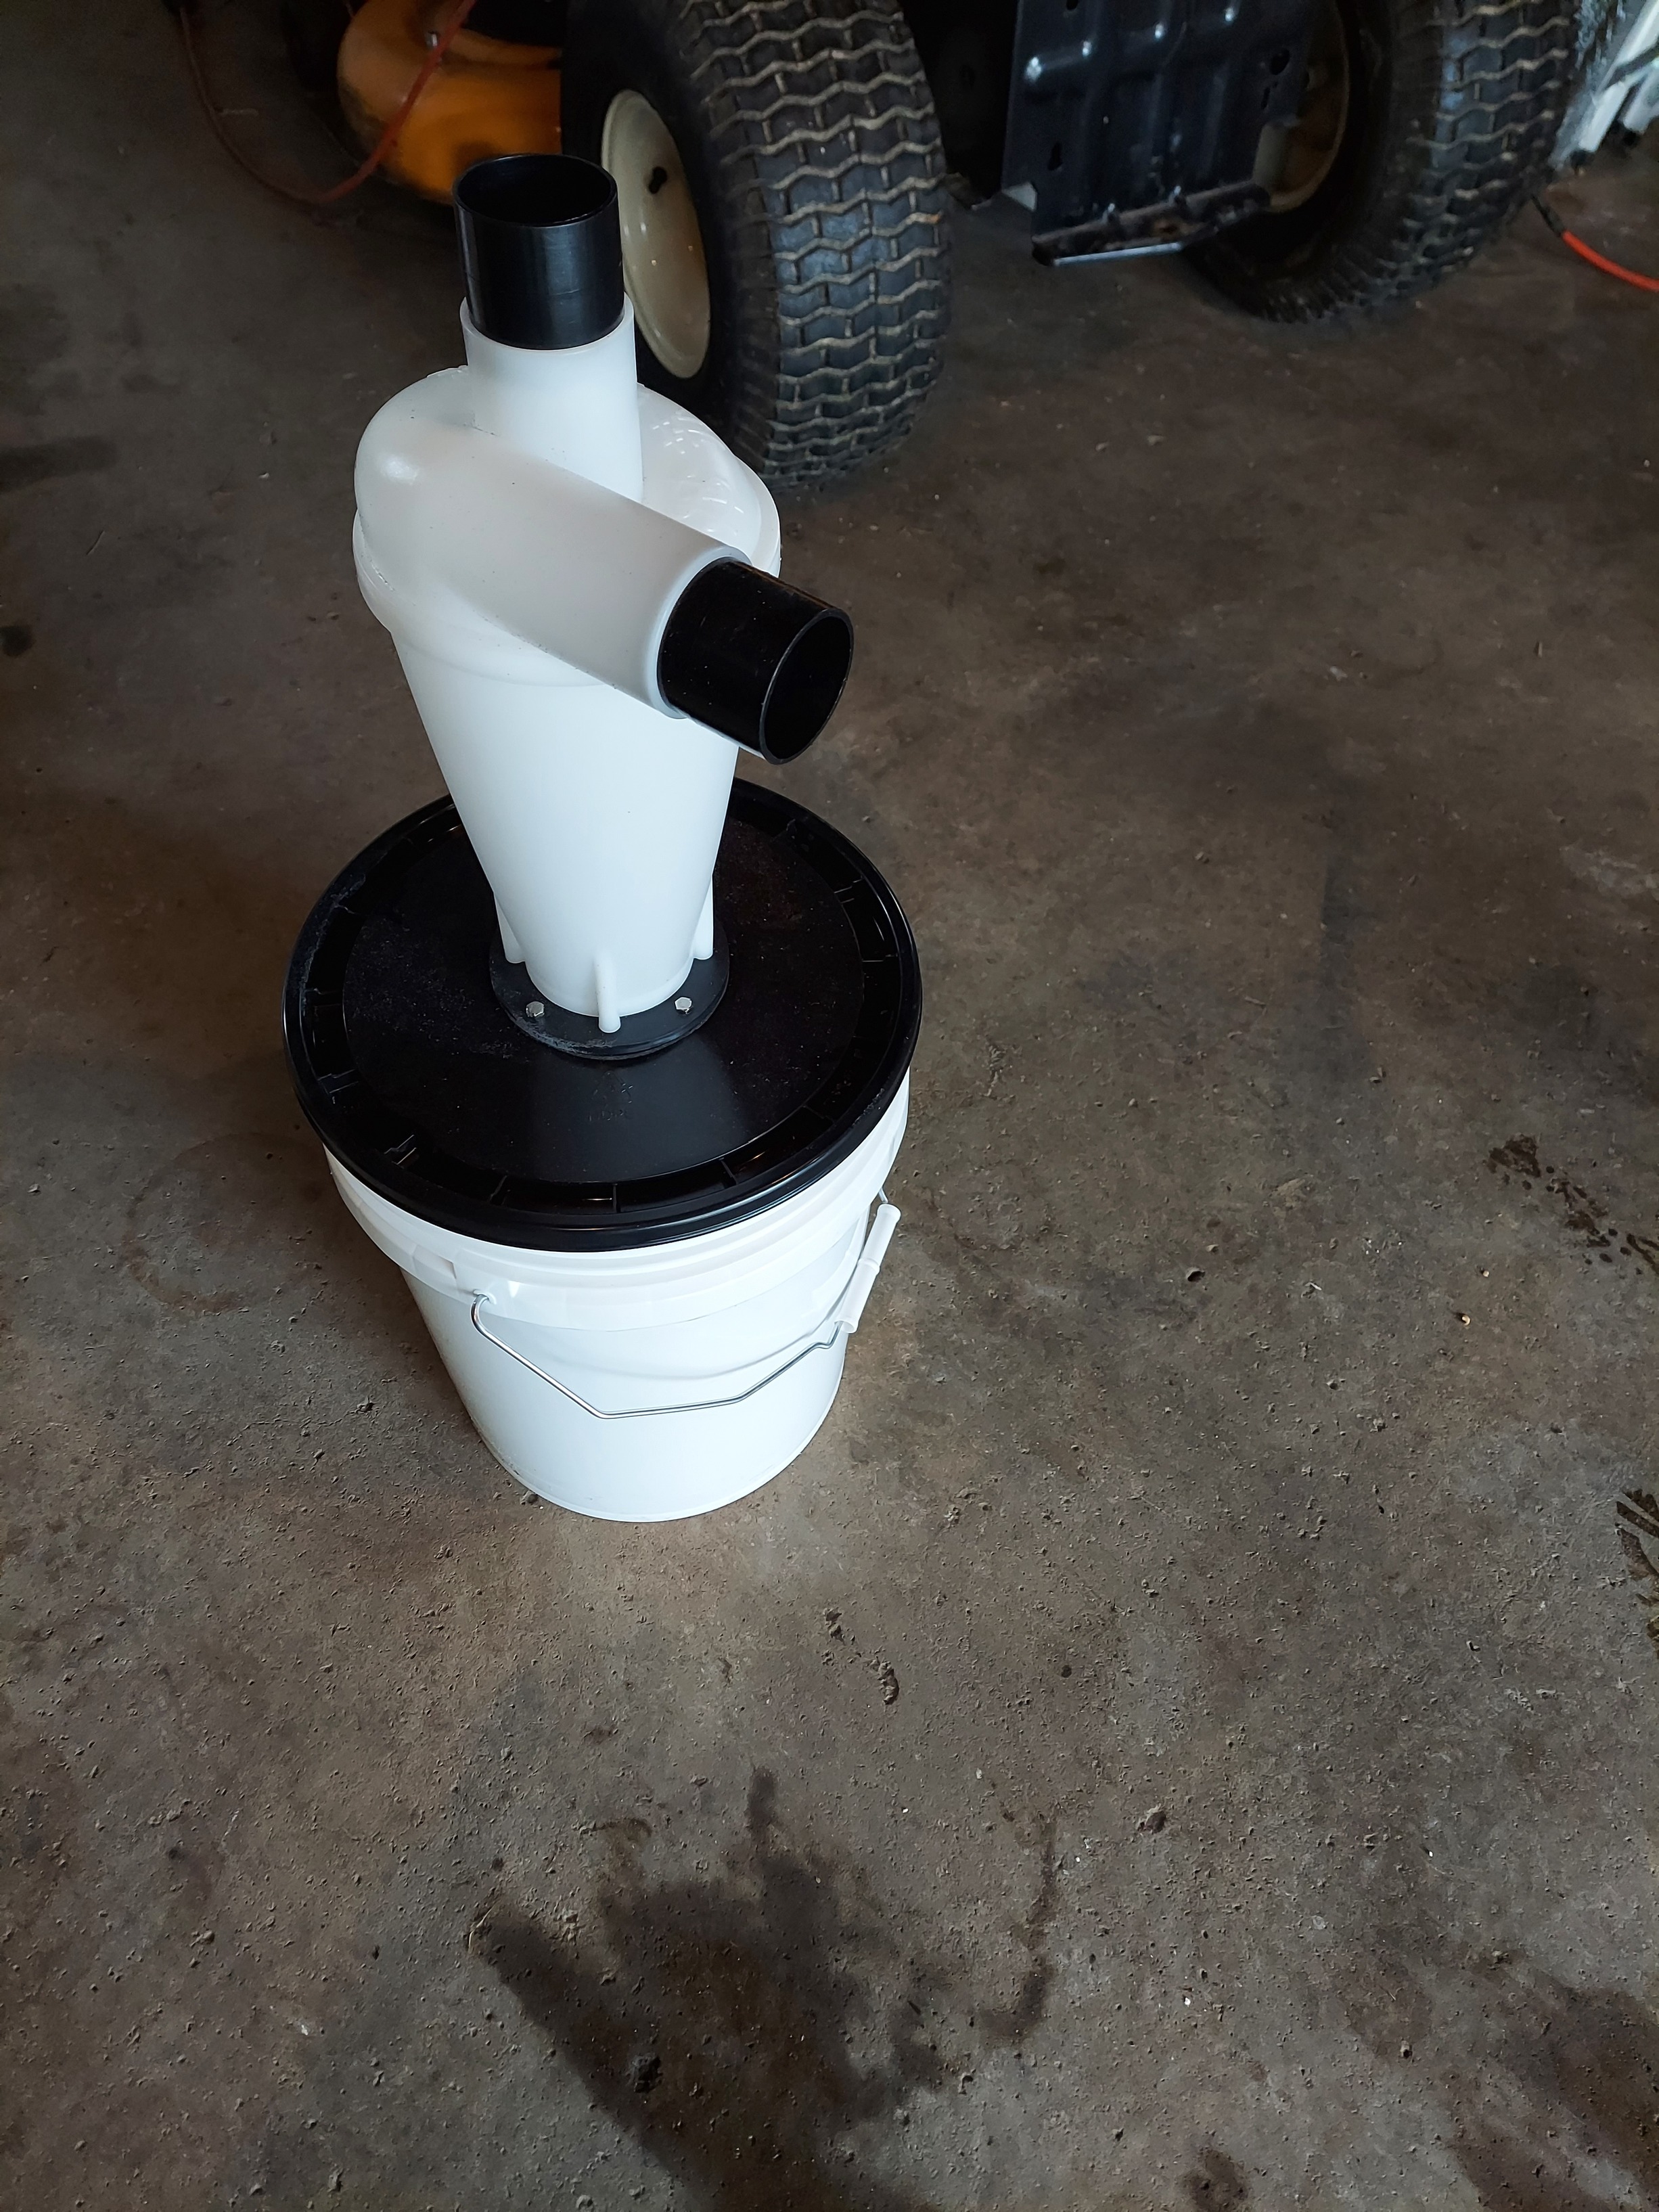
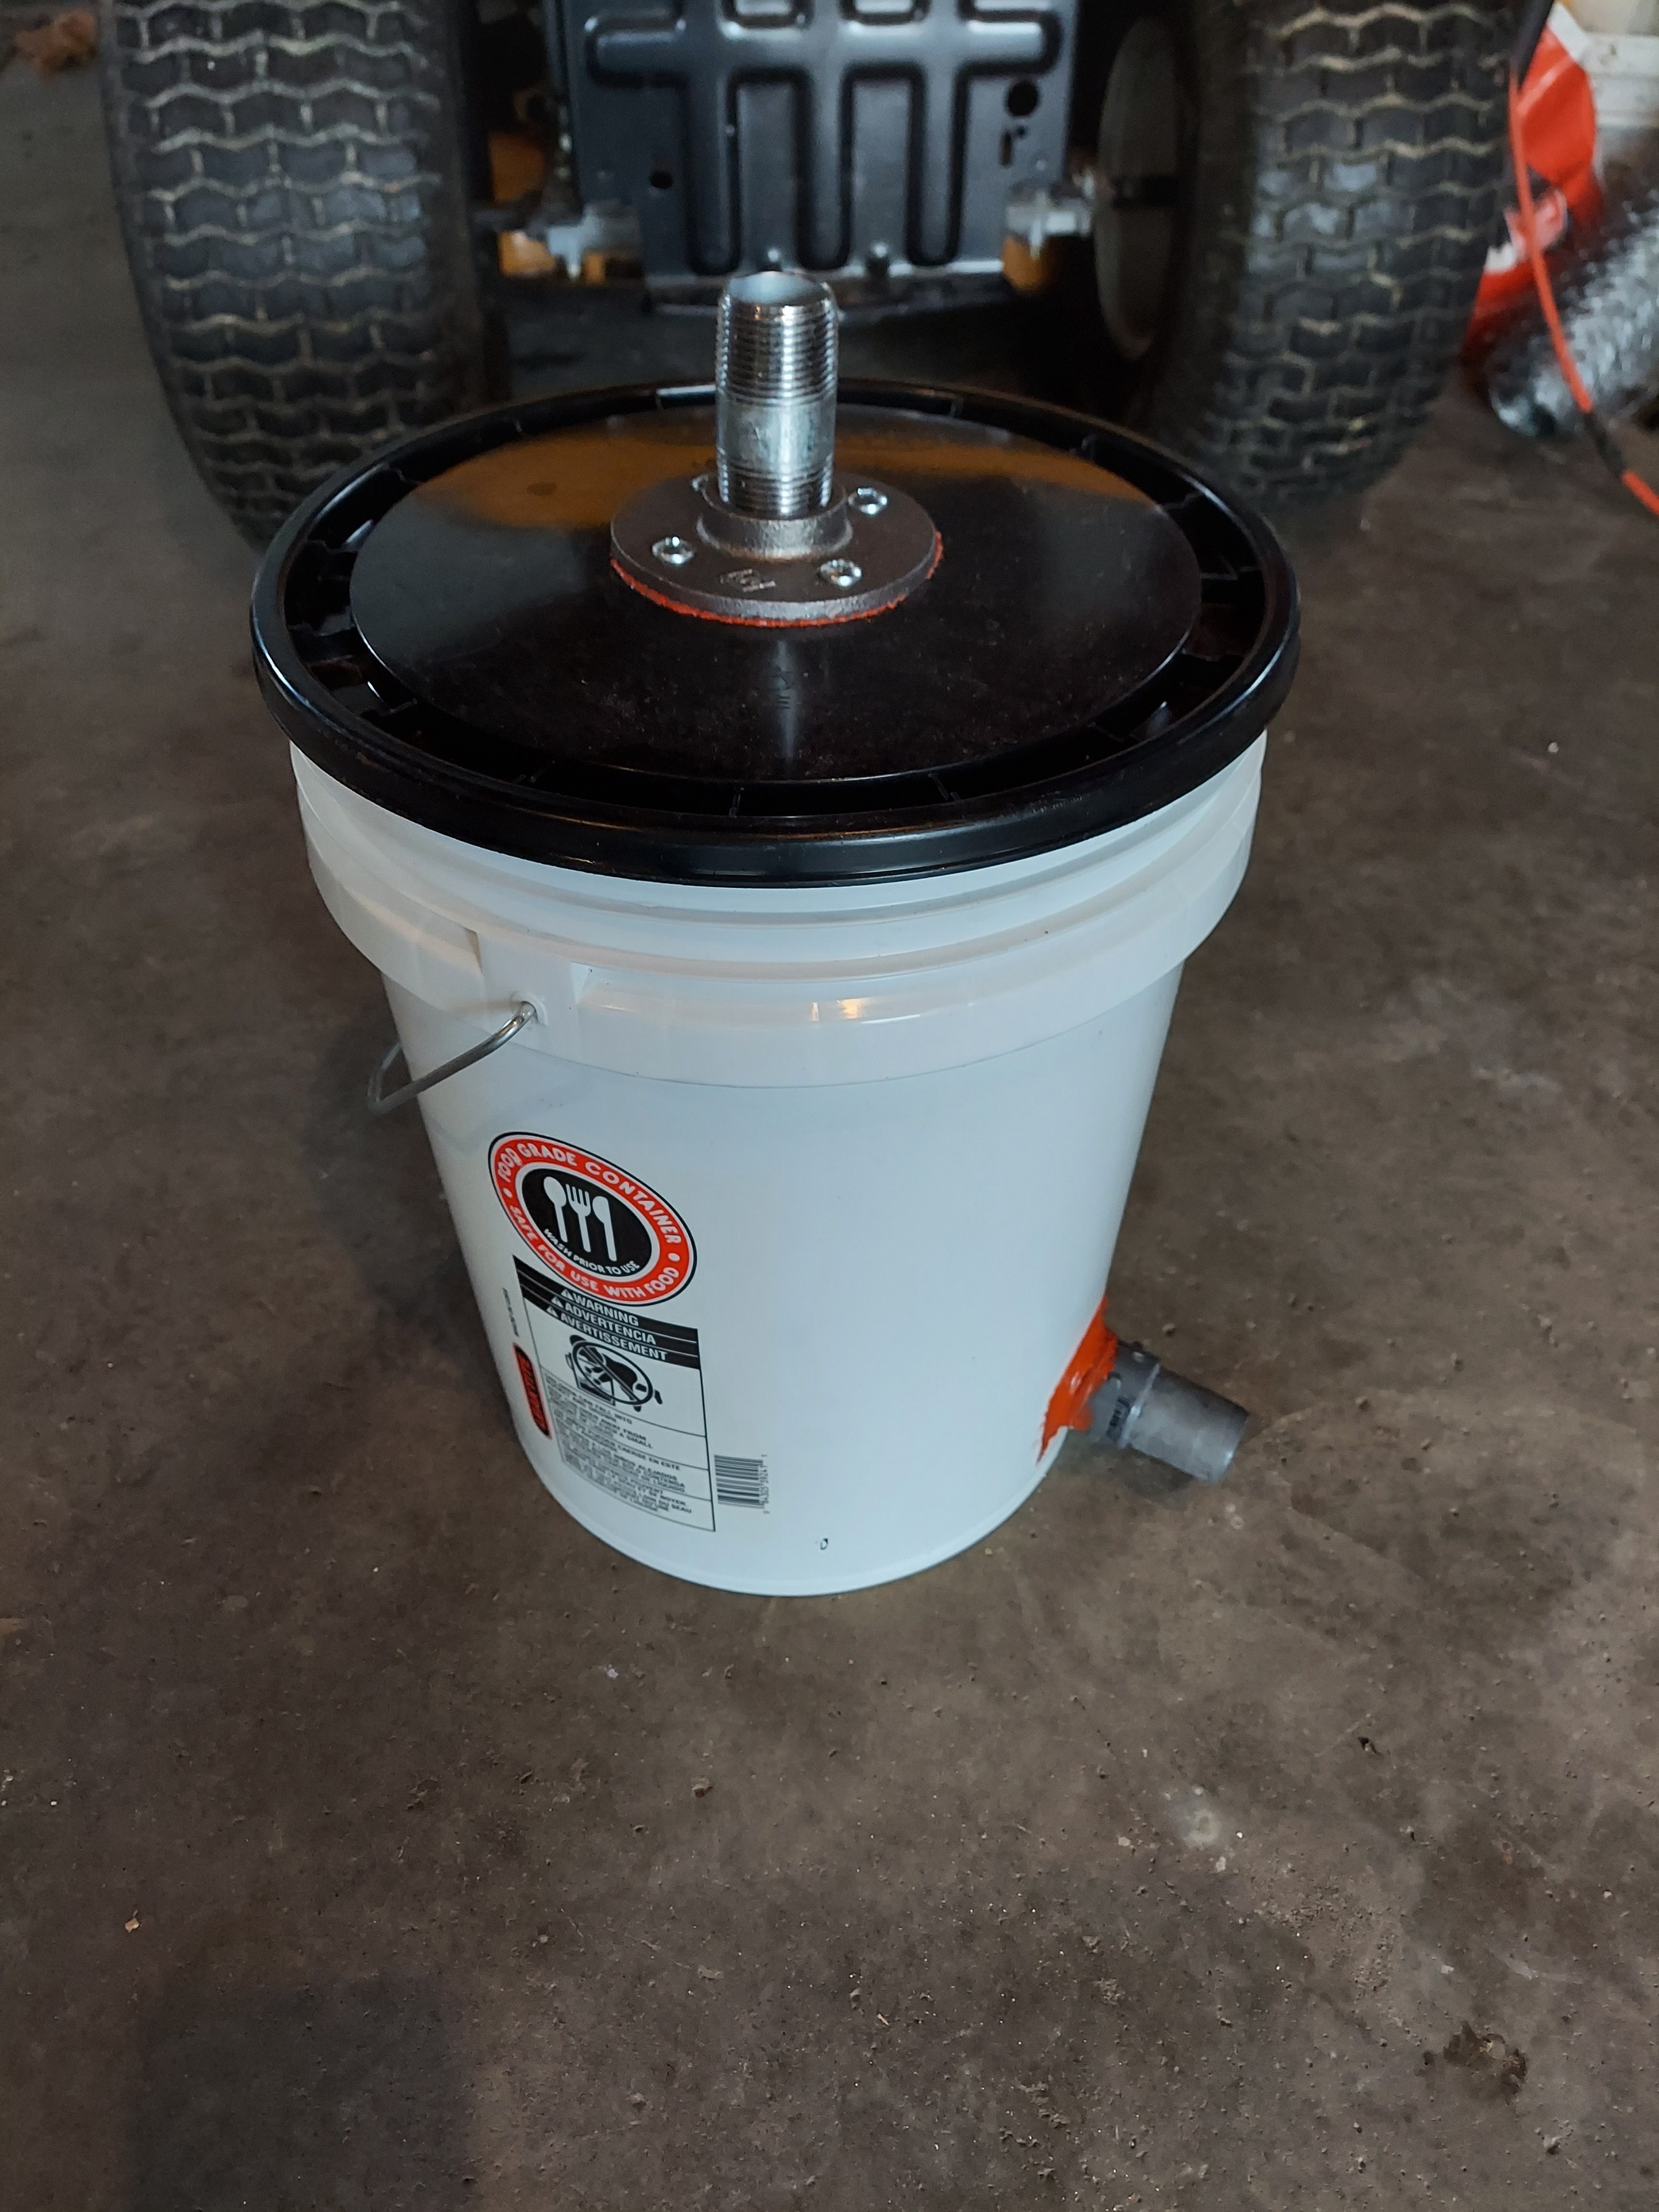
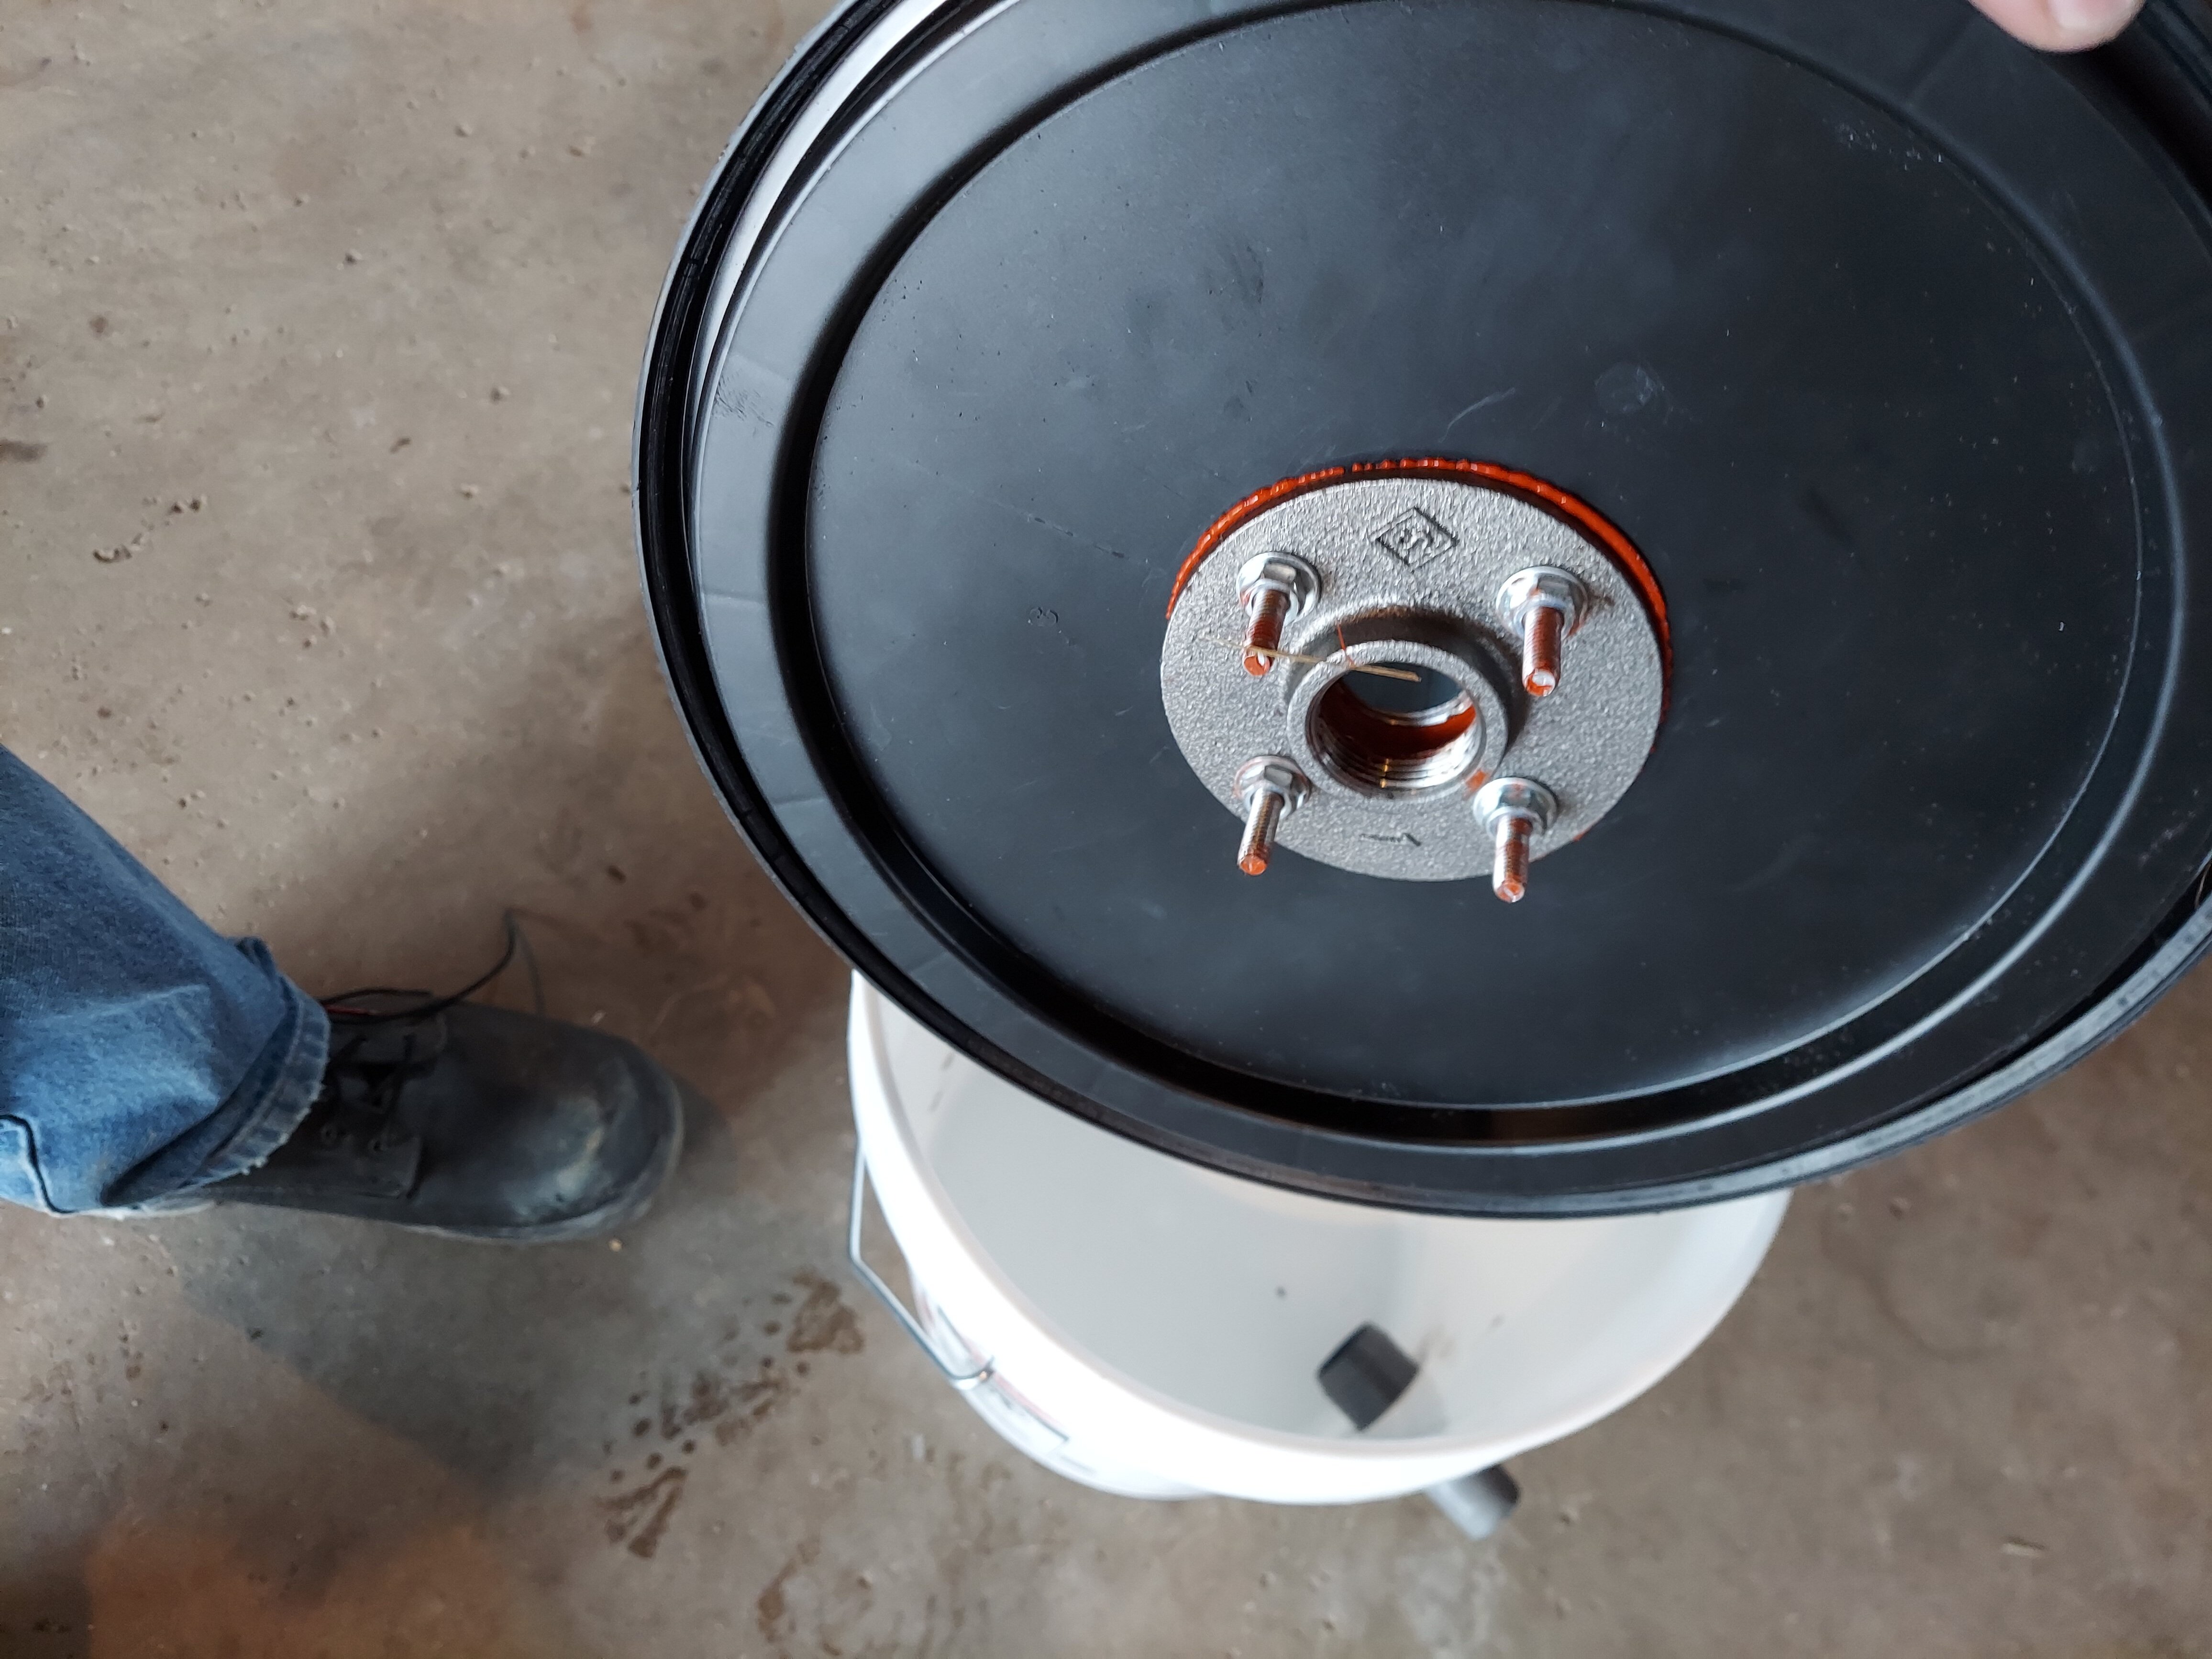
Just a bit of cutting and fit-up this weekend. Putting a thermometer at the reactor outlet to get an idea of outgoing gas temperatures. I’d like to put a manometer opposite the thermometer at some point, as well as one just upstream of the blower.
I’d bet dollars to dimes that this cyclone is not well-sized for this application, but it’s what Amazon had available. Again, winging it. Due to professional obligations, family life, and the fact that I currently reside 30 miles from my shop-space I’m extremely limited in how much time I get to spend actually working on this project.
I’m thinking for the bag filter I can make a cage out of steel wire, tack that to a steel pipe nipple, and then just thread it into the flange on the underside of the lid after clamping the bag on.
Looking good! Air leaks are a real bugaboo so I like to see that RTV silicone squeezed from the joints. Don’t get too hung up on grinding your charcoal at this early stage. Make your charcoal from hardwoods if available and make sure it is not producing yellow flames when you shut off the air. Use a shovel to break it apart a little once cooled down. Run it over a 1/8" or so screen (could even use an old window screen) to remove the fines and dust. Any chunks bigger than one inch should be set aside for another beating with the shovel and re-sifted.
Sweet looking cyclone. It may be a little big for the engine you are using, but it will take out most of the heavier char leaving your secondary filter to take out the small dust. No problems there.
You should be up and running soon.
Until later,
Gary in PA
I have the same cyclone here for some other aplication. You are not afraid to melt it?
Looking good everything. The only bear on my road is the retort. I am curious how much time you are going to spent to run that 55 gallon barrel. Can’t wait. Thanks for the pictures. Looking good!
From my understanding of the process, reduction from CO2 to CO is an endothermic reaction, which ought to cool the gas down by the time it hits the cyclone. However, as one’s hopper begins to drain the temperature of the outgoing gas increases. I’m hoping that the 1" black pipe outlet from the reactor vessel in addition to the 1-1/4" steel exhaust hose I plan on using to connect everything acts as enough of a heat sink to keep gas reasonably cool as the hopper starts getting emptier. However, that is one reason I put a thermometer at the reactor outlet.