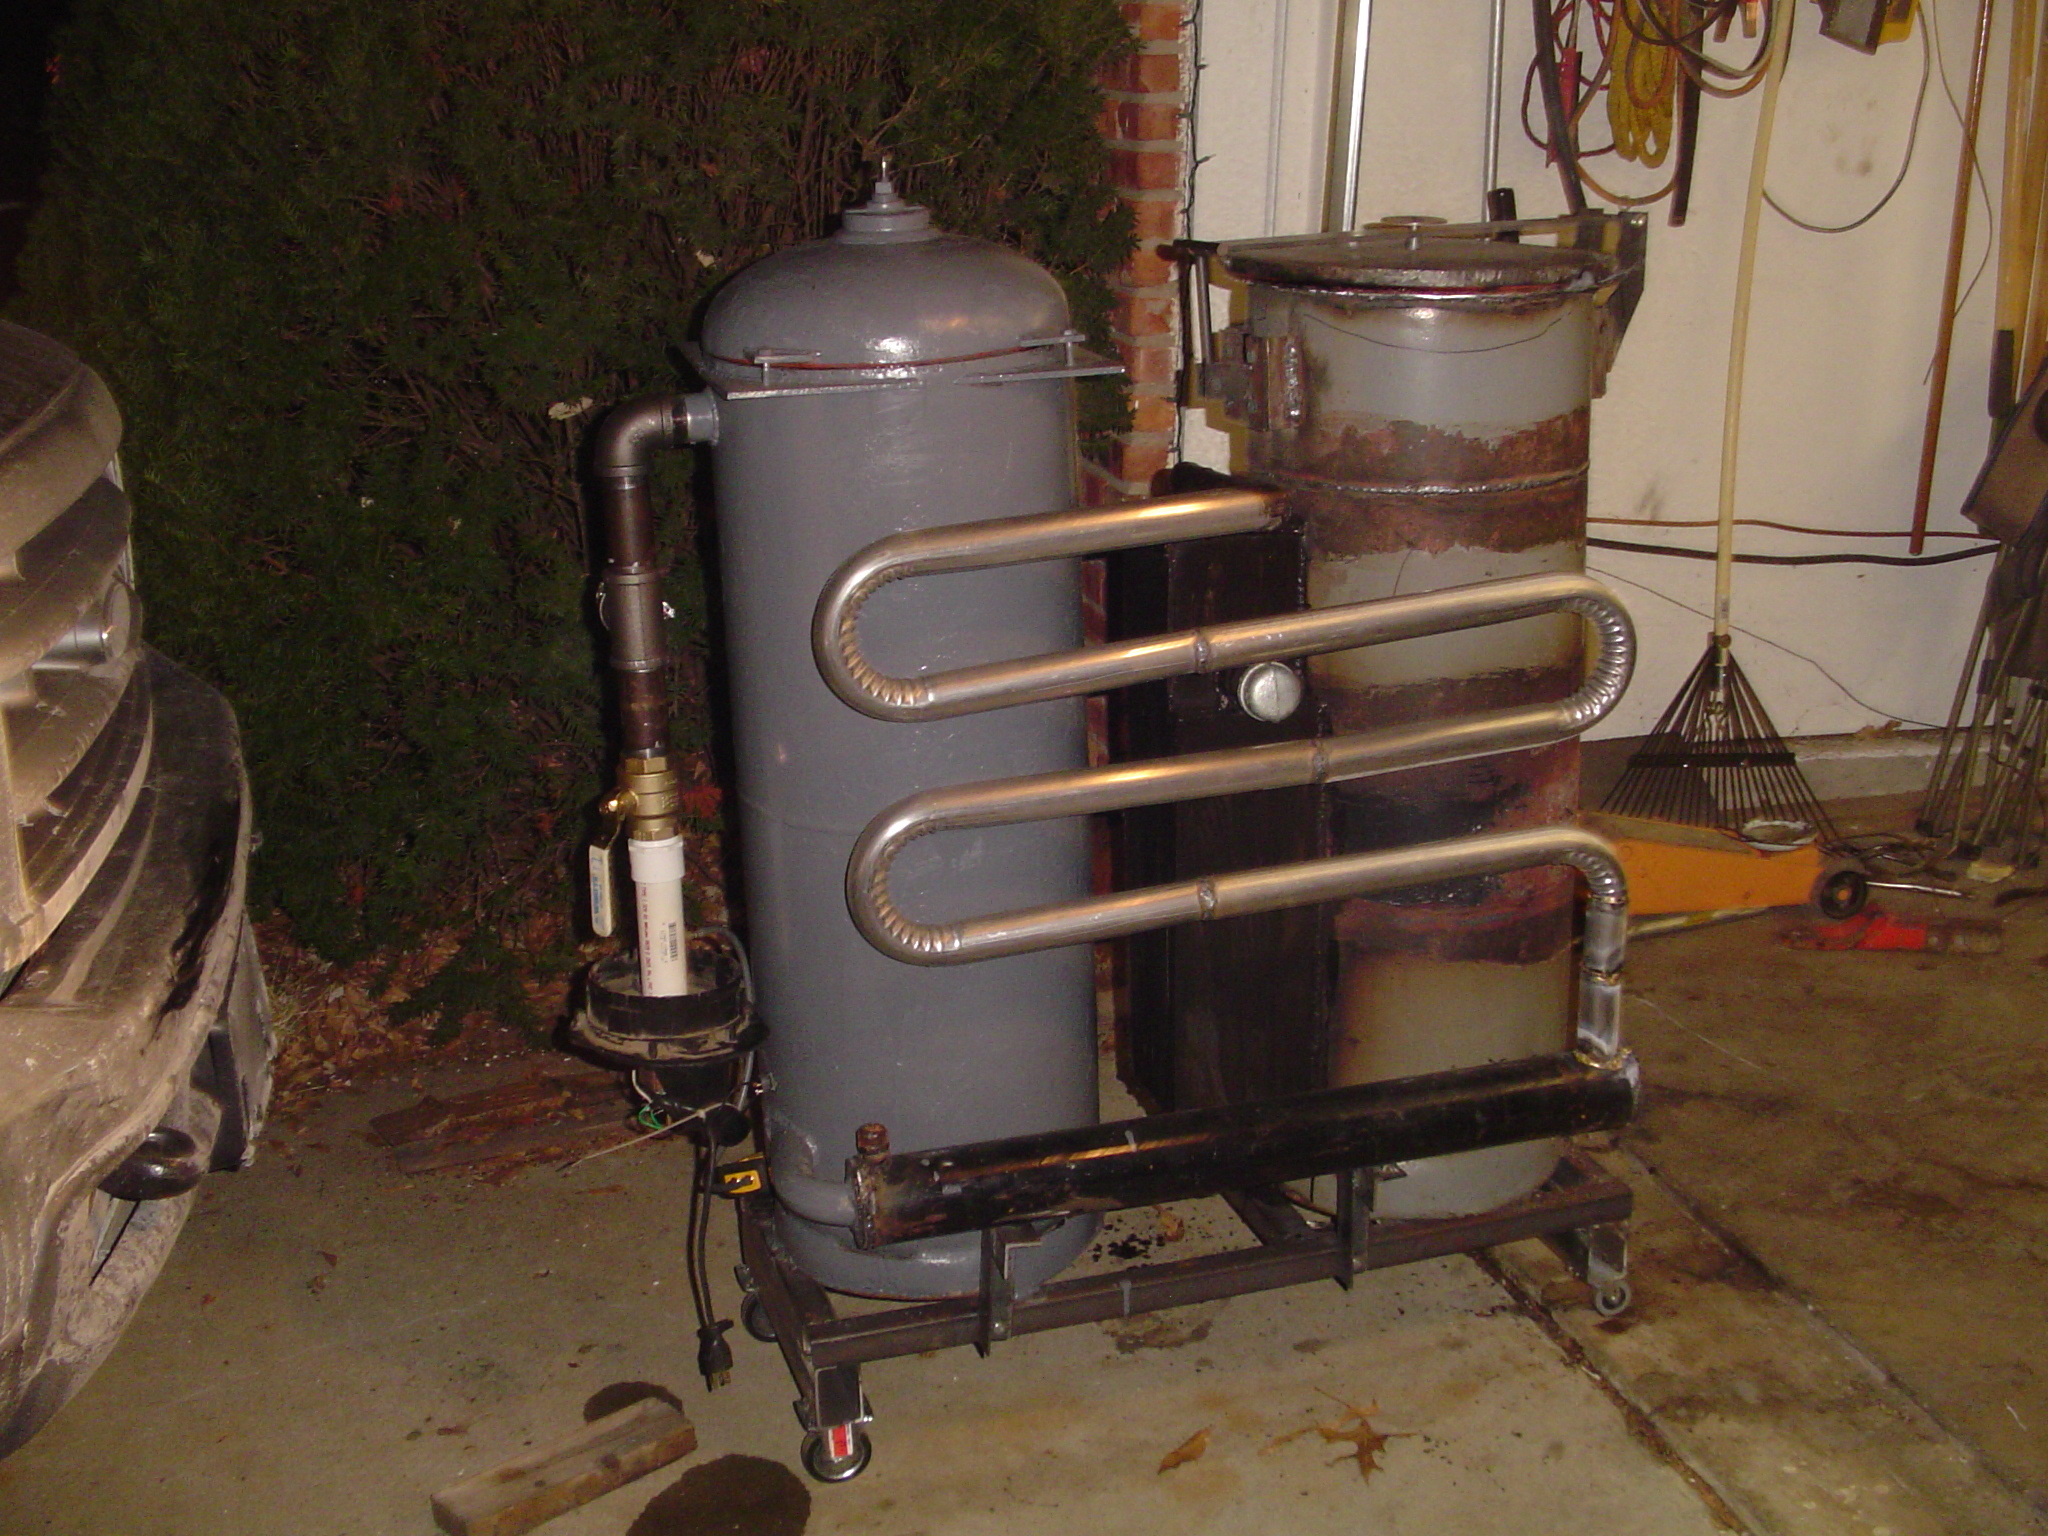
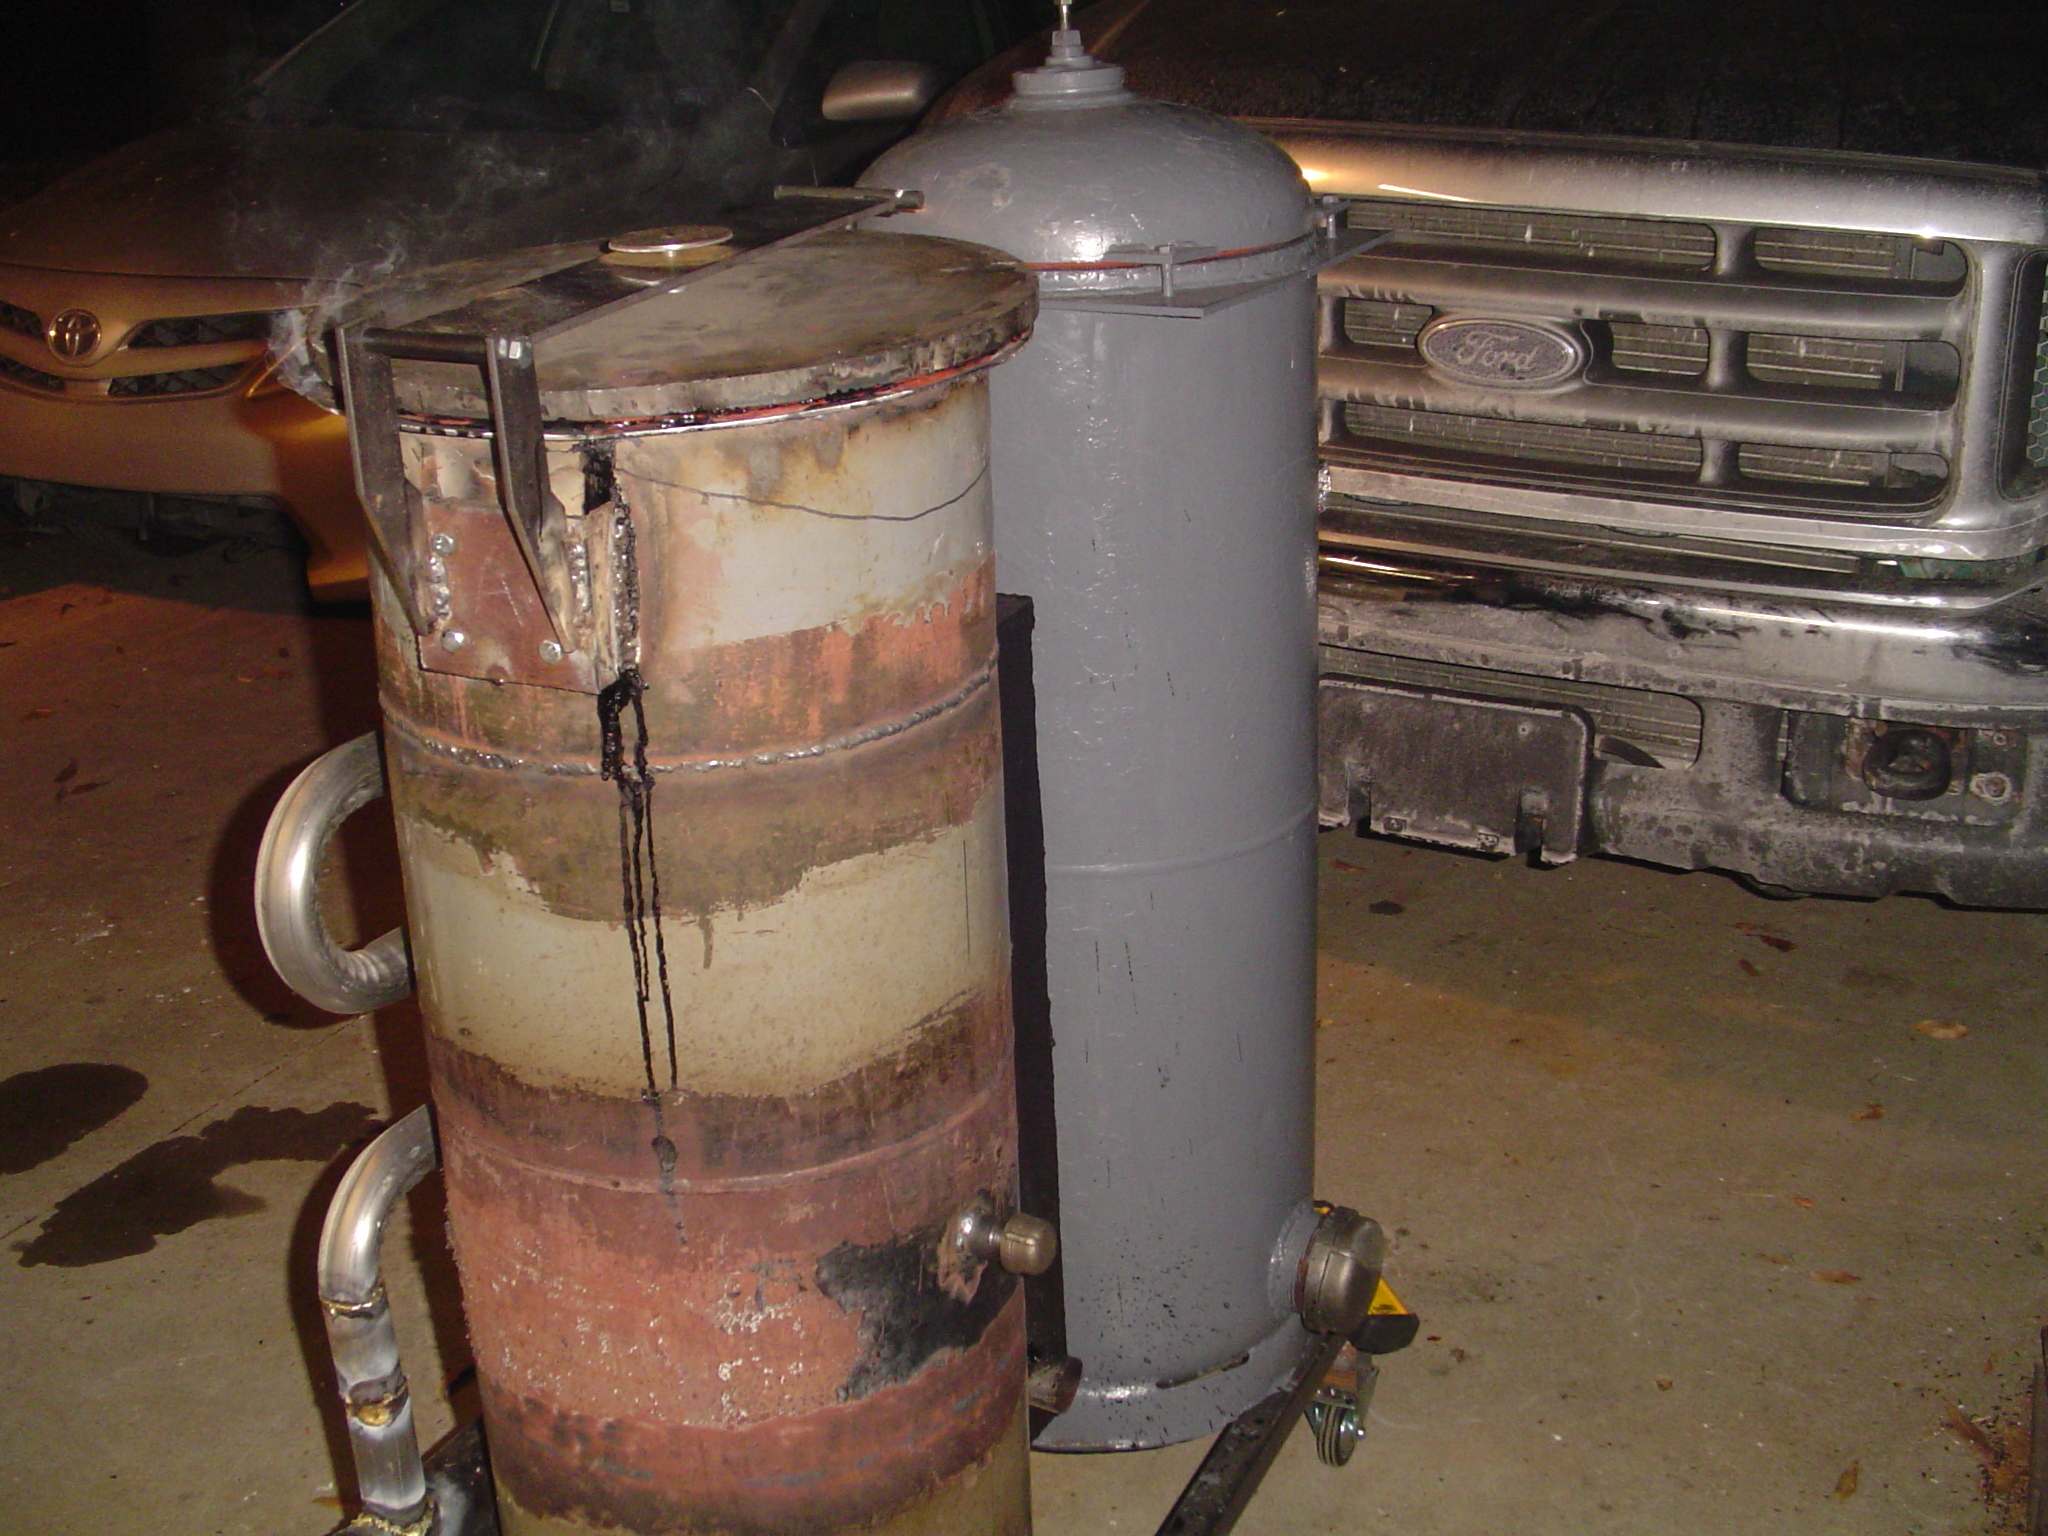
I’ve recently completed a gasifier fairly closely following Ben Petersons plans. Construction has been an off and on affair over the last two years. As of this week, it’s time to start trying to make some gas!
Two attempts so far, but no flare-able gas produced yet. On the first attempt, I suspect my blower was not up to the task - I was using a draft inducer fan from a furnace. It wouldn’t pull more then 2 in wc at 0 CFM. I replaced that with a fan component from a vacuum cleaner (bucket head), which provided much more suction, and got my gasifier properly hot in just 15ish minutes. Connected to the gasifier, I had 4.5 inches of water column on my manometer, measured at the blower input.
But alas, still not getting quality gas output. My suspensions are:
Perhaps the wood is too wet? I don’t have a way of measuring it, but maybe that’s related?
Incorrect feedstock prep? I chunked up oak into pieces about 1-1.5 inches cubed.
A machine problem? Air coming in somewhere, burning off my woodgas? I sure don’t see where it would be, though.
Incorrect blower size, pressure, or volume? I’d like to get the blower Ben calls for, but they are not currently being imported.
Any advice for a newbie would be appreciated. Please also suggest anything I should be looking for, or measuring on my next run. I have access to some fairly decent instruments to help me.
You cannot make good gas from raw wood chunks, the system must be ran long enough to develope a good charcoal bed below the air nozzels, or best to fill it with charcoal first.
Excellent advice - I should have mentioned that I did fill the reduction tube and hearth, up to a few inches over the jets with hardwood lump (natural) charcoal. I put wood on top of that. Although, I may try my next run with pure lump charcoal.
I realize that my hopper lid does not seal well - I’m beginning to suspect this is allowing too much air to enter, resulting in more complete combustion.
It’s funny - I teach heating and cooling at a community college. We’re always very concerned about furnaces achieving complete combustion, and worried about air restrictions or flame impingement causing CO. And here I am, working on a device that’s specifically designed to create incomplete combustion!
Welcome! I think that @SteveUnruh might be the only one around here with extensive experience with Ben Peterson and his systems.
Did you crush up your lump charcoal before putting it in your system, or were they large lumps still? I recall that most systems like their charcoal bed to be made of roughly 3/4" > 1/8" sized (from assorted reading here over the years.)
I might add that natural wood lump charcoal contains quite a bit of wood that has not been converted to pure charcoal. (It weighs more that way, and adds a bit of smoke flavor to food.) I would build a fire of wood scraps in a barrel, and when it is down to just glowing coals, add a coffee can at a time of crushed lump charcoal (not charcoal briquettes) to the glowing coals in the barrel. The lump charcoal will emit smoke and tar. Add some more, and when it stops smoking and glows red and blue, seal of the container, or transfer all the coals to another container that is totally air-tight. After it has cooled down, spread the contents over hardware cloth with 1/8th grid and brush it back and forth to get rid of the fines. Now, use your fingers to break up any pieces larger than 3/4". Kick out any that won’t break, or any that look waxy or have any brown color. Now you have engine grade charcoal.
I second Ray’s advice. I tried a mix of dried wood and briquets once. The briquets passed thru the system basically unchanged and all I got was smoke and tar. Did you notice that some commercial lump charcoal is very heavy (Texas stuff I tried)? Seems it’s not fully charcoal as Ray alludes to with the wood content. Reason- It’s sold by weight, so totally refining it increases the cost, aha the dirty rats! Check out my mess in the Small engines section under “My first small engine run”, comments 43-46. Definitely seal the cover to maintain air tightness.
Actually, the process requires complete combustion in the oxidation zone (the volume from just below and just above the nozzle level, basically oval shaped). The complete combustion produces only CO2 (carbon dioxide) and H2O (water vapor). As the CO2 and H2O pass through the restriction into the red hot reduction zone (sometimes called the char bed) they are rendered into free C, H and O atoms and instantly recombined into H2 and CO. Sometimes CH4 (methane) is also produced in small amounts. So we see that the CO does not come from incomplete combustion in this case, although CO can be present with wet wood, low temp. Air leaks can reduce the velocity of air through the nozzles reducing oxidation zone temps. Try blowing your gas onto a cool surface to see if water is still coming through the mix. Don’t breathe the gases as CO is poisonous.
So dried wood of the proper size ( your 1" to 1.5" chunks is good) is a must. Airtight is a must. I use a bump house blower for my start ups, see comments 401-403.
The design is proven so a few operating details need to be tightened up and I’m sure the gas will come. Good luck, keep us posted.
Pepe
You can try doing some short runs followed by shut downs to establish the machine.After you light it and then put it back into a shut down mode, it will dry the fuel in hopper and make charcoal as it cools. Before you re light the machine check and make sure there is no bridge from shut down by poking this down. Try and leave 1/3 or so in your hopper each time you shut down for fuel drying.
If you get it flaring and have new fuel above the fuel you left from your last run and the machine crashes thats an indication your fuel is too wet.
To do this run the machine for 10 15 min and then shut down for 1/2 to an hour and repeat. If you are not seeing a lot of smoke on these first light ups, you may have some clogging issues from that lump charcoal. I will never ever, ever use that stuff again, Ill light from raw wood before putting that stuff back in any machine. I had an issue where the stuff was so hard it would not come through my grate and just accumulate there until it was plugged.
If your fuel is too wet you may experience higher temperatures and the gas will not cool as quickly as it should. If gas exit temps leaving from the last portion of your filter my guess is your fuel is too wet. I like to see temps around 120* or lower leaving our machines. Id have to guess Bens machine would be similar judging from his filter system.
Hi Nick,
Prefilled char, 4.5" of vacuum and up to temp - you are probably already making good gas. A few small leaks shouldn’t matter. Hopper leaks don’t matter at all.
Maybe you have too high velocity/narrow pipe at your flaring point.
You guys bring up some good points. First, let me thank you for taking the time to help me - while I had prints to work from during the build, I don’t have that moving forward venturing out into the other 75% of the work. It’s great to be able to speak with people who have experience here.
My lump charcoal was not broken down into as small of chunks as my wood. I don’t think I was having an issue there though - I could feel the weight of the charcoal on my grate, and agitating it I could see movement through my ignition port.
The store bought lump charcoal may well be incompletely converted. Perhaps I’ll have to think about knocking together a charcoal kiln.
Pepe - thanks for the clarification. I have ordered a better seal material, and will go ahead and rebuild my sealing surface. I didn’t have a large enough piece on hand to cut a continuous ring from, so I pieced it together out of smaller pieces. Bad idea, it did not remain flat.
Your comment about still getting water through is telling - I most certainly am. After the outlet, I tried channeling my gas through a 5 foot piece of 3" PVC pipe, in a bid to entrain some air and reduce the velocity for flaring purposes. I was getting water condensate on the inside walls of the PVC pipe. It was dripping out. This means I’m not getting a good conversion, right? Not a hot enough char bed, incomplete char bed, etc?
I am monitoring the ambient air in my immediate work area with a UEI CO meter.
I’ll fix the problems I see and give it a go next week. I probably won’t be able to do much with it this weekend – holiday plans with the family.
Speaking of which, I hope you all have a great Christmas!
Welcome to the wonderful world of wood gasification
If it was easy everyone could do it
But once you get a charcoal bed and some 10 to15% dry wood chunks you will be amazed at how quickly it will start and run an engine.
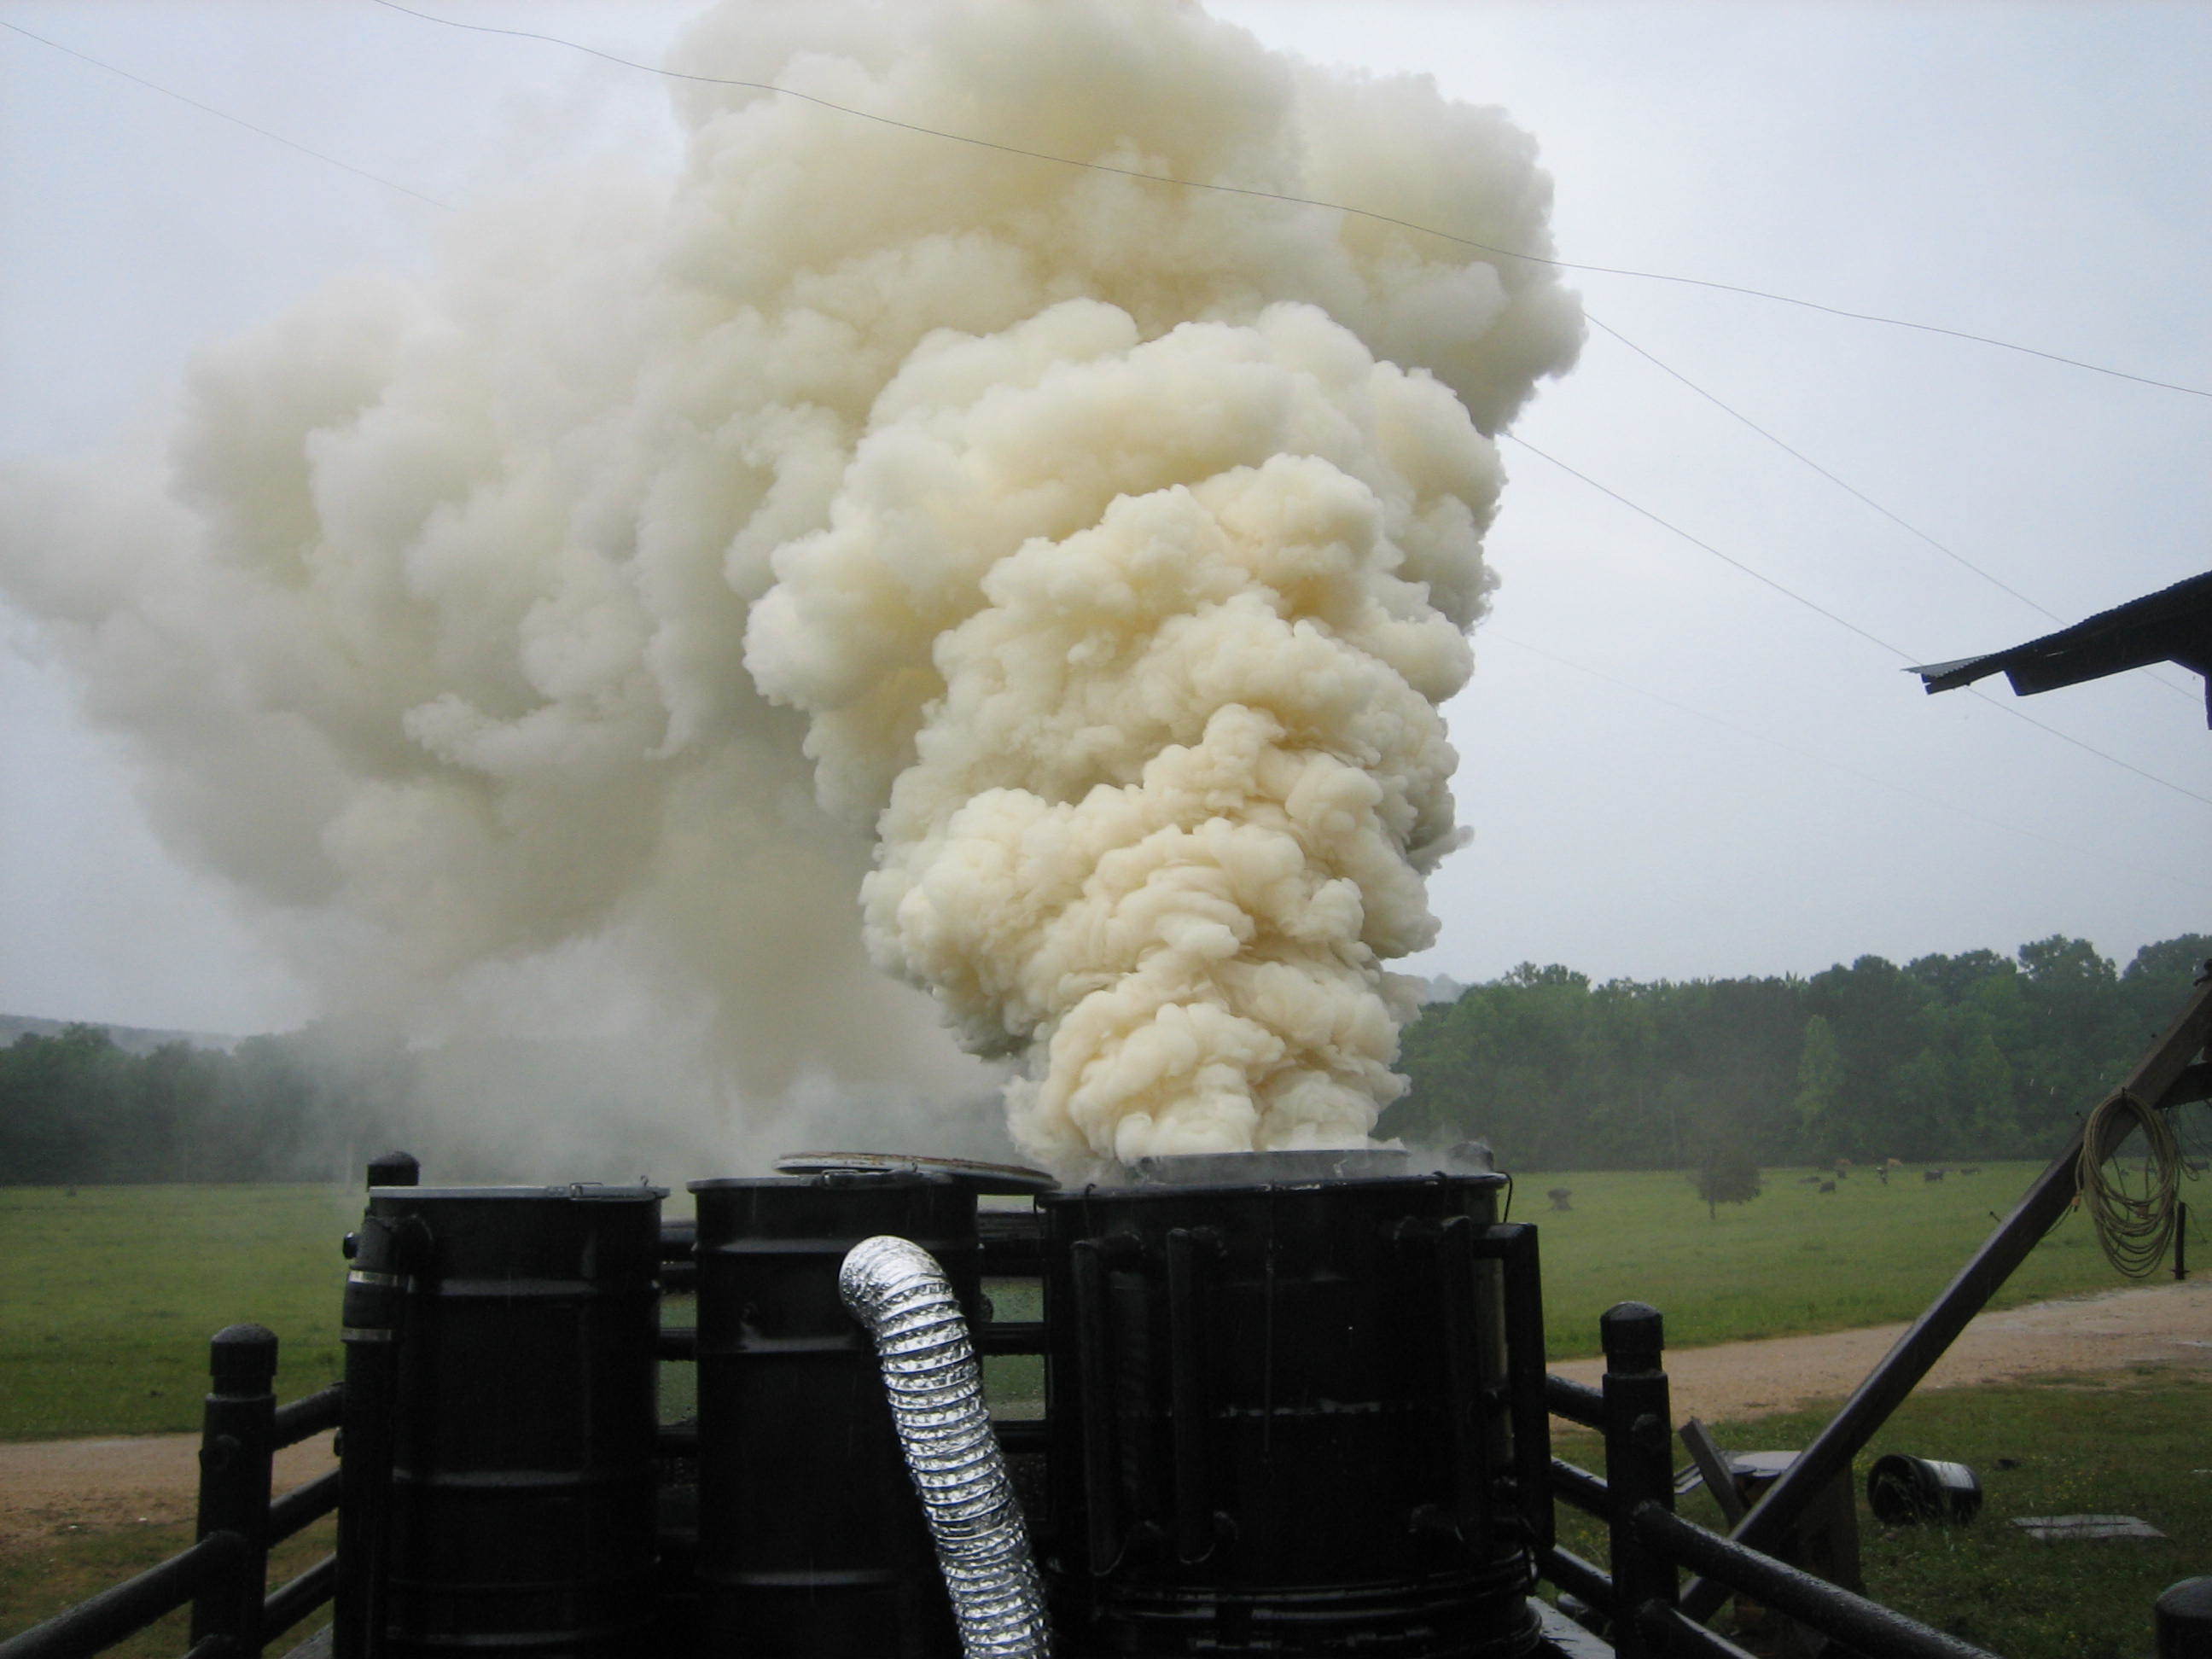
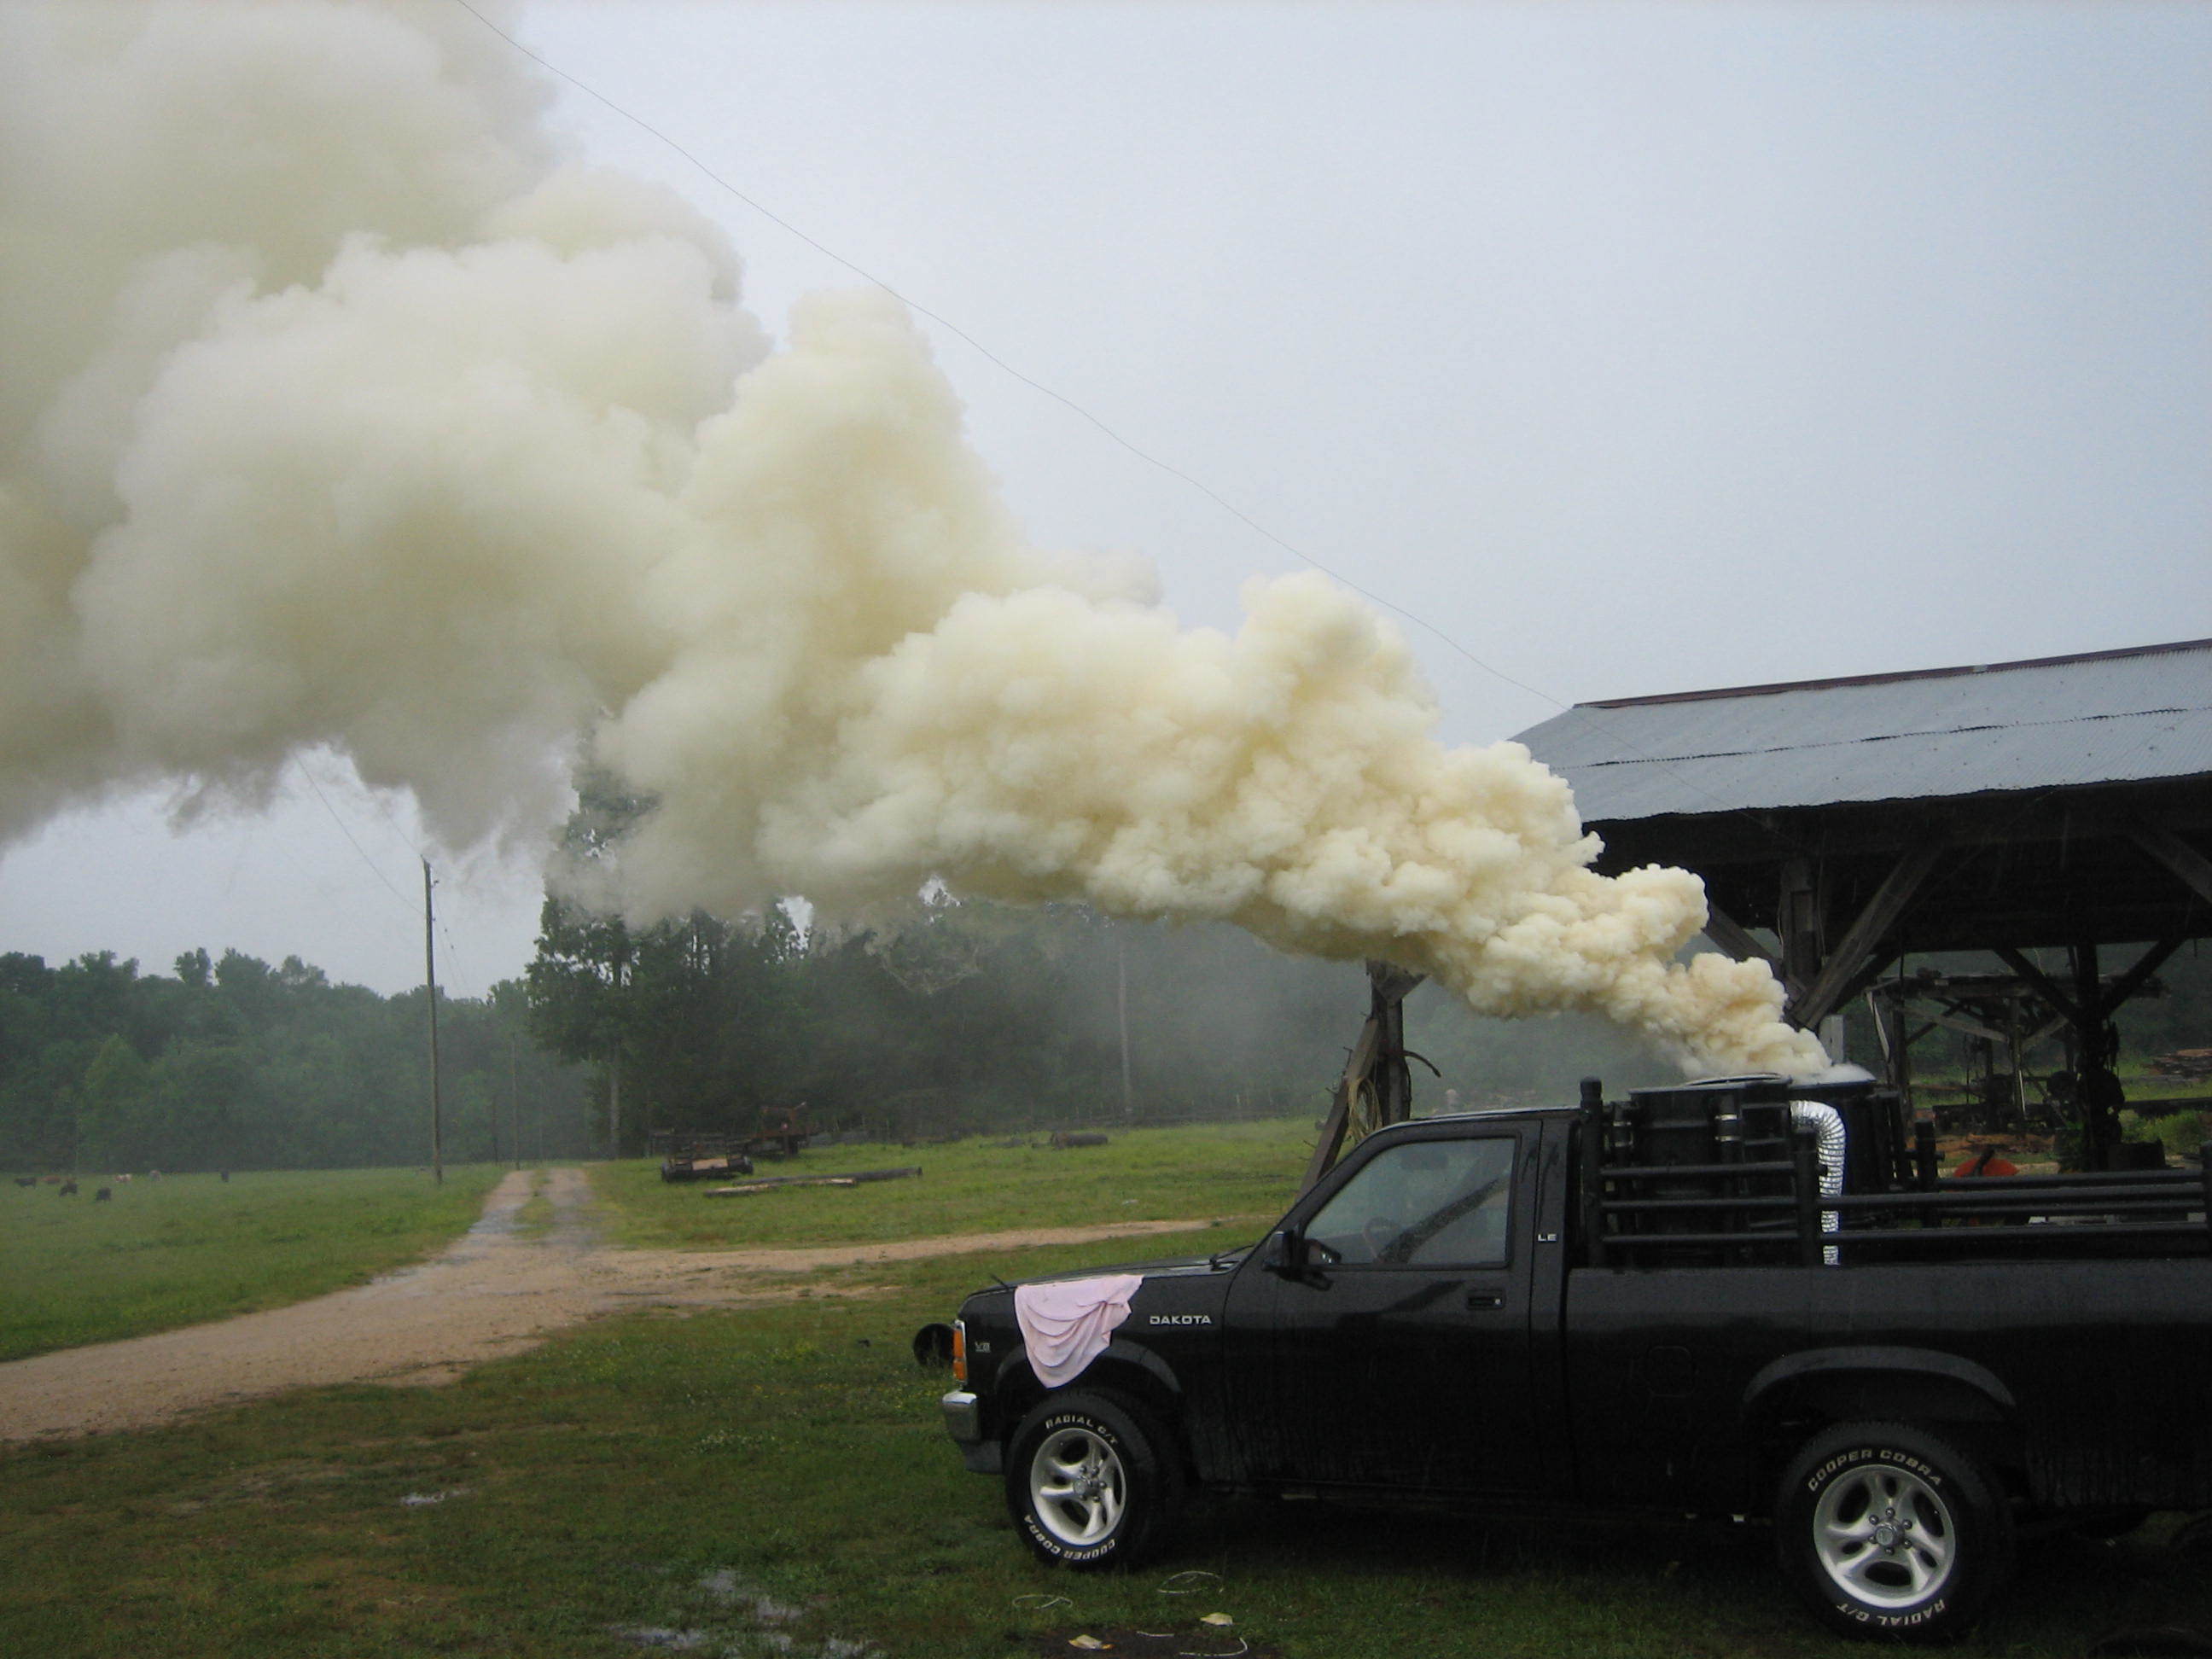
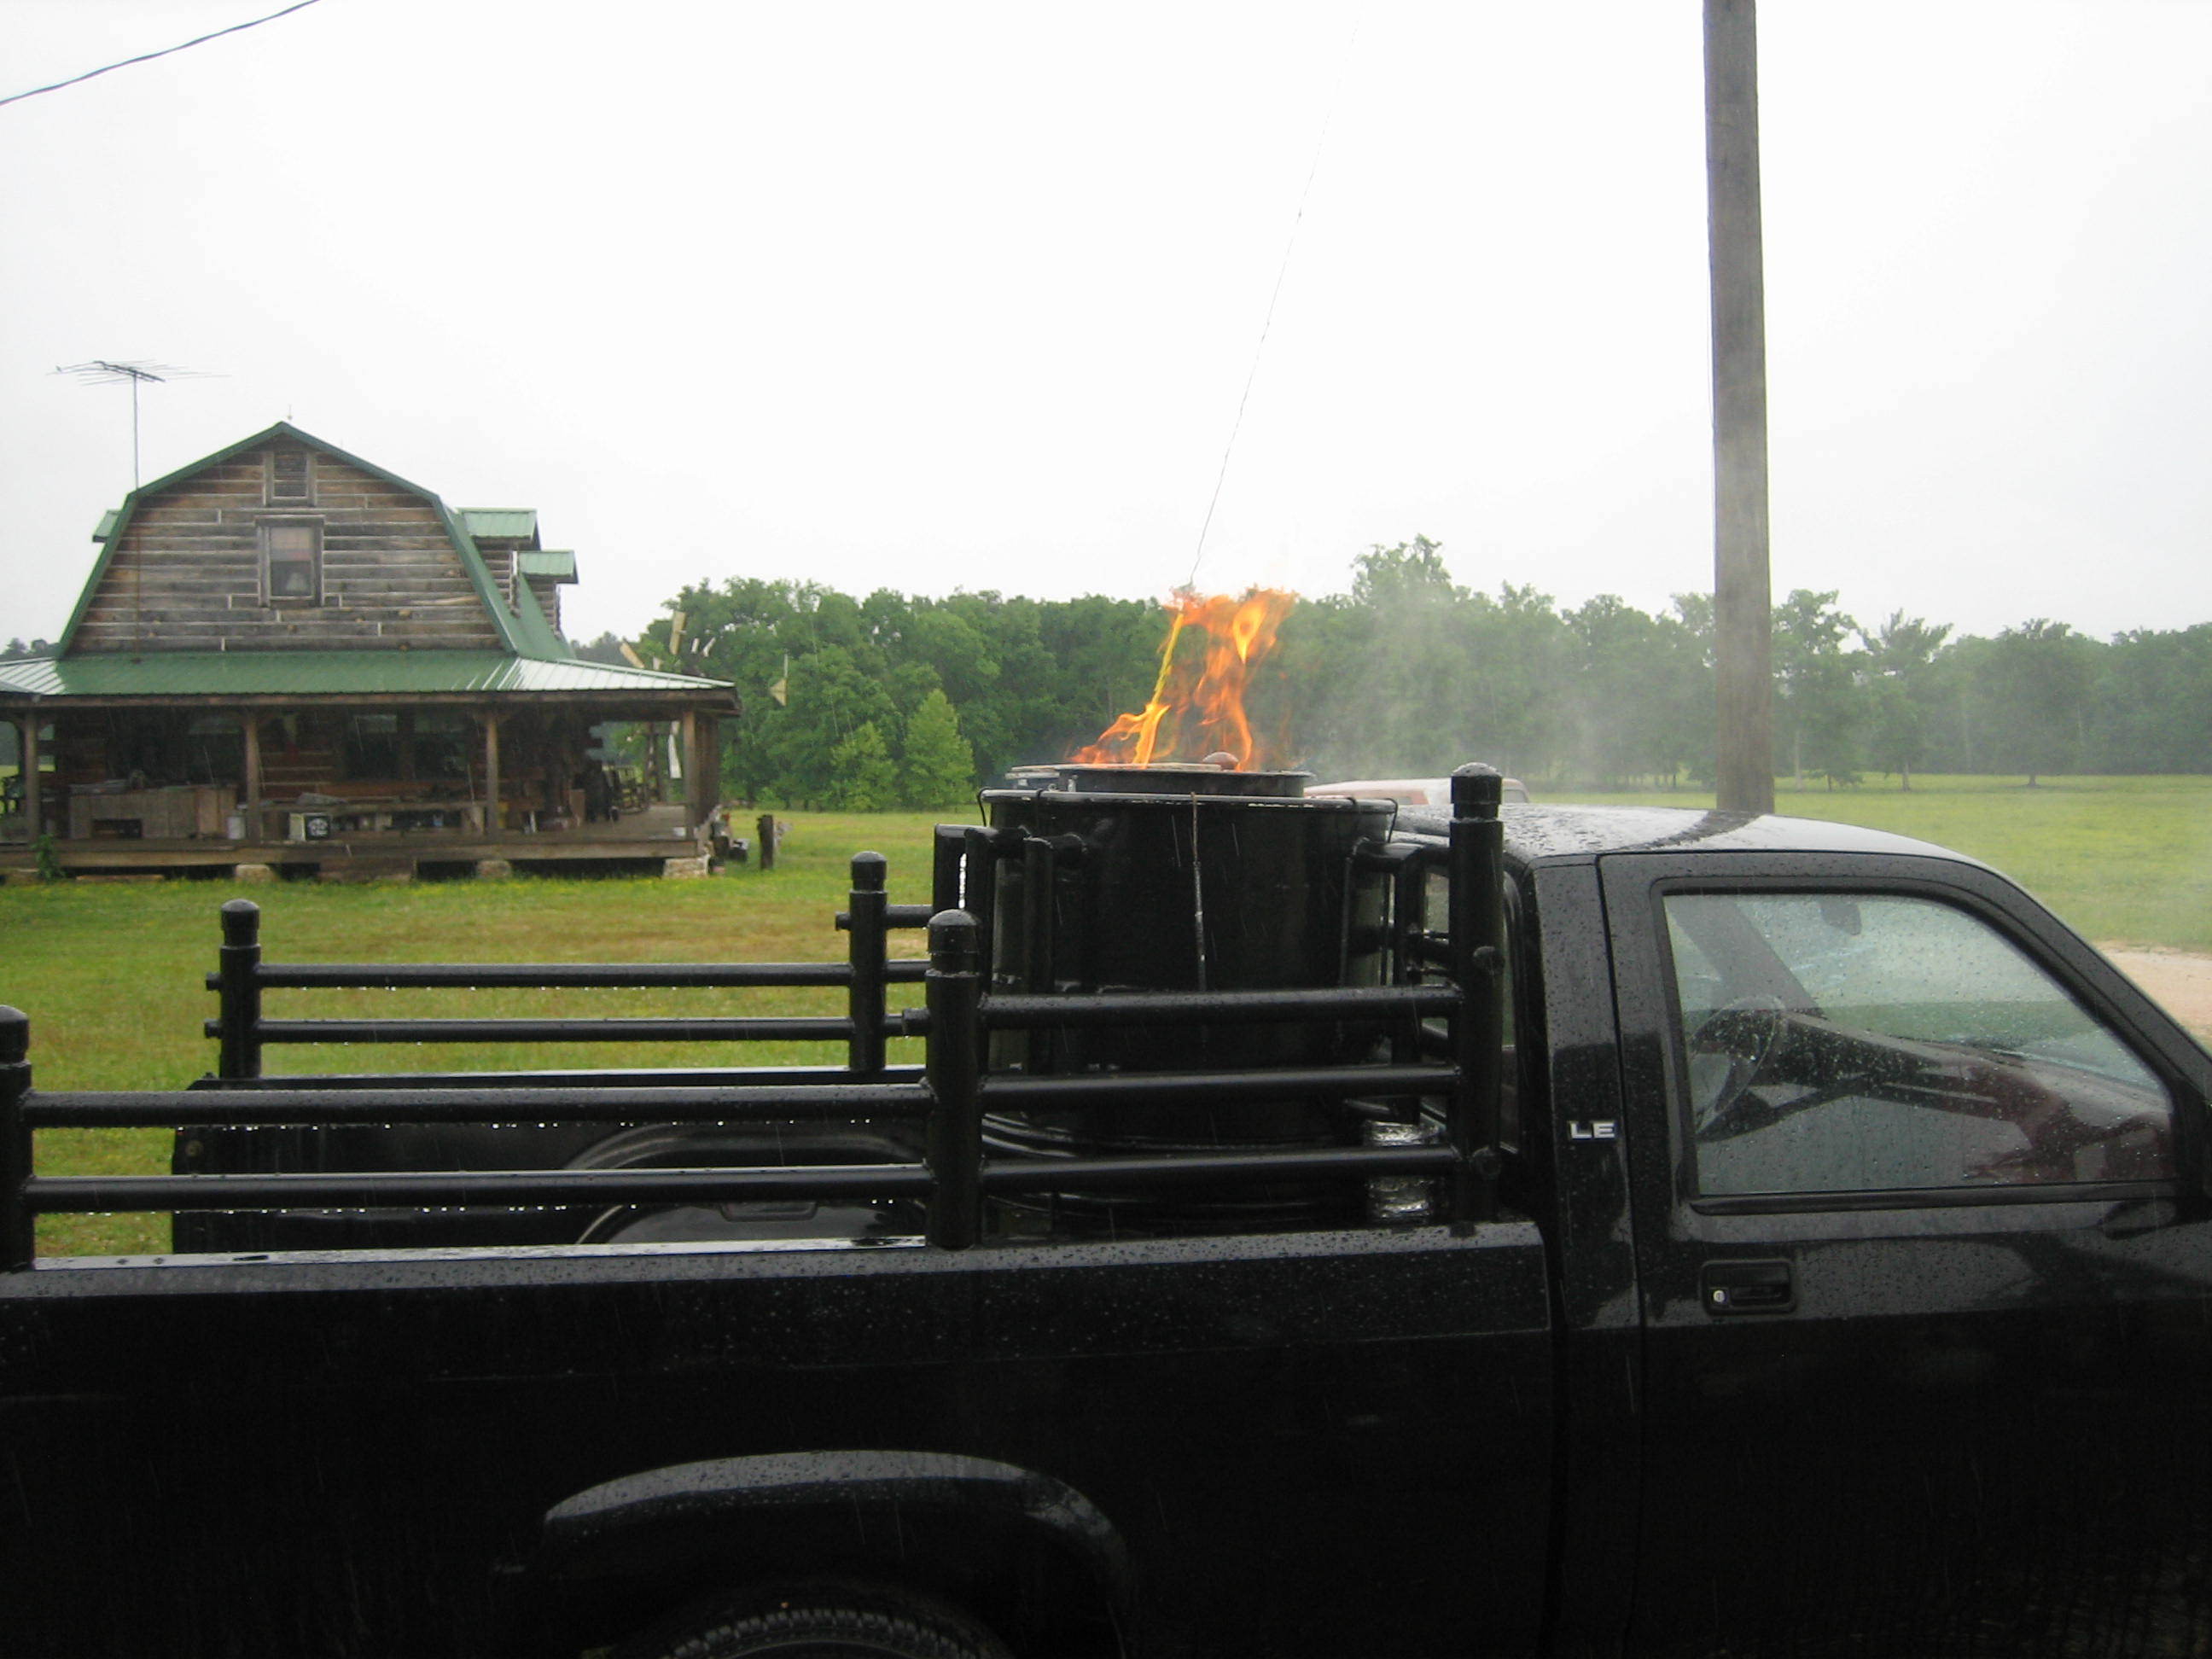
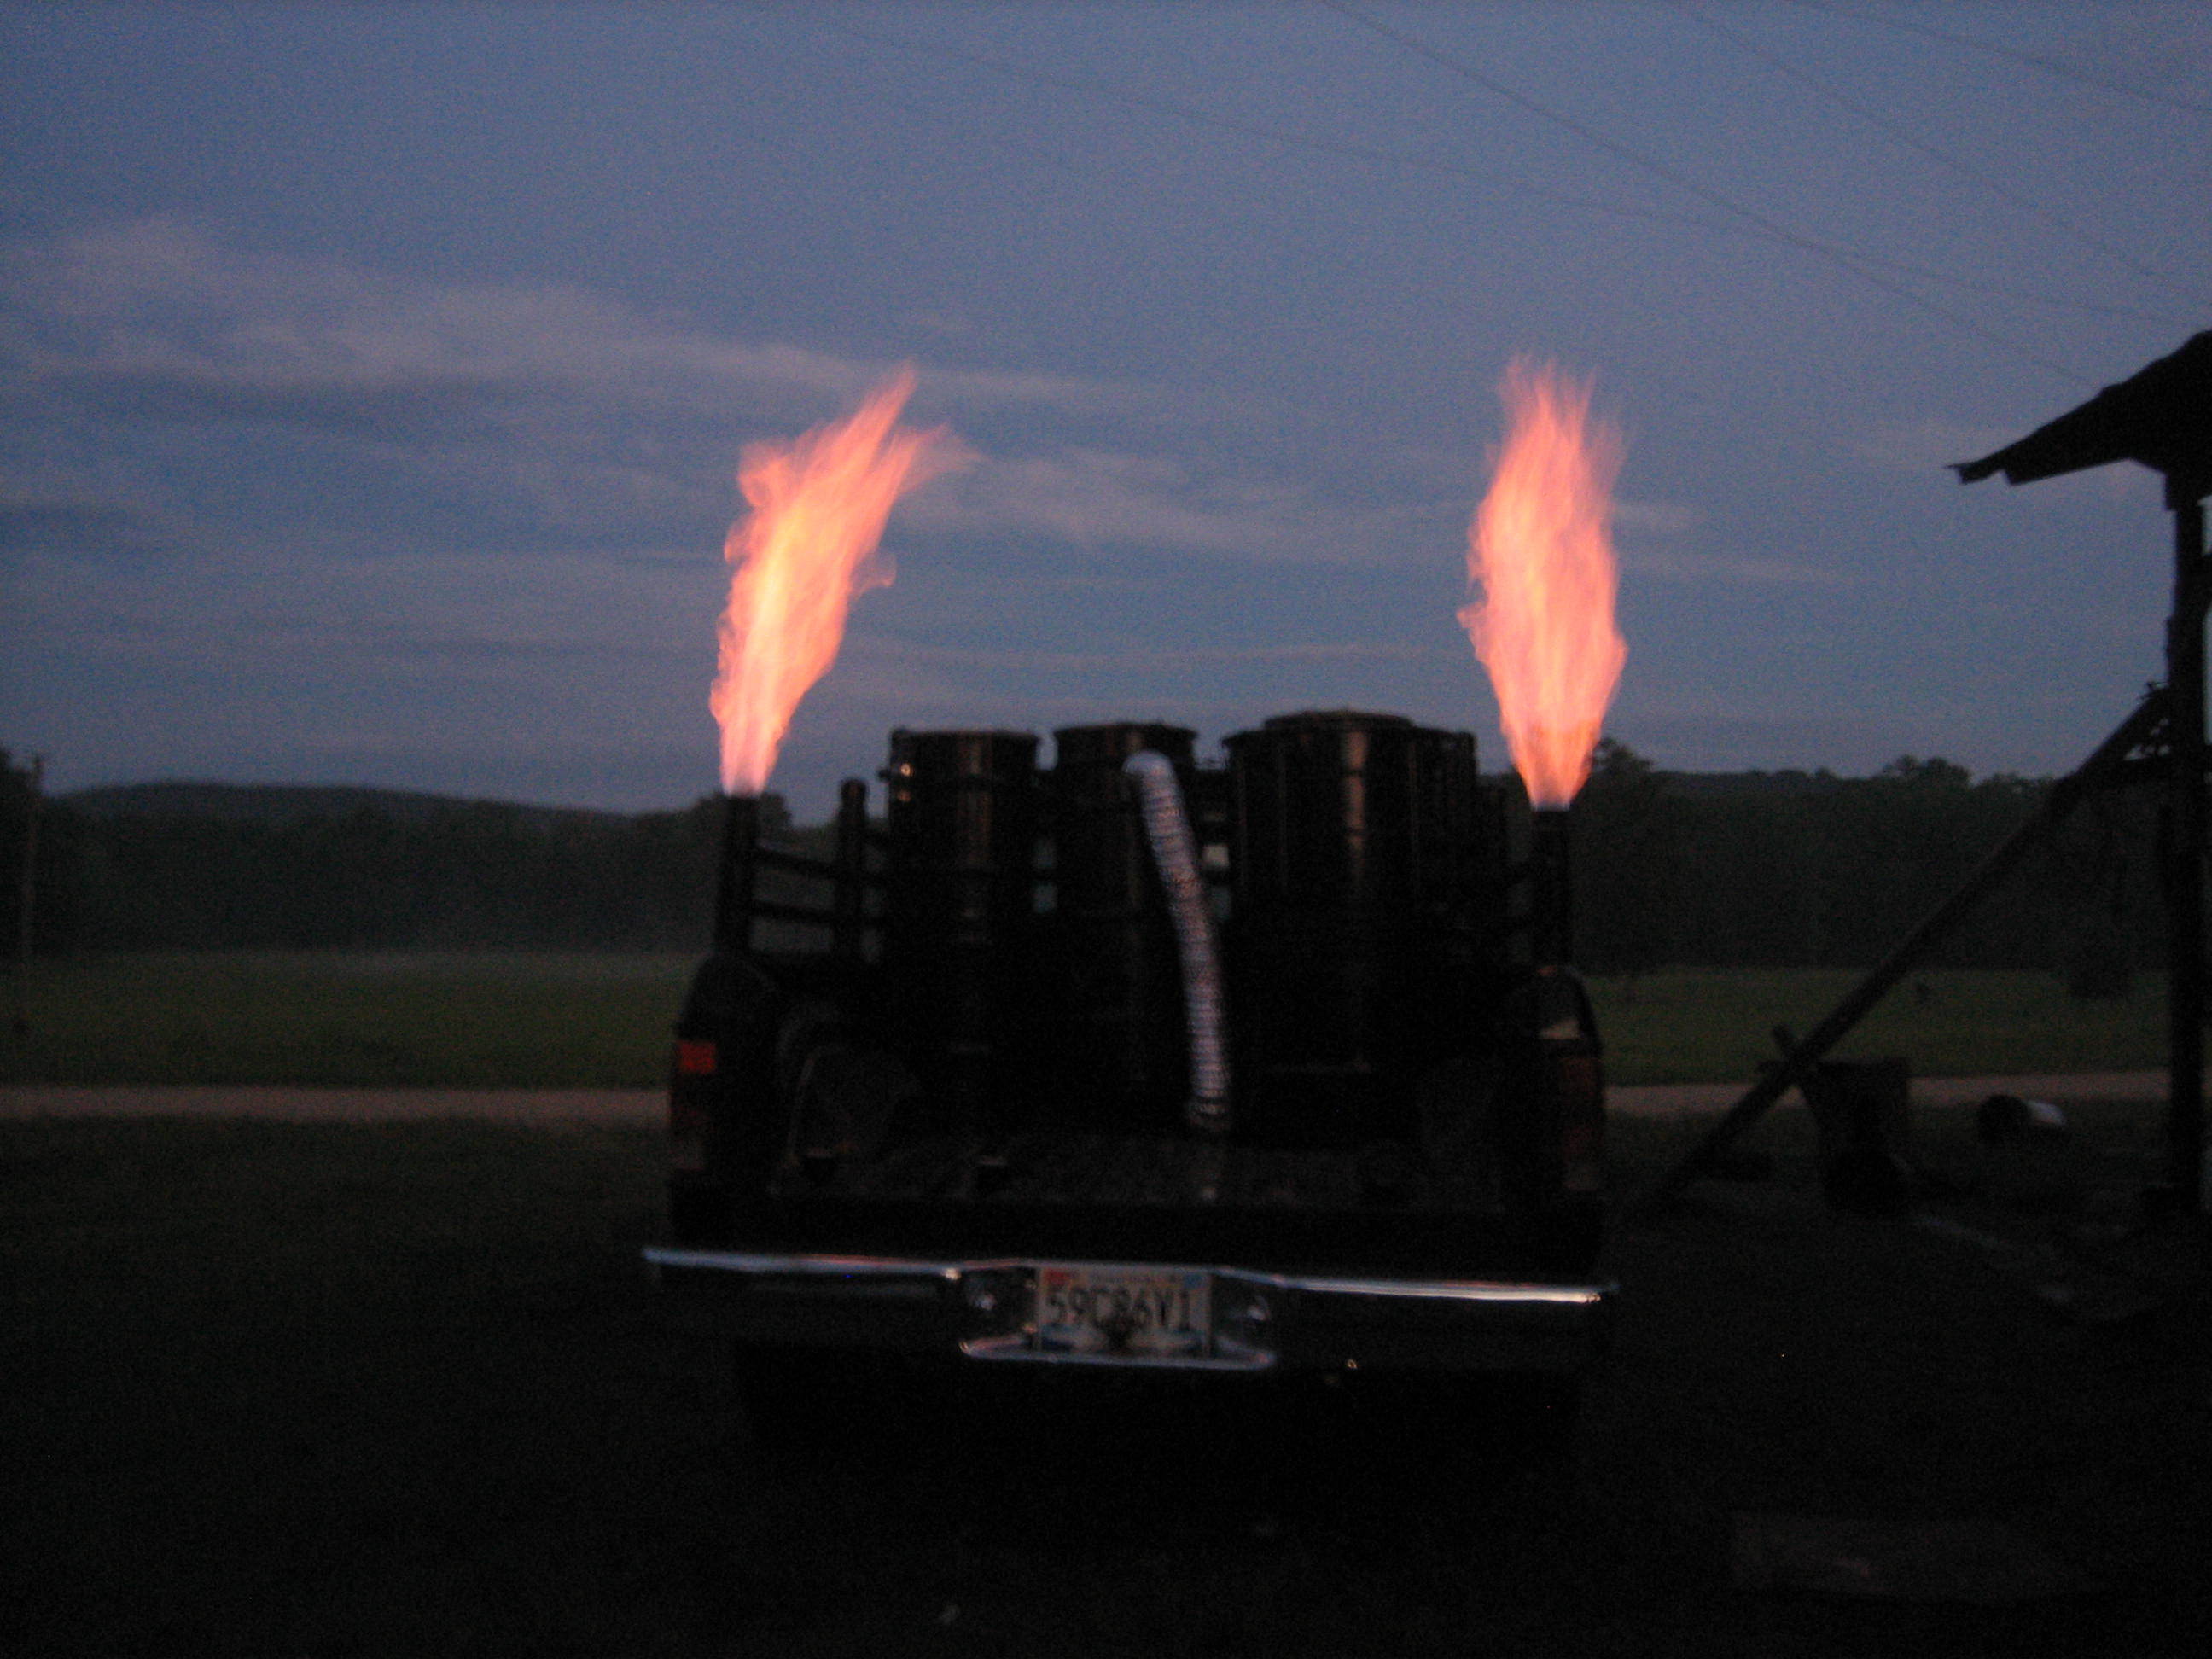
The pictures below show me starting a new gasifier by reversing the air flow until a good char bed is formed . This works good if you are in an area where making a little smoke will not get attention.
After the gasifier is burn in good and a good char bed is established each time you start up there will be no more smoke than someone smoking a cigarette .
On your gasifier I did’t see any means for separating the condensation in your fuel hopper so you may have to use good dry fuel .
Keep in mind the first start up with the gasifier seem to be the hardest .
Great looking gasifier. My first build looked like a mess.
Another suggestion for your first run is with a lighter wood like pine. Different size chunks for different wood. With the hardwoods you can mix in some wood chips too.
I think Wayne’s suggestion is probably the key. Establishing a good char bed. You are so close. Get your engine ready because as soon as you have a good flare, you may want to see if it runs an engine. Well, I did because I have a very low patience level.
You came to the right group because these guys are professionals, we want to see you succeed. Mostly because we are addicted to wood gassing and want to share it with others.
Definitely break your charcoal down into smaller pieces no bigger than 3/4 of an inch… you need to establish a char bed… cycling your system back and forth will help this too. Good looking system you have, did you check for air leaks?
That big billow of smoke from Waynes truck was from when he reversed his vacuem fans and pushed air back in the fire tube from the bottom of the grait. He only does that once and a rare while if he burns his fire tube low on charco, once he has his charbed established.or just brake up your charco small and dry and get those good results with less smoky the bear.
Hi nick1911
I’ve been off line for a few days reading much gifted to myself treasures.
The advice the fellows been giving you is all valid.
I am linking this to your comments here for clarification.
Absolutely your unbroken down from the sack lump-wood charcoal is causing the majority of your problem.
The char-bed from the nozzles down to the grate has to be very small particle to particle packed.
As Mr Pepe said your nozzle zone made HOT combustion CO2 and HOT water vapor steam has to be reacted completely moving through the HOT reduction zone char bed. The woodchar giving up carbon molecules to do this one CO2 to TWO CO’s conversions. The in-system woodchar will be used up - “disappear”. Replenished from the woodchunks just above nozzle level burning down into size, devolved, HOT char-chunks.
Too large of passages and these upper made noncombustible gases will pass through the char-bed and out, unconverted to combustible fuel gasses you are trying to create.
Starting with bagged lump wood charcoal hatchet chopped it all up. SAVE it all. Put just enough small chunks layered on the grate so char fines will not pass on through. Now, layer by layer, fill to above the nozzles starting with the finest; ending with the largest. The really fine char dust layer-in at the air nozzle level.
Largest chopped with hardwood bagged charcoal no bigger than ~3/8" char particles. Soft wood hand loaded char chunks need to be larger by ~2X.
As MattR said. And WayneK showed. The best from cold starting out success use in-bed formed wood-char.
As a better alternative to bagged commercial see if you can steal out some burnt down wood charcoal out of someones wood stove. You Stove? Put it in HOT, and go directly as advised to gasifing.
Borrowed (stolen) from someone else; then you have to air tight metal container quick-cool it in a snow bank. Or as RayM said well sealed container slow heat bleed off (no oxygen letting-in peeking) overnight to a few days. Depends on the size of the container and the air temp.
My experience has been softwood chunks versus hardwood chunks is to make the hardwood only one half the size. If you stove a lot you will see that oak has a much slower energy release rate and devolution to char chunks versus say a pine or fir. You are controlling the energy release rate and size of the char particle making with the wood chunk size.
One inch to 1 1/2" inch oak should have been small enough.
Yep. Probably a wood moisture problem.
Weight a volume of your wood chunks.
Then either microwave them until no more weight loss.
Or oven cook them at no more than 250F until no more weight loss.
This will get you down to ~5-7% moisture. Difference between starting weight and finish weight would allow you to add-calculate a starting moisture %.
As built this system will want 10%, no higher than 15% moisture wood. High engine demand drawn it might be able to handle up to 20% moisture wood. BUT ONLY after draw demanded heated up and kept thermal loaded up!!
On his web-page BenP has now put up a hopper extension project to book buyers. This CAN have moisture removing features built into it.
Needs the additional height for these features, and for hopper cooling surface area to allow condensation back to liquid for removal.
I personally only use non-condensing single wall tall, narrow hopper.
I am stationary electrical power only. And there is plenty of engine/gen head heats and air flows to just-in-time reduce my 40% moisture wood chunks down to a still-warmed-into-the-hopper 10% moisture batch dump delivery.
As MattR said; smart operating once you anticipate end-of-woodgas-production-need; then only add enough new fuel to produce this, and have just enough above the air nozzles for the next from-cold starting up.
This is an experience thing to learn.
Others are:
Burn out all of the wood, and char to below the nozzles - if you then let cool down - you get to start up that messy bed rebuilding all over again. Mistake!
Another. Dump in a hopper full of new wood just before engine draw shutting down, and air-in, locking off. Almost for sure the residual core-hearth heat will, no longer being pulled flow-down, then rise-up and moisture wood cook out. That released humidity then rise to the lid, condense and outer walls drip down and wet-soak your in-place-made starting up char. Mistake!
And Wet char will not want to liteoff producing the needed INTENSE initial system heat.
On cold startuing up you want to have CHAR opposite the nozzles. Burn/oxidize enough of this to heat up the whole system as cleanly as possible to good working conditions.
I only need to store one plastic bag of Just-In-Case pre-dryed wood. And one sealed metal can of re-charging char.
Need to use these. REPLACE and store for the next need time.
What engine load do you want to supply woodgas for??
This BenP book system will have to be internally configured for different engine sized/loading’s.
Hi Nick1911,
Here are a couple of easy ways to make charcoal that you can fit into the weekend and amaze the company. Also a lot of adults have never seen smoke burn.
My charcoal setup for my wood stove. PS you can have several of these going at the same time.
Another simple method
Still another method would be to fill a 5 gallon metal bucket with wood, add a cover with some holes and set it on top of a campfire and cook it off (burn the smoke as it leaves the holes) and when the flames go out the charcoal is ready to rest in an airtight configuration overnight, not inside any buildings. A single spark can eat up all that charcoal and consume all the oxygen in a tight room. Asphyxiation would be a real concern.
Make sure when you remove the cans from the fire to turn them upside down in dirt so no air can get in and consume your charcoal.
Fill your gasifier from the grate to 4"-5" over the nozzles. Start a small wood fire on top of the charcoal, start the fan and when the charcoal starts, fill the unit with dried wood and close the top. Keep testing the smoke until a flame sustains. Voila, you have usable woodgas.
On another note, I’m sure it does, but can you confirm that your gasifier has a drain port. I know you paid for the book so I don’t want you to disclose any of Ben’s proprietary information. I think my request is safe since I don’t want to know the design sequence or method, just does one exist?
I have a few other vids I can pull together that illustrate my runs and water separation /collection that you might find informative. I can shorten the watching time by supplying an index of high points shortly. You can view my stuff here:
I must respectfully disagree that hopper lid leaks don’t matter.
Enjoy the Holidays,
Pepe
EDIT 12/24/2016
Sorry, you’ll have to run through the vids to select, they can’t be sorted numerically or alphabetically on YouTube. Since we were talking about water, there’s some shots here showing how much water comes from drying the “dry” fuel. Just some general information and operating results from my imbert like gasifier you might find interesting.
1Fuel analysis 1 8-20-2011. This was a fluidyne design with 1/2" nozzles (too big), start with
1/4" for better penetration. @1:38 note mistake of using large square washer which blocks
the flow.
2My second ICE run on woodgas-7-29/12. @:09 note elbows for nozzle inlet air before the
single port air inlet manifold fix. @:27 see the bottom of the white PVC hopper drain at the
upper right of the gasifier. this has a shutoff to close before unscrewing it to empty. pita.
add drain pic
3Part 2 Oct 16, 2013. Startup, run,preheat gain, cooler temp. @3:50 we see the upper hopper
drain arrangement.
4third burn 8 17 2015. @ 2:08 see vibrator run. Also note the bump house blower used as fan.
5Third burn results 8 18 2015. @:36 condensate drain in moat is plugged (or so I thought). The
globe valve failed to open. @:50 better view. @1:23 40 oz. condensate drain.
6Monorator hopper first firing July 17, 2014. @1:23 drain hopper
7Third run with monorator hopper 7/29/2014. @6:26 monorator hopper drain, 1 pint. @7:14 original cooler drain 1-2 tbsps. Monorator hopper does a great job of collecting condensate at the beginning of the process
8Part 1 New Fall setup with mods aspect ratio 4 x 3. @ 4:25 see old hopper drain
9Gasifier run with vibrator made 11 24. I moved the vibrator up closer to the monorator
hopper later. @6:19 check for system water. Water in vaccum cleaner from start up, about
1/2 cup. @8:27 drain cooler. Vacuum cleaner is go for that size gasifier.
10Swirl burner start and some operating flow temp. @1:46 view of cooler
11Second run Aug 2015. @:04 good view of bump house fan setup.
Thanks for all the info. I’m working on better sealing the hopper lid now. I’m going to try to do some more through fuel prep as recommended and get another test run in by the end of the week.
I don’t run a woodstove, but have made charcoal before. I used a cut down gas water heater.
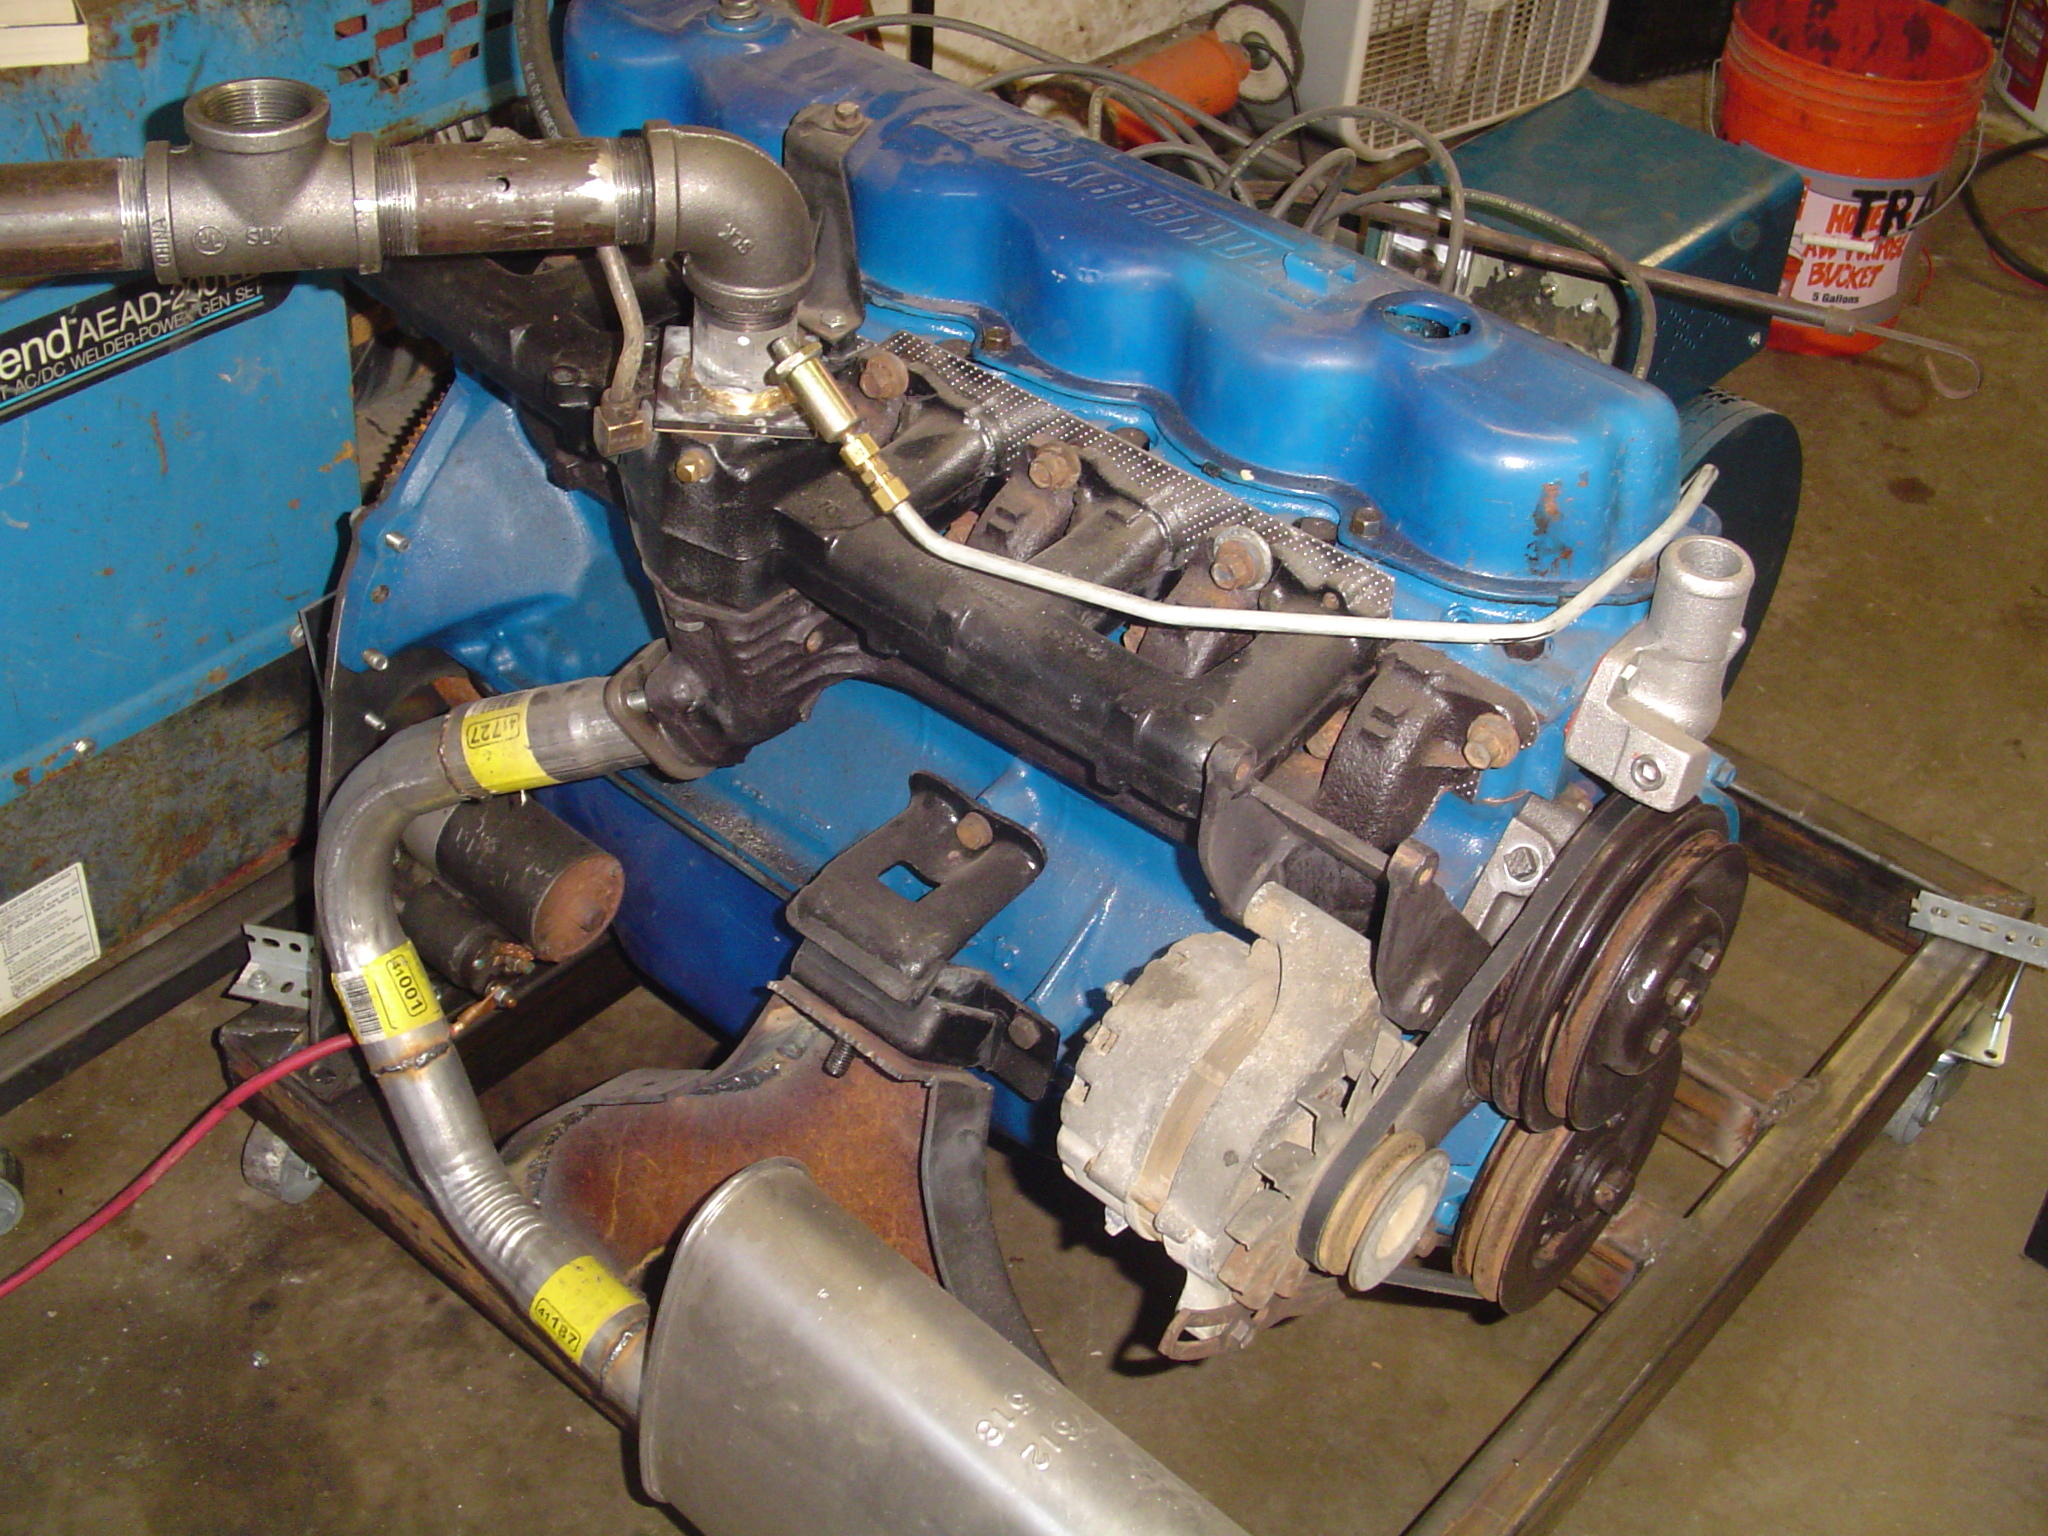
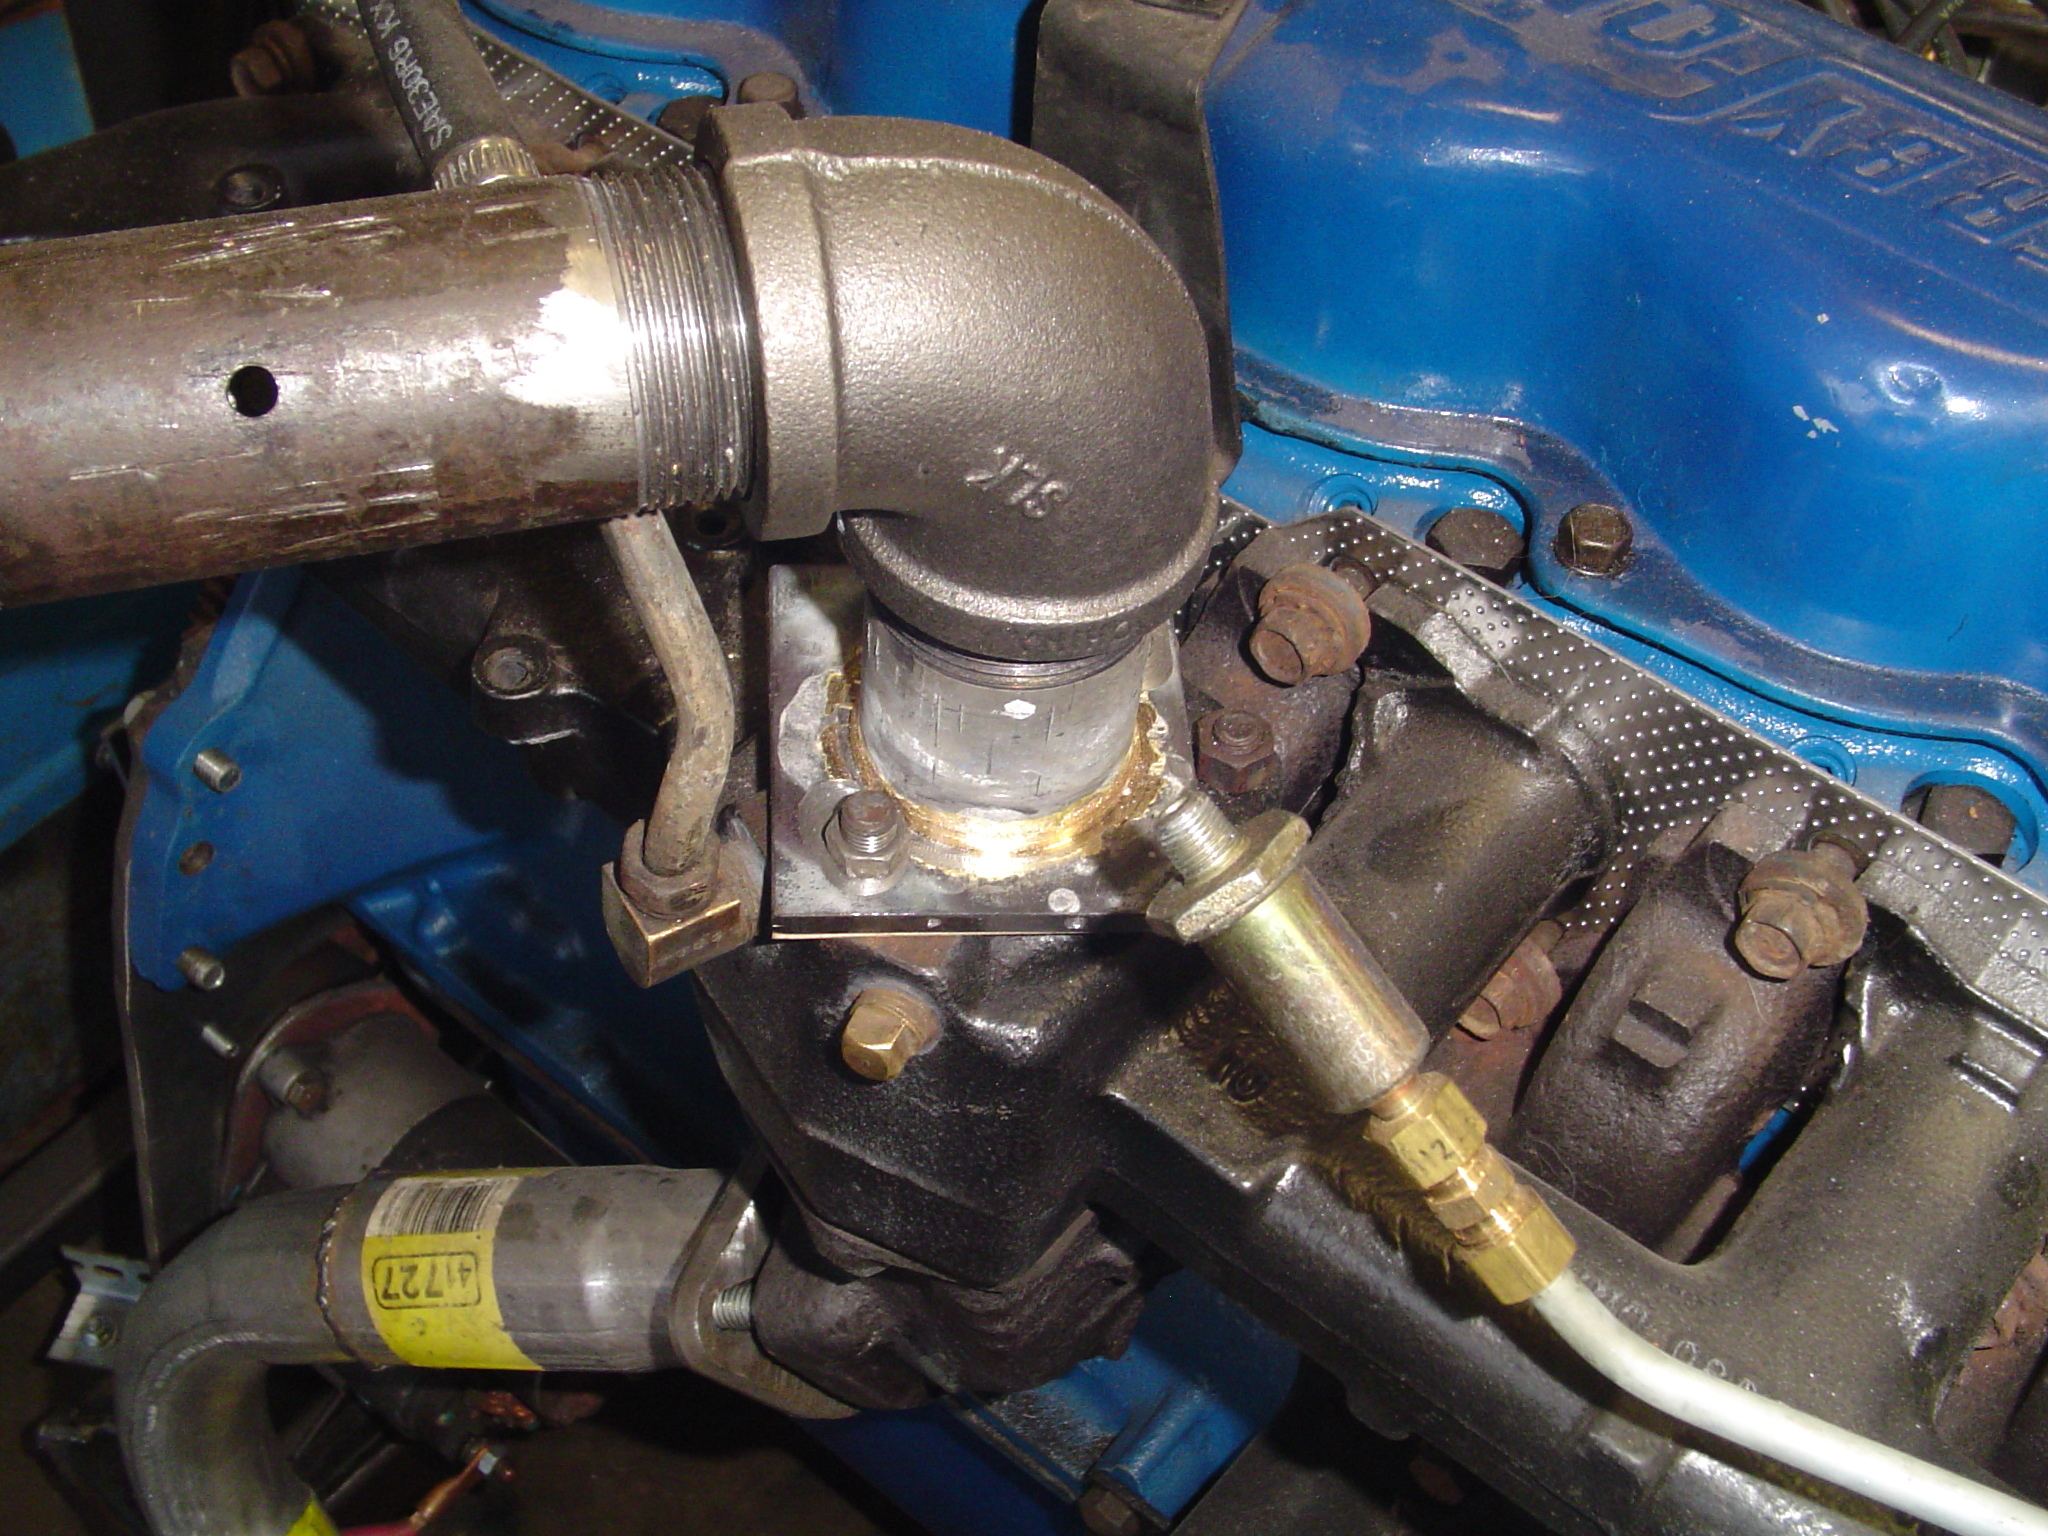
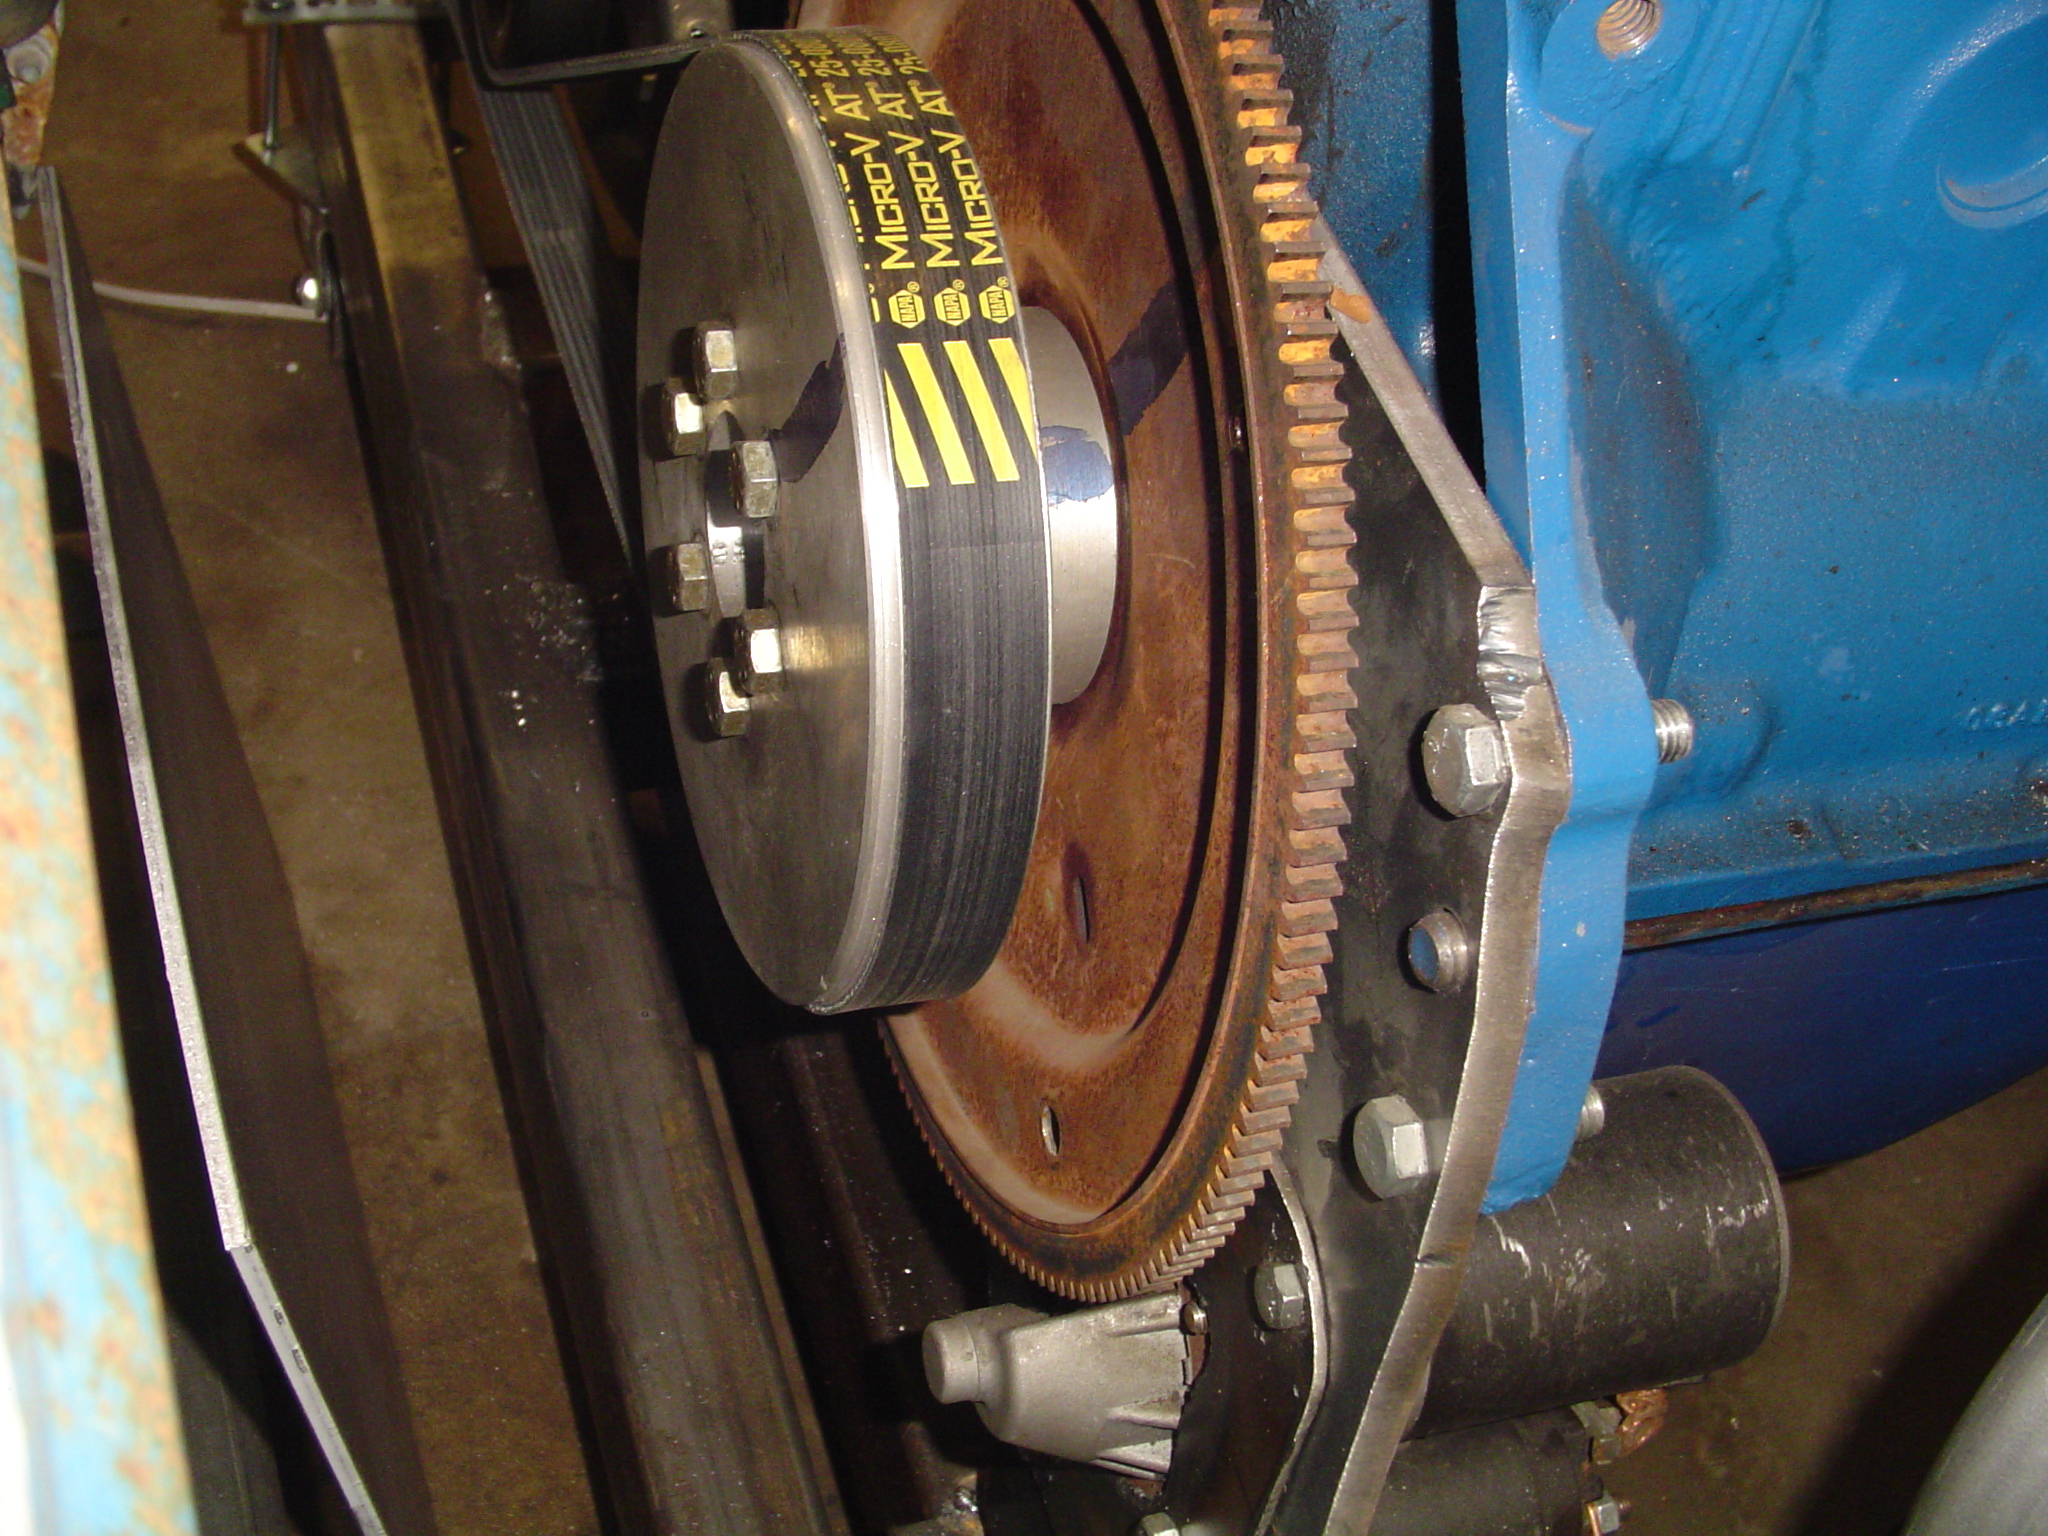
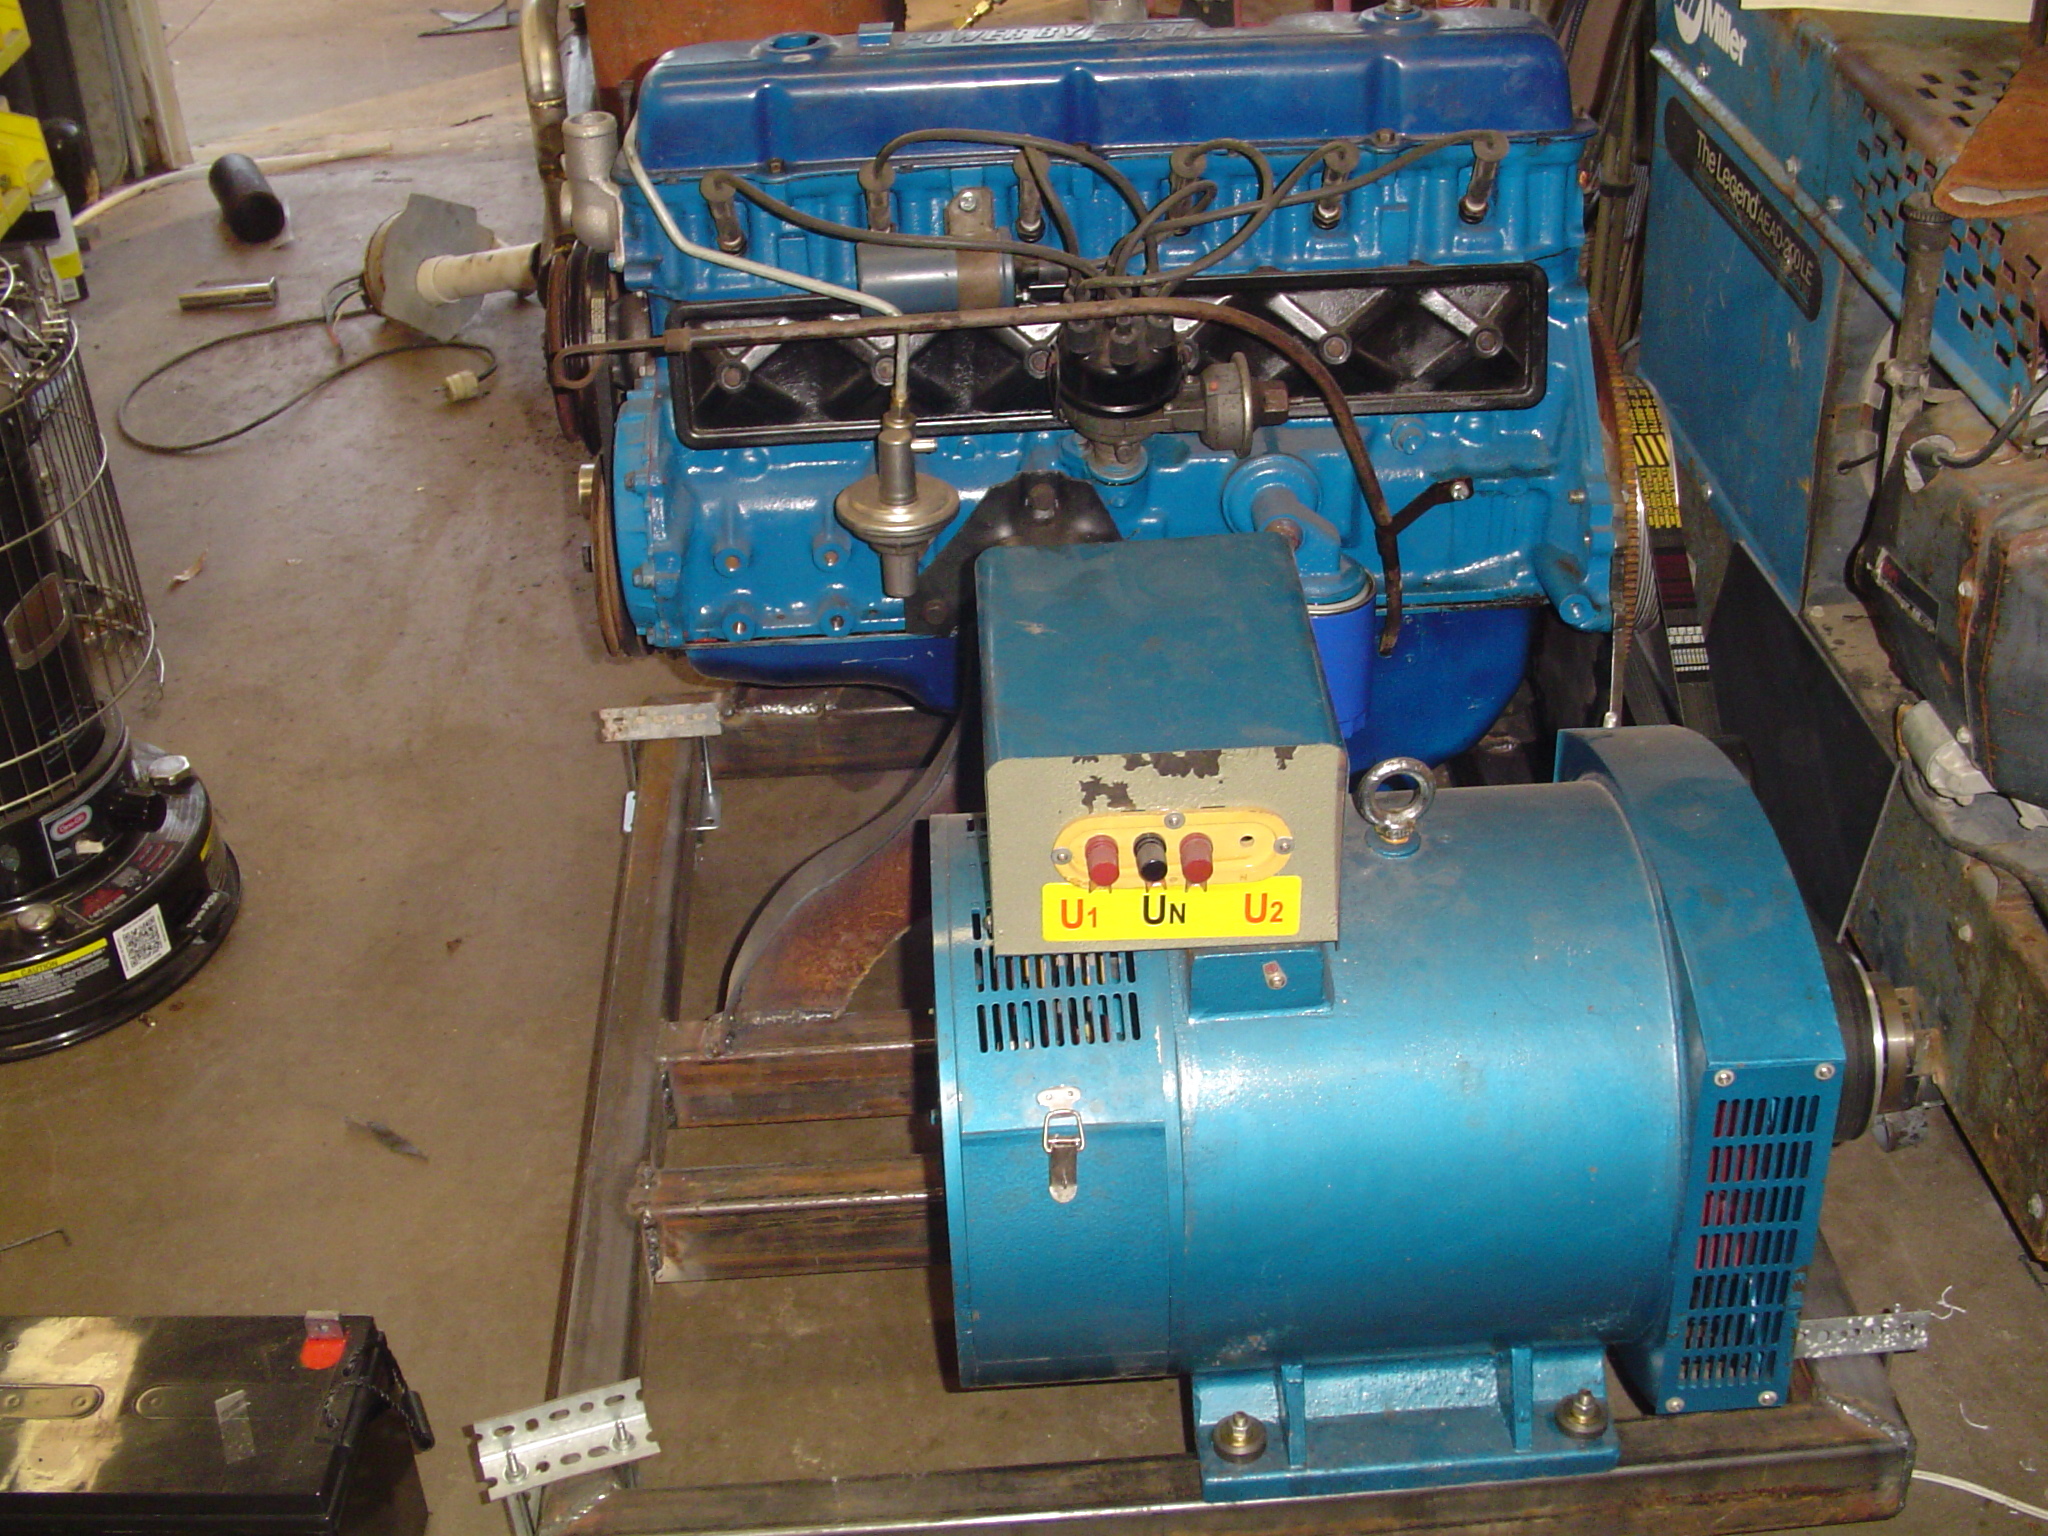
I do have an engine I’m planning on hooking in. It’s a Ford 240 straight six, coupled to a 15kw ST gen head. I’ve been working on my woodgas carburation setup. I found some pretty good info on cutting throttle plates here:
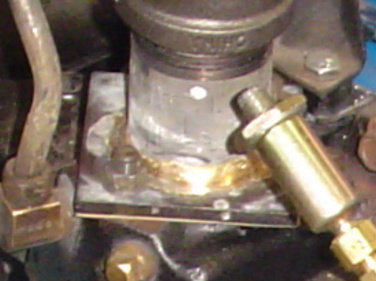
I did. I had basically no room for weld buildup due to the spacing of the studs on the intake manifold. Knowing I’d have to turn the weld bead down, I opted for bronze braze as it would be easier to machine back off.