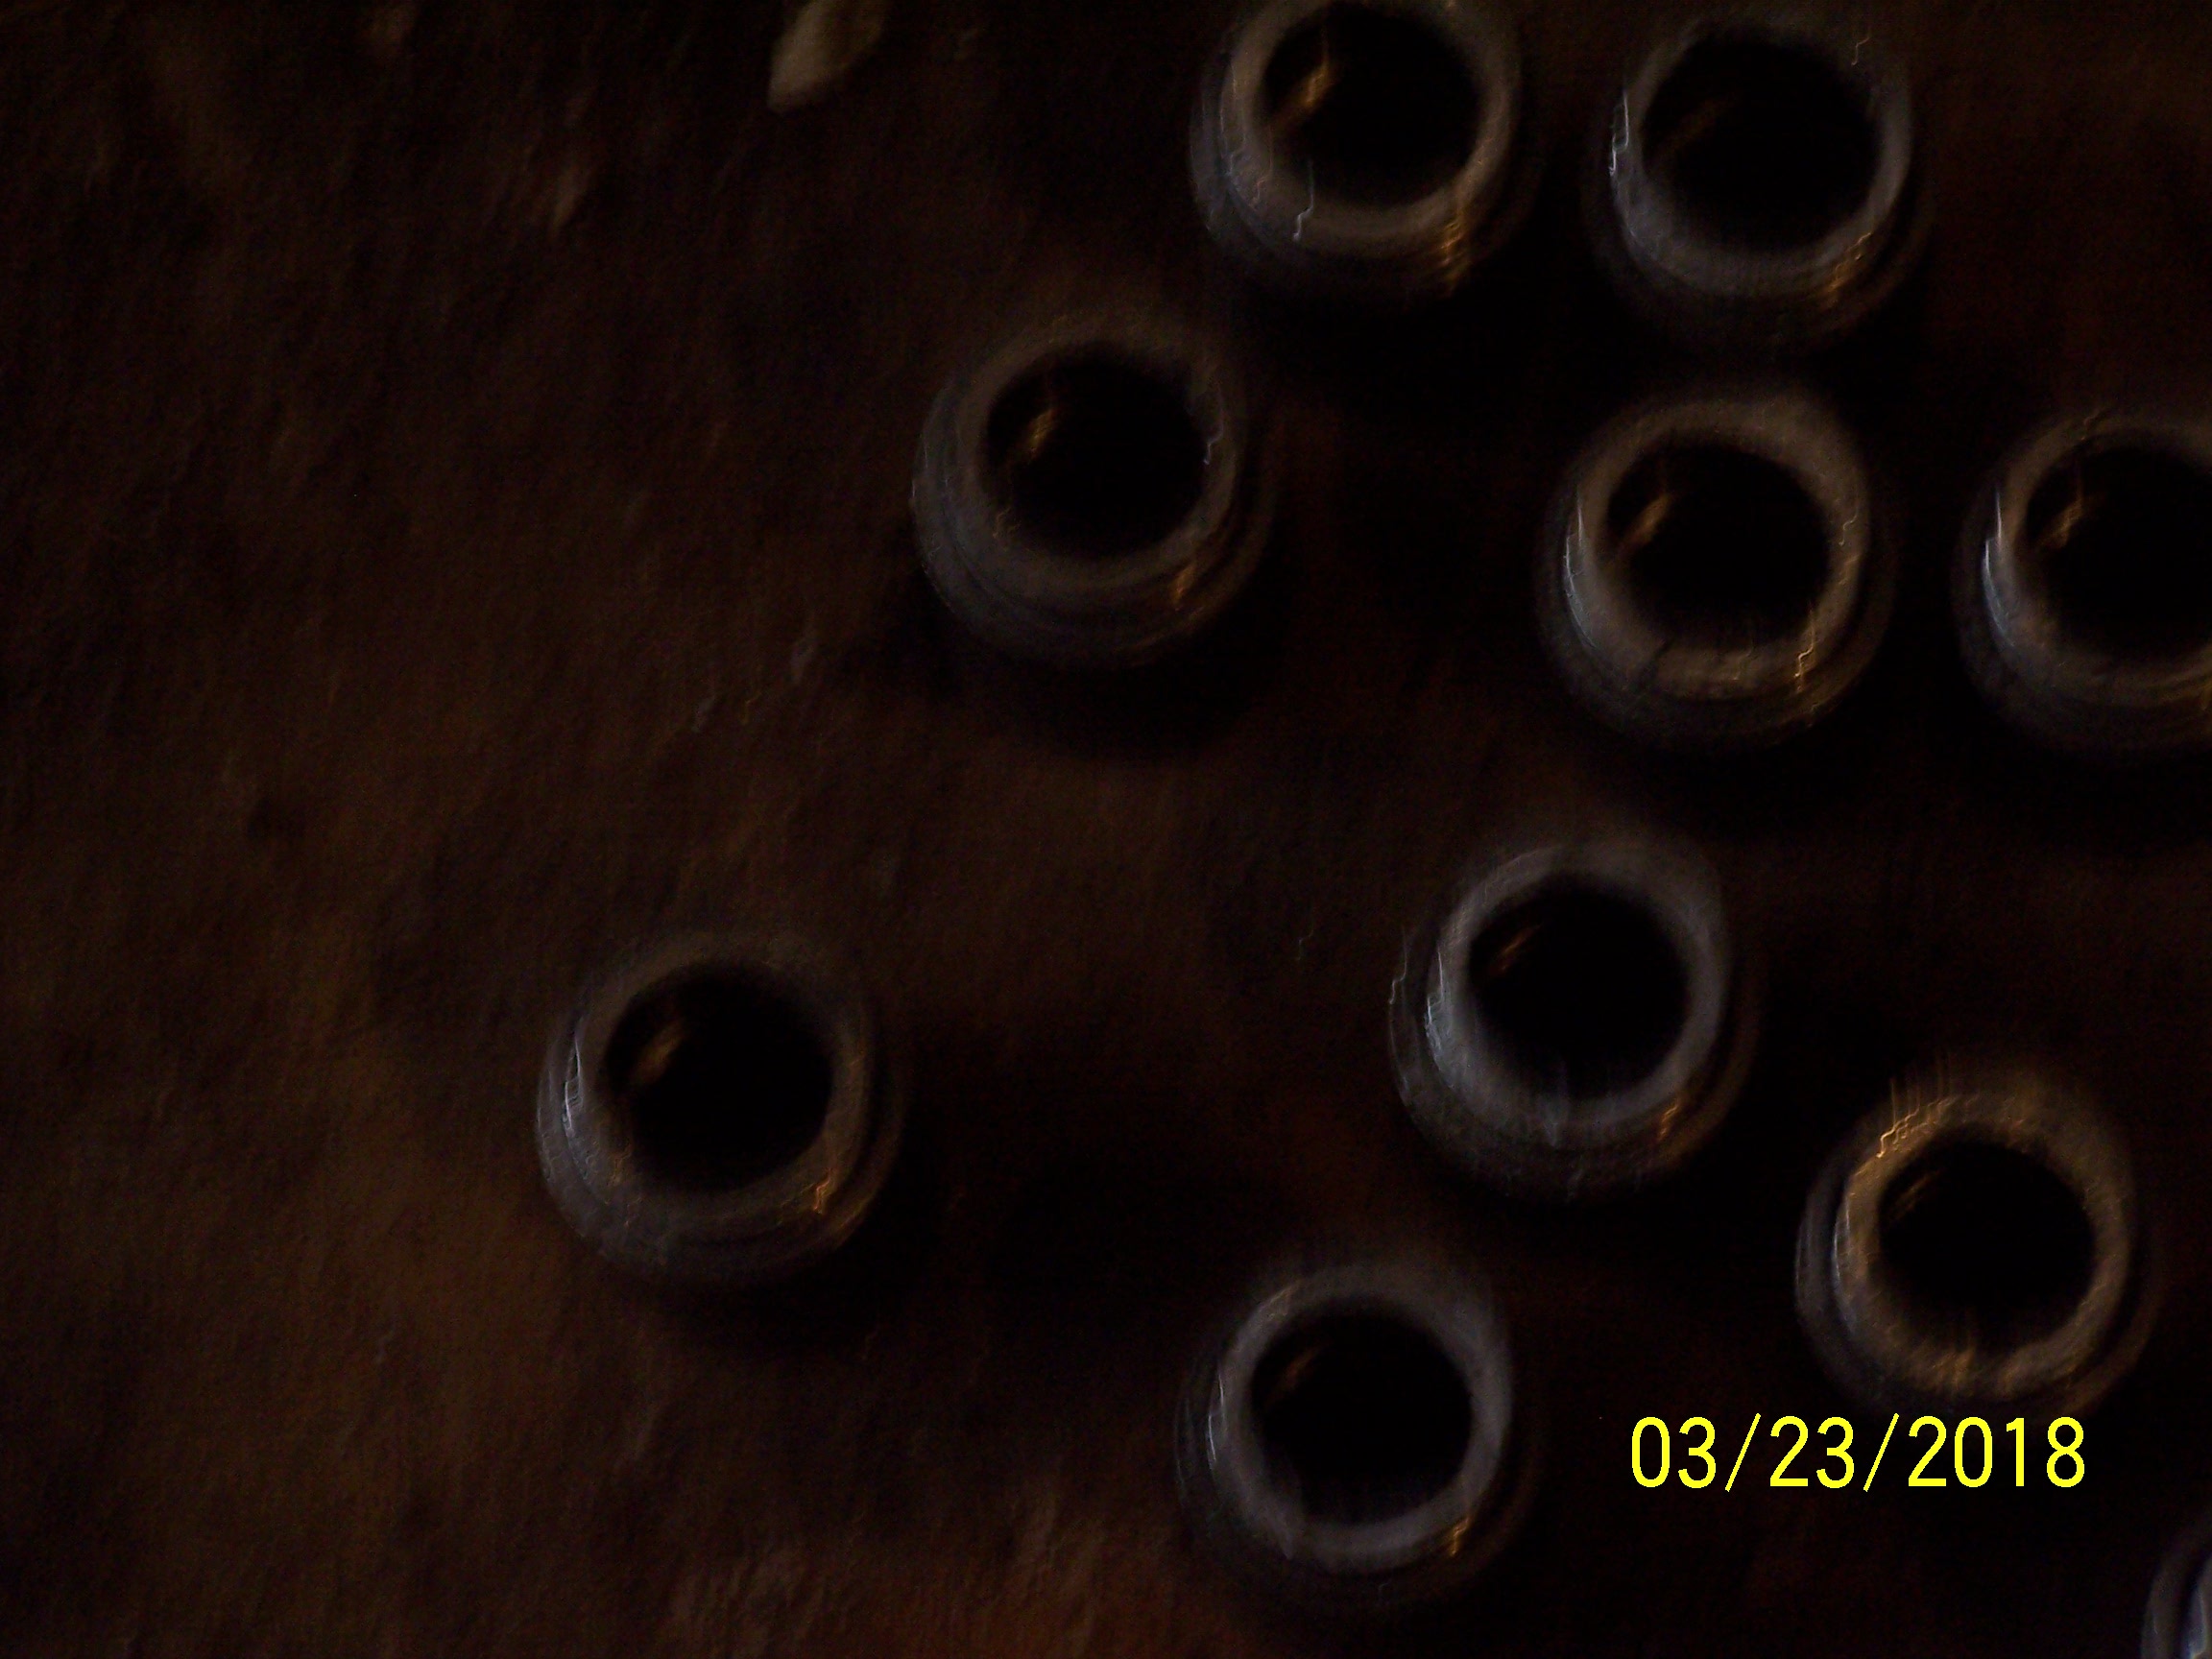
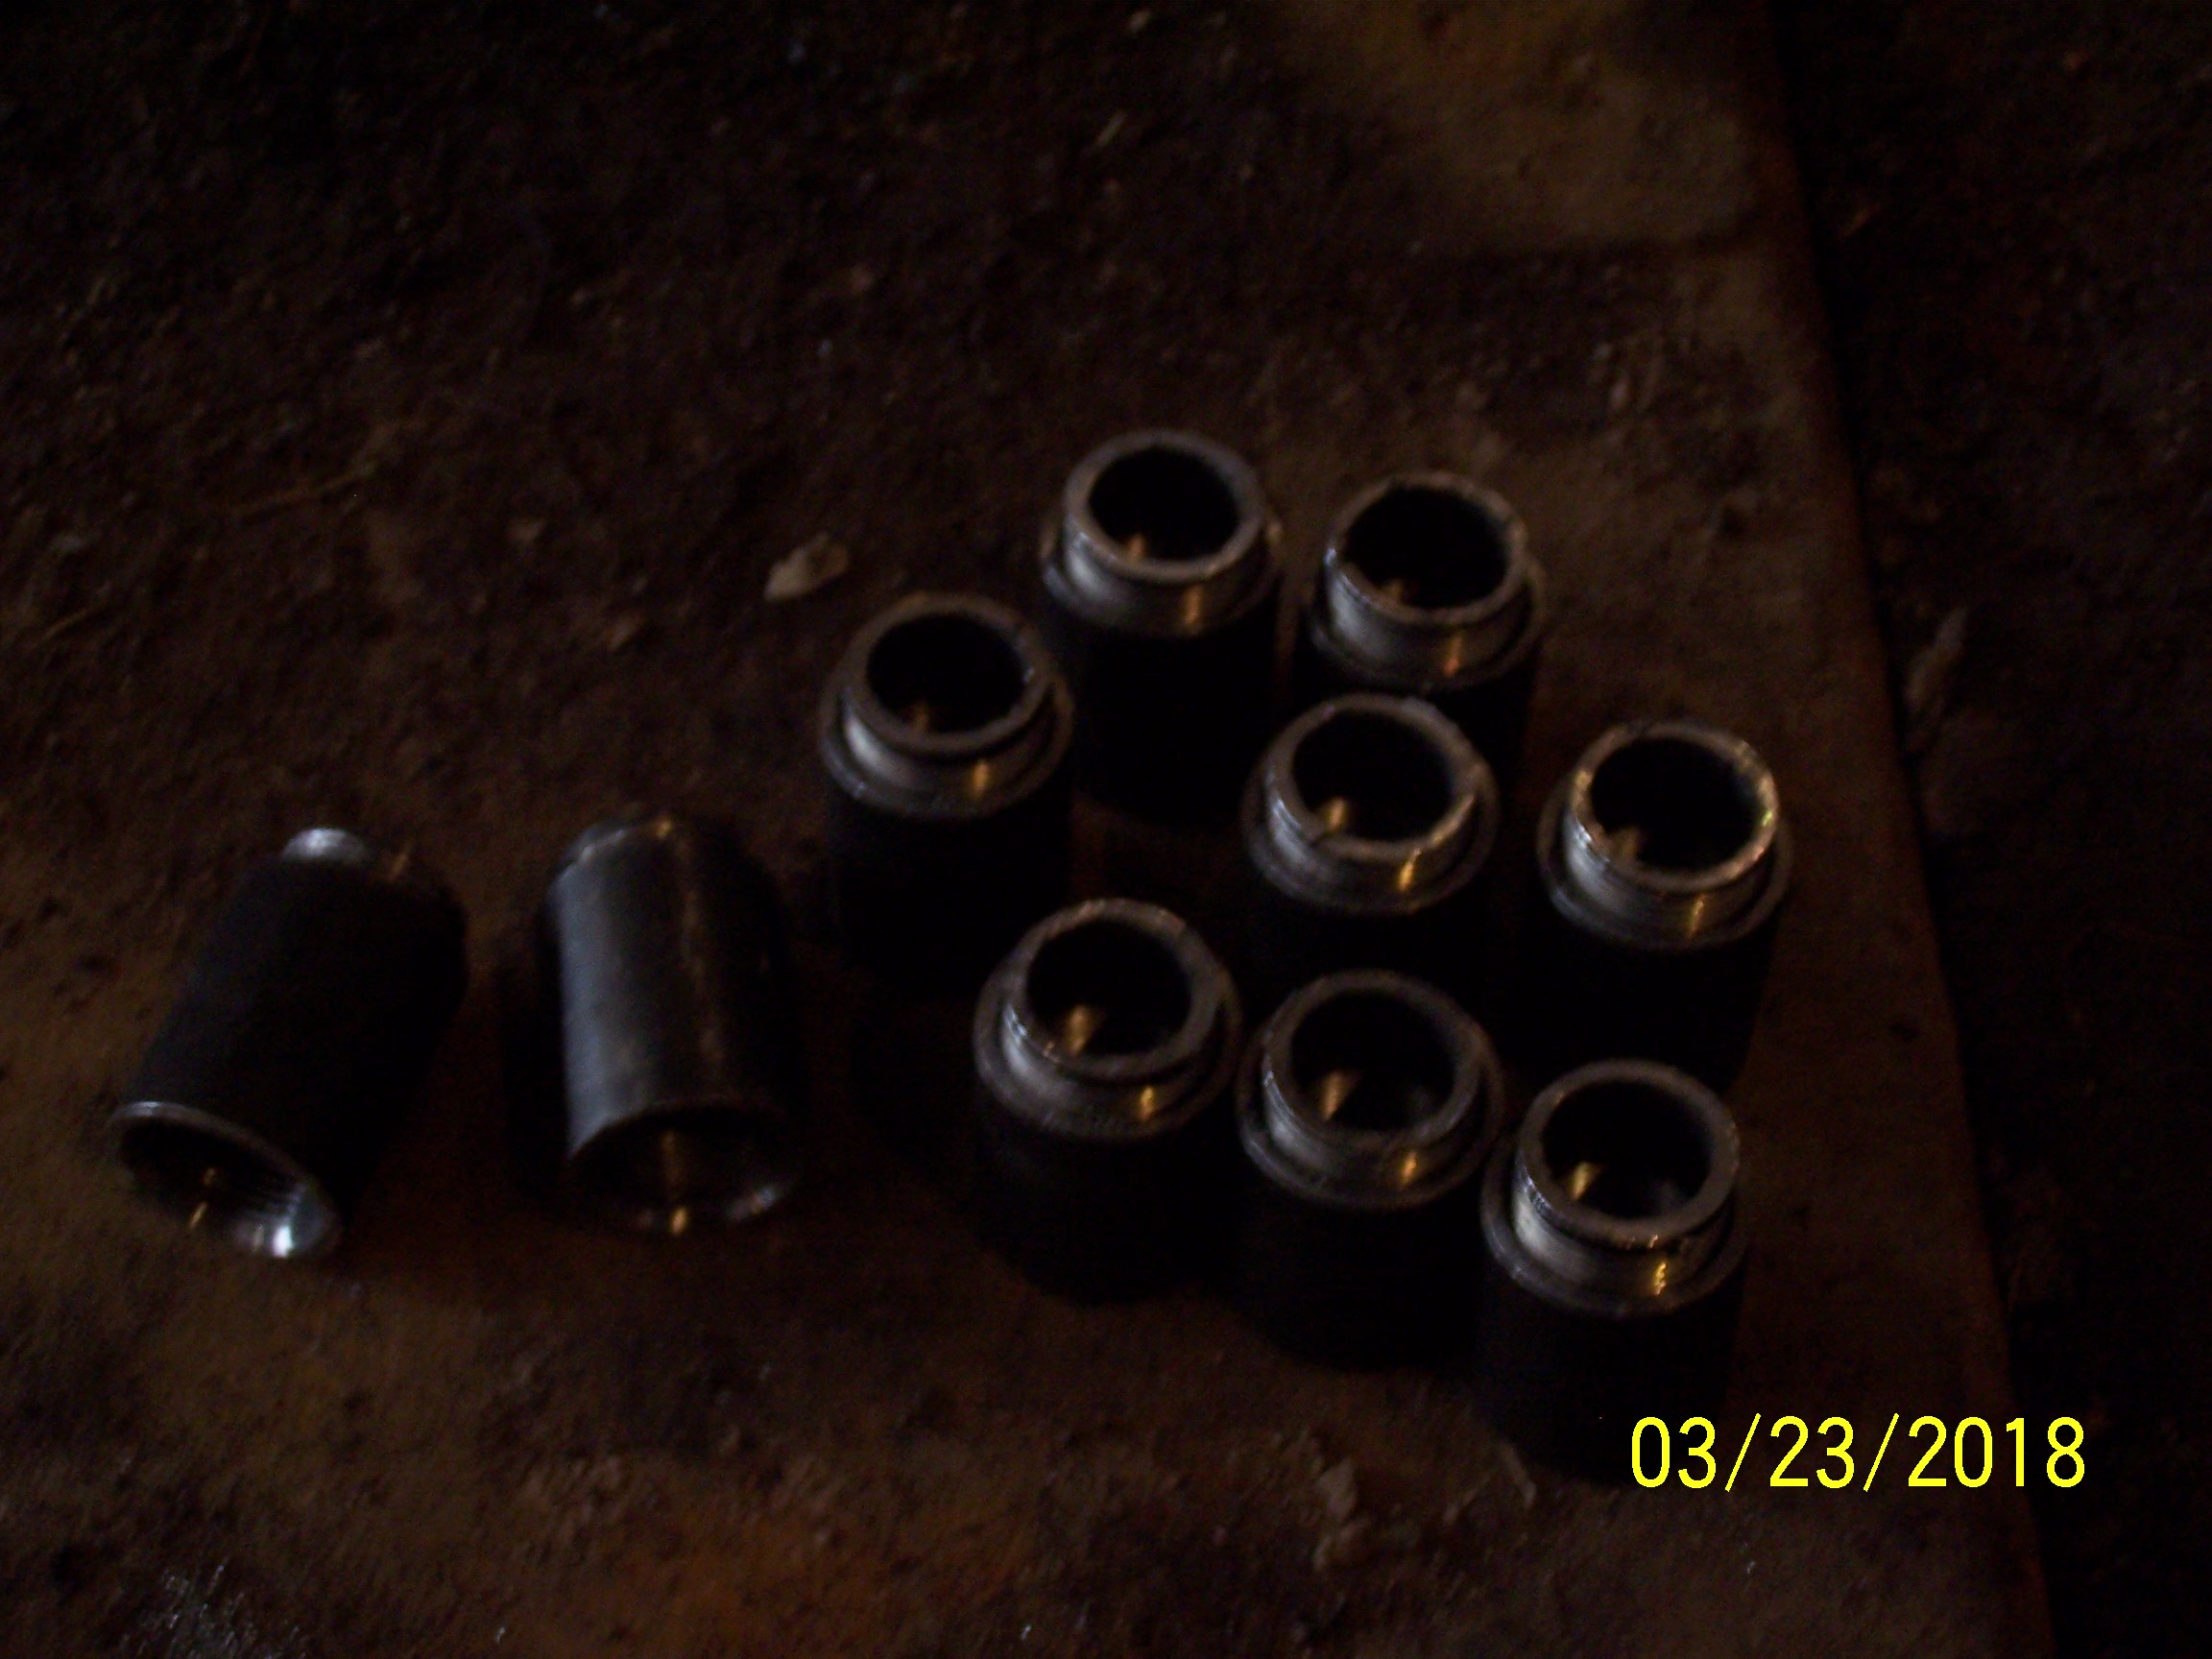
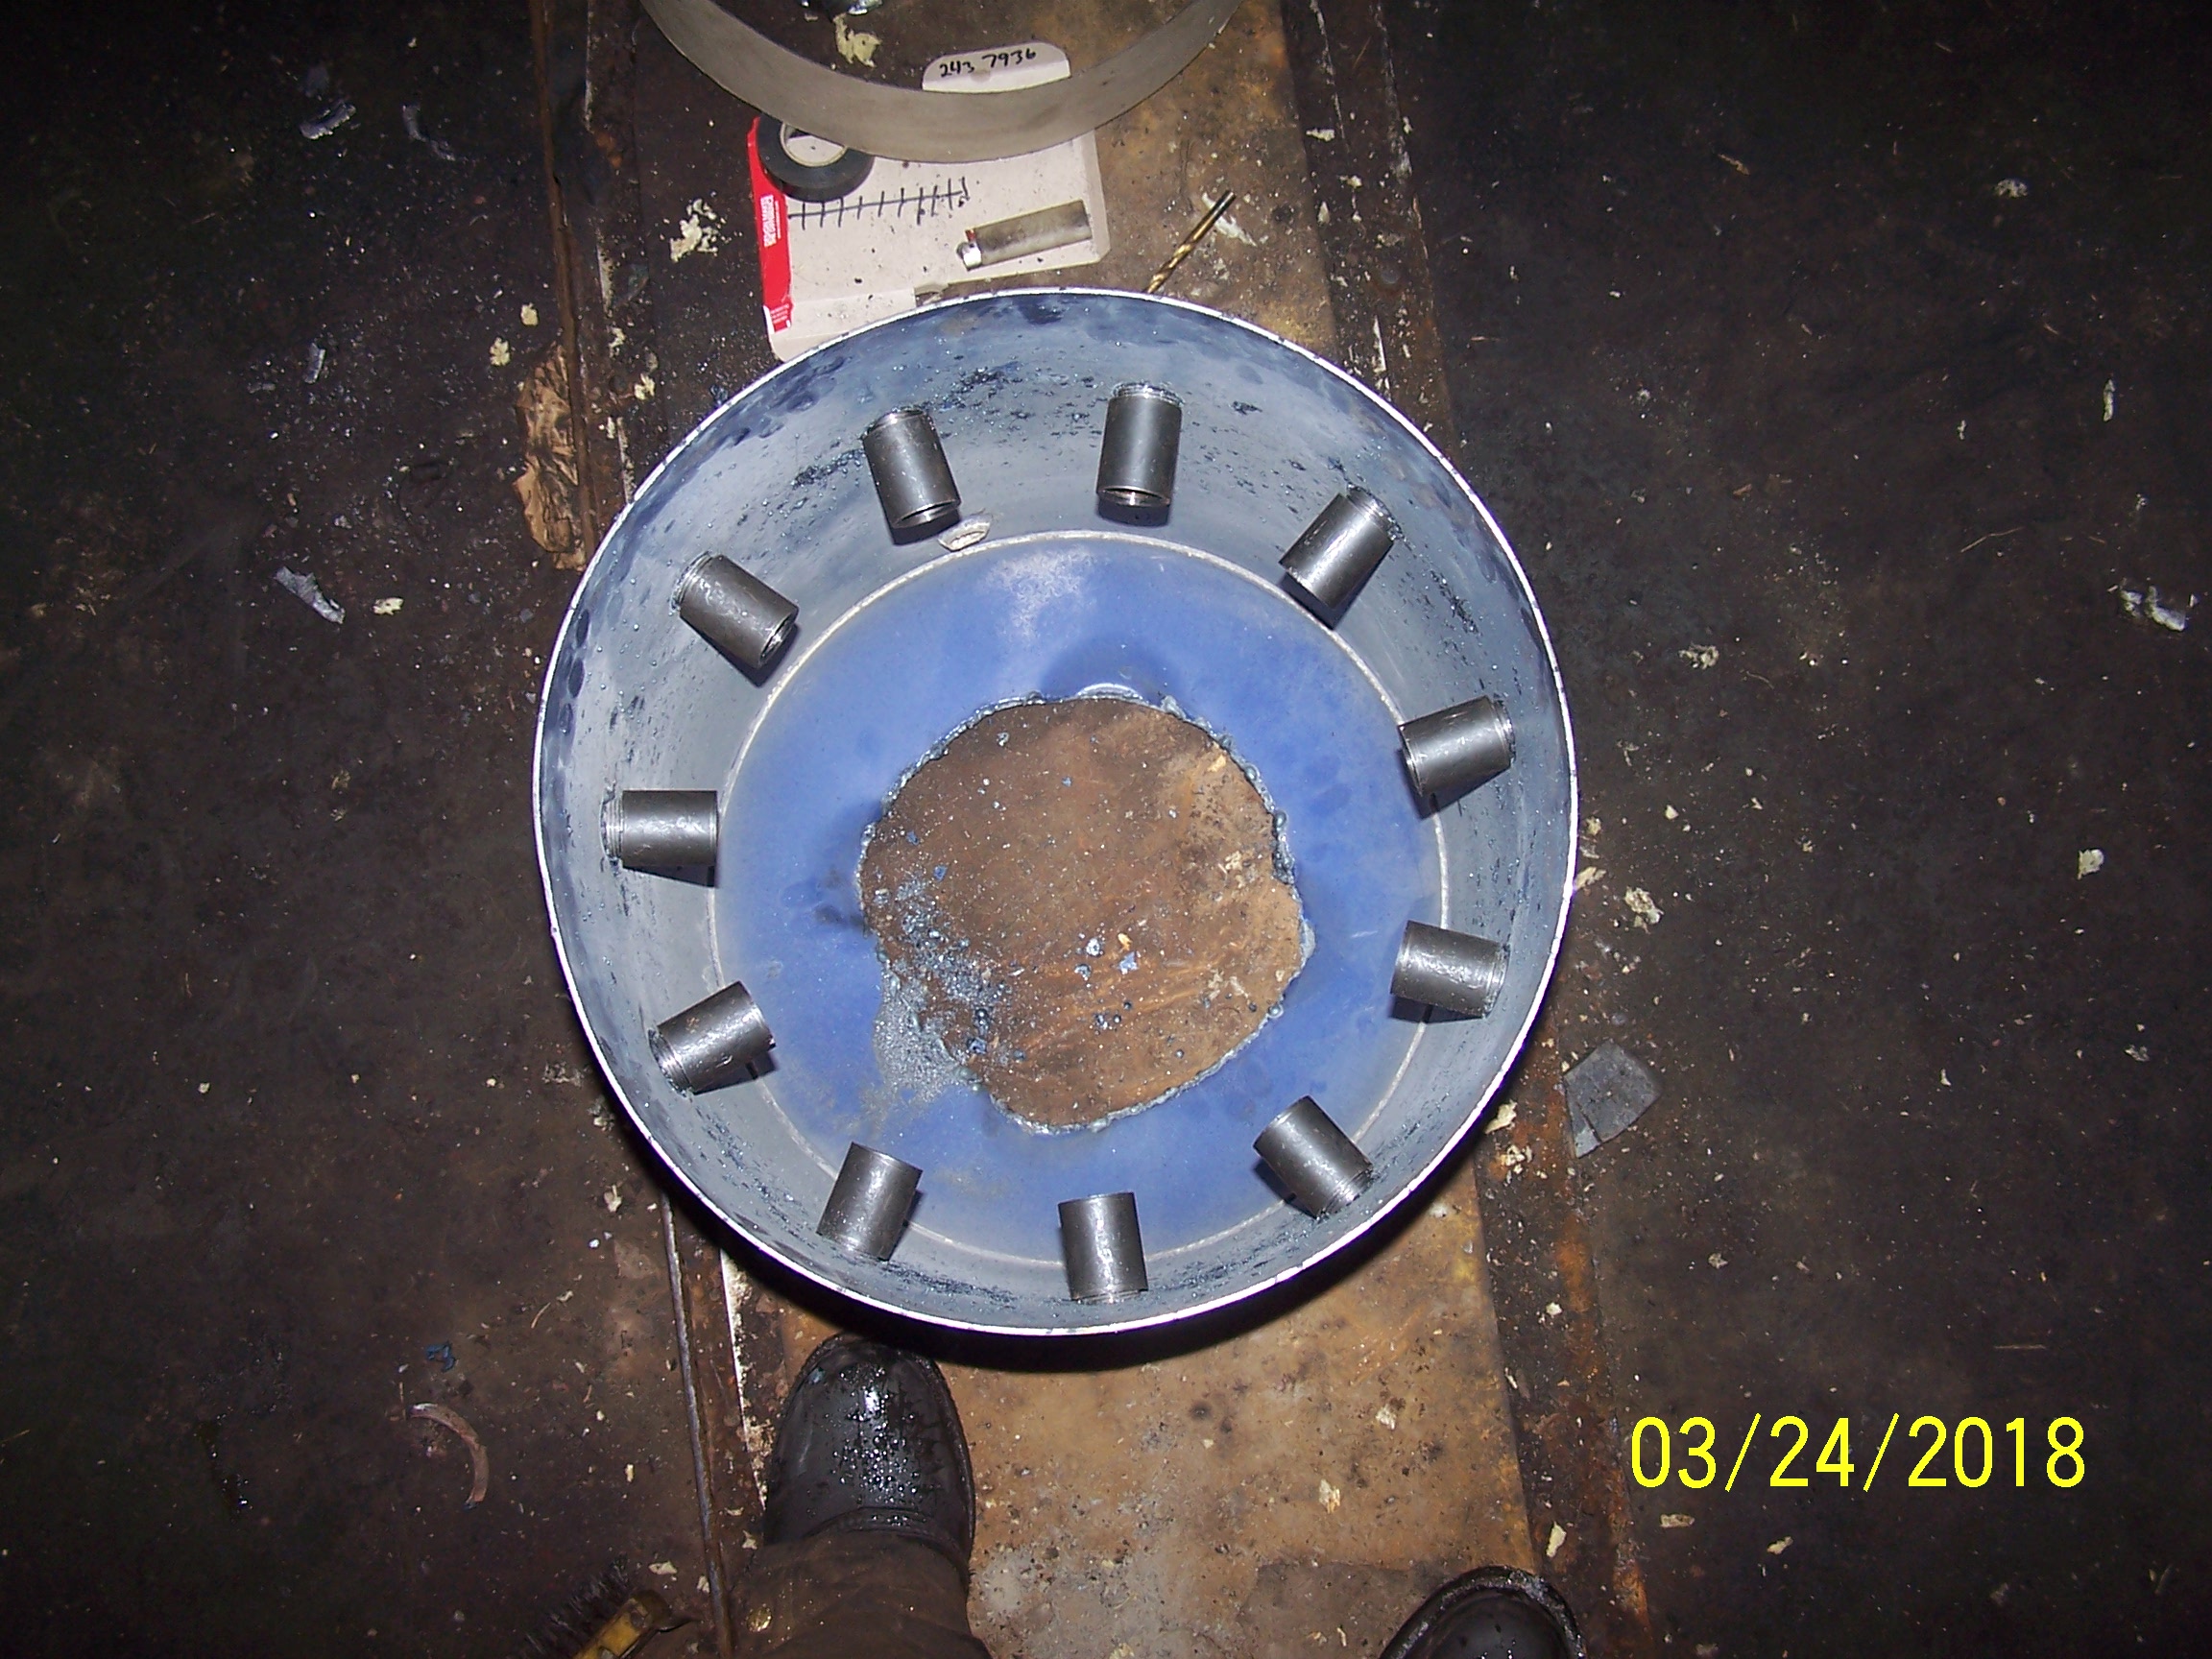
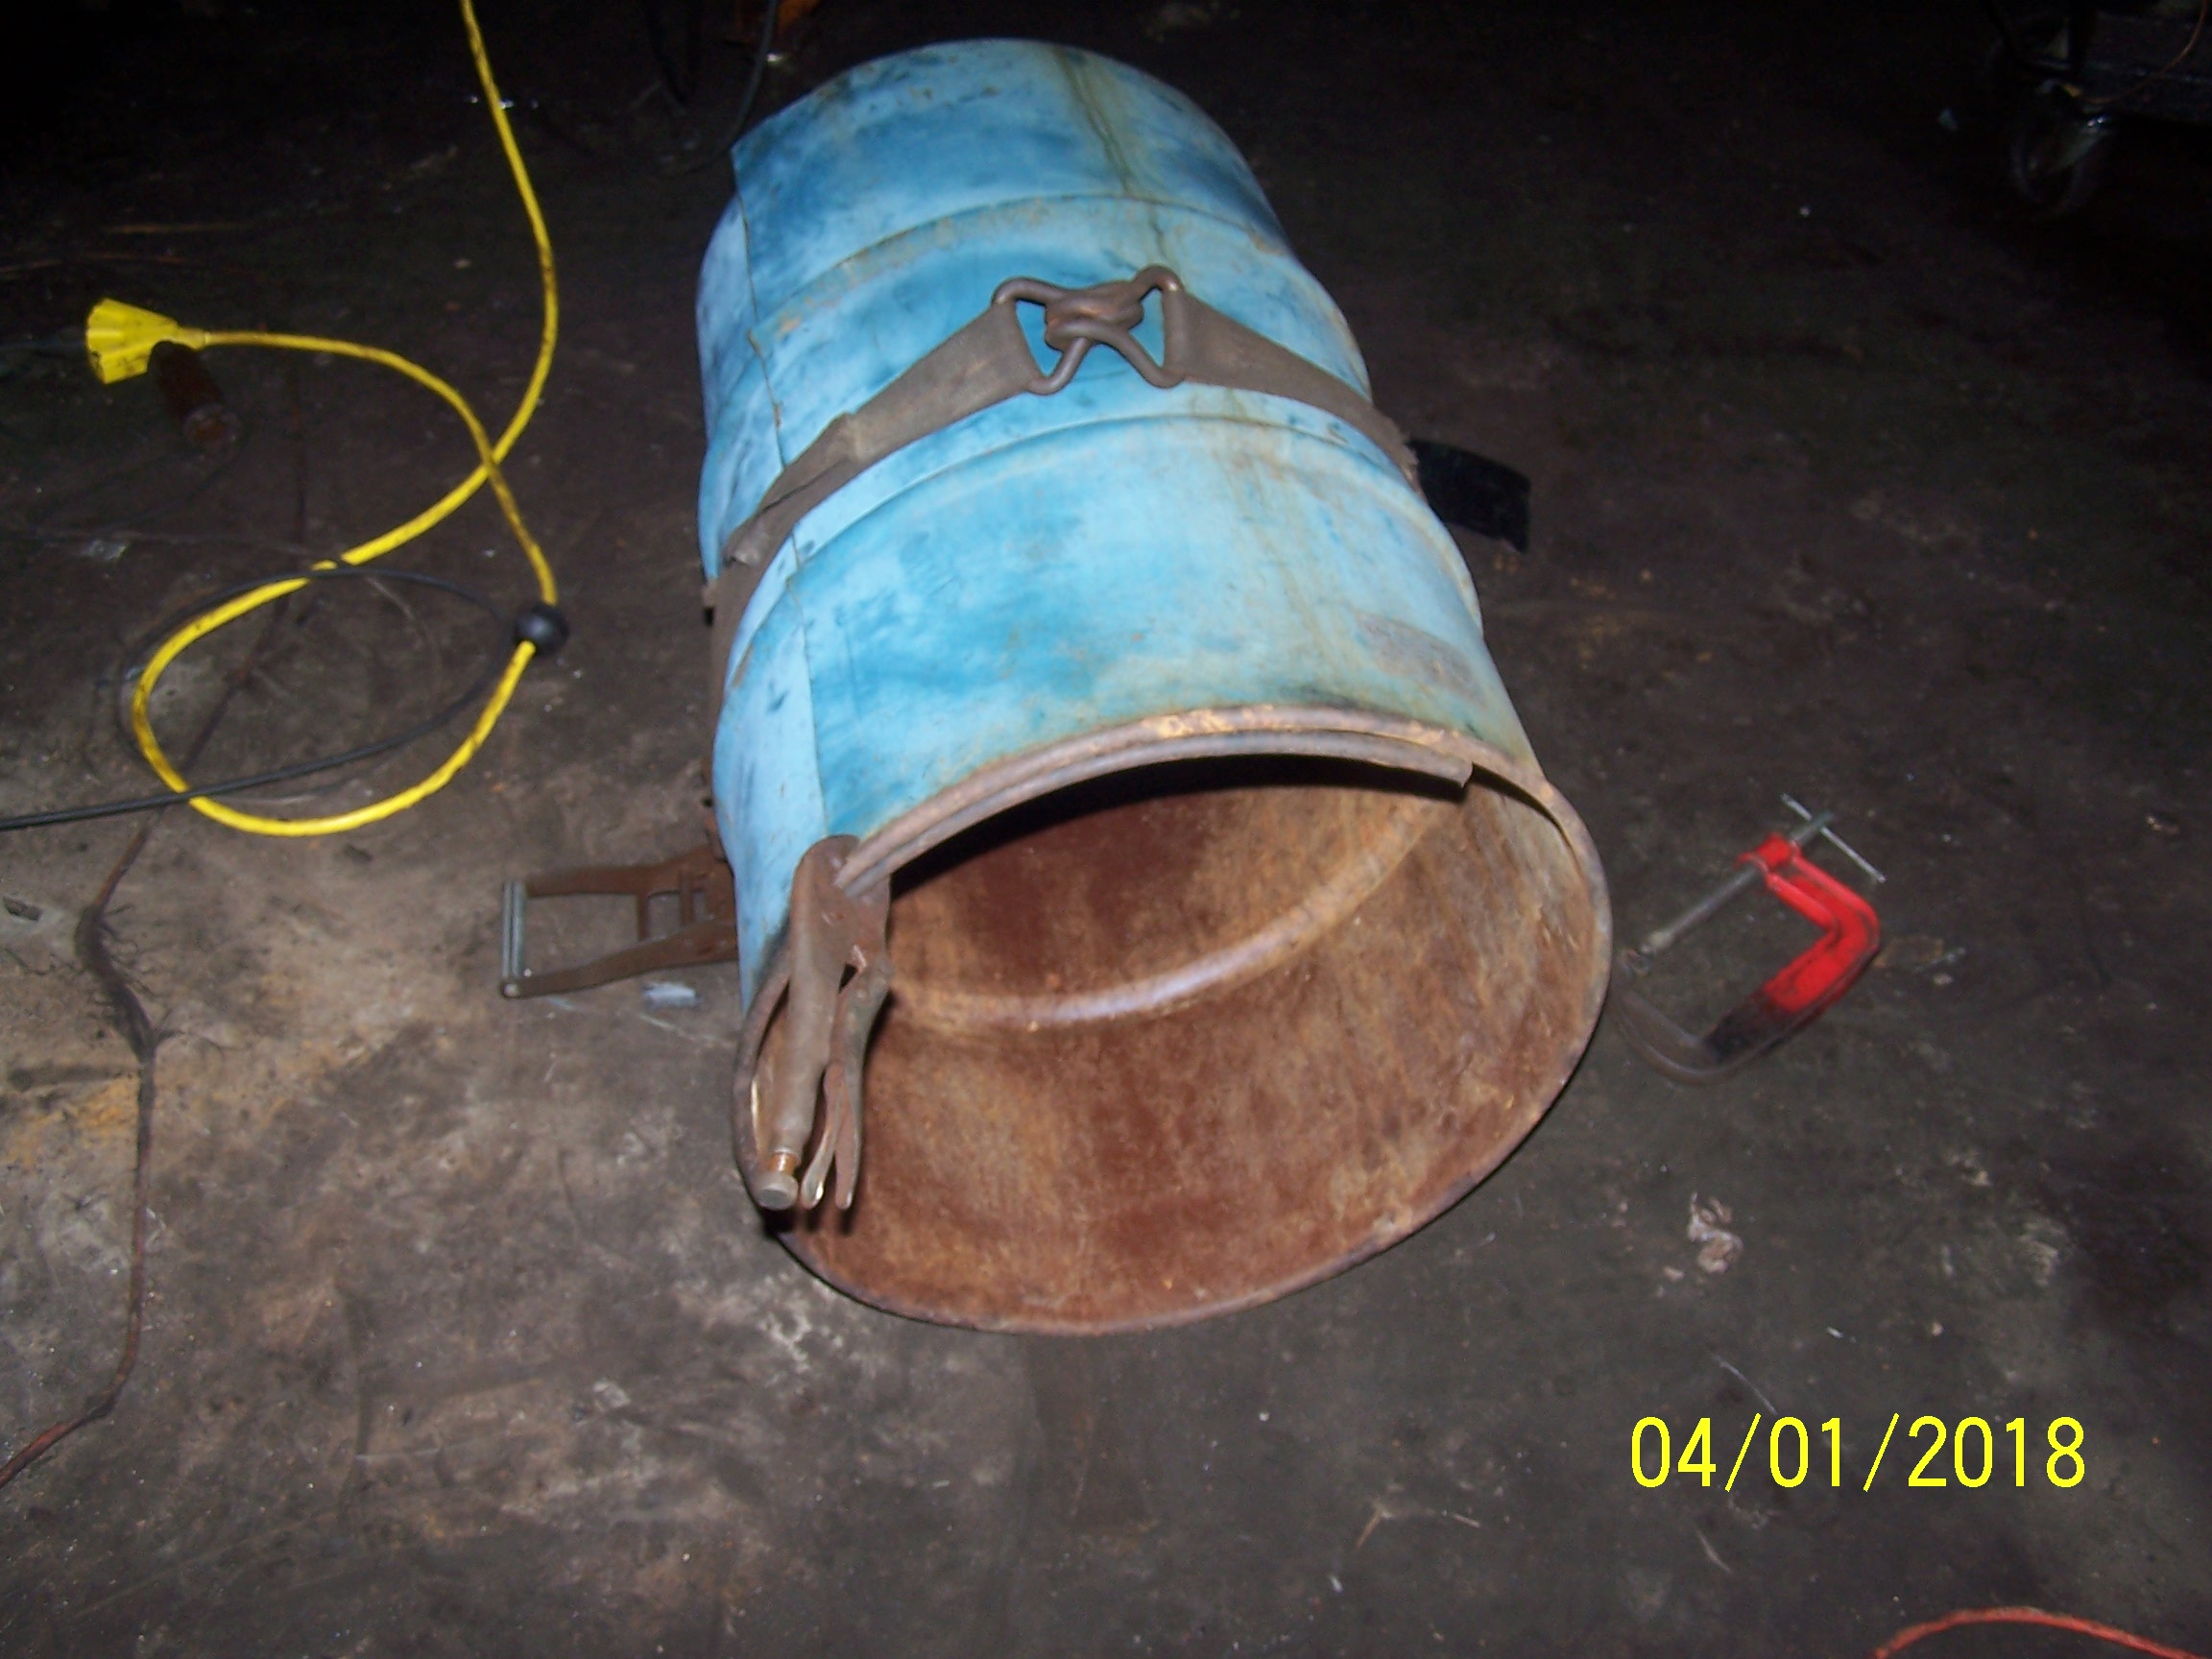
11 3/4 in nozzels 14 gauge hot water tank
11 Likes
Great to hear someone is building something new and innovative. Keep us up to date on what and why you are doing what ever you are going to do. Number one question is aren’t you adding a nozzle and going quite large compare to what has been done by others. TomC
the actual burn area will be 14 in once the blanket is added it has worked out well with my current unit and I went with more nozzles because of size . I don’t plan on a outer shell on this one I am aiming on getting between the frame and driveshaft. paul
3 Likes
Good luck with your new design ideas, a small car unit either charco or wood is next on my list as well, something that will go much farther per pound, for a run about. parts runner.vehicle. Is 14" the outer barrel size? I dont have burn tube excanger either but am going too build an exchanger in place of my cyclones too add efisency and lower temps before the cooling rails, something extra light as posible and large as will fit the vehicle even. As for my car unit i plan on a light trailer gasifier in side front tool box compartment insulated for eficiency and keep gas space out of the danger zone, and add a exturnal hopper cooler on frame with small air smog pump too get hopper smoke too cooling tube rad on frame, and have flip down sid walls on tool box for easy access for any repairs.HOPE i dident invade your thread, let me know what you think of my head plan.(BBB)*(SWEM)
the outer is 16 so when the blanket is installed it will be 14 if I have to I can do 2 layers and be back at 12 that’s my current size. I thought about a trailer for a car sounds like a good idea kevin .
feel free to post I don’t mind
Hi Paul, sorry to use your post, but didn’t know where to ask, what I think you would know. Do all OBD11 systems use wide band O2 sensors? Looking for gauges for the Ranger. Thanks
I’m not sure al I know the tuner I picked up recommends a separate specific 02 that is wired direct to it . otherwise the car\truck only shows fuel trims adding or subtracting for the 14;7-1 I’m sure it is using the data the same . I think that’s why there sold in kits mostly.
1 Like
MaYbe what al is asking is what type 02 sensor is narro band’ are they just 95 and back systems or one wire 02 sensors that are narro band or are some of the 96 and newer cars still use narro band 02 sensors, i was woundering my self how too tell the ones that are narro band, features,and years used.For the rich lean gauge for wood gassing.Thanks paul.
I have seen a few on here tying into the stock o2 with there narrow band I went with a one wire just as easy to add.
the one wire don’t require any power the stock o2 do have a refrence 5v signal for most.
1 Like

Nice start have fun building, welds looking good.caint wait too see your gas outlet mech plan.BBB SWEM HWWT.
1 Like
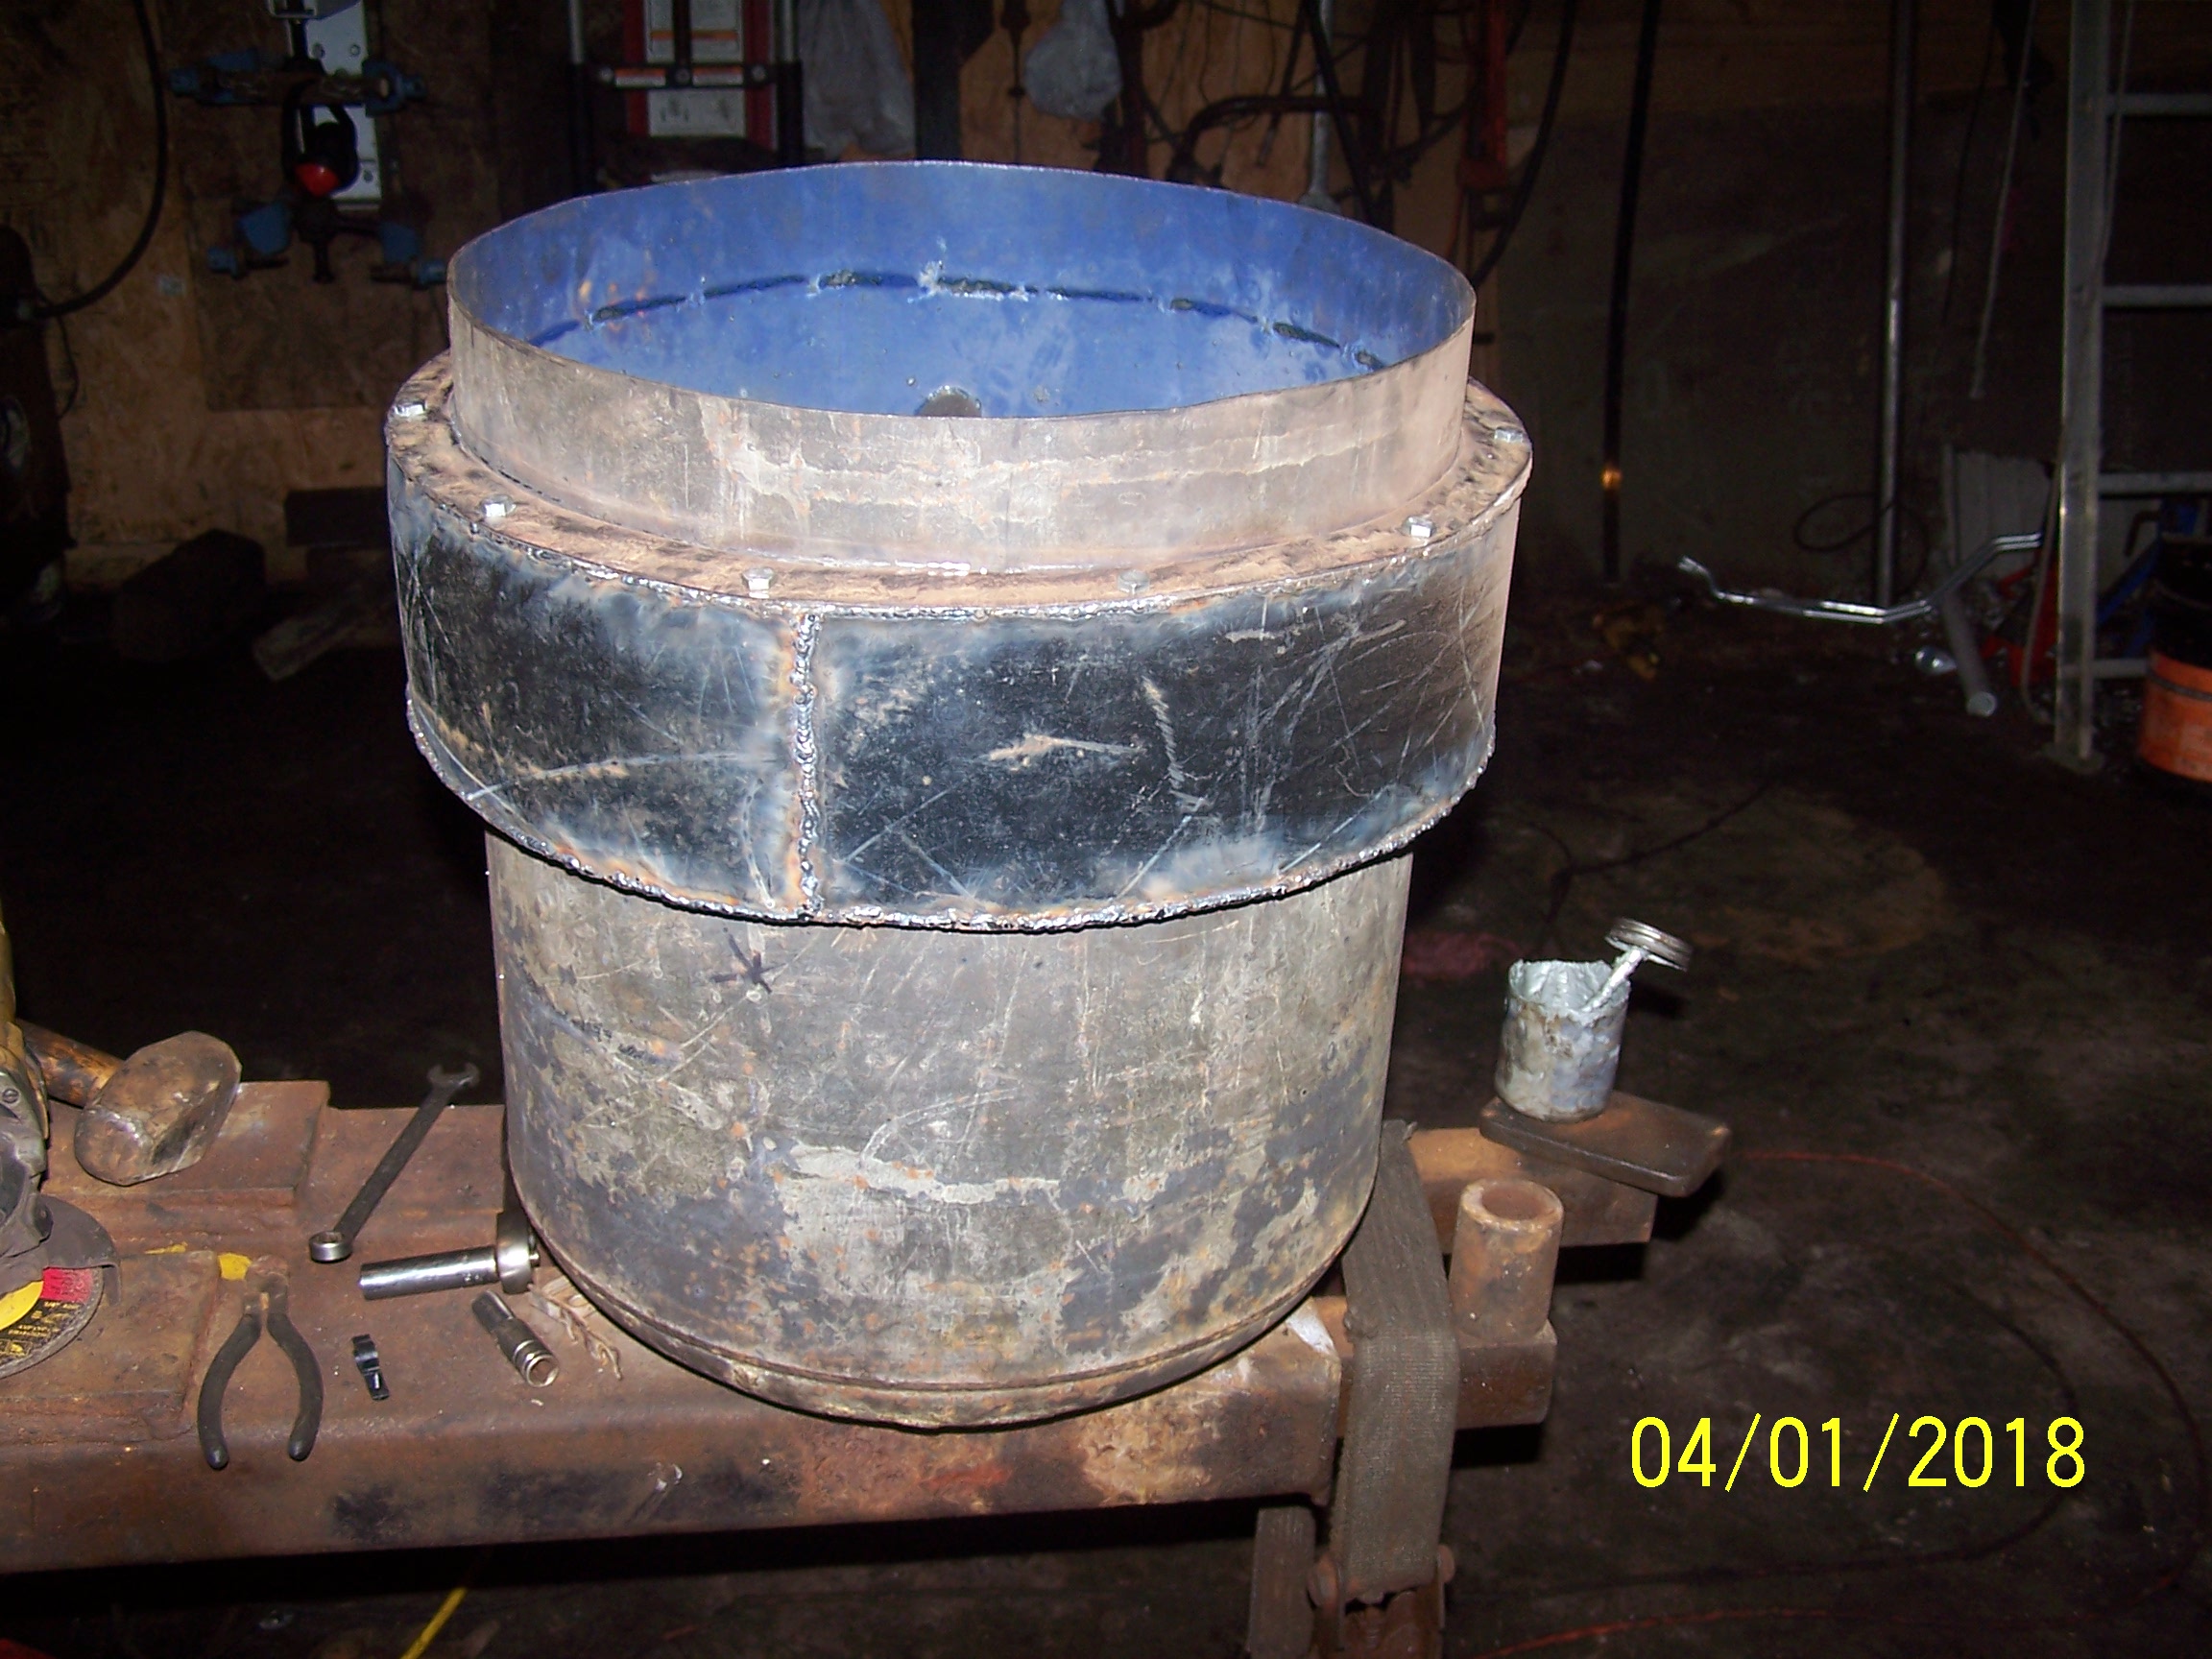
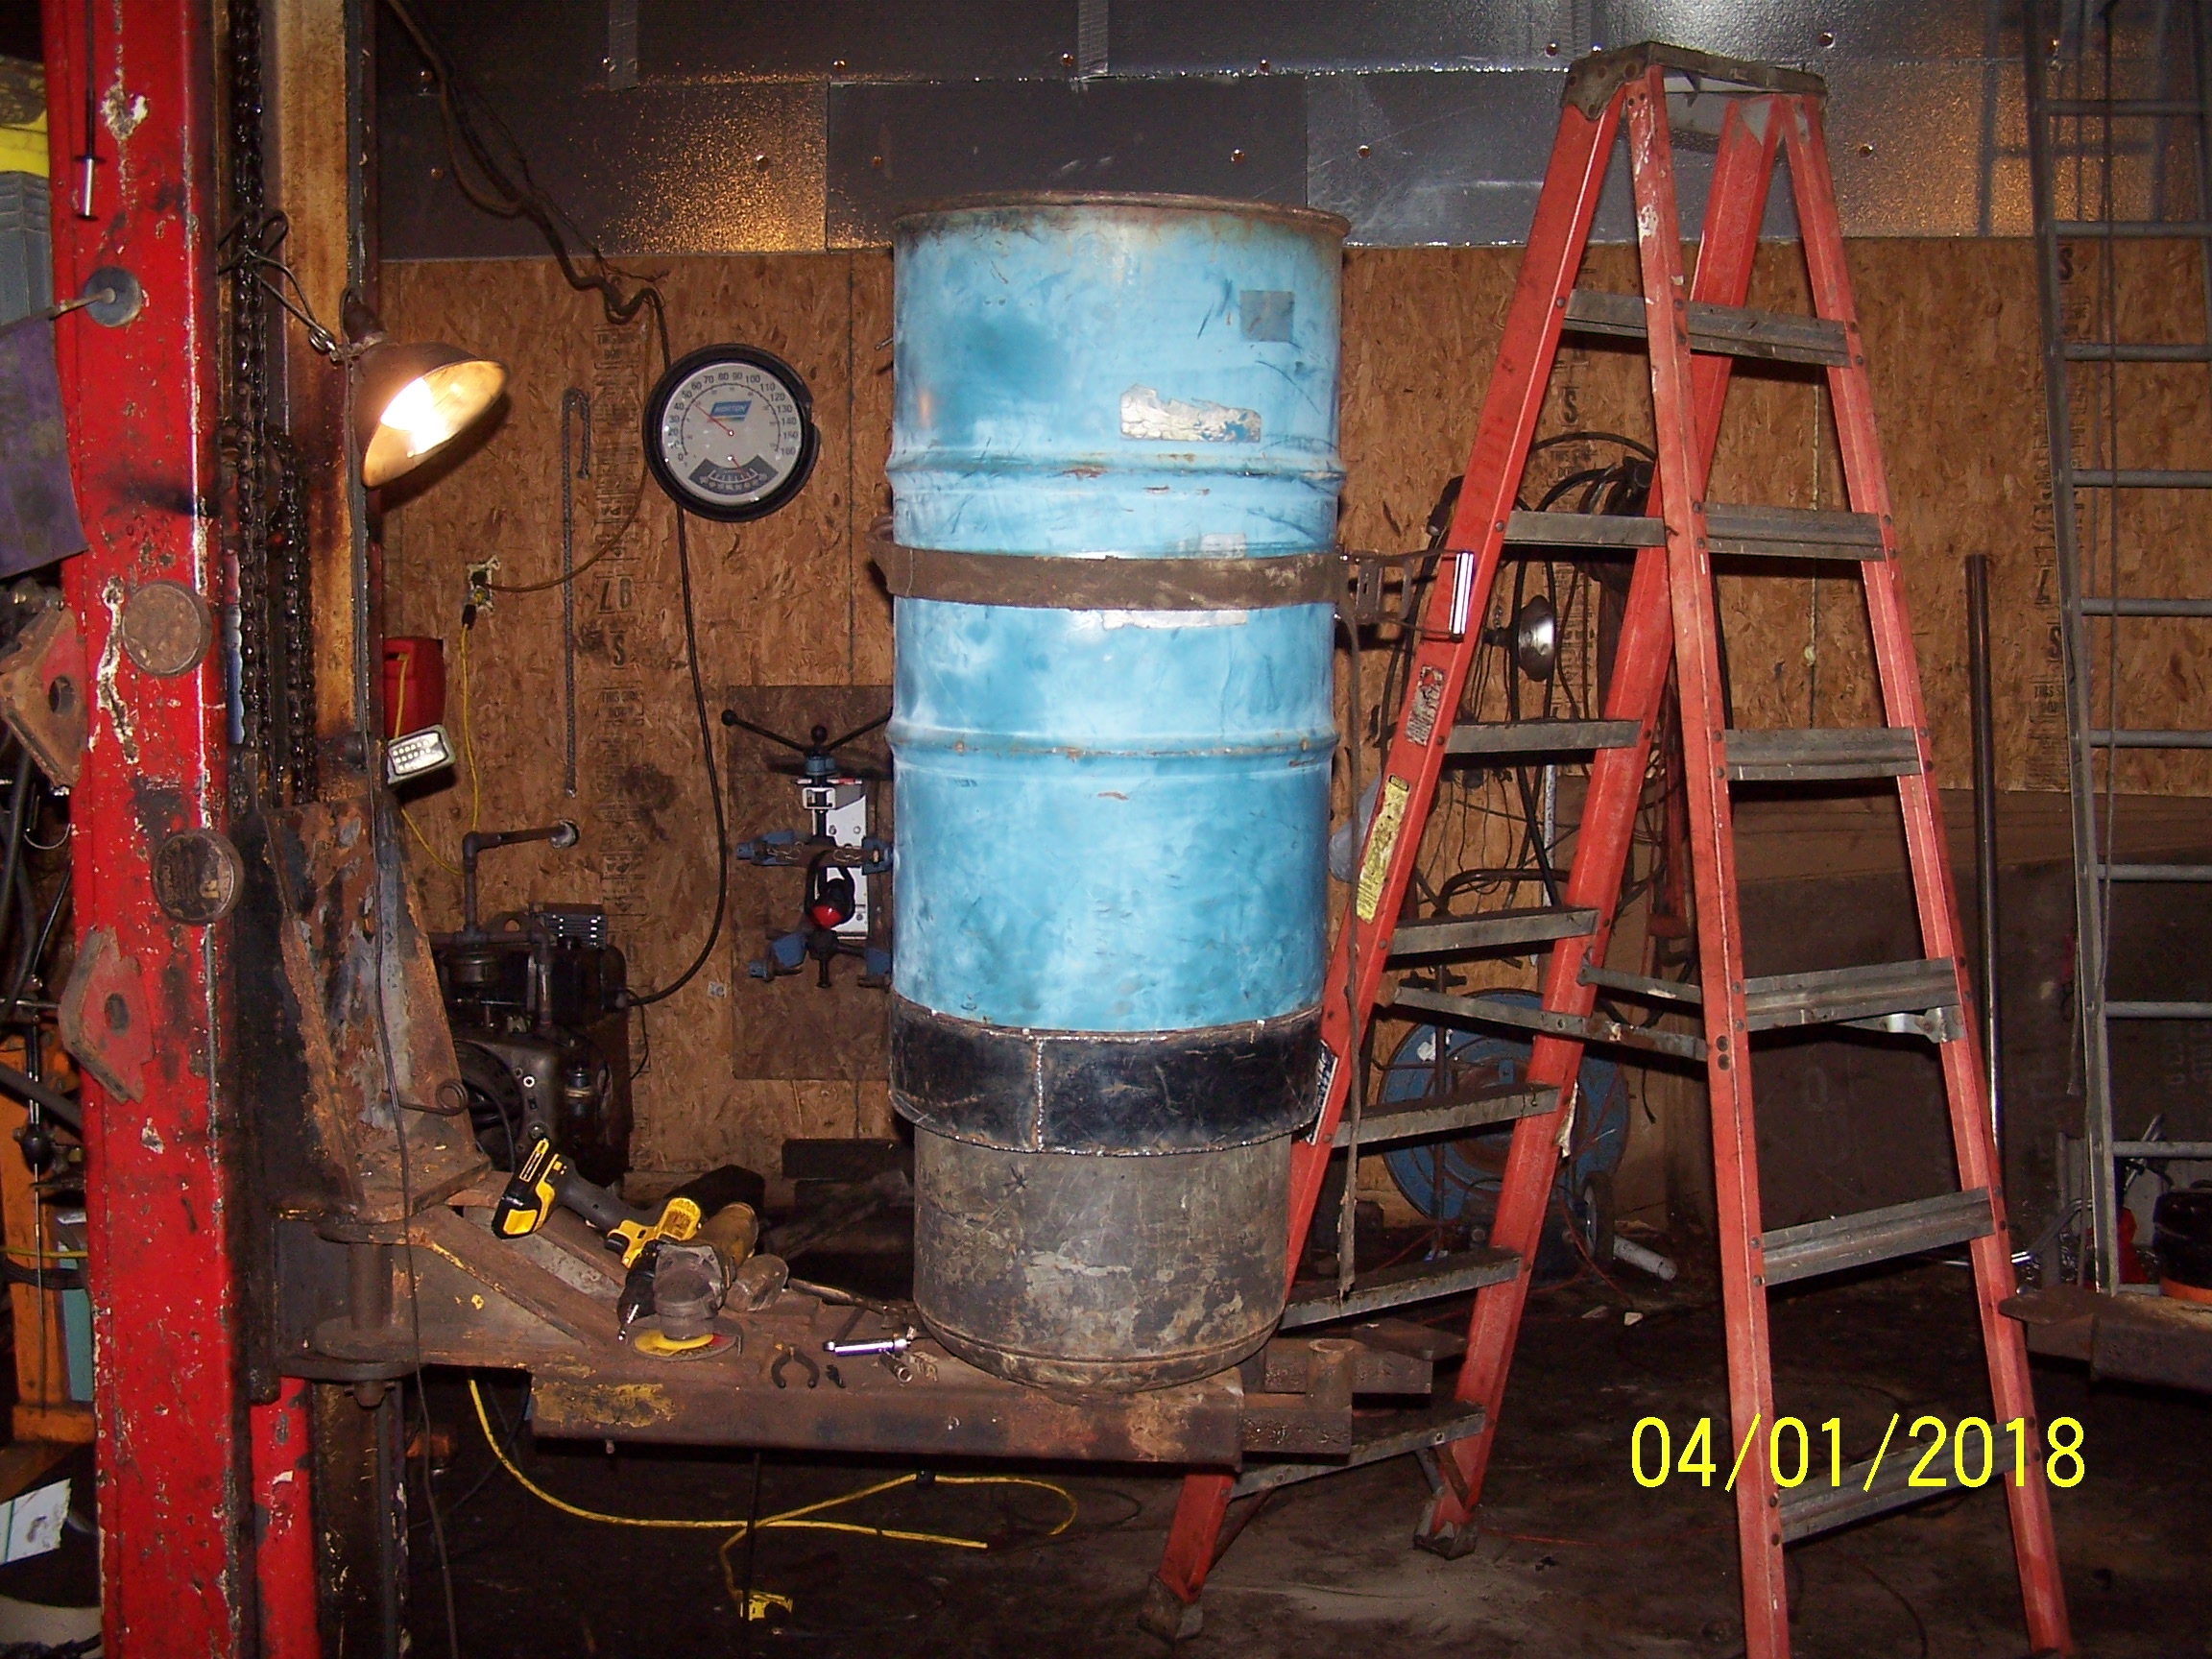
a little slow this week but some progress.
almost thought I welded the hopper and flange to the burn tube a lot of prying and got it off few.

just need to finish the seams I will add a drain pipe and air inlet when its fitted to the truck.
6 Likes
Hi paul looking at your tight fit gasifier i was thinking you could run a pipe down the center of the burn tube then go through center of grate, as a gas exit. Just a thought as a hopper heater from center out.? Just make the restrictor around the pipe too compansate for retrictor size.?Should warm up faster with less waist heat too surounding areas, if the exit pipe had char cleanout ports.
Hi, Kevin!
9-4-2018
You seem to have the BRANDT gasifier in your mind!
It had the center tube filled with charcoal from above. But it started in the lower end ABOVE the grate!
Common charglow outside and inside this upward going (large) tube-end.
Also a version with a center-tube without charcoal was built and offered 1940, until the factory was bombed. Under the name PETSMO.
Both types were very metal-stressing!
4 Likes
Hi max good evening i never studied or heard of the PETSMO Gasifier but as you say it would be hot on the pipe, might need cast pipe too last longer for sure GOING down in the coals and under the grate in my thought,good point max, might not last too long in that type design.
1 Like
that wasn’t a bad idea kevin max does have a point about high metal stress on my current unit I have fresh air there but not all the way down just to nozel hight but it gets in the way .
Hi paul i like that idea of useing the waist heat, though it would be more chunk sizeing with 3 1/2 " pipe through center of hopper, more bridgeing ishus maybe, and less hopper space, so far i like the heated outer hopper setup, dumps most the heat after the cyclons in hopper heater before my cooling rack. Good luck with your small truck gasifier vehicle, my next gassy is going on trailer till i find a vehicle worth mounting one too, and more room for plenty of filter cans. And when i dont want too drive with wood i wont have the extra weight on board. Well with gas expected too reach 3 buck a gallon mid summer,we better hurry.
2 Likes
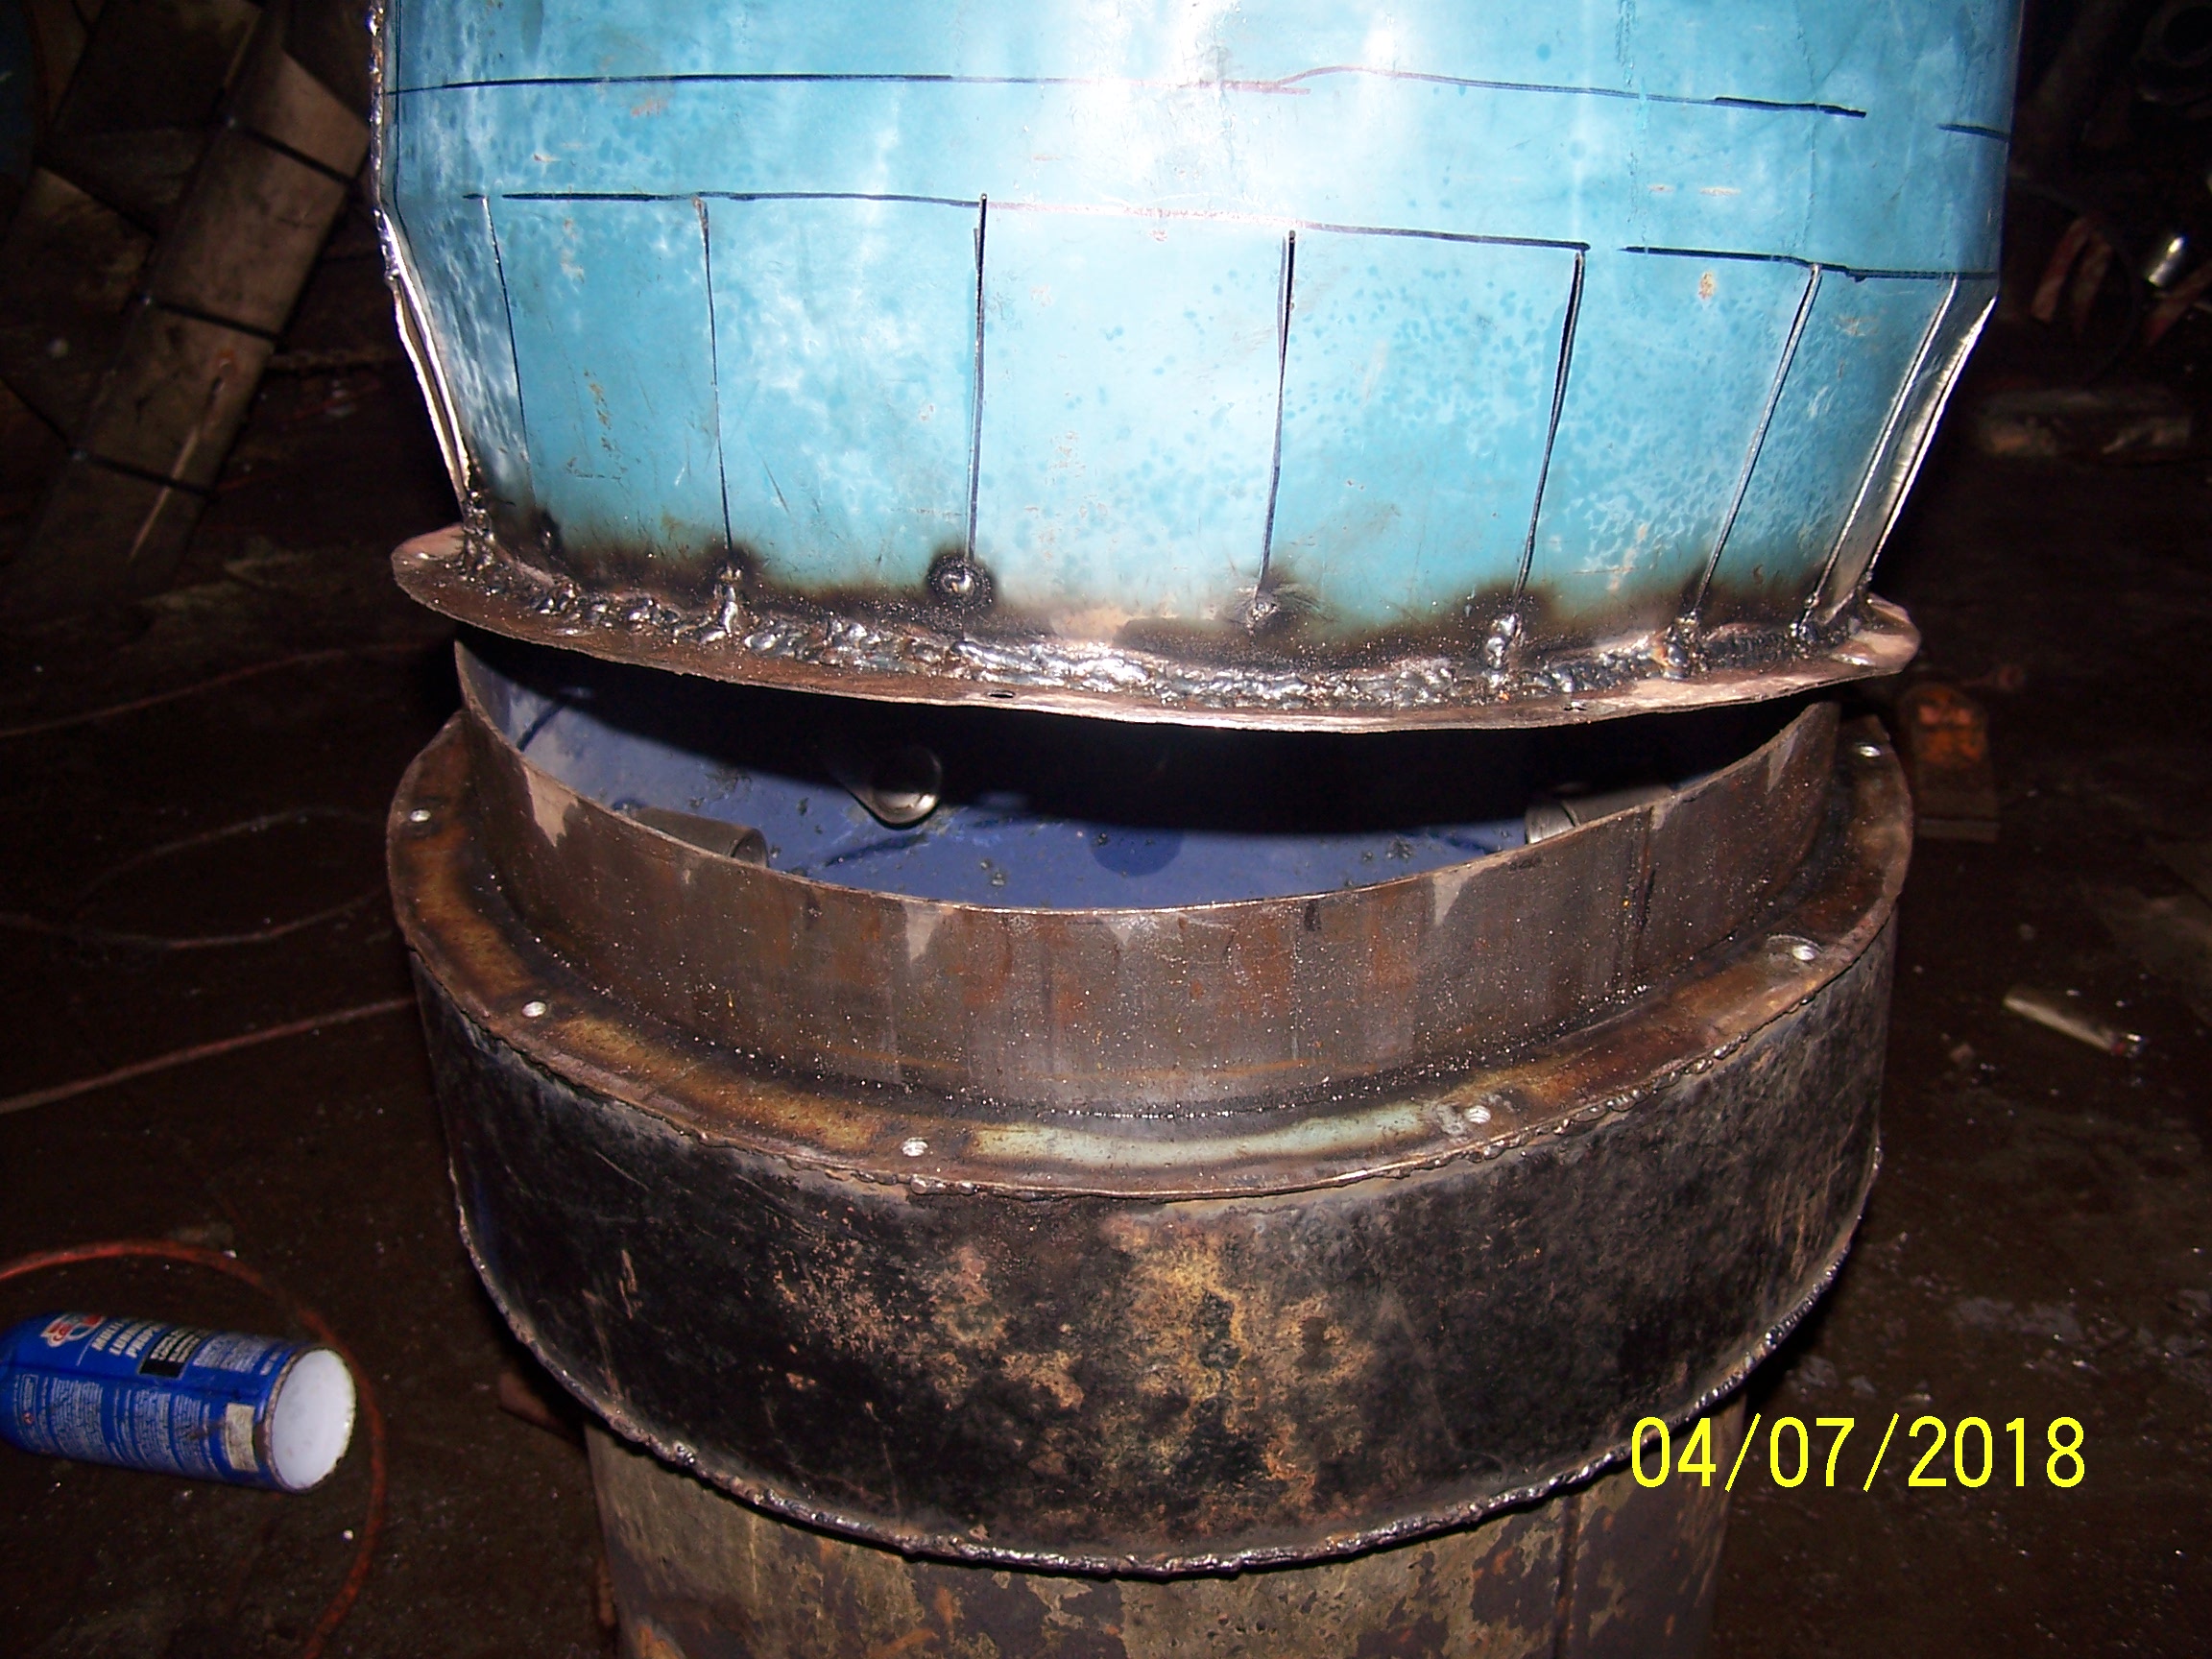
Paul, you are a busy man and it looks good. One thing I notice is that the flanges in the first pic are a bit on the thin side,
so I would add some additional hold down bolts and gasket material. How do I know? I almost blew up from air being sucked in making an explosive mixture. Thank goodness for my spring loaded pressure relief feed cover.
Can’t wait to see it run. Pepe
2 Likes
Paul McCombie; It says it has been over a year since you posted. What happened? Did you finish this build. I just finished a test of an Imbert in my truck and also a “sort of” WK in my truck. The "sort of " WK gave such good results that I am researching a new build. I have never thought of a WK build because it is so heavy and complicated. The build you have started here has a lot of what I plan— no complicated preheat-- air directly into a monifold to feed the nozzles. I had the problem of the fire tube flaking around the nozzles. I have got to decide if I want “heat sheilds” like others have done, or better yet, go to ciramic insulation. With the ciramic, everyone that has used it has gone with 2 inch layer or more. I am thinking of taking that one step further, and just use 1 inch.
Sure would like to hear from you— when I read this heading I thought we were back to where you were removing bumpers etc. to make a lighter vehicle. TomC
7 Likes