JO´s 8" gasifier

My plan was to wait a while before showing pictures not to reveal my slow progress, but Tom Collins ruined it.
I actually started early spring but the rebak chunker suddenly felt more fun and a lot of other things seems to take up ones time.
Remember I´m not a very good welder and this is my first try building anything this complex. I´m building mostly from material I already have. I don´t want to spend a lot of money on someting that might fail.

This is not a WK. It´s more Imbert(ish):
8" burntube, 7 replacable (I hope) nozzles petruding 1/4", 4" above a 3-3.5" restriction. 6" reduction tube 8" tall inside burntube. Void will be filled with asch. Gas housing is a 12" propane tube surrounded by another one for air (13"). Air will enter at the bottom, swirl around gas housing and enter air jacket around nozzles through blowholes. I will be using a cyclone, with or without a preheat shroud, we´ll se.


10 Likes

Looks good…

1 Like

Ugly welds on a working unit are far nicer than perfect welds on a thought experiment. :grinning:

4 Likes

What about when its both ugly welds,and dreaming gasification,not sure it will run motor.I may have both.Looks much better than mine allready

2 Likes

What would we do without TomC?

5 Likes

Great job JO; I don’t know what was meant by the weld comments. The best picture of your welds is on the cyclone and what I see compared to my welds is very good. I don’t know what size engine you are going to run and with an Imbert design it is kind of important to fit the design of the gasifier with the engine. With just a few slight differences, your dimensions look close to mine which is running a 4.3 Liter engine.
Oh by the way. If I spoiled your surprise by asking for pictures, I’m sorry. I am just not very patient. I have watched with envy your saw mill, and then your rebak chunker and just couldn’t wait to see what you were doing with gasification.
I believe I see your air inlet at the bottom and the gas outlet with the rectangle flange , but what is the other opening at the top? Opps Now I see another pipe at the very top. What are these?
Looking goodTomC

3 Likes

Thank you all for nice comments.
I have a new phone and pictures turned out a little to small after shrinking. I don’t know why. There will hopefully be plenty later.
Tom, I don’t know what engine I will run either. I just bild with what I have and the result will decide. No good gas or a sudden meltdown and I won’t have to think about it. Don’t worry about the questioning thing - just kidding.
The second outlet is for startup/flaring. There will be a chimney (Vesa-style). I wanted short distance to cyclone and didn’t want to disturbe flow on its inlet with a T nor drag wet/dirty startup gases through it.
The air jacket at the top will be lowerd down around nozzles (and burntube shortened at the top) and it has a lighting port that lines up with one of the nozzles (old style).
Please keep commenting.

1 Like

Hello, Jan-Ola!
I would very much appreciate a horizontal viewing of the construction, like a drawing. That would make it possible to get an idea of the vertical ratios of different sections in relation to the diameter of the individual components!

Photos from an angle above the object are impressive as such, but a constructor has to think in the ratio to adjacent details.
This comment is fouded in my lack of getting the essentials of your construction. To me the proportions between the components are essential to estimate the functionality…

I hope to be able to make some meaningful comments when I get the proportions sorted out…

maxgasman is my skype callsign. I will talk in swedish as that is my mother tongue.

Solong, Max

Hello, Max!
Reading old posts I´ve suspected you beeing swedish as well, but I wasn´t sure. I´ll keep this in english not to upset our american friends. I´ve never used skype, but I can always ask my children how to.
Drawing below shows my internals. 7 nozzles made of cut off 1/4" ss nipples petruding 1/4". CSA is 5-7% of a 3"-3,5" restriction. Nozzel hight 4" - creating a Abbadessa/Olson-degree slope. I think it also fits Imbert dimentions pretty well - except for my less nozzle petruding.
Charbed below restriction 8" tall in a 6" dia pipe.
To me all this is first time experimenting using what I have, but I´m grateful for any corrections.

JO

EDIT: My main concern at this point is welding my mild steel propane tanks to my ss burntube. I hope the dome shape will protect from cracking.

Thank you JO, that is a beginning!
Getting the outer cylinder(s) on the same drawing would make it more complete.
All functions are more or less interwoven; how they interact depends on chosen proportions, selected flow areas, etc.

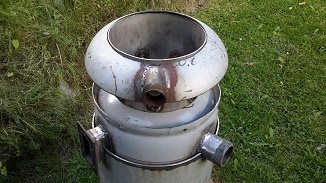
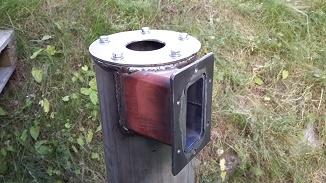
What is now clearly seen, is the very short nozzles; they will keep the succing returngas flow streaking on the cylinder plate and making it glowing hot around the nozzles, this is going to the WK system needing very heavy cooling by fins on the outside!

If you want to avoid this, make the nozzles 1,5 – 2" long to avoid the return succing streams burning the cylinder plate.
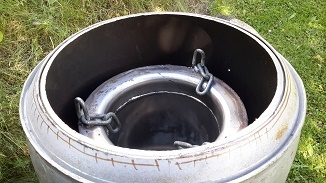
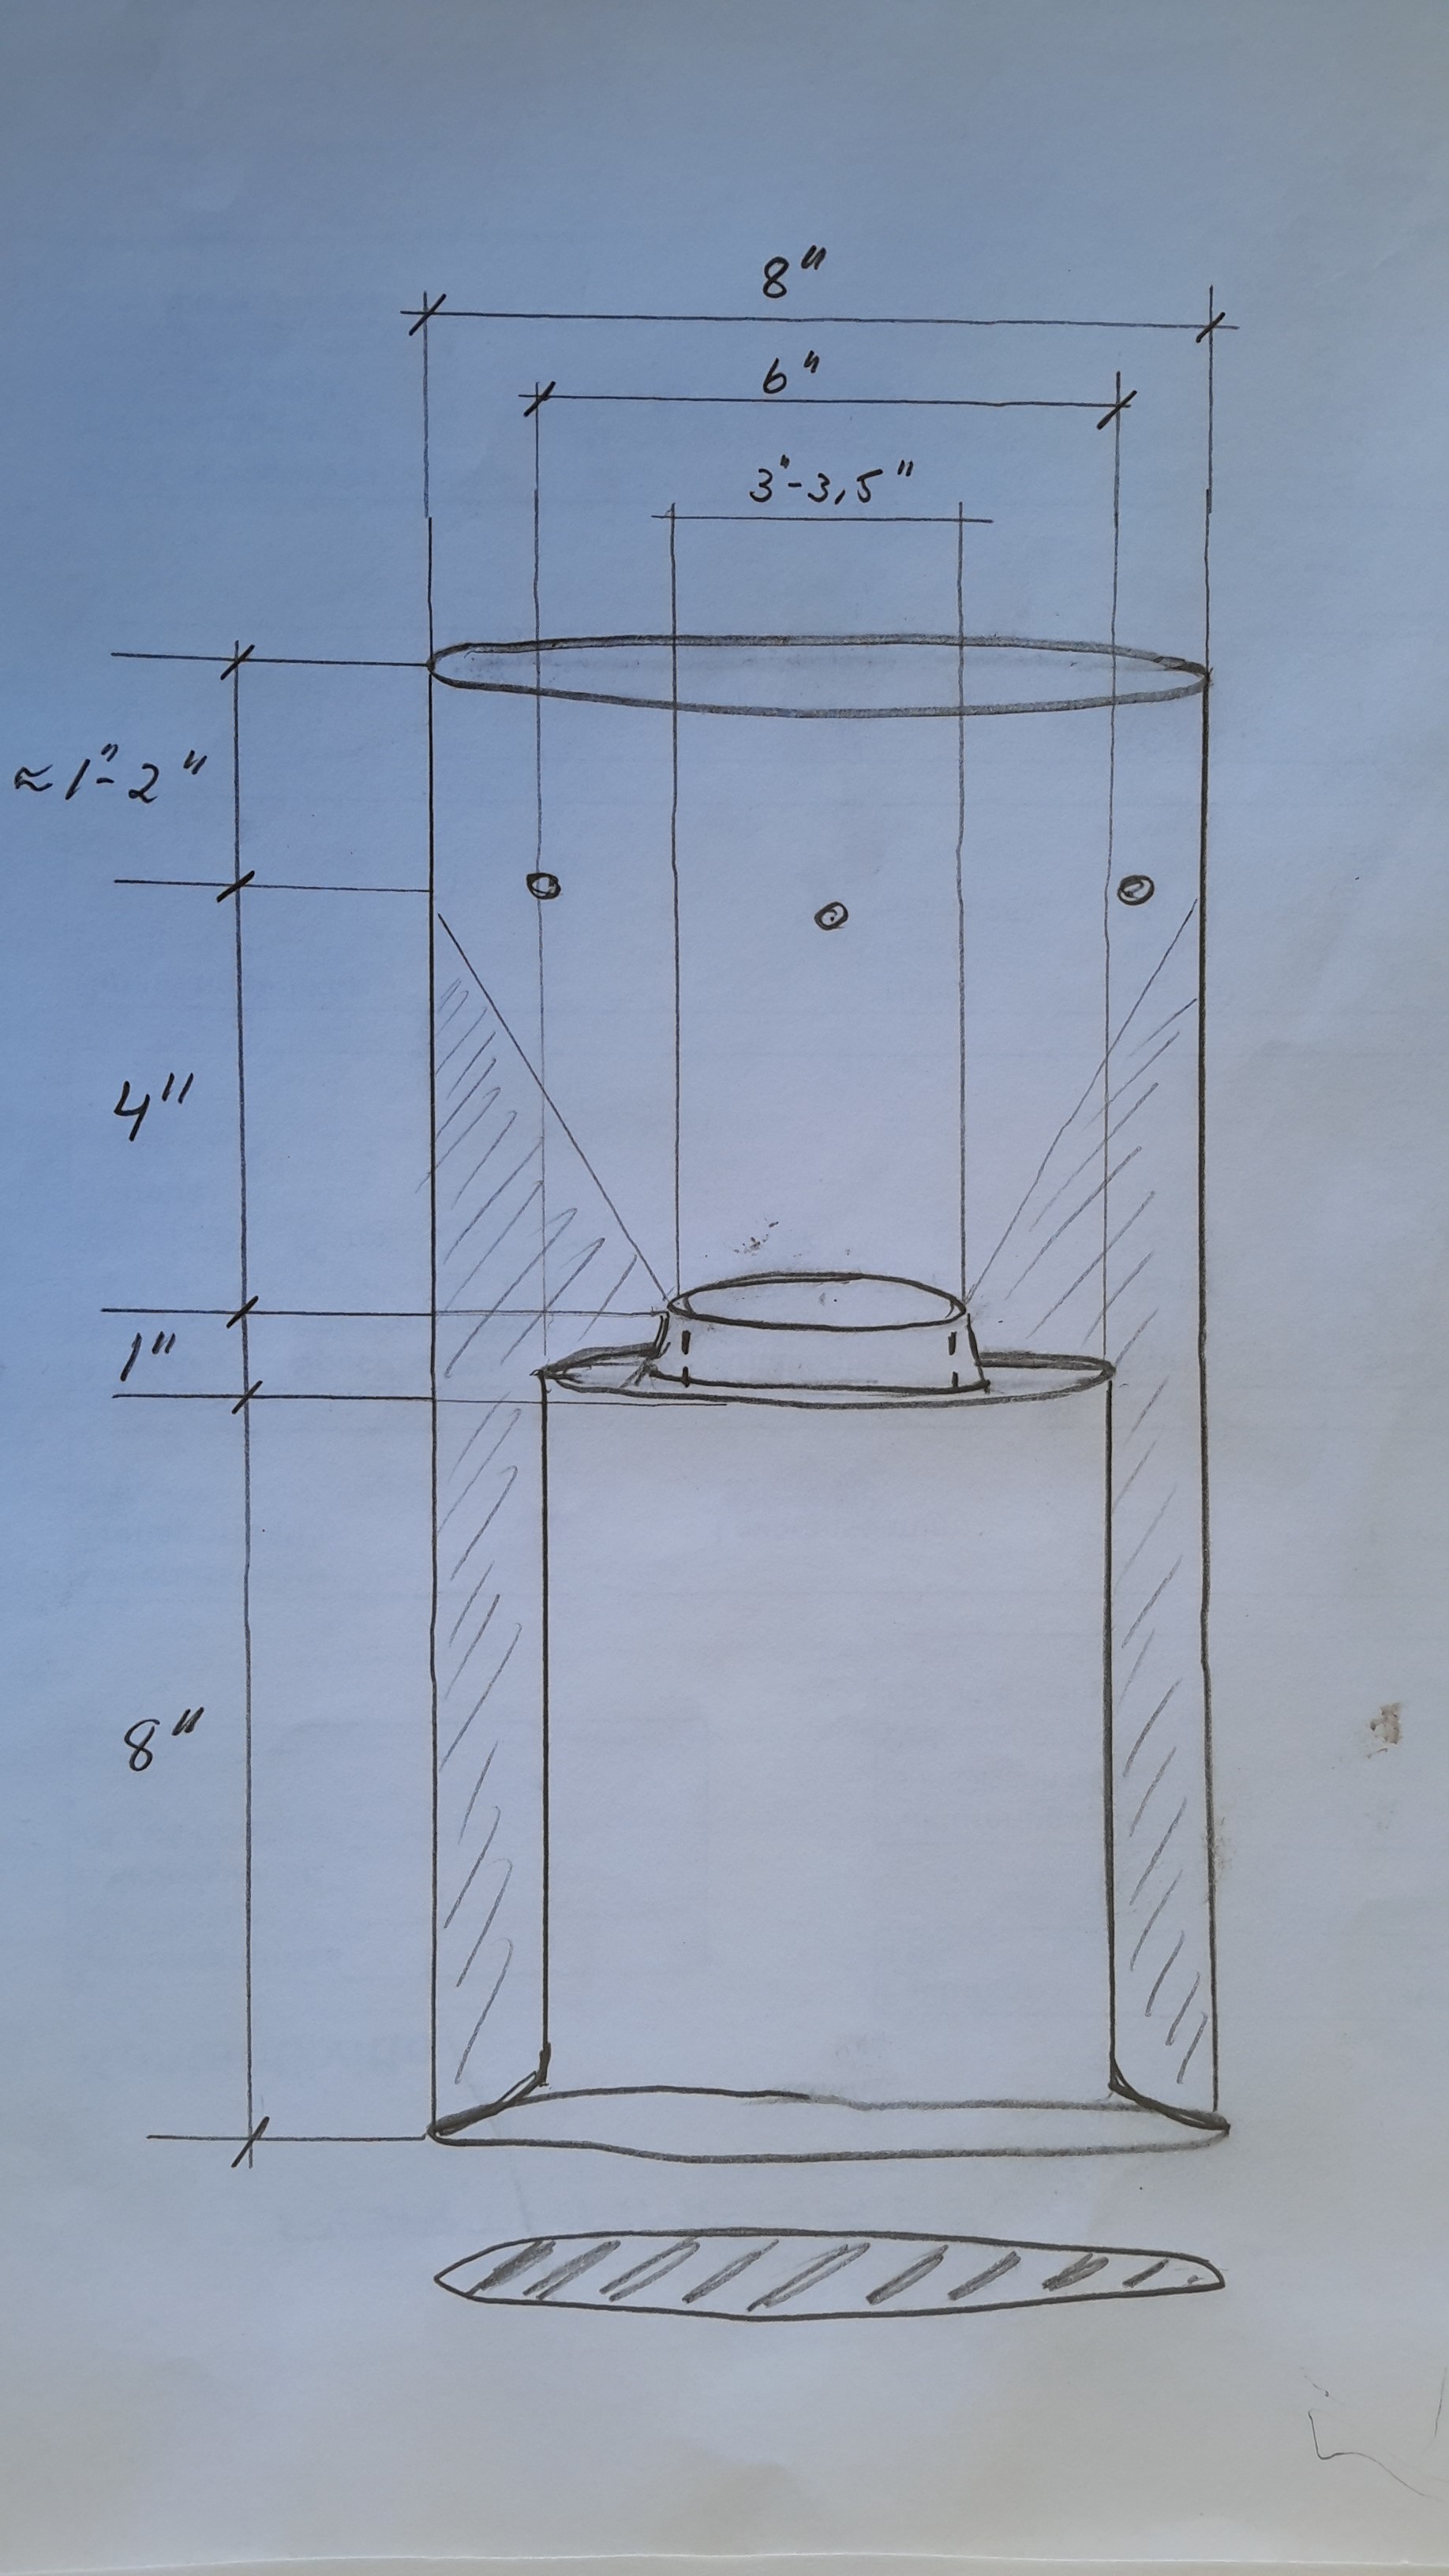
This has of course consequences on the process cone’s diameter. All the cone proportions will change.

If you want to go on with the same hearth cylinder, the cone volume gets smaller, the gasproduction will be lower, you will need smaler fuel bits…

This all tells that a gasgenerator has to be constructed from the internal process volume outwards — not starting with the metal holding it!

As others have stated, the construction starts with a GOAL, the measuring follows that goal with established rules…

Otherwise it will be more or less “build and burn” or “build and smoke”.
The rules are to keep the construction within those extreams.

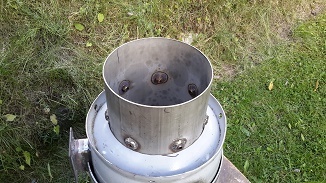
To continue on the so far effort, weld 3/4" SS nuts on the
outside of the hearth cylinder.
Screw (whole length outside threaded) nipples (soft iron) in them.

On the inner ends of the nipples, weld nozzle tips (smooth bored SS nuts).

Then make decreasing diameter upside-down L- profile rings to trim the restriction.

Make the reduction tube’s lower end hoistable, or then make the restriction rings pilable to decrease the process cone height…

Otherwise, restart it all…

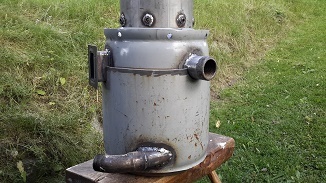
The reduction tube seems to be unnecessary high; it may clogg…

If you study “GENGAS”, you will find the ratio between gas production per second and active cone volume in liters; for busses and big trucks.
From 11% down to 4% for lawn movers, etc…

Fuel bit size goes accordingly!

Max

1 Like

I am sorry to disagree with Max, but you are too far along to just throw it in the trash and have Maz design you an all new one. I doubt very mush if this is going to work the first time you try it but you WILL learn from it. I’m sure after one try you are going to have many ideas that you think will help. At that point you can decide if you want to continue on or start a conventional design ( which I don’t really know what that is)

My suggestion would be, since you don’t know what size engine this is going to run, get a good vacuum source. Shop vacs and house hold vacuum cleans seem to work well. Put a light dimmer switch in the line to control the speed of the vacuum. I have a pipe coming out of the gas/ash chamber that I connect a vacuum gauge to. With this, you can pull very hard similar to what a larger engine would do or turn the vacuum down to simulate a small engine. TomC

2 Likes

If your 1/4" nozzles are actually 1/4 ID I’d try it like that…

The reduction tube could be half the length it is and it will make gas… I suspect it will make gas the way it is… I’d make my grate 5" OD nor so and have it adjustable by screwing it up (threaded rod) from the bottom… start with the grate 4 inches up inside the reduction tube and thread it down to see what happens. Just my 2 cents… take them for what they are worth.

You will need some form of cooler if you are goin to pull on it with a shop vac… outlet gas temp will be too high for the hoses and motor to survive for long.

Trust me, this is either going to be THE ONLY gasifier you build or one of many… probably the latter… lol… and you will learn from it just the same.

2 Likes

Hold your horses Tom!
I have NOT suggested an all out discarding of the build!
My text is twofold; reread it and you see that the second part is about modifications. Only if it is too much welded together and impossible to reach for modifications one has to resort to some drastical measures!
Comment what you actually read…
Max

1 Like

Max I sold off all my horses over a year ago, so no problem there. I just think your comments are a little late for this build and will require major changes. Let’s let him try HIS ideas. If he has problems, we can suggest changes. At least then we will be making suggestions based on something besides it doesn’t look right, or this could happen or that might happen. We will have a finite problem to address. I’m sure we can all see things that “we” would probably do different, but if he listened to and tried to do everything all of us suggest, he would just go back to sawing logs…TomC

4 Likes

Working OT. When I got home late and started to log in to DOW I thought I smelled gun smoke :wink:
I´m grateful for any input. What I don´t like I`ll just ignore. In this case all suggestions given are doable, except for the “throw in the trash” one. That won´t happen.

Nozzles: Welded ss nuts are already in place on the outside of the burntube. I can screw in any nozzle length I´d like.

Restriction: Top donut plate welded to the reduction tube has a 4" hole. I can put in any restriction shape smaller than that and/or pile as I wish.

Reduction tube: If charbed will prove to be to tall I think I´ll try Arvid´s suggestion since the reduction tube bottom flange is welded to the burntube. Reason for my reduction length was that I read somewhere that average distance from restriction to grate in WW2 builds was 23cm = 9" and that was just about what I could fit into my propane tank.

This weekend we will go for a ten day fishing trip in the Norwegian mountains, so I´ll be out of office for a while. No phone, no internet, no DOW.
Below is last year. We hope for that kind of weather again.

4 Likes

JO,
To quote a song, “up the lazy river how happy we will be, up the lazy river with me”, or something like that.
I grew up on the shore of Simon Pond in the Adirondacks in upstate New York and we lived on the water. Your boatload of smiles with mountains in the background sure did bring me back home! Great picture.
Pepe

Thanks! We’re home again. Had lots of rain and cold winds this year. Got some char and trout but not much. Better luck with chanterelles, raspberries, cloudberries, bluberries, and lingonberries since we got home. Freezers are getting packed :smile:

5 Likes

Hi JO,
Fresh fish and berries, who could ask for more. I’m not familiar with char, what is it related to?
Pepe

It’s like trout. Generally a bit smaller. Red belly. Relations I don’t know. Probably sammon family all of them. If there is one. Tastes like food for gods.

3 Likes

Thank you, JO. Trout truly is food for the gods. My dad was a fly fisherman who loved fishing for rainbows. I always loved watching him casting his line and putting that fly on a floating leaf if he wanted it there, lol.
Rain or shine, it’s priceless.
Pepe

1 Like