Hello JO,
I had the same concerns about heat and gutter placement. I ended up with a design similar to yours in concept except mine has a flat section I call a moat. I have a drain on it. Works fine and collects a lot of water. Here’s a vid of the drain and cyclone catchments. This run was only 45 minutes to shutdown. Normally a full hopper could run close to 2 hrs, so gauge the results accordingly. https://www.youtube.com/watch?v=ZBVpSLIBJmYemphasized text
Hi Brian,
Thank you, I am well and have had a busy fall. I’m trying also to clear some of those useful but irrelevant piles of steel from my shop. I changed the video to public so you should be able to view it. My next big thing will be a teardown to see how the gasket material has held up. Also to see if my hearth retained its shape with the heat sink rim I welded on.
Regards, Pepe
Hello Pepe,
What Brian said.
Seems like a nice working system you have there. I remember watching your vids a year ago when I first discovered DOW. Watching them again and I notice details I don’t remember or didn’t understand at that point. One never stops learning. I still have to learn to “clear irrelevant piles” as you put it. I don’t know if I ever will
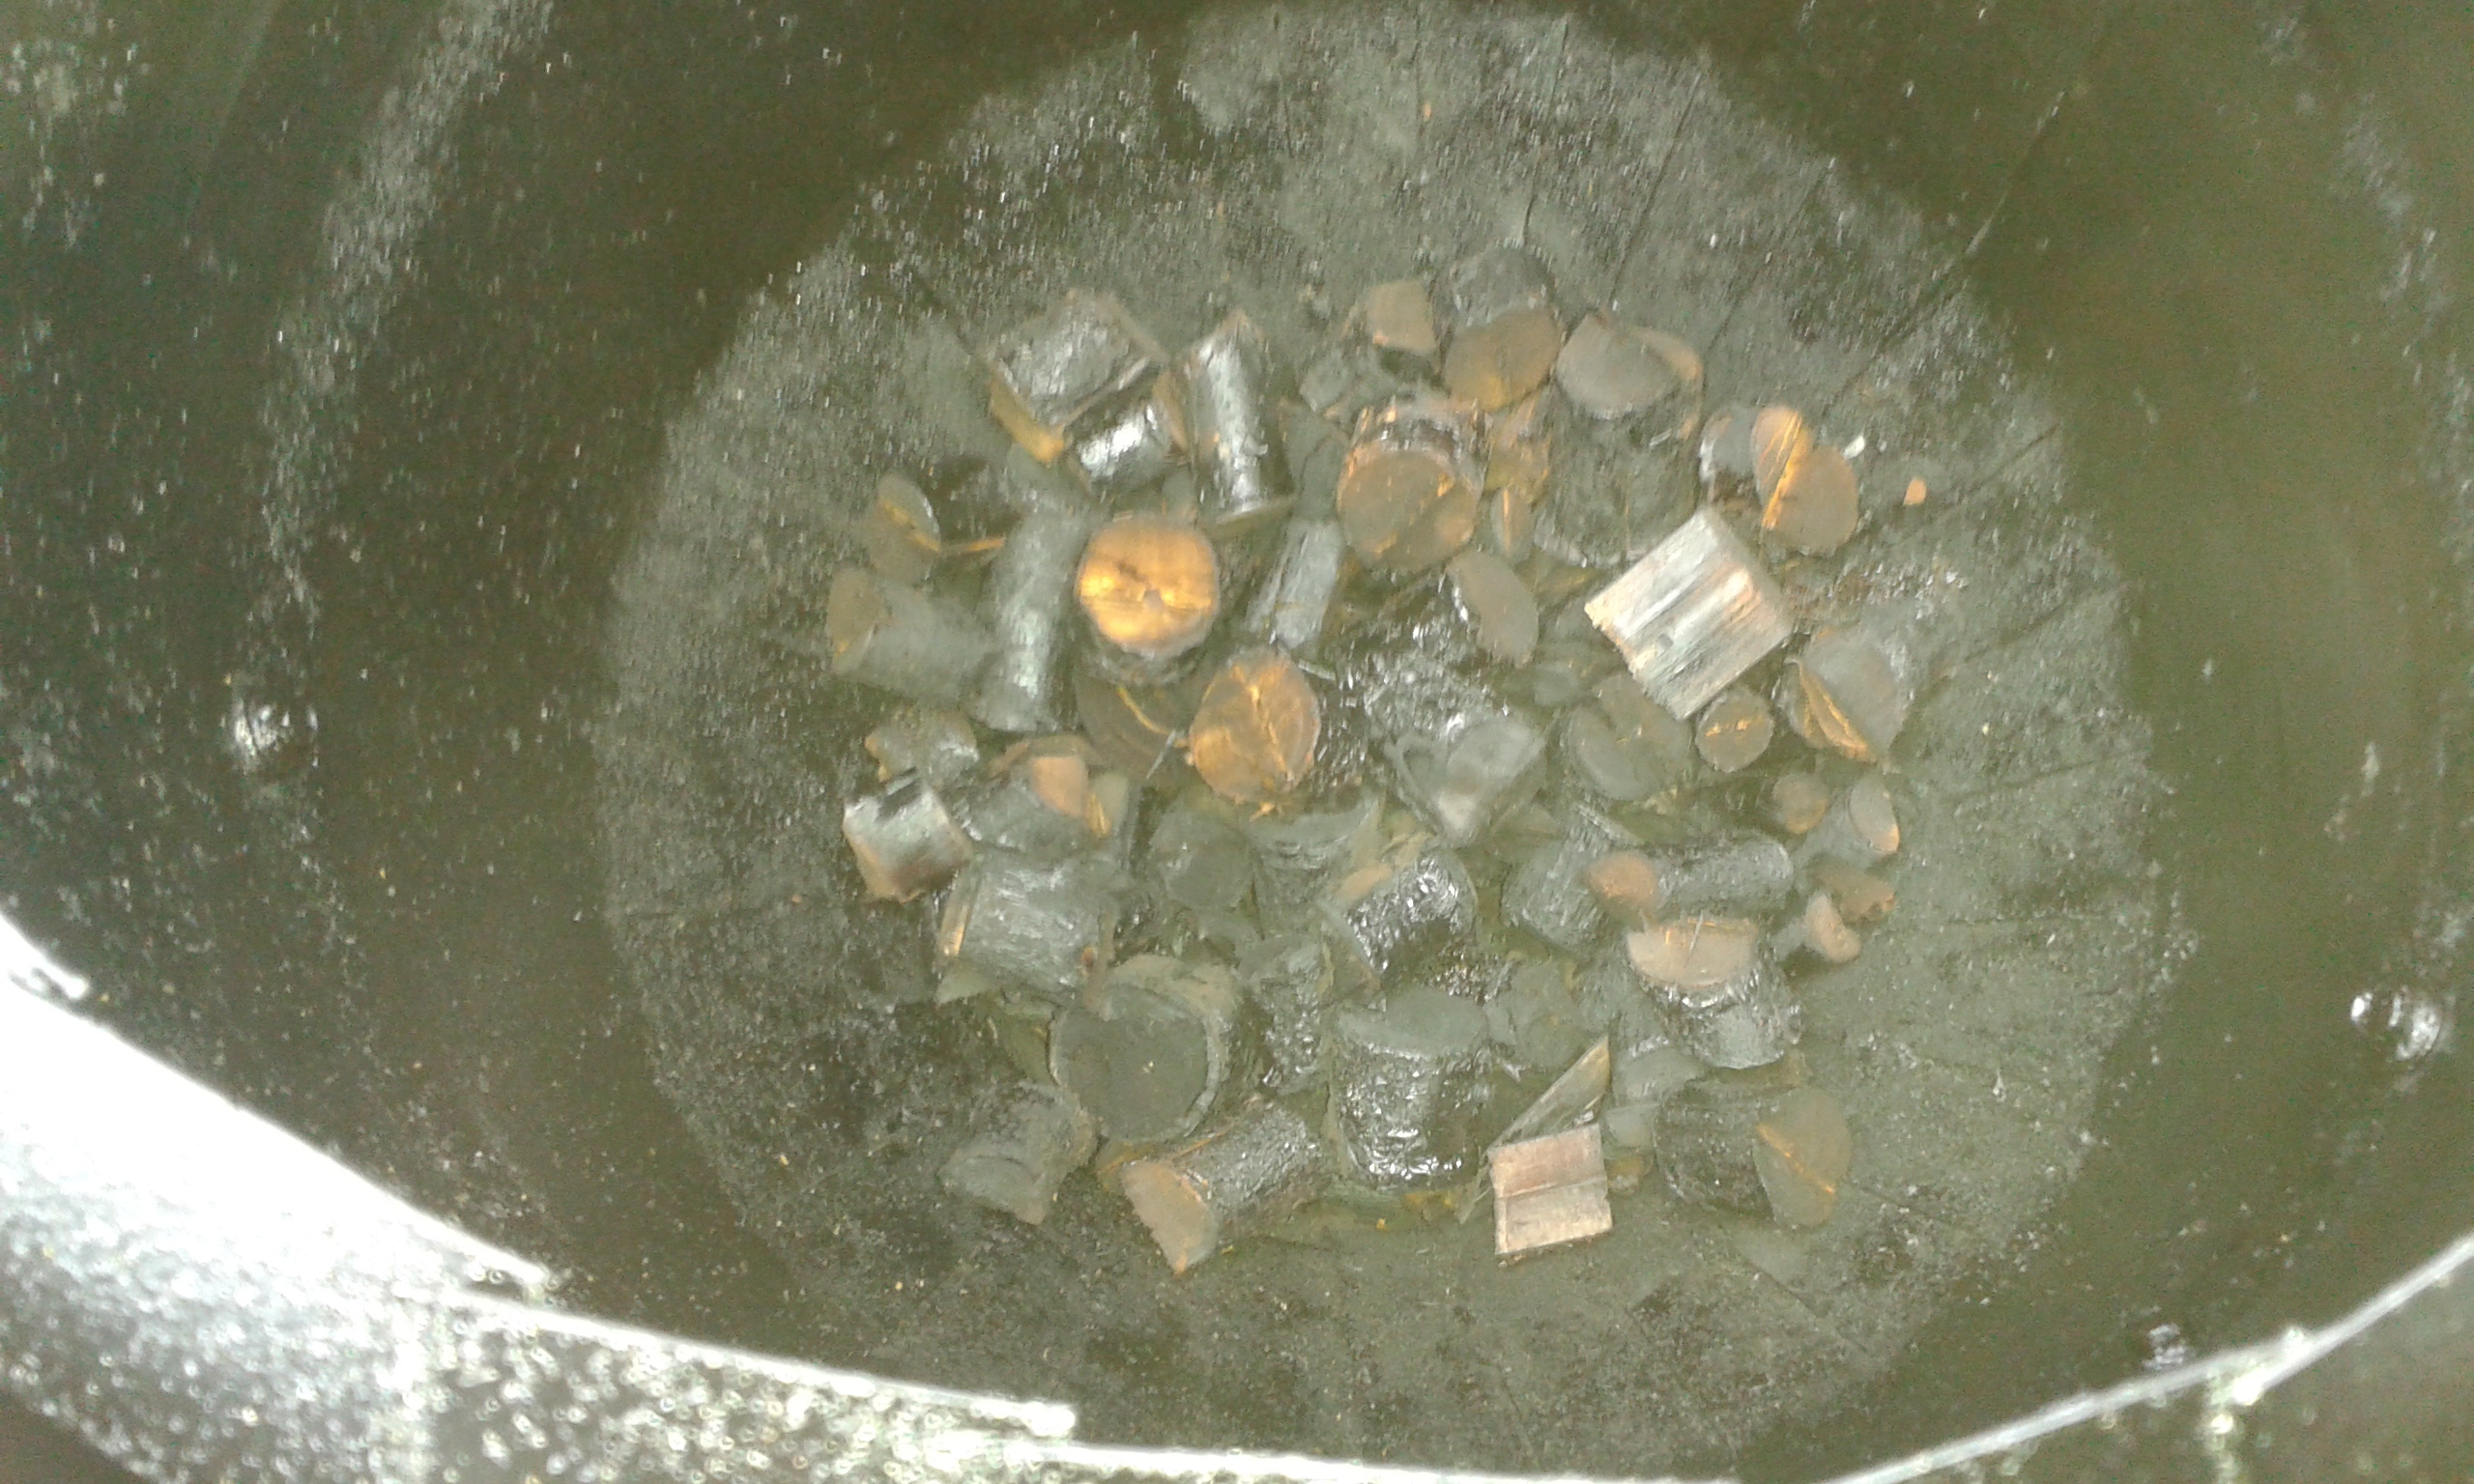
Filled up with chunked up leftovers from the boiler up to the funnel fingers. Small void, vacum and torch. Charbed started to glow and roar like crazy at once. Added wood. After 20 s revers for another 20 s. By then the hopper was already filled with thick smoke. Closed lid and started pushing. Lit the torch and watched the cyclone outlet. I saw nothing coming out thinking “not ready”, but for some reason I put the torch to to it - and the flare sustained at once - first try ???
I’m amazed. Less than 2 minutes from lightup to flare with a mix of fines, big and small char lumps and an empty dump. Ran a hopper full of wood down to the funnel fingers.
I have to do something about my hopper lid seal though.
YEEE HAAAW !!! I am so excited for you. You have been quiet for the last few days so I thought you were working long hours. Really surprised when I saw this post. You haven’t said anything about working on the gasifier and I thought it was in the dormant stage for the winter. Looks like it is going to be a great build. AND== it lit off the first try. I can’t remember how many “years” it took me to get a good flame. ( I spent a couple of years trying to get a 12 volt squirrel cage blower to put out enough vacuum to pull on a gasifier.) I really can’t wait for pictures of your construction. Thank you for the great video of your burn. As Carl said, when you blow through a gasifier it is very hard to get a seal on the main lid. I have a stack of lids that I have used and re-used and revamped; and I always ran under vacuum. Even when running on vacuum, when you shut down the hopper builds up a pressure and they would–will leak just sitting there. Thanks again for the good news. Waiting with my breath held for more pictures.TomC
Thanks guys,
I was so excited I forgot all about the camera until it was already running. I’ll be back tomorrow after work. Alarm will scream in 6 hours.
Thank you, butt kicker TomC and up-off ass advocator SteveU for pushing me to knee down into the snow with the welder.
I mean it - I need it.
Leaking lid. I didn’t have no choice but pushing. I don’t have a cooler yet.
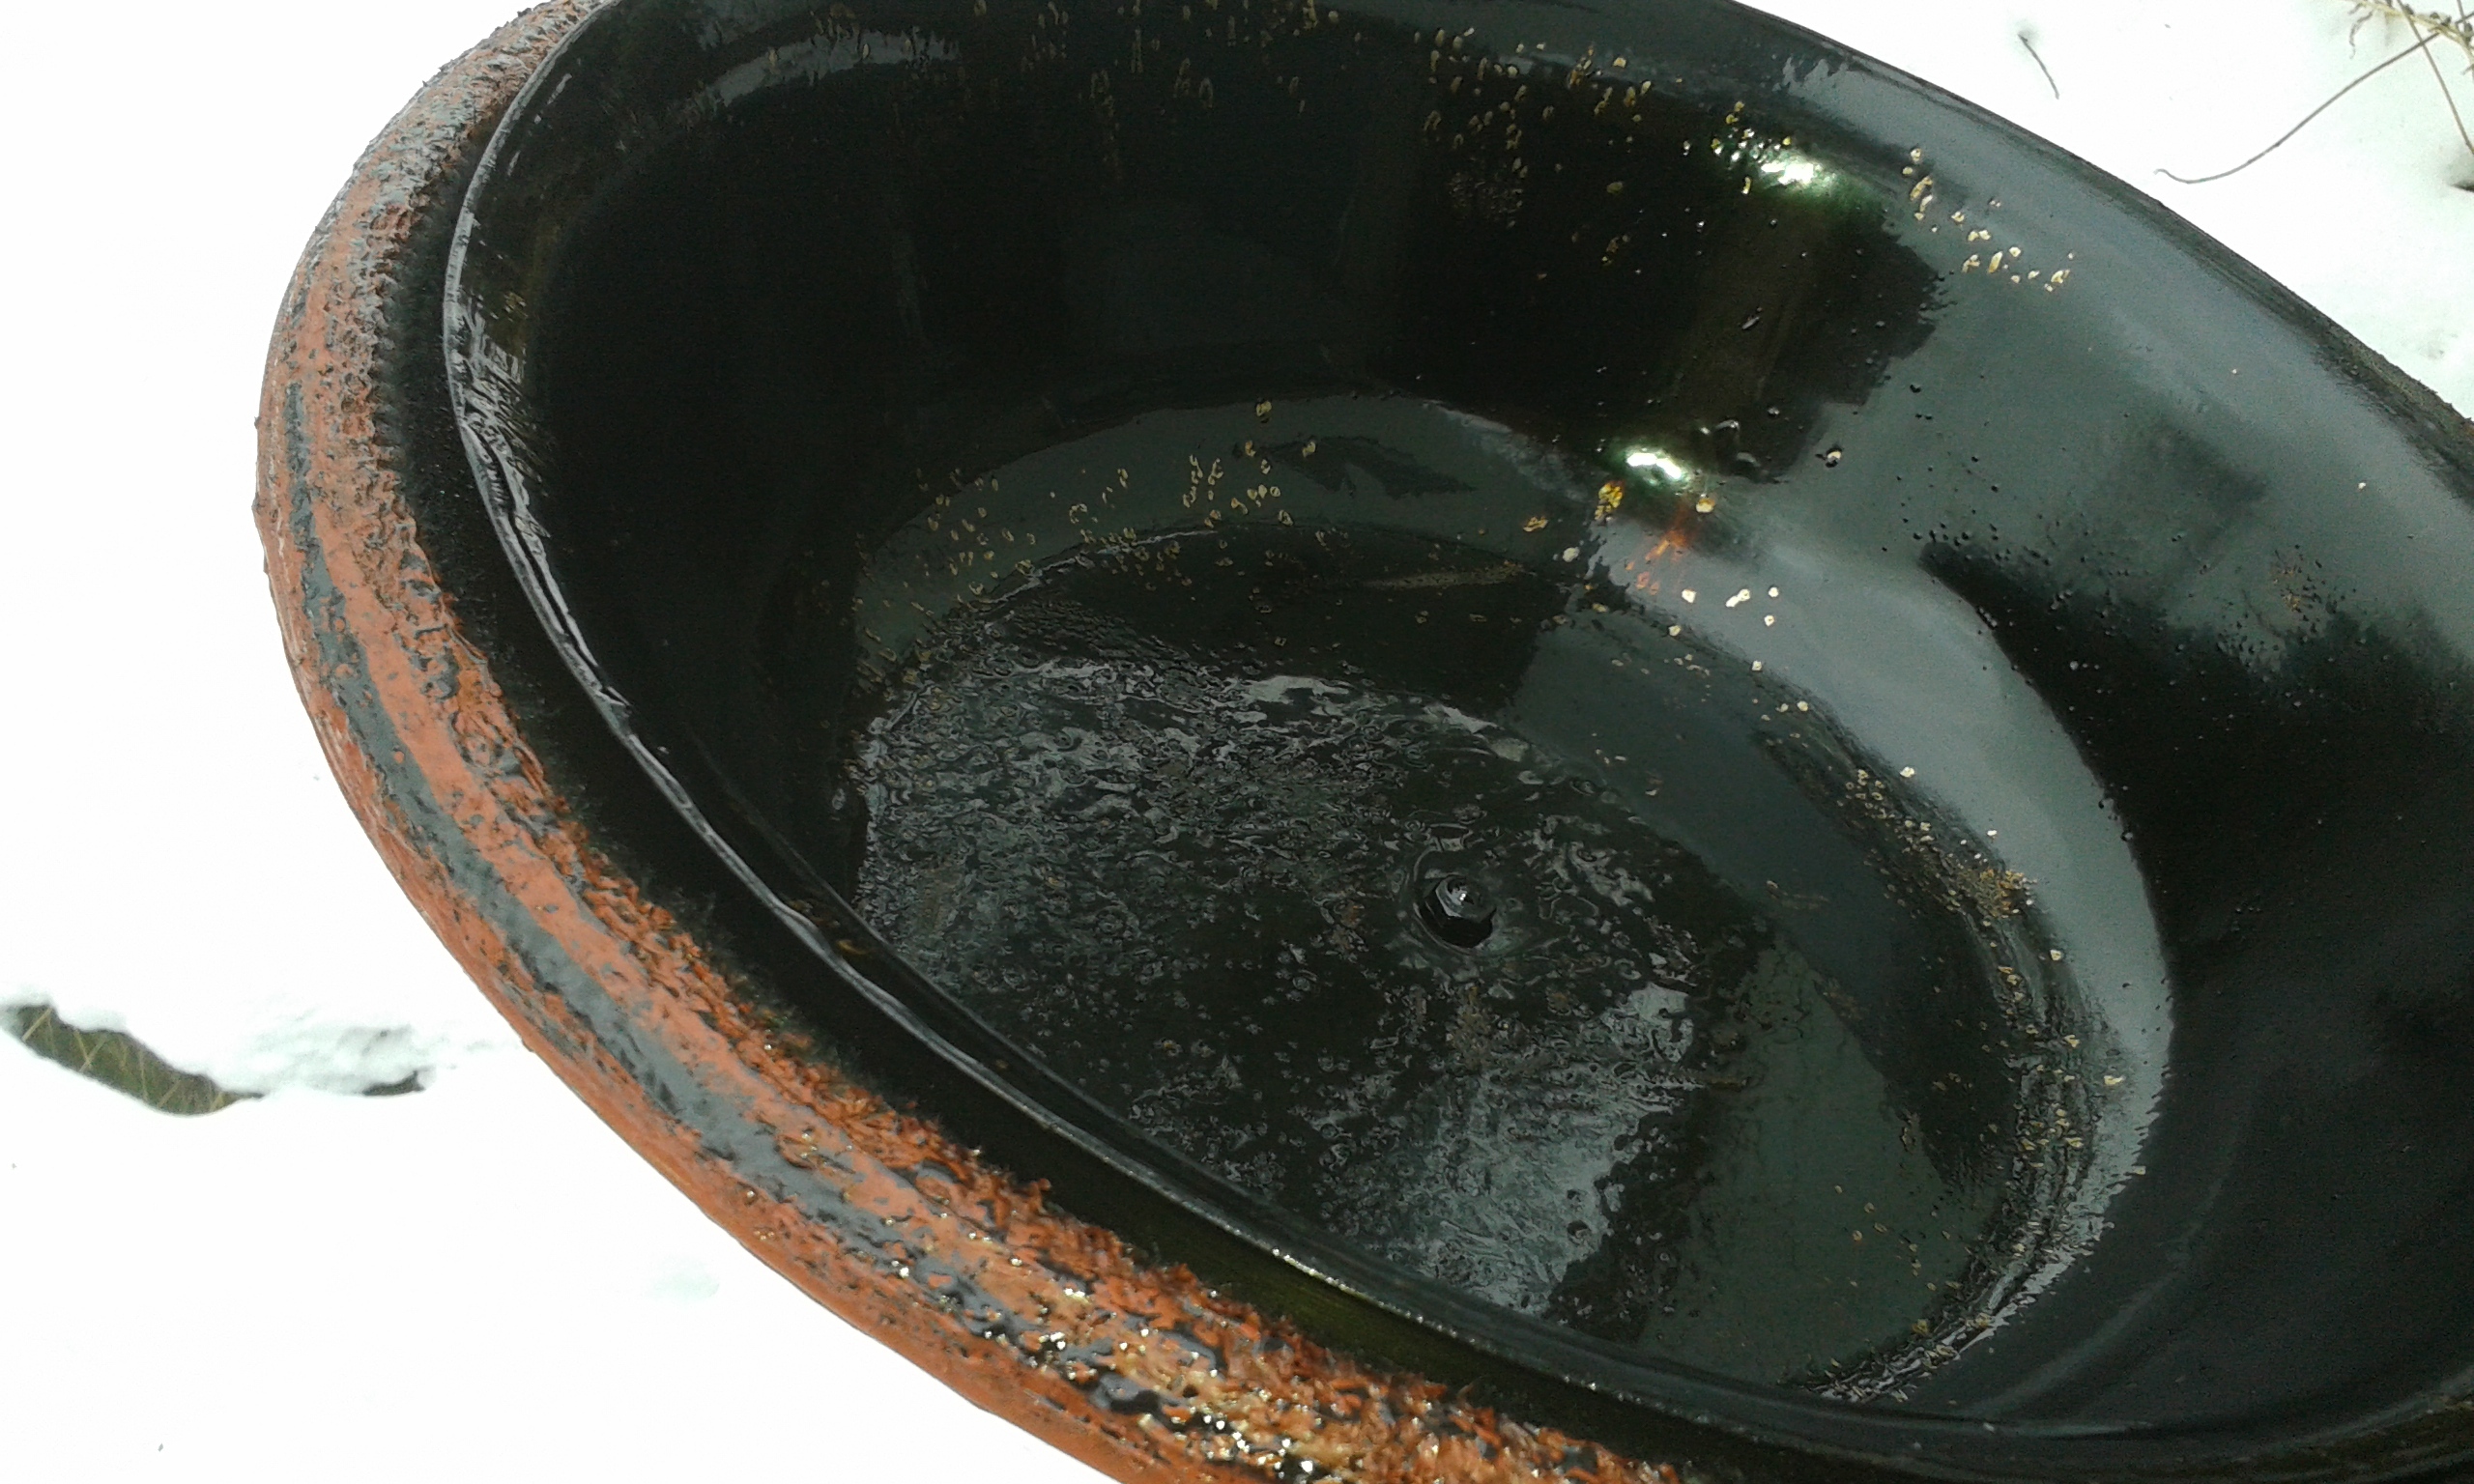
I made the double lid from two ss washbasins I found in the attic. Tried to make a seal from stove rope smeared with silicone, like Carl did.
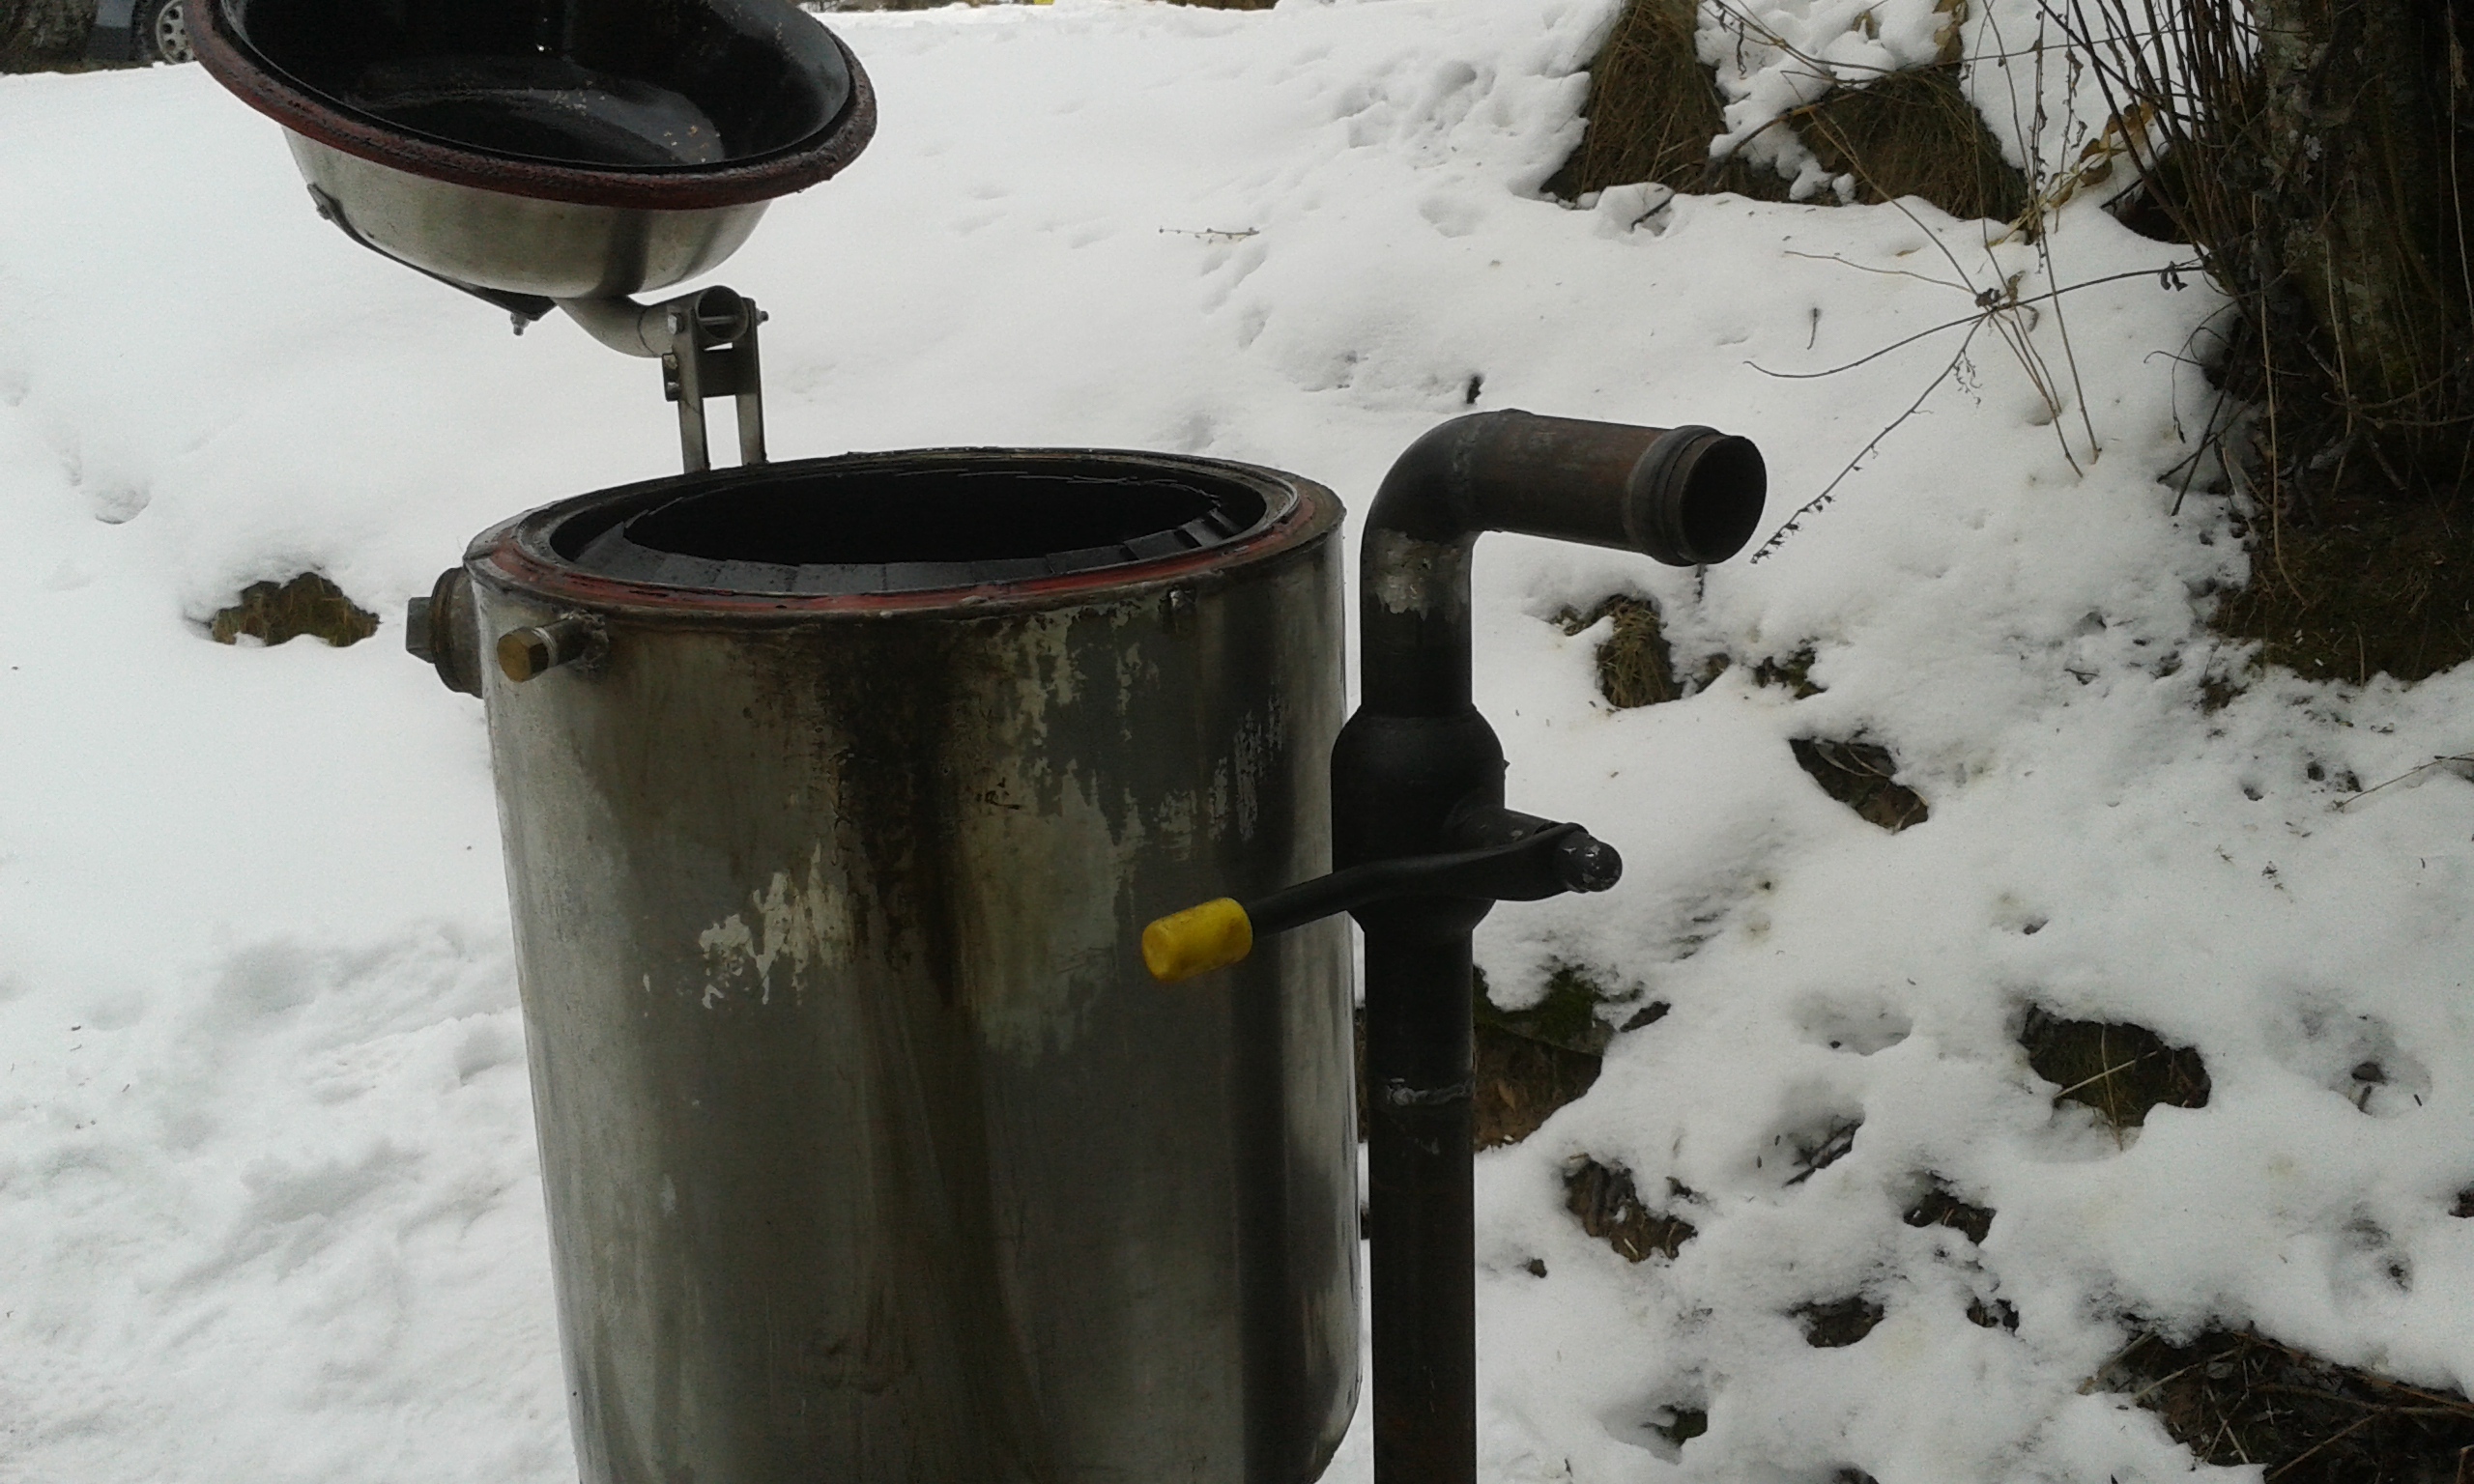
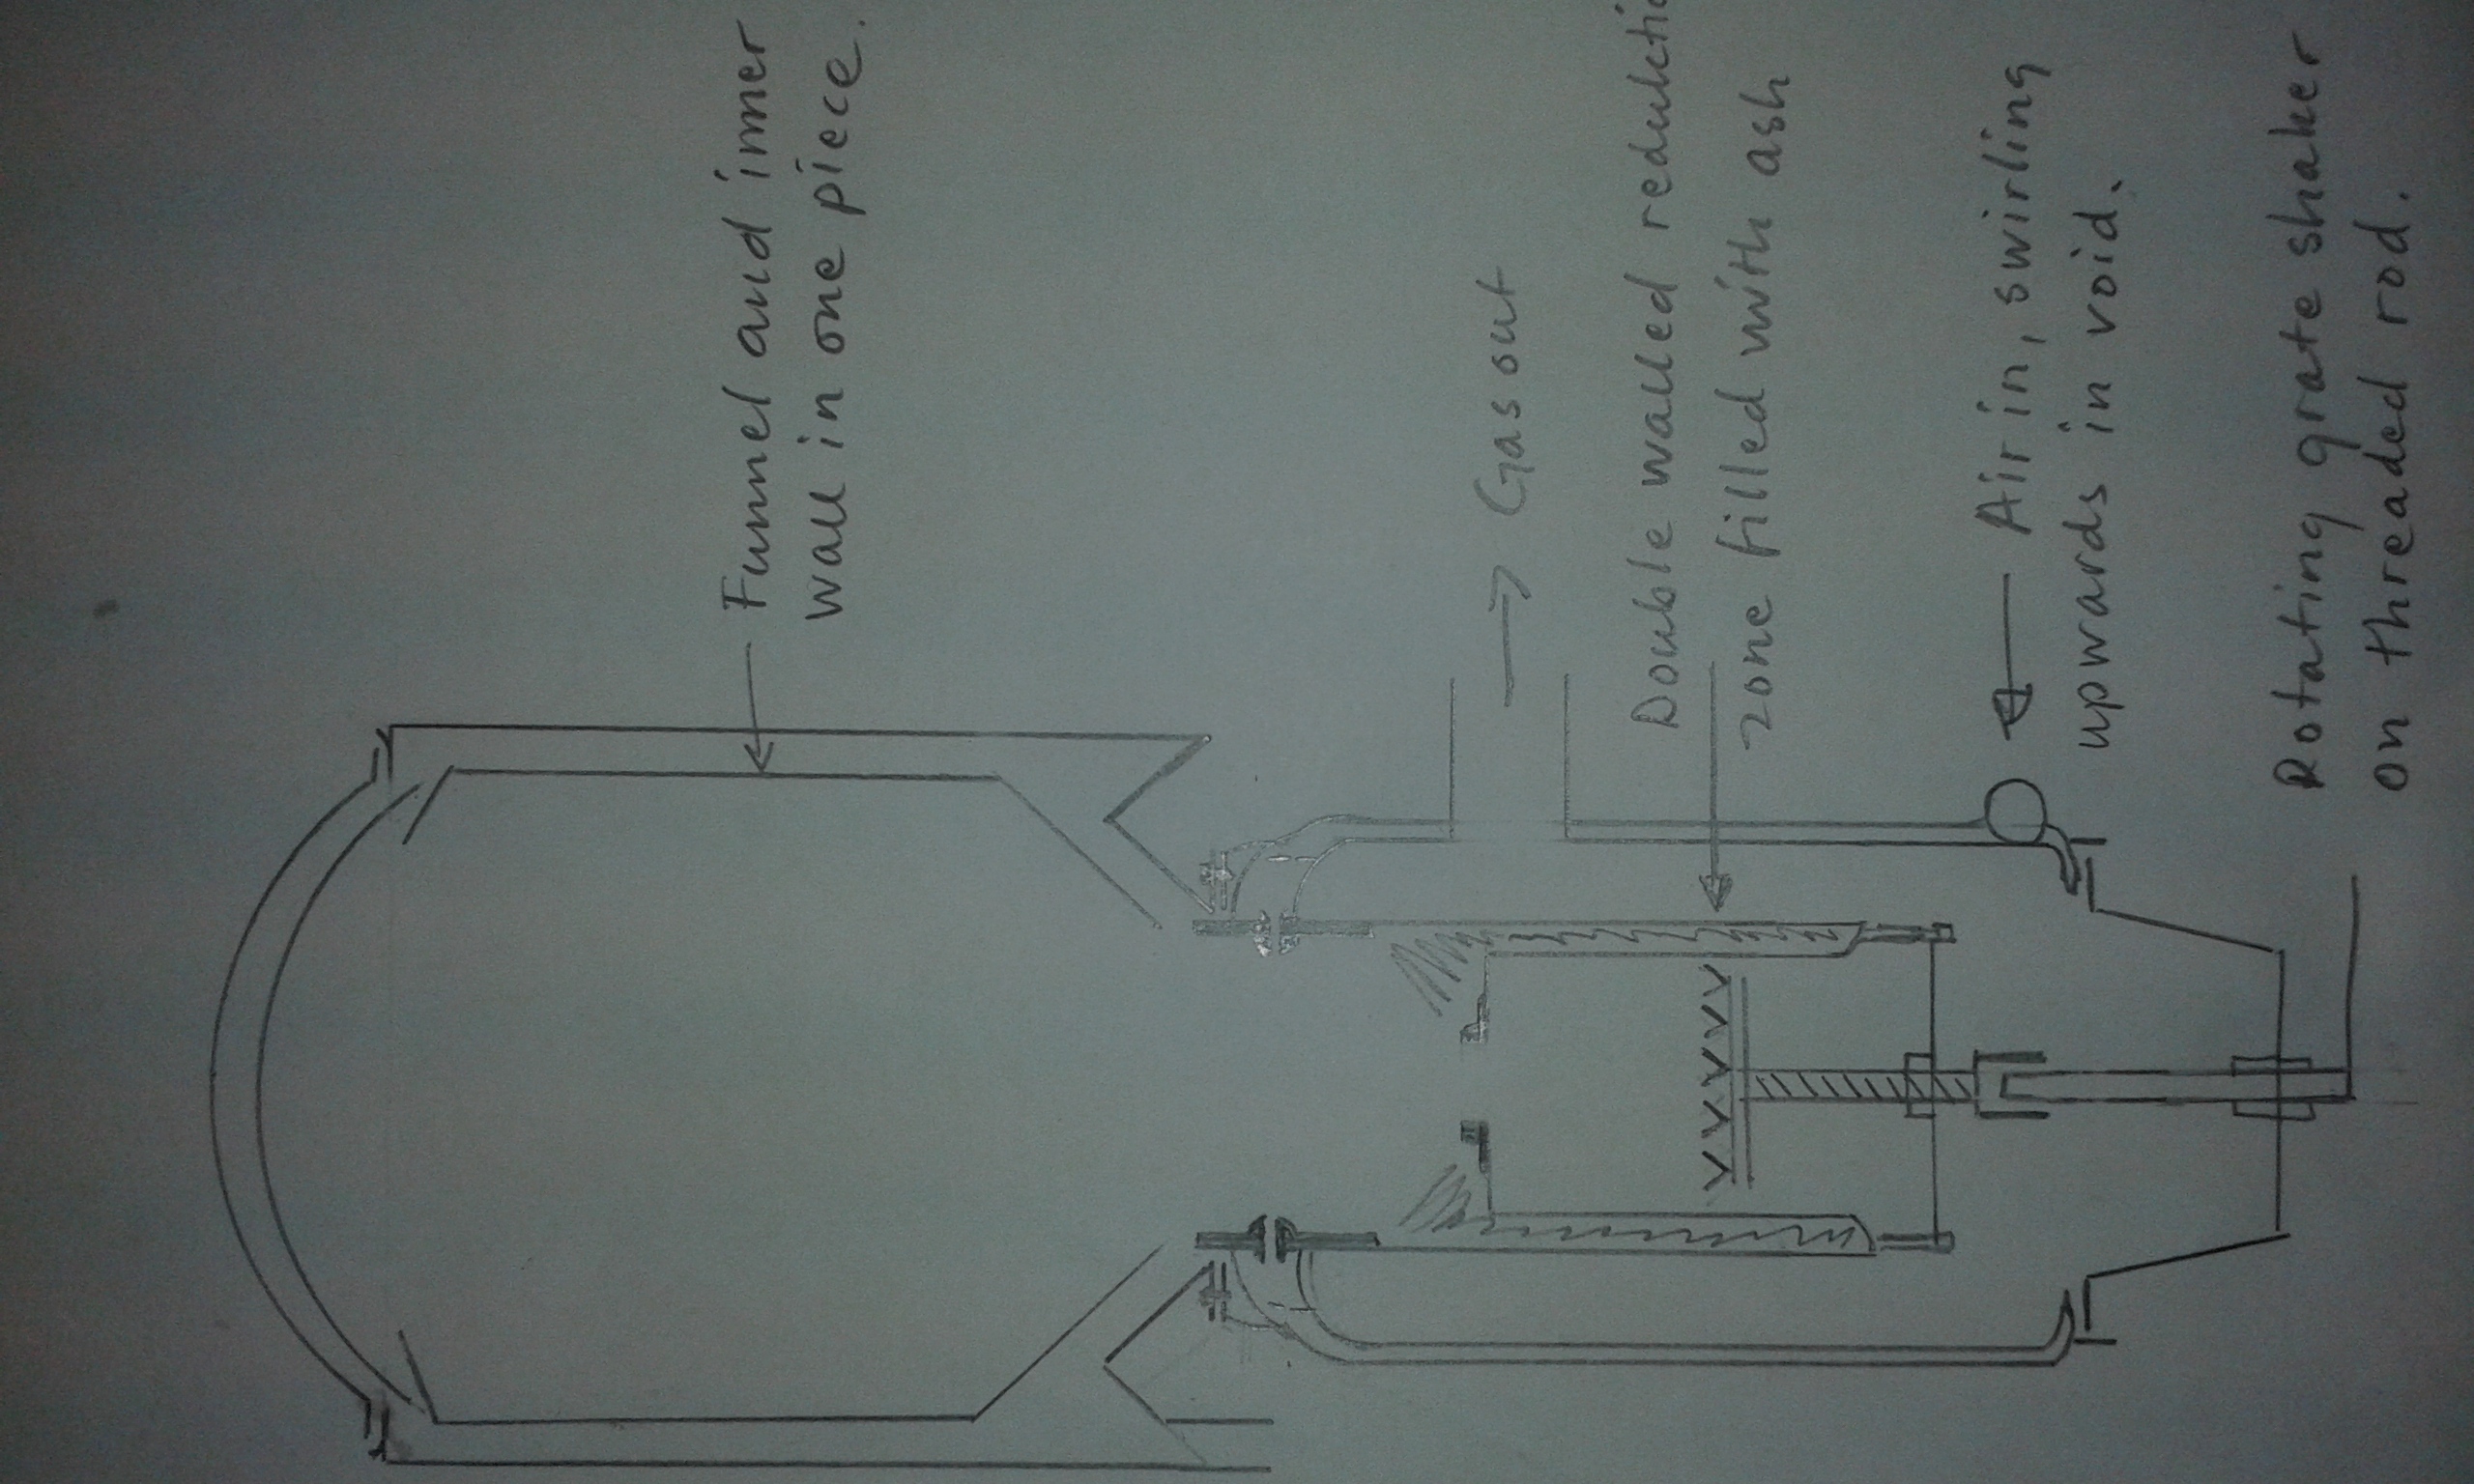
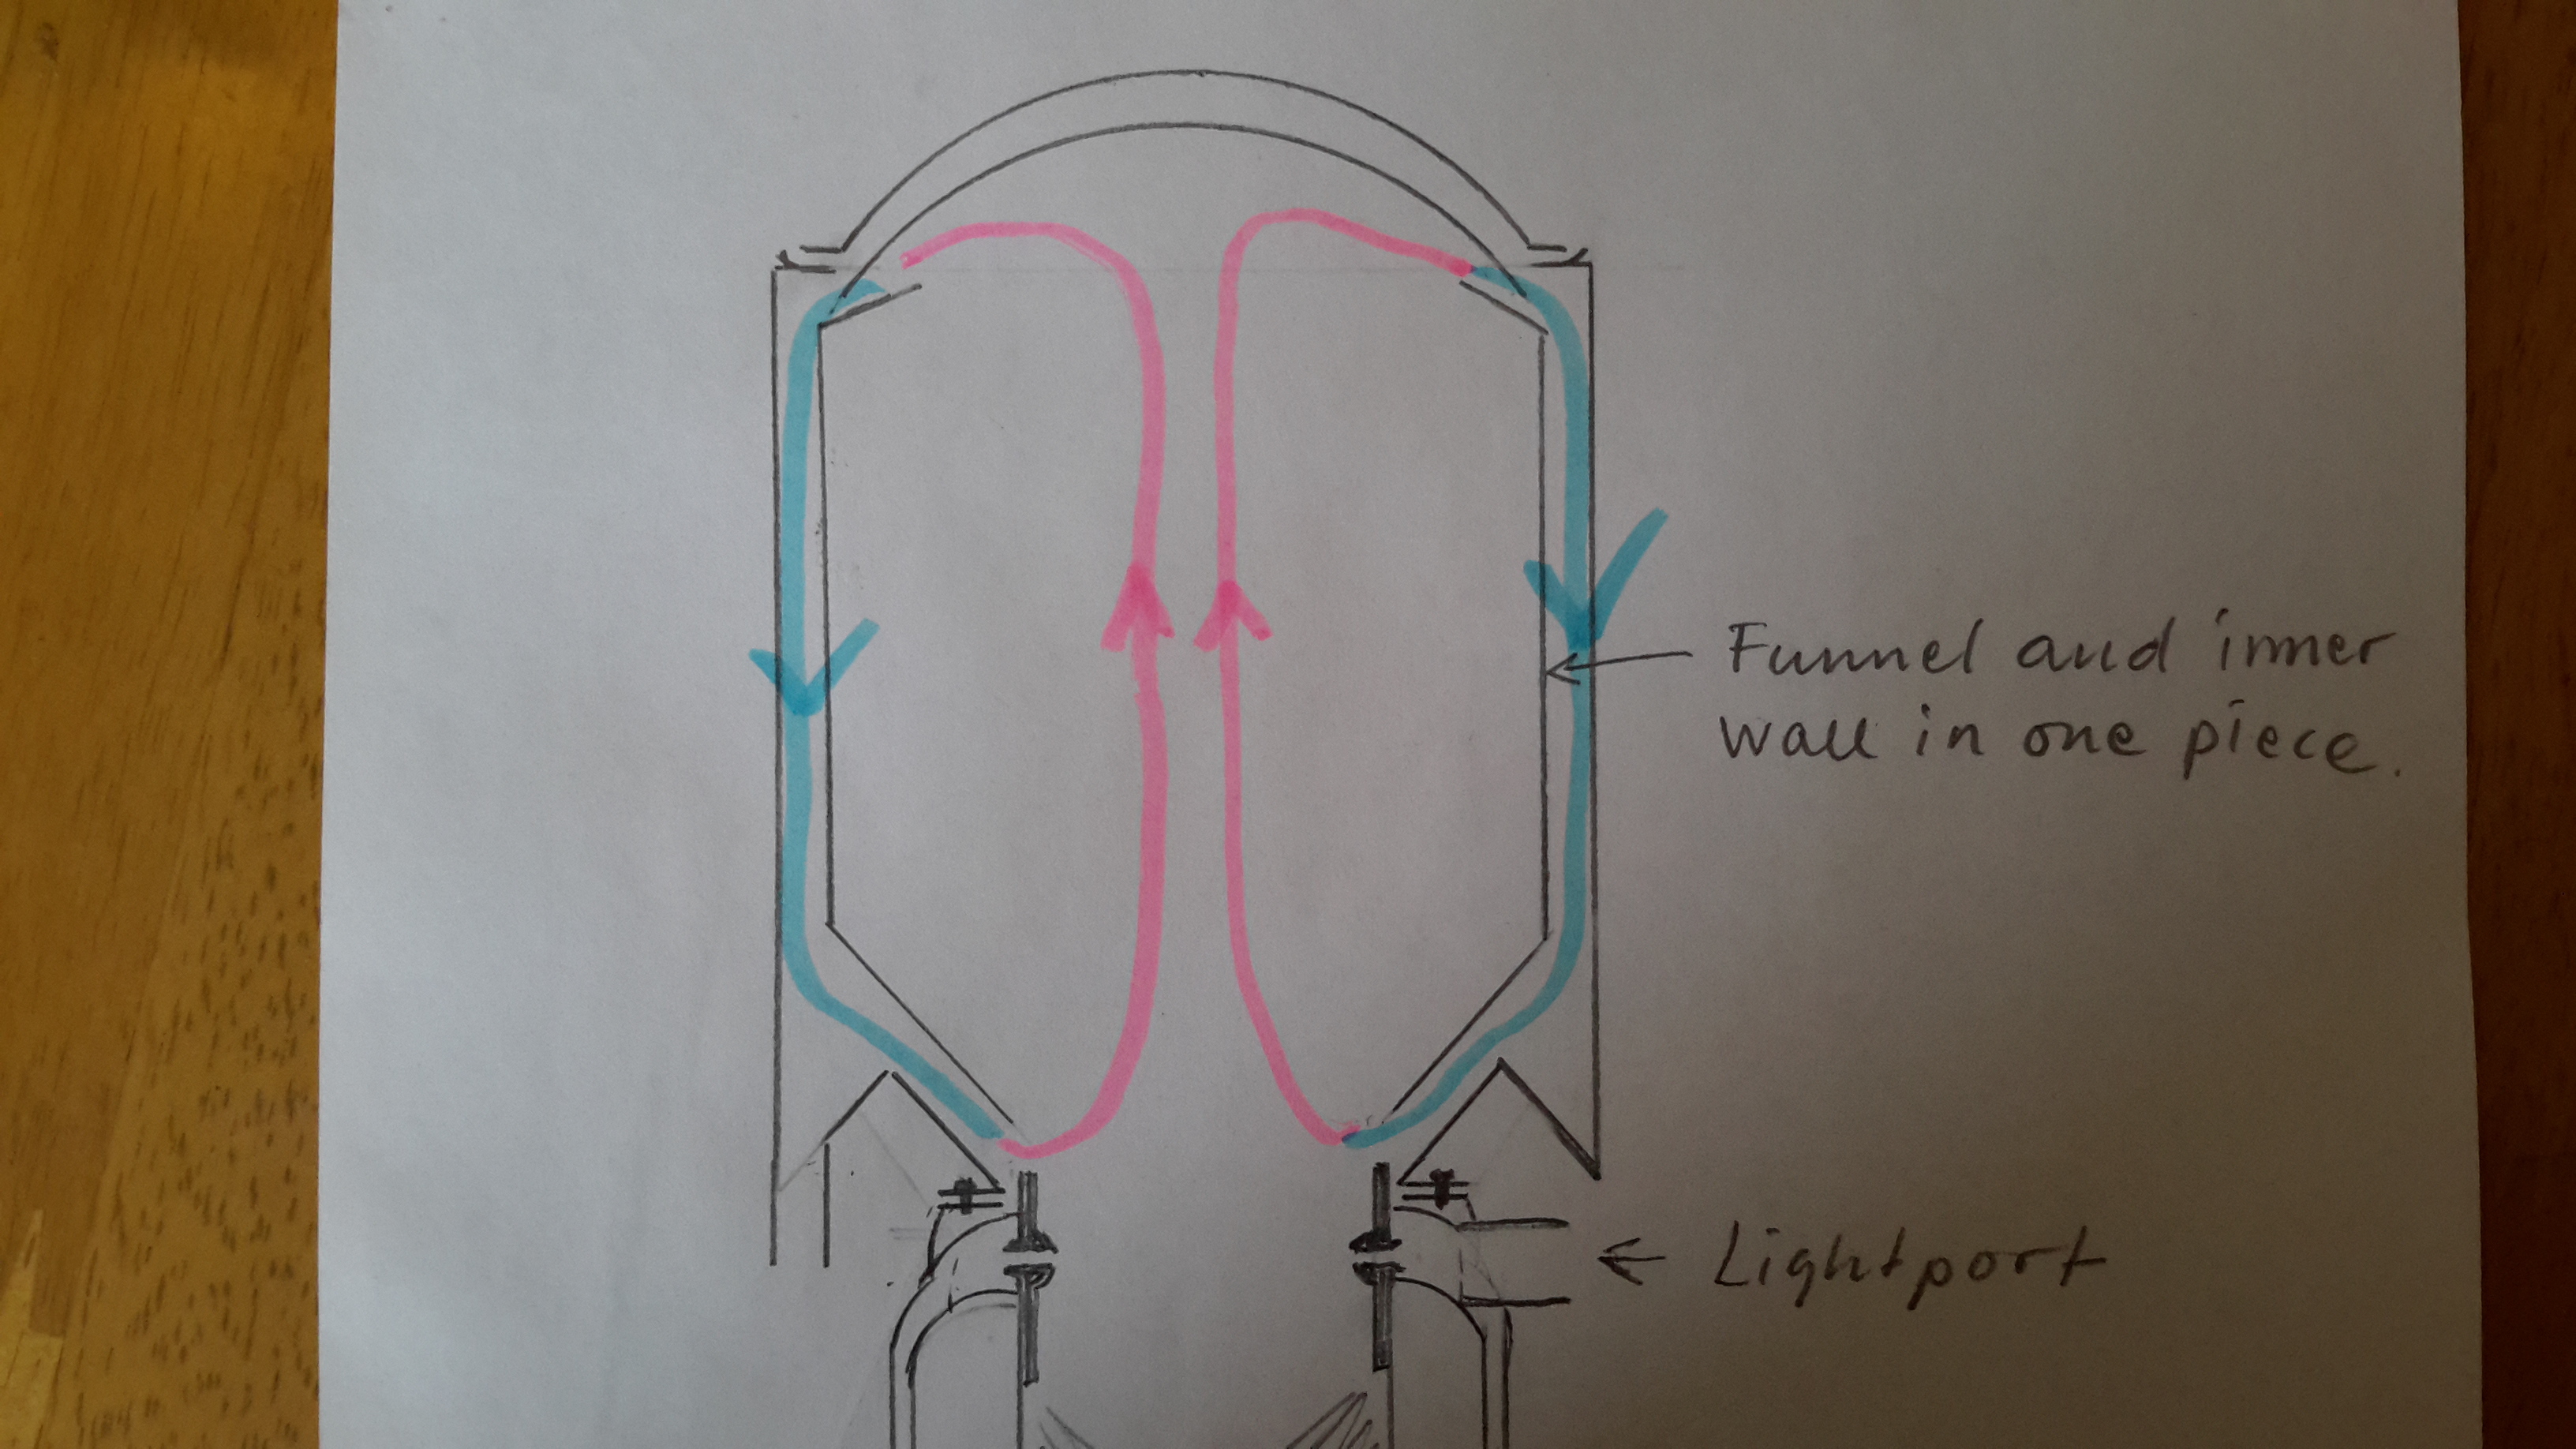
Double wall hopper. Funnel and inner wall in one piece. Loose fit. Can be lifted out of the hopper.
<img src="/uploads/default/original/2X/2/2fd5c01a4cb53329e8334033c496867fced48432.jpg" width=“690” height=“414”
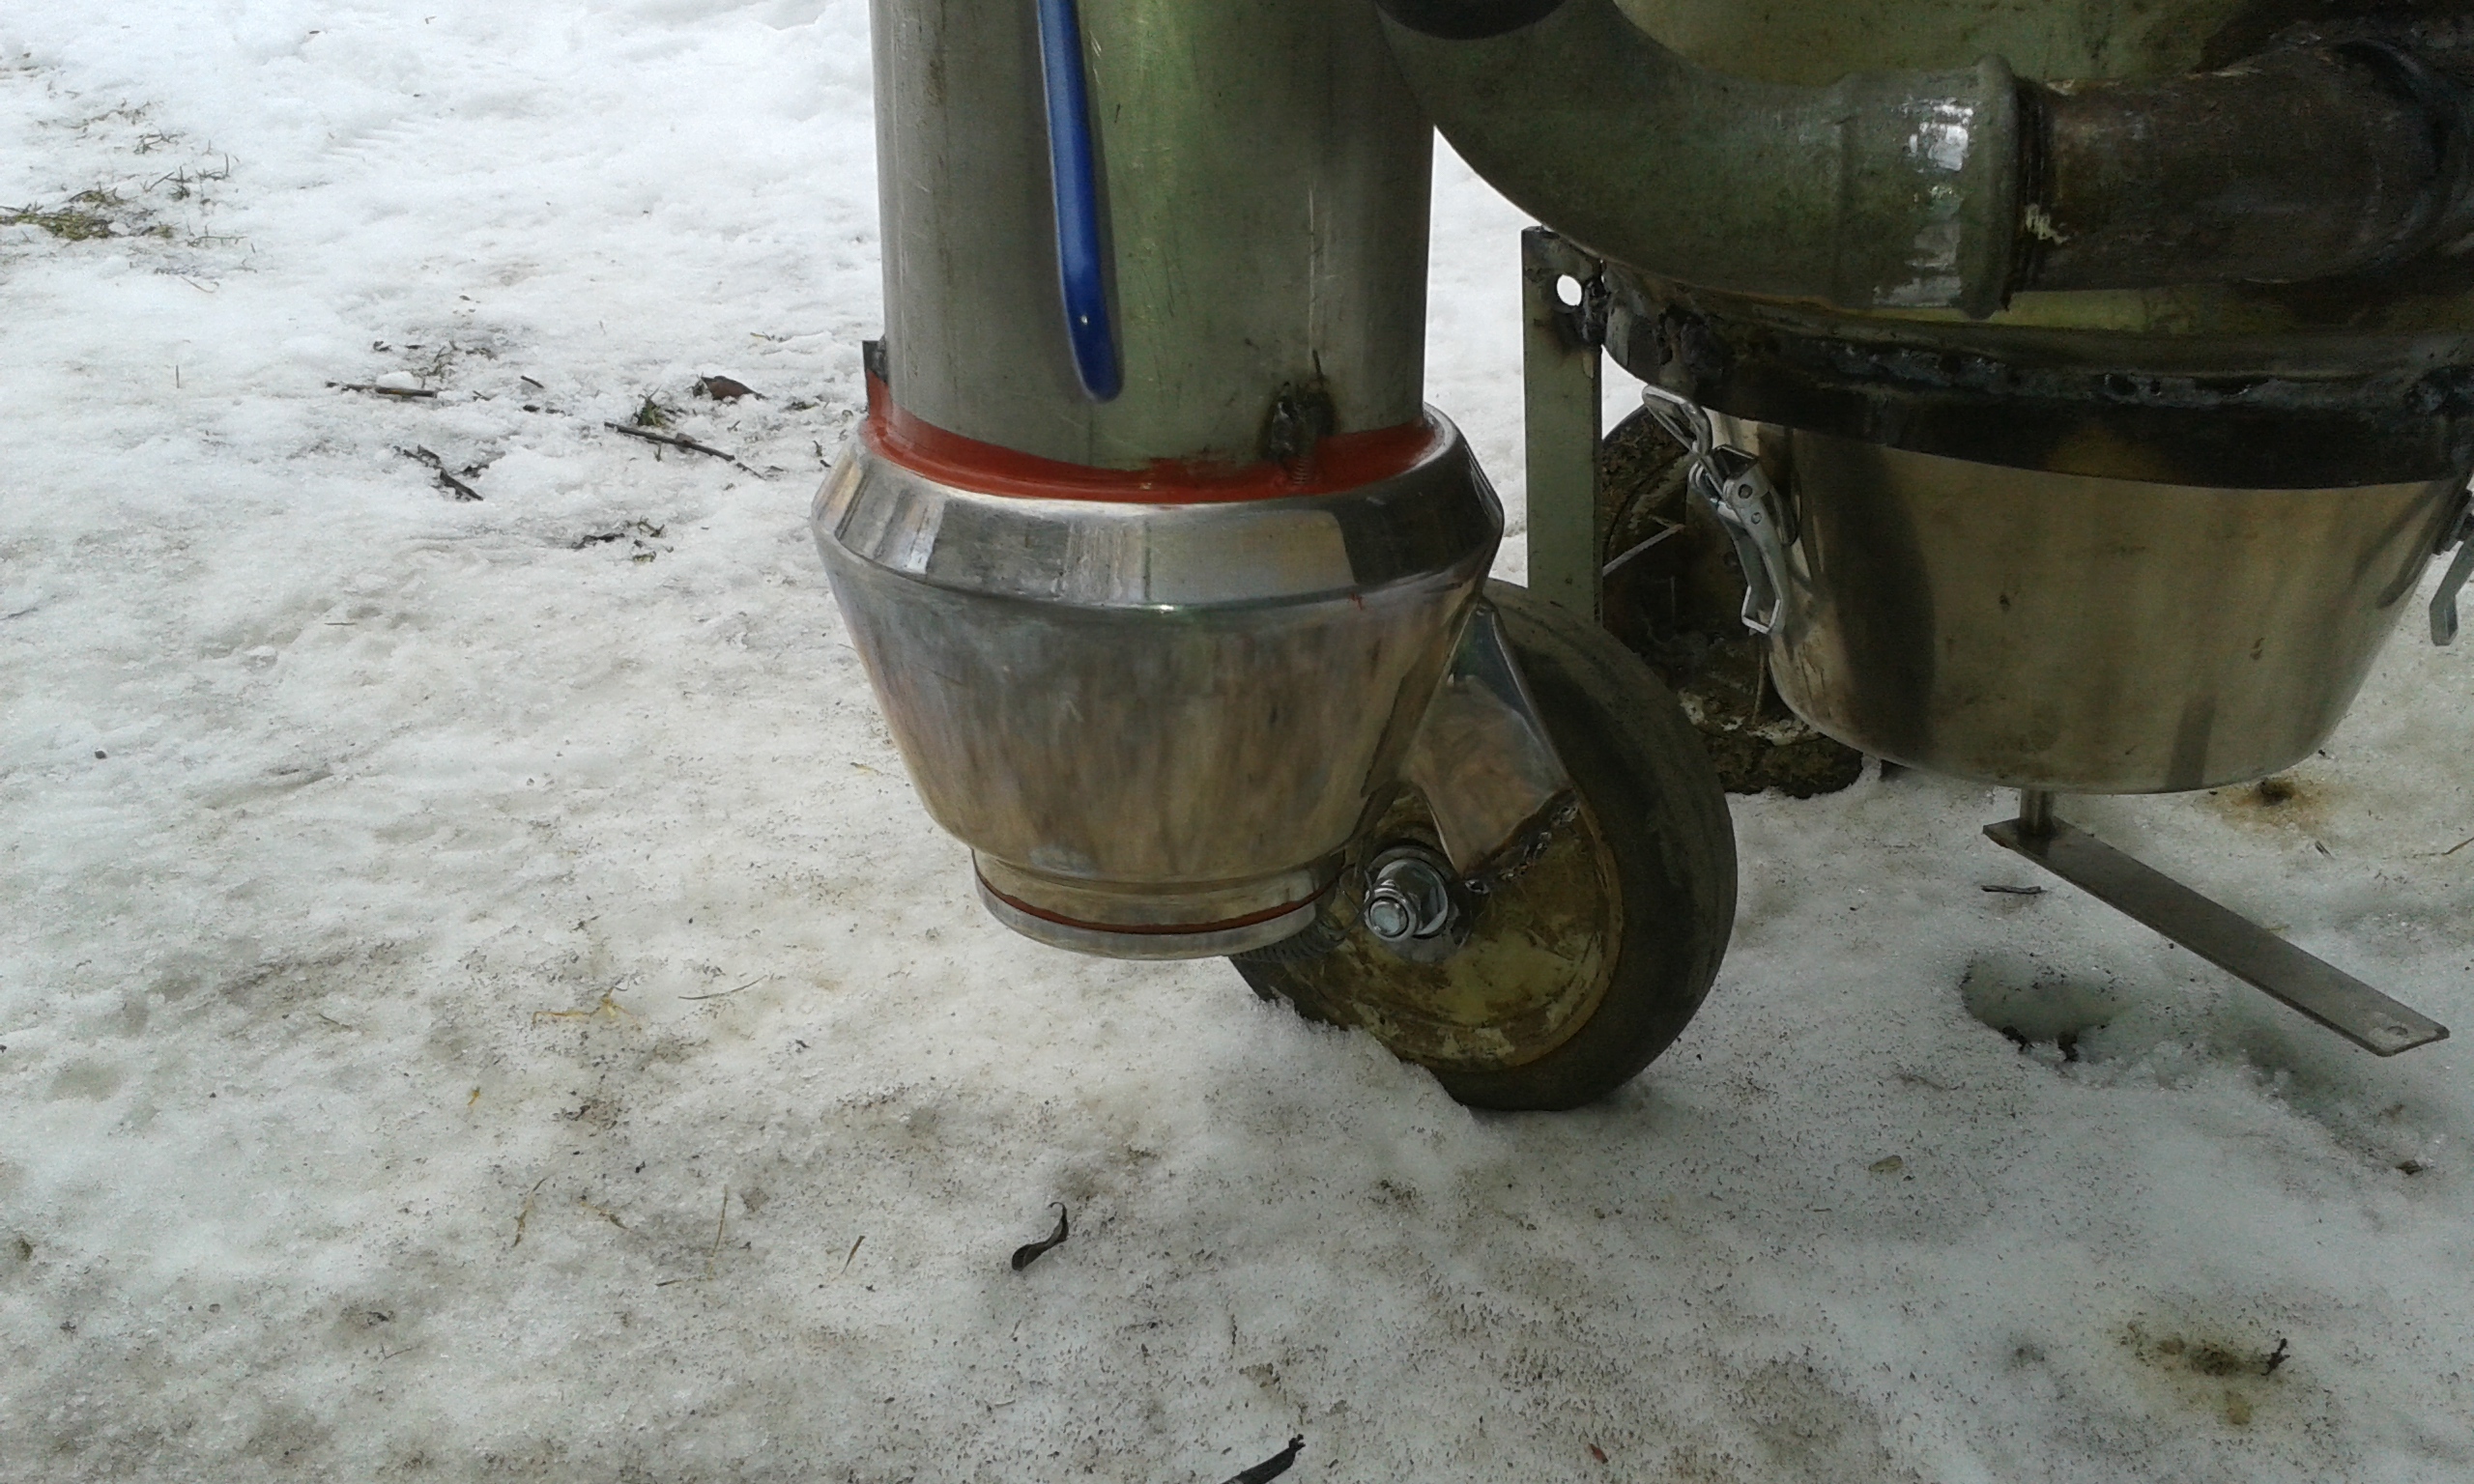
Cyclone has an upside down coffee pot as collector. Inside the lower part of the cyclone I pressed in wife’s 1L ss cone jug/pitcher (she doesn’t know yet).
Ash dump to the right - another kitchen pot.
Lawn mower wheels will obviously be cut off when this machine powers a V10-truck
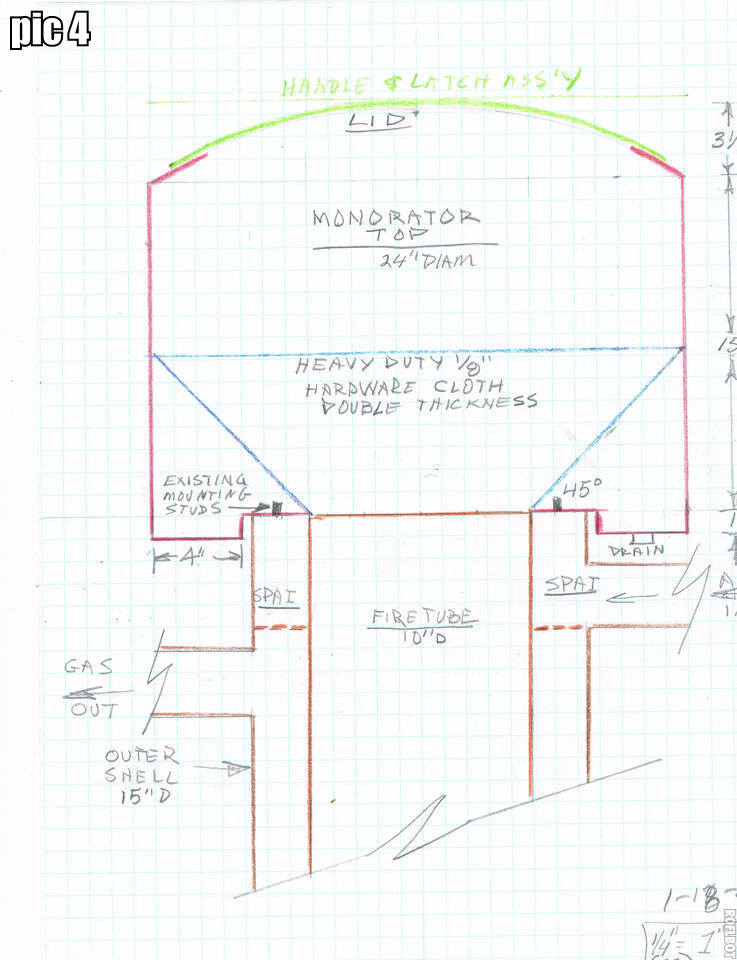
Below drawing is not in proper scale, but close.
I was told the reduction zone was unnecessary tall, when using a hanging grate. Arvid suggested a rotating grate on a threaded rod. Did it in Max’s angel iron style.
Anyway!!! I really do like you build and can’t wait to see it hooked up to your wires car or something. ( after all, she supplied the lids and cyclone material out of her kitchen.---- whether she knows it yet or not.)TomC
My small units grate is based on grate cross sectional area being equal to the restriction’s cross sectional area. I pretty much get dust out of it. Seems to work for me… but my grate and JO’s grates aren’t built the same… I suspect JO’s grate will work fine.
Arvid; Thanks for coming in. You are kind of saying what I am saying but I’m not sure. Are you saying the diameter of the grate has to equal the diameter or the restriction? OR the open holes in the grate have to have a sum total of area equal to the aria of the restriction.?TomC
Yes, the open holes in the grate have a sum total equal to the area of the restriction.
Actually in my system the total open area of the grate is adjustable… I can set it anywhere from 50 to 150 % of the total summed area, but I have found that equal works pretty good so I leave it there.
Hey J O, not sure how far up you can move your grate but I’d start with it about 3 inches below my restriction and see how well it makes gas and breathes… if it makes good gas still move it closer till it doesn’t make good gas. You only need enough reduction area for good conversion. … anything more and you’re just putting drag on the system. Just my 2 cents take them for what they are.
4 Grate.
I actually followed Arvid’s suggestion, leaving a 1/2" space around the grate.
The inner reduction tube is a 6" pipe, so I cut a slice out of a 5" tube for the grate. The angel bars, 1/2" apart, are inside that diameter. It’s all standing on a 6" dia standing flat bar cross, to center it inside the tube.
I haven’t done any proper calculations, but I guess open space CSA through the grate is 3-4 times my 2.5" restriction CSA. Good or bad, I don’t know.
I don’t doubt your experience Arvid, but I’m a bit confused by your only 3" tall reduction suggestion. I built that tall reduction because I read in some old papers that 8-9" is a minimum. Well, old isn’t always right. I’m glad it’s now adjustable.
3 Ash dump.
I have pretty flat surfaces and a good seal down there, but you never know. I’ll watch out for torch effects.
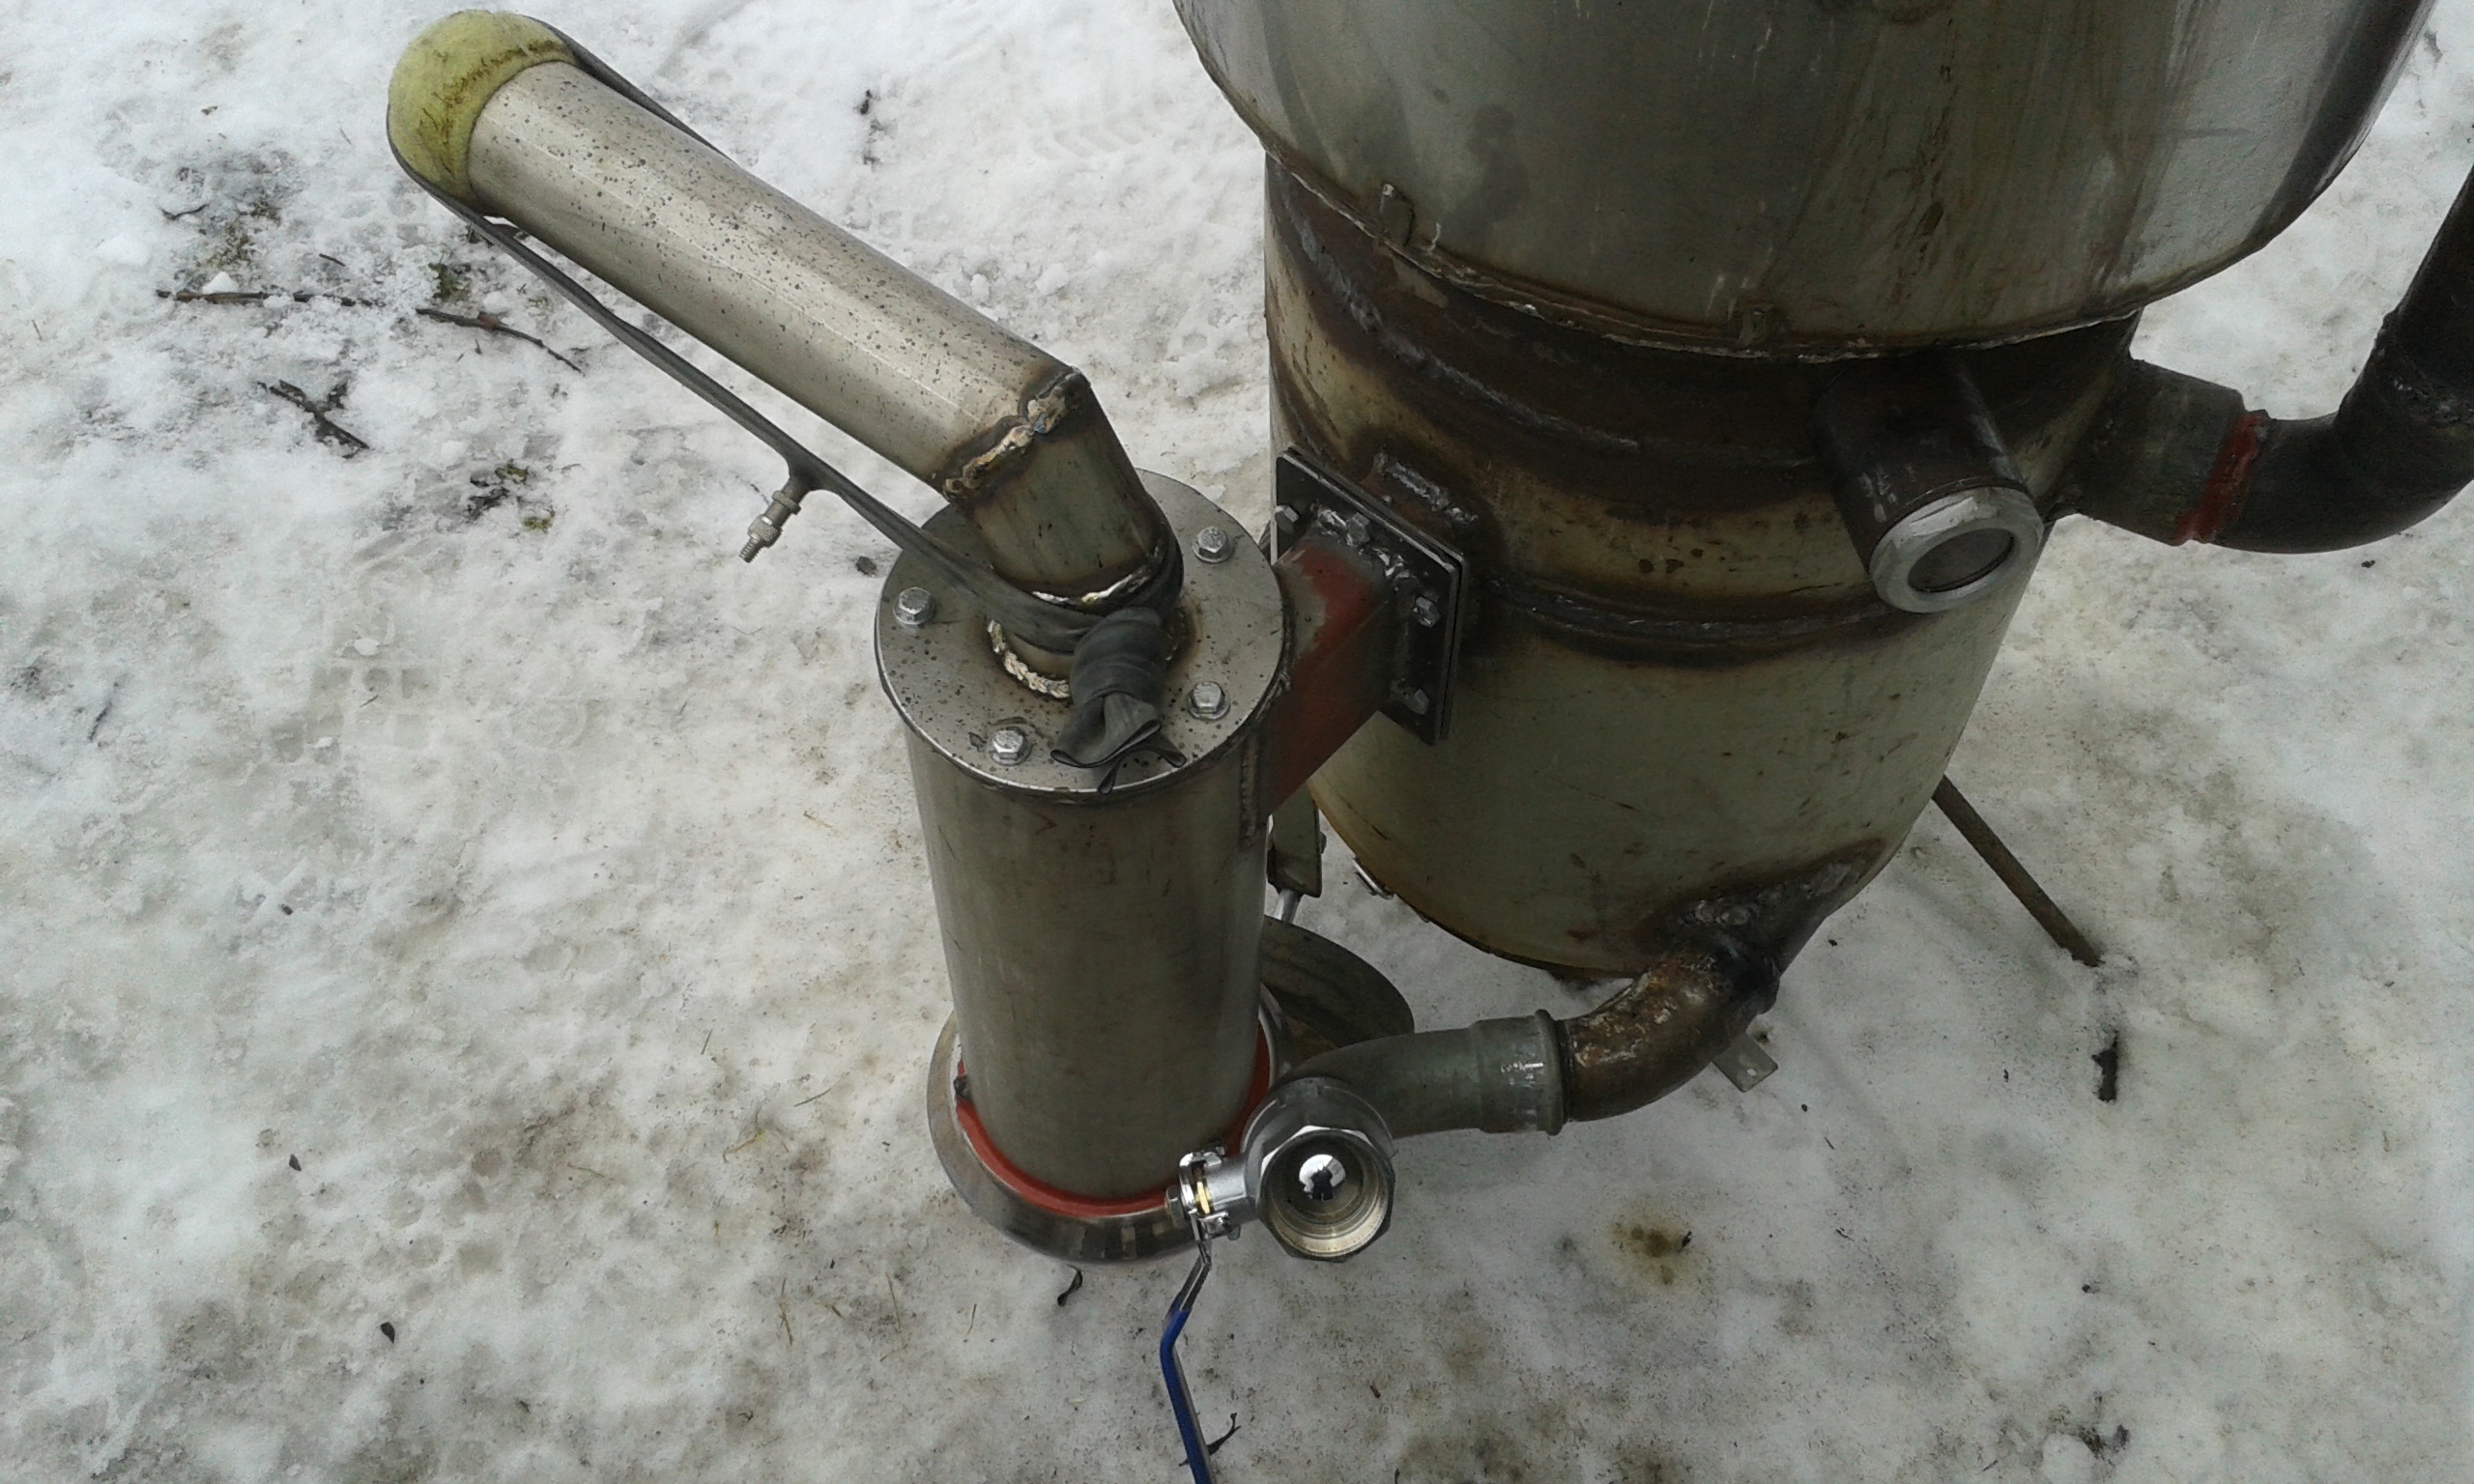
2 Cyclone.
I don’t remove the soot catcher to empty it. I just open the upsidedown coffe pot’s lid. It’s held in place with a spring.
My thinking was that since my firetube is only 8" wide and the housing is 12", all that space inbetween would also act as a dropbox and setteling area. Outlet is at the very top of the housing. I can easily fit a bigger cyclone soot cather if needed.
1 Hopper.
Insert fitted when I put it in. I expect it to come out as well
Yes, bolts are spacers to center it. Funnel fingers are resting on spacers as well, creating a 1" void above the firetube top for hopper circulation.
Good to know, Arvid. Thank you. I guess I’ll wait until under engine vacum to adjust. I think I’m at 4" below restriction now. It’s about the highest I can get right now. But it’s an easy fix to extend the rod if needed.