Come up with some way to throttle that shop vac, it’s pretty big for that small of a gasifier.
What’s the status on your charcoal ie charbed?
watch out with the flex exhaust most leak around the seams and could make for a interesting flare.
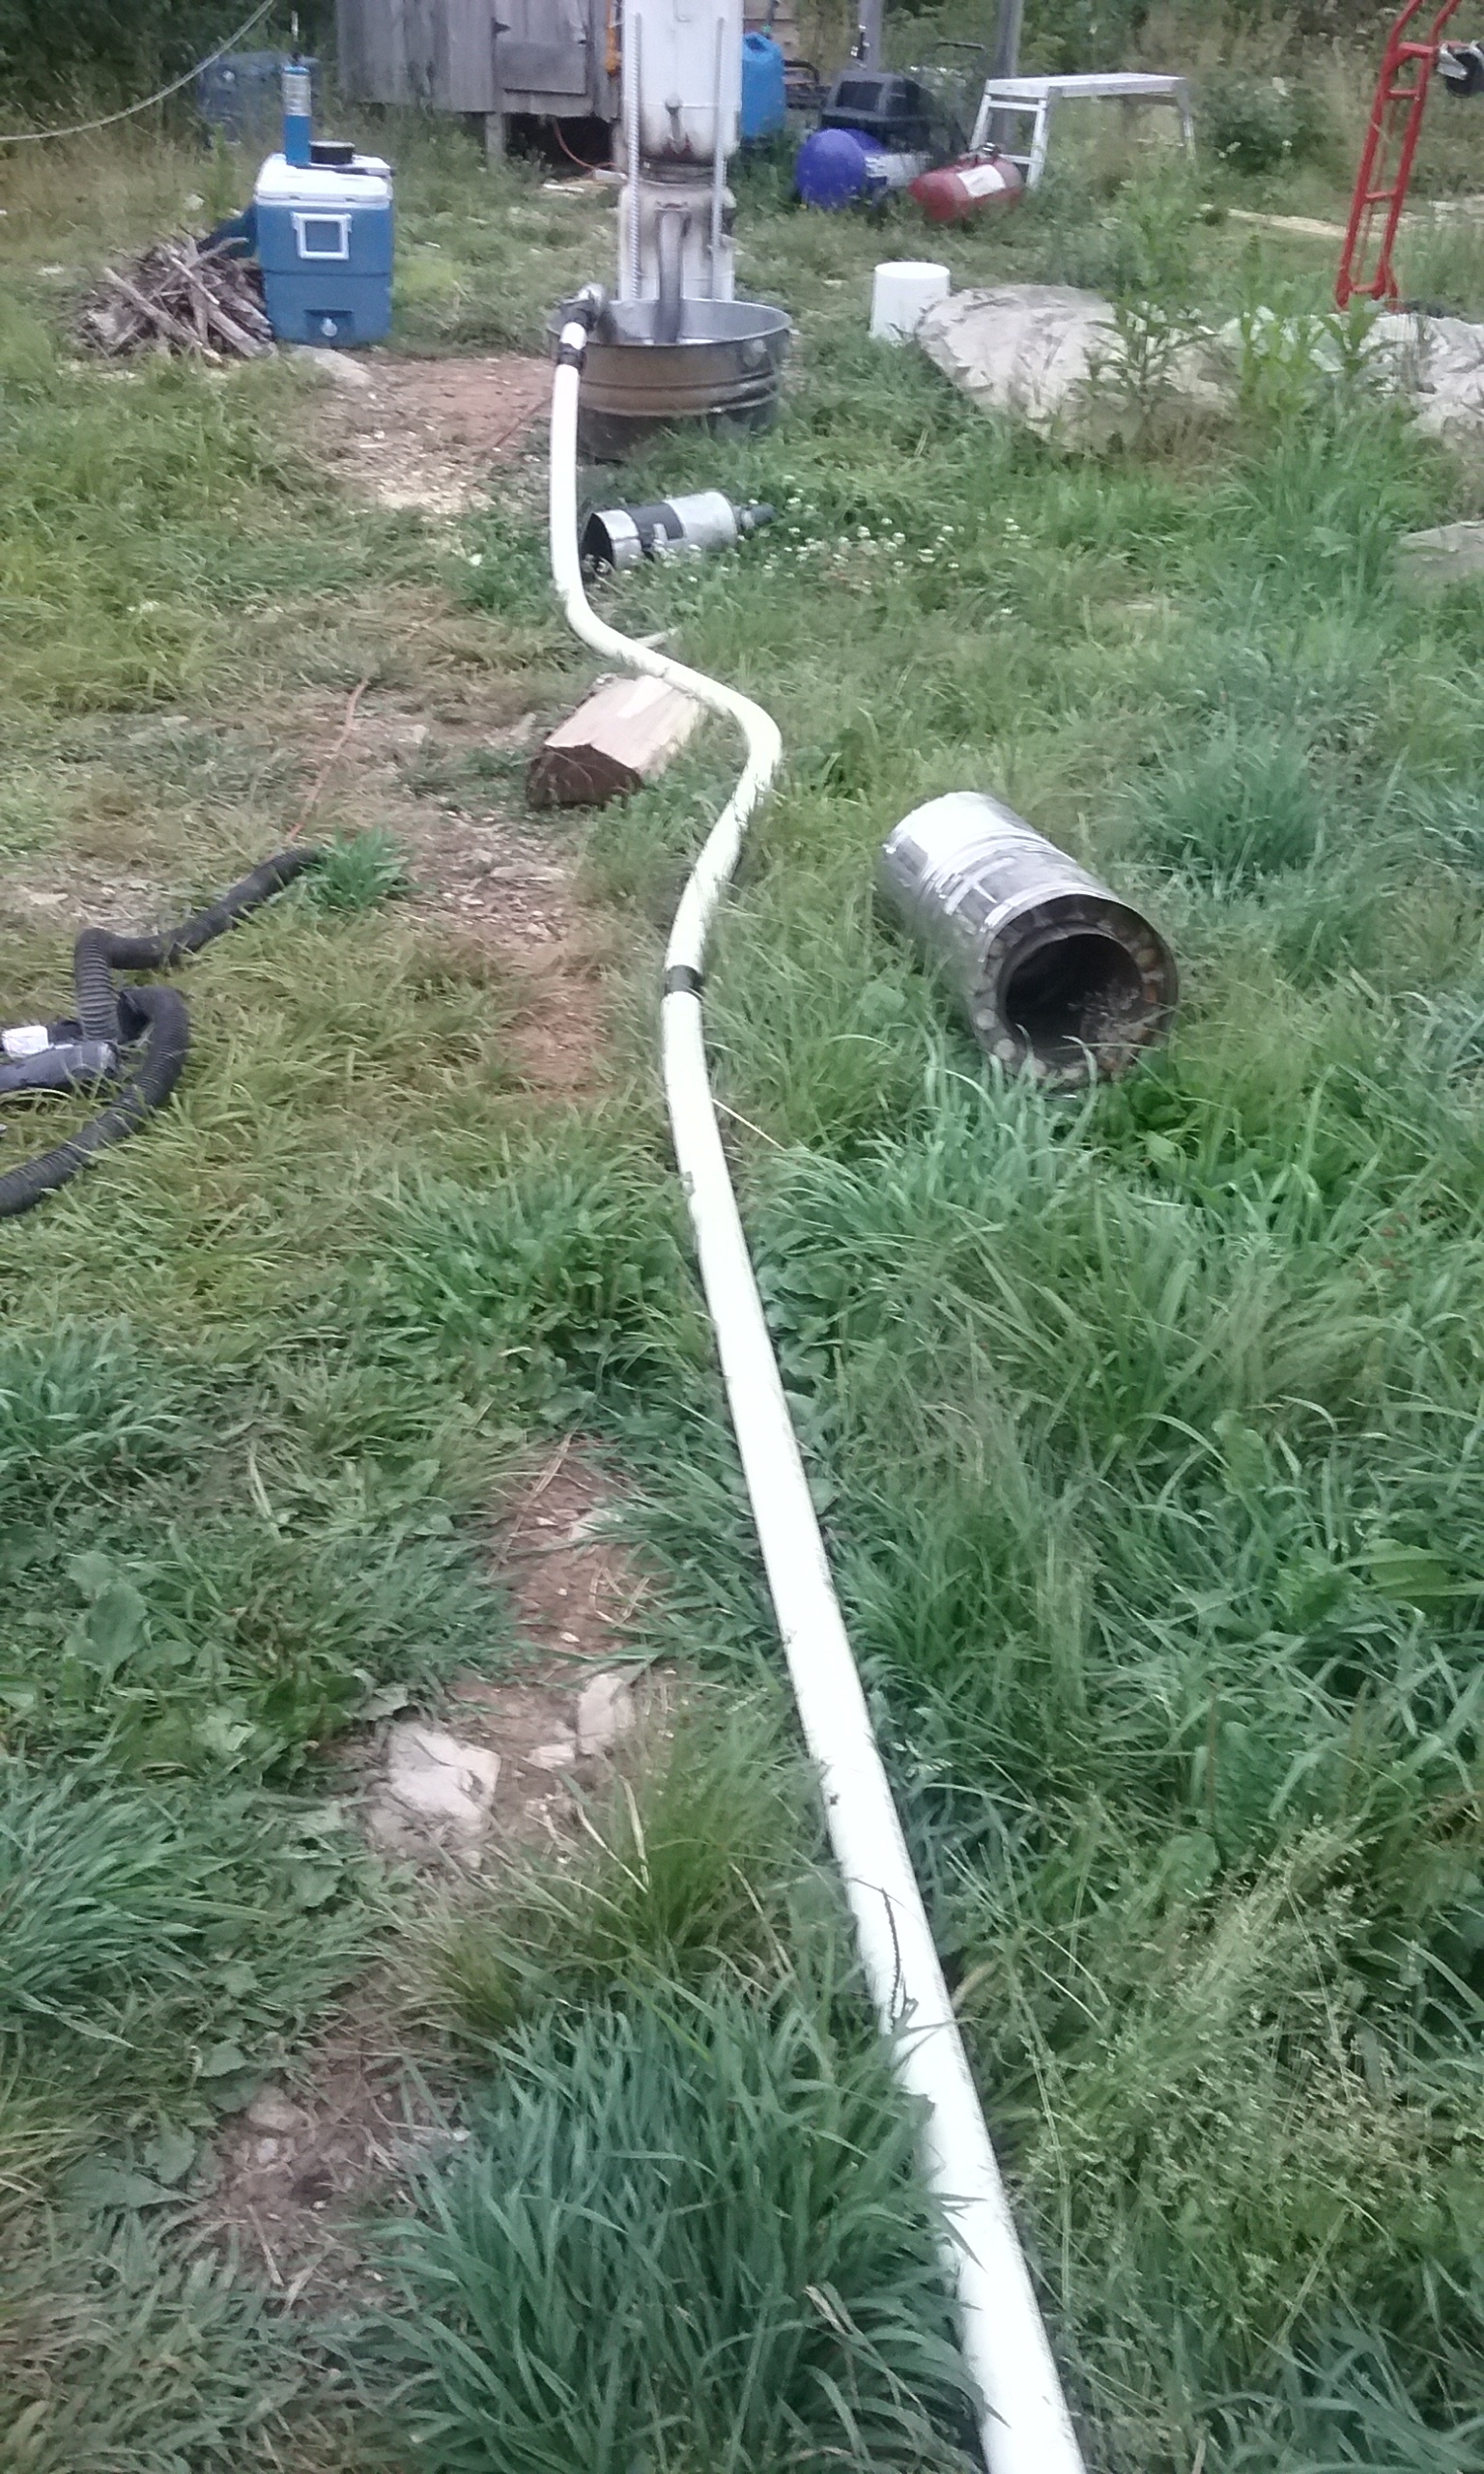
Whats the best way to check, should I remove wood from the hopper and look down, or dump my grate? If I dump it I assume I would want to sift and put back afterward?
For throttling, hmm yes i will work on that… maybe a variac
Aha! I had no idea, I will be very cautious in this case. Thanks paul! I am already fighting air leaks I suspect.
Yep, you can take the wood out one layer at a time, and get a good visual of what’s happening in there. Ideally you’d have raw wood at the top, black wood above the nozzles, charcoal at the nozzles and below, finer and finer down to the grate, where there should be some char dust and pieces about 1/2 to 3/4". You can save the various layers into different containers and put it back together again in order, it will work more or less the same.
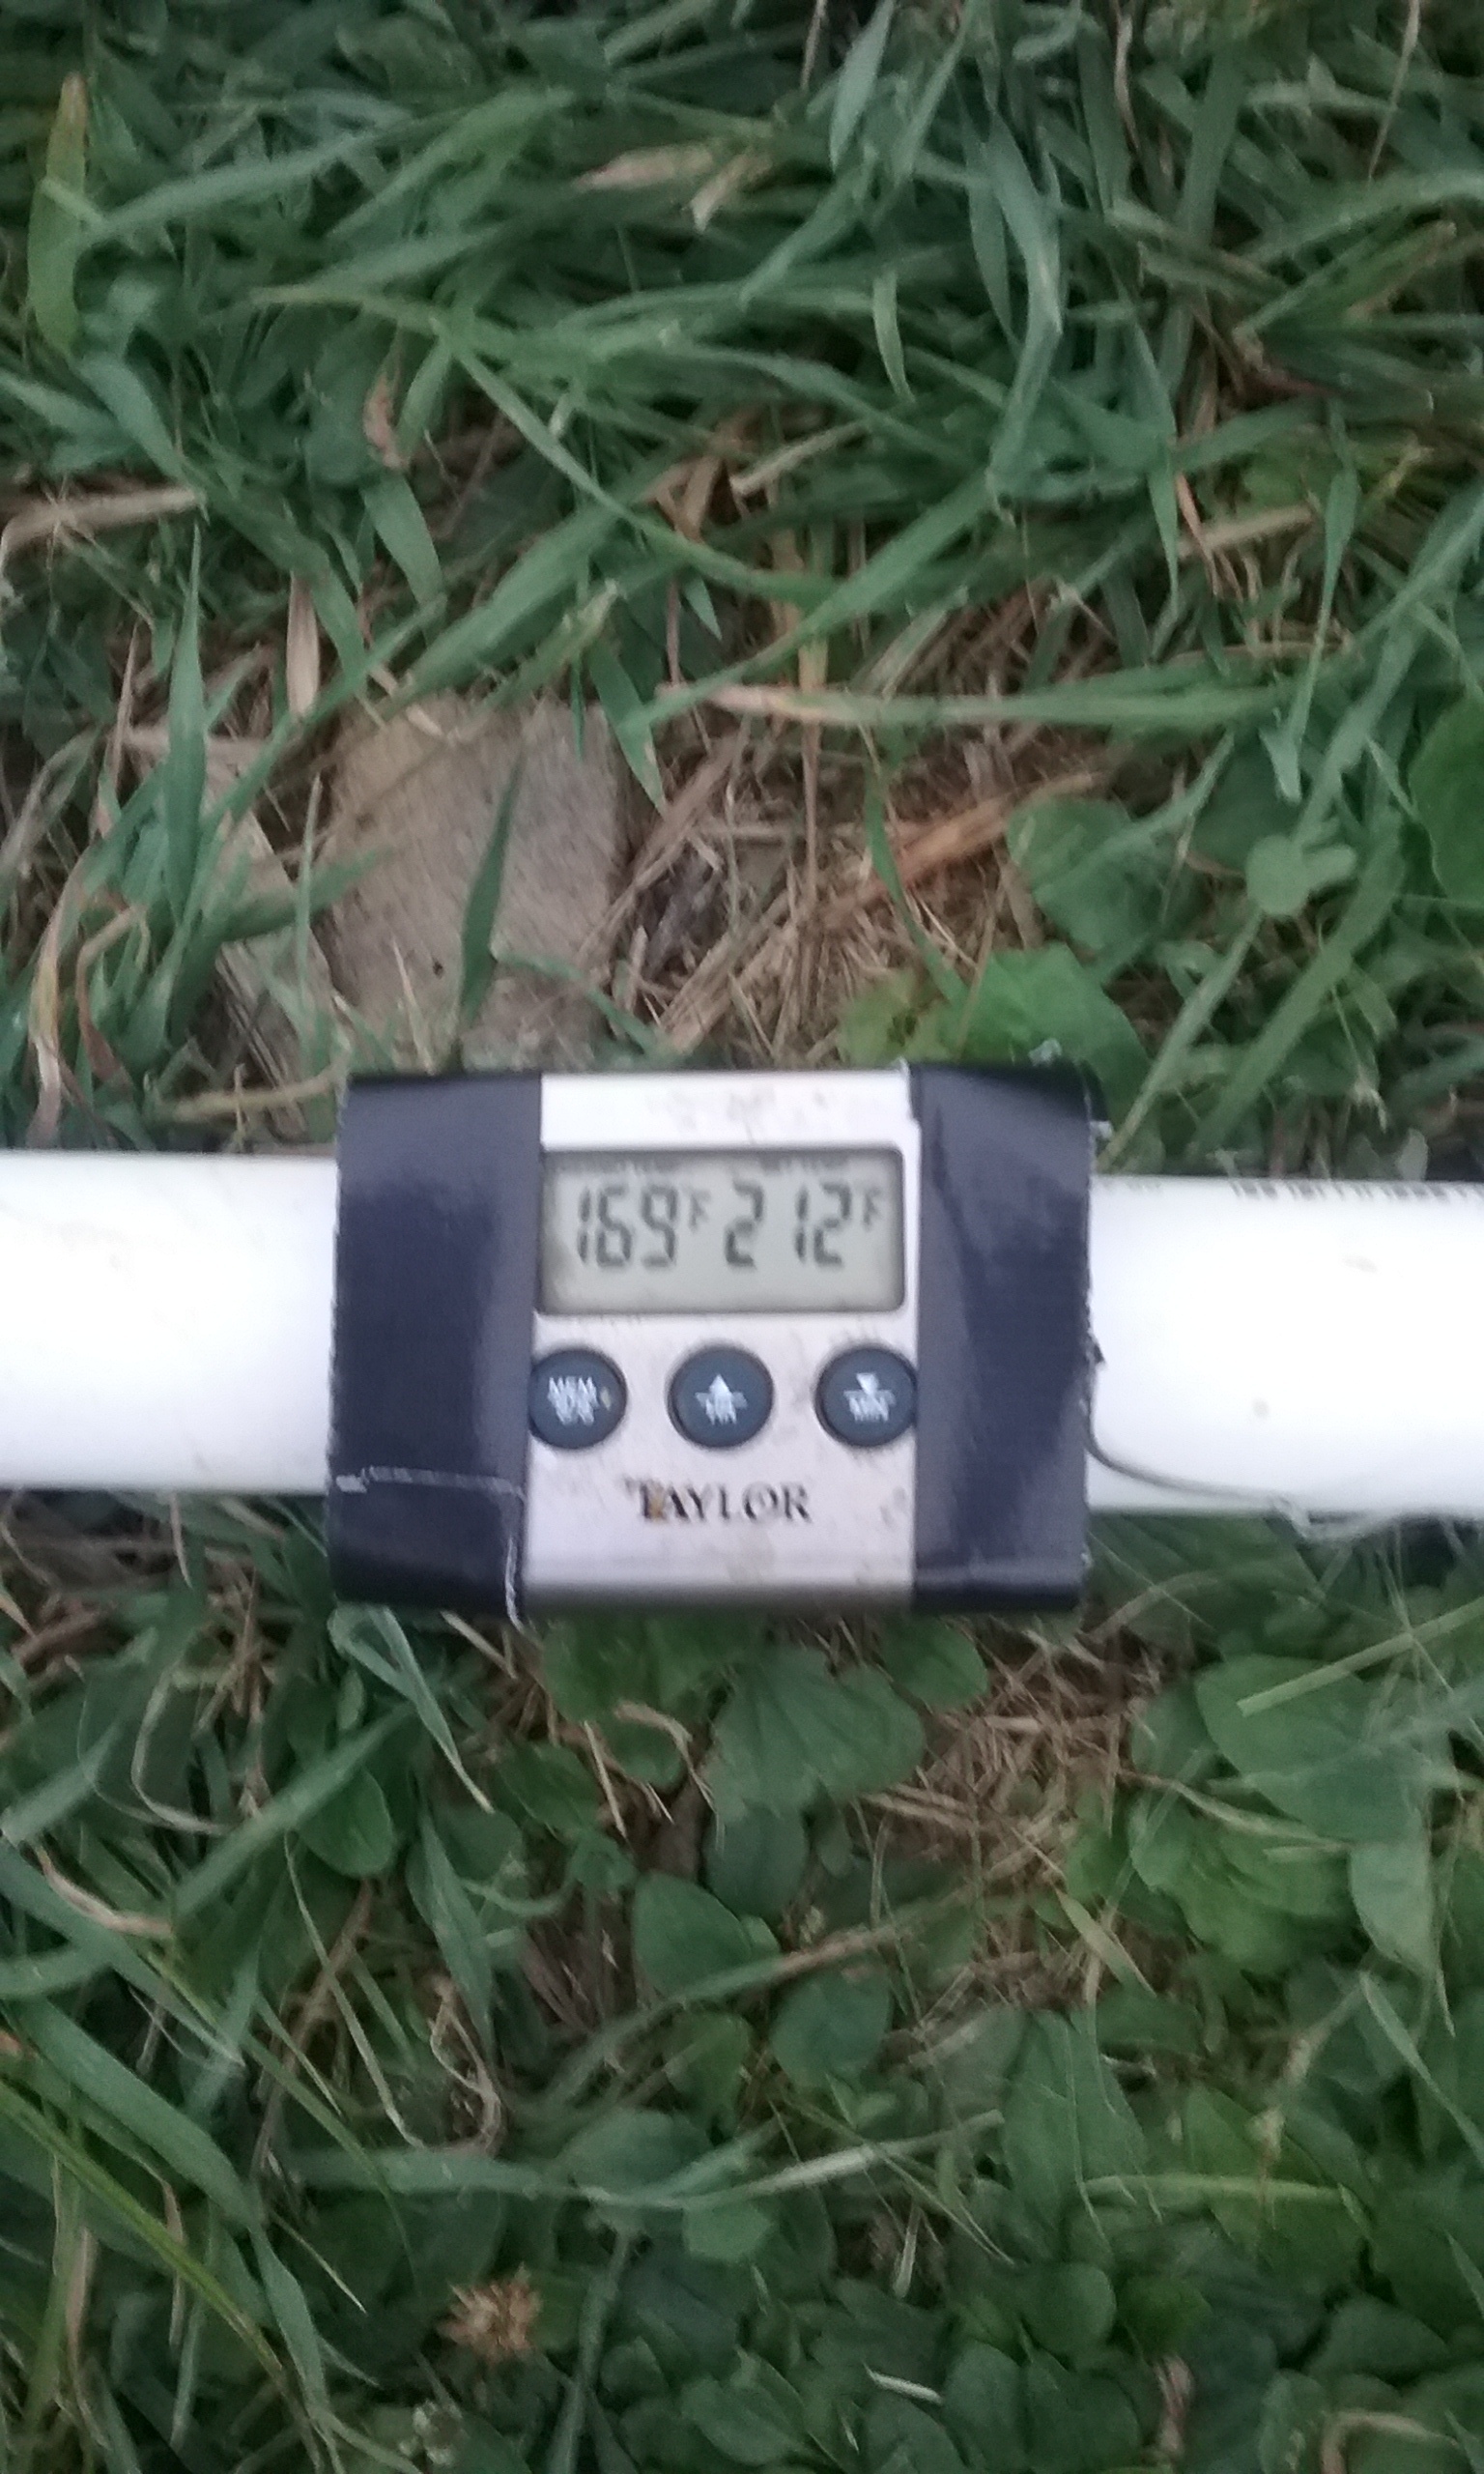
Should look something like this:
I suspect your char is gone, or never existed. If you reassemble the charbed better/deeper than you found it, it will run better. You will likely need more charcoal.
What Chris said on the cooling issue. Any metal pipes will do for testing. For longer runs you may want a vessel inline for catching condensation.
The pictures help.
Good choice on the paint to show the heat areas.
So only two air entry nozzles on this just as you text described, eh?
A Doug Williams learners system uses three nozzles. Add in another three between those, reducing inlet end holes really zooms-up the performances.
I hate anymore to see more than 4" (100mm) between the in-hearth nozzle ends. And no more than a 3/4"-1" (16-25mm) nozzle end protrusion past the wall; or built up ash slope. Wider spacing; longer protrusion lets upper pyrolosis gases (smoke&tars) to sneak past the fiery intense oxidization front of nozzle tips plane. Weak gas then with lots of noncombustible steam/water vapor and unconverted, noncombustible carbon dioxide.
Suggest you immediately add in at least two more nozzle pipes between the existing ones. Added ones only would have to be 1/2 or 3/4 pipe with male threaded inside protruding ends. Pipe cap these with black pipe, or SS caps drilled out to the actual figured air-let in. Ha! Now you are a Mukunda nozzle system.
Best to inside cap plug the other two existing with the same drilled holed ends.
Then Wayne Kieth style top light down from the top through a poked down into the char bed hollow digger-pipe.
Next performance-up improvement step then is to re-capture for the air-in heating all of that shown center and lower systems being wasted heats.
And that is where a lot of effort can be wasted to make an air tight common nozzle recovery area on this limited life system.
HAS to be air tight so you can shut off the inlet air for system shutting down and not have all of your critical char-bed burnt up by the next usage.
Heats recovery and utilization. Ash sloped metals shielding. Easy pull-out, drop-in replaceable sacrificial internals are all features that separates out the will-work; from the will-work-and-live-usable-life, with minimal repairs systems.
Regards
tree-farmer Steve unruh
WOW, thank you Steve! this is excellent information and you have educated the hell out of me in just a few paragraphs. I will stop testing and go ahead and make the necessary adjustments to the inlets (adding more + capping/decreasing nozzle size). I am going to research ‘Mukunda nozzle system’ immediately.
Thanks again! I will post more updates as I progress.
I have been tossing around the idea of using a stainless cooking pot for a firetube cut down with a hole cut in the bottom to act as a reduction point… I was thinking ~8" pot, 8" long with 2" reduction to form an ash cone…
I was thinking this would enable a replaceable hearth, which would hopefully increase longevity of overall system. Additionally I was thinking of insulating around the hearth to contain more of the heat… I have been digging through old forum topics but havent found anything related to the above…yet
I have just bought the wk book so hopefully when I recieve it I will ask less questions  about premium membership, when does it “kick in”?
My concerns:
-
SS stock pots are very thin, will the ash cone be sufficient insulation to protect from burn through? How about startup procedure when there is no ash cone yet?
-
Sealing the replaceable firetube within my hopper, bolts and silicon impregnated 'glass?
It just did… ![]()
Enjoy!
Awesome thanks Chris
I agree the best money I ever spent when you see what he’s doing the light comes on it all makes sense
I haven’t built a gasifer yet but have a 100 lb and 20 lb propane tanks. Wondering if one could run the smoke-gas thru a radiator to cool it or maybe a intercooler? Also use a fan (powered by gender wood fueled) to blow thru the rad or intercooler warm a garage in the winter?
Good morning Herbert and welcome to the Drive on Wood site .
A radiator or intercooler will soon clog from the wood gas .
Hi Dieselherb,
Go to the Small engines section and check out my first
build “My first small engine run” with 100 lb propane tanks.
You may pick up a few ideas on ways to go.
Pepe
PePe
which post is the first? I went back to 2012 didn’t see tour first build
Dieselherb,
That site is a history of my learning curve on gasification
in general. The first page is a clickable “table of contents”
There’s pics and vids throughout the site.
Pick the subject matter of your interest and click on it.
Bing, there’s the build page (s) of that item of interest. Or go to
page one and click through it a page at a time. The clickable
table of contents saves a lot of hunting.
I think most are well served to look through the entire site. It’s an
imbert built to the specs which are laid out. It’s a time proven
design based on your HP needs. Hope this helps. Pepe