I don’t have to change my air/fuel mix setting because of any changing road conditions or speed but I do adjust to any changes in the gasifier or filters . By making this adjustment I am aware of the changing conditions which is good to know 
6 Likes
“The auto mixer seems to me to be a fine tuning device.”
I put my video monitoring camera under the hood so I could watch my air valve and auto mixer work while driving, the auto mixer would open and close the valve very so slightly when speeding up and slowing down depending on the throttle pedal and load of the engine.
And yes that would also depend on the vaccum of the gasifier could run because of the char bed , the filter, pipes if there was a soot build up in them.
My air to gas ratio meter is always hunting back and forth from rich to lean trying to find ideal spot. It never stays in the lean position unless it has a weak gas conditions.
This is to me is a big disadvantage of having a auto mixer. If you get a leak in your wood gas lines or else where in the gasifier and start bring weak gas up to the auto mixer throttle body, the mixer will still mix at a 1 to 1 ratio of air to now leak wood gas.
With a manual mixing set up, you can just adjust your air valve by closing it. Now you have rich wood gas again.
This has been the biggest problem I have had with the auto mixer it works great until you get a weak wood gas conditions in the gasifier system causing the mixer to mix up even weaker wood gas and delivering it to the engine.
Your manual set up is a better way to go in a wood gasifier, for being able to make adjustments to your wood gasification driving needs.
The auto mixer is great on paper and in a perfect working gasifier world with no air leaks and no changing conditions.
I hope Kristijan has a break through on his design and application where he can make it work with a Charcoal/woodgasifer.
Bob
4 Likes
Yep, found one! Leak that is…
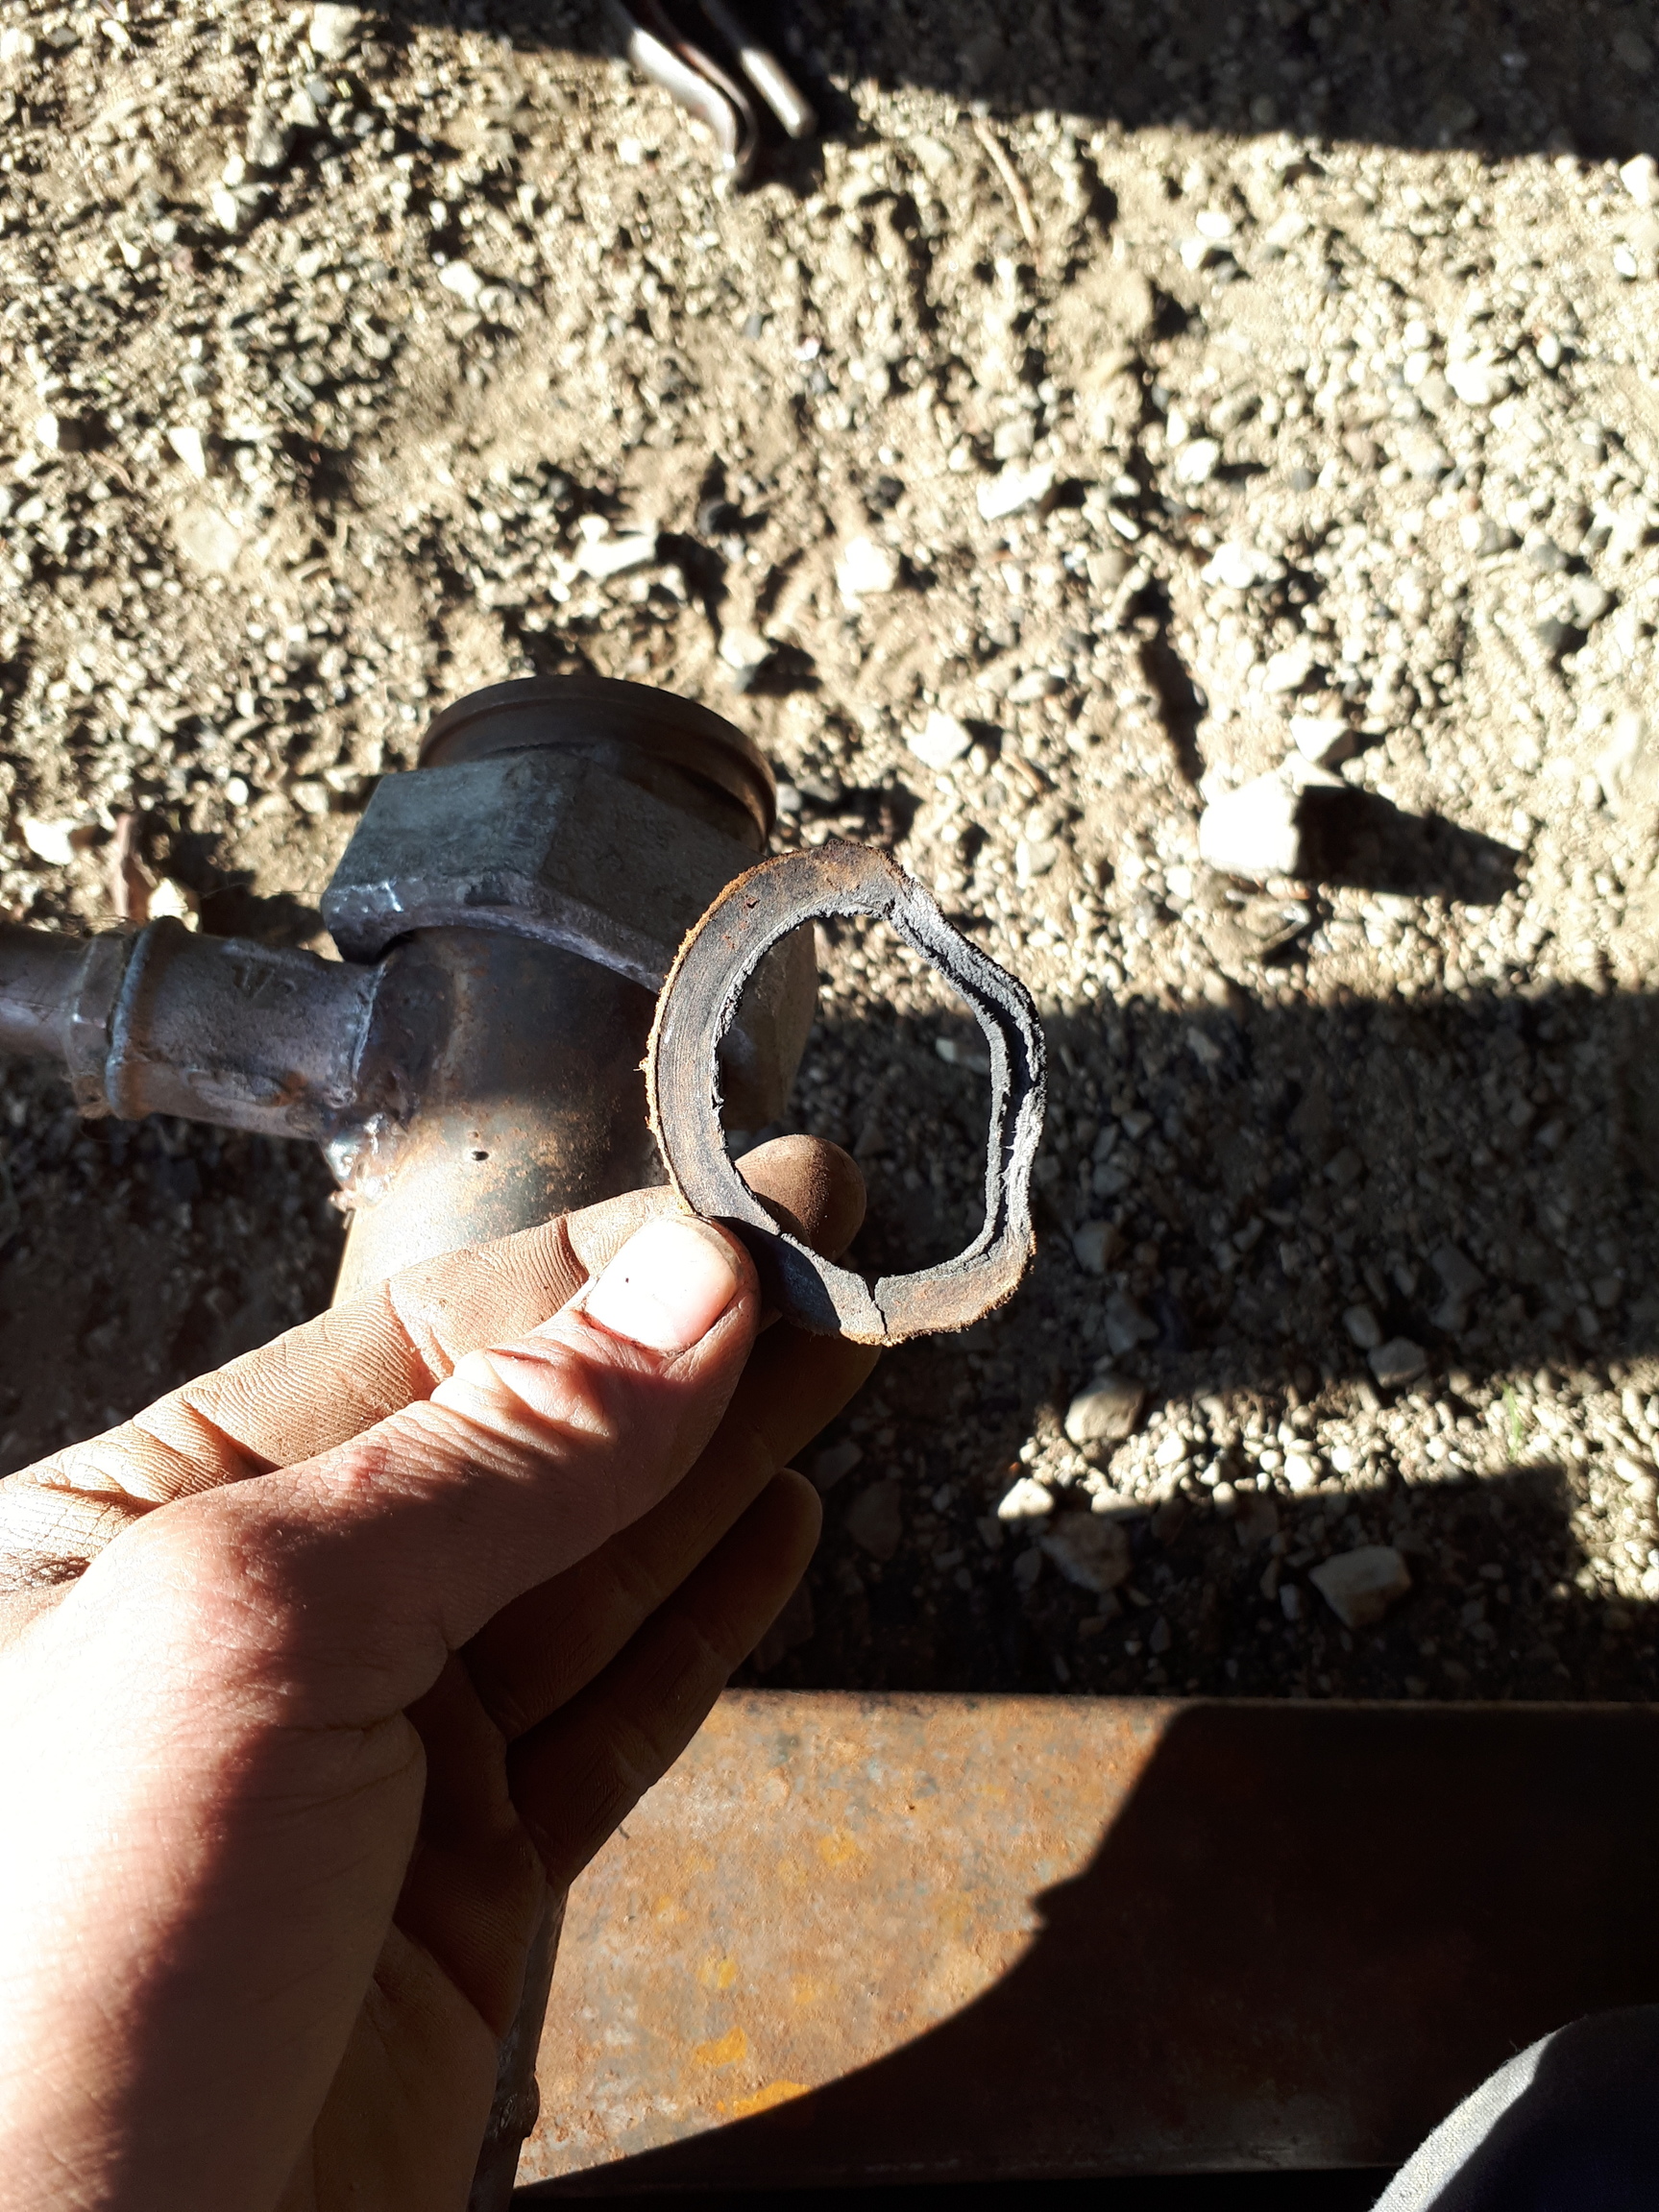
The seal was deformed.
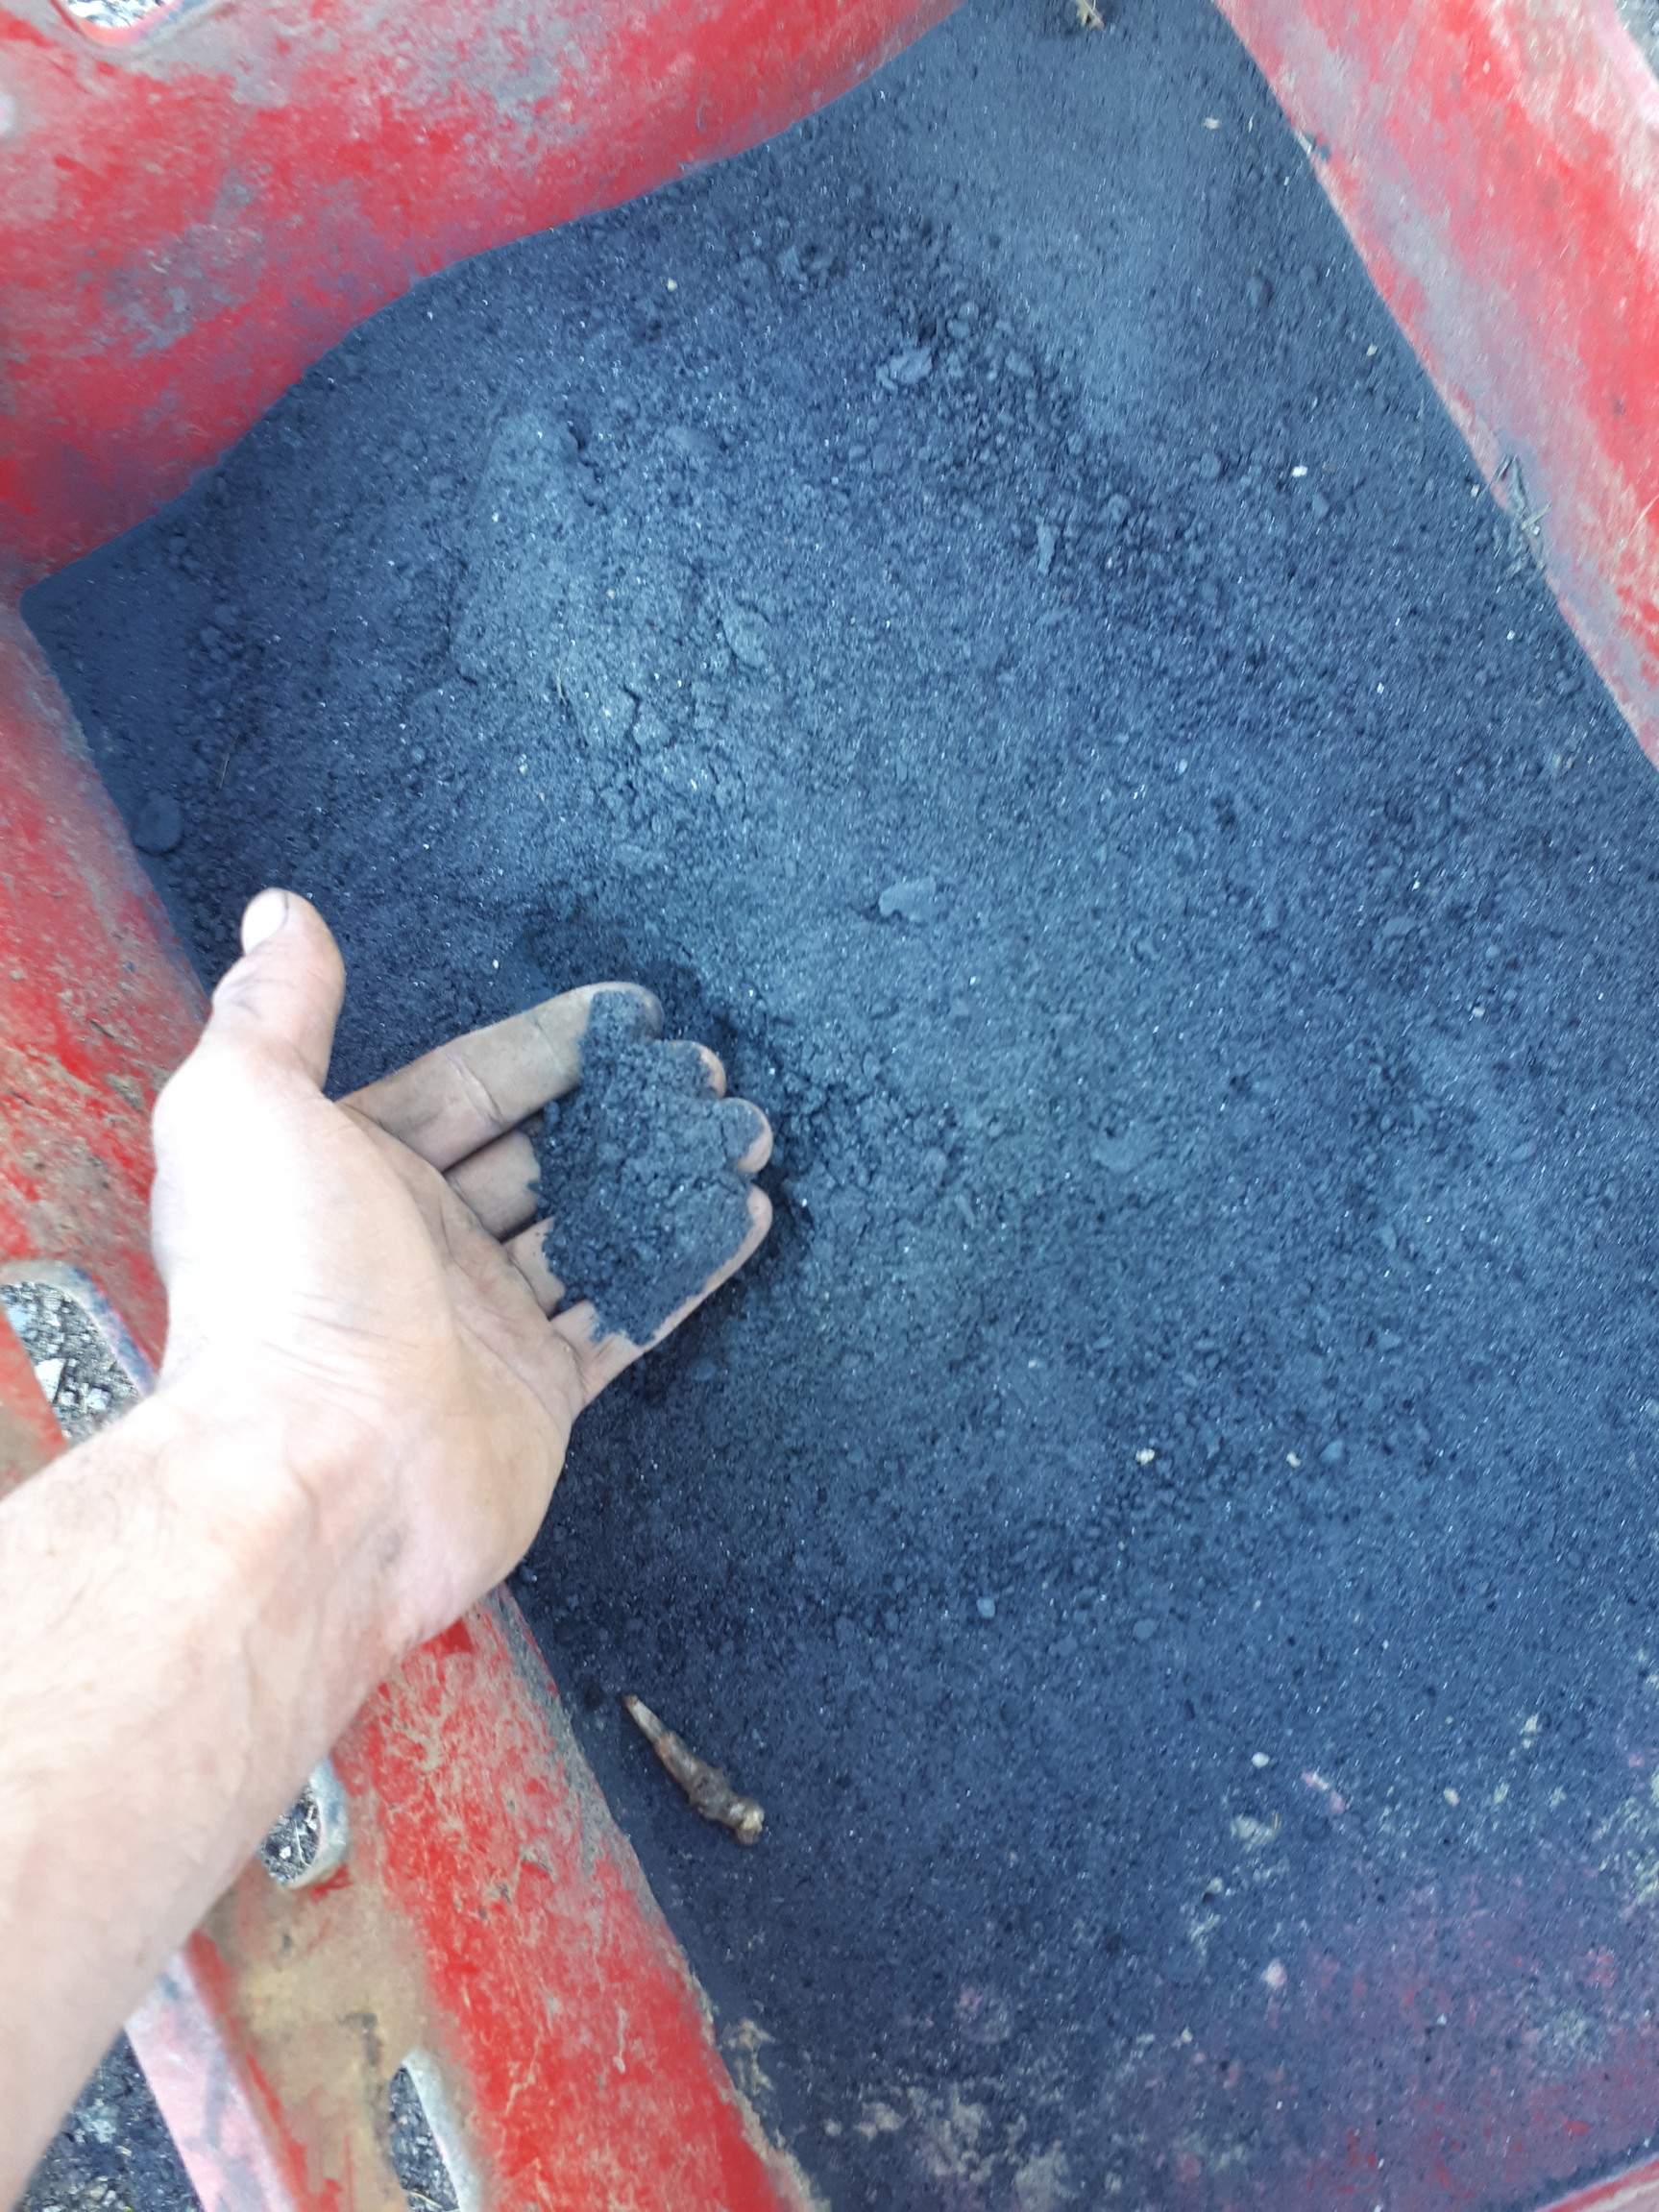
I allso installed a vacuum guage to tell me when the sack is full. Cleaned the cooler, not as much dust as expected.
8 Likes
Without going back through 825 post to check for my self, I ask, “have you ever posted a picture or video of your cooling system?” As I recall it was under the car and at one time I think you were talking about it freezing up. The last picture looks like a “lot” of soot if that is what came out of your cooler. TomC
4 Likes
Here you go Tom
6 Likes
Thank JO and Kristijan; That looks like one heavy piece of cooler. It would take a lot of heat to get that entire thing hot. So there isn’t a lot of pipe under the bottom of the car-- just one pipe to get the gas up to the front bumper. TomC
2 Likes
Its not as heavy as it looks. Its made out of quite thin sheet metal, it weighs maybee 20-30 pounds.
Yes the pipe cooler l had before did plug on me once. But here, since l run a downdraft and the gas is always dry, the pipe works like a vacuum cleaner hose, to high of a velocity for dust to setle. The cooler however is much wider and dust can collect there.
6 Likes
As usual another great innovative design and build. Would be curious how it works on long trips-- I would call it more of an “accumulator” than " radiator." With out more fins and place in direct contact with flowing air, it appear to me it is just taking heat from the gas and “accumulating” it. I don’t know how hot the gas is coming from your gasifier. Because you have gone to a down draft design, I would think it would be much higher than an up draft “charcoal” gasifier. I realize that you burn mostly charcoal now and it has very little water so I understand that the soot flows through the pipe. But now that you running some raw wood which has a high percent water, is that going to affect the soot flow. I imagine that your thinking is, " the gasifier can use a little water to cool the gas and it will “crack” into H2 and O, which makes for a richer gas".
Back to your design and build. Just curious, but do you have any idea what gauge the metal is? I would have a hard time welding anything thinner than 18 gauge with an arc welder-- I believe you and JO both weld with arc using a very fine rod which I never understood what it was in inches-- I think you said 9 mm. I found some 1/16 in. rod but my welder won’t go low enough to run it. Anyway, I just love reading about your builds. This build is getting towards the end and I can’t wait for your next ingenious idea. TomC
2 Likes
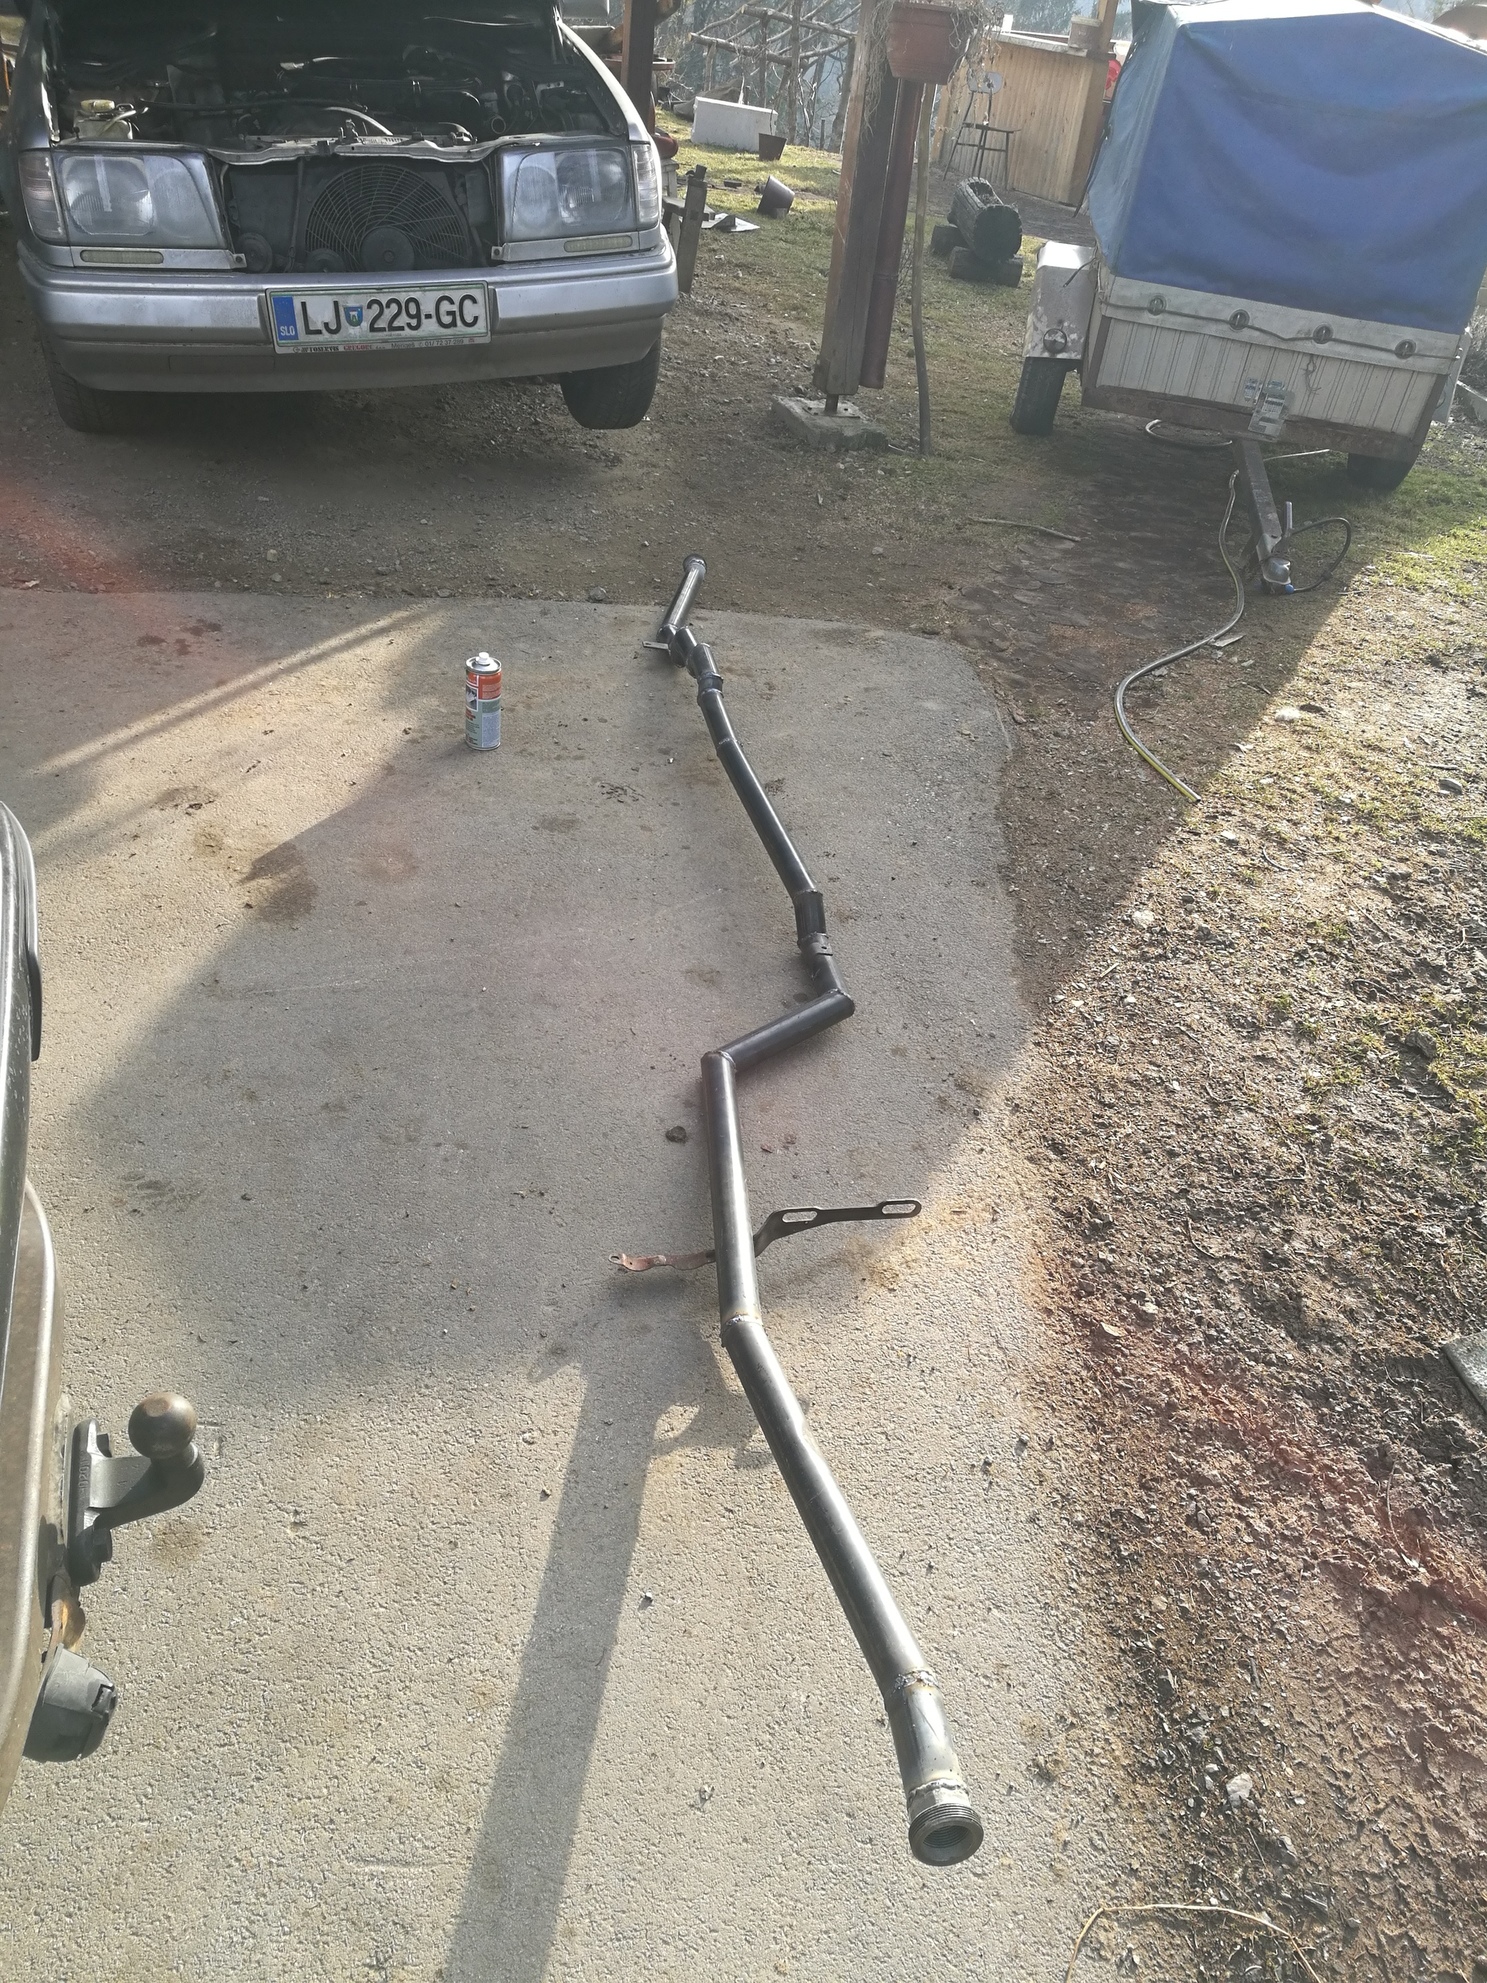
http://forum.driveonwood.com/uploads/default/original/3X/7/c/7c6d2bfe89093952039c98580d6d84d569e5a153.jpg
Hi Tom, this is the steel pipe that is under the Mercedes-Benz that comes from the gasifier to the front to the cooler dust collecting box. It is cooling gas down quickly with air moving over the pipe while the car is going down the road.
Bob
2 Likes
Tom, my hat off for welding 18 guage with a stick welder! My limit is about 2mm 0.08" whatevet thats in guage.
The cooler is 1.5-2mm, dont remember exactly. The gasifier is much thicker, 3 or 4mm steel. That thing looks small but is hevy as hell. I wuld WAG it weighs about 150 pounds.
But l did invest in a MIG last year, this shortened my fabrication time about 5 times. Fits dont have be so tight, no burn trugh, no slag… fantastic.
Well not realy. The cooler temp stays the same undependant of run time. Again, the cooler is not nearly as massive as it looks. It weighs maybee 30 pounds.
I have a unique ability here, l can adjust just the amount of water that has to go trugh the hearth so at no point l get any water in the gas. I determined my charcoal to water ratio trugh trial and error, so l did with charcoal/wood mix. This happens to be about 40% wood 60% charcoal by volume and one cup water per 2.5gal charcoal.
Since l add just enough water the system can handle, the gas is always dry. It has wery litle heat capacity so the most heat is lost a few feet down the gas pipe. Allso its important to say l put a lot of effort to air preheat. Not only this cools the gas considerably, it allso dumps energy right back in the gasifier where it can do usefull work cracking water, in a way cooling the gas twice.
Ok, some update. To tell the truth l was considering not reporting this, but for the sake of anyone copying the system l decided to go pass my embaresment 
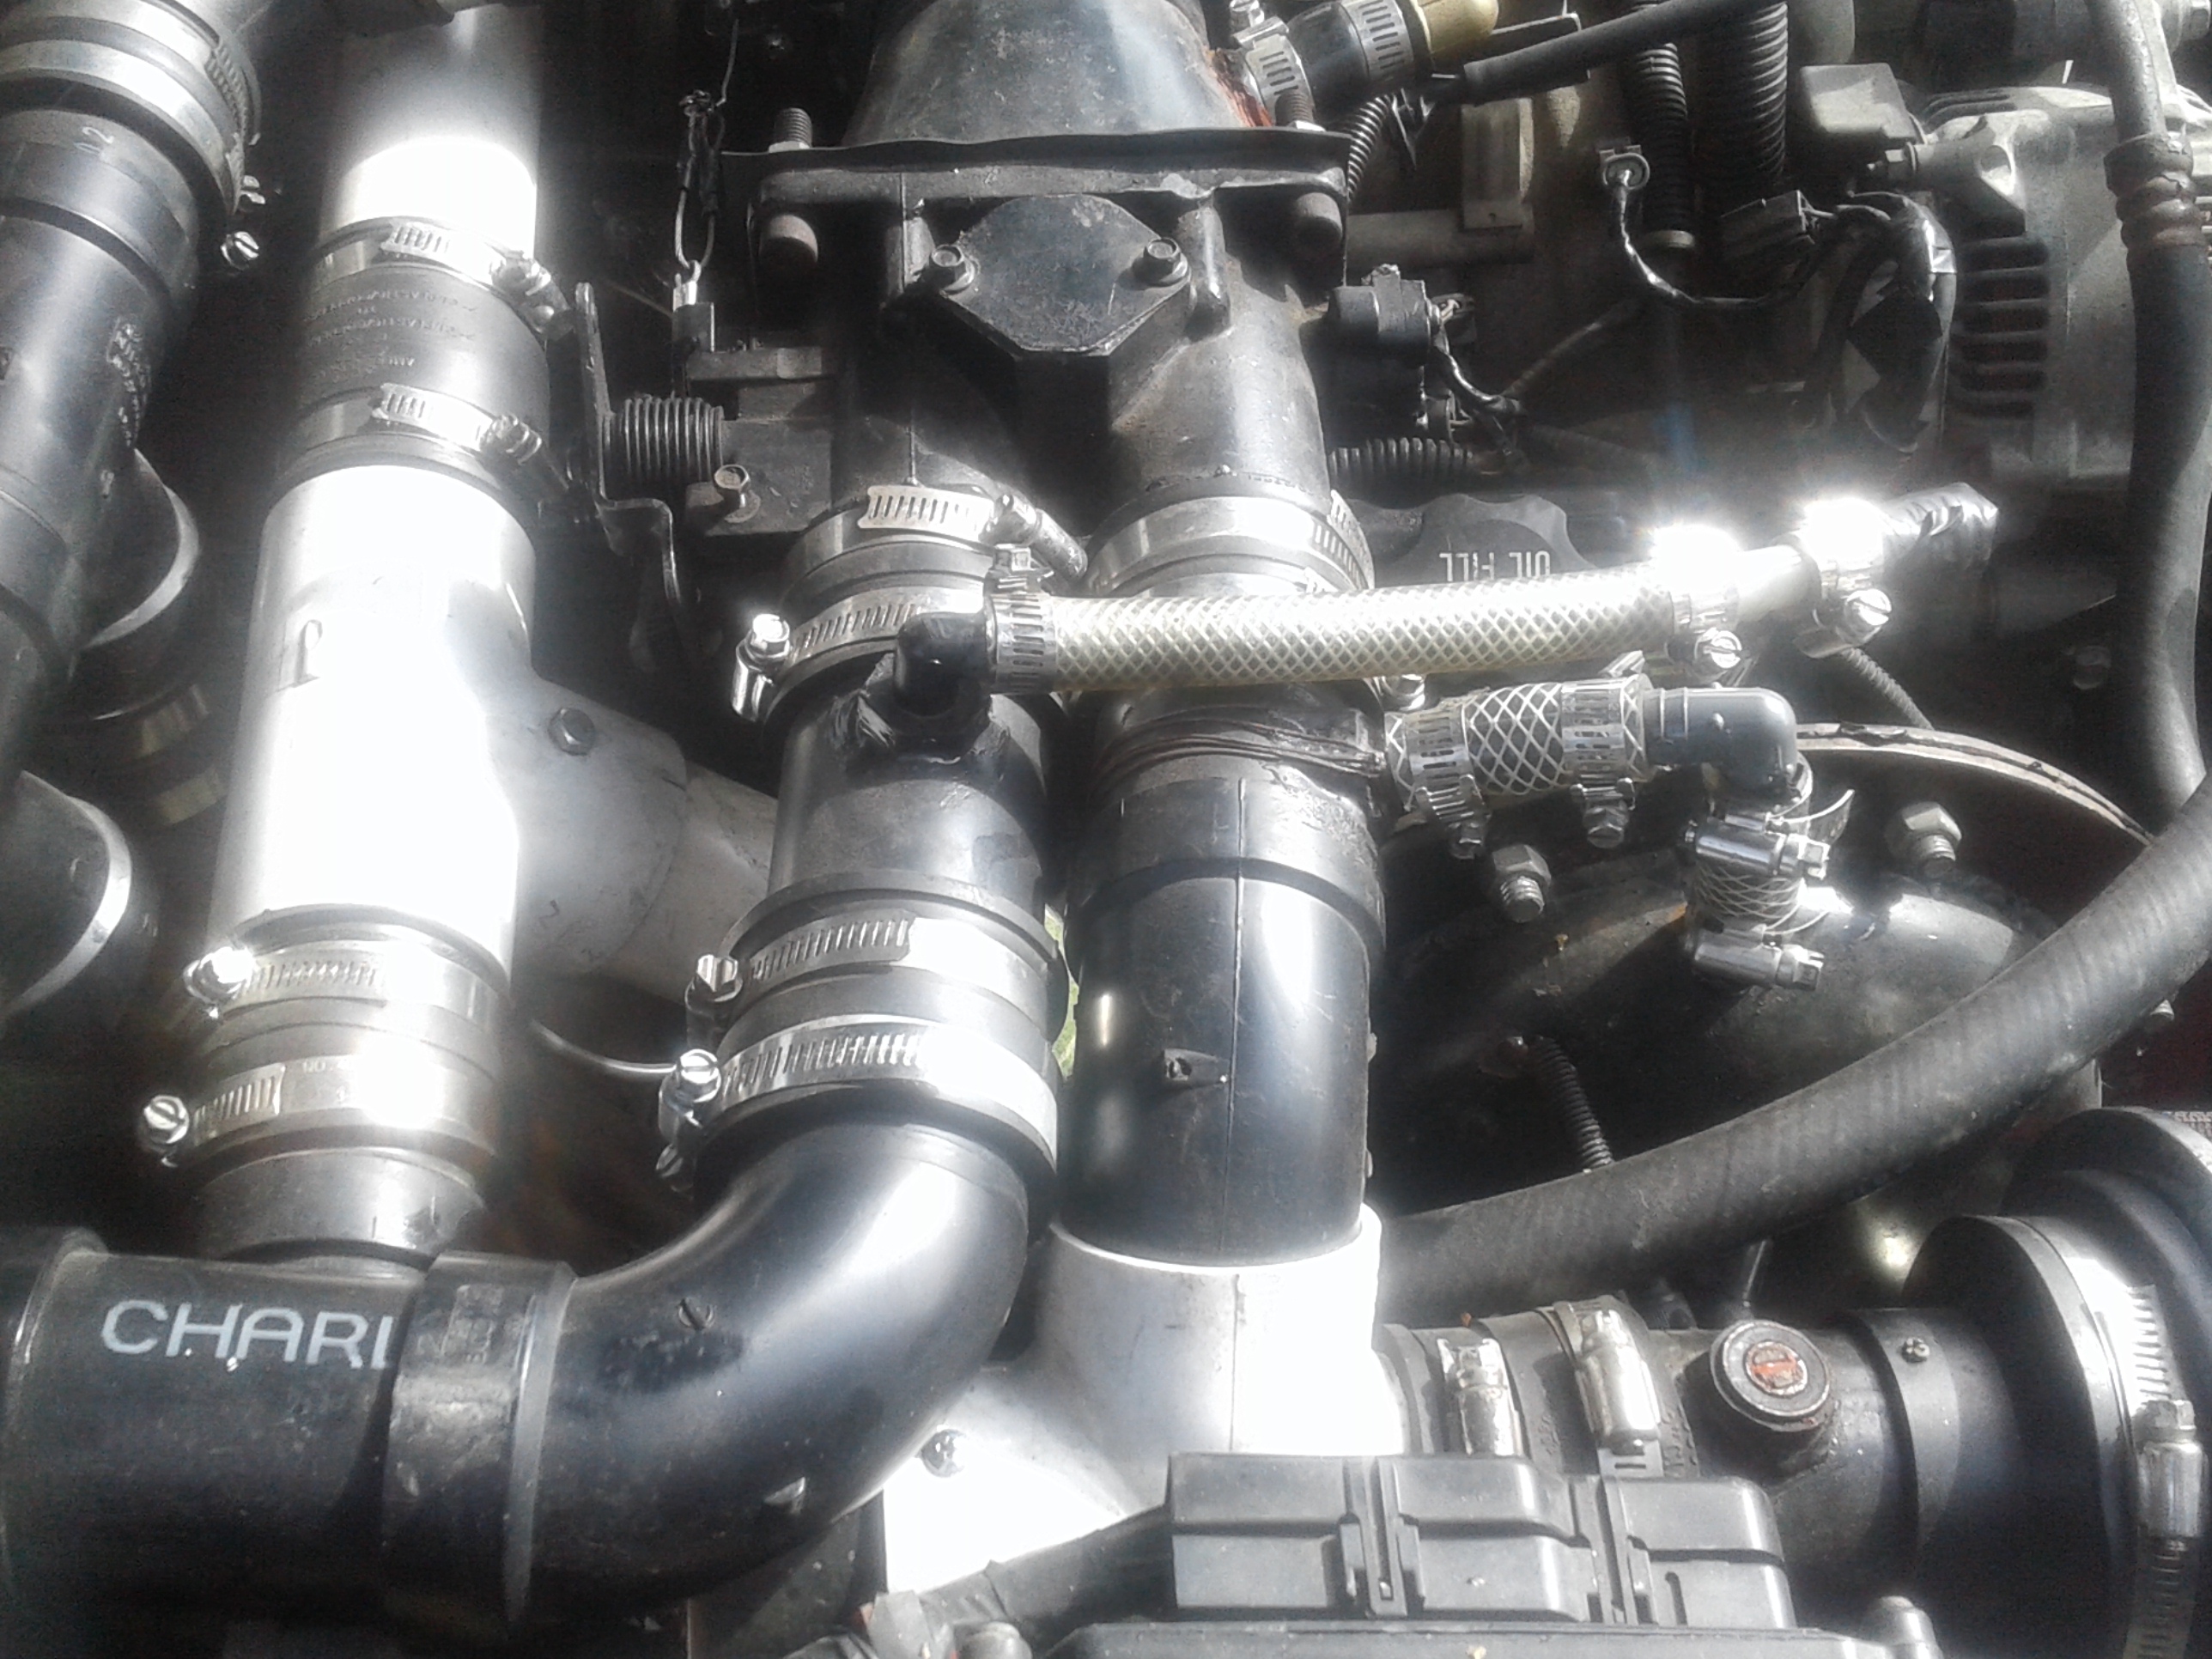
I did a couple of piping modifications on the air/gas suply and cleaned the filter.
I lit and went to work, what a frustration. Nothing worked. Lean, no hopper vacuum, didnt even hybrid. I tried lighting up again after work, same misery. Then l parked in front of the hardwere store and l bought parts to be able to mount a manual valve in series with the automixer so in case automixer dyes or a airleak occurs, l can still run the gasifier. The motor run fine on this manual air valve! What is going on??
Then l tryed the automixer once more, it was open 100%. Then it hit me, l piped the automixer wrong! I connected the air sampling hose to gas part of the membrane and vice versa so when the automixer detected lean, it leaned even further instead of richening.
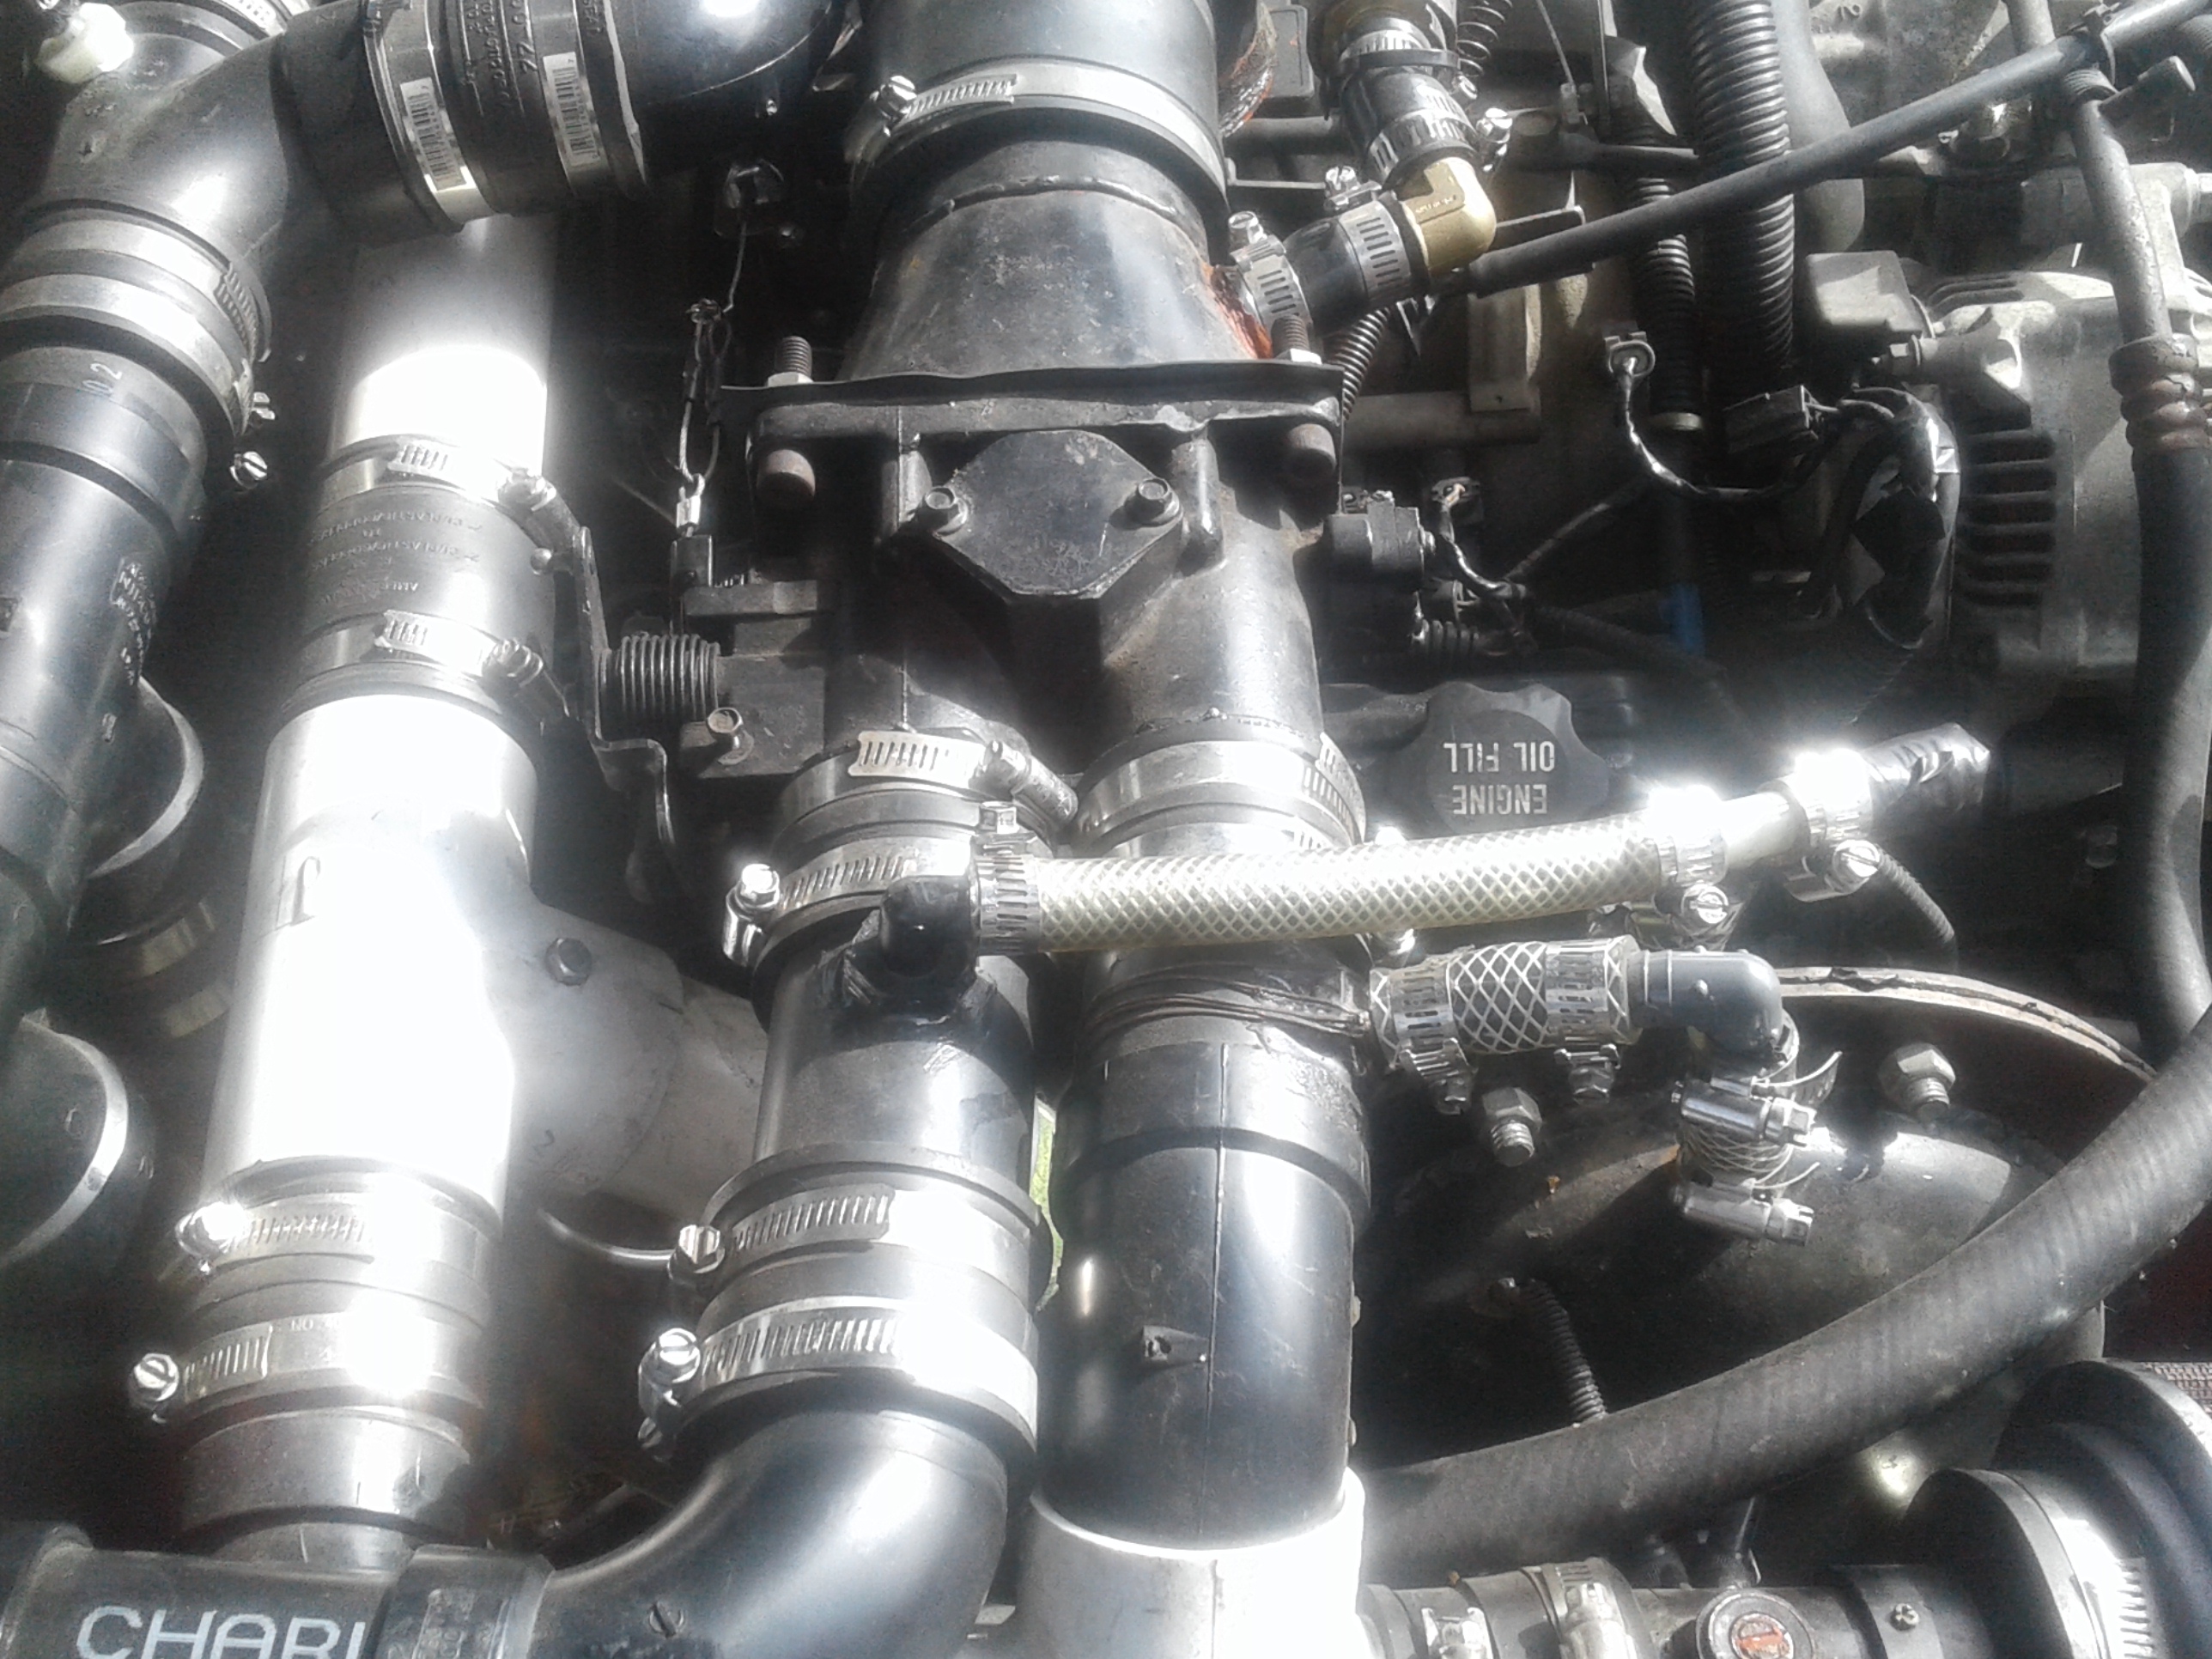
Anyway, l swiched the hoses and the motor run. Drove home great, drove back to work today great.
What l have noticed now that l eliminated the air leaking seal on the gas pipe, the motor runs a bit rich with automixer. @Bobmac have you got any tips for that? If l remember right you have had the same problem?
9 Likes
Yes Kristijan, what I did is add a extra valve 3/4" to add air after the auto mixer throttle body. I could have used my 2" air supply by pass valve but it was hard to fine tune the air down, being it is a push/pull slide gate valve. It would also make a whistling sound. The 3/4" ball valve operates with a 1/4 of a turn lever movement that is controlled with a push/pull cable at my dash board. This works great for fine tuning.
When everything is working correctly I can open the 3/4" valve a little and get the air/fuel meter to read on the lean side. With out using the extra added air it will usually be running on the richer side of gas as it is hunting back in forth to the lean side on the air/fuel meter. I am thinking of changing my plastic foil membrane out with new and see if I get a steady reading. When everything is working correctly on the gasifier system it is fun the drive and anyone can drive it.
I will say it again that I hope you come up with simpler design that works. I spend a lot of time keeping my auto mixer and 2 throttle bodies in sync with each other.
Bob
6 Likes
So when the diaphragm is centered with equal pressure on each side, is the air butterfly or opening all the way open or partly open? It seems to me that if that was a slightly adjustable setting, you could make the mixture tend to be somewhat richer or leaner. It would not be adjustable while running. Does this make sense?
6 Likes
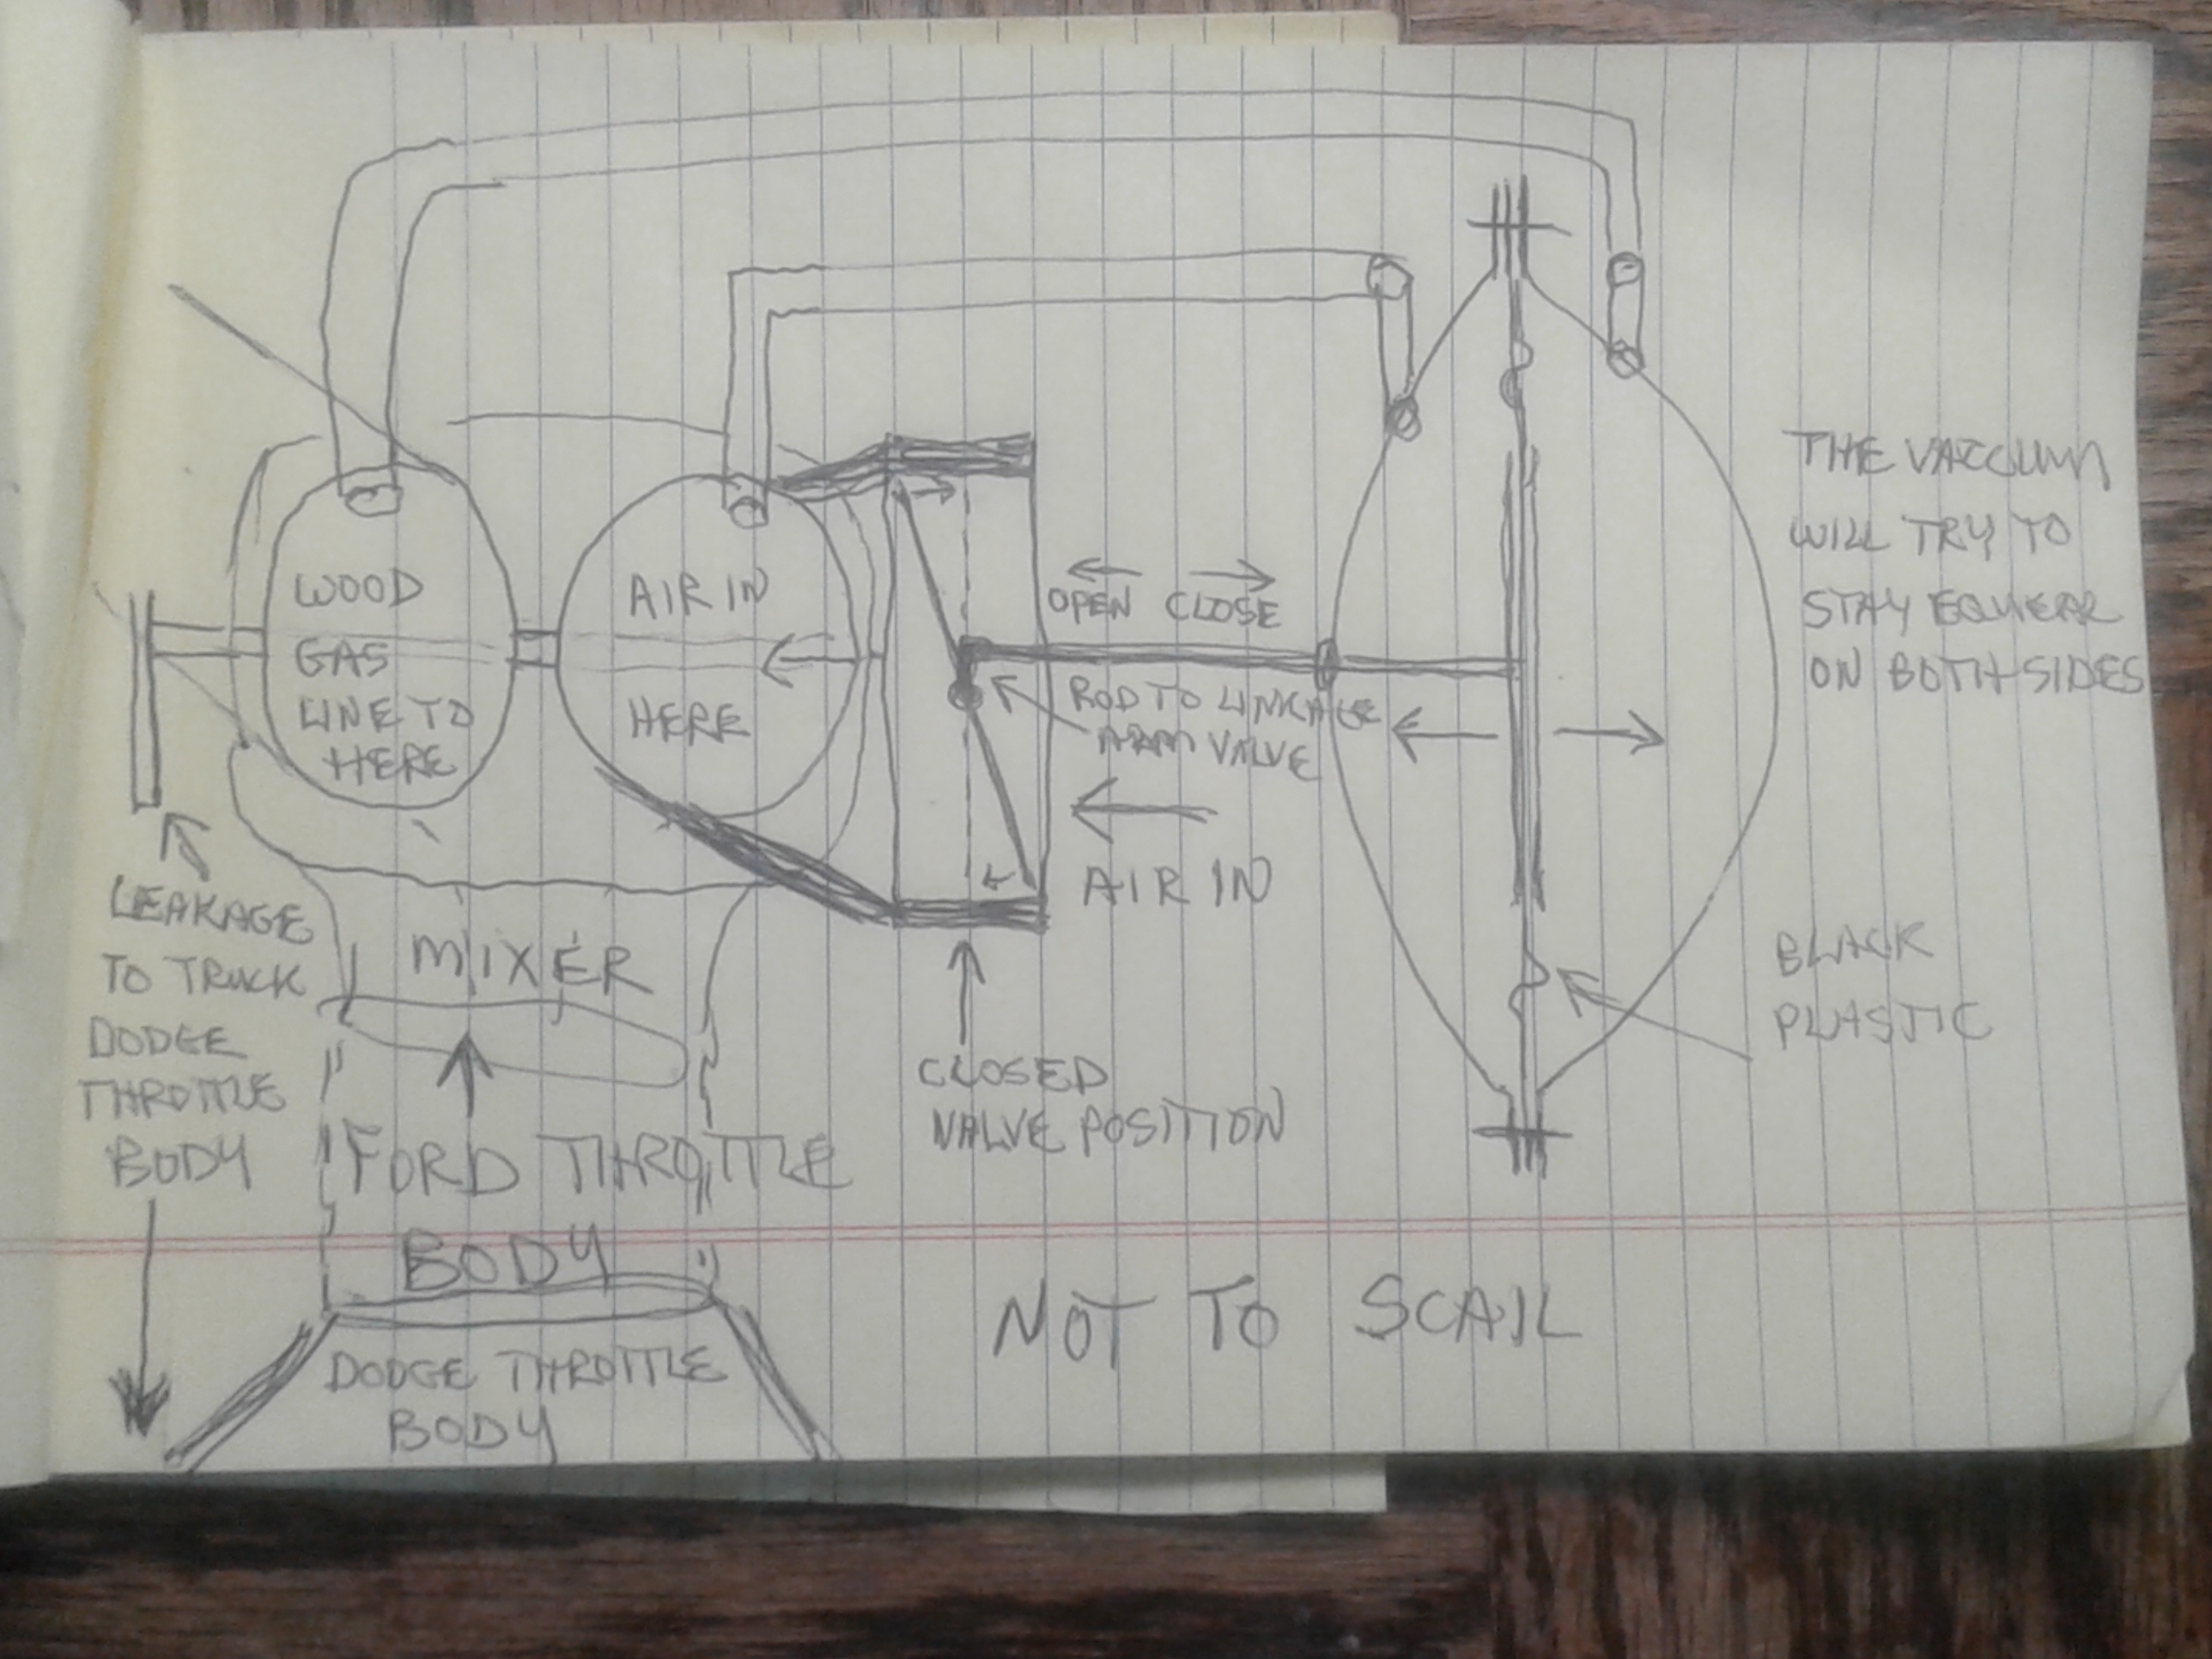
Here is a couple pictures of the the auto mixer and Ford throttle body intake the air mixing valve is in the very bottom of the picture. The vacuum line are located just in front of the Ford throttle body intake and the lines go to each side of the mixer canister.
In the drawing not to scale you can see how the movement of the rod opens and closes the air valve. The vaccum of the wood gas controls how much air will go through the air valve. At high vaccum the gas flow decreases and it causes the air valve to close causing equal vaccum on both sides of the canister. If the vaccum is low on the wood gas line, then the gas flow is greater and the air valve will open causing a equal vaccum on both sides of the canister, the air valve can be correcting the vaccum any time it changes. This is what I have observed while driving down the road. It is ever so slight the valve movement at times but it is moving making corrections to maintain a 1 to 1 air to wood gas ratio. Just like Wayne has said if the conditions changes in his gasifier he will make a adjustment with the air valve. The auto mixer can make very fine tuning balancing adjustments to the air to gas ratio, but so can Wanye and others, because they know how to operate their gasifier trucks. I believe the operator can do it better, because he can think and do some adjustments that the auto mixer just can’t do. Like close the air valve down a little to make a richer gas if the gasifier system developed a air vaccum air leak causing weak or lean wood gas.
I hope this helps everyone in understanding the auto mixer pluses and minuses.
Bob
4 Likes
Hi Don, I have made my auto mixer adjustable just by putting a air valve on one side of the vaccum line canister. I removed it after Chris and Max help me to get it operating correctly.
I then added a air valve 3/4" after the auto mixing system, at that point I can just lean my rich gas out if needed.
I can hardly wait until I can see pictures of how @KristijanL did this auto mixer set up under the hood of his car with the throttle body and all.
Bob
5 Likes
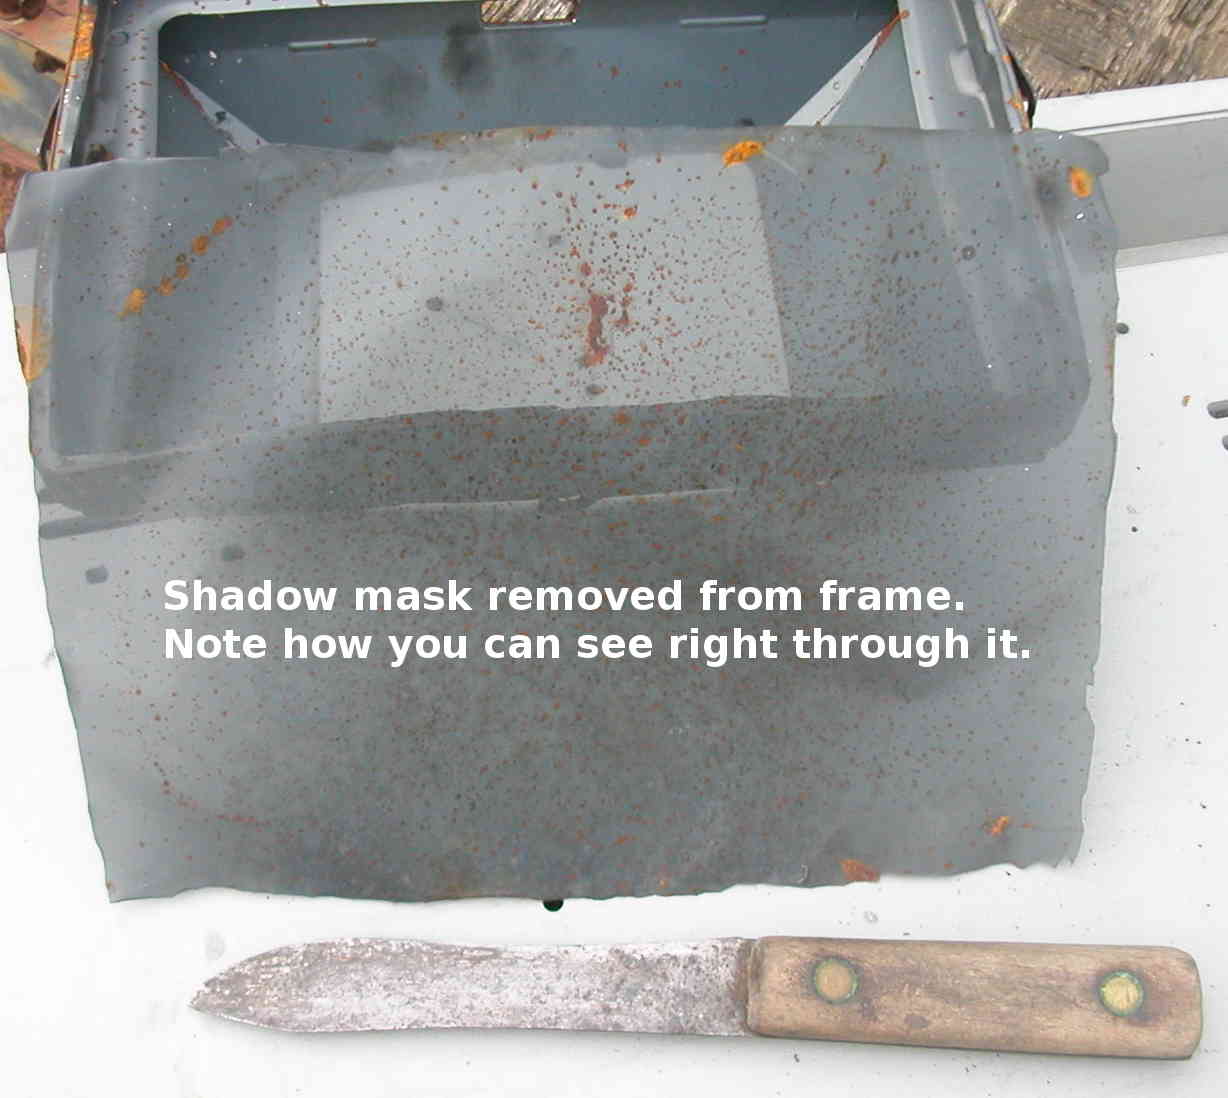
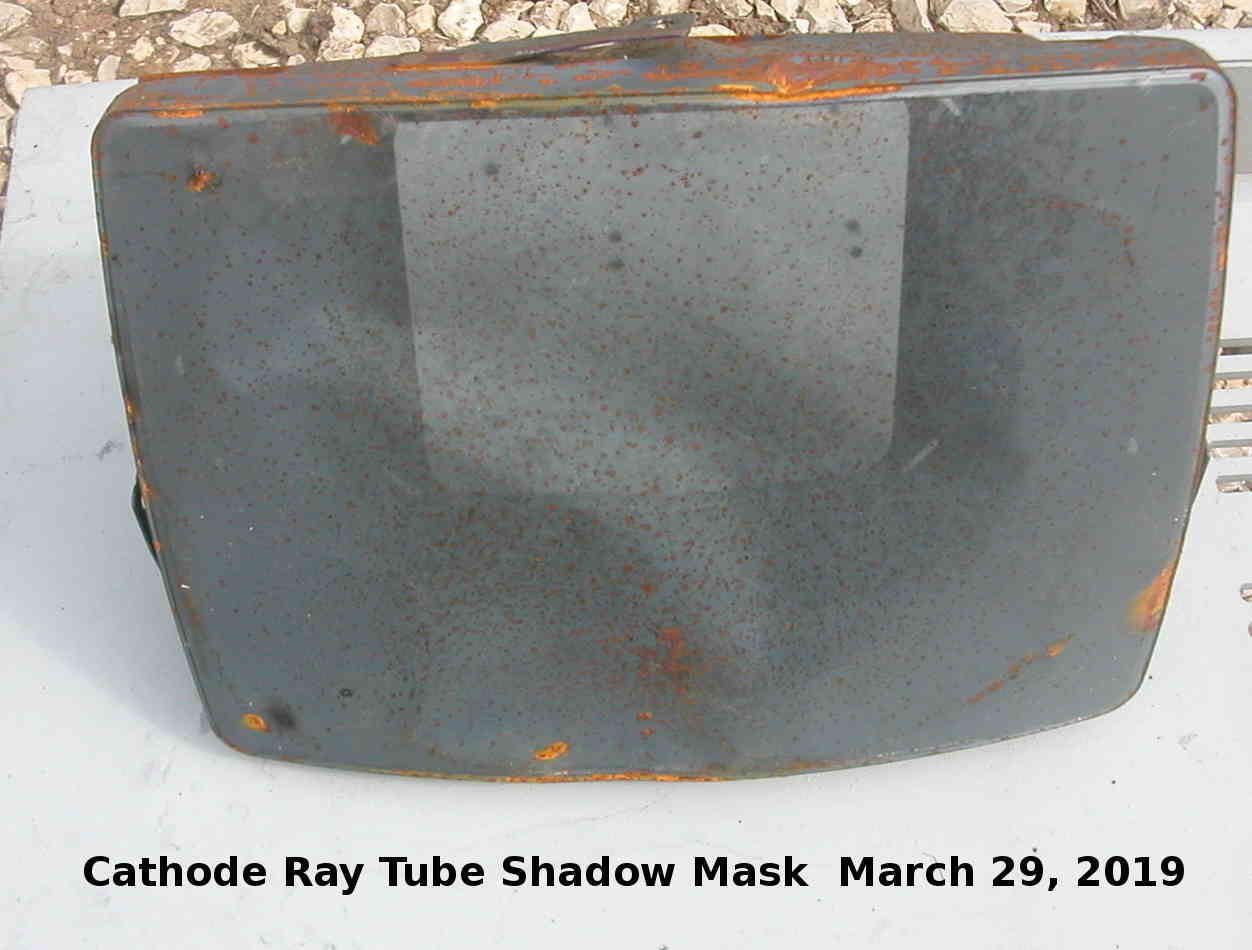
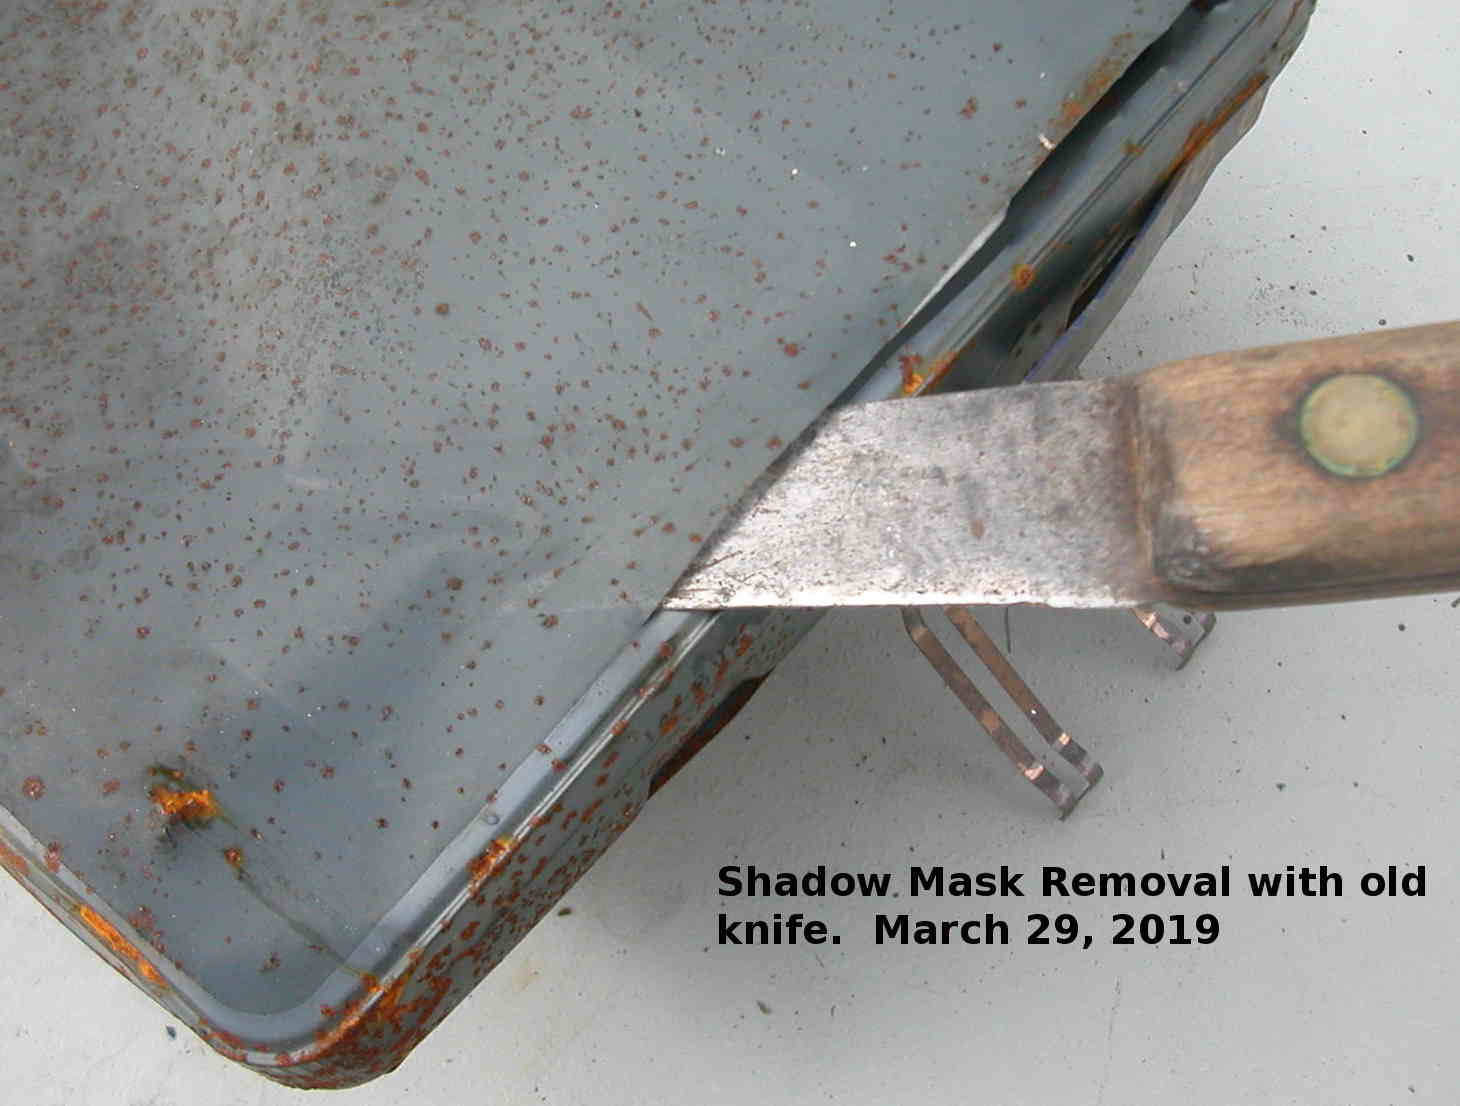
Here is some follow-up information on the Cathode Ray Tube (CRT) Shadow Mask material. I used a knife to cut the fine mesh away from the frame that holds it in place in the tube. Later, while cooking lunch, I placed the material in the concentrator hole of my high powered TLUD charcoal-making outdoor stove. It diffused the flame, and after about 5 minutes, it was glowing a faint red color. I took several snapshots but the flash went off and the red color was not captured. My stove burns very clean, so I cannot say how effective the mask material is, but the concept is that a glowing red mask might ignite any smoke or soot particles in the flame. Here are the photos: (Oops, they are out of order.)


5 Likes
I wonder if a cheap stainless kitchen anti spatter screen would do the same?
3 Likes
Hello Garry,
That would certainly be an “easier to obtain” item, and might be much more durable than the shadow mask. I used the same piece of shadow mask material again this noon, and it is now very fragile, with some of it breaking up in my hand. I don’t think it is going to last very long in the high temperature environment of the open flame. I was also considering a stainless kitchen sieve. Maybe I can find one of those out in the barn.
2 Likes
ok so basically what happens is that excess wood gas is piped to the other side of the diaphragm and that pushes the valve open that lets air mix in right? The diagram makes a lot of sense thanks
1 Like
Hi Corey, In my drawing the two small lines to both sides of the diaphragm are controling the valve by a vaccum being pull on both sides of the diaphragm. If there is a unbalance vaccum in the canister on either side of the diaphragm move and it will cause the air valve to open or close a little to balance the vaccum ratio flow of wood gas to air 1 to 1 ratio. The engine is pulling a vaccum on the wood gas line and air supply line. The auto mixer runs on a vaccum principle that is trying to stay in balance all the time.
Bob
4 Likes
Thank you Bob for your skech. It shows wery clearly whats going on.
Corey, what the automixer does is equalise/balance the vacuum on gas and air side, thus achiveing a 1/1 mix. But since woodgas gives best power at 1.1/1 mix, a propper working gasifier and automixer system will always run a bit rich.
I agree with Wayne, a manual seting is simpler and better in many terms for a skilled operator. The reason why l fuss with the automixer is l want to make the system more newbie operator friendly.
There is only one thing l might add. Despite common belif that the automixer is eliminating the insight on the system performance, its actualy just the opposite. If all works flawlessly, the reading on the O2 sensor is rock solid and slightly on the rich side. Any problem on the system, air leak, weak gas etc will resault in a leaner reading. Time to act and find the problem. With a manual seting you just richen the mix and may not even notice the problem.
Allso, l noticed a trend in automixer movement. It tends to restrict the flow conciderably more at low gas demand and open quite a lot when throtle opens. This means with a manual valve the seting can never be ideal at both low and high throtle.
Anyway, the system apears to run good. The membrane culd be biger thugh, it lacks some sensitivity with low vacuum at low throtle therefore the o2 readind is a bit off at idle, but as soon as l press the throtle, vacuum rises and the membrane equalises the ratio ecactly.
7 Likes