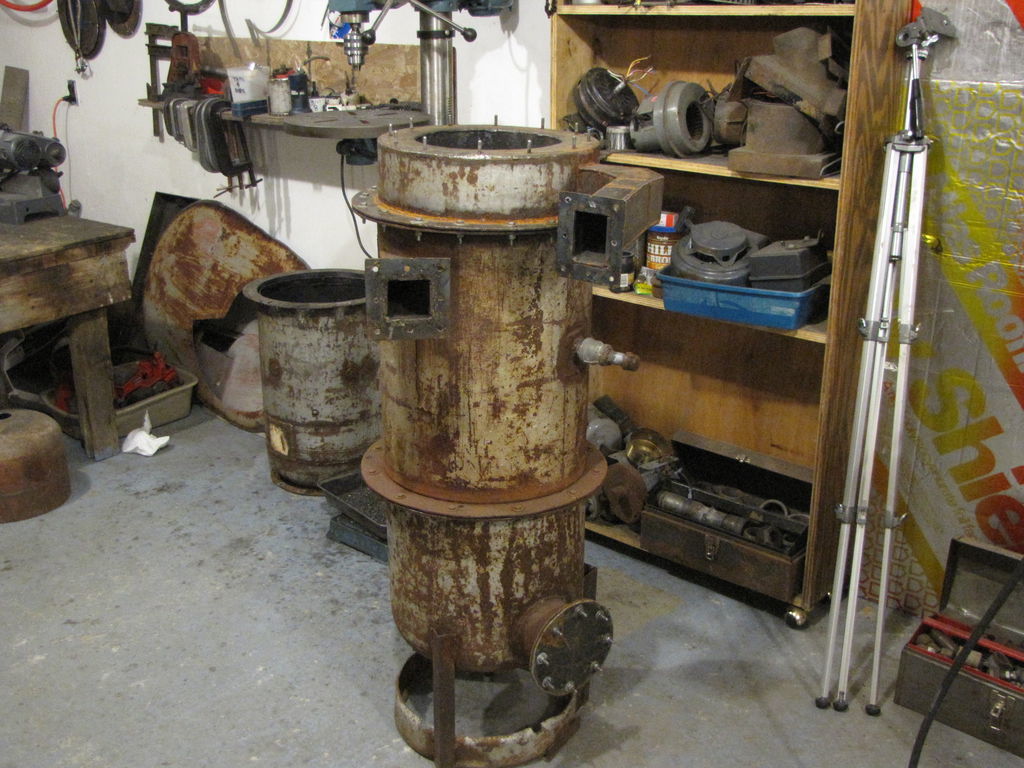
I thought I’d update my gasifier dwg to reflect design changes. Notably, they are the 2" x 3" single port air inlet manifold and the 2 1/2" x 3" gas outlet. Both of these are flanged to accept the new longer cyclone enclosed in a shroud to preheat the inlet air.
Learned from the snow blower run…don’t run syn gas through the carb, it will deposit some tar on everything in the throat. Yeah, it’s soaking now, lol. Remove the carb and make an adapter for syn gas entry.
I found a fantastic small engine repair Channel. Go to youtube and type in donyboy73 Channel
The best detailed how to videos on small engine repair I’ve seen yet.
Enjoy, Pepe
Hey Pepe, check out this tape. We have been using for some time now and it is working great. We use this on just about every thing except for the lids we use rope on them.
It is very cheap too. For ten bucks it will go ten times as far as sylicone for the same price and you can take stuff apart and put it back together with out the need of re applying it.
Sorry about that, the link was supposed to bring you to ones I use. Strange how that works. But any ways the “slotted fiberglass seals” are the ones we use. We get the adhesive backed loosely woven. If needed you can get the spay on copper silicone and apply this to the the opposing flange. This will ensure a good seal or you can apply the tape to both flanges.
Thanks for the info and tips, Matt, I’m headed back to the site now. Fabricating gaskets has been a challenge for me, time consuming and frustrating when they fail. A kind of lick em and stick em approach is real appealing.
Hi All,
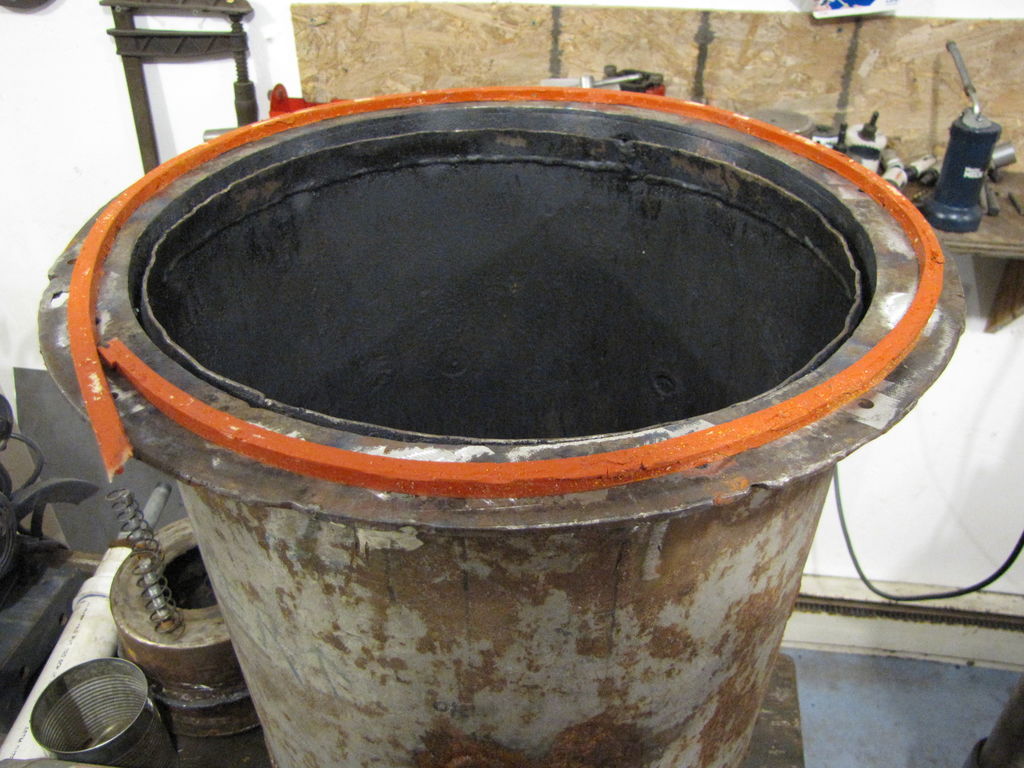
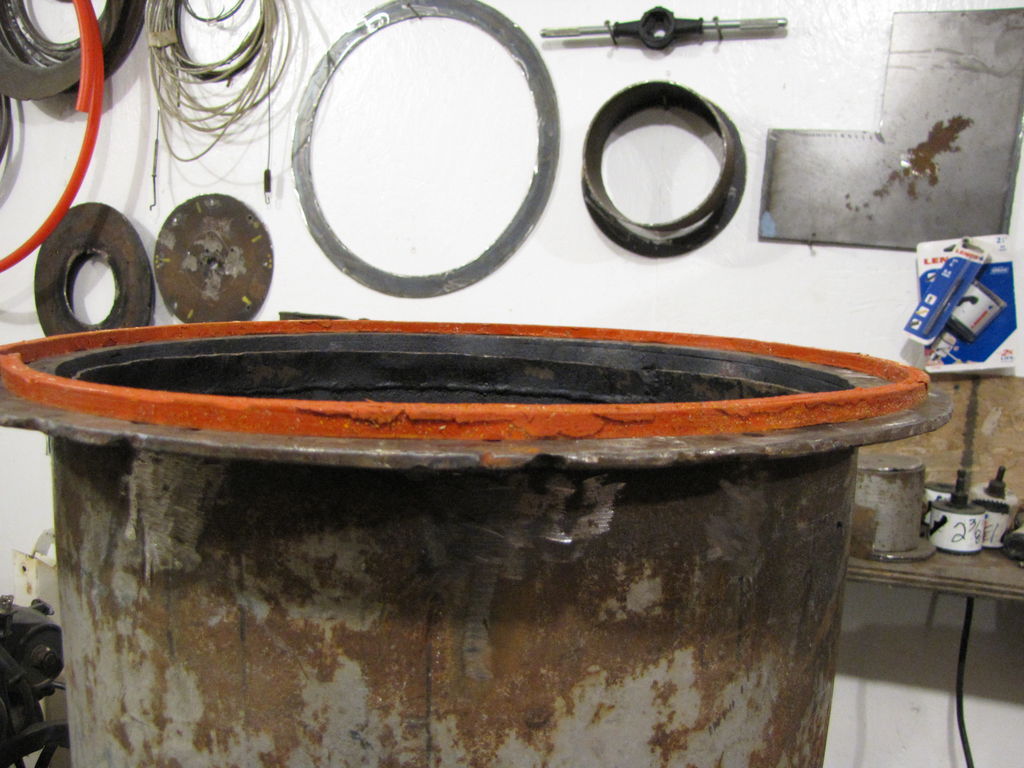
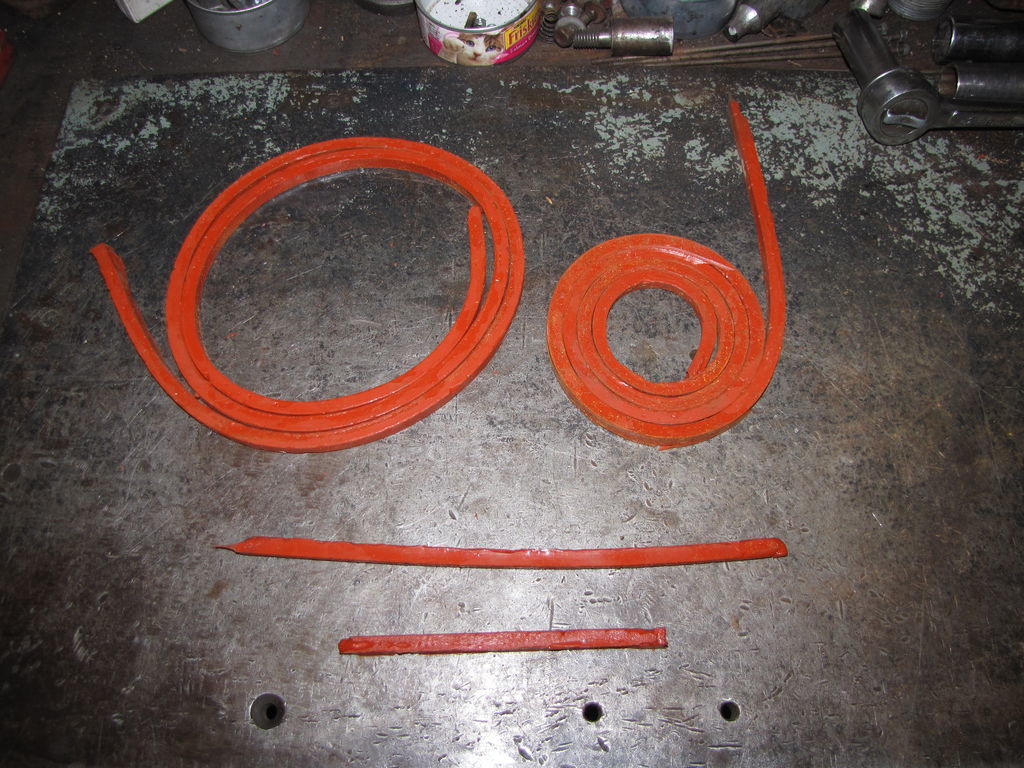
A little update on my gasket mold. My gaskets have set for 5 days and are ready to remove from the mold. I ran down each side of the gasket mold groove with a very sharp utility knife and used a small screw driver to loosen the bottom as I gently pulled the gasket up. Tedious? Yes, but I like the results, except I will make any new gaskets only 1/4" deep instead of 3/8" deep. Note how flat the gasket is in the third pic. At $5 a tube I got 12" of 3/8" x 3/8" gasket. That’s about 42 cents a foot. So if your building once in a while it’s reasonable in time and materials.
Once you cut them to length, you can glue the ends together with more silicone. You’ll have to leave them for a few days or so to set before you use them. Kind of a pita, but it forces you to plan ahead so they’ll be ready when the time comes.
I used veg oil in grooves, but it didn’t work well to keep the silicone from sticking. I’ll use bearing grease next time. The hottest areas still get fiber glass rope type gaskets.
Hey Richard; Looked thru all your pics and enjoyed your work. Looks like your a good welder and fabricator. Do you still use pine needles in your filter and if so, are you happy with them? I’ve got alot of them around here free for the picking. I just finished making a better hopper vibrator, don’t think i will be having bridging anymore.Anyways, Just wanted to send you acolades on your work and say hey. Dan
Richard
I mold alot of stuff in my profession (Taxidermy) a great release is Jhonsons paste wax, you can apply with a brush it has enough body it wont run like oil, and is a great release agent, you might give it a try. Love your gasket idea.
Hi Robert,
Thanks for the tip on the paste wax, I just happen to have some Johnson’s paste wax in the shop, I will definitely give it a try. I use it to finish off after staining furniture, etc projects, Easier than varnishing for sure.
Your WK project is moving along nicely, also.
Hey Dan,
Thanks for the compliment, my fabricating is better that my welding, but I’m finally getting the hang of welding thin stuff. I went through the temp range, rod size and type, speed, etc. I used to say, " there. it’s welded, by gob!". lol.
Yes I’m still using pine needles and they seem to work OK, but I don’t have a lot of burn hours for a more definite assessment. I mixed some (a little) leaves in with the pine needles to help slow the straight line gas flow. The gas hits the leaves and is forced around them exposing the gas to more needles. I will be building a new two compartment filter arrangement and plan to use pine needles in it.
I’m also putting condensate traps on my cooler and filter, although I haven’t found any water under the raised grate (1") in my milk can filter setup so far.
I also need to fabricate a hopper vibrator as I had some bridging when I was experimenting with fuel size and shape. I found that 1" to 2 1/2" branches cut 2" long seemed to work best for my parameters. Cubes seemed to bridge the worst…
Check out donyboy73 Channel on youtube for a great small engine repair and rebuild site.
I can’t wait to see how your mods work. Good luck.
Pepe
Merry Christmas and a prosperous New Year to all.
Wayne, what a beautiful spot, thanks for sharing.
The pic is Whiteface mountain in the Adirondacks with Lake Placid in the background looking approx west. I live about an hour and a half north of here by road.
Over the last several years for my son’s birthday he would want to go out riding. We would put several sacks of wood in the back of the truck and plan on using it all and that meant getting to stay in a motel somewhere along the way. The motel stay in some town in a different state with cable TV was a big treat to the son.
We would start out early of the morning and not have any idea where we were going. At the end of my drive way I would ask the son right or left , and he would give a direction. This procedure would go on all day. The second day I would find our way back home. I think the wife and I enjoyed it as much as the son. I learned if you are going nowhere in particular any road will get you there.
The picture was taken a few years back about 40-50 miles northeast on one of the birthday events . The Tennessee River in the back ground, between Fort Payne and Scottsboro Alabama.
This is where the singing group Alabama was raised and they mention this area in a few of their songs. They would swim across here just to prove they were a man.
Hi Wayne,
You brought back good times for me, I used to live my life that way… Many adventures.
I hope with the help of my Woodgas truck I will be able to do so again.
Truly one day at a time.
Merry Christmas to you Lisa and Tally
Chris All the best to ya!
Not to mention all the Gassers and those soon to be.
TerryL
Hey everyone,
I found a free PDF file download of David Gingery’s Manual, “How to Design and Build Centrifugal Fans”.
It has some really interesting details on the hows and whys of fan design. Type the following link in your search bar and it will bring you to the download page, real easy. I use Adobe for downloading PDF files.
Hi Matt,
I took your advice and tried some of the tape you use. It sure is easy to work with and no mess. Reasonable cost, too for a 25’ roll. I’ll see how it works in the next couple weeks when I fire up my unit with a bigger restriction (4.5"), cooler and filter.
Pepe
Hi Pepe; Looking at your pics, thats a nice looking gasifier.When you are done building and you get it cleaned up and painted, it’s going to look sharp. Looking forward to your run wishing you the success you deserve. Dan
Hi All,
Thanks for the kind words, Dan. Chad, the rope works well, but I replace it every time I do a tear down because it seems to pack tight and I’m afraid it wouldn’t seal well the second time. I’m trying a flat type Matt uses. I’ll see how it does. I’m moving ahead with a new cooler which will provide approx 39 lineal ft. of 2" d 16 gauge pipe from an old swing set. That translates to approx 23 ft2 of radiating (cooling) surface. This includes the surface area of the manifolds also. I could also use a shroud around the cooler to preheat incoming air and feed it to the existing preheat shroud on my cyclone. Need a new filter container first.
Pic 1 Concept drawing 1
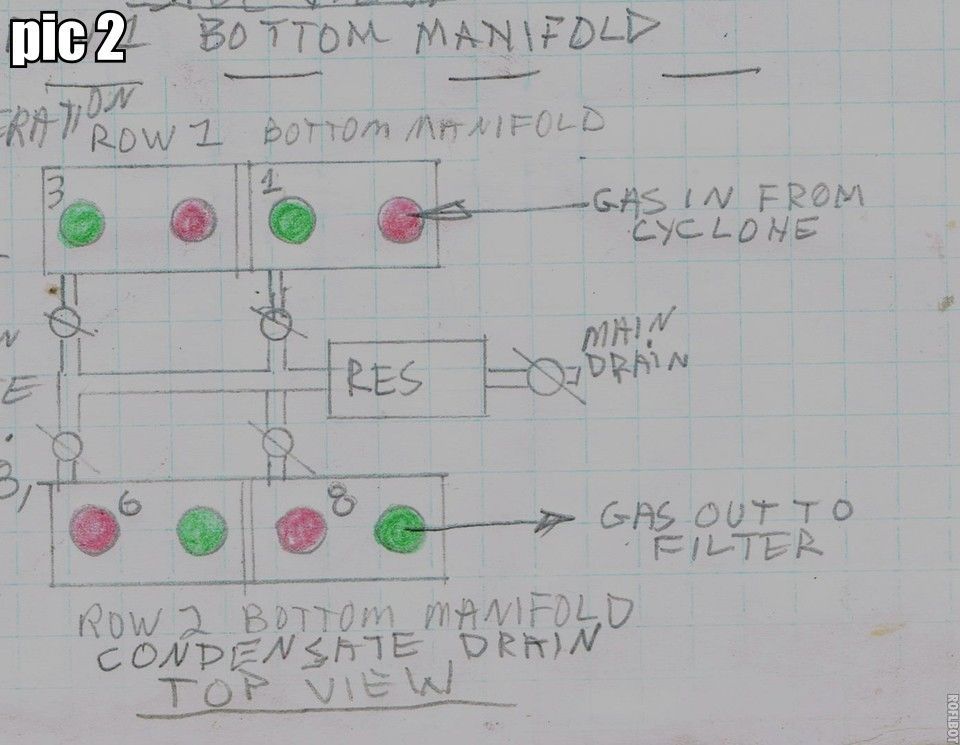
Pic 2 Concept drawing 2
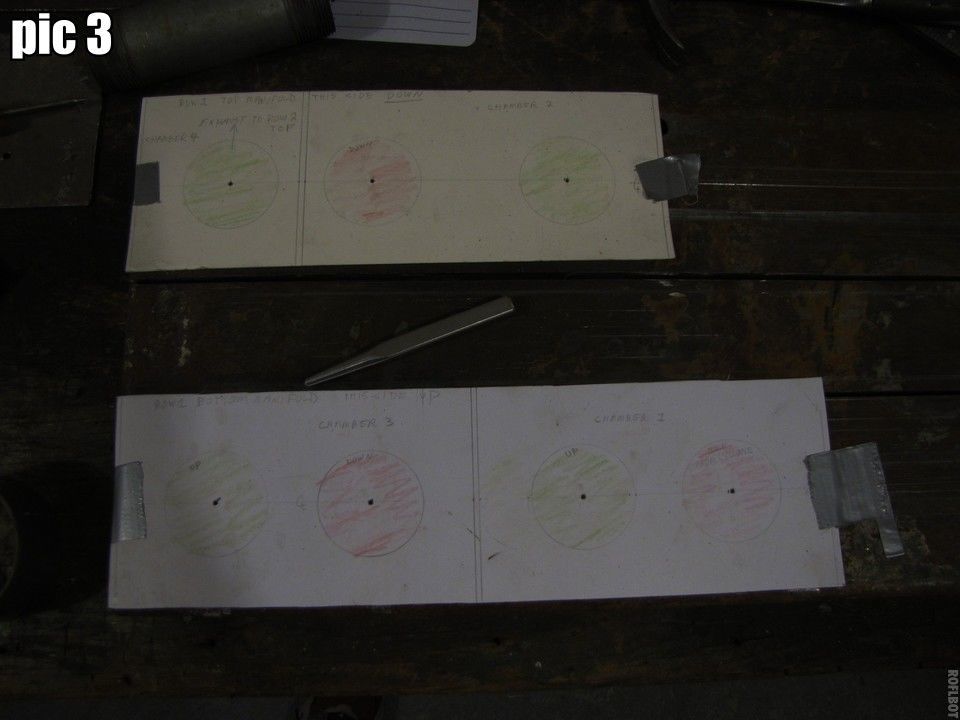
Pic 3 Full size layout of top and bottom manifolds
Pic 4 Lining up pipes with manifolds.
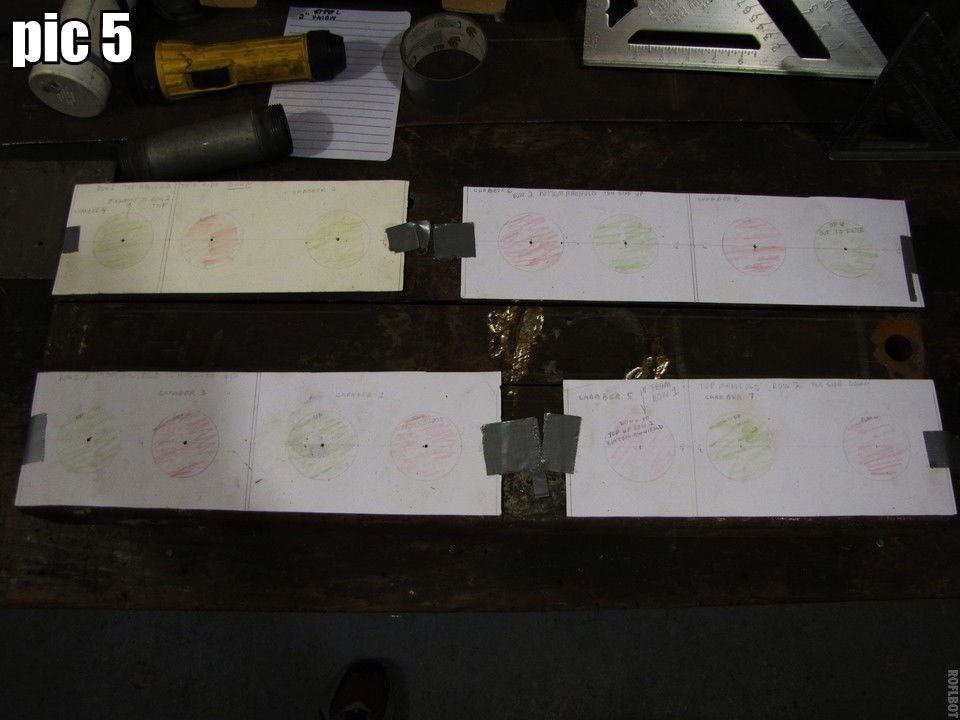
Pic 5 Layout for cut only
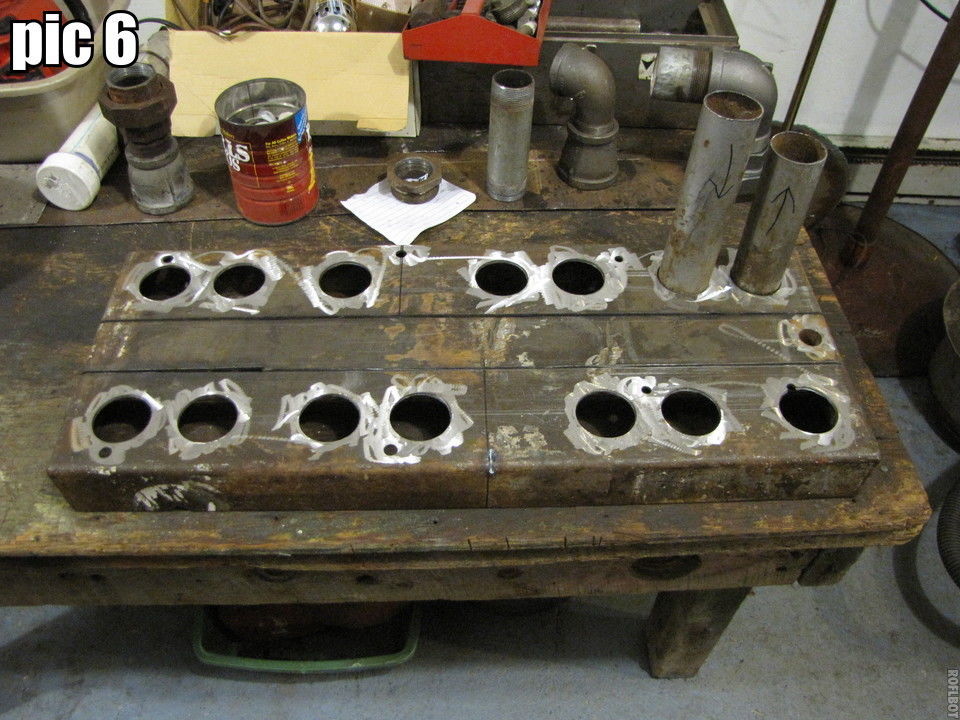
Pic 6 2" holes cut and the fit is good. Next, cut out individual manifolds and begin assembly. This is the base from an old belt driven 1 hp air compressor. It 2.25" deep and the manifolds are 4" wide. I planned the width of the manifolds so the strip in the middle was wide enough to finish some of the manifold sides complete with built in corners.
Pic 7 Weld from underside. Start bead on thicker metal and bring the bead just to the edge of the thin metal tube and don’t slow down! The 3/4" pipe will be removed.
Hope to have some assembly to share tomorrow.
Pepe