Great post Sean, totally agree and interesting about the fracking being a potential cause of drought, I had never heard that but we rarely get something for nothing - I used to build airplanes and we can design lift, but still have to deal with gravity and we can design thrust, but still have to meet with its counterpart friction, so I could definitely see the possibility of the law of unintended consequences at play here.
So one more quick “nozzle” question for anybody reading. I have not had time to do much testing with my gasifier yet this weekend because my wife has been sick for a few days and I’ve been stuck doing dishes and other boring stuff to keep the house from falling apart. But I am going to town today for groceries (since she usually shops for us) and was thinking of picking up a few fabrication supplies for a nozzle ring - I was wondering - I could easily pick up some steel electrical conduit and bend that into a ring - but what does everyone think of this? Would it hold up to the heat and could I drill holes in it to be used as nozzles or would I have to weld in pipe threads? Just curious of your opinions since I can pick a few materials up when I am in town.
If you have the means to roll it into a ring I don’t see why not. I believe Joni has done such a thing before. And there is a WW2 Gasifier that uses a tube ring for air supply to the nozzles.
A metal ring down in that near Hell will erosions thin quickly.
Better to start with thick walled tubing.
Black pipe gas pipe would be the best.
And IT does not like to bend at all.
Why I’d earlier recommended a four corner, four 90 degrees fittings ring. Better to use eight 45’s. An air jet in each made segment then. But expensive!!
I did like that video that was put up about the India/Pakastani/Indonesian guy who ground slits, then bent in, to form his half circle and welded back up his forming cuts. Neat.
Seeing that . . .what I’d try to do instead. Cheap. Cheap.
Steve Unruh
That what I was wondering too Steve, if the steel conduit might not hold up. Thick wall conduit will be harder to make a nice circle than thin wall and thin wall probably wont hold up as well. I was also thinking maybe of working 8 black pipe 45s instead of 4 90s black pipe. If I do this, 2 other questions what side pipe would you recommend from inlet down to the final ring and secondly, should I plan to get my ring as close as possible to the choke zone? What should I be looking at as far as positioning?
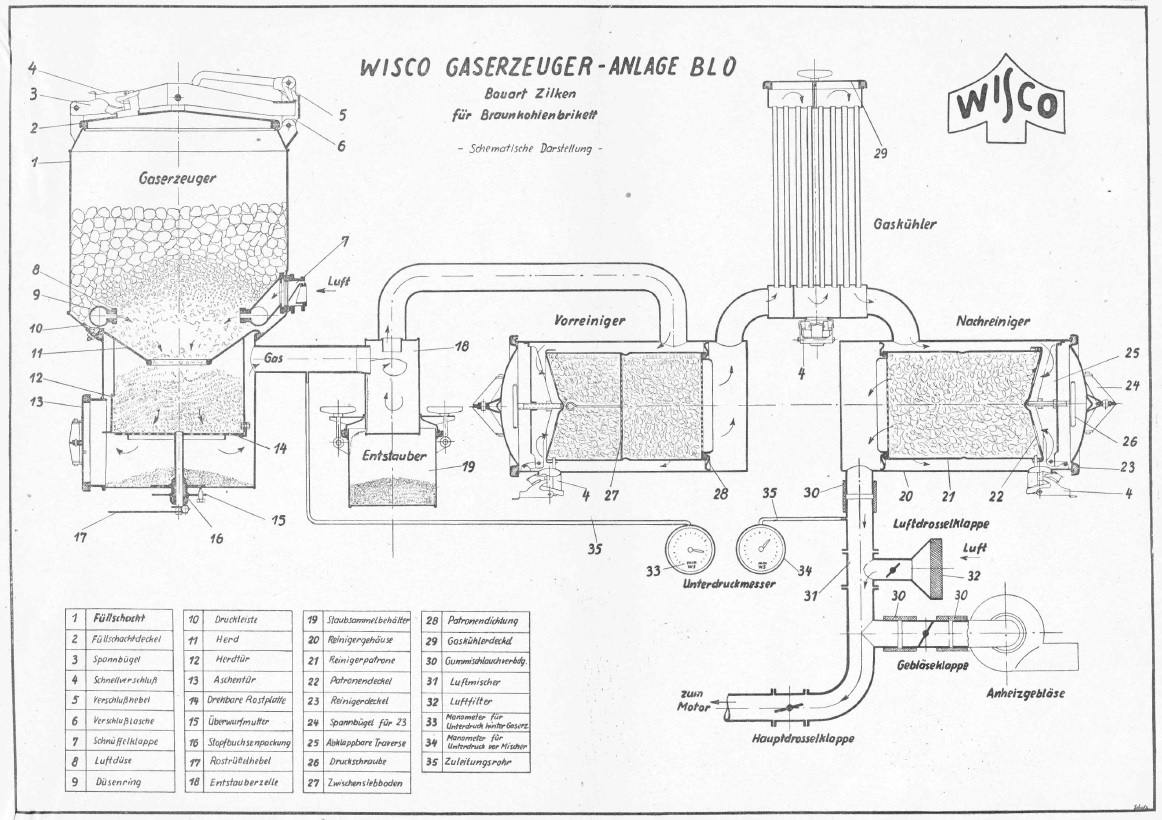
Derrick if you look at the Imbert chart I linked it shows a variation of nozzle distance to the choke. It depends on the engine you want to fuel. To determine that, look up the CFM of your engine and the chart is set into groups using the CFM to size the gasifier hearth.
Edit: Here’s the link again, I’d use Inch spec since it’ll be in CFM instead of NM^3/Hr
Edit-2: Oops they’re all in Nm^3/hr but you can Google a converter for it from CFM.
Thanks Cody, I’ll give that a watch and may give it a try.
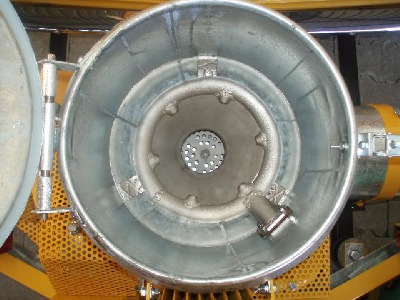
So I have a bit of a progress report, I sealed my lid well enough that I was finally able to blow some air backwards through the system and spray some soapy water down on everything as Dave has been suggesting. I found 3 leaks, two fairly large I think. One leak was at a rubber coupler joint - no big deal, just tighten the clamp up a little more. Another leak was at my large ammo can that I am using for a medium filter, I was aware of this leak and had tried to fix it once before, but after spraying it I noticed it was quite large. When I disassembled the lid to check the fix on the seal I noticed something I never had before - there was a ever so slight dent on the lip of the ammo can which was making it very difficult to seal, so I will have to address that. The third leak that seemed quite substantial was on my ash clean out door, which again I thought I had sealed up finally. This is showing me that I am going to have to rework this area considerably. I am thinking I may open it up a little more and weld a brand new ammo can in place so that I can have some assurance that it will be airtight.
To do this I will have to pull the reactor completely apart so I am thinking after I get all of this done, while everything is apart, I am leaning towards putting in a set of ring nozzles since I am getting tired of failed attempts so I am thinking I want to have every single thing right and in place and tested airtight, before I even try to fire it up one more time. It might be a little while before I can get all this done, another week or two, but I’ll keep you guys updated with my progress.
Hey guys, just a couple of quick nozzle questions since I am going to source some materials tomorrow to build my ring. First of all if I have threads to put in nozzles, should I just use pipe nipples for nozzles or should I cap them and drill holes in the cap to make a “jet”? If i remember right I think someone suggested this?
Also can someone confirm, if I remember right, I am supposed to angle my nozzles down 45-60 degrees right?
For raw wood it’s best to angle them straight across, or about 20 degrees upwards.
The only gasifiers I’ve seen with a downwards angled nozzle setup are charcoal downdraft gasifiers.
Also, using pipe caps with a hole drilled is a good idea, the cast iron can take the heat better than the steel nipple. If the hole in the cap is smaller than the bore of the nipple it will increase the air velocity to let it penetrate the char bed.
The 45-60 degrees thing is your Ash Cone, the ash will pile itself up at a 60 degree angle and eventually build up behind the nozzles, that’s a good thing.
This is my thinking in my new build in a WK style design. Insulate the lower part. The firetube will have heat shielding and for nozzles I am using nuts 10 of them. This will be a light weight gasifier.
In Joni unit the firetube hearth area is being formed by using it. He does not chip it away. It is taking the shape it needs by running it. In a WK it does the same thing with a soft ash cone forming below the nozzles to the restriction opening. I put ashes in this area before I load it up with charcoal after a complete clean out inspection. I am very careful not to disturb this area after it has been estabished with my poking rod into my grate area checking the condition of the charbed or shaking the grate.
Bob
That’s one reason why Wayne and others like to have a real narrow end on their poker, right? To be more precise and only rod the center.
While we’re on the tangent of Rods, @Bobmac show your tube poker that you can use to light off your gasifier. It makes for a Mess Free way to light at the char without diving in yourself. Makes lighting ports basically useless in my opinion.
Apparently you mix ash containing greater then 10% char with water, and it hardens over 1to 3 months because of CO2. Kind of like water glass hardening I guess.
Yes Sean, the ashes in my firetube below the nozzles to the restriction opening requires a little digging to get it out after it has been in there for months. I use the ashes out of my gasifier and screen it down really fine. It is not white fly ashes more of a gray/black ashes. Not sure of the charcoal % content in it. But it sets up and seals everything below it and gets hard pack. It makes up it’s cone shape on it own.
Cody here is some pictures of the rod that Wayne built for this truck in 2012. Still using the same one.
Just rebar with a smaller rod welded on the end that will go through my grate holes to feel how loose or tight my charbed is. I use the same rod to circle drill a hole in to light it up as long as it is not to full of wood in the hopper. I use a different tool for that. The T tube.
If it is tight I use this grate T tube shaker to loosen it up. I can pull the center rod out after I push it through the hopper wood down to the grate shake it. The 2 rods fit into my grate holes. Then I can drop pieces of white hot charcoal lit from a torch to light it at the grate. If you find your charcoal bed is really tight this will burn up the fines clearing the grate area.
I do not use the shaker very much now that I am burning hard and very dry cherry wood. Burning the tall wind brake soft Poplar wood we grow up here is a different story. Having the right tools when running any gasifier is very important.
Bob
It is really related to wood ash cement but they wash the potash out first because that among other things raises the melting point.
Which of course gets back to the homemade firebrick… Which I don’t know if that is what this guy is trying to do or not. I thought he was trying to look like a young Tarzan, therefore implying that if we do this we can look like a young Tarzan too.
Well, I did work on the gasifier this weekend but am still in the process of plugging leaks. I fixed the major leak I found in the medium filter box seal, but have been chasing small leaks around the ash clean out door. I riveted it in, so first I had to caulk every rivet head, then I found minor leaks around the corners (where the corner of the small ammo can meets the round barrel wall) now I am finding a small leak in the door seal, so hopefully if I can get that fixed today perhaps I will be ready for another (hopefully successful) test.
Well I made what I consider to be significant progress today - but I’m still not quite there yet.
After adding a ring of 4 nozzles and checking and double checking, caulking and double caulking leaks I finally had the confidence to try another test today.
So I fired it up, gave it about 10 minutes to warm up and still nothing that would light at the flare.
I peeked in the hopper (after I gave it plenty of time to burp if it was going to) and I saw the fire burning hot as hell, but not solid - it looked like the char collapsed into the choke and reduction zone - so I took my rebar poker and poked around getting all of the char to settle in more of a solid column within the choke without packing anything too tight - then I tossed a couple of handfuls of wood chunks on top and within moments here is what I got.
As you can see, my woodgas lit up nicely and was producing a nice light blue flame when I hit it with my propane torch. However when I removed the torch the flame went back to a haze and I could not relight it with a conventional cigarette lighter or a welders spark, only with the propane torch. And the gas was not a good enough quality to start the generator either (I didn’t think it would be, but I thought let me give it a try in case it was my torch design that was causing the flare not to stay lit.)
So obviously I am getting a whole lot closer in the process, but if it is not producing engine quality gas and lights easily with a propane torch but won’t stay lit at the flare what does that indicate? I am wondering could this mean my radiator is not cooling the gas sufficiently? And if this is the case, can I just add a second radiator inline past the medium filter? What do you guys think?