I would like to start posting pictures and observations from the nozzles we have good and bad experiences with.
3 Likes
Koen - I think it’s a great idea to have a dedicated thread for nozzle designs, even if it leads to some double posting.
I just started experimenting with a charcoal gasifier for the first time a few weeks ago, and promptly melted two steel nozzles. They lasted less than 15 minutes each.
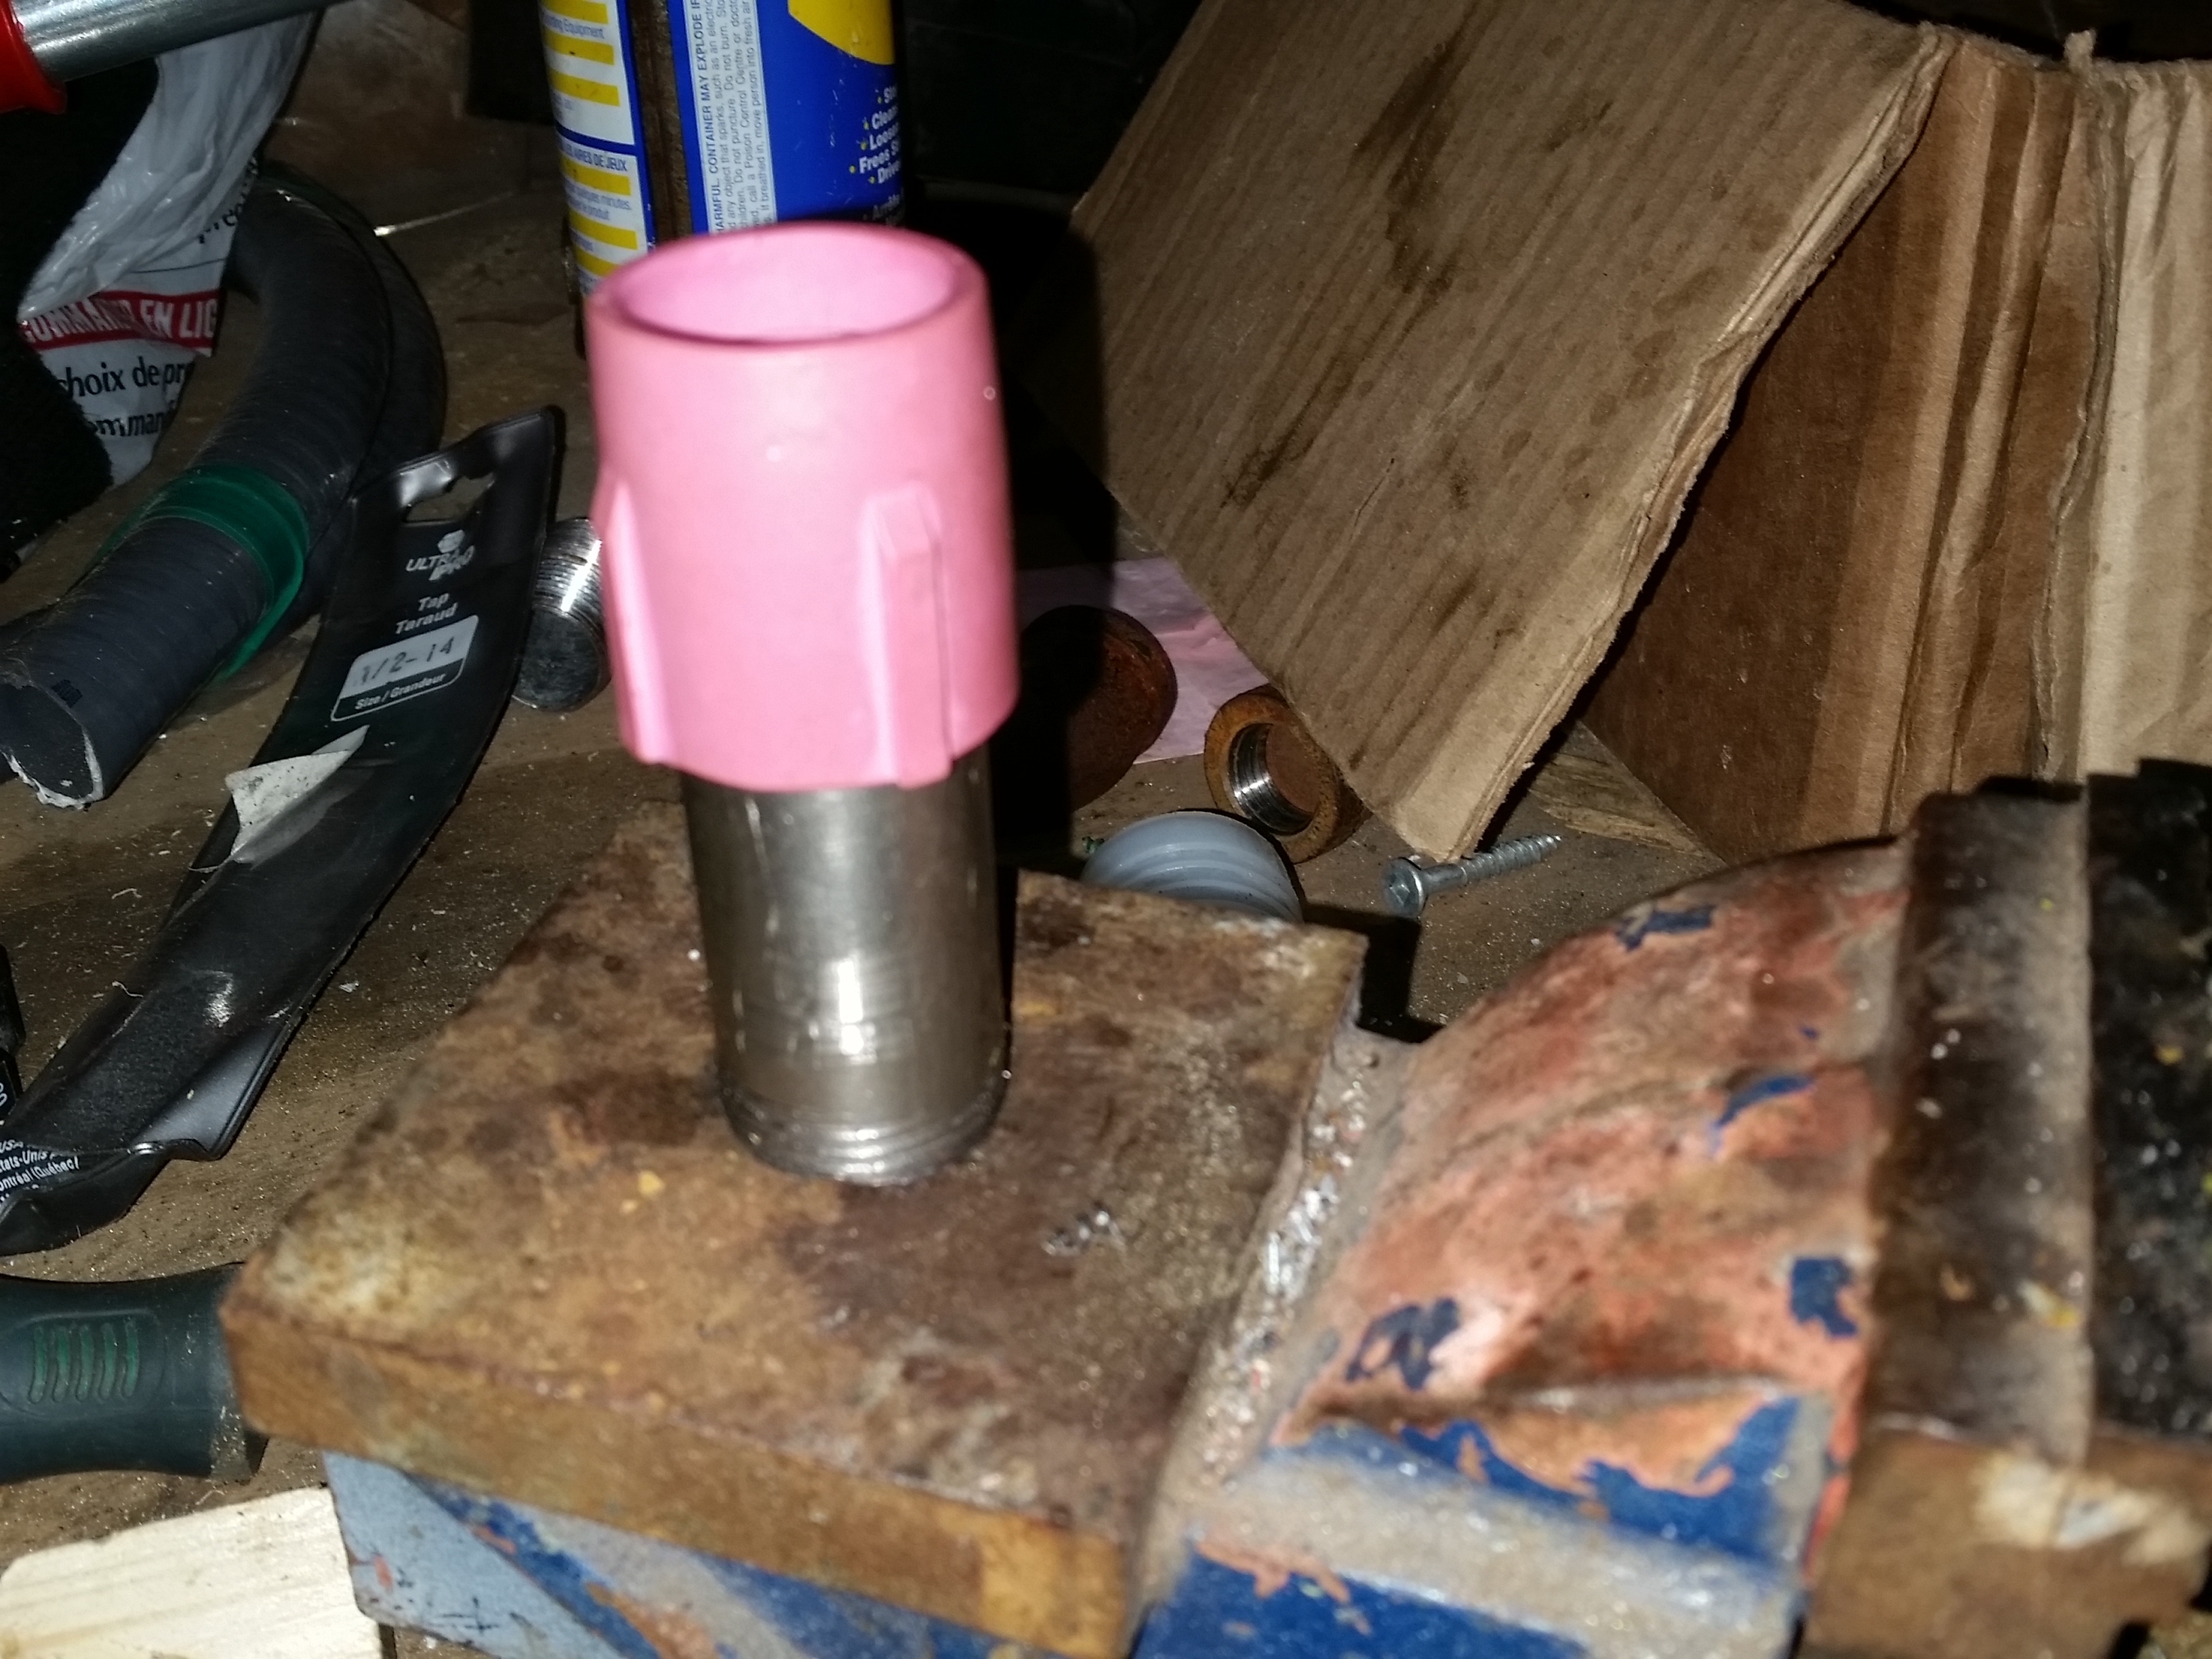
My current design is an alumina ceramic tube wrapped in a thin ceramic blanket, and stuffed into a steel nipple. The alumina tube extends beyond the steel nipple about 2 inches.
Only have about 40 minutes on this nozzle. So far, so good, although I might be able to discern a hairline crack starting to develop.
Will let you know how it holds up.
1 Like
2 Likes
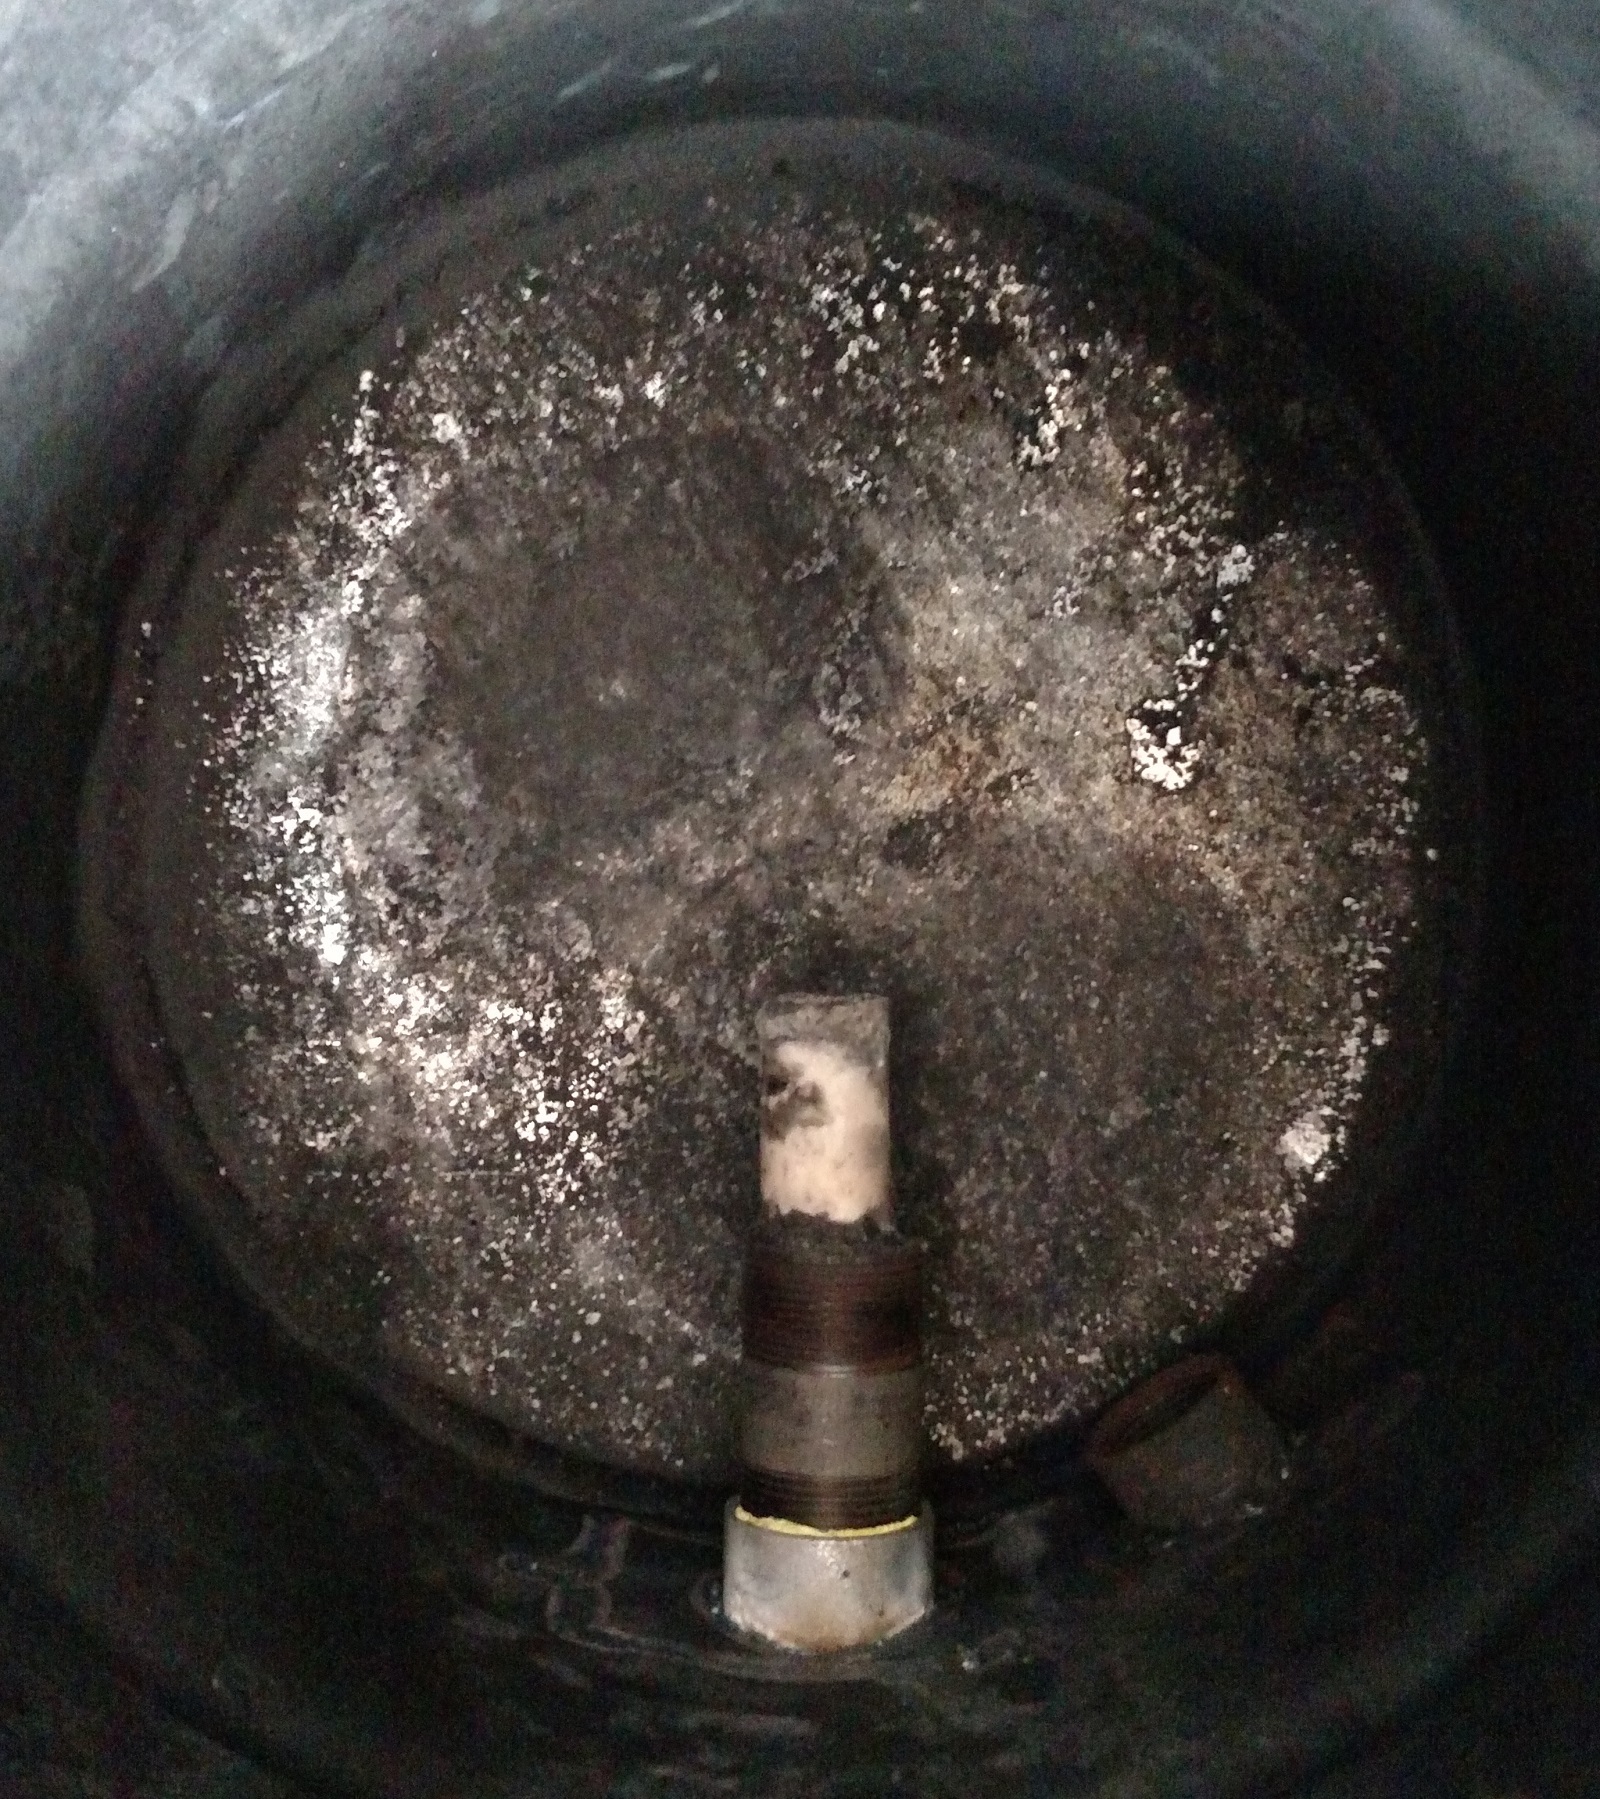
I have just removed the nozzle that I have been using since last year , I cannot remember the month I first started running it , but I do remember taking it out around November time to check on it and noticed that the refractory had a crack in it and so re cast some more refractory cement on the outside of it , the nozzle its self apart from the normal slagging was fine .
I noticed that the glow from the intake was a lot closer than it normally is yesterday and so guessed I had worn it out .
Run time is just a guess at over 150 hours , some with water drip and some without , I am replacing it with another old nozzle I made with a number 10 Tig cup with the small hole on the hot face ( around 10mm) used on my smaller gasifier , just so I can compare the engine power as I normally use the 25mm TIG cups .
This is how they start out …
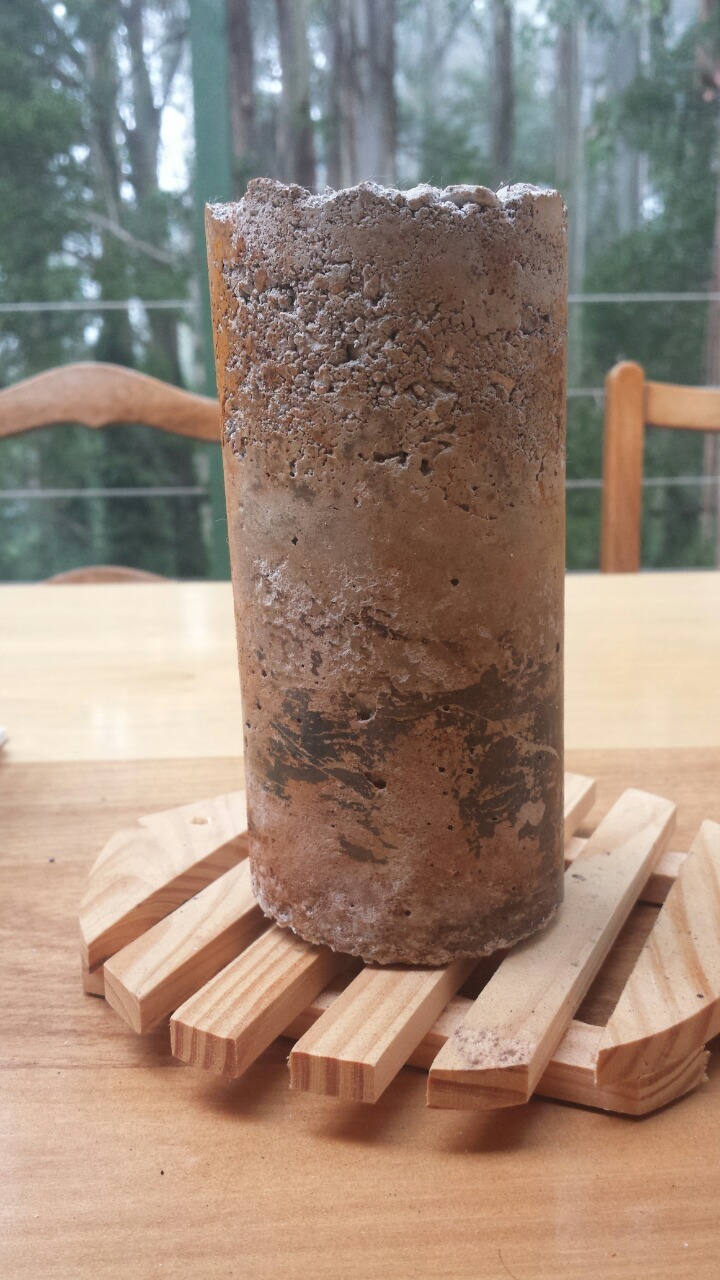
and this is after its been worked to death
You cant see from the photo’s but it has burnt away at least half of the TIG nozzle .
Dave
3 Likes
This nozzle earned its retirement!
Did you mix the cement with sodium silicate?
I had bad experiances with water drip on a non metalic nozzle as they cracked a lot.
1 Like
The refractory cement I use is a 75% Alumina content from memory and store bought , I was advised to cut back from the 90% because of thermal shock, and to be honest I am dreadful at casting I have not made any of these sacrificial covers for the TIG nozzle’s correctly , I should try making it a lot dryer and then compacting it better and maybe then they would last a few hundred hours each .
Dave
4 Likes
the quest for finding “good nozzle materials” did made me read and think a lot.
Here one link to a might be reason why our nozzles melt,
Damn, a long link indeed…
For my own, 2 cents worth, the less carbon in the alloy, the less it reacts with the glowing carbon and oxygen air environnement…
I have good results with steam pipe iron and with high nickel stainless…
Also, my observation: my vertical nozzles do not melt as where i try to do the same with horizontal…
will post some pictures later on…
5 Likes
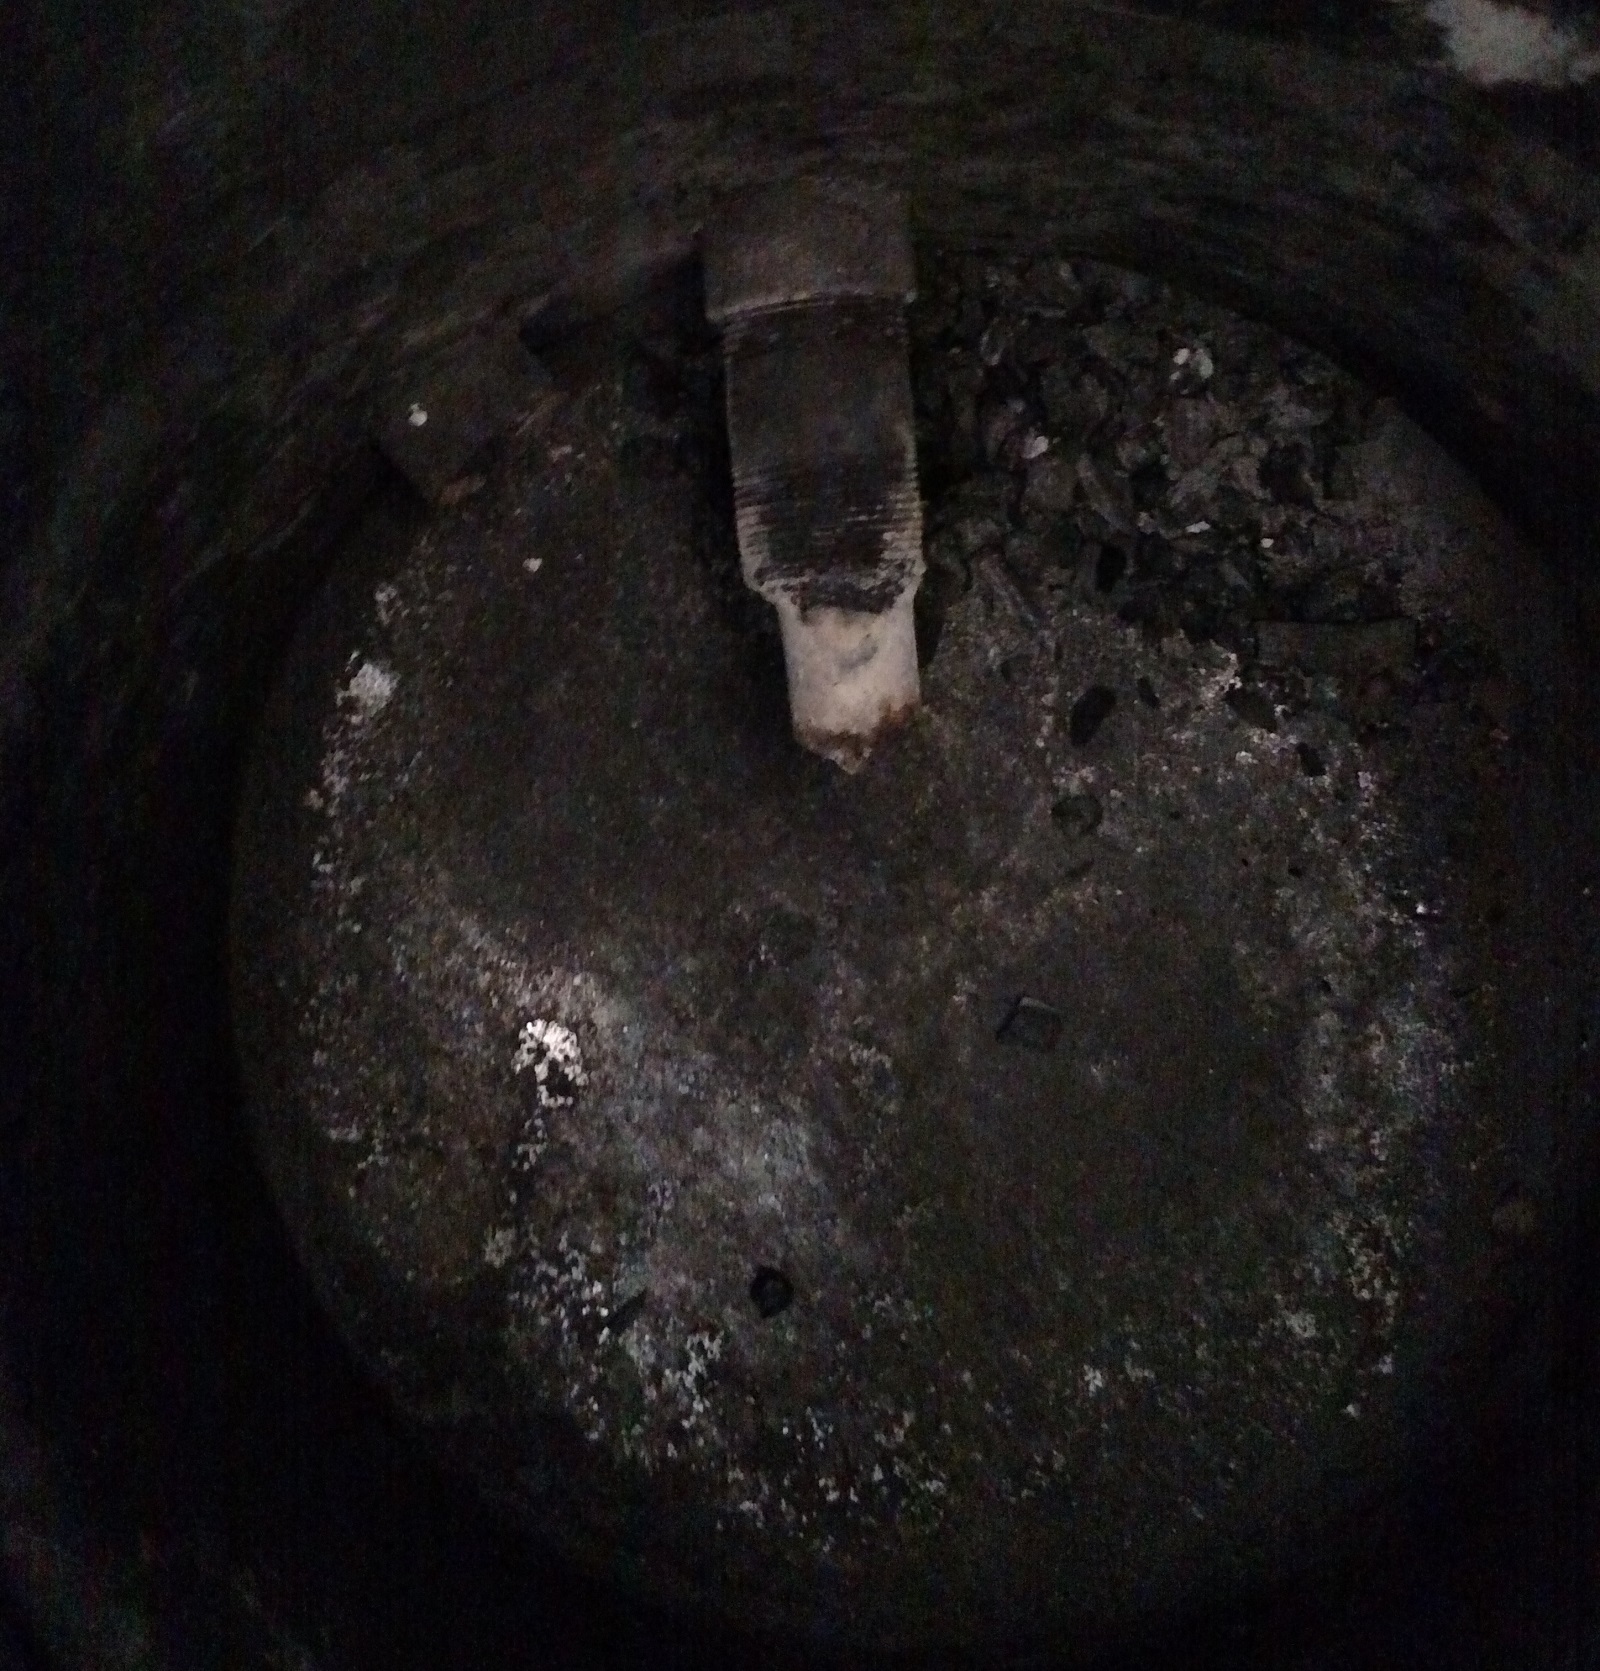
Here are a couple of pictures of my setup. This is commercial castable refractory. Air inlet is feed from the side through a 1" or 1 1/4" steel pipe. The grate is a 4" floor drain cover. The mould for the castable was a 2 gallon bucket. The round opening was a short yogurt container. I don’t run the gasifier often so maybe have a total of 4 or 5 hours on it. Both the grate and castable have held up well and the pipe hasn’t melted. I have tried exhaust and a water spray into this system. It is harder to light that having a straight pipe with charcoal right at the end. I have been placing some charcoal below the grate at startup to make it easier to start up.
6 Likes
Wow George that’s quite nice;lots of Mass there. Is slag build up on the grate an issue? Or do you dump it to clean it out?. For lighting have you tried spraying in some wd40 and lighting it or kerosene or diesel. Might make start up more pleasant. Love seeing all the variations out there.
3 Likes
I haven’t had any slag buildup but also haven’t run the system long enough to know for sure. I do dump it to clean it out or just add some charcoal.
I have tried lighting it with an oil soaked rag on wire without much success. I cut up 1/4" by 1/4" by 1 foot long strips of wood and lit those. I think the charcoal works the best in my limited experience. Most of the runs were done in the winter when the castable, grate and charcoal were all below freezing. At least the grate needs to be warmed up a fair amount before the charcoal above it will get hot enough to burn.
The winter before last I set up a workshop at the local high school and the seven guys made up 7 of these gasifiers. We didn’t get to the point of making mixer valves for the various engines they were going to use so none of them have run an engine that I know of.
My two charcoal gasifiers run a Case 446 lawn tractor with a twin cylinder Onan engine and a 4000 watt Onan generator.
Here is the gasifier running the generator a 1500 watt milkhouse heater and 700 watt hot plate…
https://mail.google.com/mail/u/0/#search/label%3Aenergy-gasifier+video/14c5e4a6dac214fd?projector=1
2 Likes
I think gary and don have the setup from below like that. They added a side lighting port maybe something to think about…just a thought.
3 Likes
Ok, here are 2 pictures from my tuk tuk nozzle…
In total now 10.000 Km with this nozzle
Had to clean it every day, in the morning , but this is intended to be…
(clean out every morning)
To observe the extend of the heating creeping up on the tube… , just reaching the outer zone of the reactor tank, keeping the heat in the center
The rim is tig welded and not grinded in a nice shape, and fully vitrified
Inside some residu’s
The nozzle is inserted from the side, but pointing/blasting upwards
Now, my suspicion towards melting nozzle’s : always the upper part of the nozzle, pointing horizontal, was melted away…
This lead me thinking of an to large surface, by pointing horizontal and the gas going vertical upwards, heated up, not able to transfer the heat.
a kind of burning a hole similar as when welding ? when the metal gets just a tiny bit to hot ![]()
also, the surface of first contact air/oxygen/charcoal is the hottest, exceeding the 1500 ° C easy
4 Likes
Impressive! Is 1500C the startup temperature before steam? Do you think the temperature drops when the steam starts? Do I remember correctly that you are adding about the same weight of water as charcoal? Is this the original TIG welding or did you have to occasionally reweld the lip with TIG during these 10,000 km?
I’m thinking about slipping a graphite crucible over the inlet pipe for a nozzle. I’ve read that coating the graphite with silica will protect it from oxidation at high temps (>1200C). Any thoughts?
2 Likes
Interasting pictures! I have seen nozzles oxidizeing on top when positioned horisontaly (like most guys still do) so from then on l only position them verticaly. The nozzle heats more eaven that is one reason why my nozzles last so long.
A nother thing i wuld like to point out is that in contrary of most peoples belives slag formation is in fact your friend with charcoal gasification. I drive my charcoal Seat every day but only clean the gasifier once a month. The reason is that on top of my nozlles a “nest” of slag forms, acting like a heat sheald for the iron nozzle. In about a 30 days the slag nest becomes to contracted and i just take them out.
5 Likes
Valuable observations Kristijan. I shall remember when I start charcoal playing.
I wonder, Is there any problem with charcoal falling into the nozzle when positioned vertically?
2 Likes
Great thinking Andy  that does happen with my sistem when the gasifier is cleaned from slag. When the slag nest builds up the charcoal can no longer fall down the nozzle. Not such a problem thugh…
1 Like
Hi Bruce,
Still the same welded lip. Keeps me surprised as well.
With the tuk tuk i only ad small amounts and without a coil for preheating.
The ECU has an knock sensor so it adjust the ignition back if the ping comes 
2 Likes
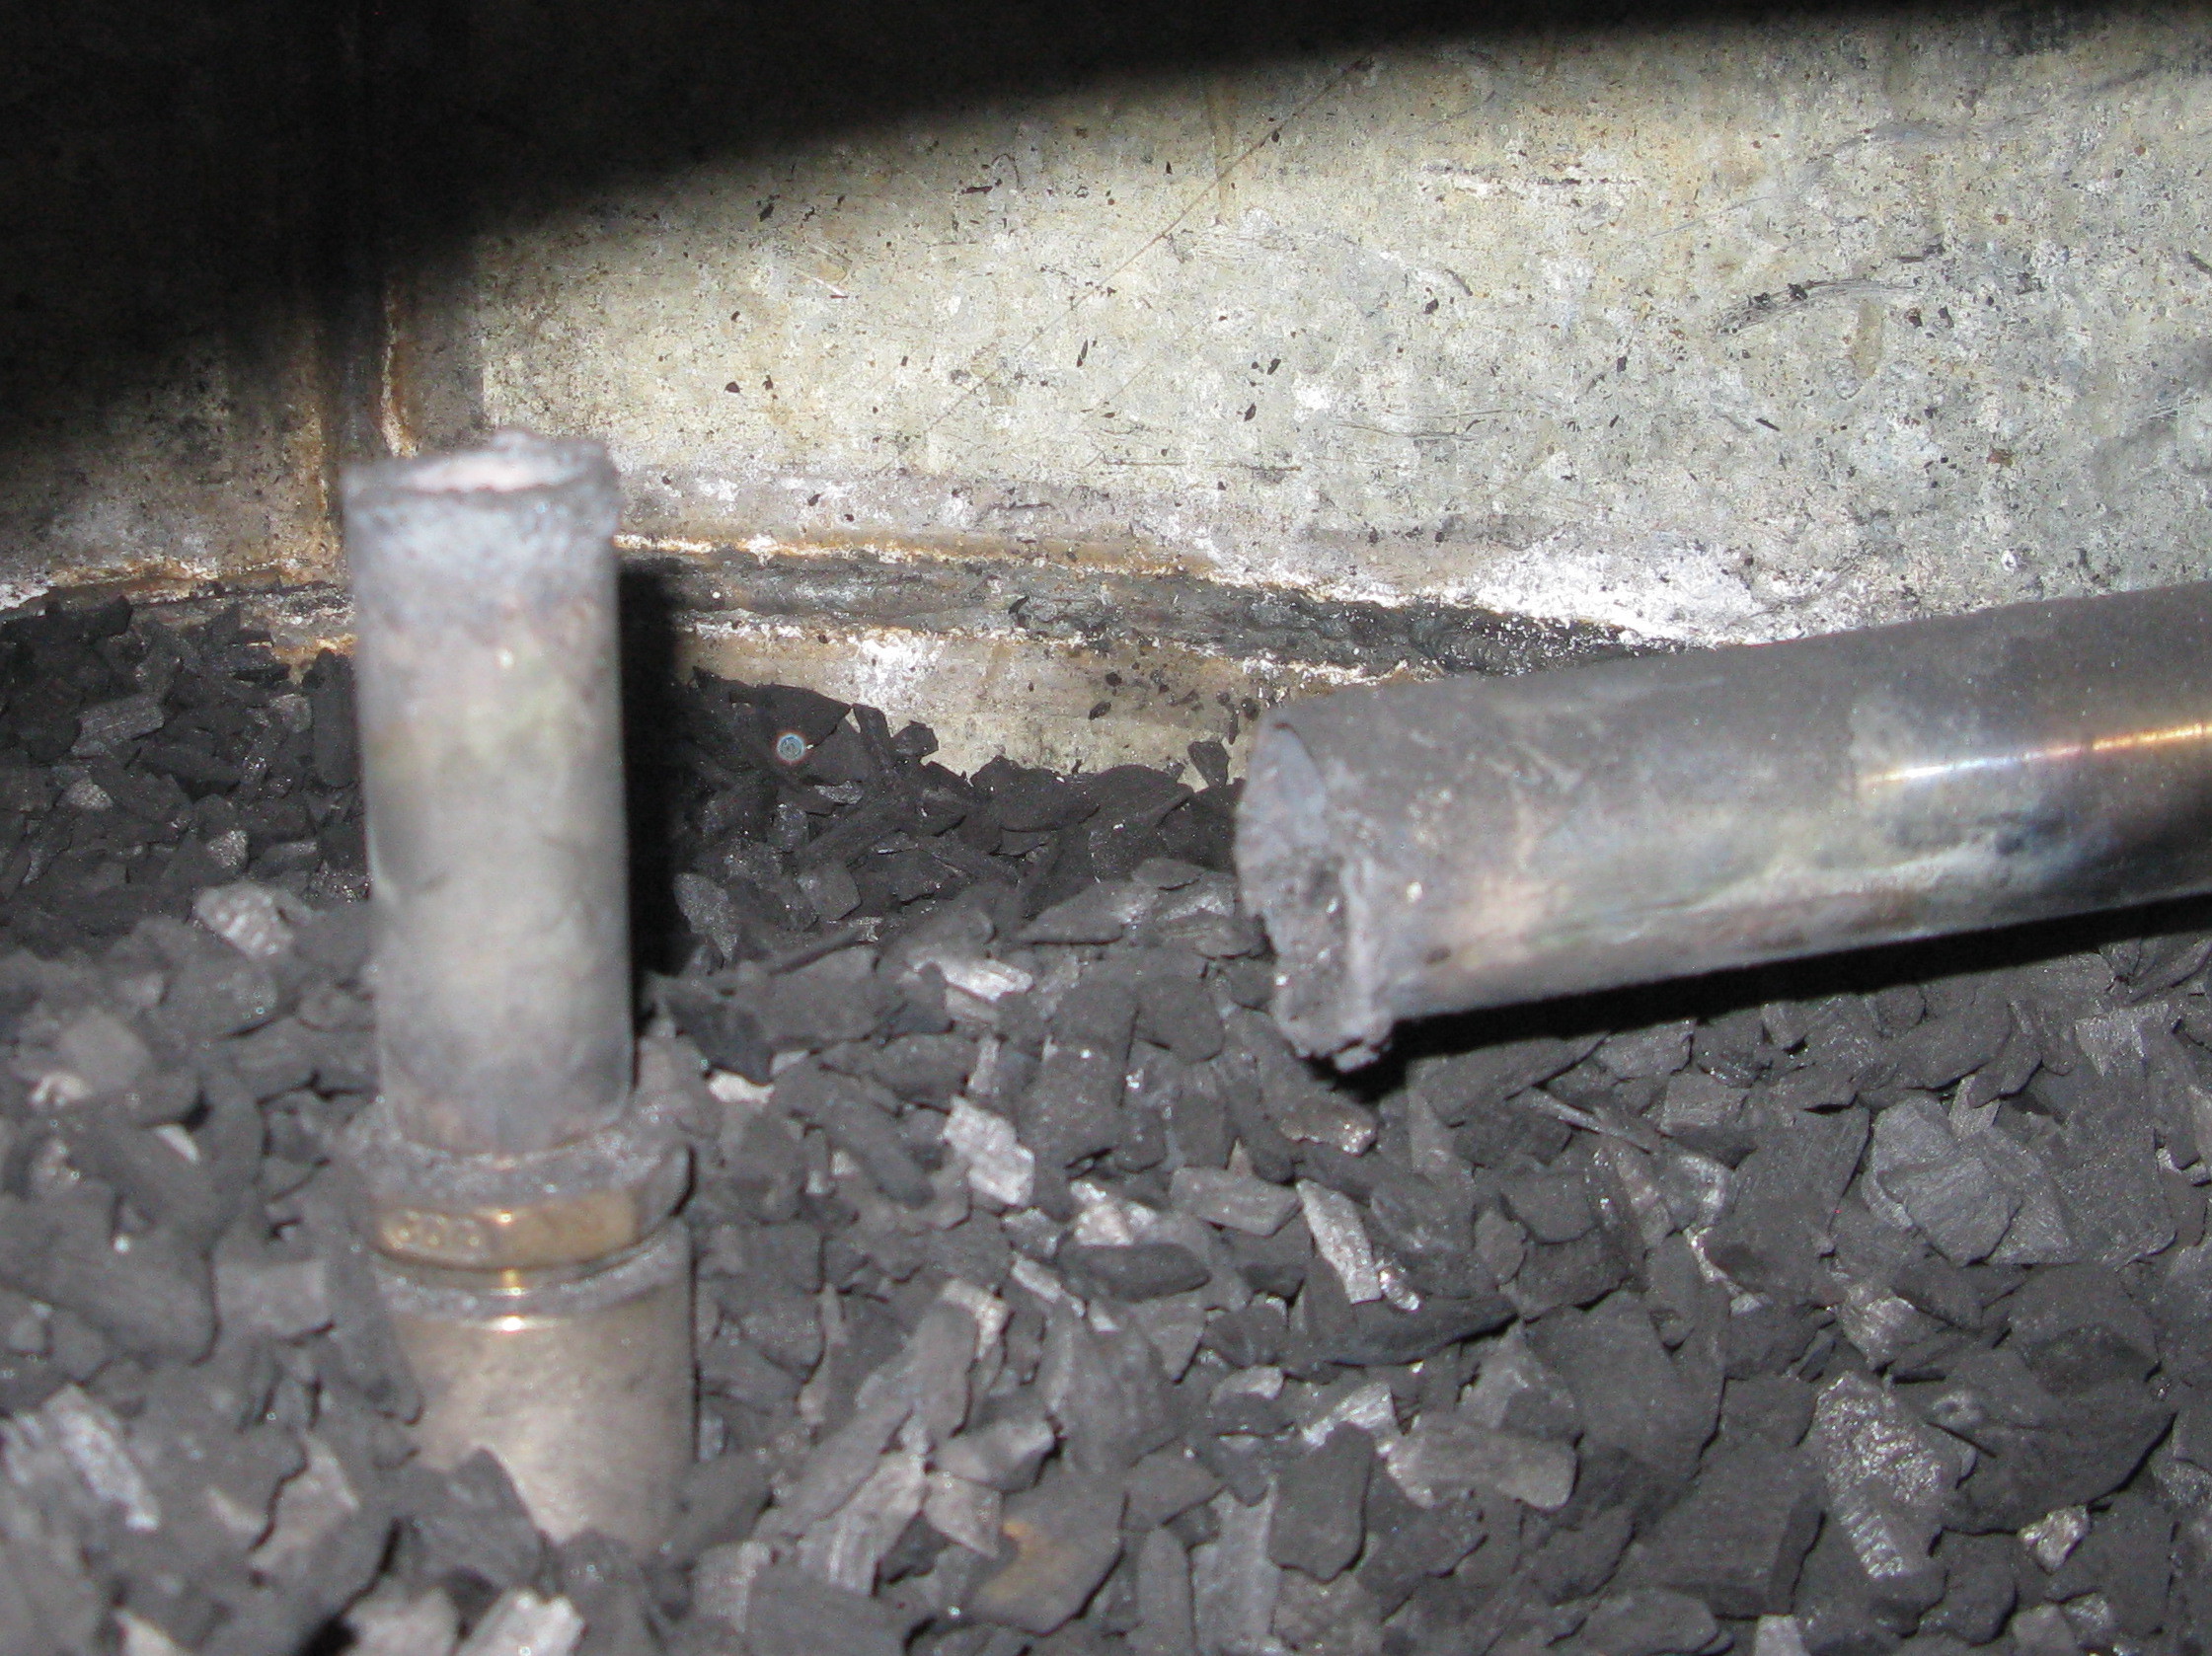
Here the nozzle setup from the diesel pickup…
at the left side the vertical nozzle and right side the lightning nozzle
Size nozzle 3/4" for the vertical
3 Likes
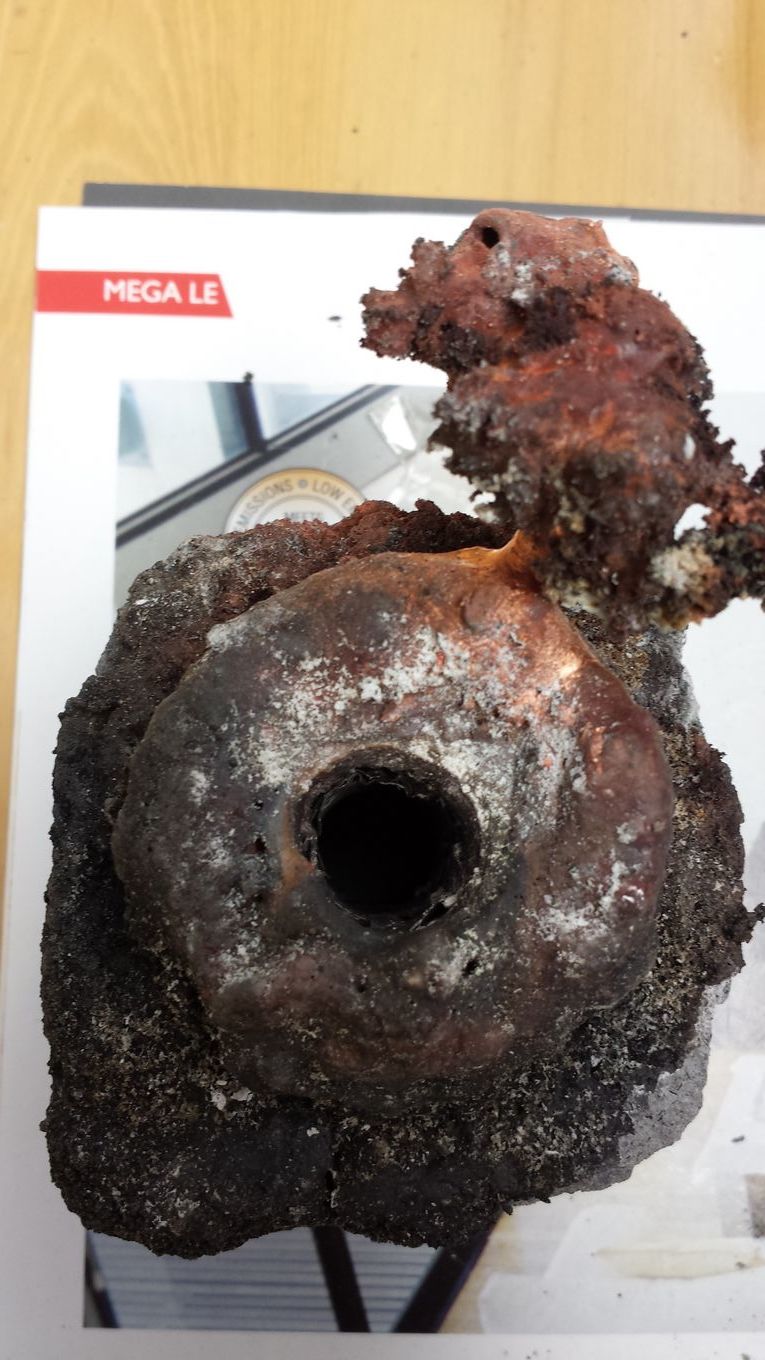
Nozzle Report
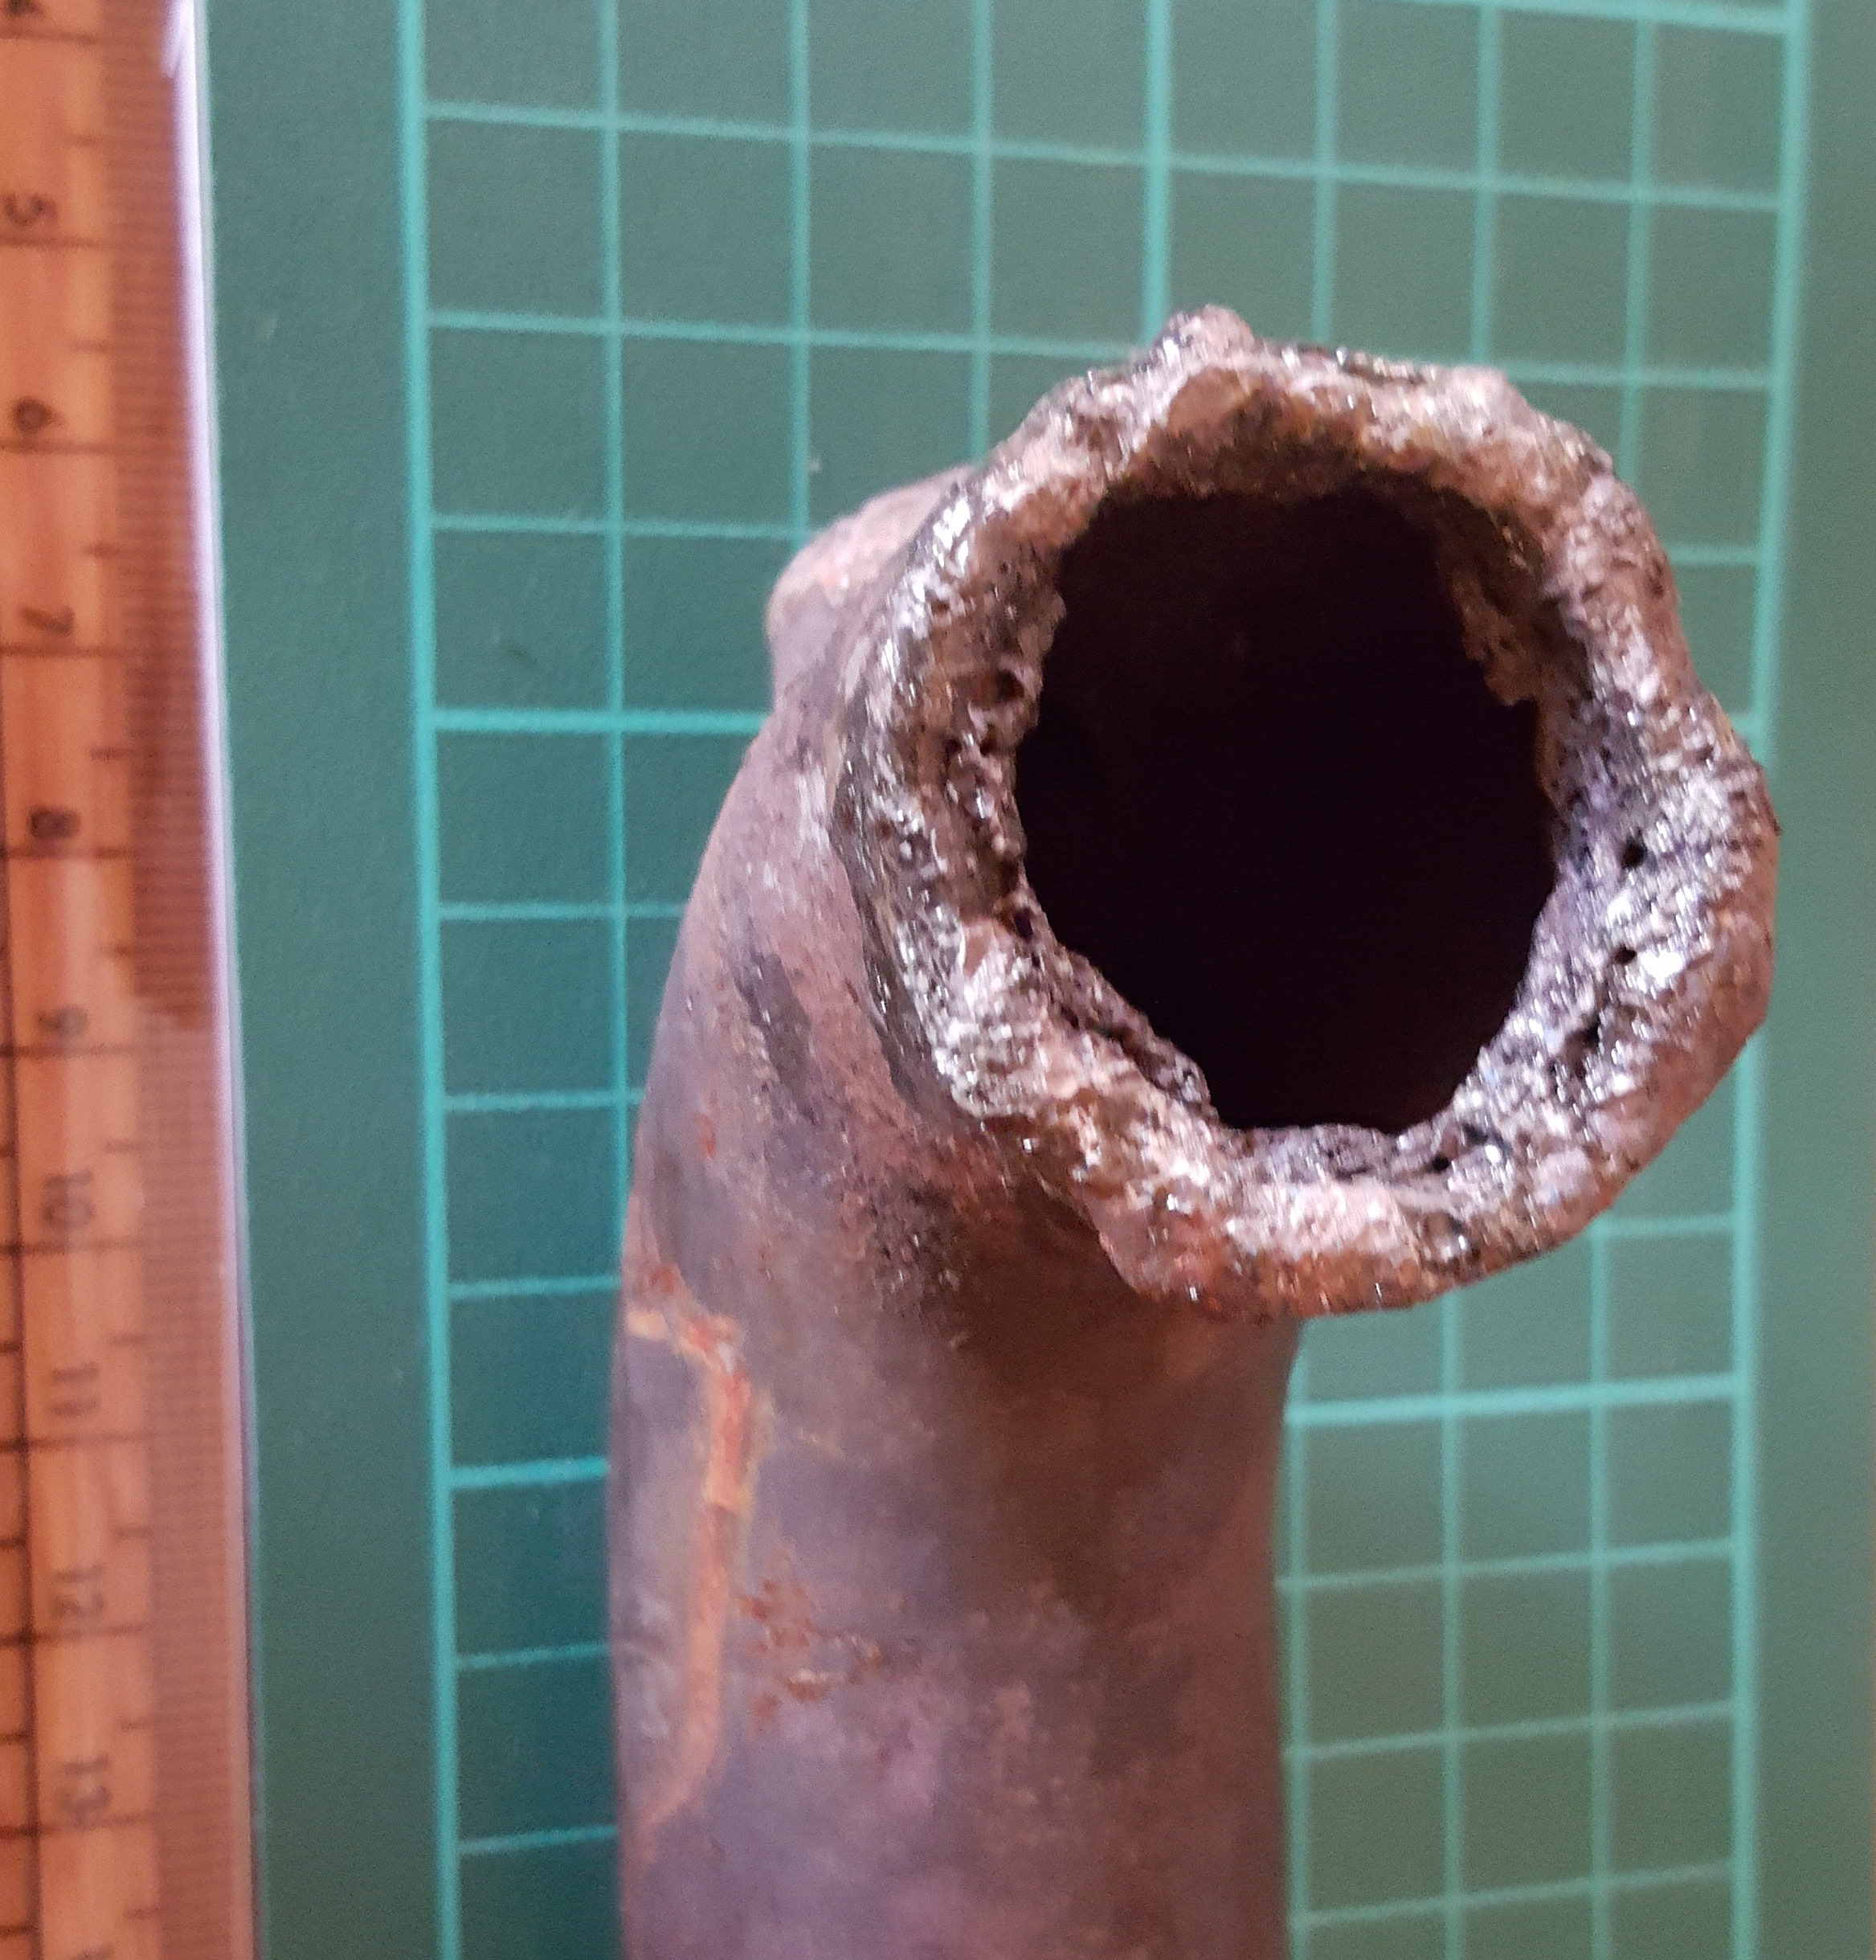
Hoss emptied the retort after run #5 to examine the alumina nozzle that I mentioned at the beginning of this thread. At this point, we had about 1.5 hours of run-time on this nozzle.
We were disappointed to see that approximately 1 inch of the nozzle was missing.
Unfortunately, I was not there when he opened and emptied the retort.
However, he said that he found something very curious.
Rather than finding the broken end of the the alumina pipe as one might expect, he only found a small pile of fine white powder where it should have been.
This makes me think that the alumina itself was eroded and broken down by some high temp corrosion process.
Here is what the nozzle looks like now:
The good news is that we have about 5 inches of the alumina nozzle remaining (most of it is stuffed back inside the steel nipple and coupling. So, in theory, we can merely draw it out a little bit as it erodes.
However, at this rate of consumption, I would say that alumina pipe is not a viable option since it is fairly expensive (I think I gave around $30 to $40 for the pipe).
1 Like
Hi Kyle ,
I bought my first set of 5 tubes from china at around that price plus the same again for postage and although they all broke I didn’t see any of them disintegrate to powder .
I changed over my 25mm nozzle last week because I noticed the glow of the charcoal was getting closer to the fittings on the tank and replaced it with a number 10 tig nozzle , I have to admit that so far its worked very good (20 hours so far ) start up of the 9hp B&S engine have been easier as well .
Dave
3 Likes