I set out to build Matt’s ammo can crossdraft but my ammo can order got held up at the canadian border and returned to Minnesota. And there are no ammo cans around here. So I am now going another direction, the kalle/gilmore style. I wish to run my 6.5 HP 200 CC generator or my 10HP 500 CC gravely walk behind.
I found two large pots that fit together at the thrift store. I put a hole in the top pot and set in a connector for car exhaust systems. The outlet is 1 3/4" diameter.
Not sure yet how I’m going to connect the pots. Here is a high temp silcone seal I made (silicone baking tray). I will use springs to allow for any explosions.
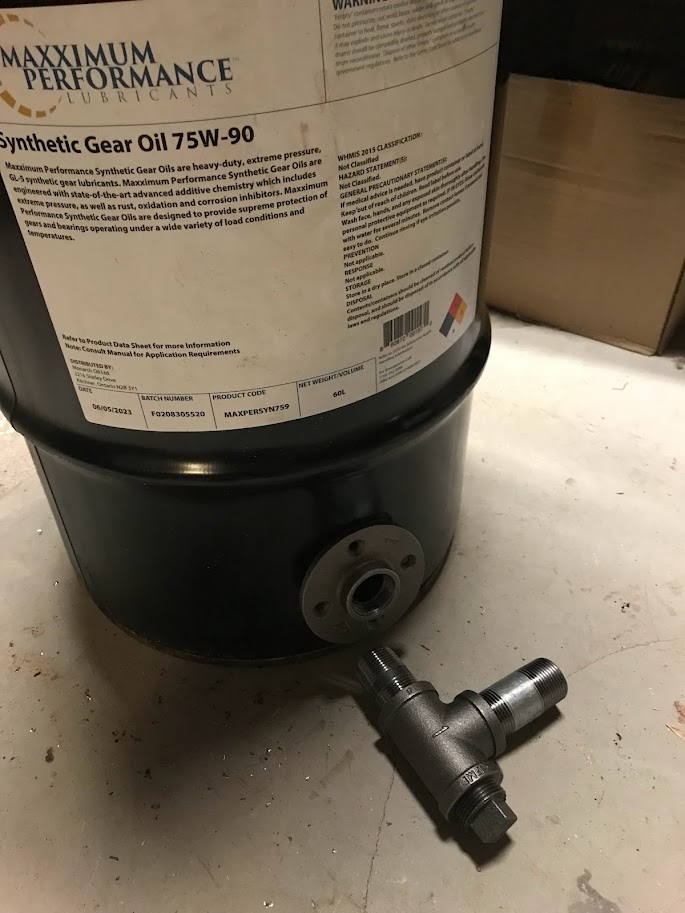
A friend with a welder tacked 4 bolts to the inside of the exhaust piece, allowing this flange to be attached. The air inlet pipe is 1 inch black pipe screwed into the back of the flange
Hi David , great to see another charcoal start , those pots look like they might be too small to give you much of a burn time before your over heating , if i could suggest maybe holding off for a little while and have a look around for any old 25 litre paint cans or small oil drum then maybe you can join the 1 pot to the top of a drum or paint can so its not wasted .
Simple fire is the way to go to break into gasification for sure , the Kalle style gasifier was never tried by myself , but good luck cant wait to see how you get on .
Dave
Hi David , my first simple fire experiment was using a 25L can it worked well enough for proof of concept so to speak , it ran a lawn mower engine for 30 odd mins unloaded before the outlet pipe was getting too hot to touch , once i melted the pipe i decided bigger was better and went on to use things like 100lb propane tanks and then onto 55 Gal drums with sealable lids , i also spent many years playing with nozzles getting them to last and have now settles on only 2 that will work and not cost the earth to replace , make sure you read the nozzles for charcoal post .
Dave
Hi David,
I assume you are filling this through this big outlet then reducing down to maybe 3/4 inch to fit a fan and flare? Dave is right, of course and it will overheat in a hurry. But, if you use a pulse width modulator (PWM) on a small 12 volt inflator motor you may be able to get a nice flare. Once you produce some good burning gas you may even be able to run a small engine for a few minutes. If you decide to give it a go, view this as a proof of concept test. 8 or so years ago (before being a part of this great DOW community) I actually drove my small 18 liter truck up the road for a few miles on a 5 gallon kalle style gasifier. If you can shut things down before it burns up you may want to run your flare gas through a simple burner to serve as an emergency or camping cookstove.
Bruce
I didn’t want to get too ahead of myself, but since you brought it up I was thinking track down the ‘fire clay’ mentioned in gary’s video. I don’t see how to do a flute nozzle for the kalle for this design. I do have a note on the silicon carbine nozzle you mention, I know this design is very hard on nozzles. To start I was going to just wrap the tip in scrap thin stainless sheet. What is the second nozzle material you recommend?
EDIT: I see it now, it’s the pizza refractory cement eh
Thanks Bruce sounds like the consensus here is it’s likely a bit too small to run what I am looking to do although nice to see you’ve built one a similar size and run an engine. I have a small air mattress pump, hopfeully that will do the trick. Yeah, before I install a fill port or do anything too much I was just going to fill through the large port and see if/how it runs and behaves. If it goes on the art shelf, that is fine
All of this assumes that you have developed a way to produce “engine grade charcoal.” Kalle style gasifiers are especially sensitive to charcoal size and quality.
David,
I don’t know why, but it appears from the videos Gary did and the dates they were produced that he abandoned the Kalle style for the later SimpleFire. Might be worth considering when you start over with a larger container.
Hi David , forget the fire clay, don’t even bother with the refractory cement as cost per nozzle verses the life it isn’t worth it .
If you just get a small length of thick walled steel pipe and drill a few holes in it , hence the name " Flute " then that will make a perfectly serviceable Nozzle as explained by Kristijan .
My Nozzle is a Hexoloy piece , my very first 1 is still in my large gasifier and is still useable ( just ) after nearly 6 years and well over a thousand hours run time . not sure if they are still being sold on Ebay , maybe if Tom still has the link handy he will post it .
All the best Dave
I haven’t used mine yet. The thick nozzle I have in mine right now is still working and I have some more thick wall pipe that I plan to use when the current one melts but I will eventually use the Hexoloy one either in my current gasifier or another one.
That’s good to know that they are still available , on a side note , if you mount the Hexoloy , i would recommend using a 1 inch adapter and grind out the thread on the 1 side leaving a shoulder and allowing a plug fit , then heat the fitting up and push the Hexoloy into the fitting , that was the way i did it and no problem with expansion when getting hot then .
Dave
Not sure how I missed it but I just assumed the more complicated Kalle style was the latest and greatest from Mr Gilmore. I should have just done a simplefire. Steve I read your toyota thread and I was enthralled. I don’t have high hopes for this little unit and have already procured some barrels this week for a proper simplefire. But I’m still going to proceed with this little guy, my friend is going to weld this weekend.
Thanks all for the hard earned nozzle information.
In the meantime I found a scrap old kenmore vacuum by an apartment building trash pile. It has a variable speed control built in to the handle, and with metal fins on the inlet not much plastic to be seen. However all the air rushes through the middle, around the rotor and around the wires, brushes, etc. Maybe hot woodgas would destroy it quickly. Also the brushes are making lots of sparks so maybe I’m asking for big trouble passing woodgas through there!
David,
I’ve never done it this way, but you can get the gasifier going by blowing into the gasfier air inlet. I have always used bilge blowers or mattress blowers and pulled the air from the engine end of the system.
Well I appreciated all the information so didn’t want to leave this thread hanging, the base unit pretty much is set up just need a chance to get rural and try it. The four bolts make a very snug friction fit between the pots.
I made a carboard cyclone exactly to scale (except for the cone) based on my 6.5hp 200cc generator to get a feel for the size, and it is tiny. But that’s what the spreadsheet is telling me
While I wait I have started a 16 gallon simple fire. I figure I will use a 3-hole flute for my 5-25 hp applications, and if that gives me trouble I will try out a single nozzle hexoly.
Have also been considering the charcoal situation. My special order 1/8" screen came in, so I built a frame today from scrap pallet wood which was fun.
Finally, I tried novel (to me) charcoal crushing methods. The first was a 3/4" grate I made of thin steel which I thought I could push the charcoal through. This does not work, it just gets mushed up against the grate. The second was a paper shredder I converted for shredding kitchen waste to feed our worm compost. Running it in reverse and spacing a piece of wood 3/4 or so away from the spinning deathtrap made smaller pieces of charcoal and dust. Having never welded together a gilmore style charcoal crusher, I don’t know if it makes more or less fines.
Hi David looking good so far and it wont be long before you will flaring and running a engine i’m sure .
As a temporary measure you could maybe crush the charcoal a few ways without making too much mess , one of the ways i do a rough crush is when i am taking charcoal out of my fire i fill up a medium sized saucepan and take it outside where i empty it into a 25 litre drum before putting the lid on i grab a piece of wood roughly 2 x 4 and crush the charcoal down smaller to allow me to get more into the drum , when i do run it through my charcoal crusher i am amazed at how good a lot of it is in size before i even crush it again .
Or maybe get a pillow case and 1/3rd fill it with charcoal and gently bash it down with a piece of timber to it feels to be about the size you need .
Dave