I like screw type chunkers because of lower cyclic loading.

I like screw type chunkers because of lower cyclic loading.
Hi.
A collection of small DIY spiral-shear systems are in this video.
It does CC languages translate pretty well:

S.U.
Screw style chippers generate a lot of friction as the cutting blade is dragged across the wood. Rebak is a shearing action and doesn’t generate that kind of friction though the blades need to be sharp in order to shear rather than crush.
If the chipper is PTO driven, the tractor probably has a surplus of power so a screw chipper works well. But if the chipper is being powered on a stand along basis, Rebak should be easy to drive. And if you use a flywheel on a rebak chipper, it can handle bigger branches as long as you let the flywheel recover its speed.
Thanks a lot for the input. I will have to just go slowly and see. I did do a fair bit of ‘farmers research’ as you called it. And in that regard it seems to be about average for the kind of wood I will be processing. And as I understand mechanics, the hip bone is connected to the back bone is connected to the neck bone is [etc]. Meaning that if I stick something in the chunker that is too thick, the weakest part will break. The belts are for sure weaker than the axle so I imagine the force will ‘escape’ over there rather than twisting up the axle.
I will go slowly and incrementally and see if it holds up. Go slowly with what diameter of wood I feed it too.
Next step is to make up a 1:1 size model using scrap wood. Just to see if it all works out in terms of ergonomics and how the parts fit together.
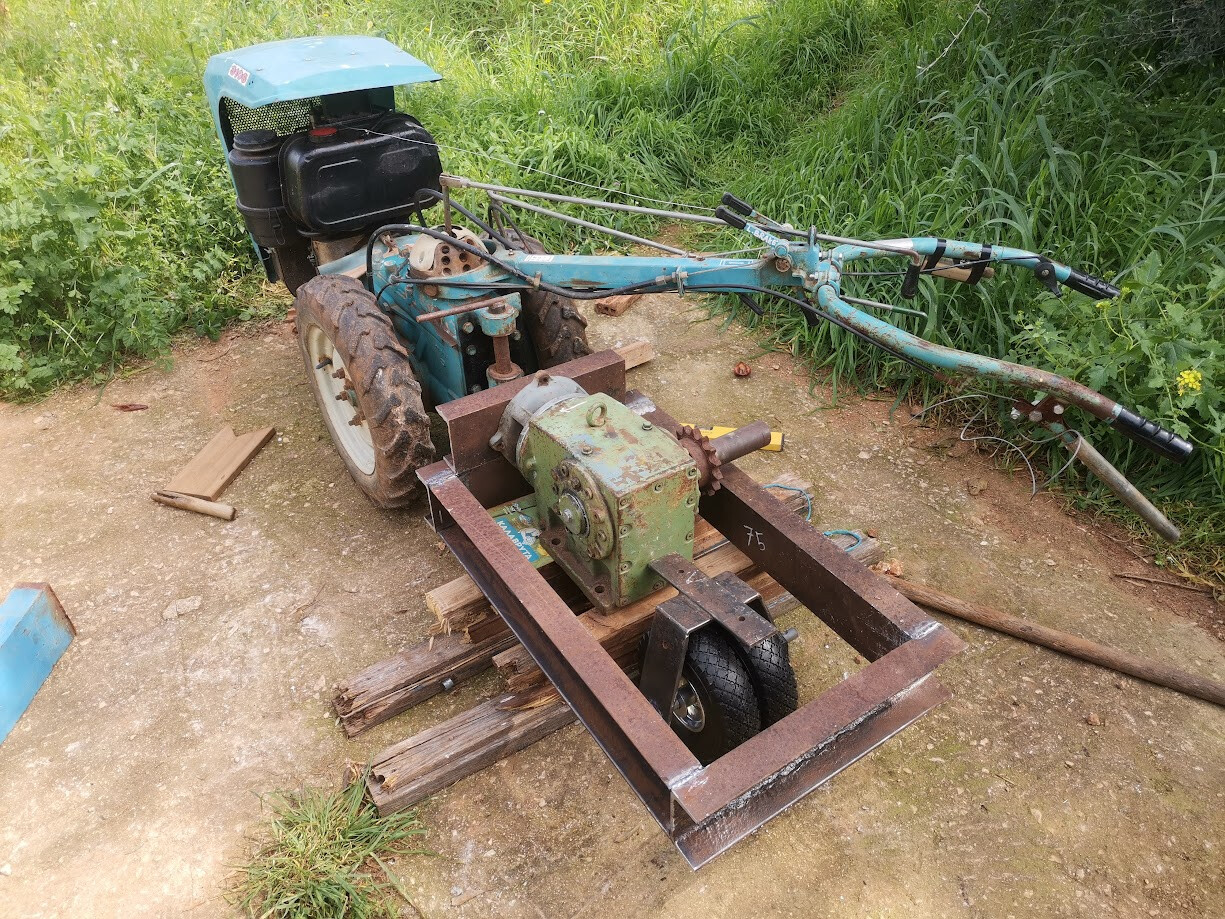
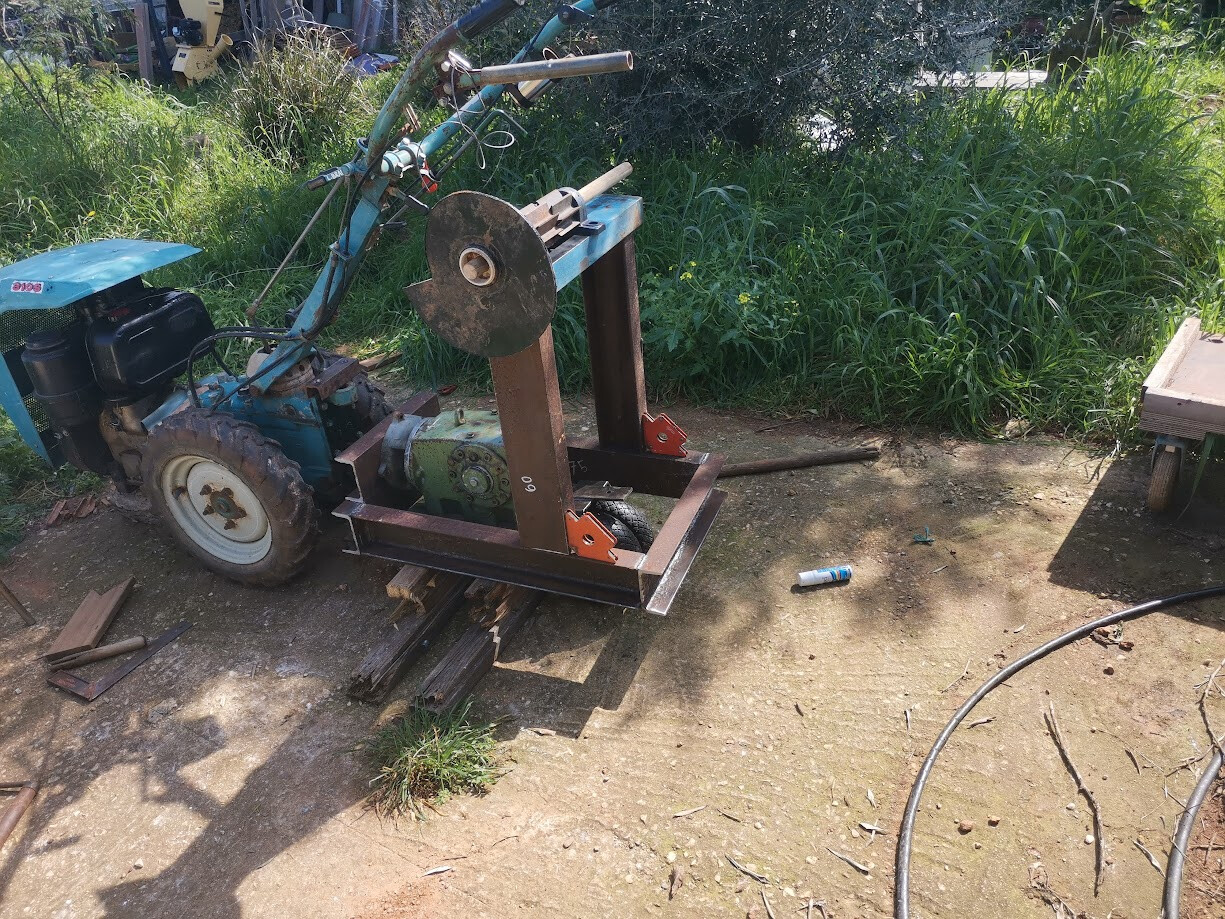
Hi there everyone! It’s been a little over a month and I thought it was time for an update. I didn’t post about the prototyping and component gathering phase because I was just too busy. But now I have started welding some things together and I actually have something to show.
First a video showing the prototyping. I just threw this frame together in about an hour from absolute garbage wood. But it served its purpose in giving me a 1:1 model that I could stand around and think. Do ‘practice cuts’ and try out the ergonomics. The top PTO is 25mm / 1 inch at 843 RPM. The bottom one is 35mm / 1.37 inch at either 520 or 700 RPM. Their directions are different. The reducer in the video is 12:1. With an RPM of 843 for the top PTO, I will end up with 70 RPM on the working axle.
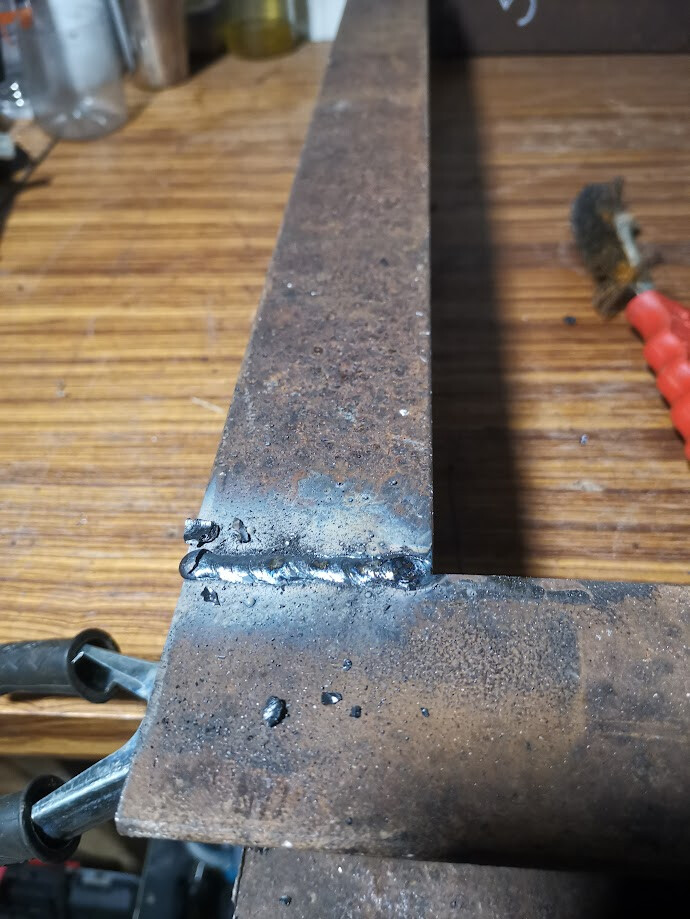
Here’s a shot of the first bits of frame I welded up. Had a local machinist cut the beams because I still find it difficult to cut very straight cuts with the angle grinder, and these need to be spot on if the machine is gonna be square and plumb.
My first weld on this thick of a material. I find that it is much easier to weld thick material then the thin stuff I am used to! Happily surprised by that!
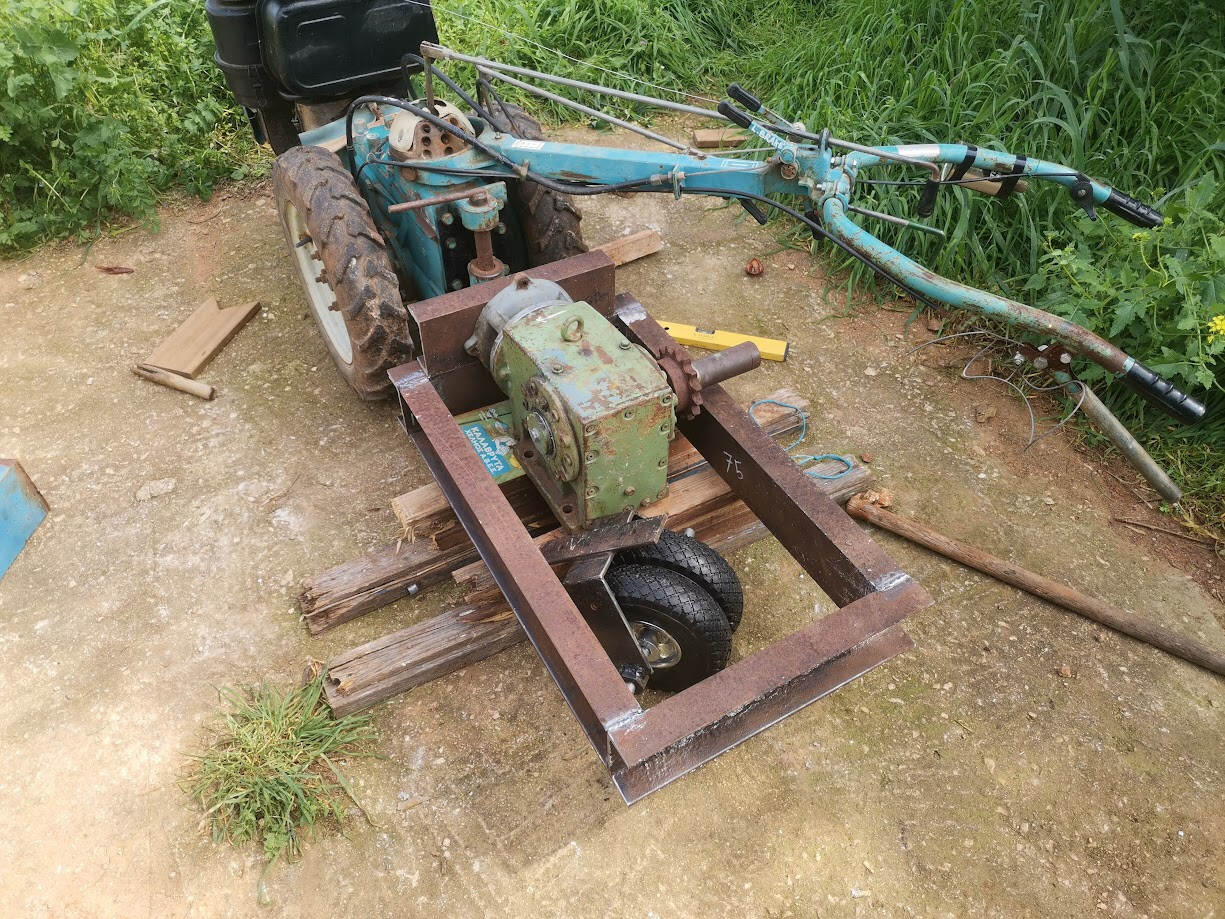
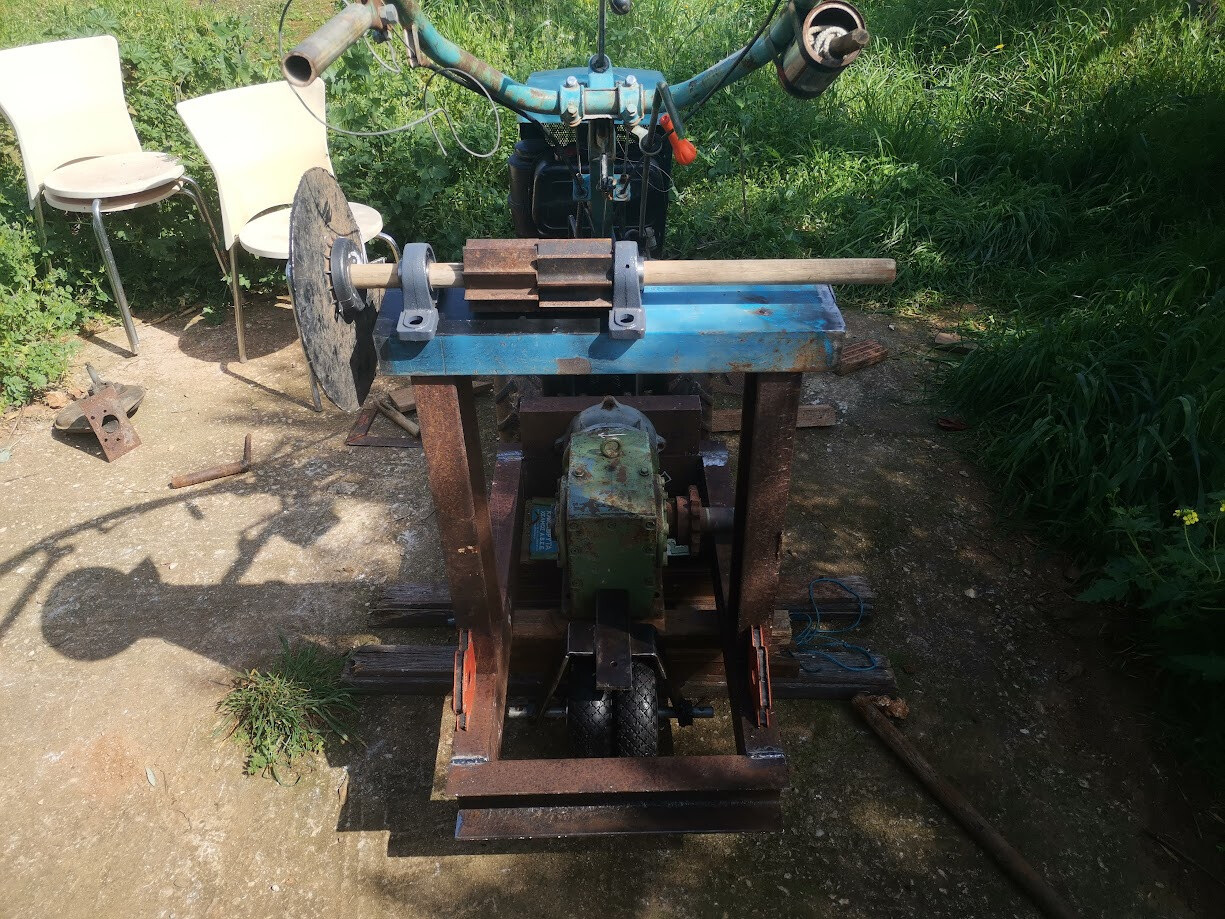
I also welded up a frame to hold the backwheel. And in this picture you can see it turned so that the tractor would turn right.
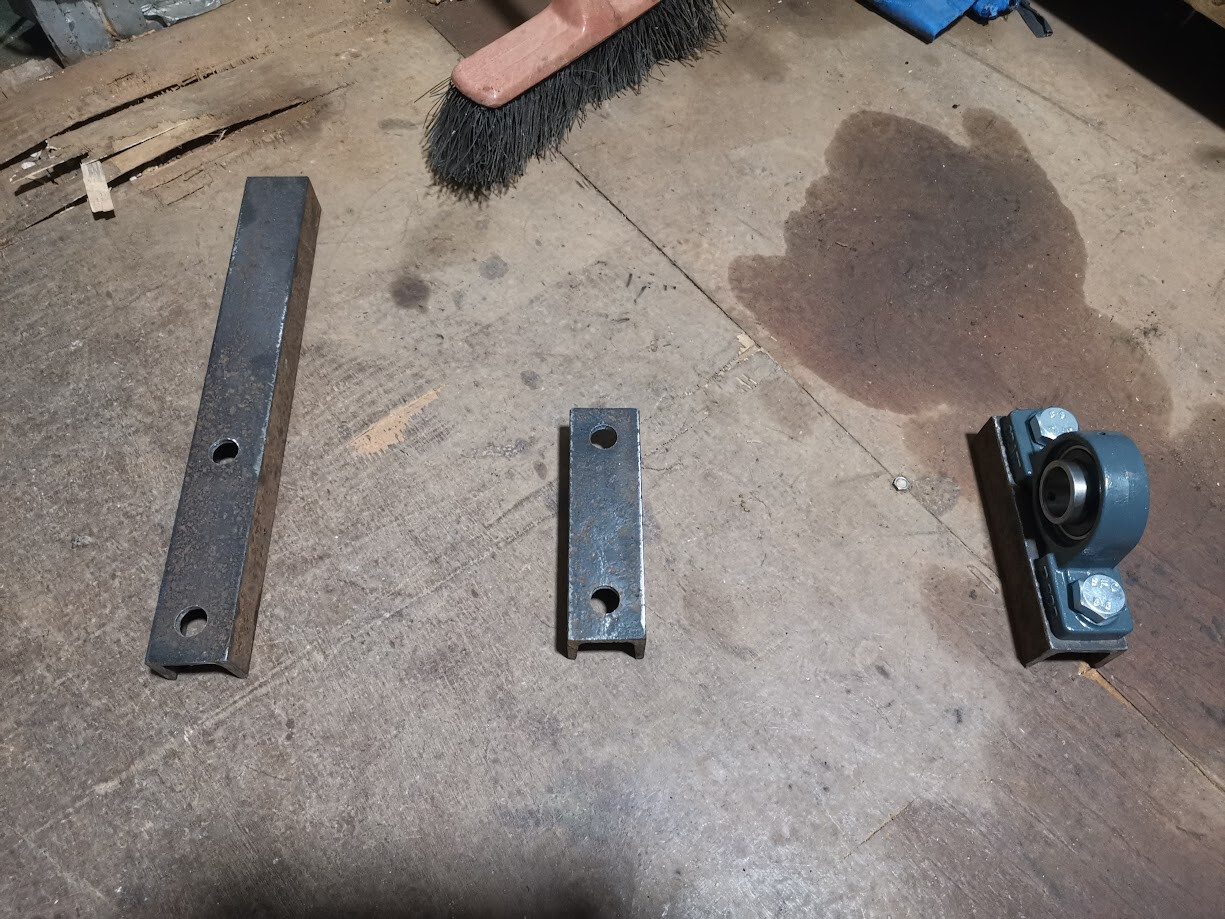
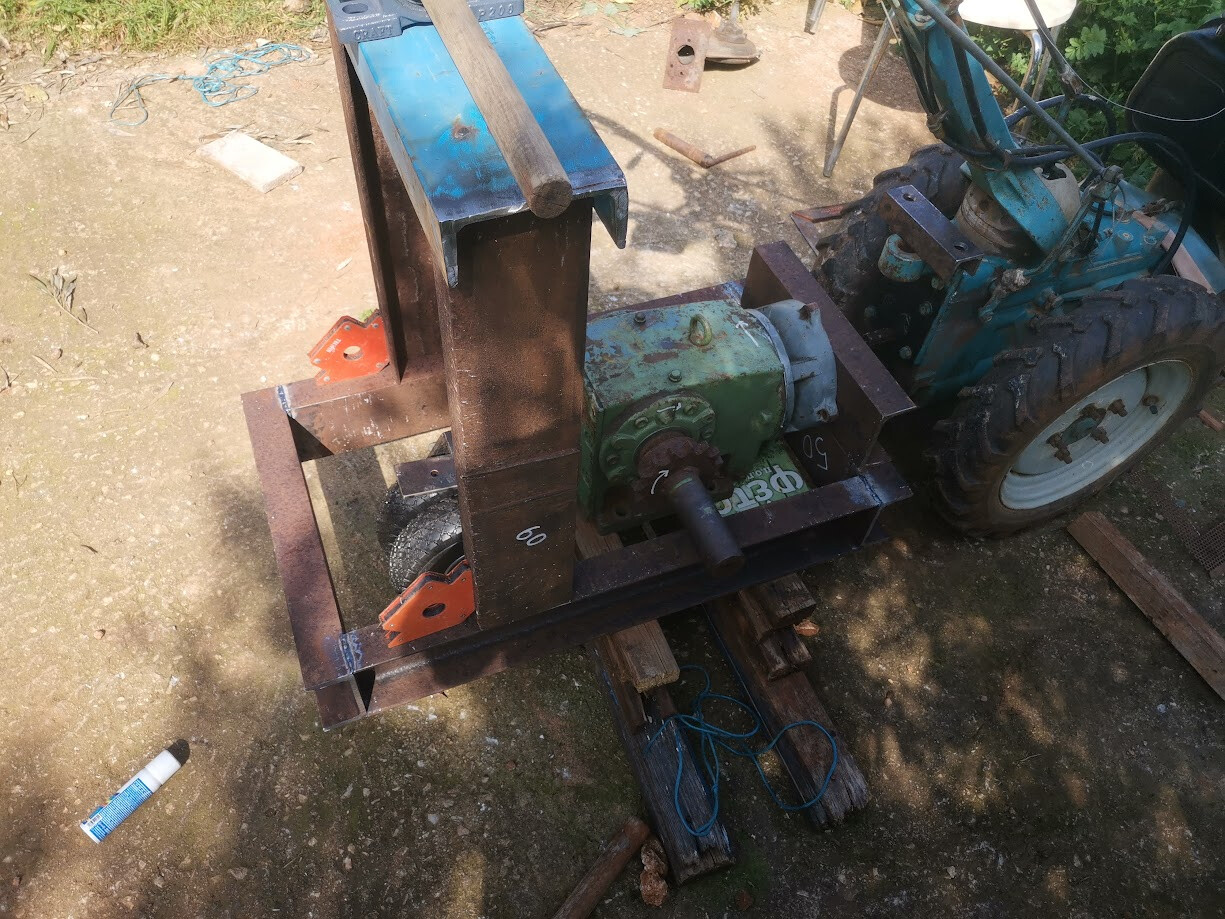
Supports/spacers for the bearings I made up. As you can see in the video, the chipper blades are a bit larger than the bearings; spacers were needed and I also needed a way for the woodchips to pass underneath of them. This will do both. The long one on the left will support a cutting platform for the chunker as seen in this video.
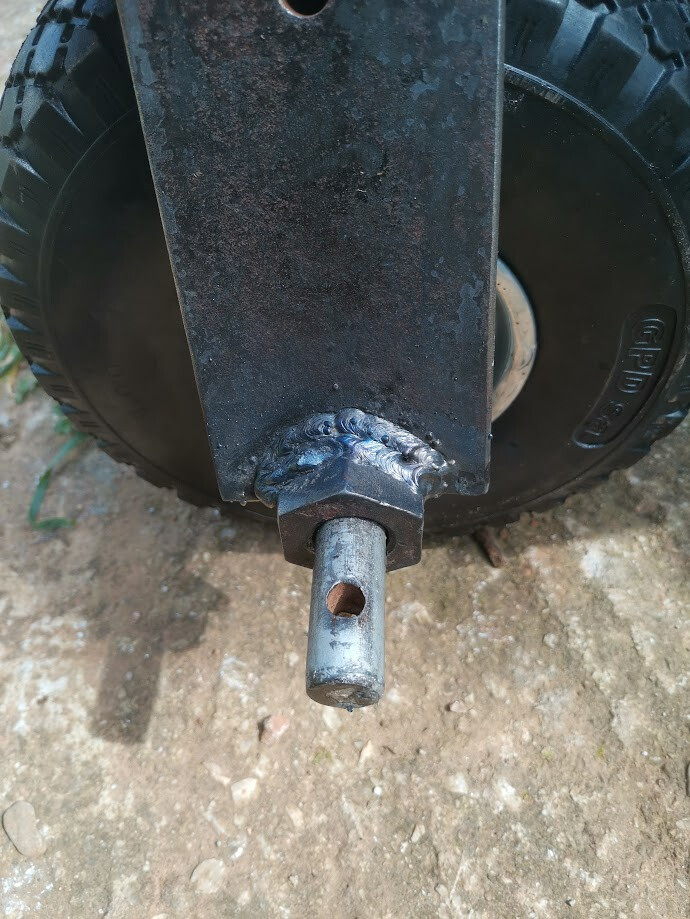
The ‘hubs’ for the axle were some old, imperial nuts I found lying around. Everything is metric here so I was never gonna use them. This should be plenty sturdy I imagine. They are about an inch thick, maybe more.
And then finally three pictures of all the parts in place.
I am very happy with the progress, I have plenty of time to think about every step and to come up with the best/sturdiest way to put things together.
Looking forward to your feedback!
Edit: Corrected a few mistakes
Hello,
You’ve already made good progress on your machine, congratulations! ![]()
I don’t have much experience in this area, but I’ll still give my opinion. ![]()
Personally, I would add two small diagonal braces (one on each side) to increase strength when the belt is under tension.
I would also add a forward/backward adjustment at the top (the blade area) to adjust the belt tension.
Cheers for the feedback!
Diagonal braces are definitely in the pipeline. I will probably use that same C-Channel that I used for the spacers. And I have thought about how I could build in some adjustment. For now I have settled on not welding the uprights into place until I get the belts I need.
And I also intend to make a belt tensioner which will act like a clutch. Like every homemade chipper / chunker I have seen online this thing will look and feel like an amputation waiting to happen. So i want to make a footpedal on the side of the machine that has the chunker. It will allow me to step the fuck away from the machine and it will automatically just stop working (or at least, the deathtrappy parts of it).
This clutch would look like a horizontal bar that you press down whilst you work, it connects to an axle that travels through the machine in the same direction as the working axle. It ends up on the other side of the machine, where the belts are; and its held by two bearings on each of the big uprights. The foot pressing down will engage a similar cam-mechanism on the other side, which will hold a drum that presses against the belts.
I was going to suggest braces. It is high so there will be vibrations that are leveraged pulling at the welds at the bottom, then you will also have some twisting because the torque is not centered. I don’t know if it has to be c-channel strong. You could probably get away with typically less expensive angle iron, however, you use what you have and what is your best option. ![]()
As a note, the big miter saws for wood can work to cut straight with a big grinding wheel on them. There issue is the motor and cooling, and little bits of metal dust.
The other option is essentially a motorized hacksaw. David Gingery has one in his books but there are certainly other designs. They are slower then bandsaws or chop saws, but typically less dangerous and the blades tend to be cheaper. However, getting wear across the whole blade is an issue.
I have the c-channel and I’d rather overbuild it… ^ _ ^
I have thought about investing in different tools so I can do all of the work myself. But it’s not like I am doing this kind of thing on a daily basis. Not even a yearly basis. So I decided to pay the 15 bucks that the machinist wanted and do all the parts who don’t need to be exact myself. Especially the upright supports needed to be exact, if they’d be off by a mm or two in opposite ways I would be in a lot of trouble. I guess I could fix it with a thick amount of weld but I don’t want to risk doing things improperly when I will be working with 144hp in torque lol (12 hp x 12 from the reducer).
If I am going to invest in something its probably going to be a proper bench drill and some decent drills to go with it. That I see myself using on a monthly or weekly basis!