Here is a sketch of what I have in my head. None of this actually exists yet, as I am currently calculating material cost. But, before I nail down too many details, I’d like to run it by those who may have swum in these waters before.
I’m using a 55-gallon Gilmore-style retort, just as Gary has described. It sits inside a cinder block housing underneath the oven. The weight of the oven is supported by the steel plate which has one 12” hole in the center, and as many 1” holes as necessary to supply pre-heated secondary air to the inside of the oven chamber. The pyrolysis gases exit the retort and pass through a 12” clay pipe to the underside of the soapstone oven floor, supported by a loose layer of firebricks, the layer being open on the sides and back. The hot gases flow out toward the side and back openings, where the secondary air nozzles are located. The gases ignite and should completely combust inside the oven chamber, transferring most of their heat into the thermal mass of the oven.
I am also planning to mount wheels on the bottom of my retort, and put in some type of steel rail on my concrete base to safely roll the hot, loaded retort in and out as necessary.
Hi Alex, Here is a furnace I made for my shop so I can keep making charcoal in the winter and capture the heat to keep me warm. The paper and pictures are posted in the “files” section found under the “forum” tab. Here is the link http://driveonwood.com/content/charcoal-making-furnace
Your system will work, but how are you getting the container of charcoal out? How is air getting into the bottom of the retort? Are the hole just missing from the drawing? I’d forget about the 12" clay pipe and push the retort right up against the 12" hole in the 3/4" plate. You can see from my design that a scissors jack is used to push the retort up against the metal lid. My metal is 1/4" which is light. Had to do some serious reinforcement with angle iron to keep the top from warping. Your use of 3/4" should not cause you that problem. Give the burning gasses lots of room to escape. If they get throttled down after leaving the retort, they may cool off and smoke. Also, be sure to use dry wood. It is the end of winter and I have a little bit of my wood supply left. I also have lots of charcoal wood stacked next to the horse’s fence. It got put there last October so is not as well seasoned and you can definatley see a difference in how it smokes.
Until later,
Gary in PA
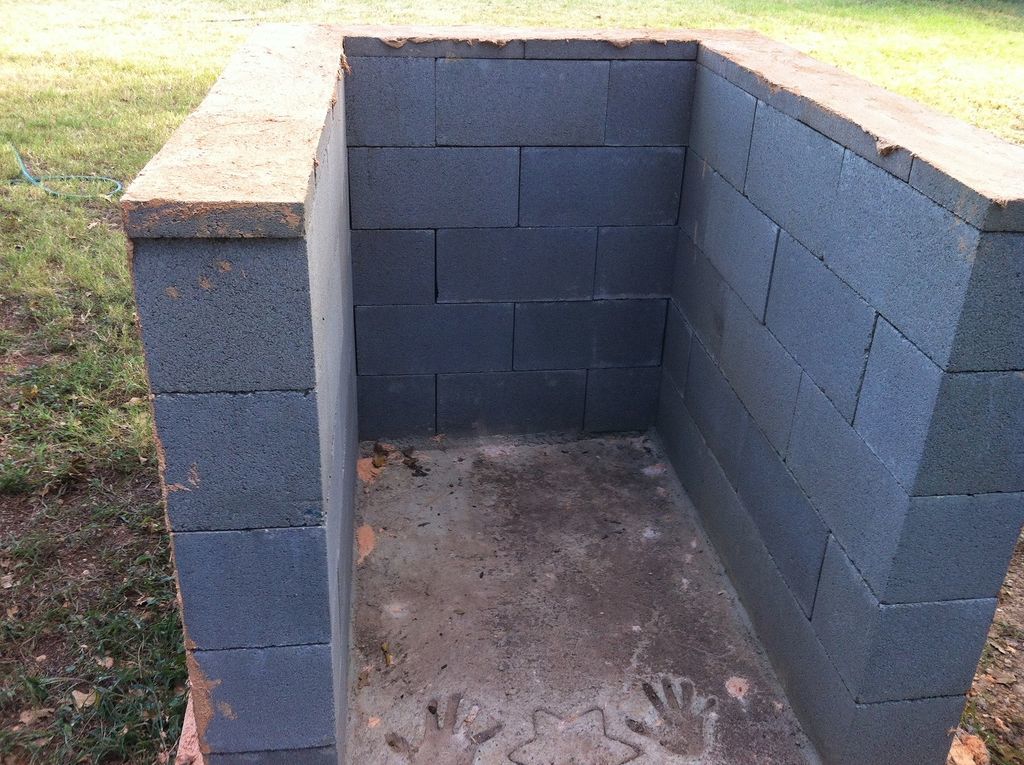
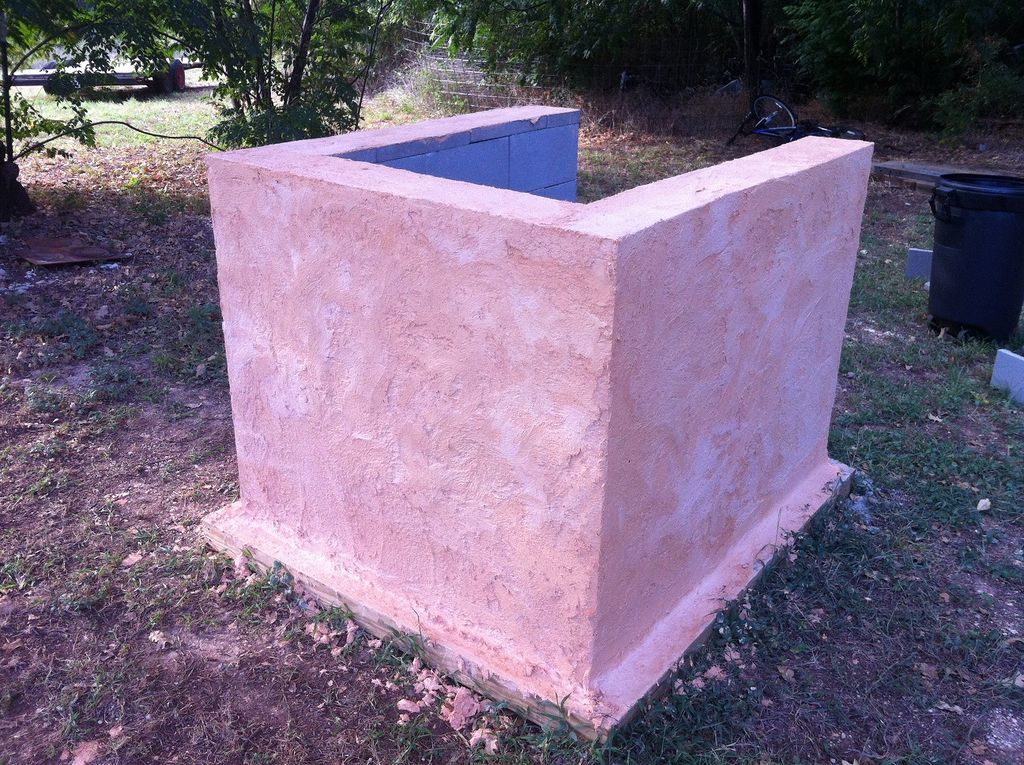
Here are some update photos of my earth oven retort. There have been a few discussions the last couple of days about capturing waste heat from charcoaling, and this is my attempt to do just that. I am using dry-stacked concrete blocks as the base, within which my 55-gallon retort will sit. I used a commercial product called QuikWall http://www.quikrete.com/productlines/QuikwallSurfaceBondingCement.asp to bond the blocks together and give it a nice stucco-like appearance.
I am using the top off of an old rusted out wood cook stove, and will remove one of the “eyes” to provide a vent for the hot gases to exit the retort and heat up the thermal mass of the oven.
My next step is to collect a few 5-gallon buckets of good Brazos River clay, mixt it with sand, and apply a 4" thick layer of “cob” over my steel plate, to serve as the oven floor.
The idea is to transfer the heat into the thermal mass of the clay oven, which will be built on top. How long it retains the heat is directly proportional to how much clay insulation I use to build it. I have a friend that has a brick oven mounted on a trailer, and he takes it around to farmer’s markets on the weekends, cooking brick oven pizza. He said that he can cook pizzas all day on a Saturday, and the oven will still have enough latent heat left to cook Sunday roast beef the next day.
I’m also planning to enclose the back of the concrete block base, and pack unseasoned wood around the retort to serve as a drying chamber, and install a coil of copper pipe somewhere (haven’t decided where yet) to heat water. The eventual plan is to make this oven the centerpiece of an outdoor kitchen, complete with a TLUD stove, charcoal grill, 3-compartment sink, and hot and cold running water. Helps to keep the wife and daughters on board
Alex, are you saying that your friend fires that trailer oven up in the morning and then lets the fire go out and then he can use it for all day and part of the next day? Must have some serious mass (and squatty tires:-)
No, he keeps a small wood fire burning inside the oven chamber all day. You pretty much have to in order to maintain the 700-800F temperatures necessary to do brick oven pizza right. At the end of the day, he lets the fire go out, but the oven temp will still be in the 300-400F range the next morning - just in time to put the roast in before church!
As far as the trailer goes, he has two 3500# axles - and needs every bit of it.
I built one of James Hookway’s charcoal kilns, and it worked great.
It’s all SteveU’s fault, because he was one of the commenters, and said it looked like “the best thermally/fuel efficient that could be made out of common obtainium materials.”
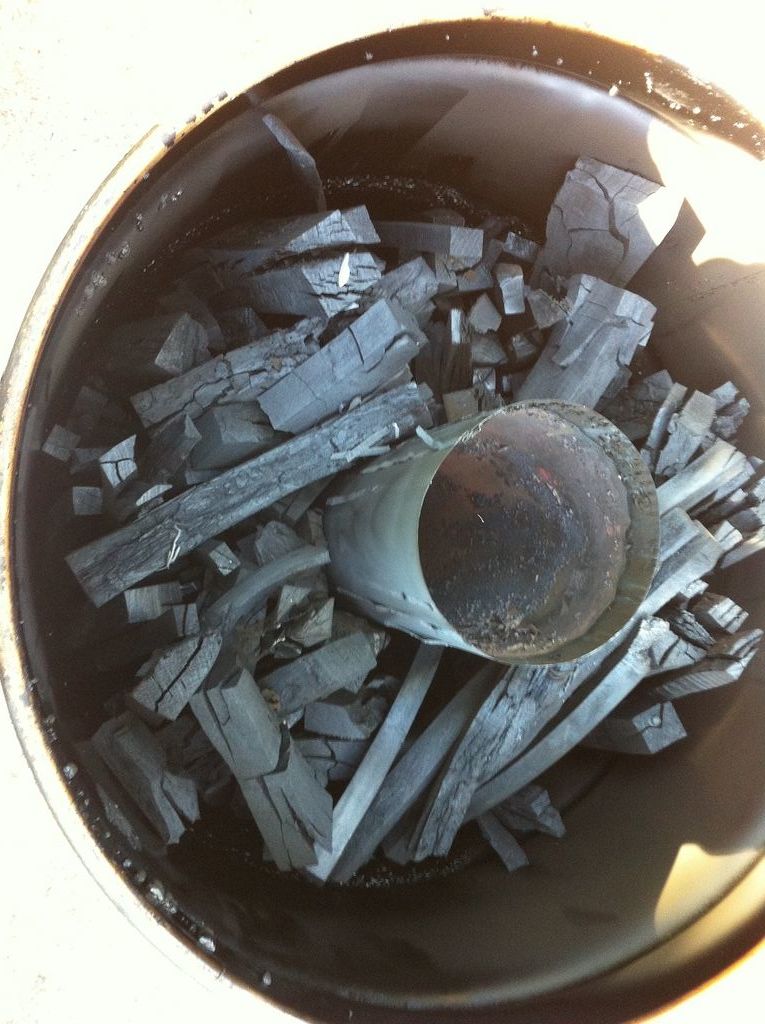
I got in too big of a hurry and didn’t add as much insulation around the barrel as I should have, so the only char I got was from the top of the barrel where all the heat was concentrated.
Next batch, I’ll insulate better, and take the time to weigh out all my materials beforehand, and compare them with yield afterward. The whole setup cost about $40.
That is quite impressive! How much is he asking for his plans? They seem fairly self explanitory which lowers the value of his plans to someone like me.
I didn’t order the plans - not sure if he’s even still offering them. I just “rednecked” it from his demonstration. I used 6" black stove pipe (three 24" sections and one elbow), and a 3/4" pipe nipple for the steam vent (fits the smaller bung). I traced the outline of the stove pipe onto the bolt-on top and bottom side of my barrel, and cut the two holes with my jigsaw. Should be a fairly tight fit. Since the joints are not structural, I did not weld the joints, but instead sealed them with a mixture of water, clay and wood ashes to seal off the air gaps. Lastly, I drilled a 1" hole in the top of the horizontal portion of the stove pipe inside the barrel, so that the pyrolysis gases would be sucked into the burn chamber. Pack your wood inside the barrel, putting smaller pieces at the bottom, and successively larger pieces as you go up. Don’t put in anything bigger than about 3 inches in thickness. Bolt on the lid, and cover the barrel with some type of fire-resistant insulation, and feed it like a rocket stove for about 3 hours, then damper everything down and let it cool for 24 hours. I used mostly mesquite - smells like barbeque when you open it up.
I smoked two Thanksgiving chickens on Thursday. Results were excellent!
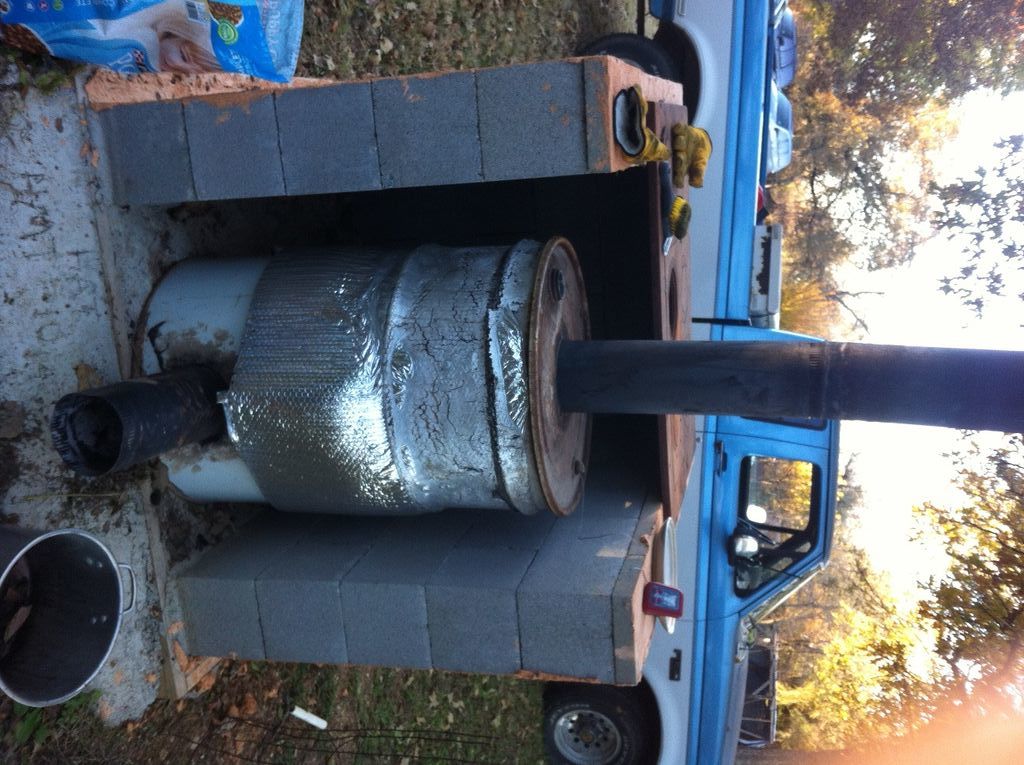
I took out the vertical pipe section inside the barrel, and stacked concrete blocks on end to raise and support the grill just under barrel lid, where all the heat accumulates.
First picture - The retort barrel sitting in it’s eventual home, on top of which a earth oven will be built to capture the waste heat - but that’s for another day - for now I’m still wasting the heat.
Second picture - Fire in the hole!
Third picture - I used the small bung to insert my meat thermometer into the chicken.
Fourth picture - I positioned my oven thermometer on the grill next to the chicken where I could periodically peep at it through the large bung. Notice the chicken wing tip next to the thermometer.
Fifth picture - If I needed more heat, I added a handful of grilling-size charcoal.
Sixth picture - If I needed more smoke, I added dry mesquite chips, slivers and chunks.
Seventh picture - I spent the intermediate time with my Fireside Friend, prepping fuel.
The goal was to maintain 235F inside the barrel, until the internal temp of the bird reached 165F. Took about three hours. I have to admit it was a little bit of a song and dance until I got it regulated. Smoking meat without petroleum or electricity is more of an art than a science. Was it worth it? You bet! We were so anxious to eat the proceeds, that I never got a chance to take a picture of the final product - it disappeared too fast!
Alex,
I do like the Hookway charcoal maker. I just have to make a few adjustments to turn mine into that.
Is that a 1995 Ford? I believe I have the same truck including color. Mine’s a F150 4x4. My project after the Dodge
It’s a 1992 5.0 V8 with an E4OD tranny and 3:55 rear end. Has 313,000 miles on it, but is straight and rust-free. Biggest problem is the tranny is on it’s way out. I have Park, Neutral, 1st, 2nd and overdrive. No reverse or 3rd gear. I have a friend that owns a transmission shop and he has quoted me a price of around $1500 to rebuild it, and add all the later E4OD upgrades that didn’t come on the older ones. Still saving pennies for that, but it will one day burn wood. My immediate attention is small engines run off charcoal - a little more doable for me at this point. I just have to learn to weld without burning holes - practice makes perfect . . .
Didn’t get pictures of the retort-smoked chicken last time, but managed to sneak one in on this batch. The cast iron dutch ovens are for transport only - there’s nothing but a grill inside the smoker.
My mouth started watering immediately. I could almost smell the smoke. The pics are coming out very large, maybe you need to resize your photos before you post. I had the same problem a while back and I resized some, but then I reset the image size on my camera and it fixed the problem. Mmmm, I am so close to those birds.
Pepe