I guess I have made twenty or so wood gas stoves, and have even purchased some very nice Stainless Steel versions, but my two workhorses are now a pair of TLUD stoves constructed from found items, based on the Anderson Champion. I just posted a short YouTube slide show/video, showing some of the construction, and then a view of the actual flame doing the heating. This stove does not smoke! At the very end, I dump the char into a pan of water, and lay it out to dry. Here is the link to the video. http://www.youtube.com/watch?v=vHms7E0VAio
This is a nine inch diameter TLUD with a 7 Kw firepower that I use for longer or higher powered water heating and cooking chores. I started with a nine inch stainless steel pot, some used six inch stovepipe (two pieces tacked together to make the 9" diameter), and a section of a water heater tank. A layer of old tin roofing is inserted into the water heater tank to provide some insulation, with some fiberglass inserted between the two. The lid is part of a 55 gal. drum with a hole that a grapefruit juice can sits over. The can is wrapped with ceramic wool high temp. insulation. The damper valve is used to restrict the primary air when using very dry fuel. Fuel is mesquite slivers topped with a large coffee can of sliced cardboard slivers. A few drops of alcohol and a match lights it off, then I put the cover on, add the six brick to hold it down tight, (plus they hold the grill and the pans/pots), and let it go. A short video at the end shows the process. No smoke, plenty of heat, and at the end, lots of biochar/charcoal. I heat the water in the large pan to 160 degrees. The smaller pan is brought to a boil and fills two Stanley Thermos bottles. After that, we might boil a dozen eggs, or cook some veggies. The stove runs for 45 min. to 1 hr, depending on fuel density. I have another 6" TLUD that I also use. They are both based on Dr. Paul Anderson’s Champion Stove. You can find a .pdf on the web showing how to build his design. I have another video showing how to make Pita Breads on that stove. The nine inch stove runs a bit hot for making Pita breads, and takes serious effort to prevent burning them (if burnt, they do not make pockets!) The larger stove does an excellent job with a heavy Lodge Cast Iron Wok.
After 20 months of use (about 3 times/week) the grate at the bottom of my 9" TLUD stove was worn out and ready for replacement. I was about to drag a big hunk of steel plate to the plasma cutter when I had another idea. One of my ten inch carbide miter sawblades was in the sawblade collection even though it was totally worn out and missing several teeth. After clamping it down, I cut some notches with my thin cut-off wheel, and bent the teeth upwards so it would fit in my 9" stainless pot. Then I drilled some holes, but this time I wanted to reduce the primary air…so I drilled fewer holes. I boiled some water this morning and the new grate worked perfectly. Basically lit the stove and came back in 30 minutes for over three gallons of very hot water, plus about a gallon of hardwood mesquite charcoal. (Not a bit of smoke, either.)

Thanks Ray. I can think of a few things for this while I make charcoal.

There’s a doc on their website with build instructions, but it’s pretty simple. I find the heat produced is a bit excessive, but clearly better than fiddling with an open fire. Possibly fuel capacity could be reduced with some engineering. There seems to be a loose end in the instructions, mention is made of a 4" off cut from another pail, which would serve as a regulator for primary air. Apart from making good charcoal / biochar, I think it will make a good tractor heater, running the exhaust through a stove pipe, as would be done with a tiger torch. In that mode charcoal would give a slower and milder heat.
The only trouble now is that steel pails are scarce - who decided we need every pail made from plastic?
Garry Tait, MB
Gary, thanks for the link…she is pretty! When I first made my 9" TLUD, Dr. Paul Anderson mentioned that he saw no need for that much firepower for normal cooking, which is probably true. If you follow the link I gave showing construction of my stove, you will see the 9" diameter being reduced by using old stove pipe as sacrificial liners. I have lots of used stove pipe because my house heating stove is in the basement of my three story house (about 46 feet of 6" pipe), Just lay a couple of layers of pipe inside the 9" cylinder, and as they burn out, just add another. Cheap! She was regulating air flow by moving ash at the base, which is a good idea, and cheaper than my Wayne Keith Style valve. I light the stove with small paper pieces, and once it is going, I completely shut off the air at the bottom, until near the end, when I open the valve, and then eventually add a blower powered by an AGM motorcycle battery. My stove never smokes as much as the one she is showing, but I use smaller wood that is bone dry. Yes, steel pails are very scarce, and they don’t last very long. I dump my glowing char into large stainless bowls filled with water. I pour the water and char through a screen of expanded stucco mesh into a white plastic bucket, and then put the char out to dry. The char from this stove, when dried, and run through my charcoal grinder is my best “engine grade” charcoal.
Oh, one other thing. I like to wrap the steel riser with ceramic wool insulation, wrapped in aluminium foil. The riser is a juice can that has a very short lifetime, but juice cans are free.
The topic of TLUD’s is fascinating. I like the idea of the steel pails, especially for the developing world, because those folks who really need better fires don’t have tools or resources to do better.
I have been putting my TLUD’s through a lot of work, they are showing wear after many burns, but I’m impressed how well they have held up, I think the atmosphere in the burner is mostly reductive. The plan they provide calls for half a coffee can on the original pail lid, which works very well.
The girl in the video seems a bit cavalier with the operation, but I’m sure it’s far better than what she grew up with. She is pretty, from Costa Rica, or southern Nicaragua. I spent some time in Nicaragua years ago, some beautiful women there.
My next vision is to use a bulk bolt / chain pail, taller and about 10 1/2" at the bottom, and fabricate a 9" cylinder from 26 or 29 ga stainless, protruding through the bottom of the can. That will tone down the heat, and should give an hour to an hour and a half burn time, and be a good height for cooking.
Regards,
Garry Tait, MB
Been thinking about replacing my ventless propane buddy heater with a ventless biomass heater that makes charcoal for my shop. A small cone kiln on top of the bottom half (grate shaker) of the bucket a day would be one way to make heat and charcoal continuously. But new territory.
Batch mode is OK with two for longer time at the shop. An hour shop time is common also so the tlud would work nice at that time. I like the Garry because of the simplicity but looks rather smokey. I can put up with some smoke after all I weld in there with a power vent. Could also use the power vent to start the stove. I like the Ray stove but kind of complicated. But little smoke…!
Would need to be a bit on the large side and would want to replace the pot of food with a large heat sink…
Comments…! 
in my experience, once the pail TLUD is running, especially with the coffee can neck on the lid as they show in their instructions, it runs very clean, like a gas stove. Outside in the cold it just produces a plume of steam, like a gas furnace vent. It seems to throw a bit of creosote some times when it gets right to the bottom, but I’m using a model with no regulation of primary air. I expect that regulation of primary air would give far better control. Pretty easy to throw one together and judge it for yourself.
The size of the wood charge is decent for a heating application, and the exhaust gas, if I could call it that, is clean enough generally to pass through a heat exchanger with little difficulty I think.
Garry Tait, MB
The TLUD’s are not very tolerant of damp fuel, btw - as soon as the moisture content starts to go up, they are hard to light, and don’t produce nearly as much heat. I’ve seen some models in India where they have wood laid right up on the side of the unit, using waste heat to dry down the wood.
Garry
OK here’s the nuts and bolts.
https://picasaweb.google.com/m/viewer#album/114261170173561967216/5604193666753698929
Well, times about up… Till next year or Argos… Happy New Year…!
The Picasa link didn’t work for me. This is another link for the document. As I mentioned, cutting 4" off the bottom of a second pail to make the stand leaves a perfect part for regulating primary air through a duct / damper, should nest quite tightly, few sheet metal screws and some rtv…
For lighting, I’ve found using strips of newspaper mixed with small kindling works best, and to get it off to a good start, place the stand on the open TLUD, it serves as a chimney.
If the wood is too coarse sparks can work down lighting wood from beneath resulting in a dirty fire. My fix for that is to throw in a layer of dry sawdust, possibly 2 while filling.
Coarse wood chips would likely work well, the only drawback is the work to cut the wood short and split it fine.
Regards,
Garry Tait, MB
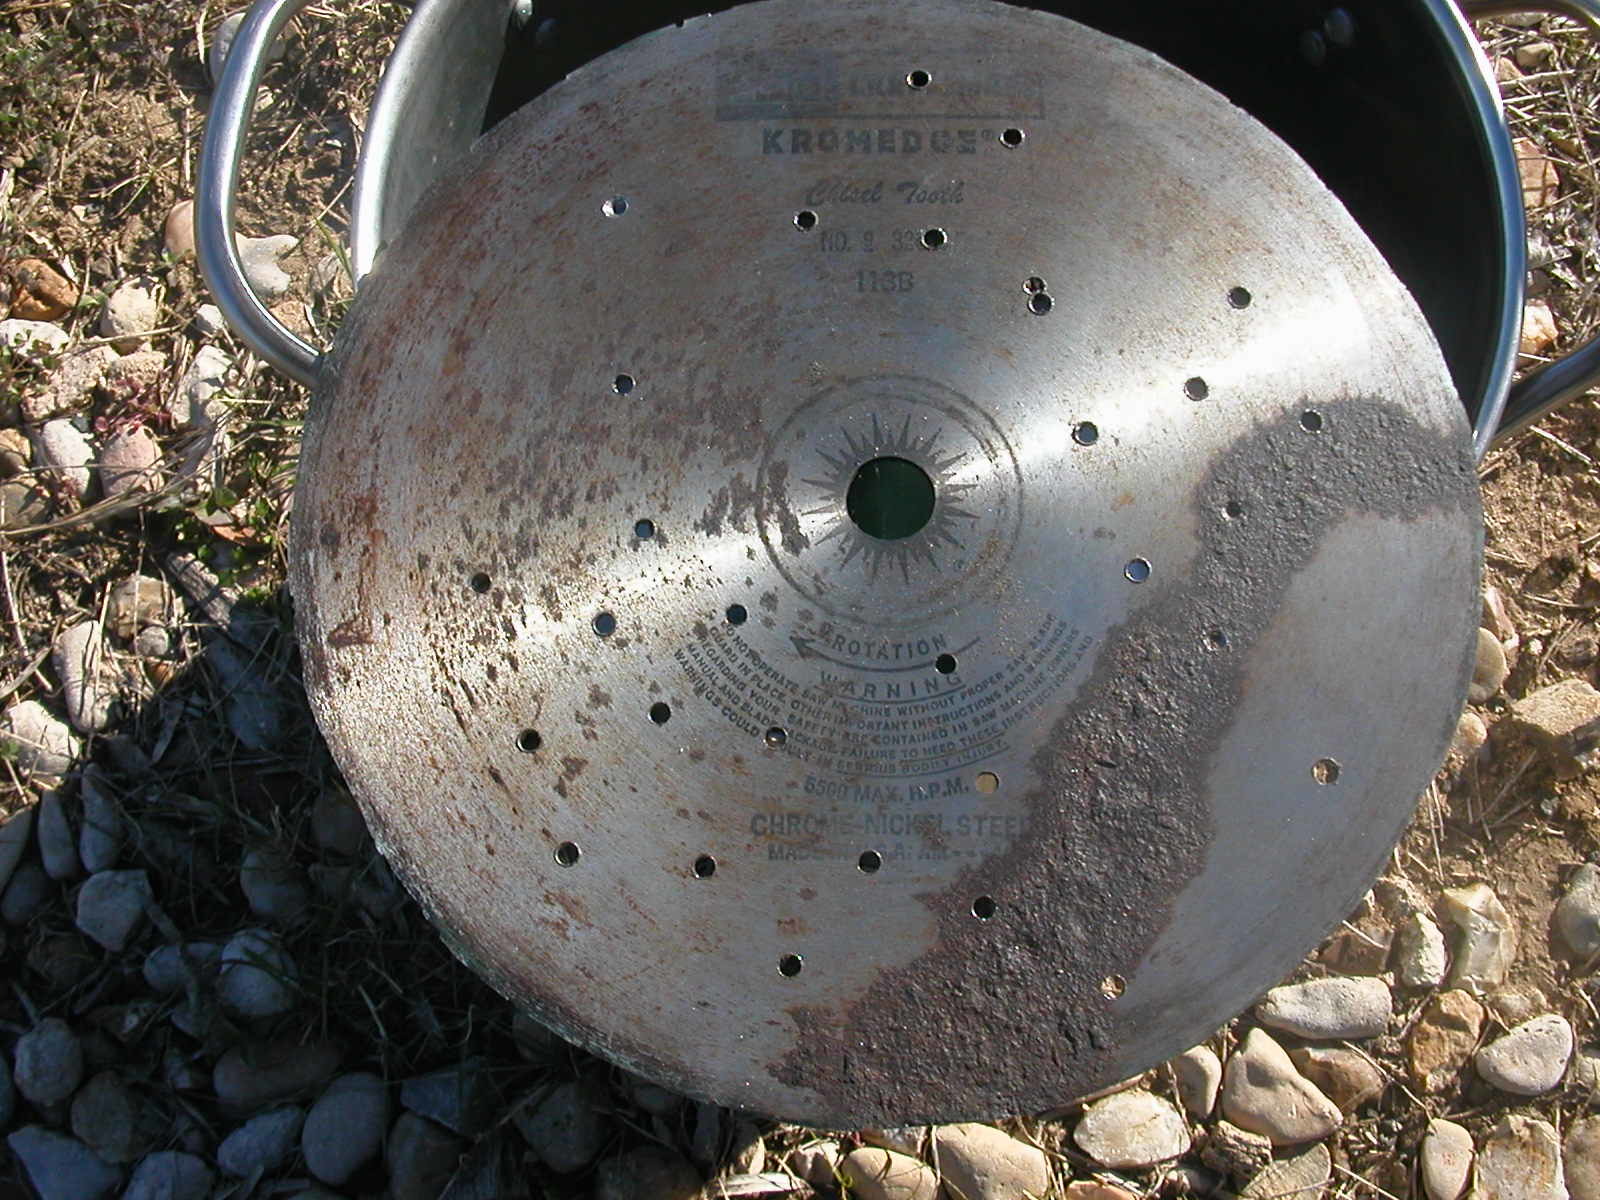
Drilling the 10" Harbor Freight blade was like drilling butter compared to the next blade I drilled for a second slightly larger stove. It was a Sear’s Kromedge and some sort of acid caused a nasty streak of corrosion, probably not safe to use as a saw blade.
First, I attempted to drill holes in the blade on my drill press. It is so hard the drills were making sparks and breaking! Then I wanted to reduce the diameter by cold bending the teeth 90 degrees. (This worked like a charm on a Harbor-Freight saw blade.) Rather than bend, the teeth broke off! I ended up breaking them all off, and the blade does fit in the stainless pot, but the first test run indicated I needed more primary air (more holes), so I cut some slots using my angle grinder. (not shown)

While at Belton, I mentioned this to Carl Zinn and he said he ran into the same thing while mounting his saw blade to a pulley for his pneumatic chop saw.
Now I can say, from experience, that not all saw blades are equal.