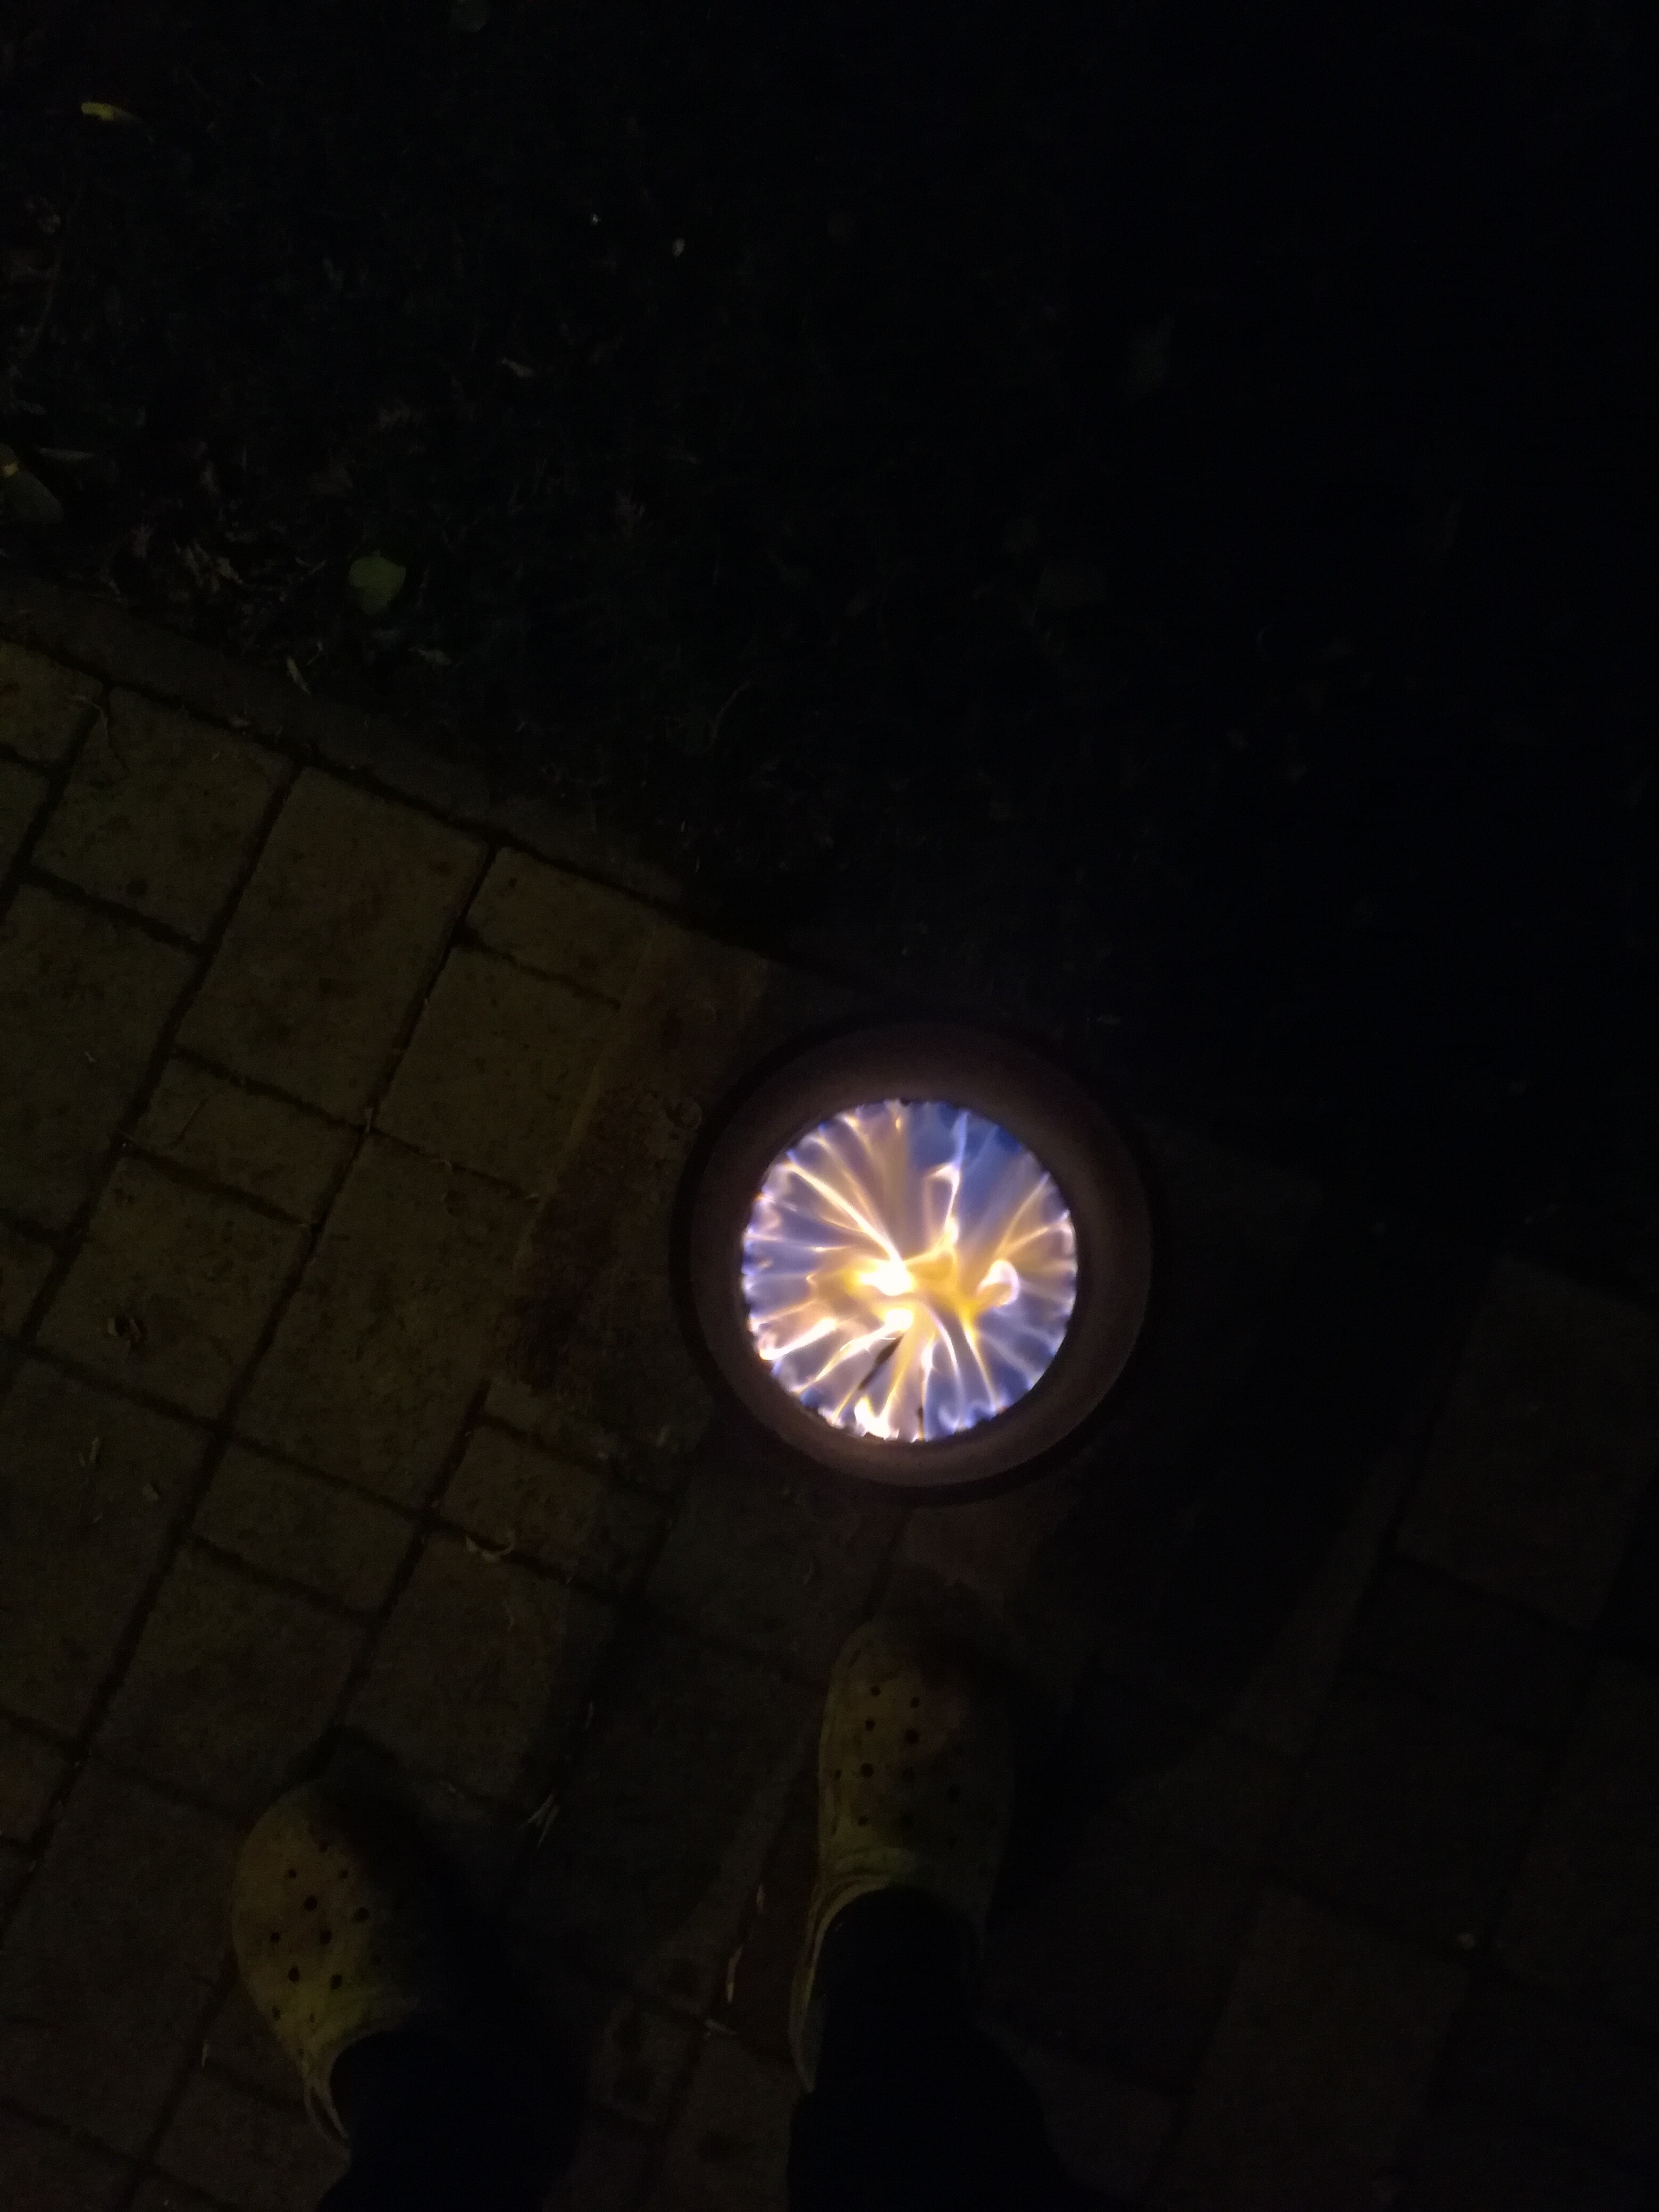
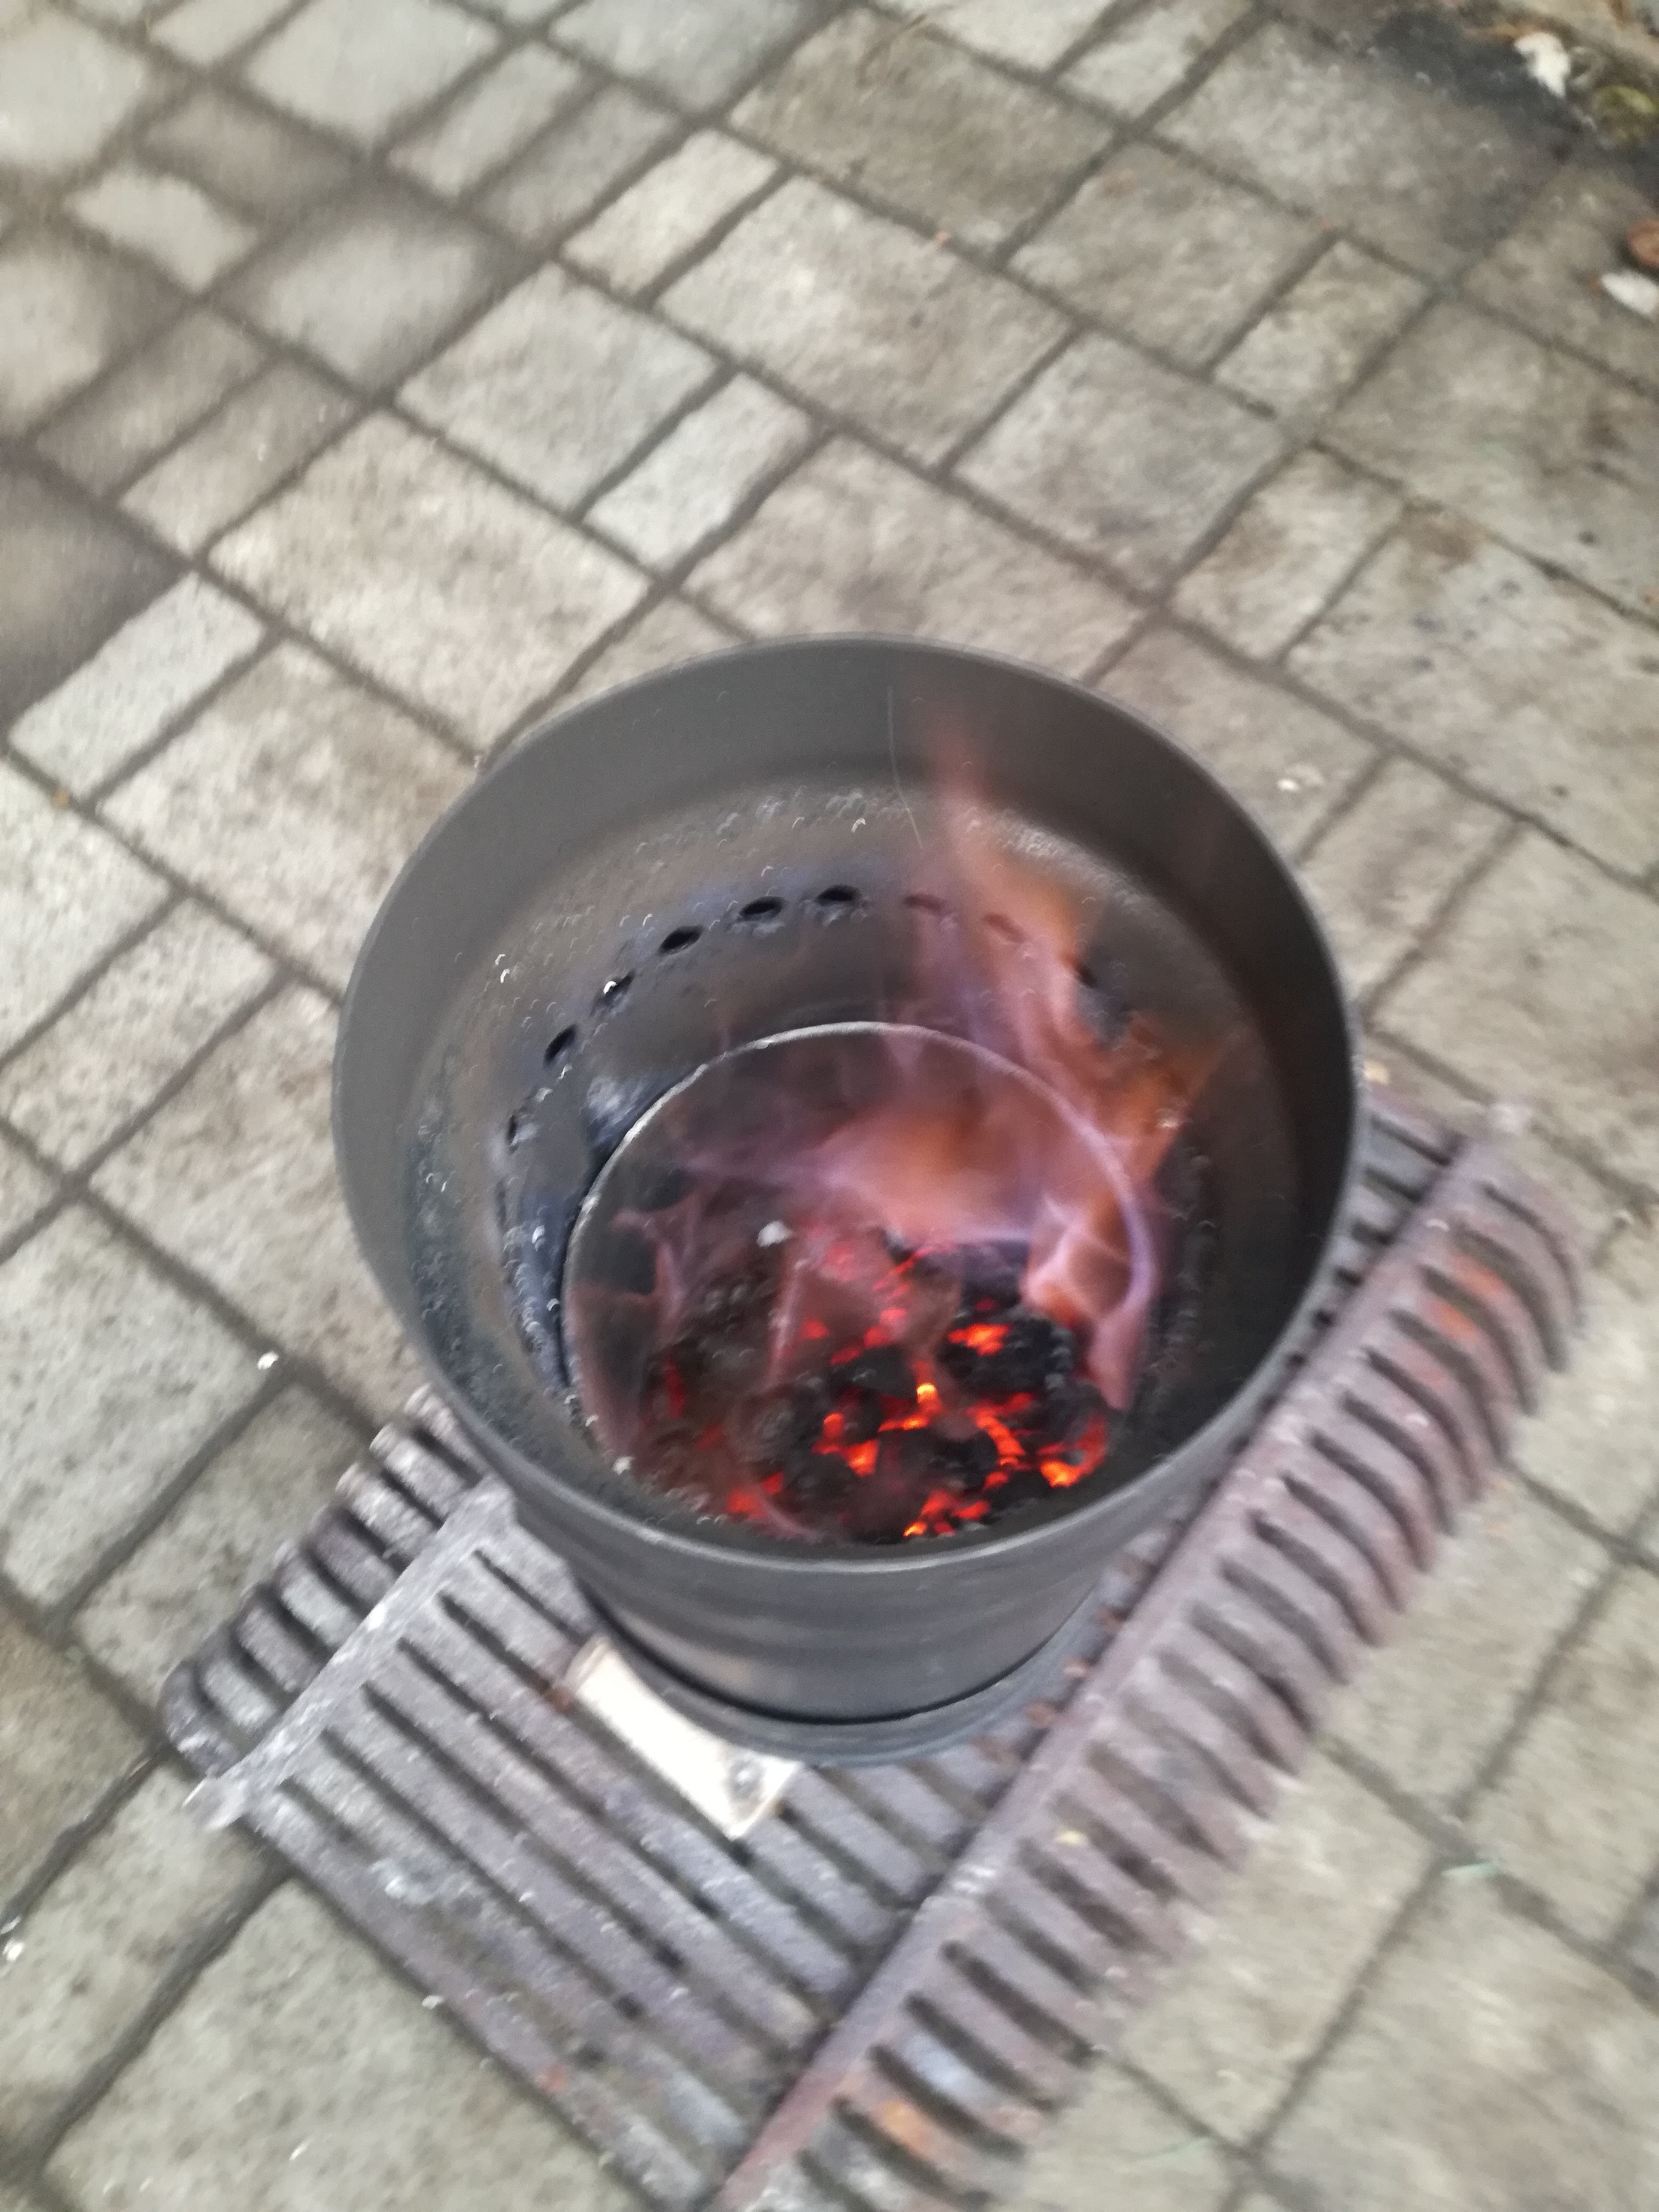
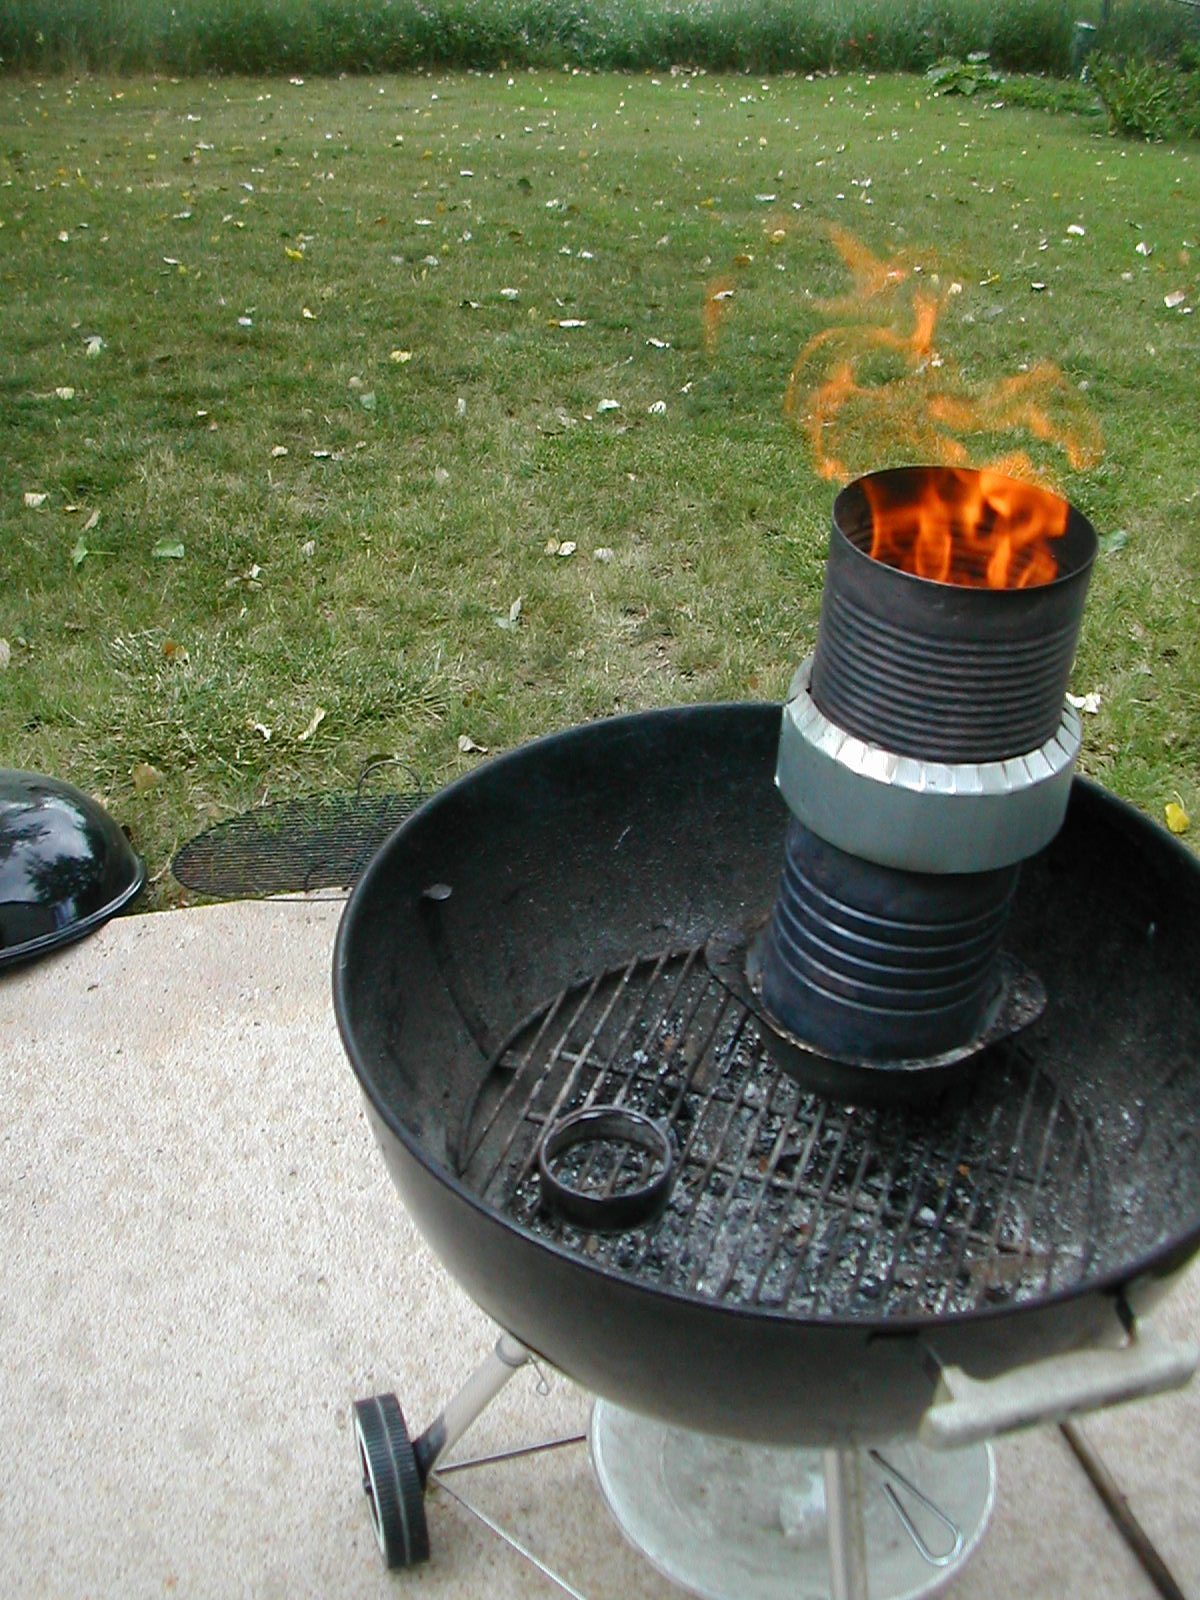
I used about one liter of red hot charcoal as an ignition at the bottom and same amount of walnut shells as a fuel. The load resisted to autoignition, so I used gas flame to set top afire. After short time the flame became stable, as shown at the picture. It last few minutes until I tried to add some fuel, which cool top so much that fire ceased to burn. After some time another equlibrium was reached and very nice blue flame start to glow out of the top.
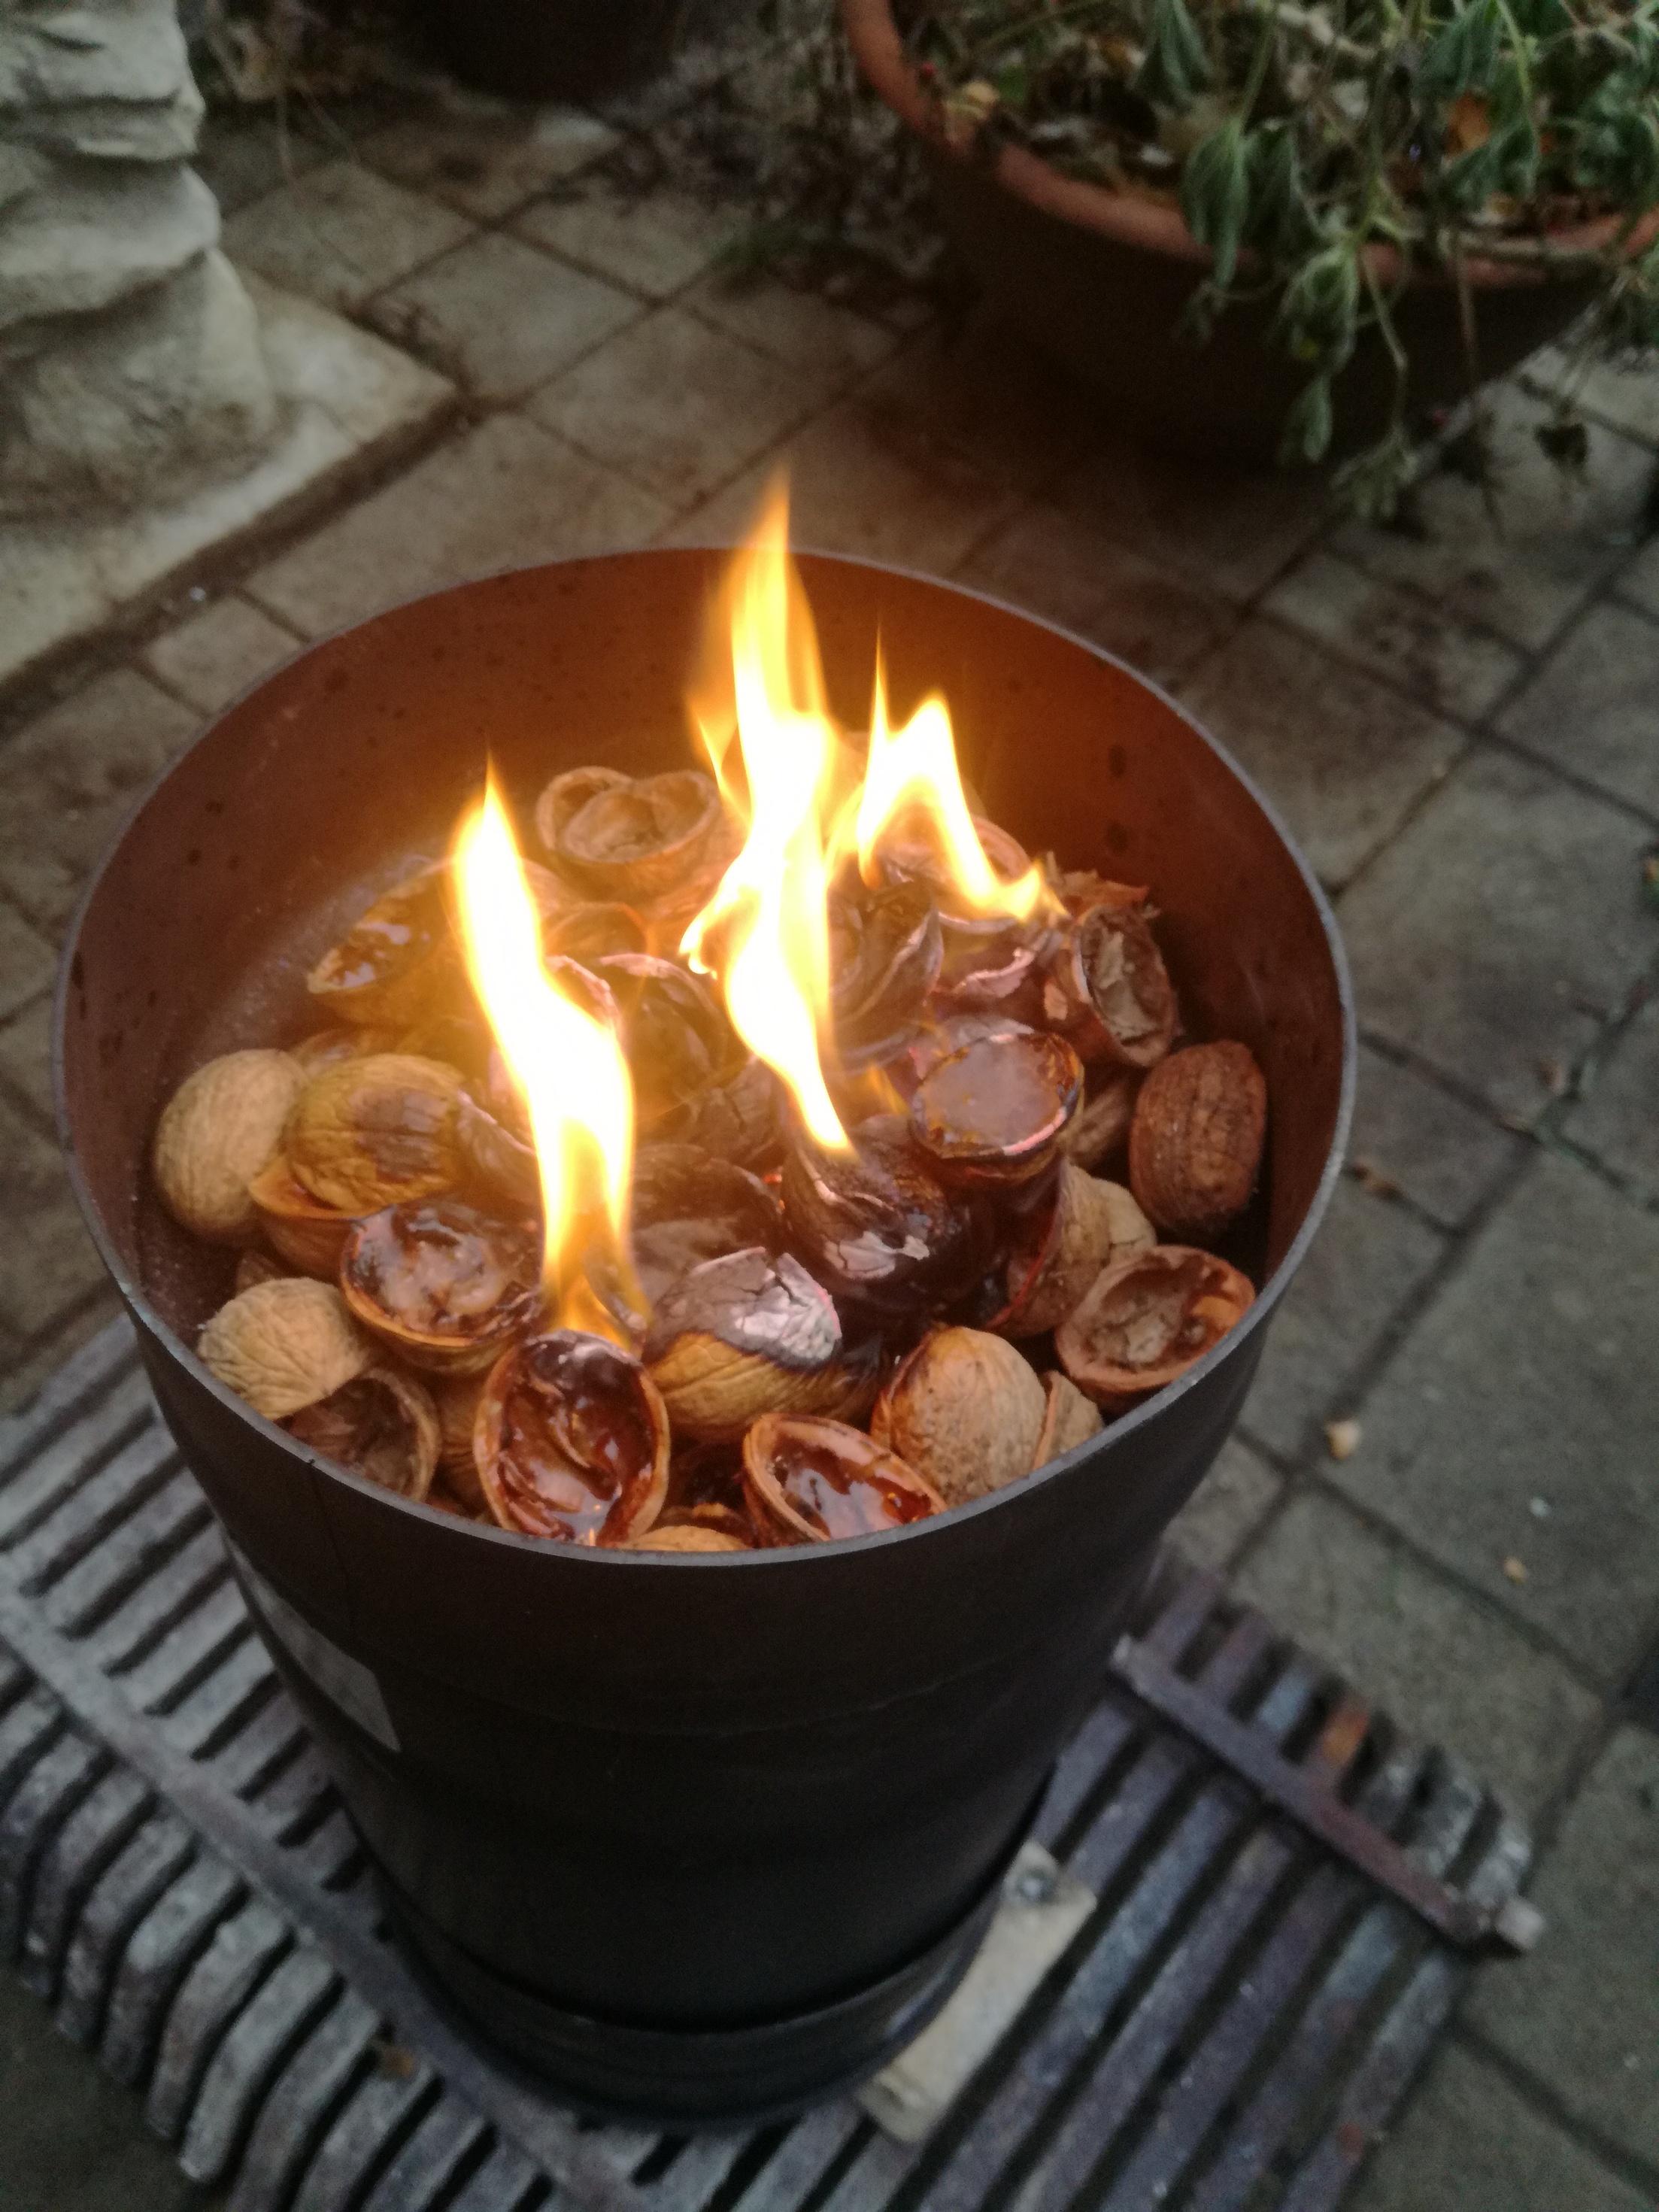
Yesterday morning I progressed with testing. I made one test run with outer shell. Walnut shells was the only fuel put in and lit atop with aide of twoo spoons of vegetable oil.
It continued blazing for next 20 minutes until finally flames ceased and only glowing charcoal remained at the grate. Whole run lasted some 80 minutes on two gallons of walnut shells.
Great assembly, @r_wesseling. Very simple. I spotted the TLUD being mentioned here in several topics and visited this site just today morning. It seems that all woodgas enthusiats have their minds connected
The “batch gist” is what make me unsatisfied about TLUD. Reffering to the Dr.TLUD, this stove ceases to be TLUD once the fire reaches the grate. So to keep the device true TLUD, one has to pour residual charcoal out and start whole thing gain.
One may see from many pictures here on DOW, that key reqirement of “smokeless fire” could be achieved even with burning zone stabilized at the grate. The only thing is to balance the height of the fuel inside the active zone, amount of primary/secondary air and distance between active zone and gas burning zone.
So what I am trying to create is the device based on the TLUD design, but working continuosly so long as one adds appropriate amount of fuel to the active zone.
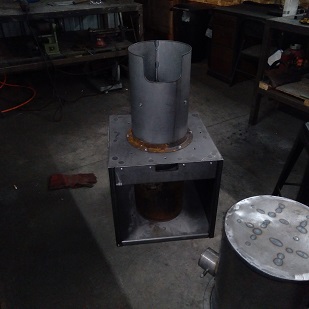
Another step foward yesterday. Just before Christmas I received this grate, made from grey cast iron, which perfectly fits to the rossete making bootom of the stove.
I also used now tools found under to drill holes into bottom of outer sleeve. To make whole thing more firm, I fastened the bottom sleeve to the rossete by four self cutting screws.
Based on lesson learned last time, I decided to use some fast burning fuel to lit the stove. So I use my jack-plane on bone dry plank to make pile of shavings.
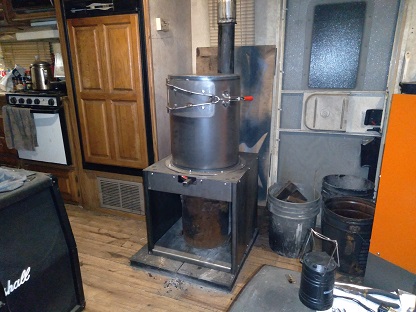
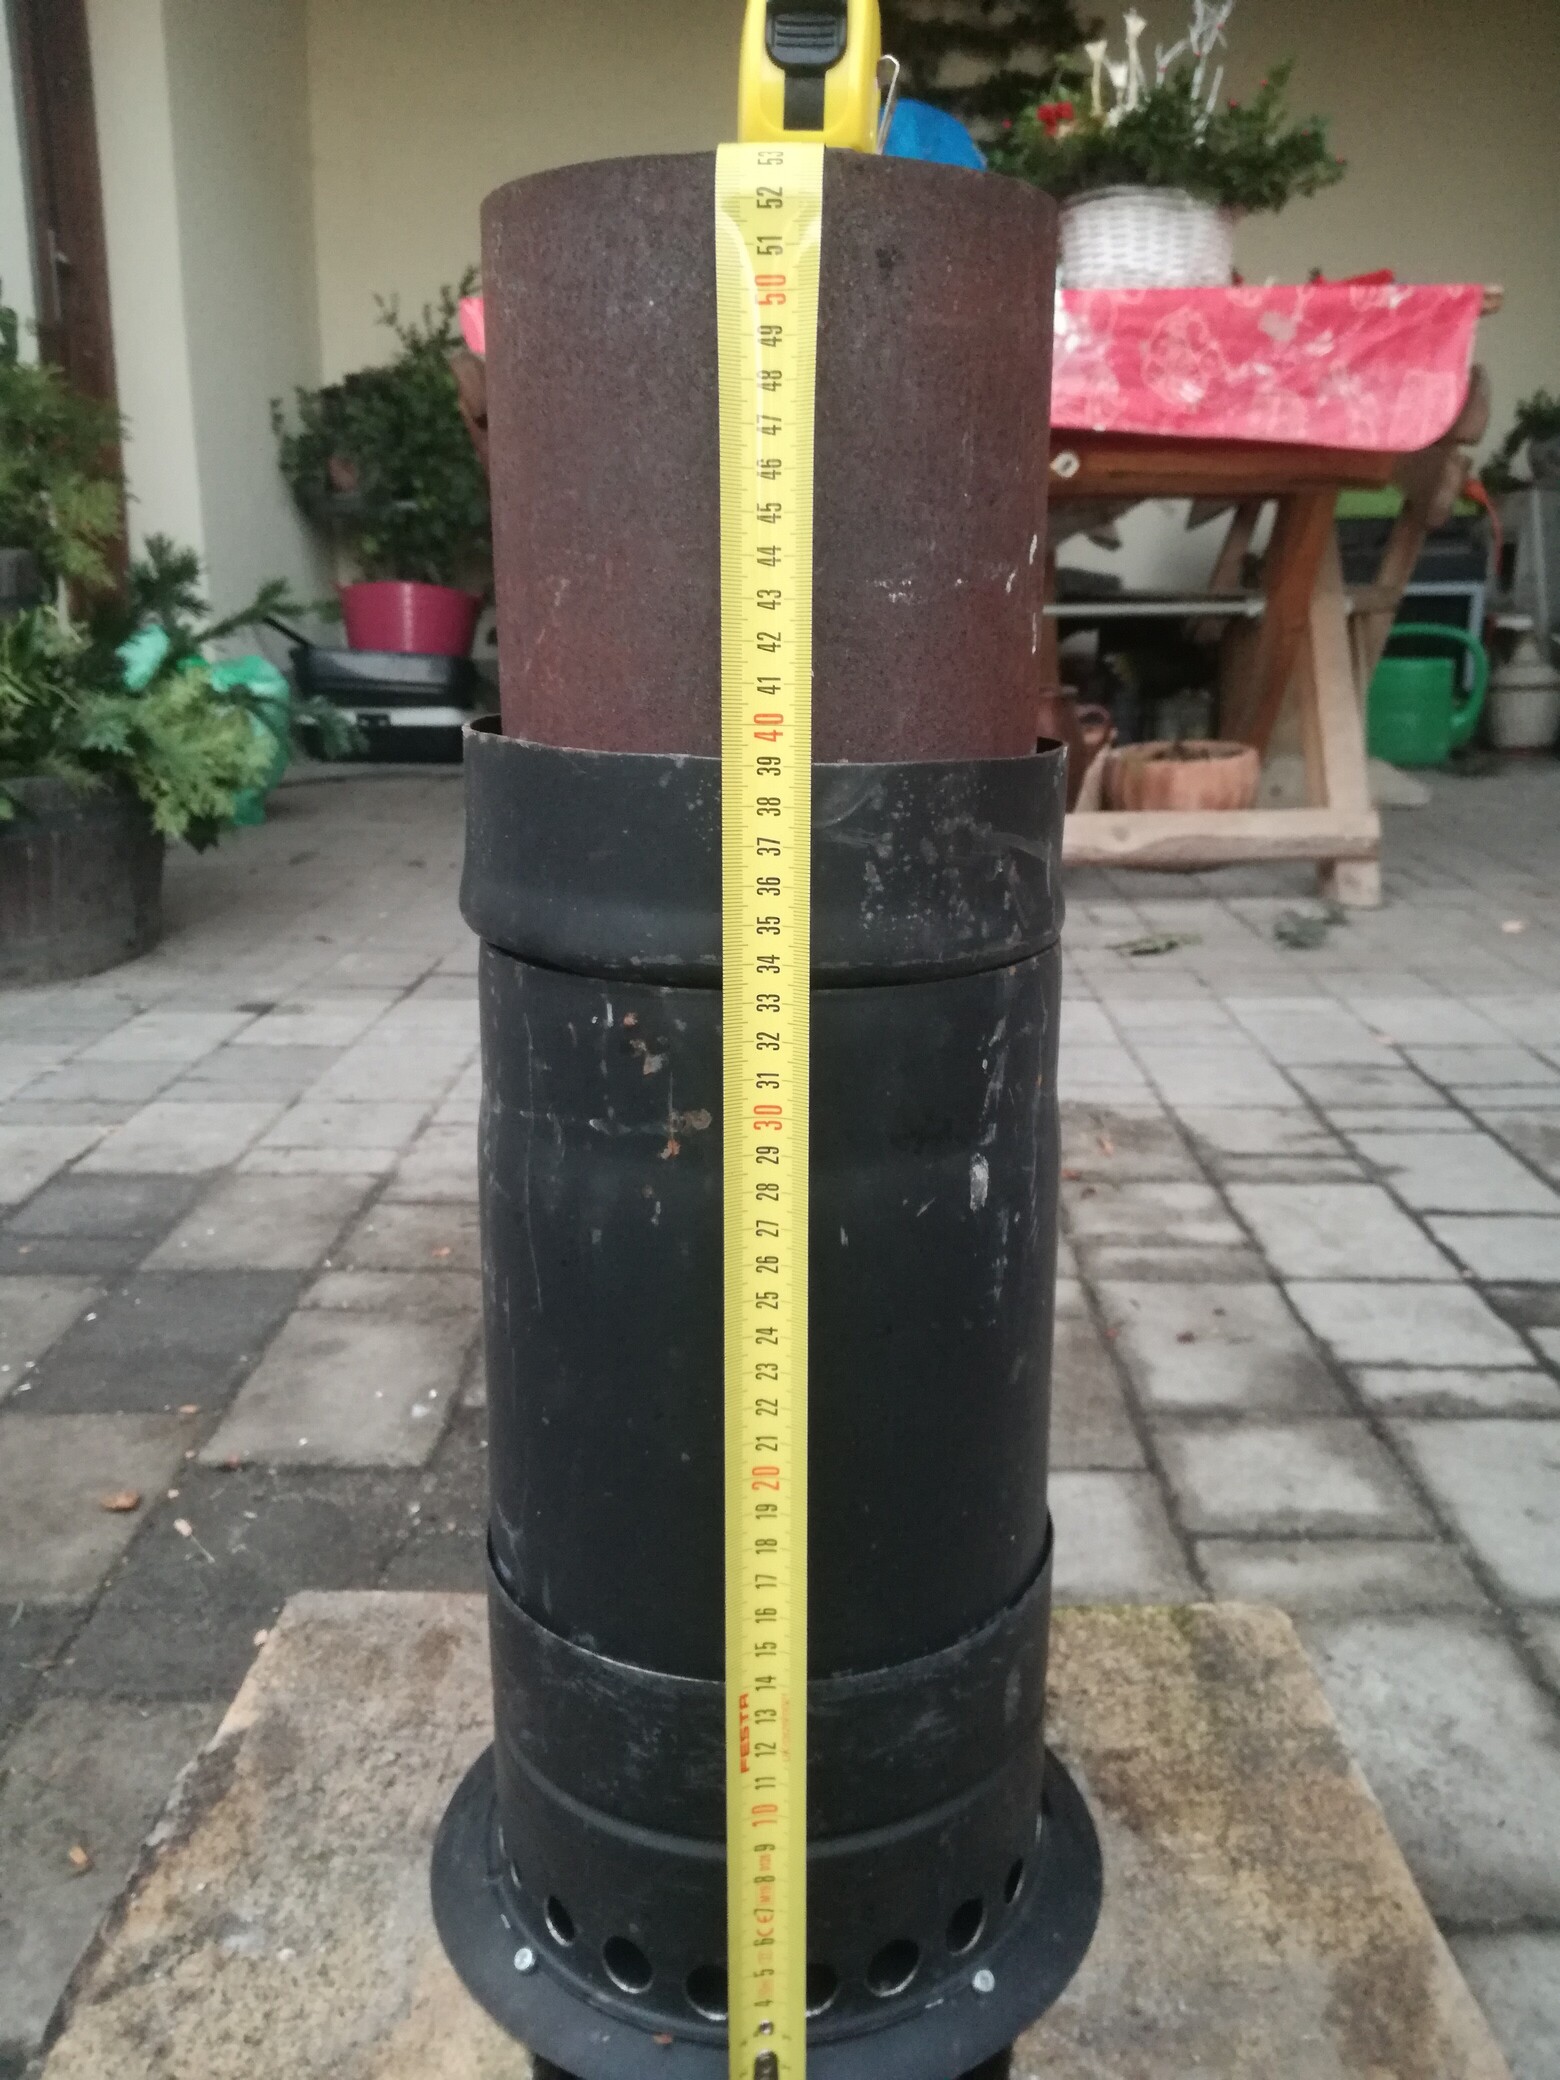
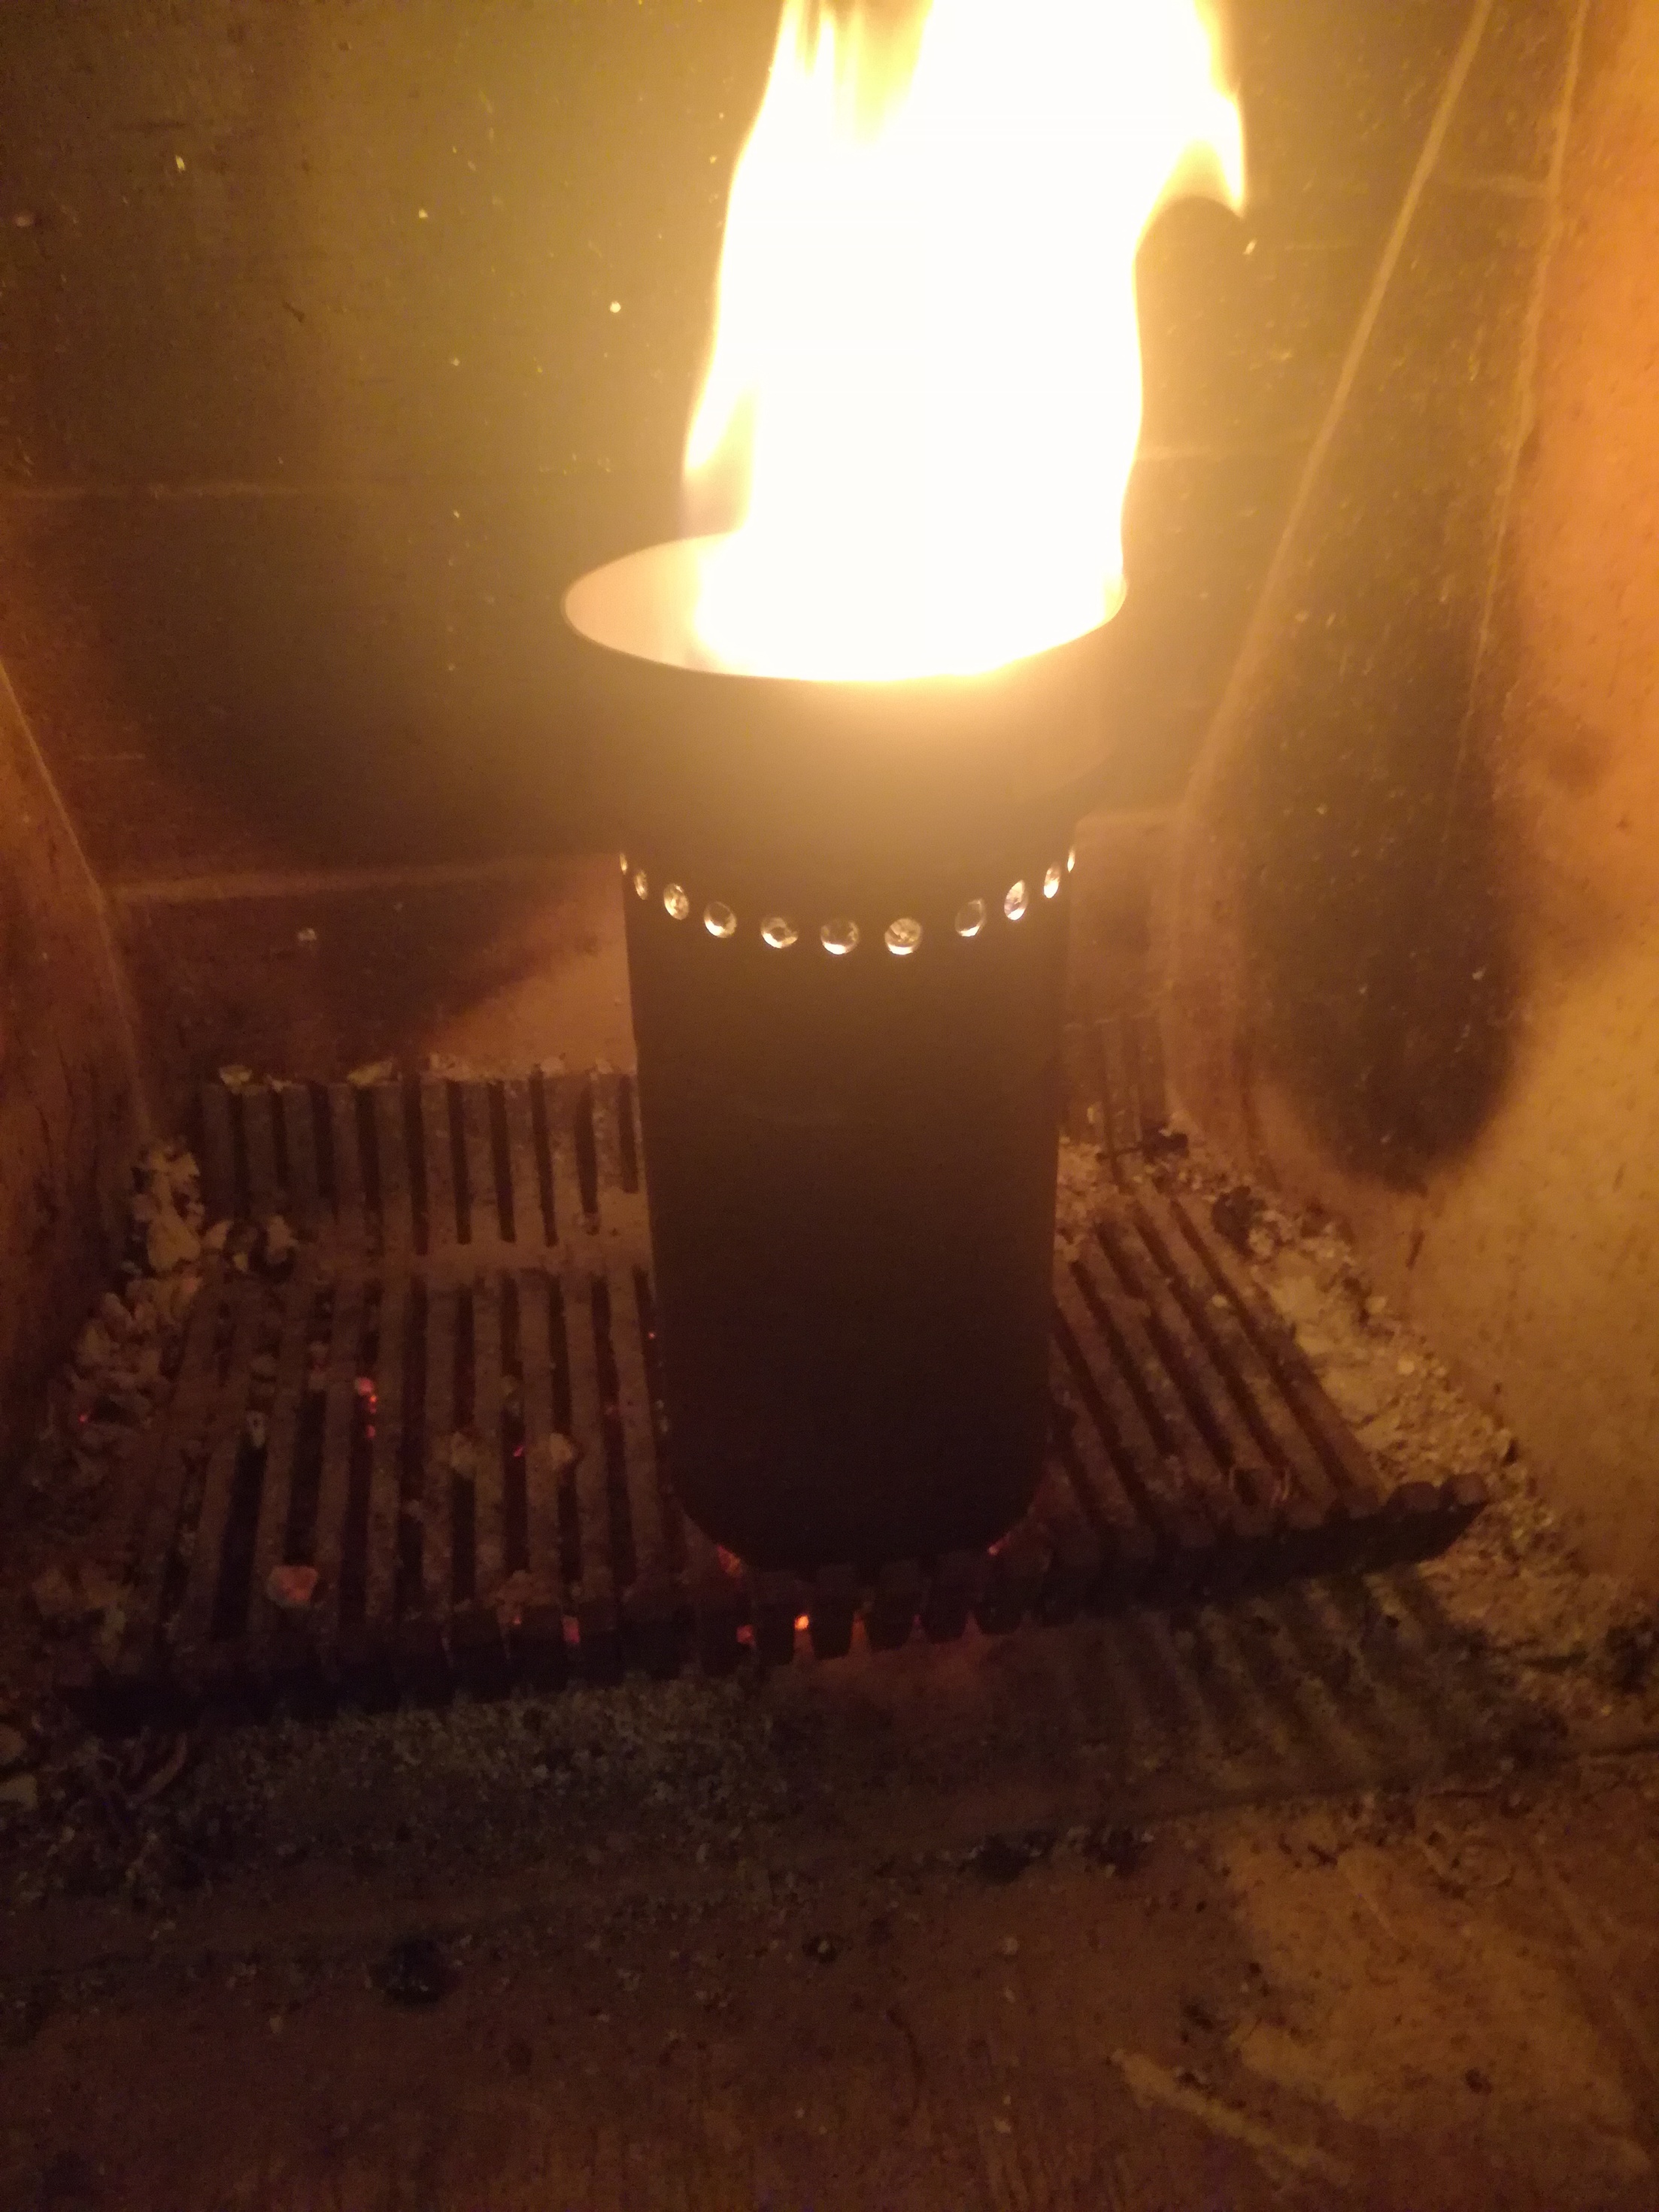
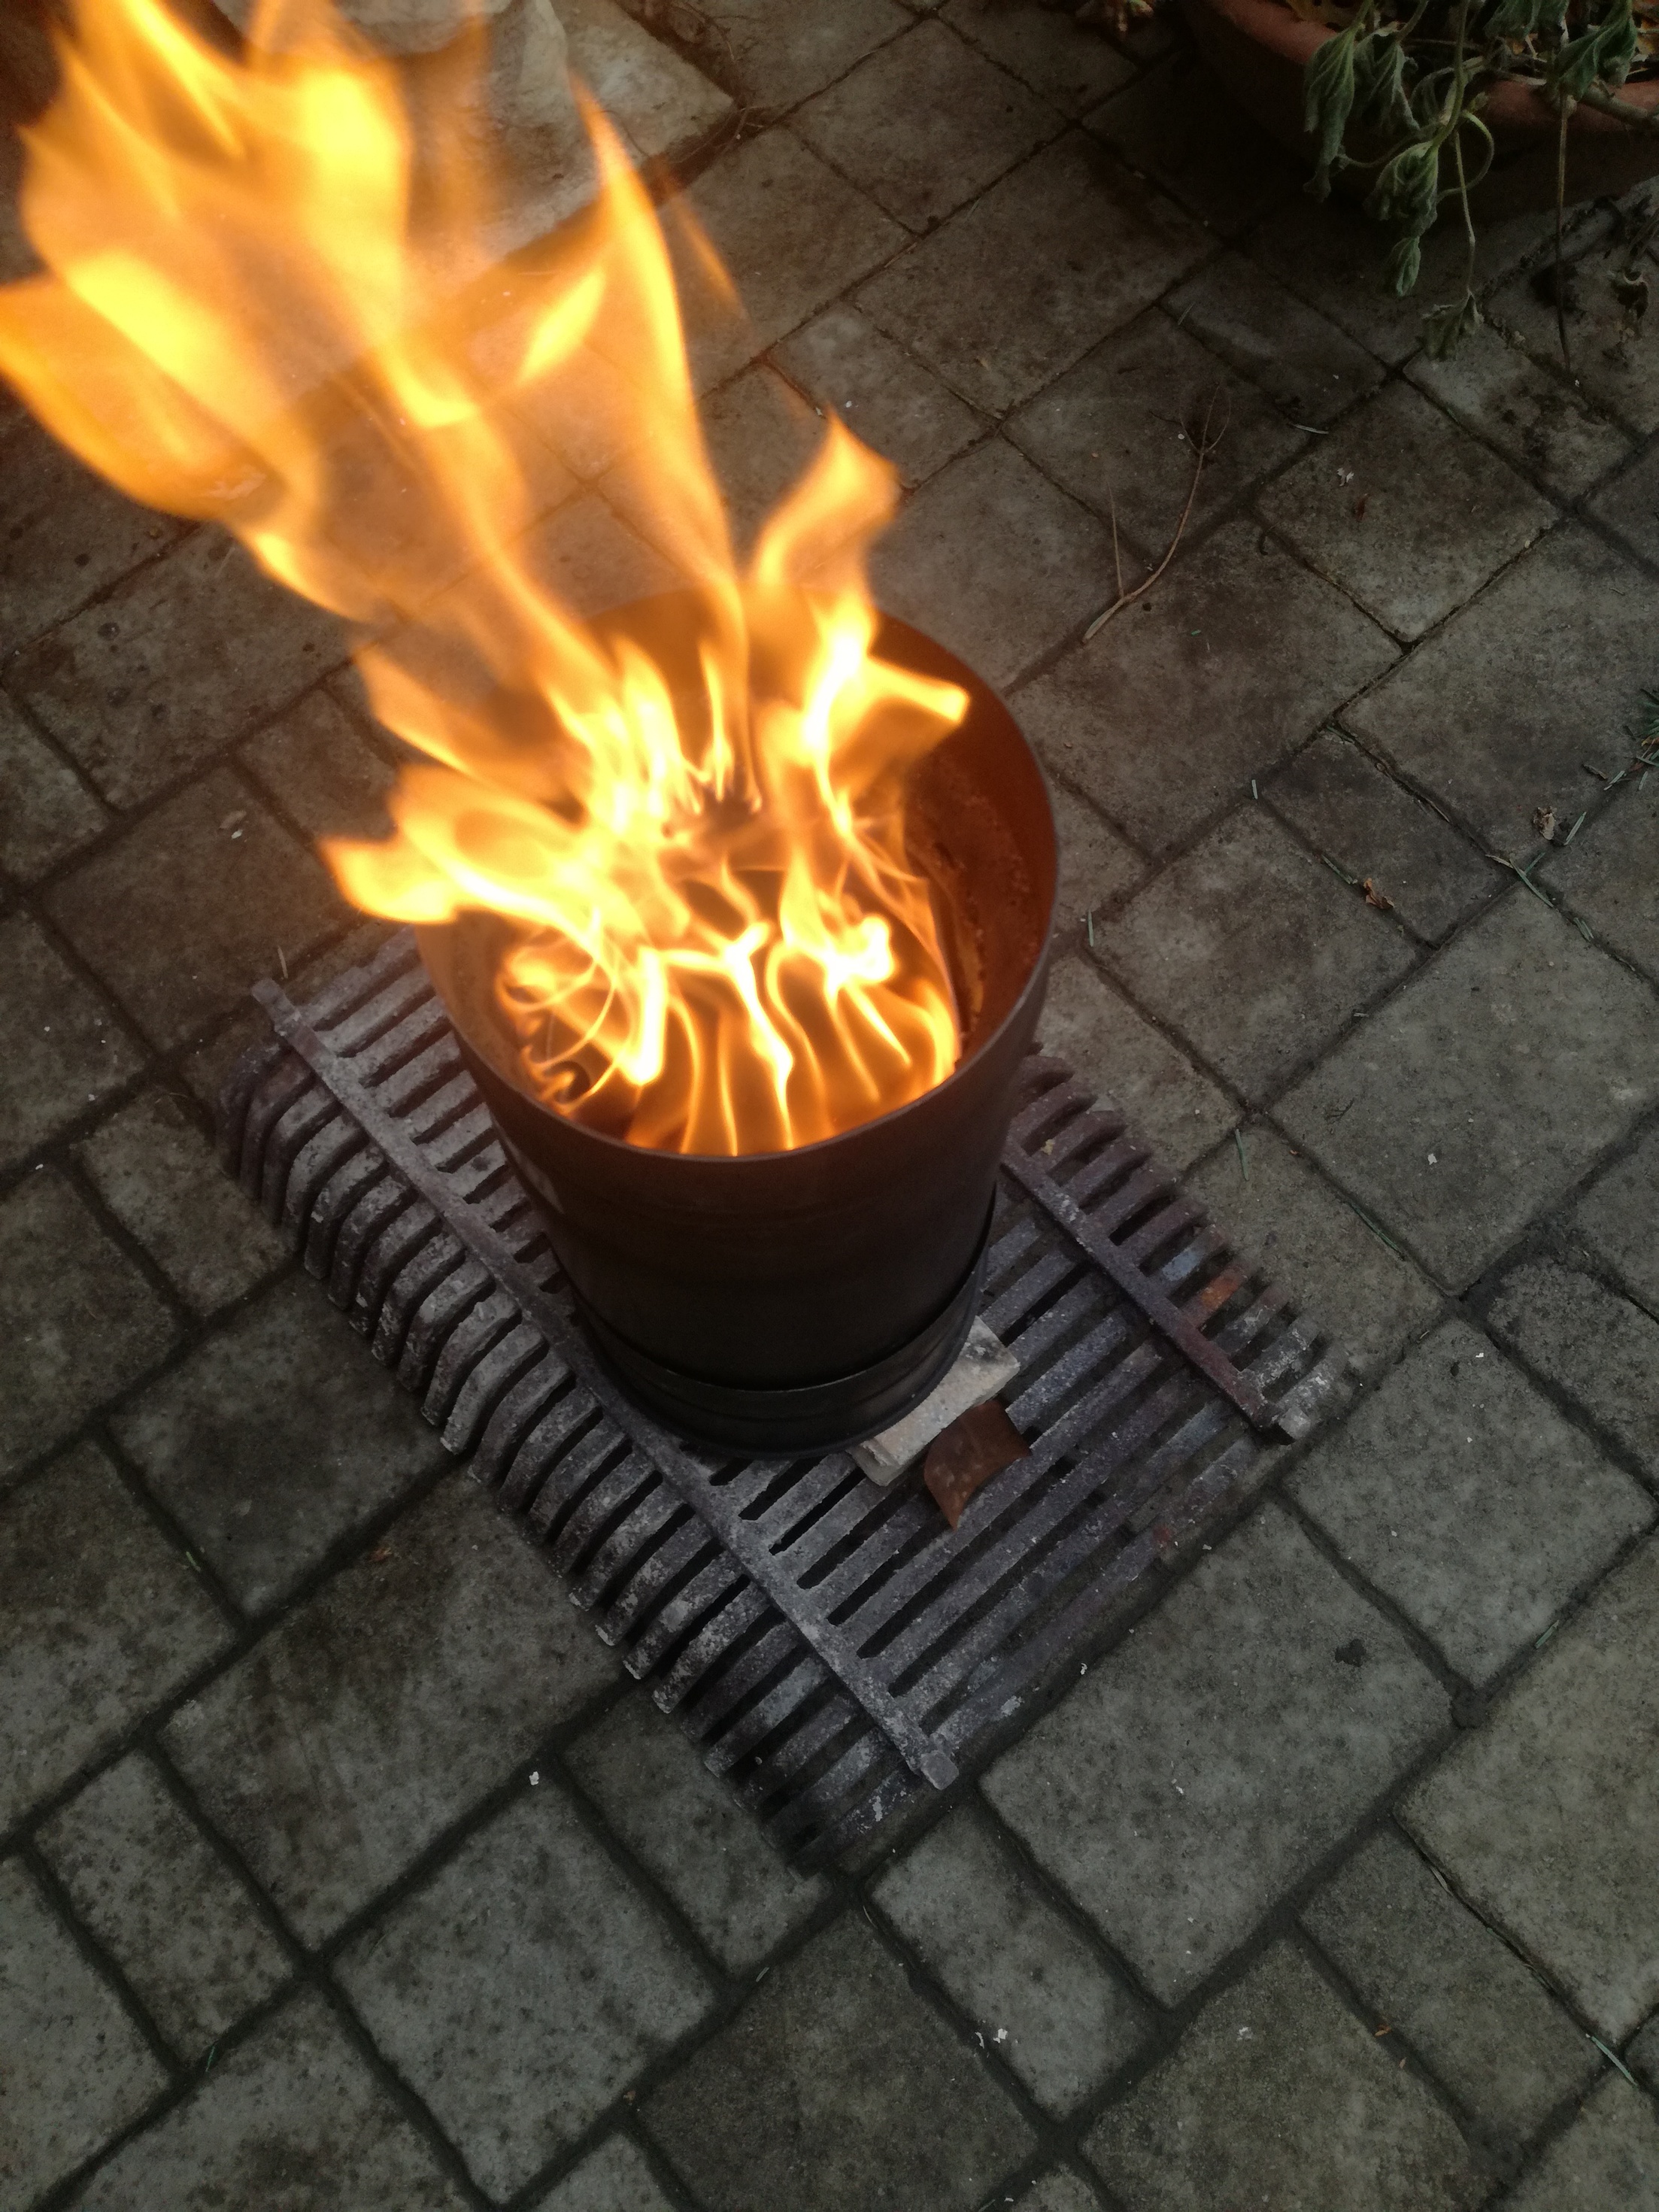
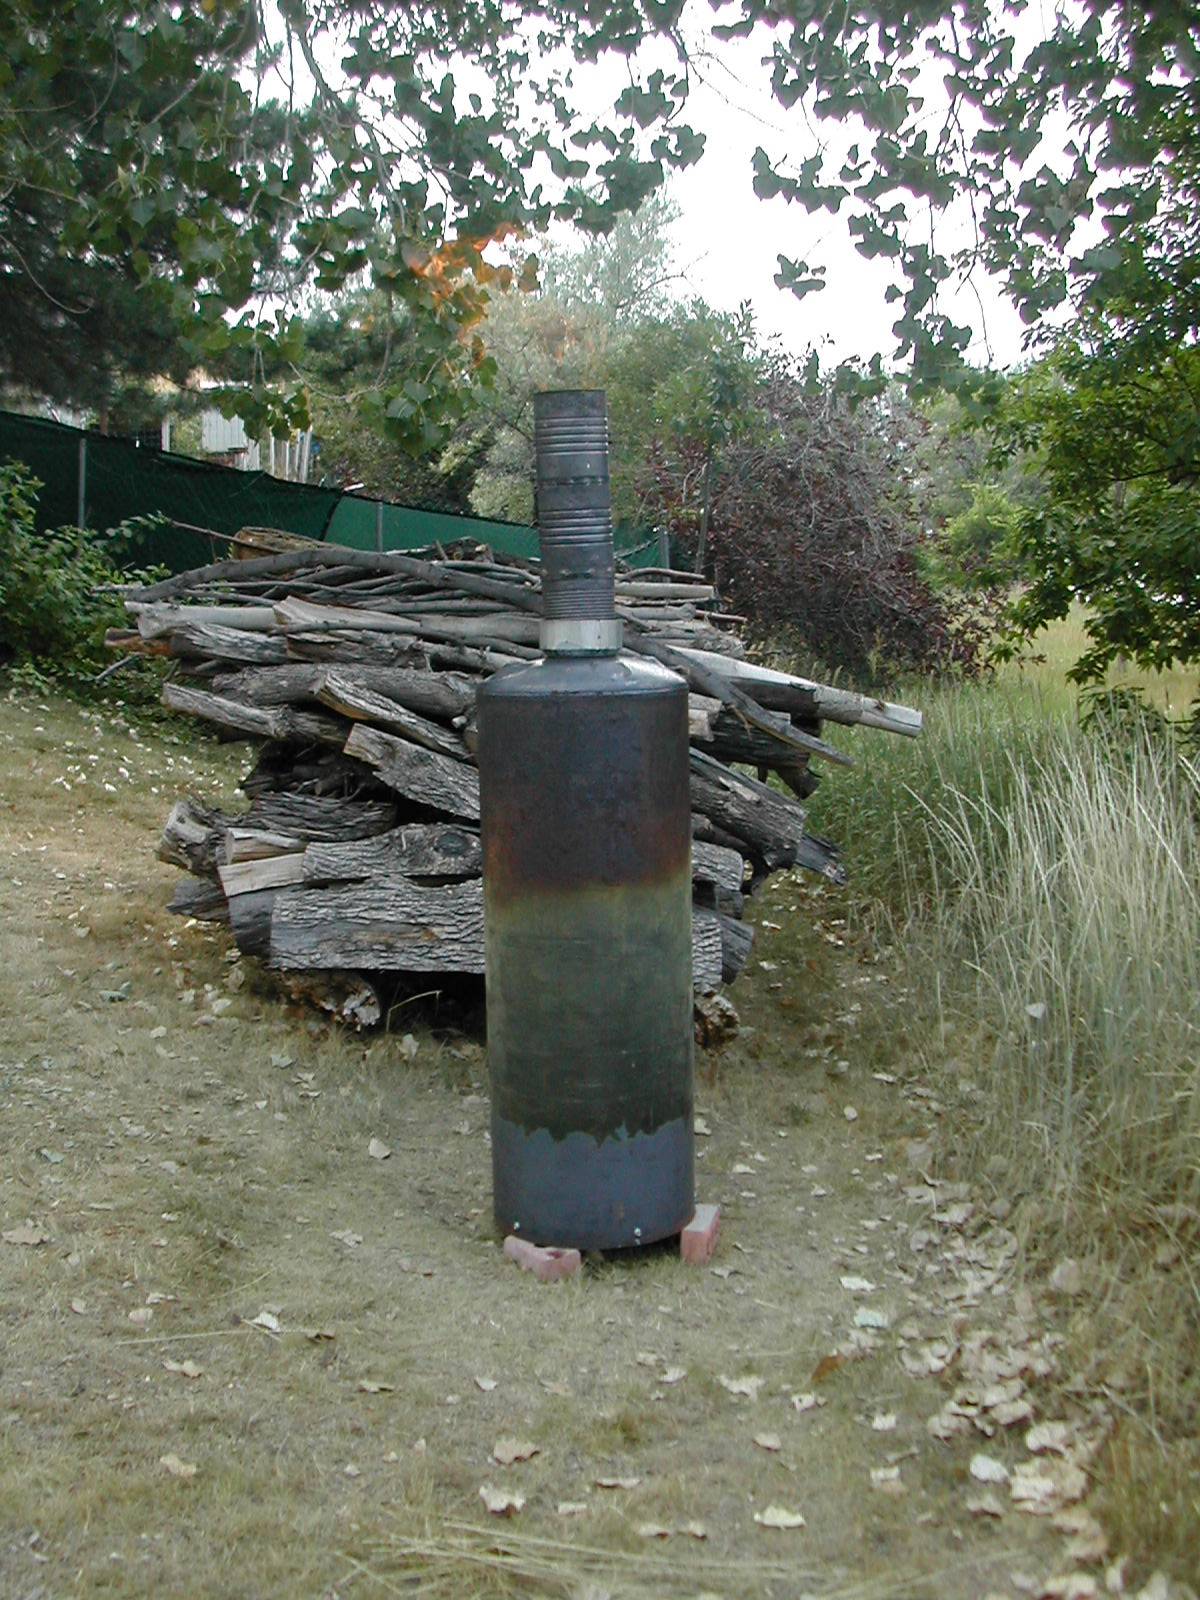
When fire made its way down to grate, a started to add fuel. Walnut shells as usual Because I considered draught not sufficient during last test, I added some 8" extension to the top. It is thick wall steel pipe I luckily found among my scrap metal It helped to suck more air through the grate which improved the gasification process inside the stove.
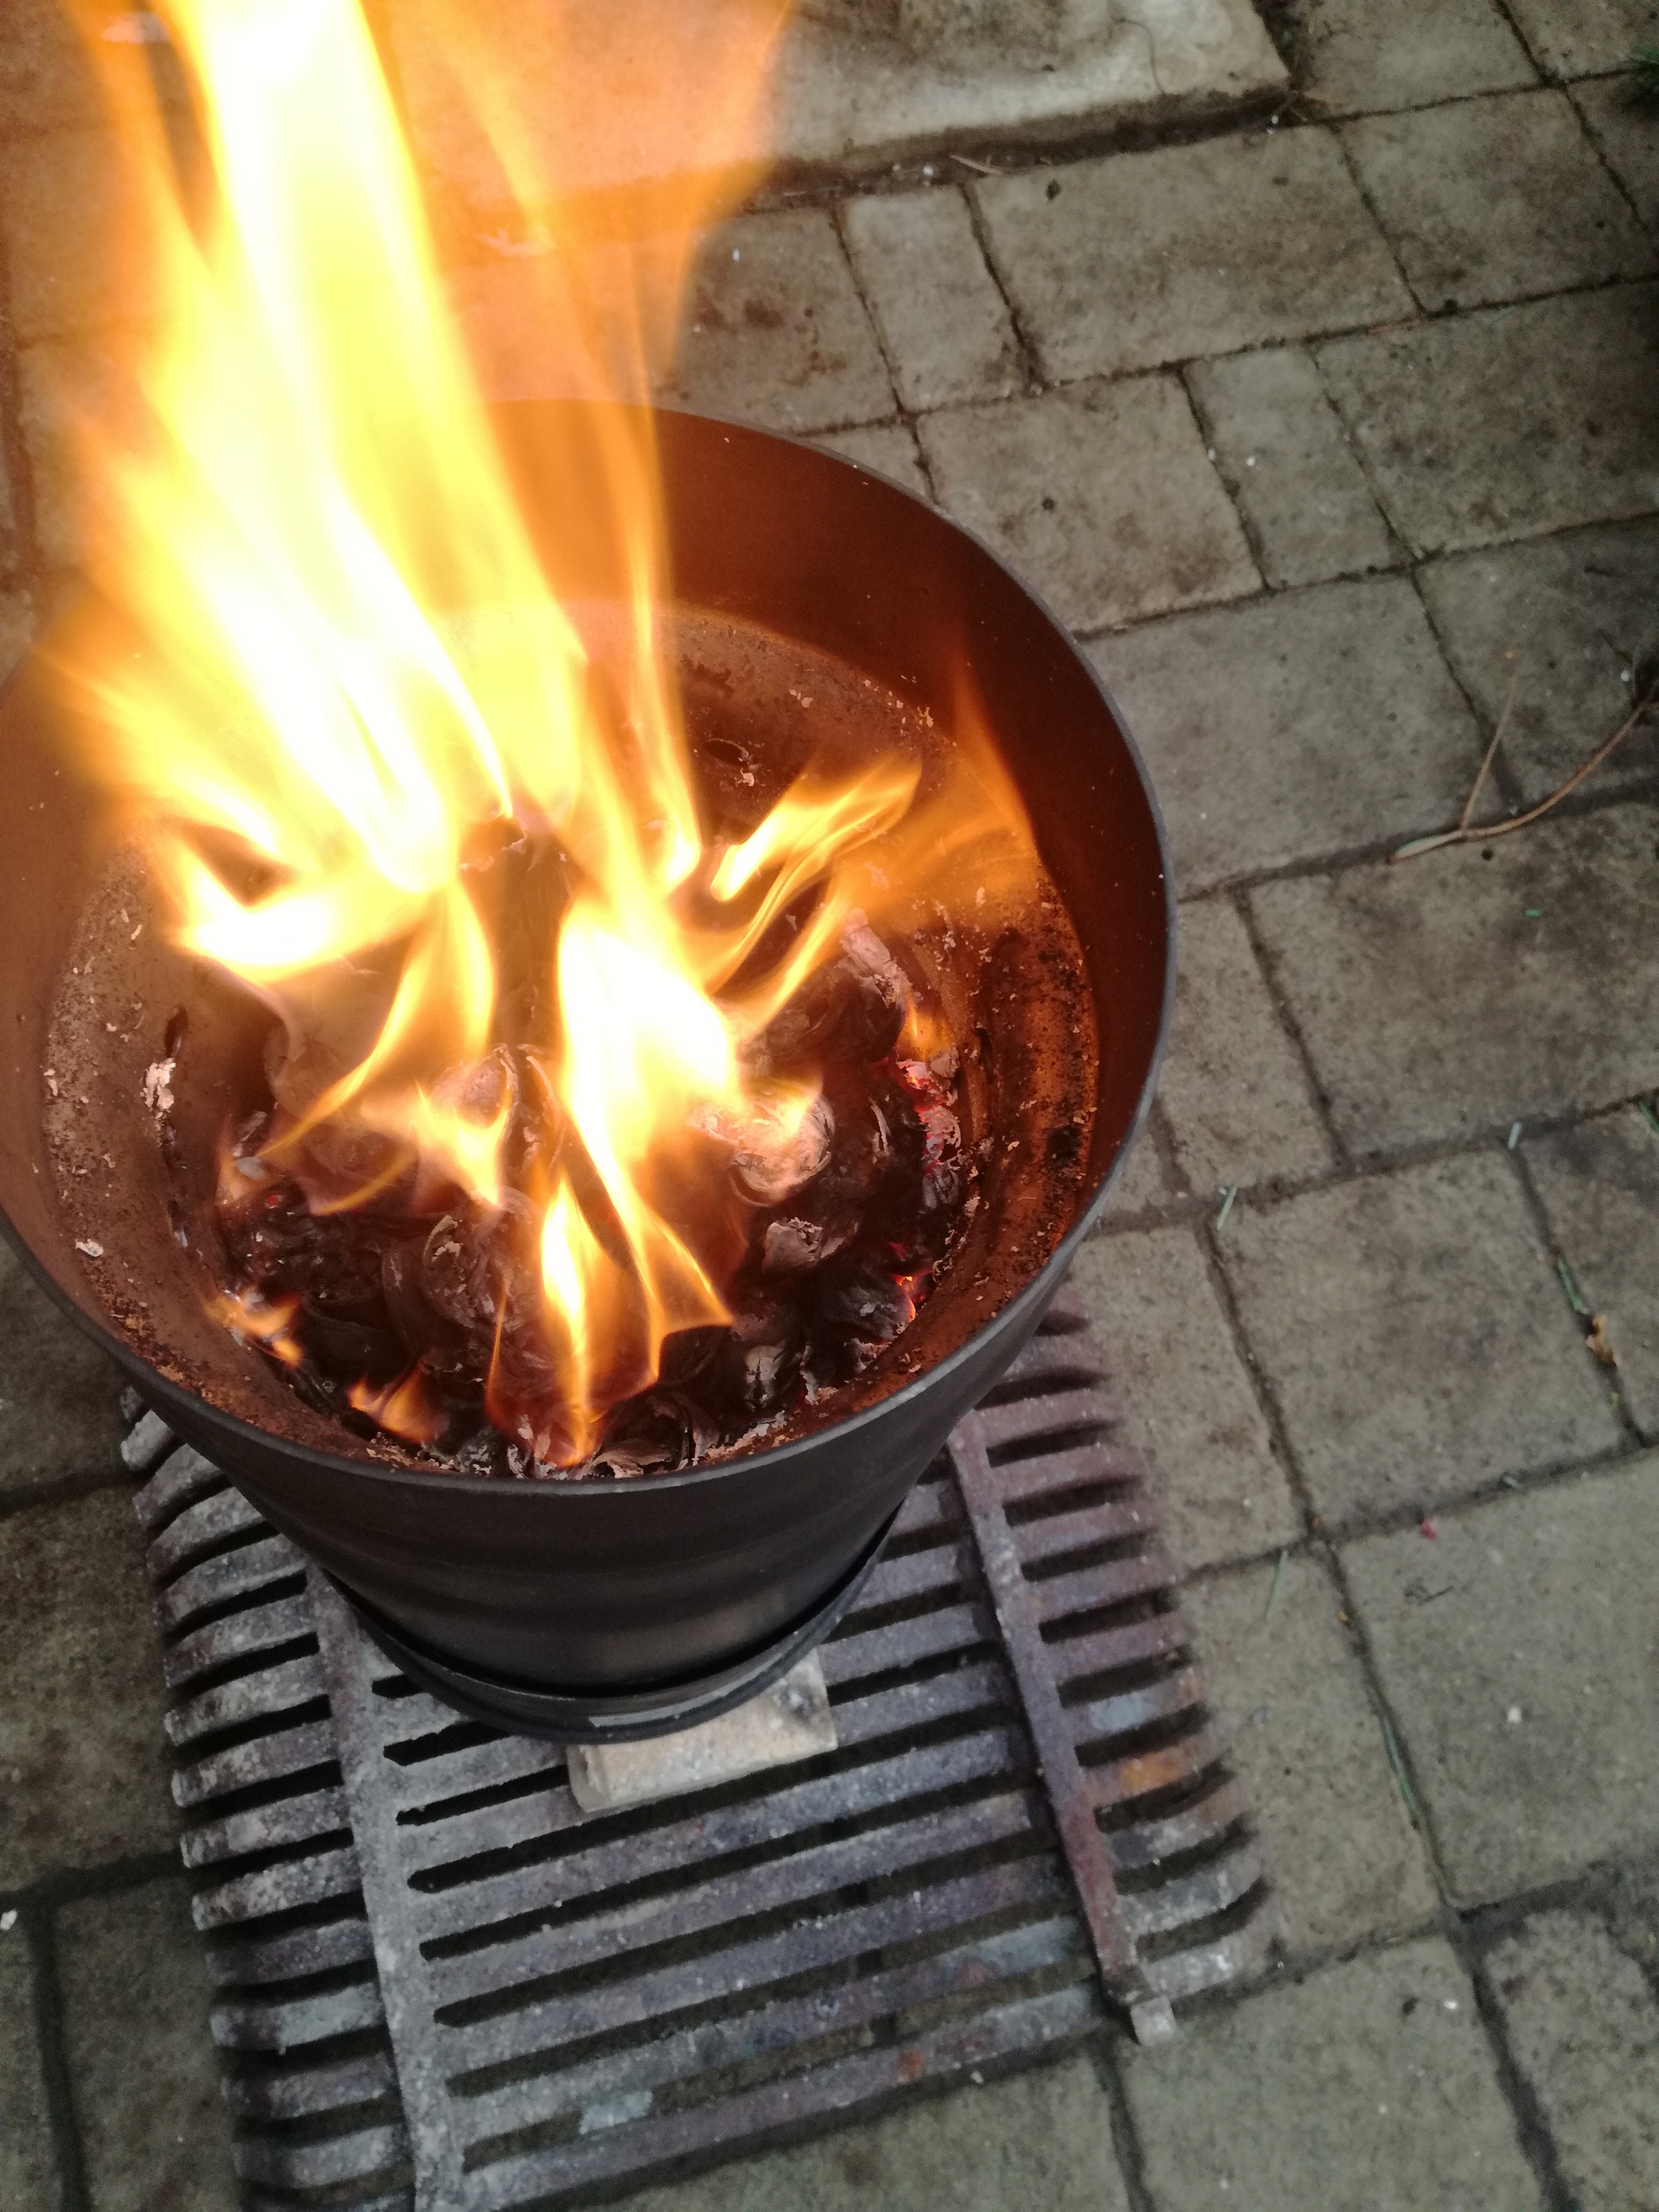
After few minutes the stove was hot enough to be able to handle fuel layer up to the secondary air intake and work at full power. It represents fire blazing almost 20" from the top of the extension.
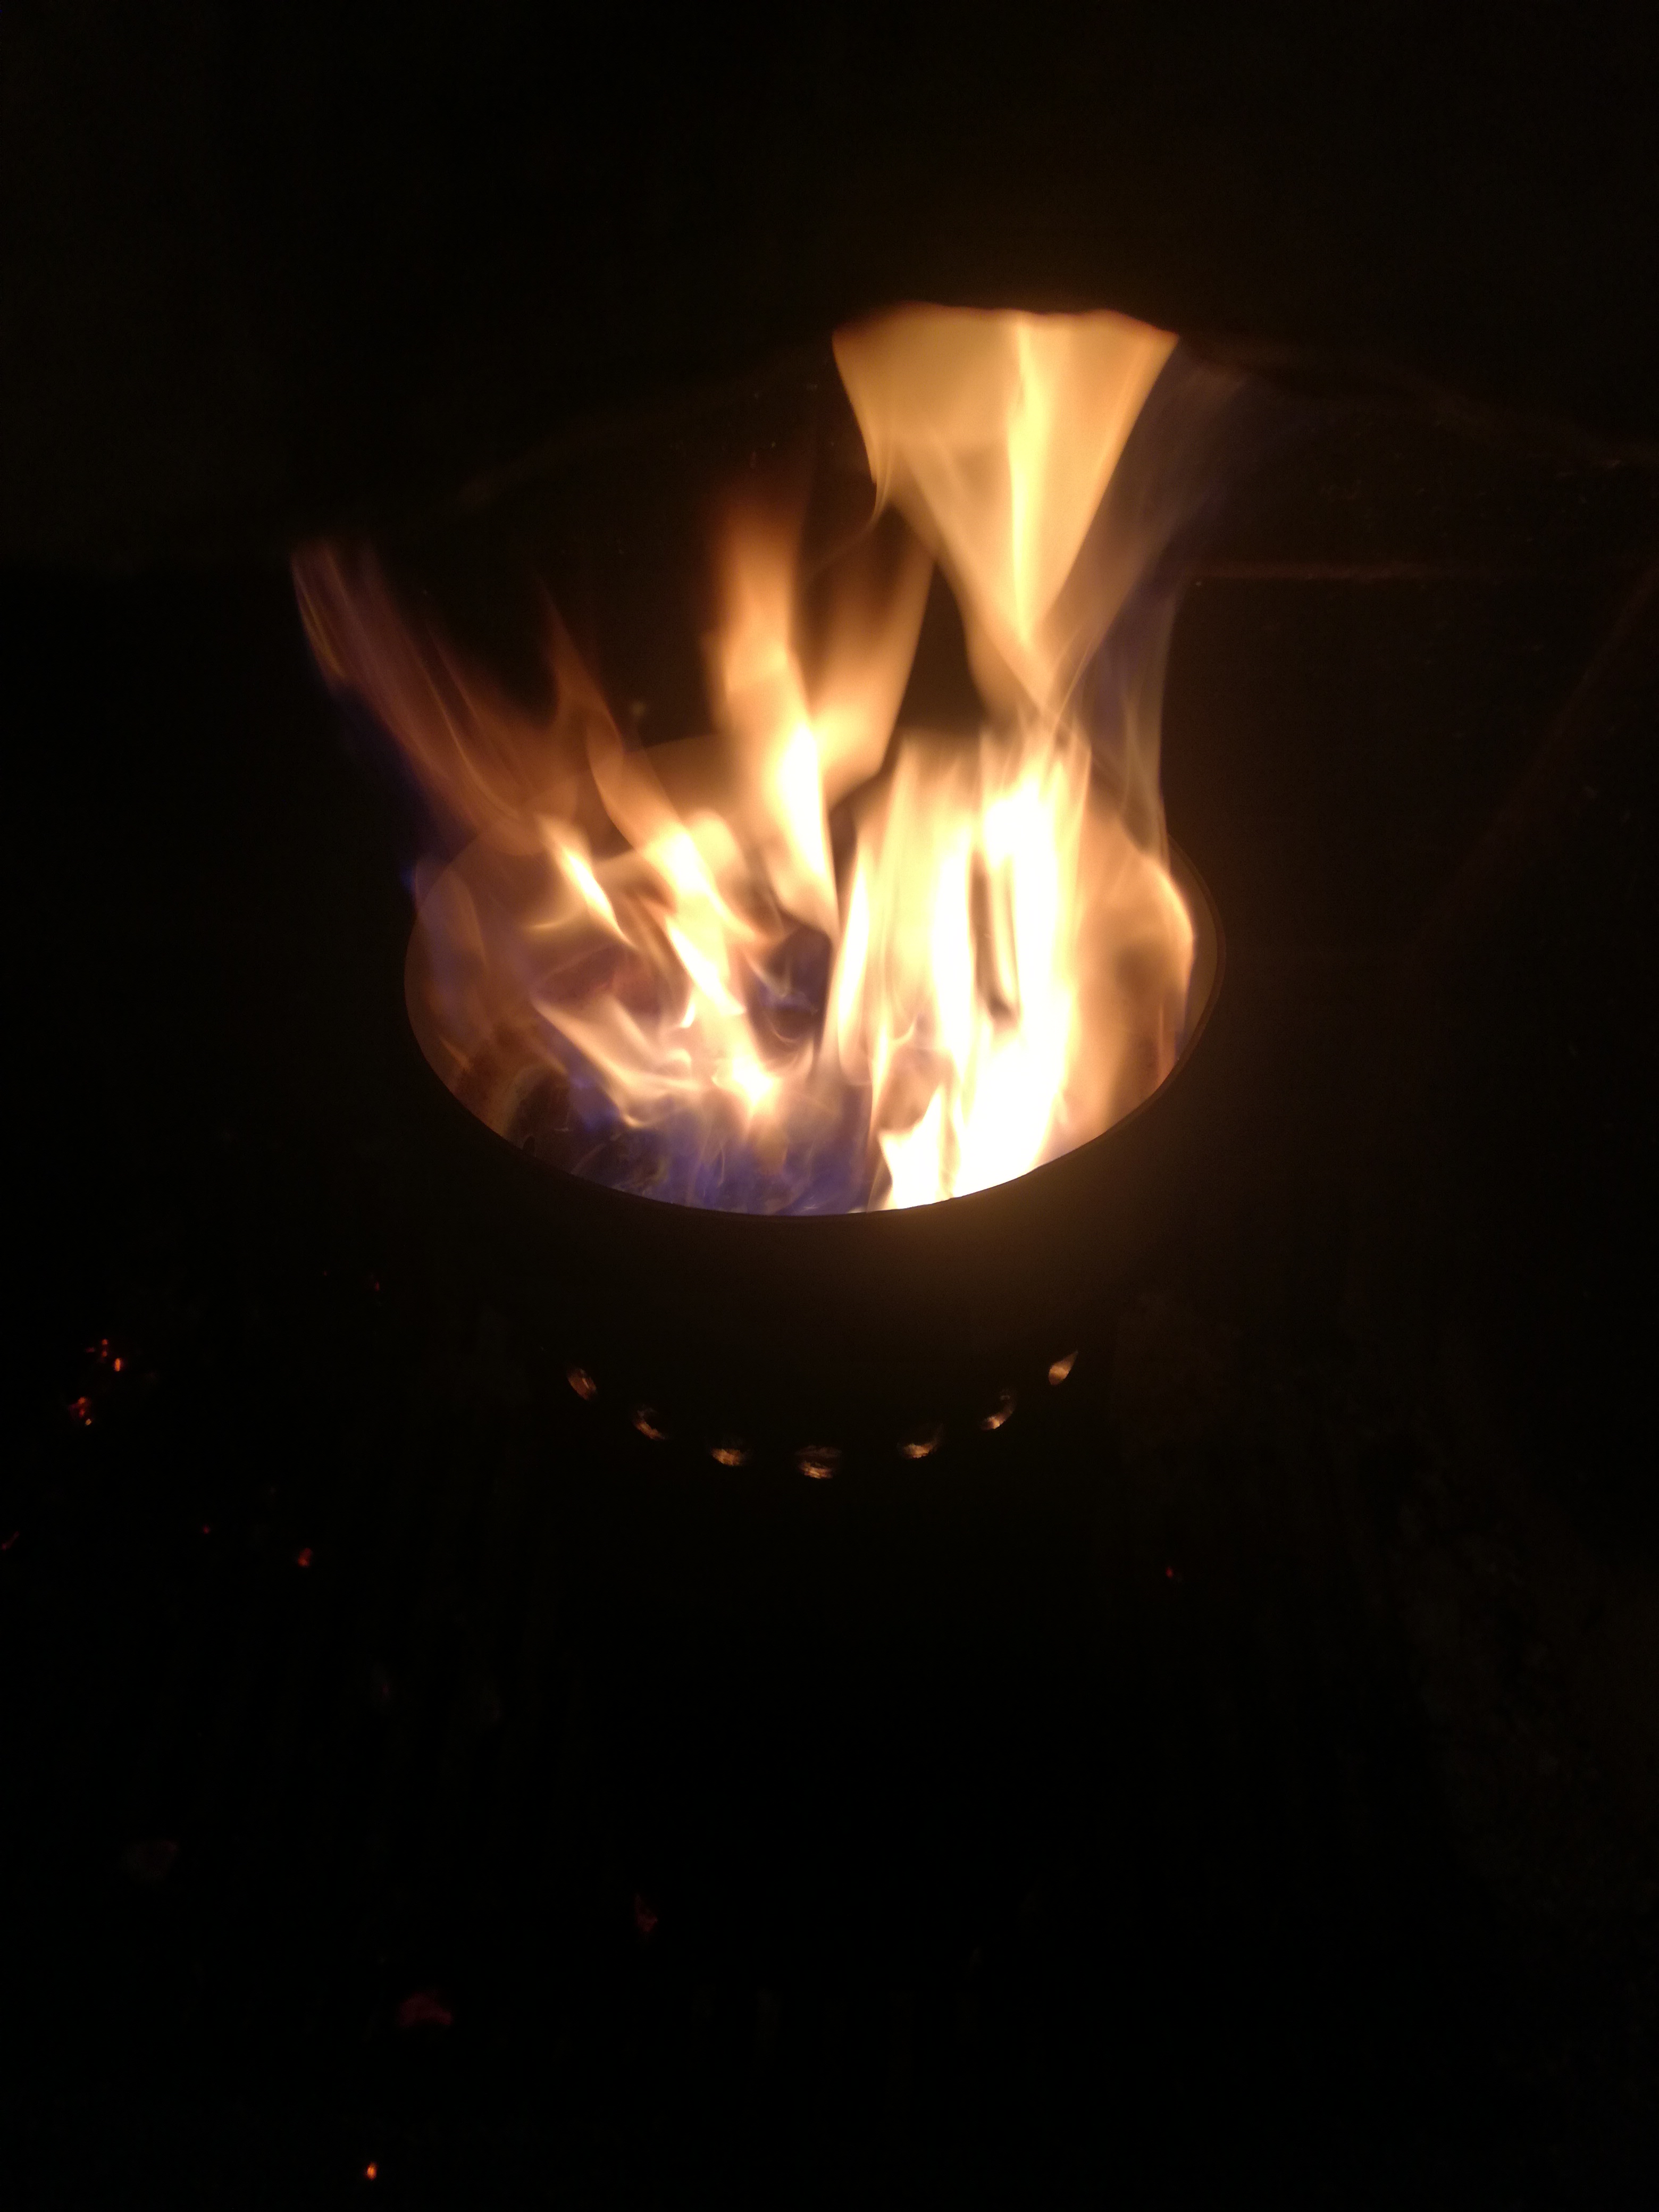
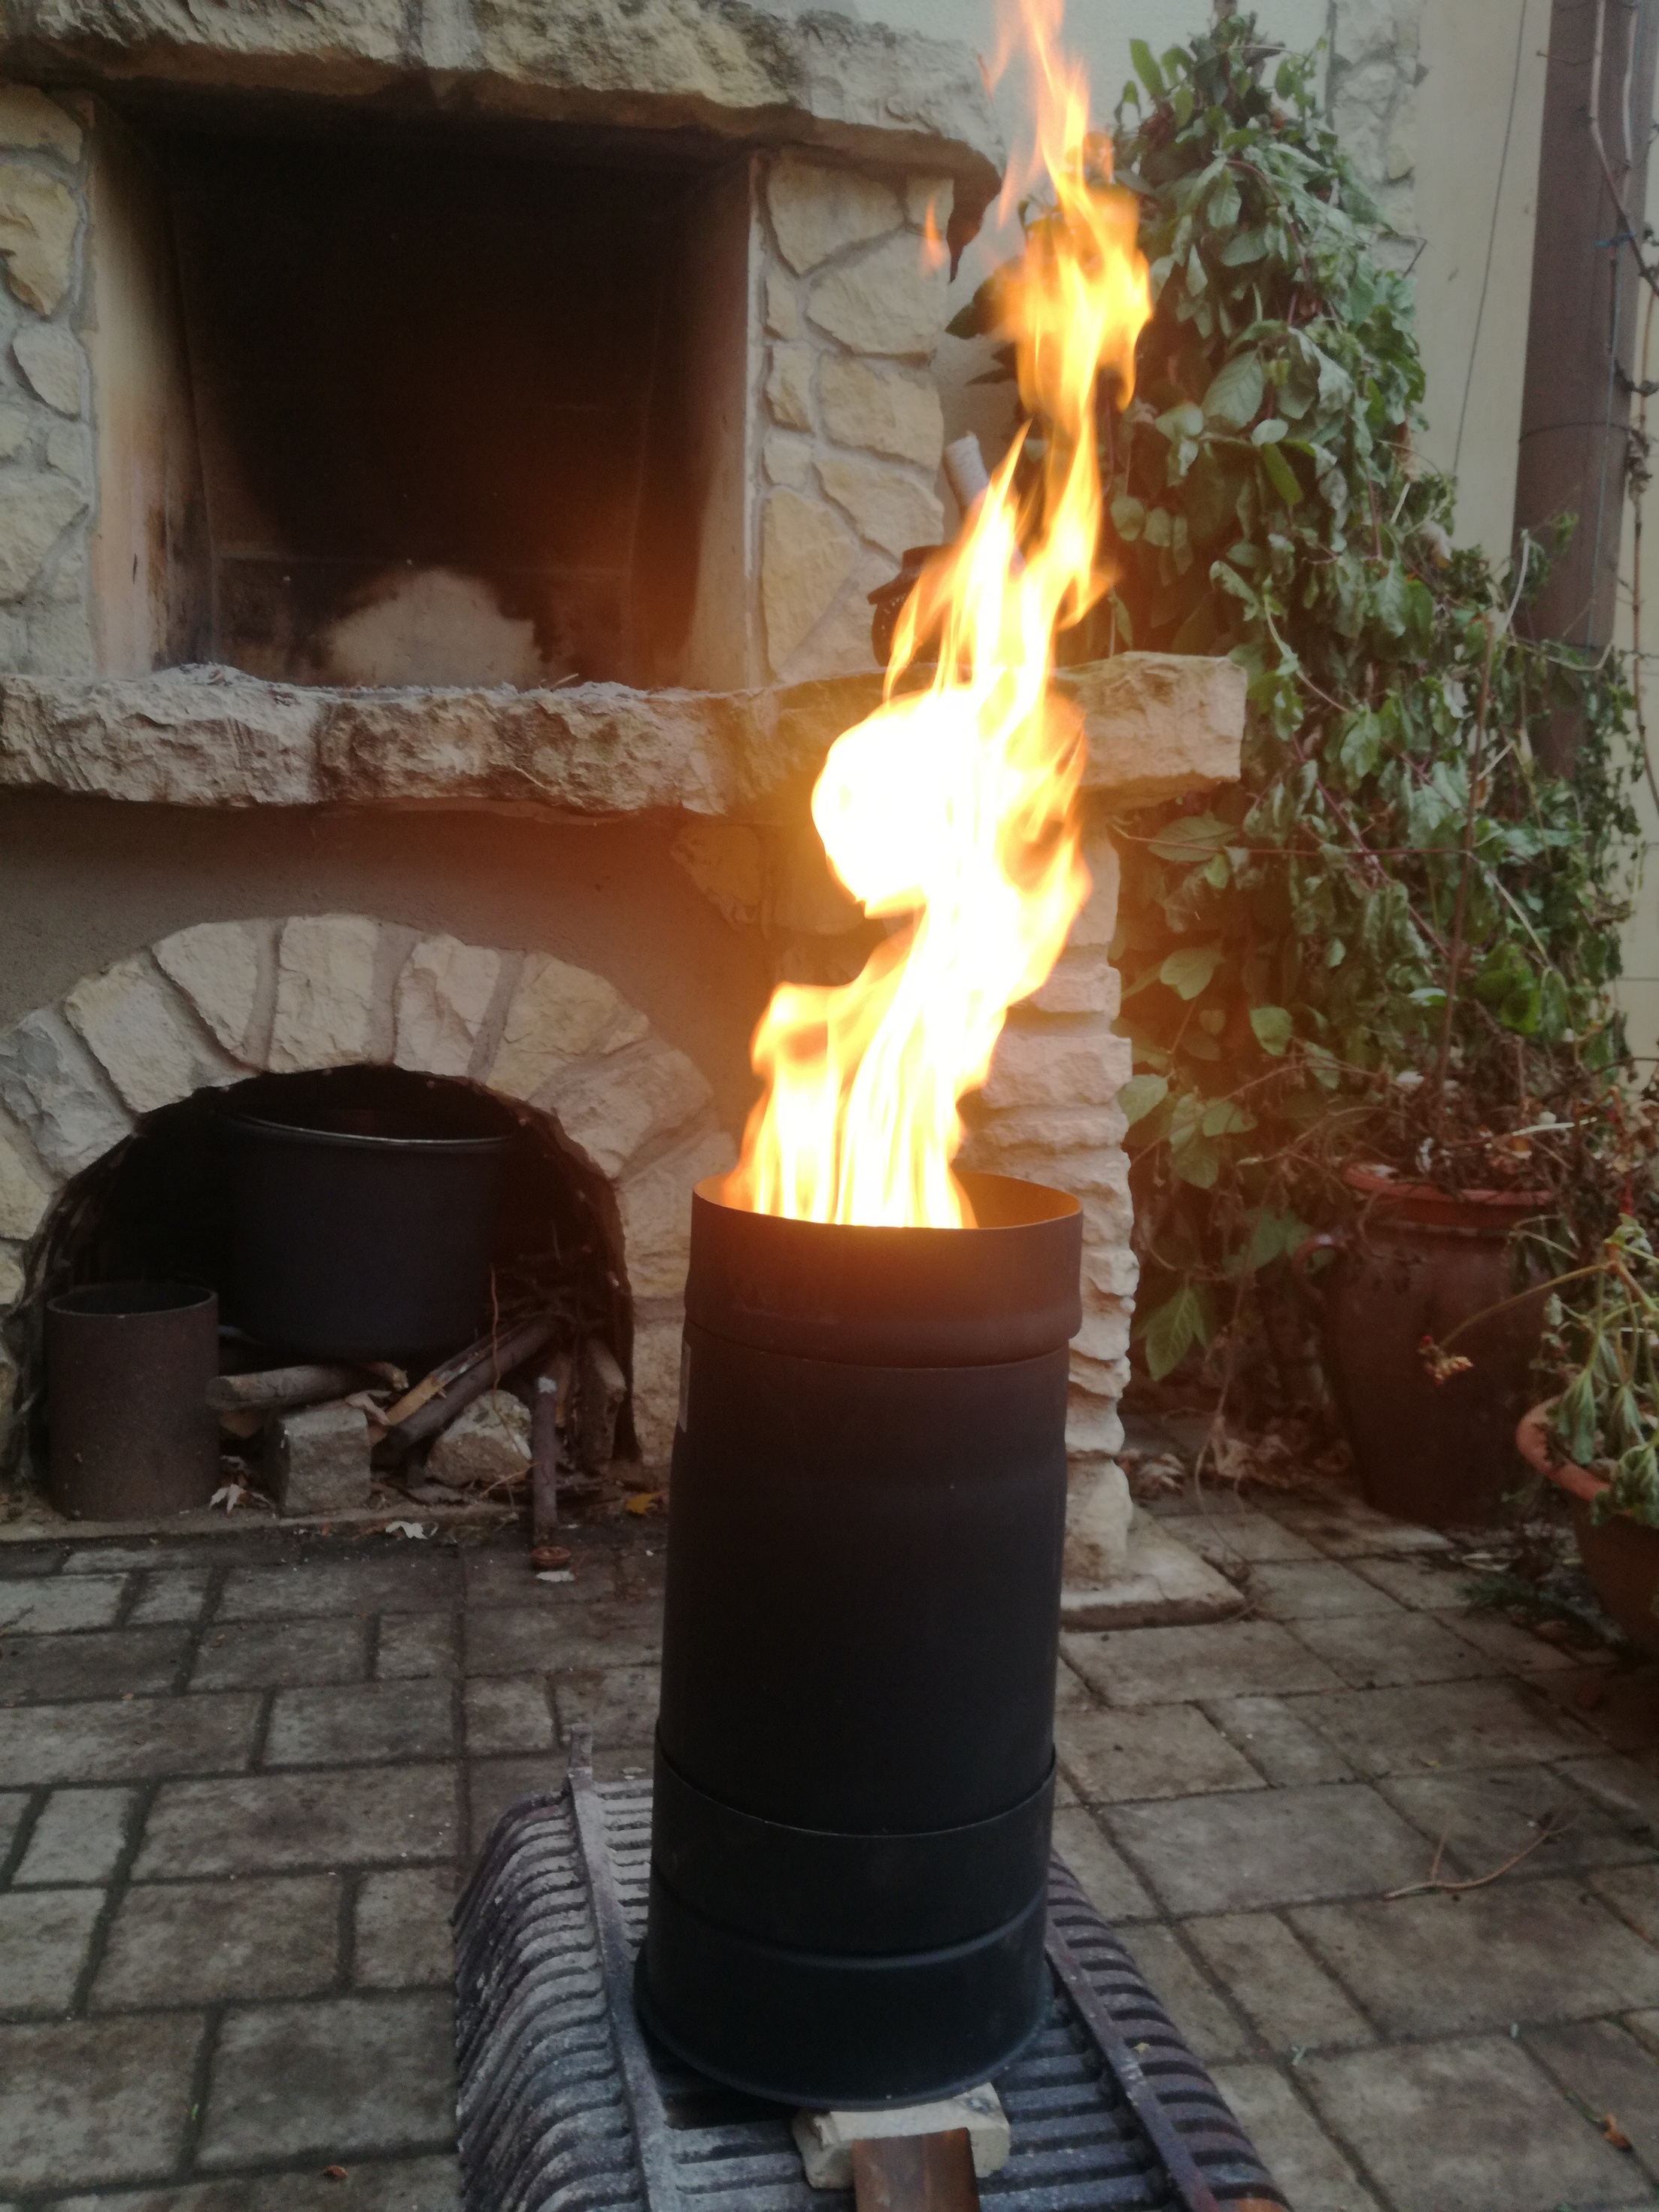
Roaring fire continued for another 30 minutes with occasional adding more fuel until whole 2 gal bucket was consumed. As soon as all fuel inside became a charcoal, the stove went to clear blue gas flame like from the propan burner.
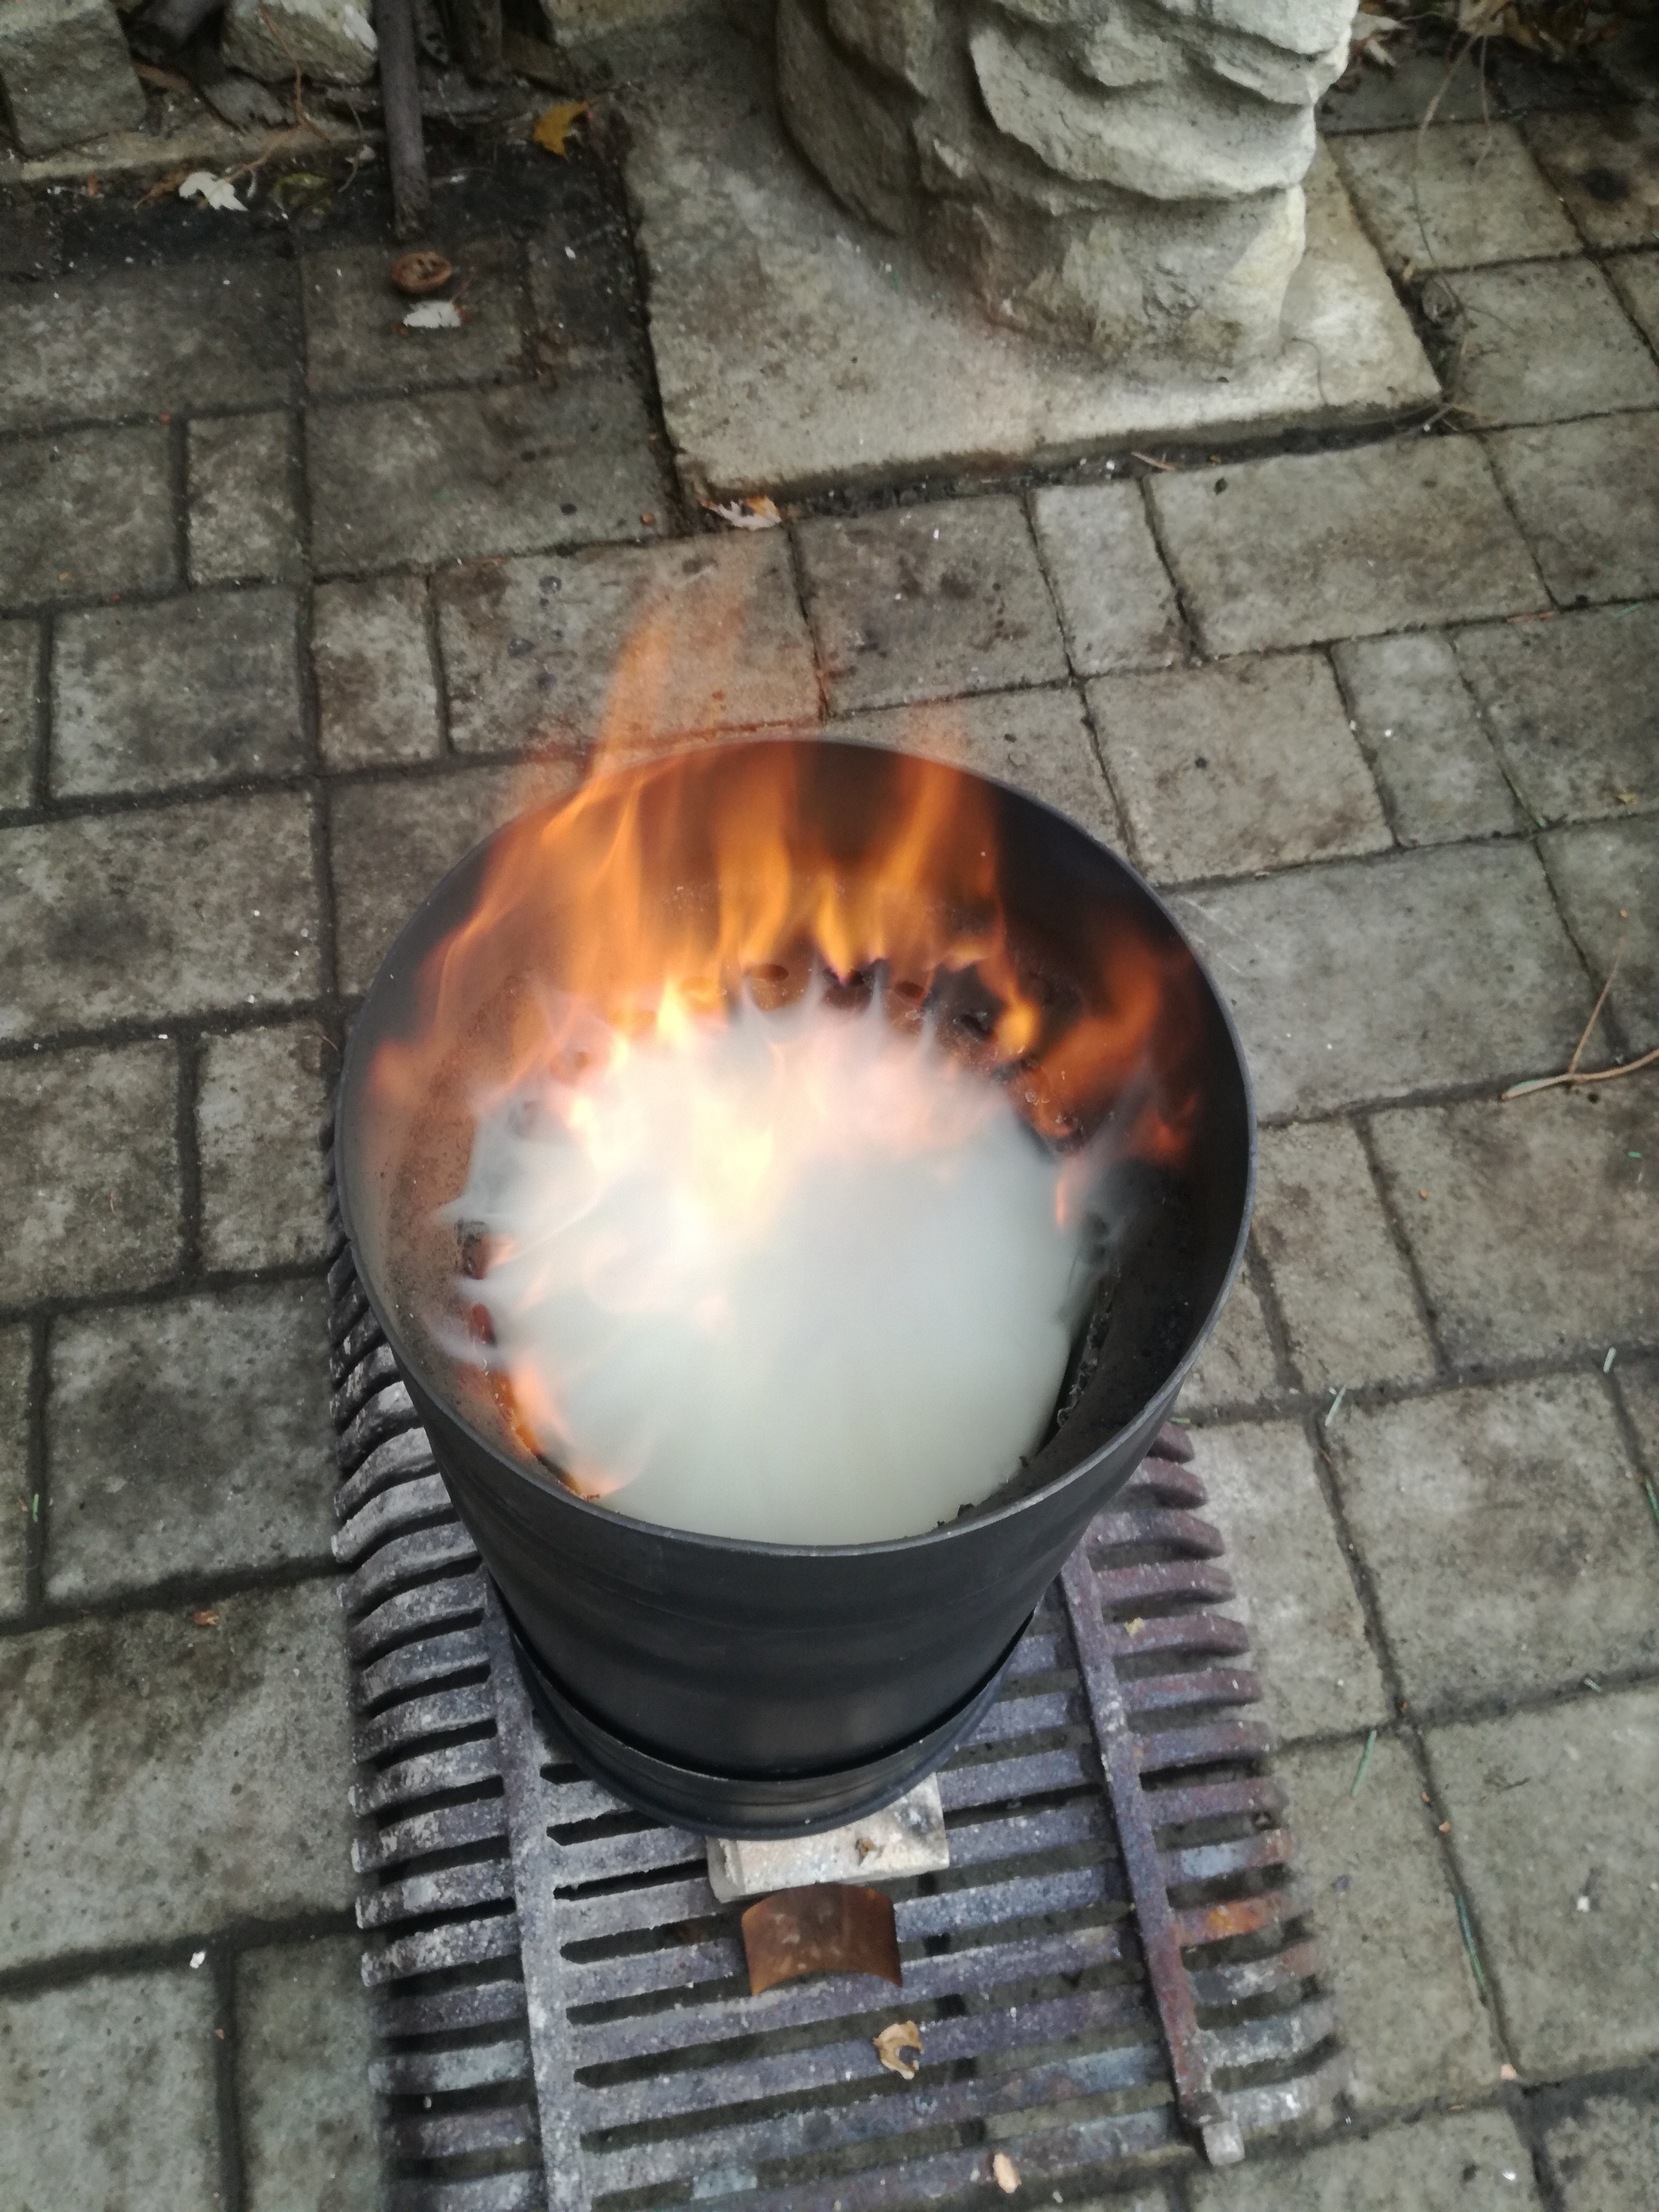
It was able to run in that mode for another 20 minutes. It worked very steadily for the whole period. After that flames at the top ceased. There was still enough hot and black charcoal ad the bottom of the stove, but I suppose that it was not thick enough to slow down the gas enough to be reducted into producer gas.
That is very much my plan with our kiln development. The difference is Im putting a bell over the top and using a chimney flu to draft it, along with an active grate to expel the produced charcoal as it is made without further oxidation degradation of the charcoal as it is produced.
So the change is to replace the fire tube with a TLUD designed fire tube.
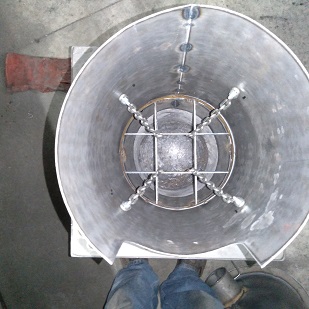
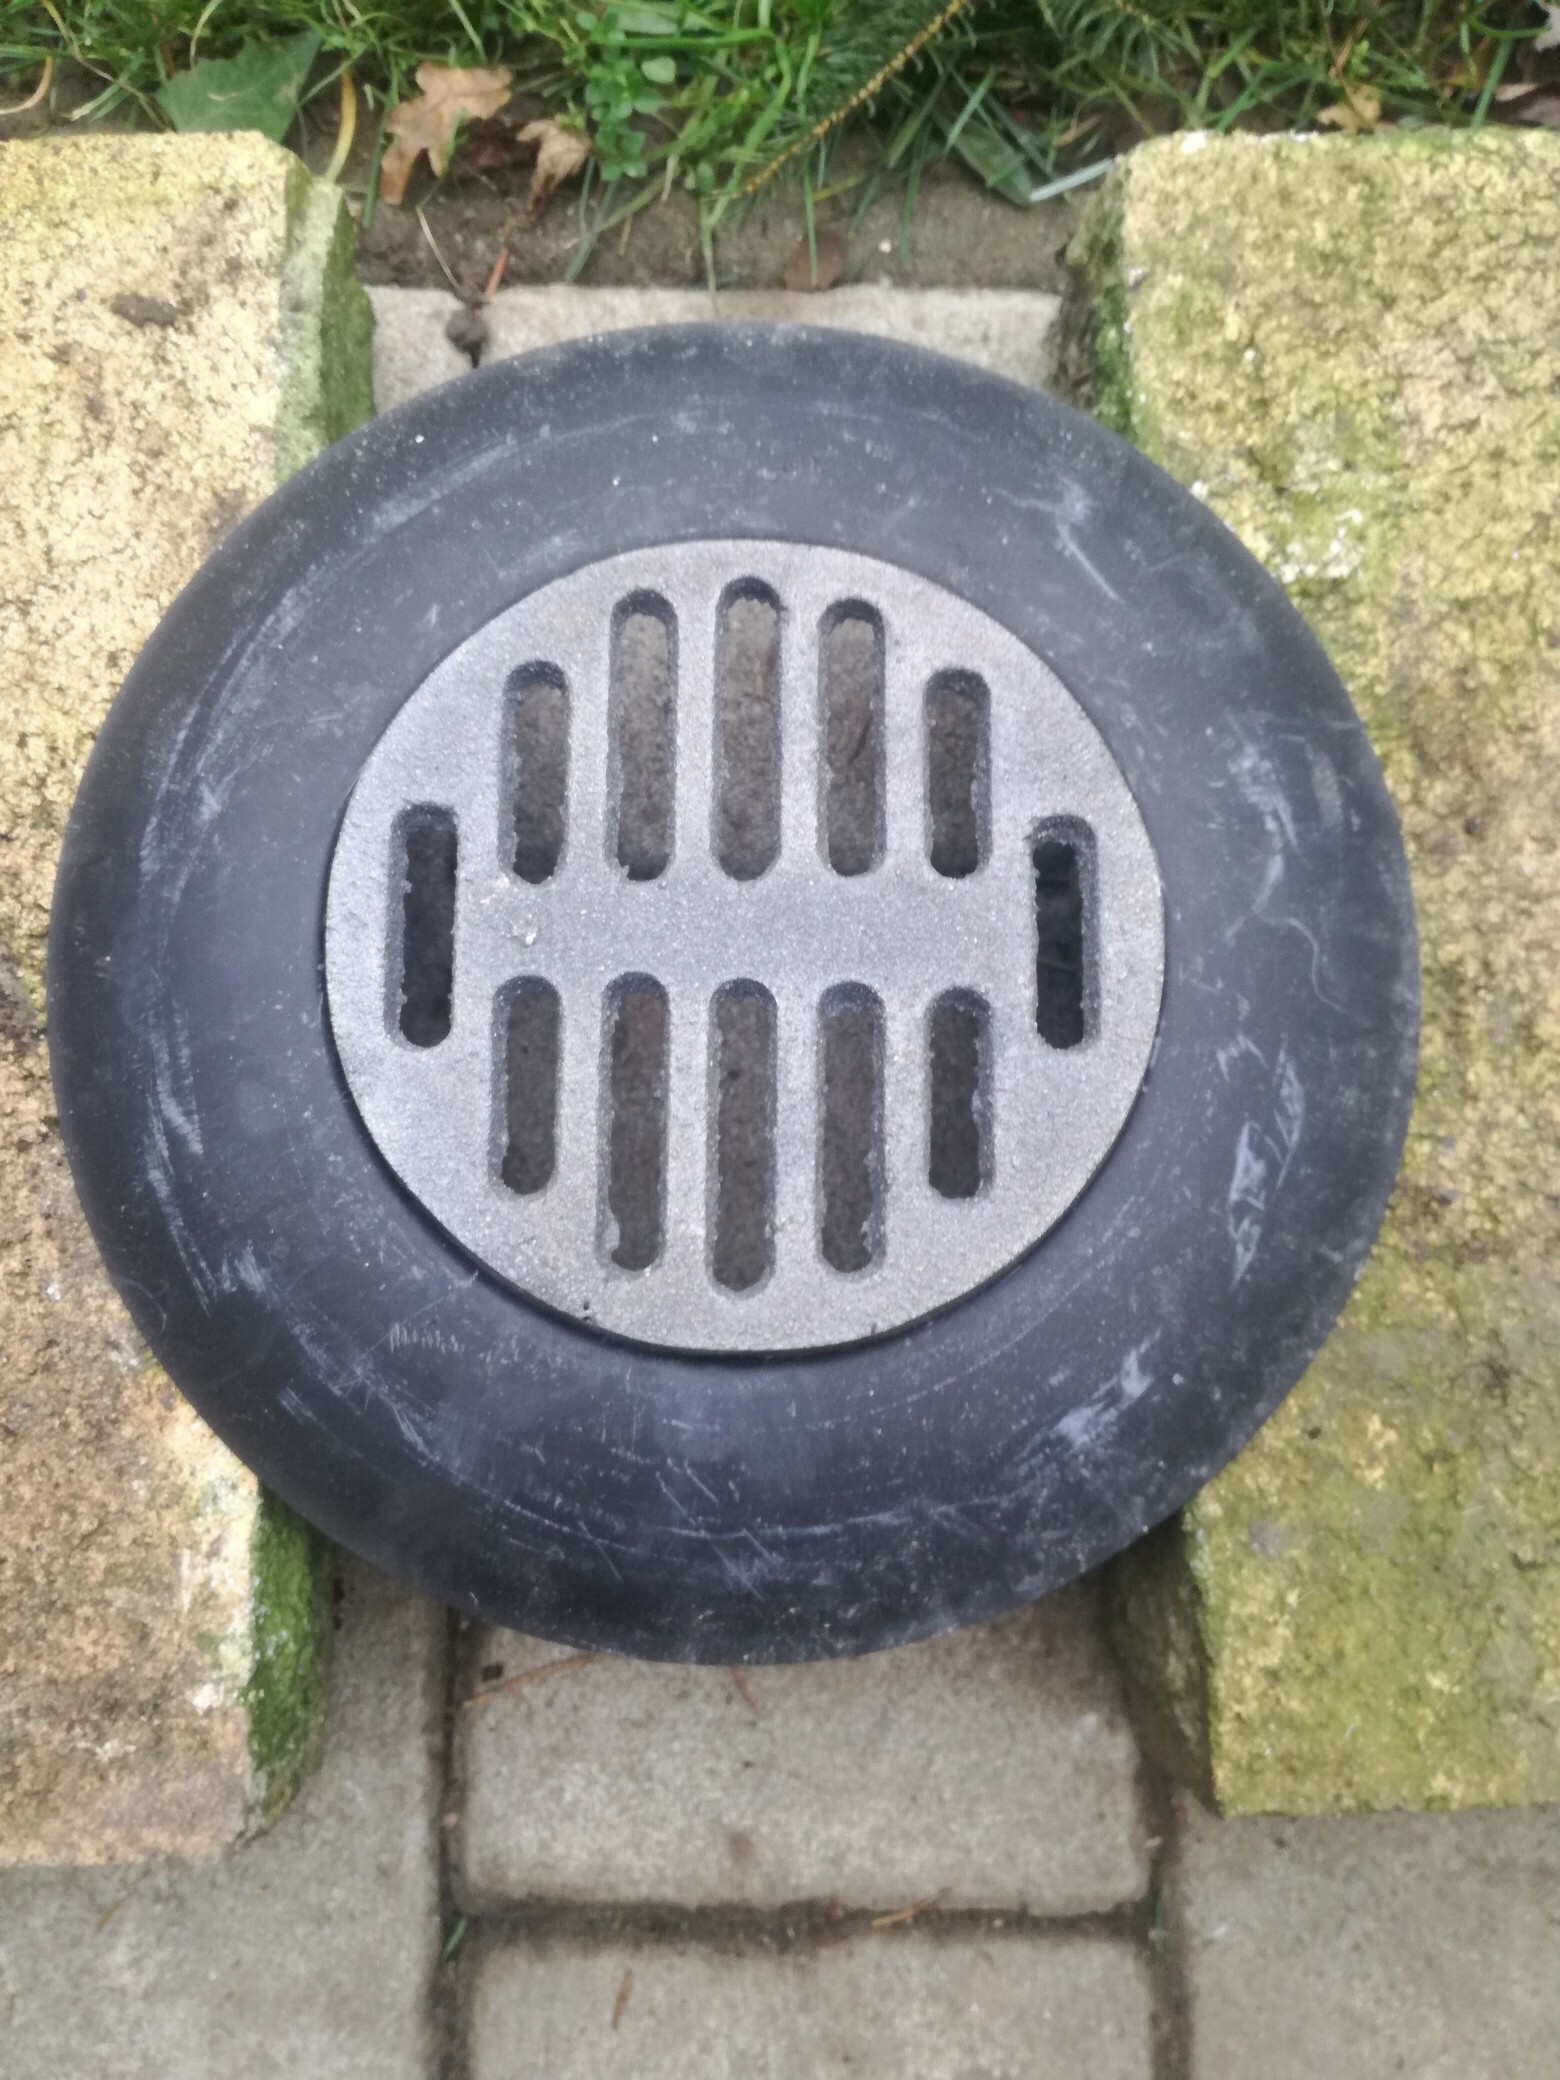
Pic of the active grate
Fully assembled with the bell top and chimney flu set up. I can run this indoors for primary heat and it works quite well. With the TLUD fire tube I anticipate it will be more efficient for both heat output and charcoal production. We can already get 50% charcoal of what we put in by volume. I should note, that is only if we are working the machine to produce charcoal. If we just let it be it is much less.
I do not plan to develop something sophisticated like you, @Matt. At least for now, I do not see more than fancy heater usable at my backyard or at the tarrace.
Now, when the concept is proven, I would like to add something to manage primary air intake. Also some stand to improve stability will be my concern.
Once bottom is solved, I will focus on feeding. I was thinking about 3" to 4" pipe and two feet long inserted from top just one inch below the secondary air intake. It should keep automatically appropriate fuel level in active zone. I already find the proper tube in my backyard
If you install the bell this is a huge huge improvement and its not sophisticated at all. Its just a barrel drum over the top of what you already have created with a chimney. I did not have a barrel drum for this project so I had to make it. Now instead of the heat just dissipating out the top into the air, the heat is forced back down heating the fuel again. Much more efficient.
Yeah it is actually not designed for indoor use. I can not market this as heater, its for outdoor use only. But if the user installs it indoors then they installed indoors.
At some point I am going to build a huge one and it will be housed inside a cinder block enclosure to further insulate it. Keep that heat inside and heat that fuel as much as you can before it leaves the unit. These machines are amazing as is, you load the machine shut the door come back and the fuel has not even moved or changed other than it is black. Put new fuel in and that existing fuel falls apart almost like glass and just drops to the bottom. The goal for me is to make this as efficient as possible.
Very cool what you are doing, I have built a large TLUD much like you have built. We used to use to incinerate our trash.
I guess I may have missed the point of his thread. About the 4th post down his stove looks huge and after second glance it is much smaller than I realized and thought he was trying to make charcoal verses just a small cooking stove. But his build is pretty cool and is exactly what I plan to build and incorporate into the design I posted here for charcoal production. Just with some added features to add efficiency. So I got a bit excited seeing his beautiful build here.
What about to make it “box-like” instead of “drum”, @Matt. It would allow you to have double walls at sides, which could serve as risers for hot air sucked at the bottom. I think it could improve hot air circulation in your workshop.
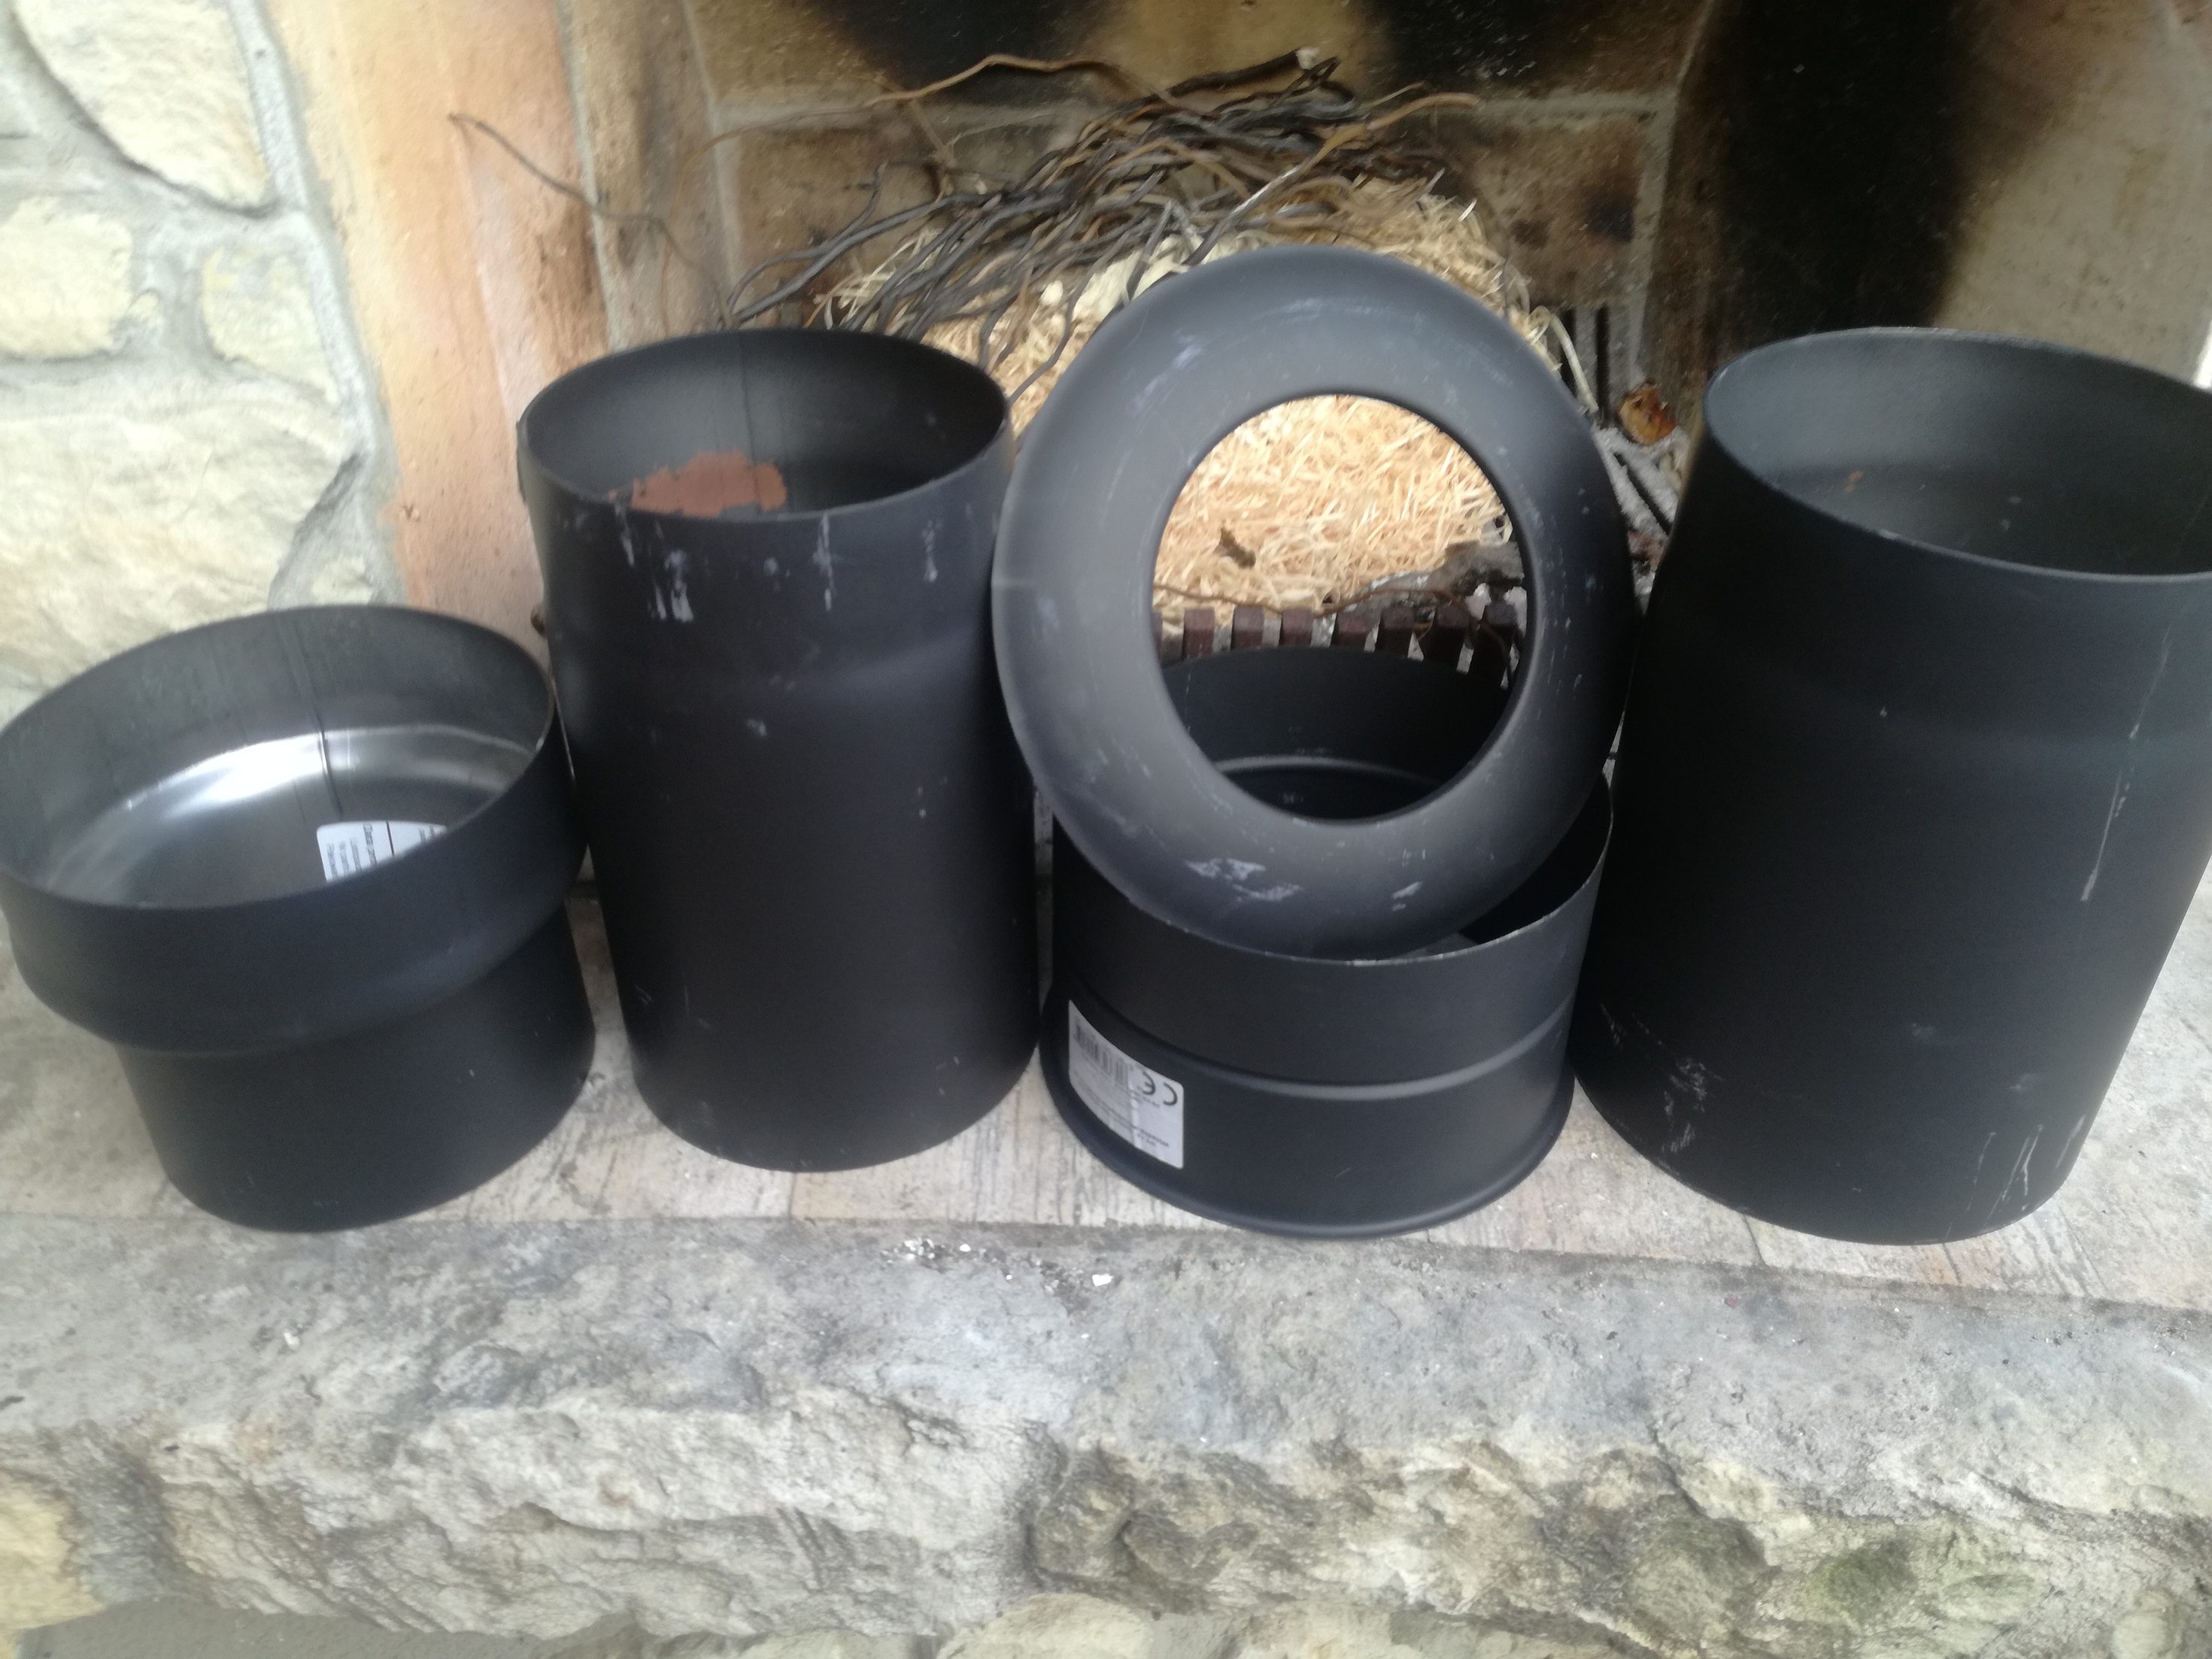
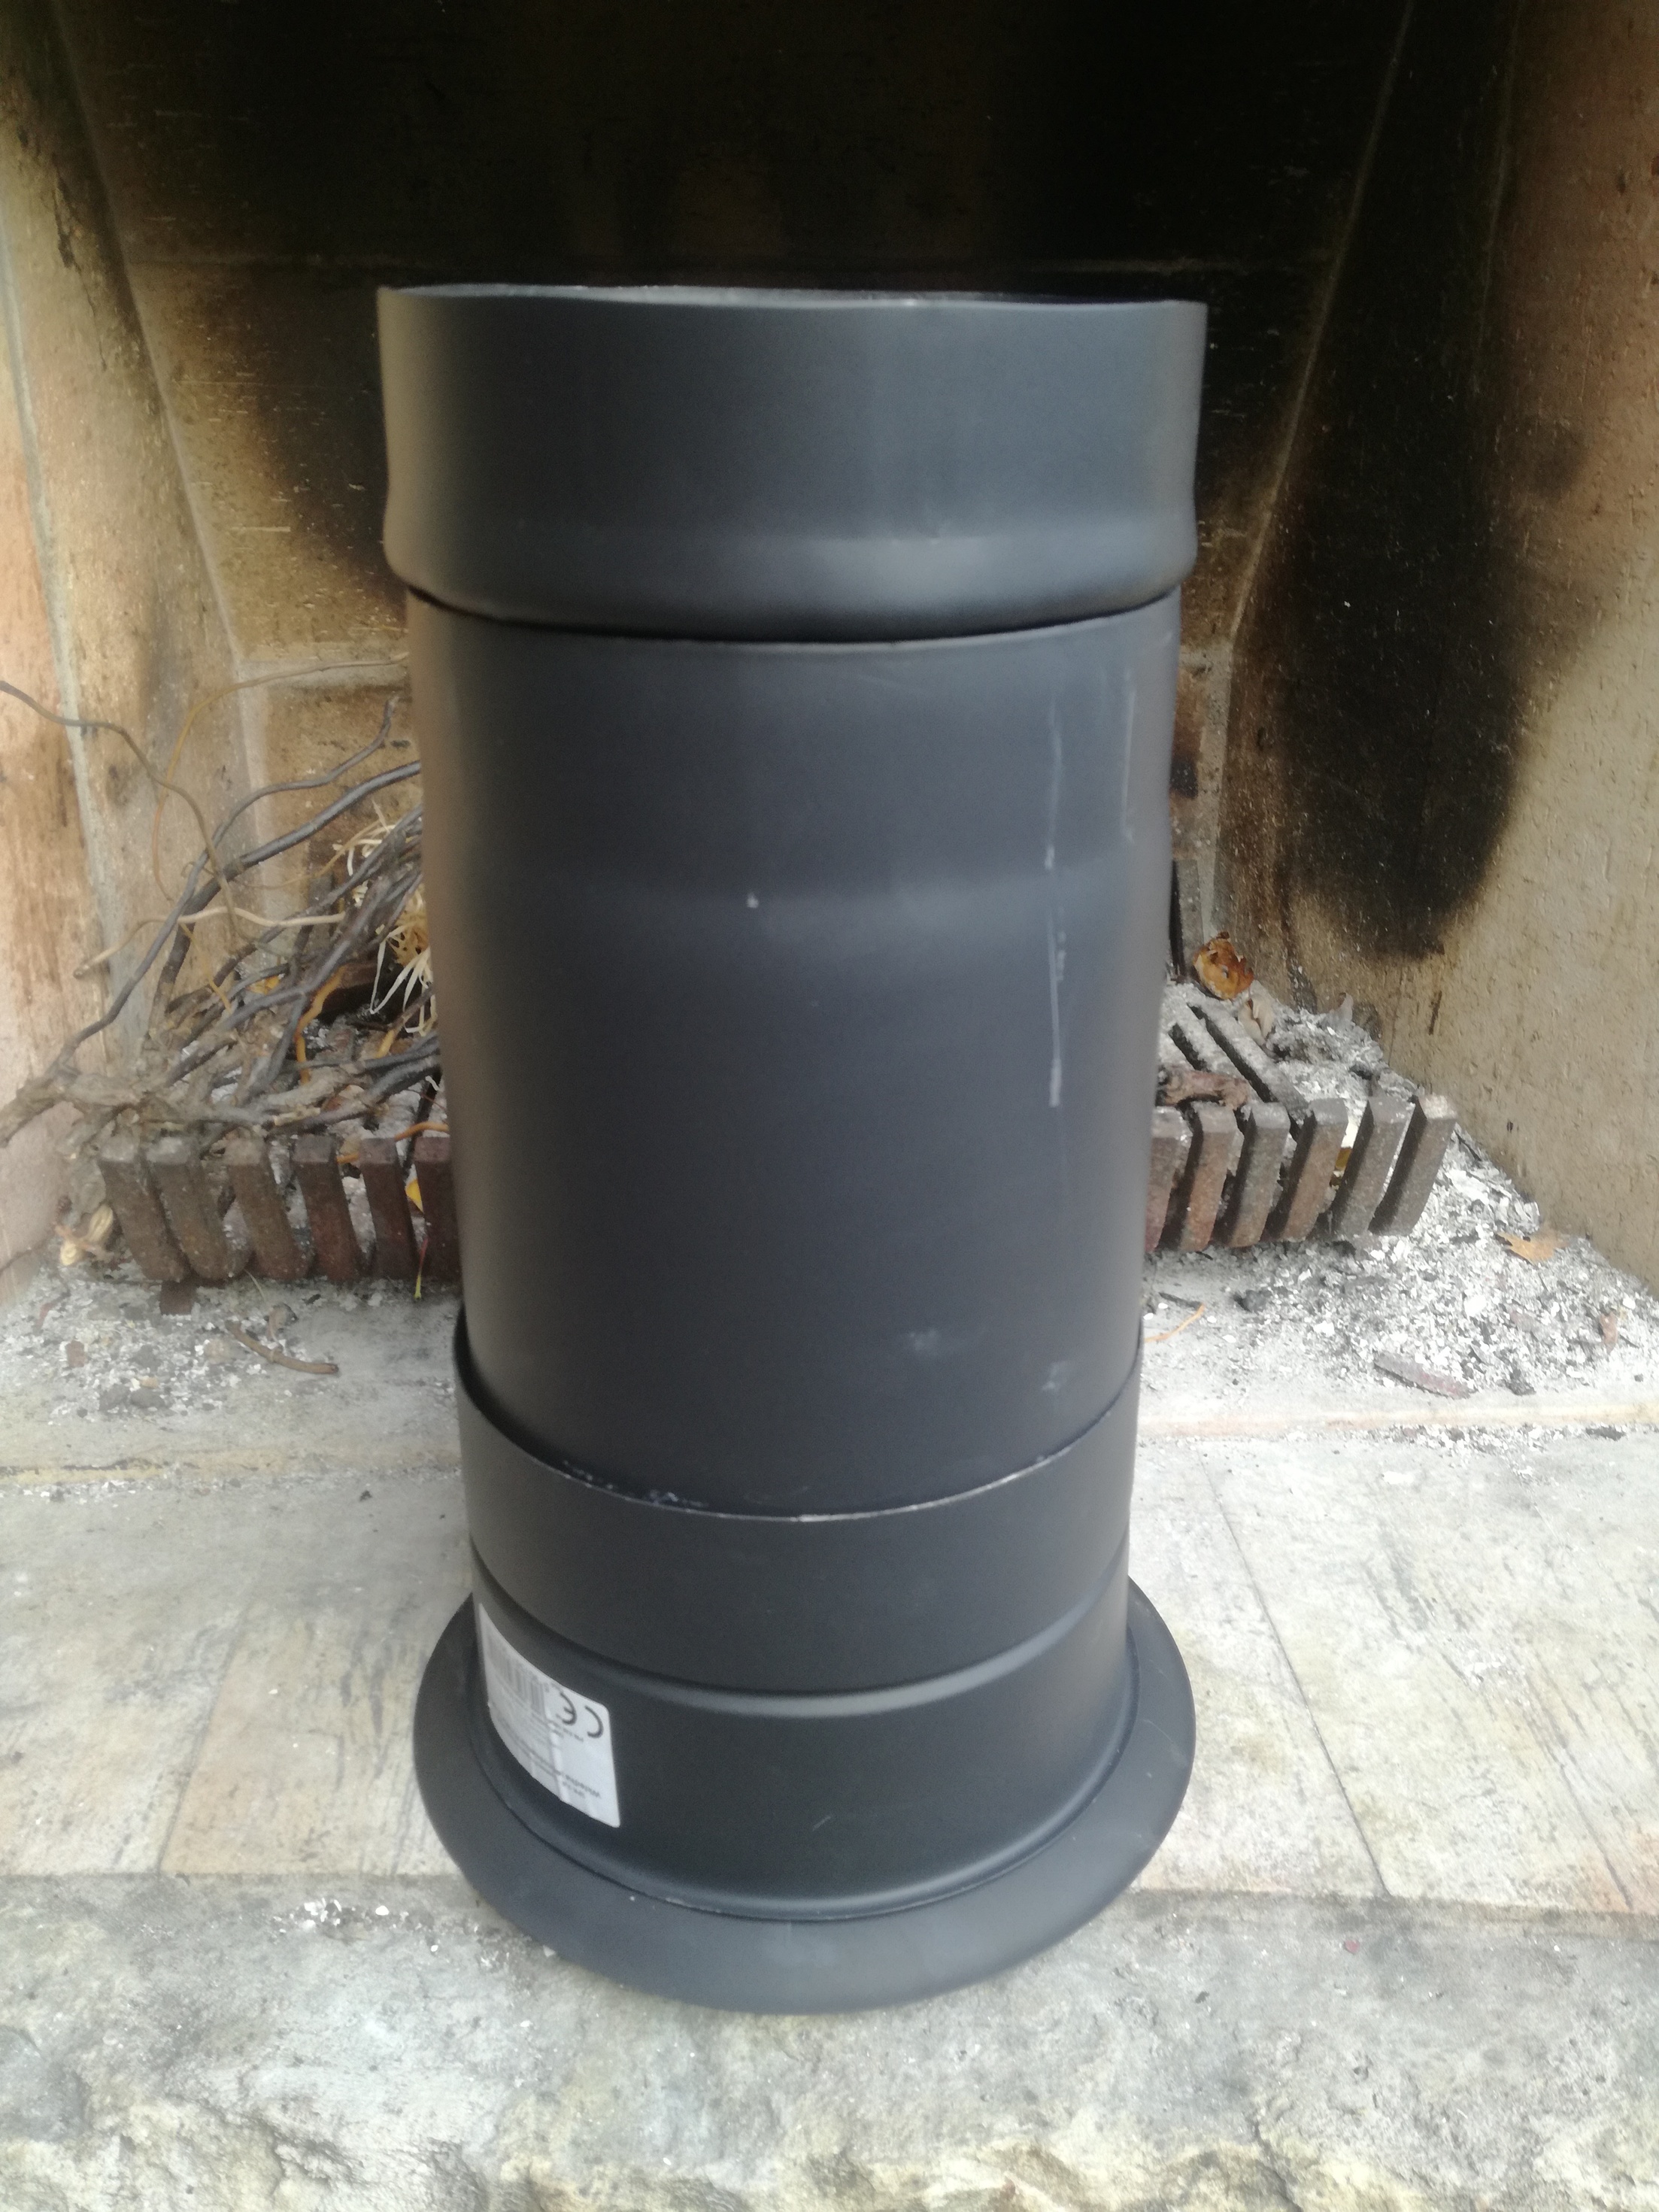


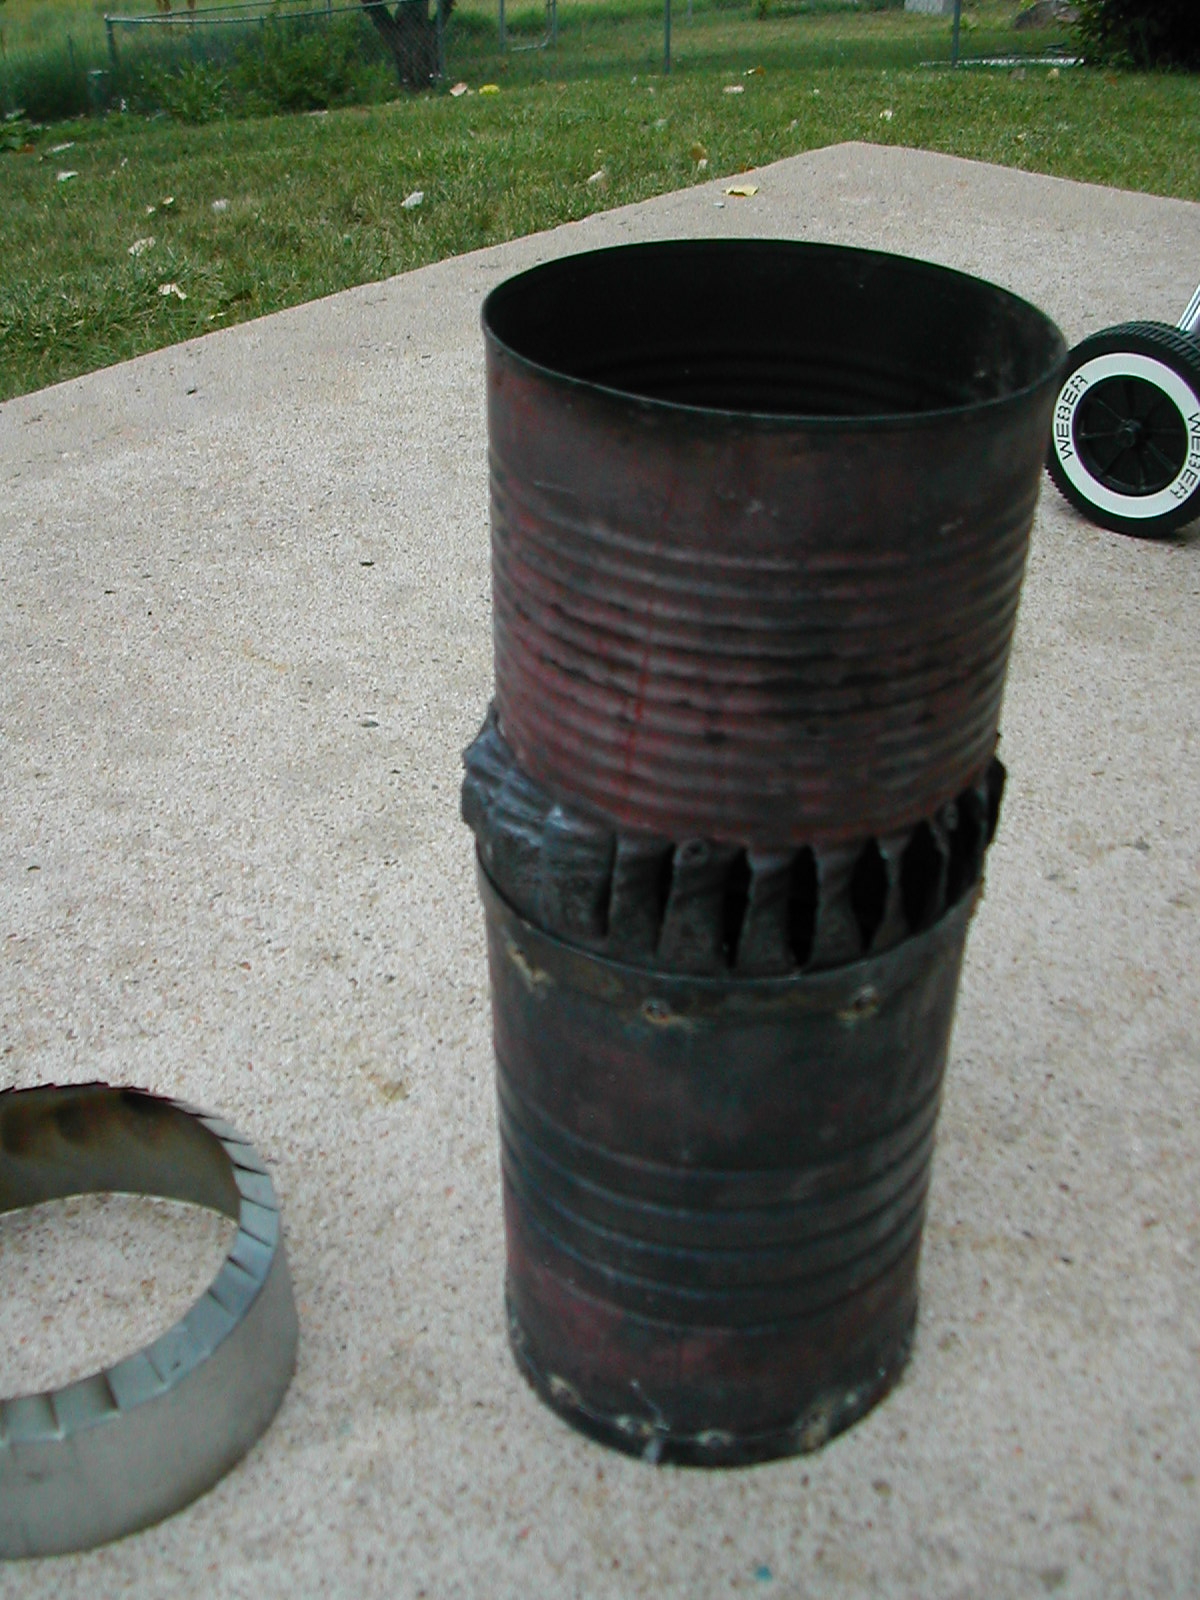

 to drill holes into bottom of outer sleeve. To make whole thing more firm, I fastened the bottom sleeve to the rossete by four self cutting screws.
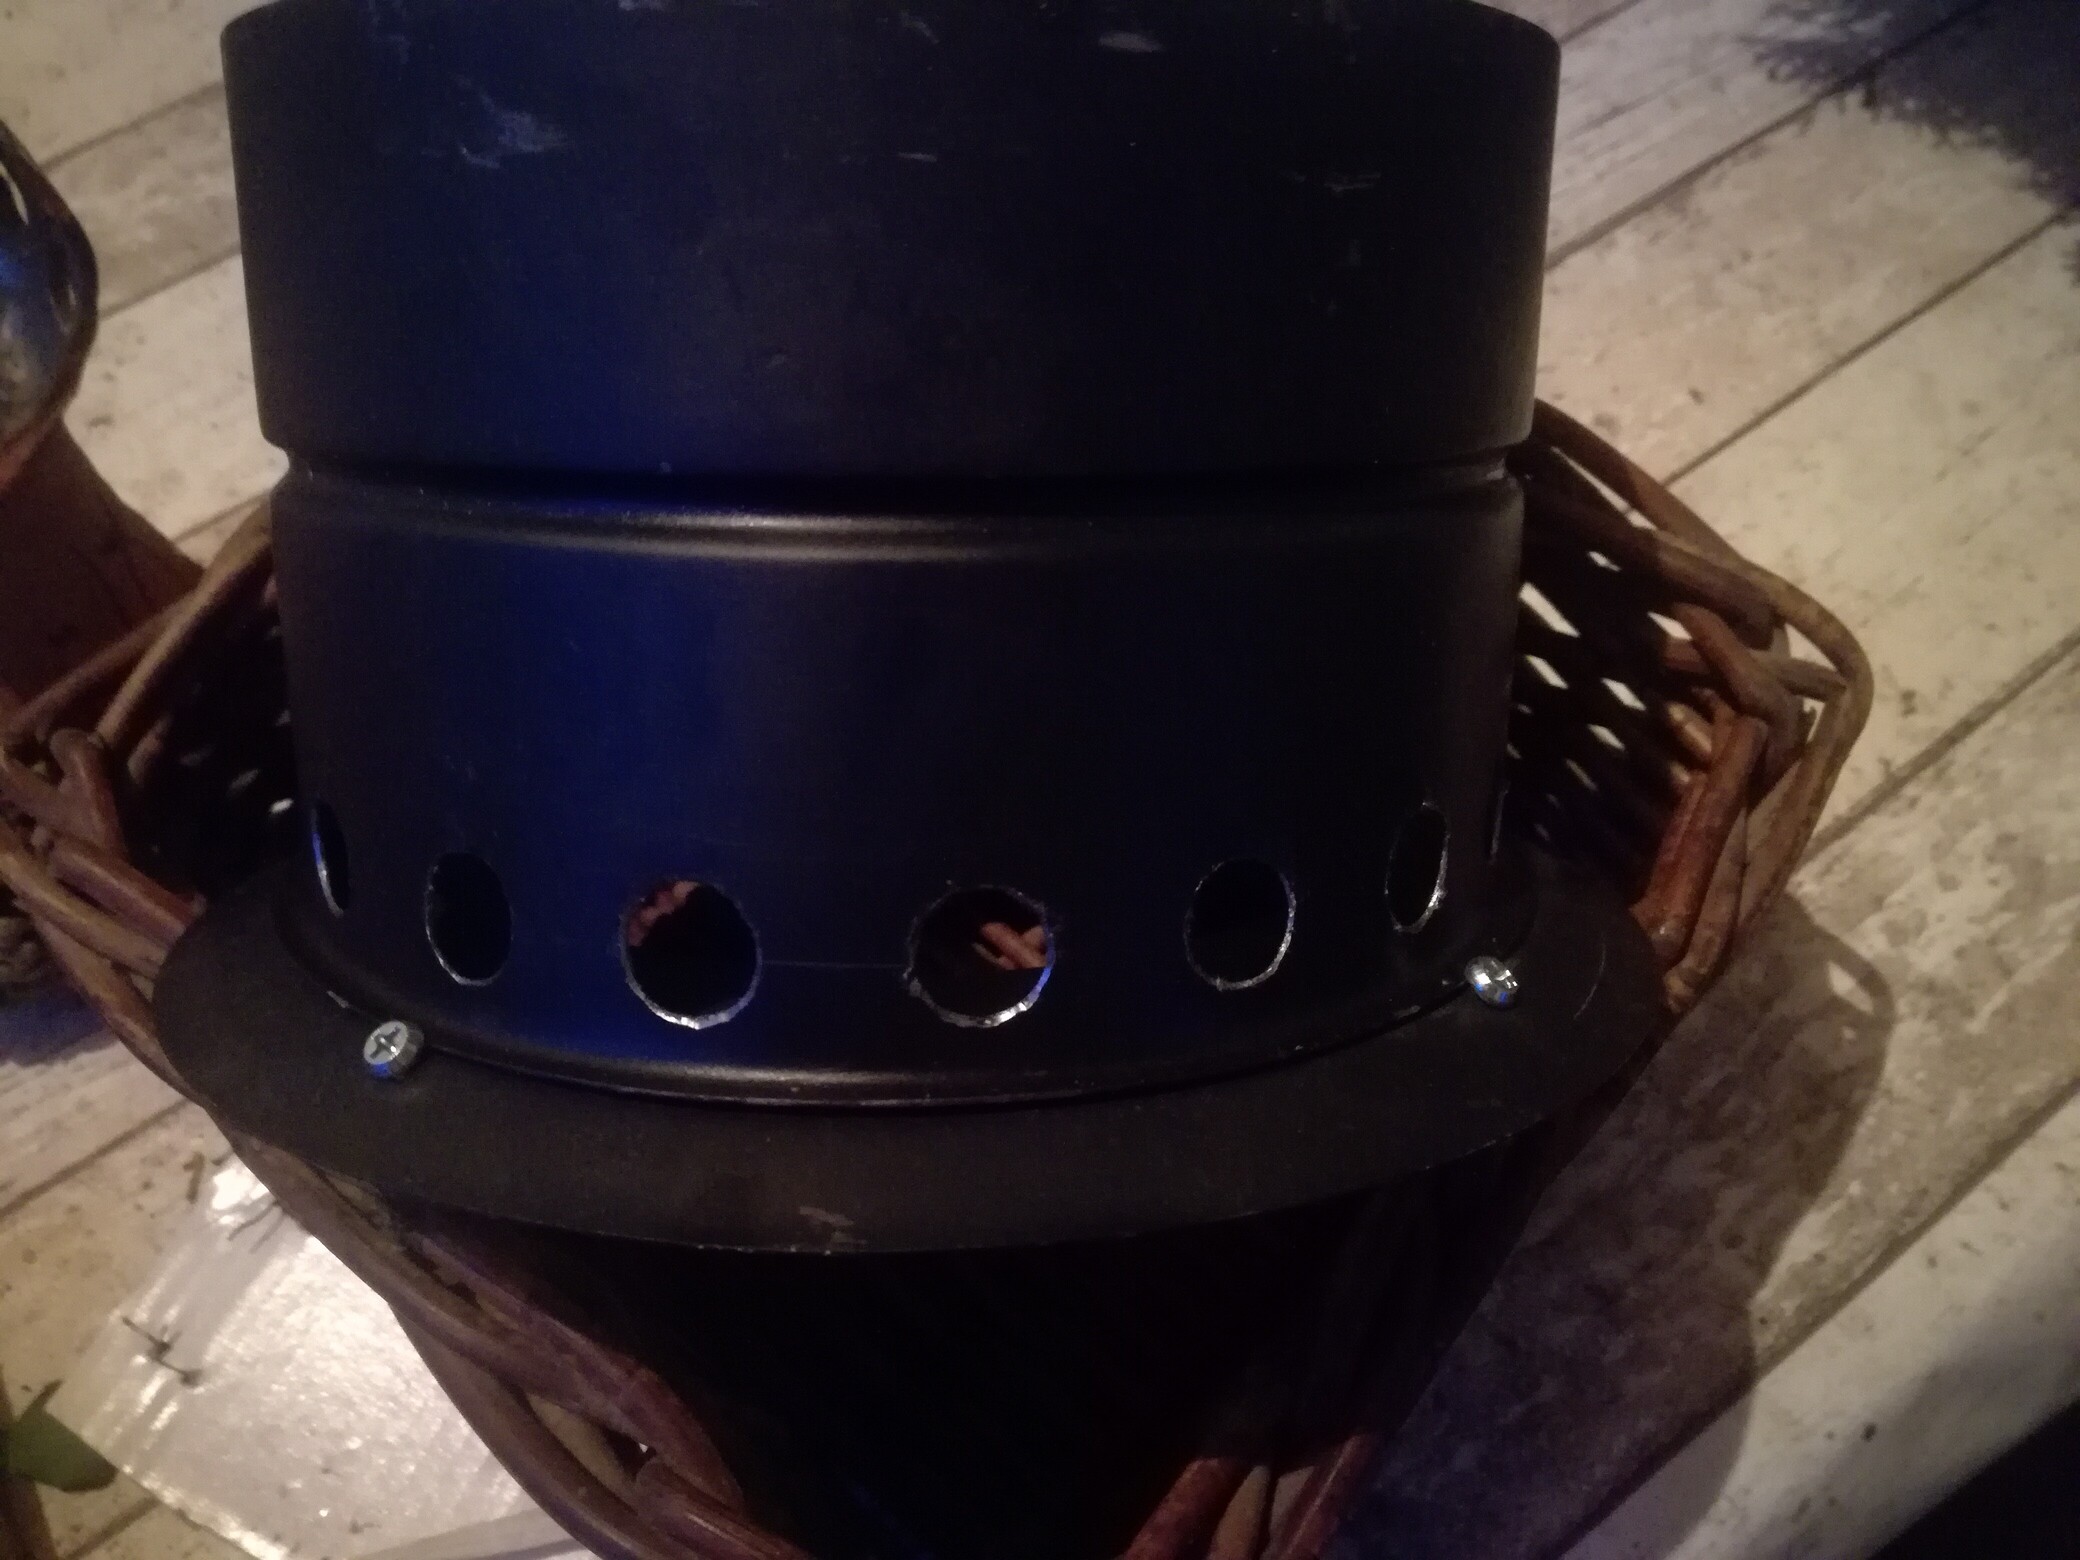

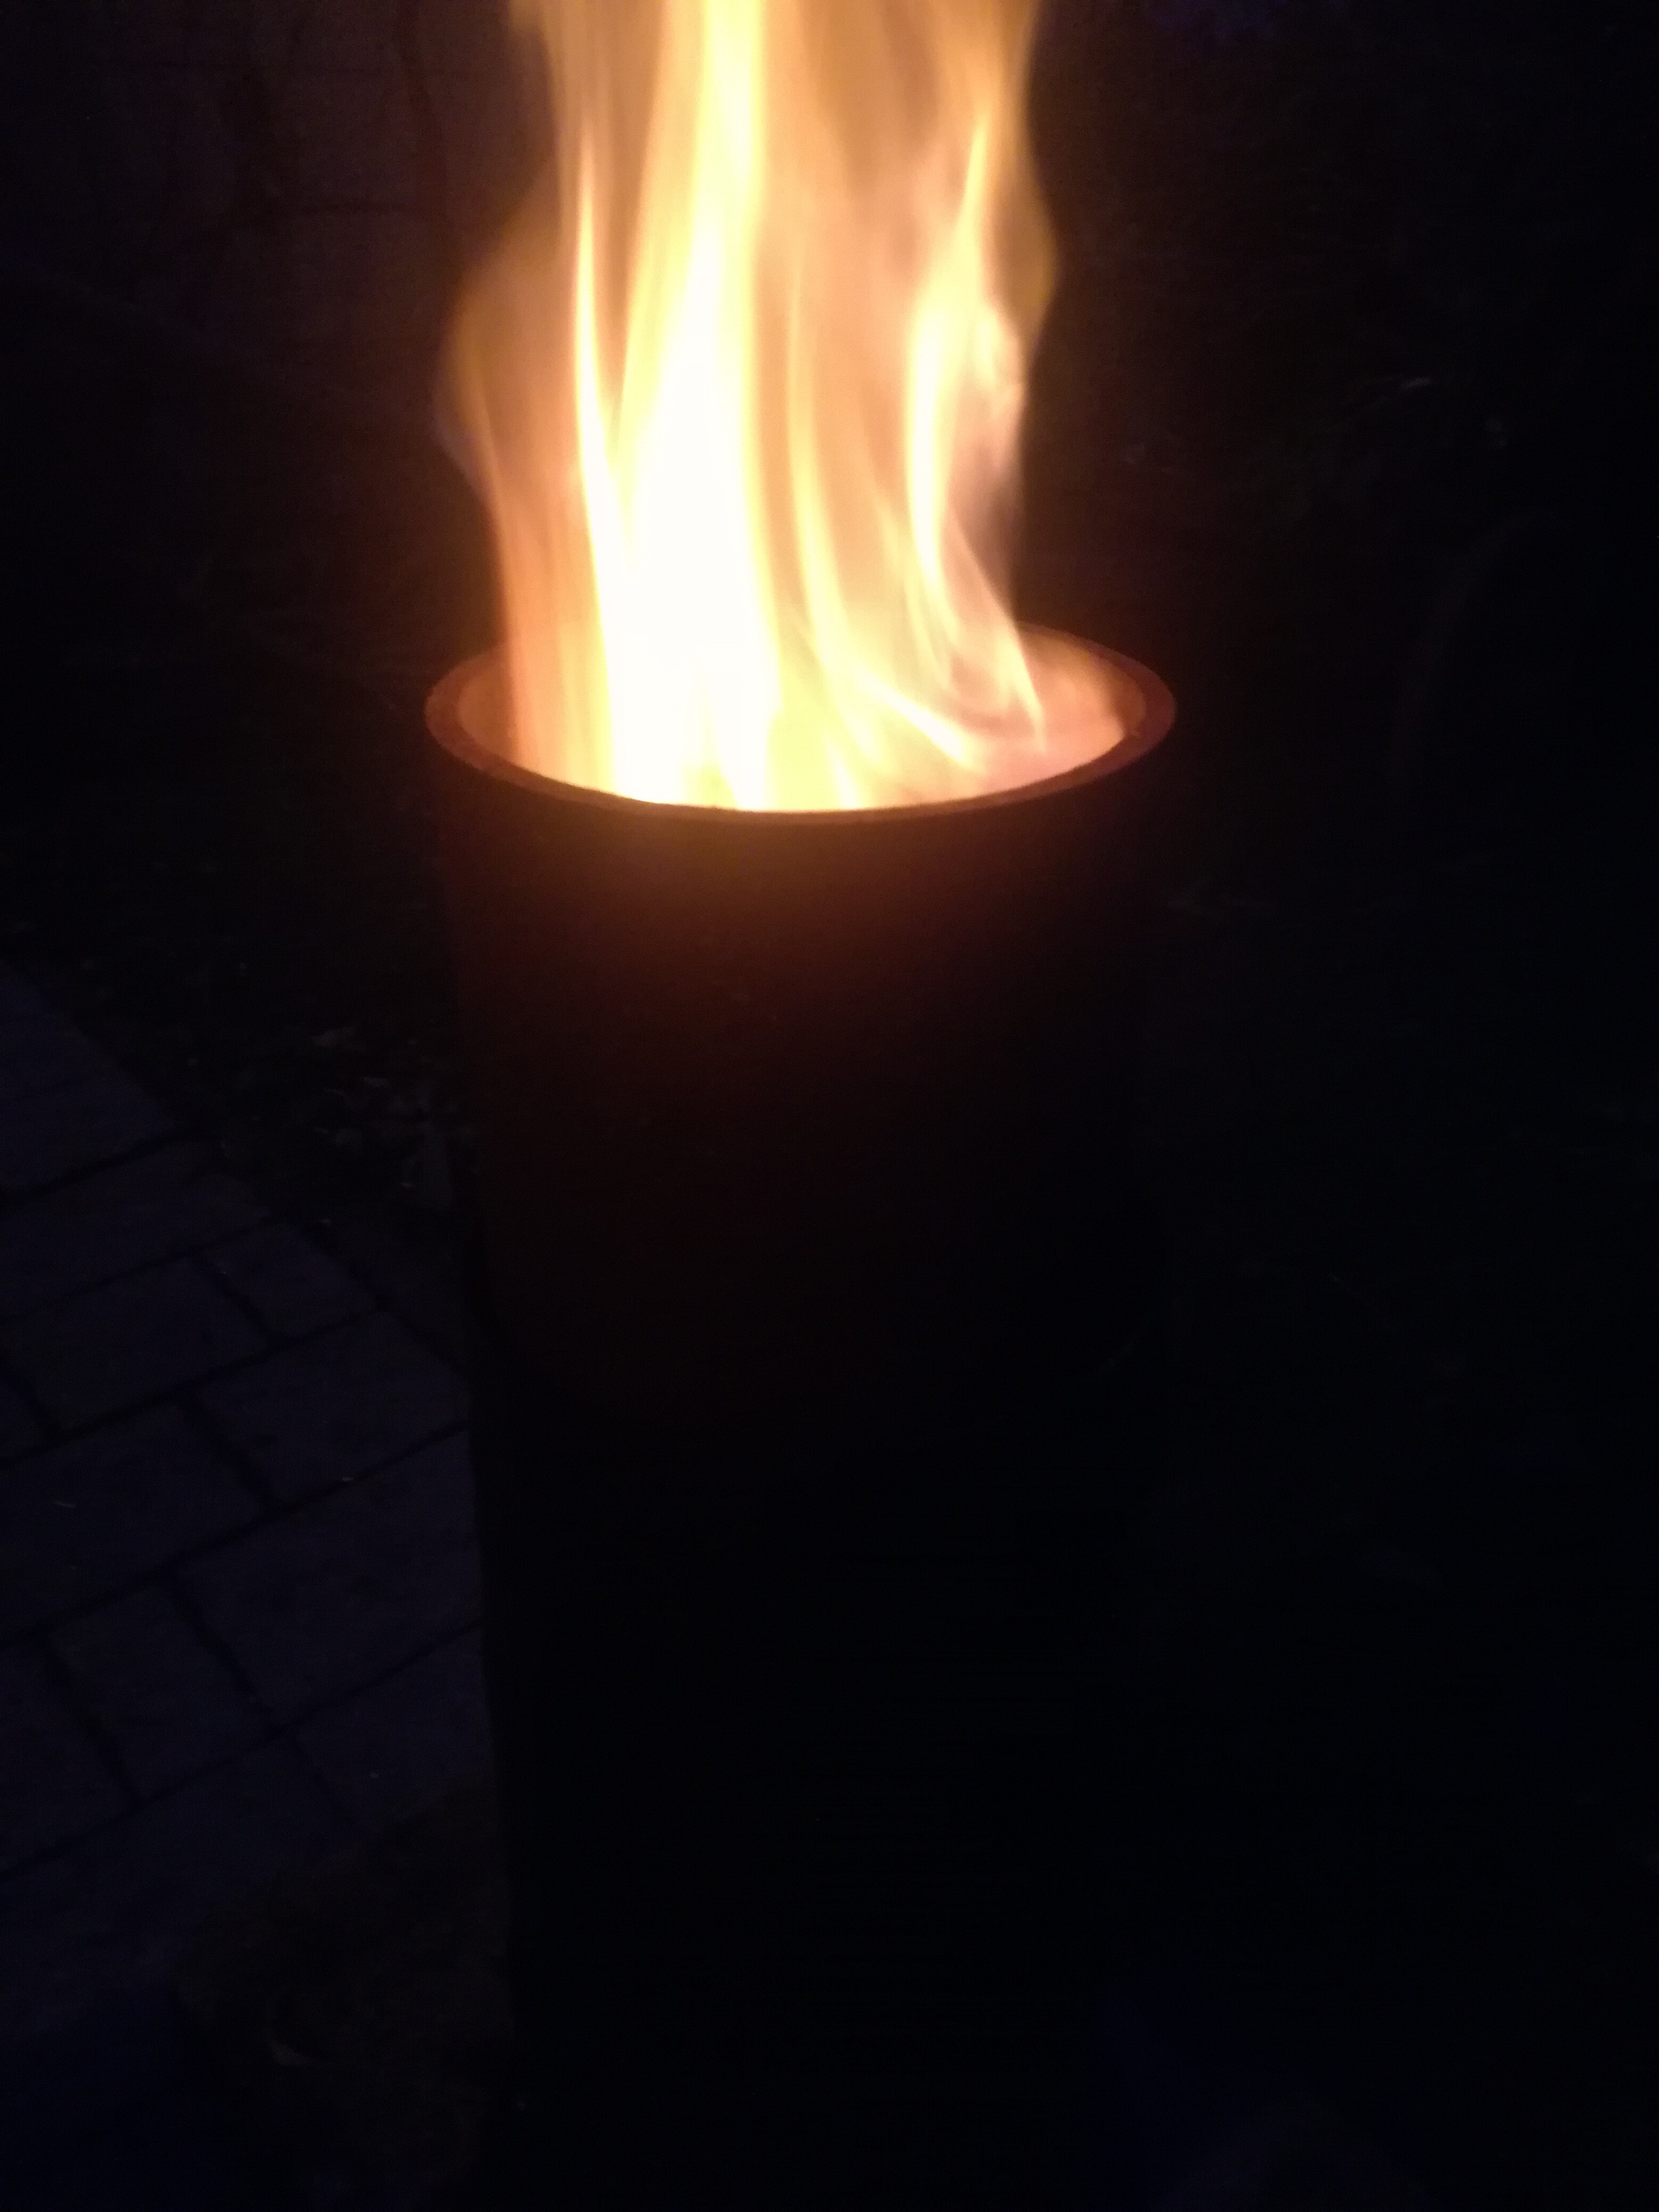
 Because I considered draught not sufficient during last test, I added some 8" extension to the top. It is thick wall steel pipe I luckily found among my scrap metal