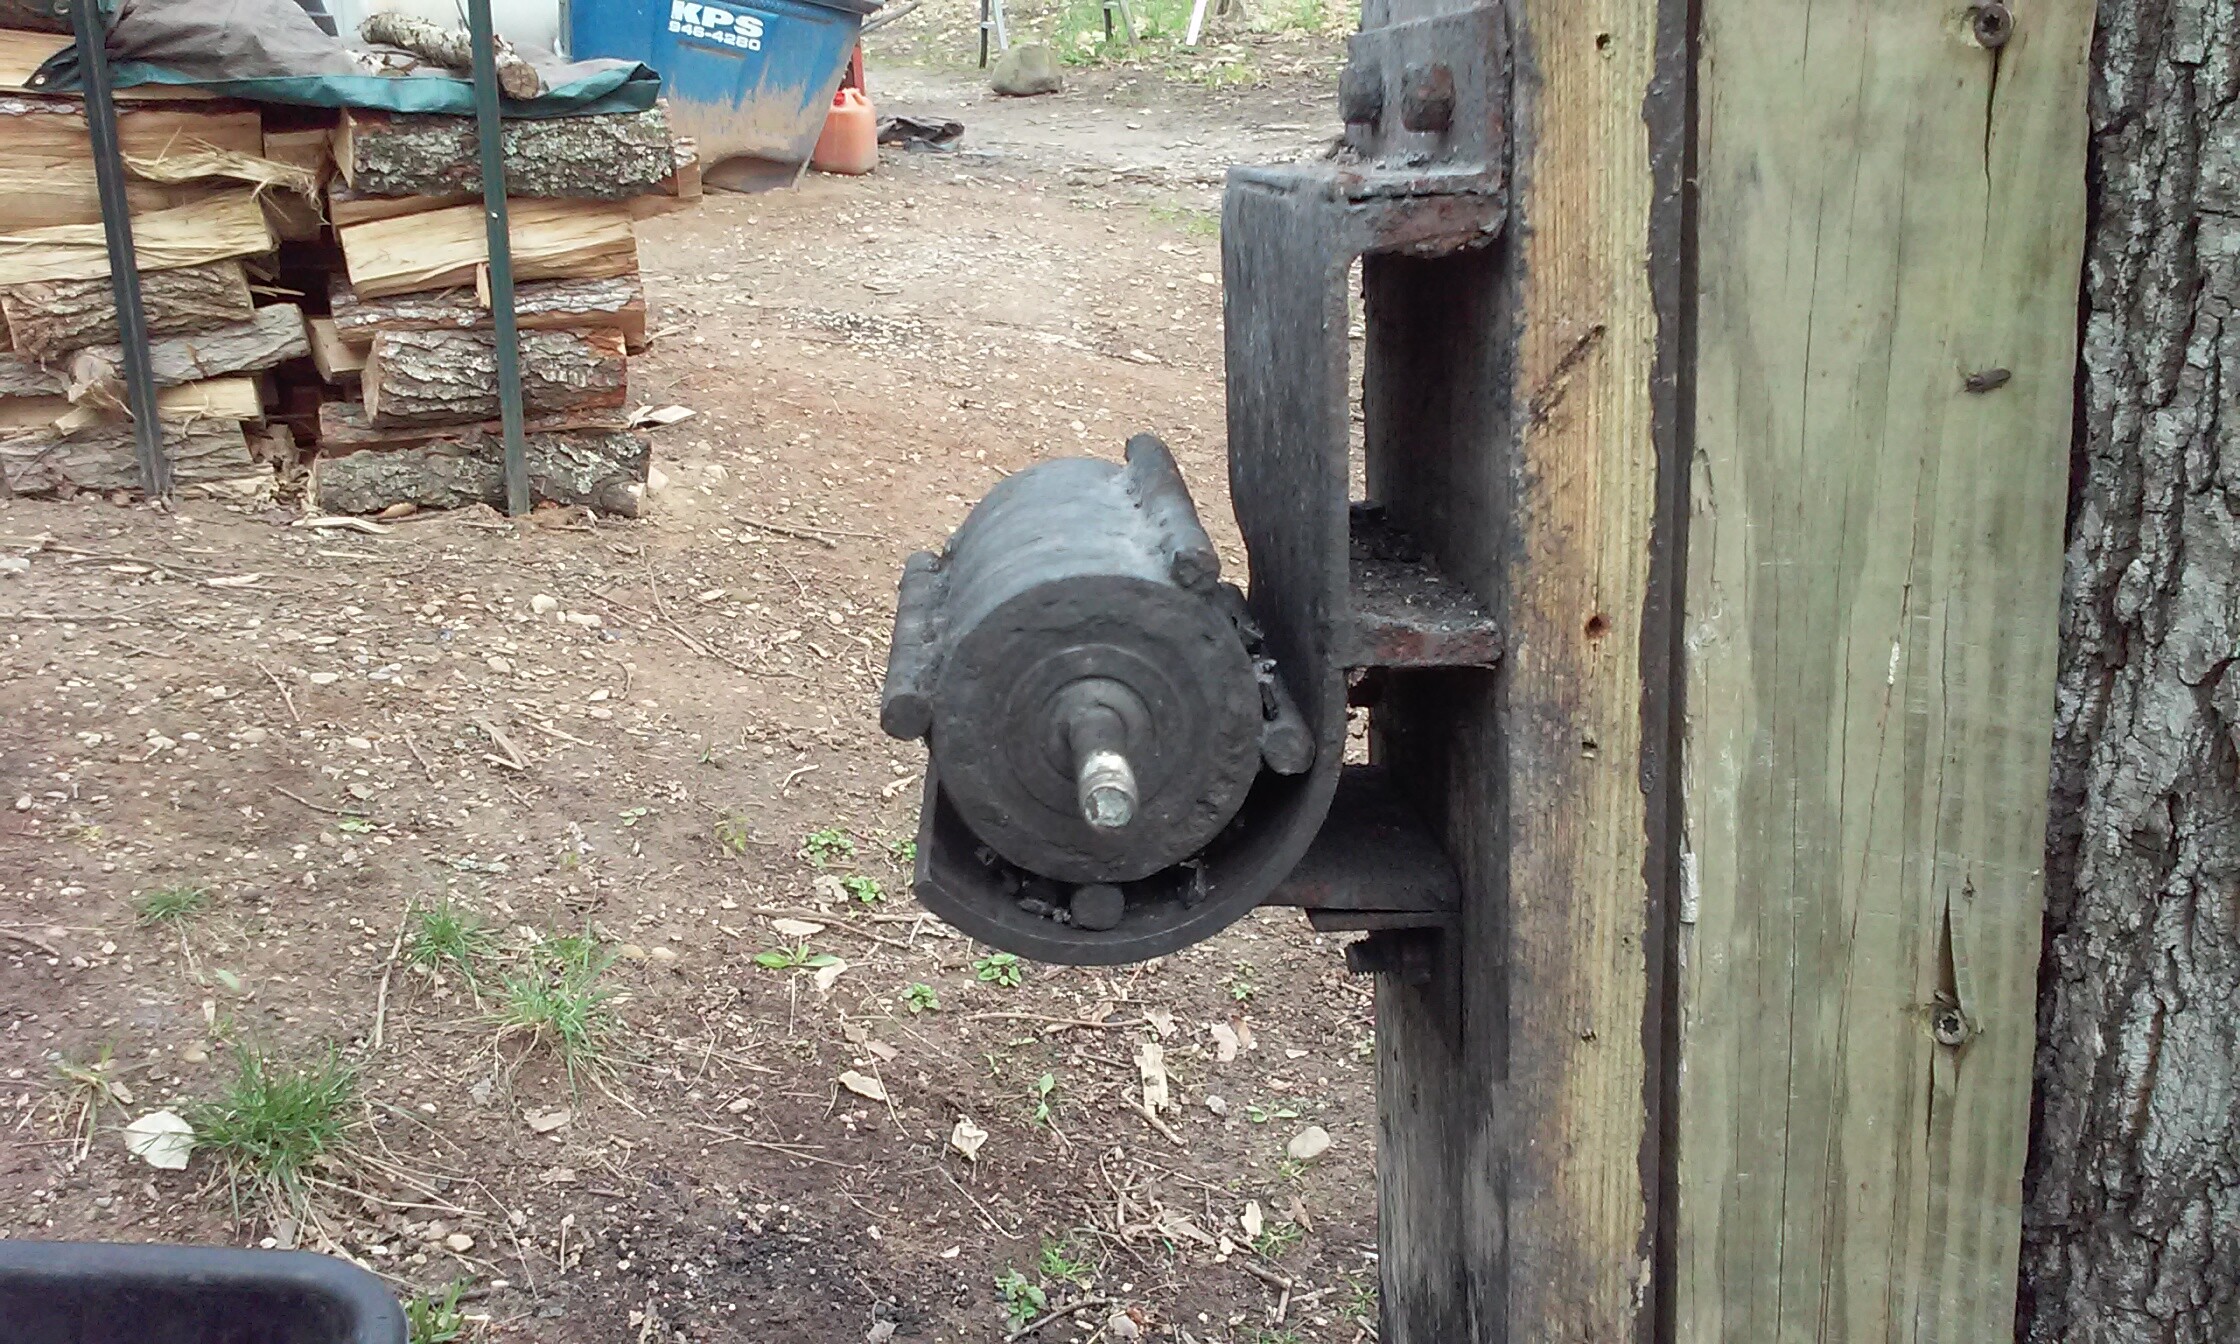
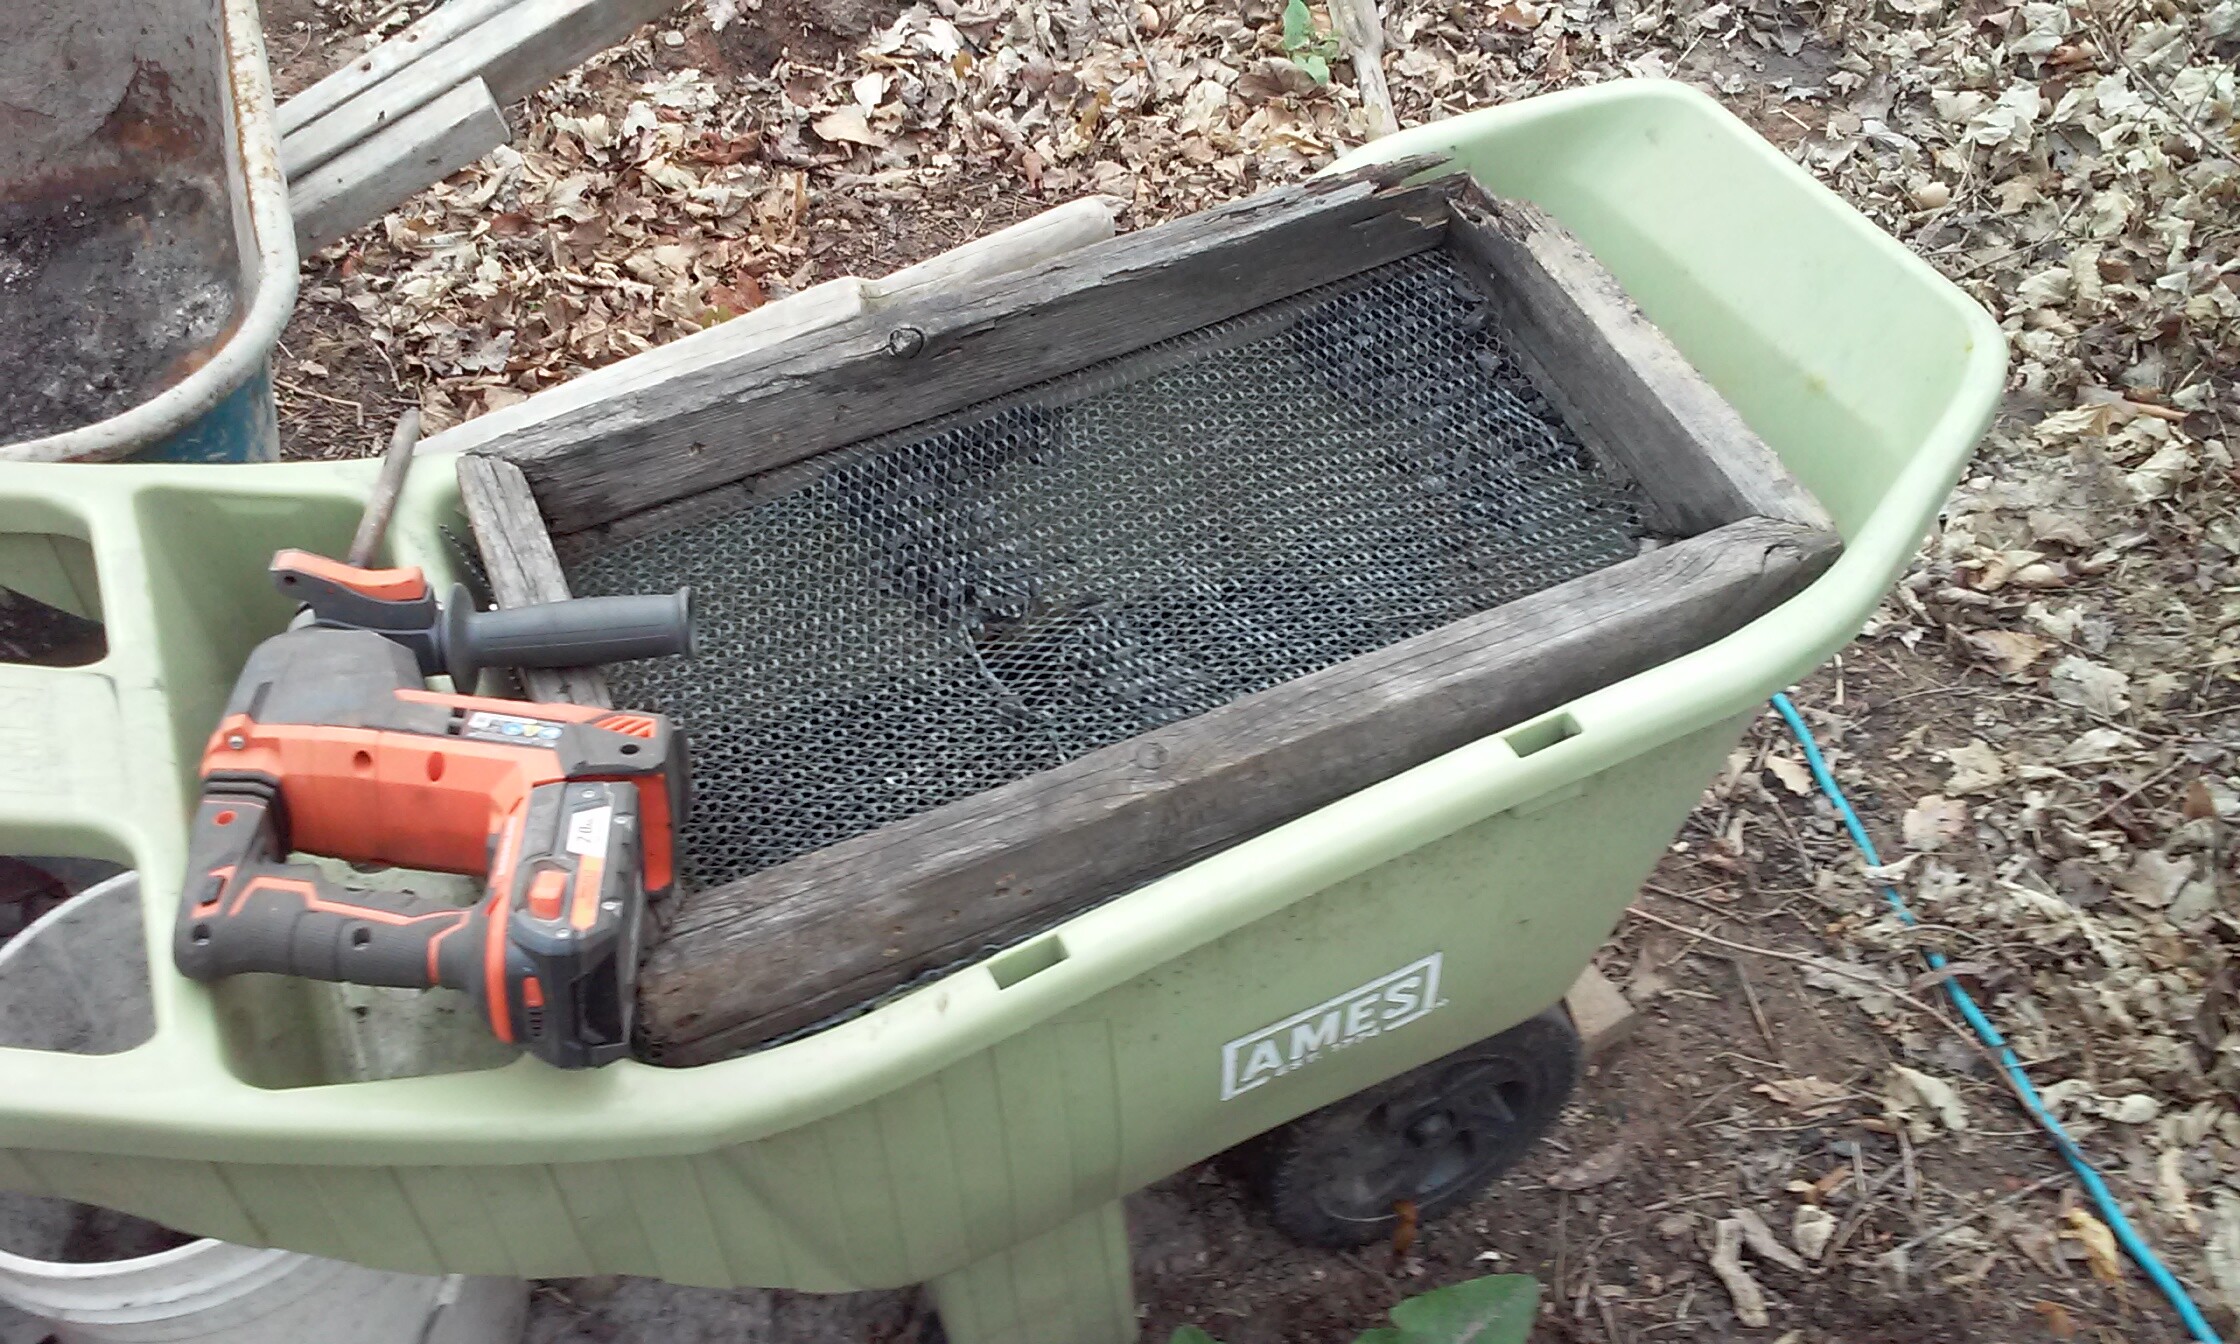
Pictures of the actual grinding mechanism of the above video. Also the screen for sifting. That is just a wooden frame with expanded metal nails onto it. I pour the ground char into it and stick the rotohammer on the edge of the frame. No real work involved.