Small or home made sawmills

Well ChrisKY a lot will depend on the diameter size; and sawn lengths of logs you want to process.

More than just moving saw-head versus stationary with the log moving, is having to have a bed to dog down and turn the log to be sawn . . . Or Not.

The or-not is for circular single blade swing blade mills… The log section is either big and heavy then gravity held in place; or dogged down only once; then stationary.
The swing blade system does first the wide board cut as horizontal going one way forwards. Then on the reverse return, the blade is flipped 90 degrees and the one edge cut on the return movement. Once started then each forwards and back gives you an edged board or beam produced. You edge cut as you slab cut.
You work starting at 10 o’clock, or 2 o’clock on the log depending on how your flip system is set up.
Only five carbide brazed on inserts teeth to on-mill, sharpen on my N.Z. Peterson brand swing blade mill.
Look back and see how J.O. made up his D.I.Y. swing blade mill.
Watch Australian Lucas brand swing blade systems videos.
Canadian D & L brand swing blade videos also.

Ha! if you have chickens or goats the kerf-cuts strands and saw chips are not a waste. Dry, and then animals bedding.

Regards
Steve Unruh
Edit correct. My saw blades have eight teeth. Been years since I’ve looked. S.U.

11 Likes

I didn’t find any wheels, where has surplus hidden them?

3 Likes

Many just use these pulleys with a belt tight fit into the groove.

7 Likes

Not off topic but a better explained out explanation why I never worked my Peterson brand of swing blade mill I had bought in early-early wet Spring of 2007.

Same-same market conditions reasons became real for me then by late 2007 after coming out of the no-cutting-activity summer fire drought season.
Ha! Then market recovery 10 years later I’d just gotten too damn old.
Our trees then harvested and sold to big commercial mills. Seven, sorted, saved back tops and butt cutoffs piles I worked for the following four years as personal use heating fire wood.

Lesson is by all means make up a much less expensive D.I.Y. mill.
Something; maybe slower. And working a fellow more, to get lumber cut. But something a fellow could justify setting aside un-used when not needed.
S.U.

11 Likes

I remember thinking when the COVID-panic buying set in, there’s going to be a glut of equipment after this is over. People were buying up every DIY alternative tool you could think of, from canning supplies to electric mixers to toilet-seat bidets, and yes most definitely small sawmills… there was a years long waiting list. Some of those will have buyers remorse and need to liquidate, so watch out for upcoming good deals on lightly-used sawmills among other things. As for me, I can’t wait around and don’t have the budget for even a used mill. Fortunately the DIY route is FAR cheaper if you can scrounge and weld.

13 Likes

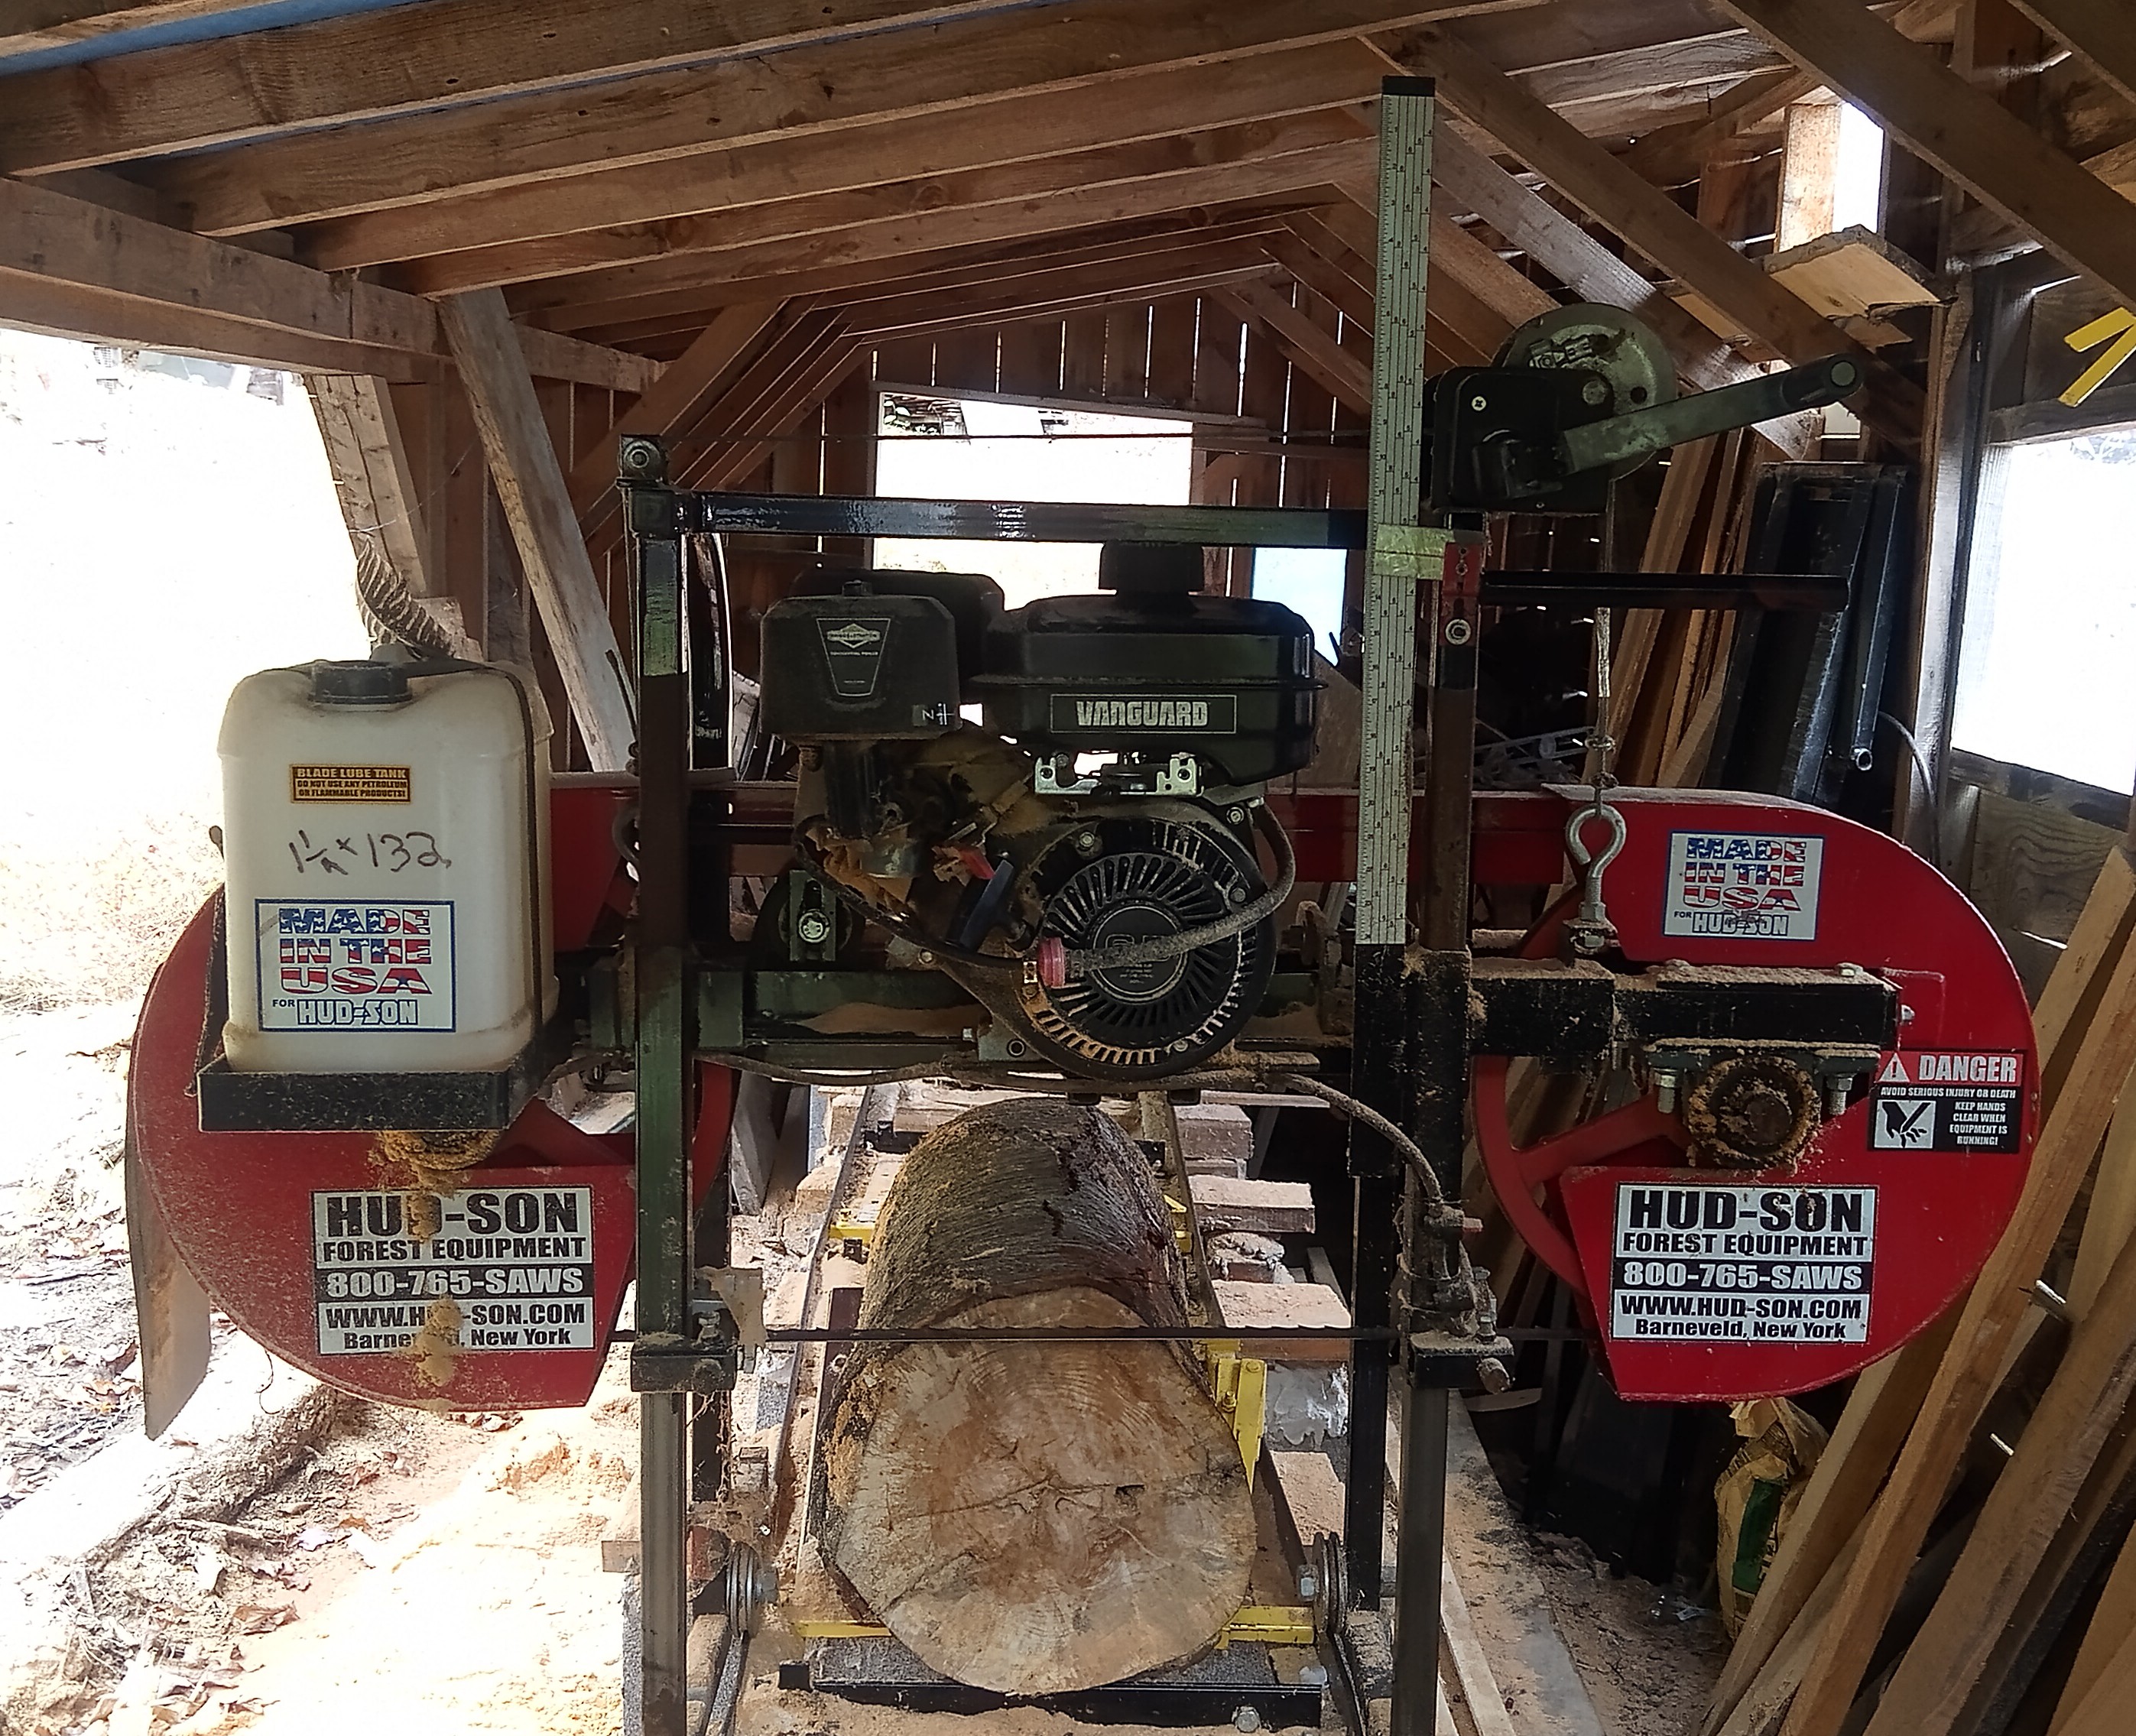
I didn’t have anything that really needed cut but set up the sawmill for pictures. Sorry for such a long post but hopefully it interests someone.

This is one of the log clamps. I added the angle iron and the threaded rod.

This is a short birch log clamped in place. This one is only around 14 inch diameter and 28 inches long. Being able to saw shorter logs means I can saw things that most sawmills wouldn’t bother with but there’s a lot of projects that don’t need long boards and this short log would normally just be firewood.

My mill claims it can saw a 21 inch diameter log but the clamps won’t open that far.

You have to nail or screw these angles on the ends until it gets small enough to clamp.

This is how I have the water drip set up for cooling/lubricating the blade.

This is ready for the first slab cut.

Not much there but could probably get a 4 inch wide board.

Now comes the decision. Do I flip it or keep cutting? There’s some defects that look pretty deep.

Took one more cut and hit a couple soft spots.

This is where the extra threaded rod comes in. The original clamp would twist the log out of square.

A few thin slab cuts to get a flat edge.

Now the log can rest on the stop of the carriage. 10-1/2 inches won’t quite get rid of the live edge but should get close.

There’s one of the defects but might be a 16 inch long 1x6 in here.

Nope, more defects. Maybe a 1x4. Time to flip it again.

Kept cutting until…

The lower board looks like a good charcoal board. Too many defects.

Time to flip it one more time.

Now time to edge.

These two have some defects but looks like about 6-1/2 inches should be good. I use a 2x4 on the carriage stops to give it a little more height to keep them straight.

This is an old rough cut 4x4 again to keep the boards straight to edge. The original clamps aren’t perfect.

Finished. Just random sizes but not bad considering it was basically firewood.

These should plane to 3/4 inch thick. I cut at 1 inch but I didn’t take into consideration the blade thickness lost at each cut.

My scale does have marks for 4 quarter, 5 quarter, 6 quarter, and 8 quarter that will give me full size boards but I’ve found it easier to just accept the lose since they still clean up at 3/4" if I cut every inch. My final cut can only go to 1" but, in this case, that board was junk so just got tossed into the slab pile as either firewood or charcoal.

14 Likes

Great info post you put up BrianM.
Showing all of the critical set up steps.

Here is a first time-buyer of a D & L swing blade mill being show the operating set up steps. Than the sawing on a cull log. Long. Long. Skip to 13:20 minutes to get to the cutting. Gets serious at ~15:00 minutes

Today pictures of my set aside mill before I overstack and bury it again; jamming storage into this buildings far corner. Note both the D & L and the Peterson systems use four posts with roller chains equalizing the raising and lowering. Much, much more precise than cable systems.


I have two piles of stored old growth Douglas Fir recovery lumber to last me the rest of my life. Old growth stuff was always only stabilized heart wood


S.U.

10 Likes

I talked about my mill a little. For newer guys that may be interested in this topic my video description is at post 133. These kinds of home built mills are not for any real production in my opinion. Waynes mill is capable of doing much more work that mine or ones similar to mine as far as I can see. Mine was built mostly for cutting beams and planks for projects around the homestead. As Brian said, a lot of stuff doesn’t need long lumber and these mills are about the only way to get quality boards four or so feet long from logs that may not be good for much else. I never bother turning the log on the mill. I just cut S2S and cut the edges with a chalk line and circular saw.

11 Likes

The log clamps look very interesting, can you show a little more how these work?

6 Likes

The dimensions would depend on your track but this clamp can be swapped to different locations depending on the log length.

There’s a rod that bolts inside a tube that fits in holes on the track so it can pivot up and down for the height to clamp the log but avoid the blade.

The clamping arm slides on the tube and locks in place when it when it is angled while clamping.

The clamping mechanism is pushed by a cam on the lever that forces the point into the log. The threaded rod was added which doesn’t dig in as much and helps keep the boards from twisting while edging.

This shows the threaded rod locked against the fixed angle iron and you can see how the clamp is angled locking it from sliding.

This is the part that digs into the log. EDIT *** I forgot to mention, the tooth is also used with the clamping bar all the way down to lock a square block or board against the stops on the track to get it below the 1 inch final cutting height so the blade doesn’t hit it. ***

The cam is just another piece of rod welded to the locking shaft. It looks like it was ground to match the radius on the square tubing it presses against.

From the factory it just had a flat bar as the back, fixed log support but I added the angle iron to give it more surface especially when edging flat boards.

10 Likes

Thanks, it looks very good, I don’t have a good solution for my saw, thanks for the tips.

5 Likes

Hey Chris,

Just about any mill will work. The keys are reasonable quality logs at a reasonable price and especially that a sharp blade will cut faster easier and true. I have two mills, an older WoodMizer Lt 40 with hydraulics. Fast and easy on the back but added complexity and a Woodland mills push system. Simple and easy but more work to handle the logs. Break down the logs into cants as fast as possible and cut into clean wood. Bandsaw blades can but don’t love wide cuts but shine at resaw.

7 Likes

Hey All, sick in bed I found this one:

This was his episode #1. In his read-more he explained why with both a D.I.Y. made chainsaw mill and a band mill he is now making up a swing-blade system mill.
He is now up to 8 info videos on his building up.Find these on his YouTube channel.
Regards
Steve Unruh

7 Likes

This picture is deceptive. Nothing to do with the video. I am posting it because this guy claims there is no real difference between using a regular chain and a ripping chain. I have owned the Granberg Mk III chainsaw mill for a log time and never found it real useful. Ripping boards seems very long and tedious. I never bought a manufactured ripping chain and only made one by grinding off every other tooth and regrinding the bevel, so maybe that was the issue. Anybody had good results from a chainsaw mill?

5 Likes

Yes, I have a sawmill like that too, thought it was a little easier to get a nice surface with it than with the band saw.
But it’s harder to press and there are a lot of chips.

5 Likes

I can’t say if it is good experiences with a chainsaw mill since I never have tried any other. A bandsawmill cuts faster with way less sawdust of course but what I wanted to say was that I run a full chain with a ripping bevel at 5-10 degrees depending on manufacturer, Oregon goes with 5 degrees and Stihl with 10 (unless it is the other way around but I think I am correct) but I have not seen a ripping skip tooth chain here in Sweden, nor a full chisel ripping chain either.

6 Likes

I was using the mill with a Husqvarna 460 with a 24 inch bar. May have been too short for that type of chain. According to this link the point is to make less drag and keep the cutting speed higher than regular chains used for ripping. I may mess around with it now that I have a new oil pump on that saw. That may have been an issue as well.

3 Likes

@Chris , what I think is good about my saw construction is the trapezoidal thread for the up and down of the saw, a little easier to get the same thickness of wood, I had wires first. but didn’t get it to work well.
The measuring ruler is also good, then you know (exactly) how much wood will be.


13 Likes

Hi All
I am finally feeling better from my late summer “cold” (covid 19 for the third time) to be able to watch then DONN DIY’s swing blade build up videos.
I regret now ever posting it up.
The very best DIY videos in my opinion show FIRST the system working/producing.
This gives encouragement an average Joe could build up one too to meet a need.
Then showing the actual building steps. The design having then been modified from using expereinces. Then end the video/series with it working again. The blade singing sound. The flying chips made. The dimensional boards made. A gasifier making an engine run/work for a purpose!!
DONN DYI’s build following the now eight time-compressed; and he is still not cutting wood.
He’s an impressive fabricator/machinist/welder-man. With a big lathe, a milling machine and even a precise metals cut off saw. And these are driving just how he is fabricating.

Watching other swing blade mill systems now been put up for them working. Then you can see at 20 minutes into his #8 video where he is going with this project

For the rest of the video’s series do not bother.
I know I’m seeming critical of him. His shown hand works are lessons in fabrication. And I like that he used a boat trailer winch as his mill-head drive lifter. My old late 1990’s Peterson Mill used a modified boat winch too.

As I’d said earlier look back at J.O.'s DIY build up instead post #229 on this topic for his pictures. He appeared to have used much wooden framing in his constructions.
He is able to cut and sell dimensional lumber with his.
Reducing down 80% of the metal fabrication a fellow could then afford to have any nesassary lathe and mill work done in a commercial machine shop.
Regards
Steve Unruh

9 Likes

I’m not sure how you get paid from Youtube. Seems like you must get more if you show every hole you drill and every weld you make. I just need to see one hole and the end result and I’m betting I can fill in the inbetween ten minutes. Big fan of the guys who know how to fast forward through redundant actions.

I think that a band saw mill could be well made out of maybe 85 per cent wood as well SteveU. I’d like to test that theory out. Actually I rather someone else did. If I add any more projects to my queue I’m going to have to live to 100. I don’t think I can take that many more aches and pains.

13 Likes