Hi Mart here are a few quick snaps I went out and took a moment ago for you to see .
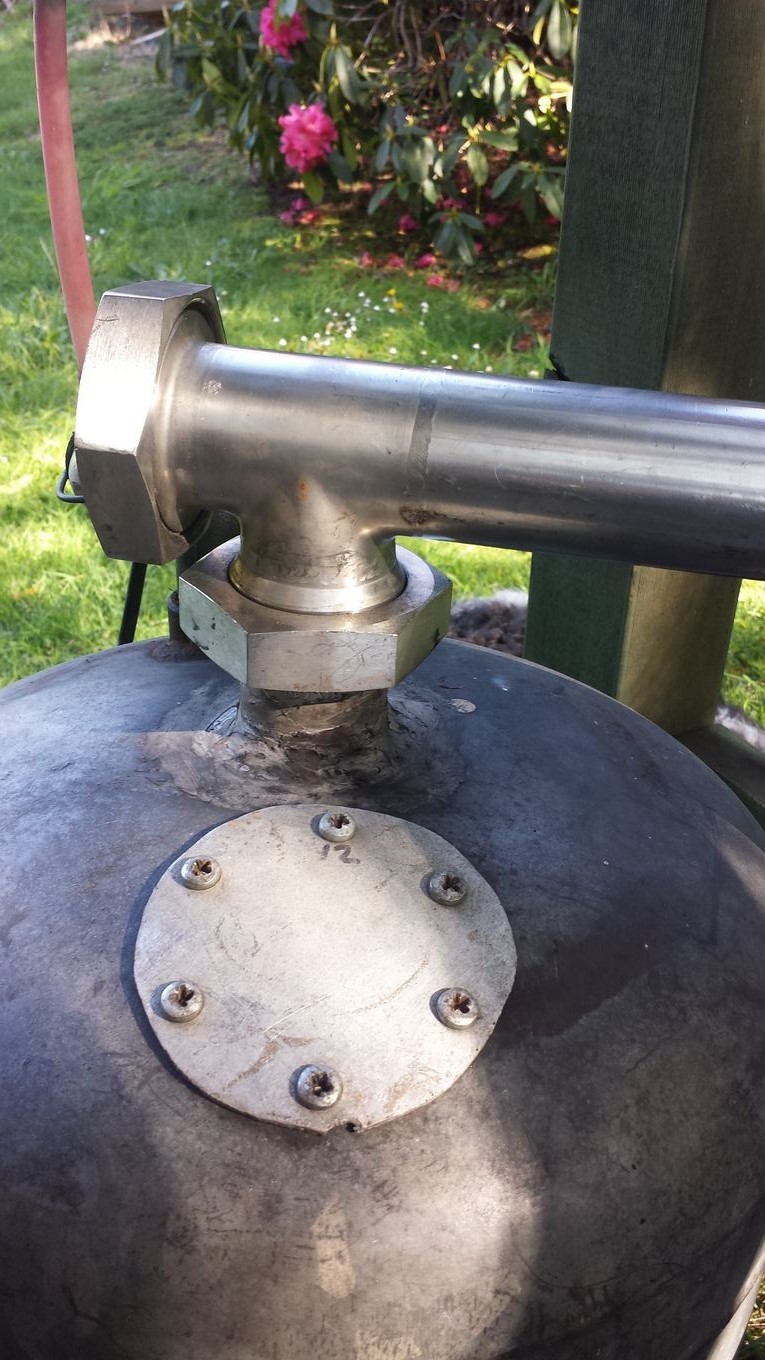
On my tank it had 2 outlets on the top , so the standard outlet I cut out and welded a 2inch screw outlet for my stainless dairy pipe I have and I use that for the larger engines , on the other side is a standard 3/4 threaded outlet and I use that as well when I am running small engines sometimes , the filling hole on mine is only about 3 inch in dia and sealed with a piece from the bottom of a aluminium saucepan screwed onto the tank with a small amount of silicone for a gasket that so far has lasted nearly a year as it never gets that hot up there .
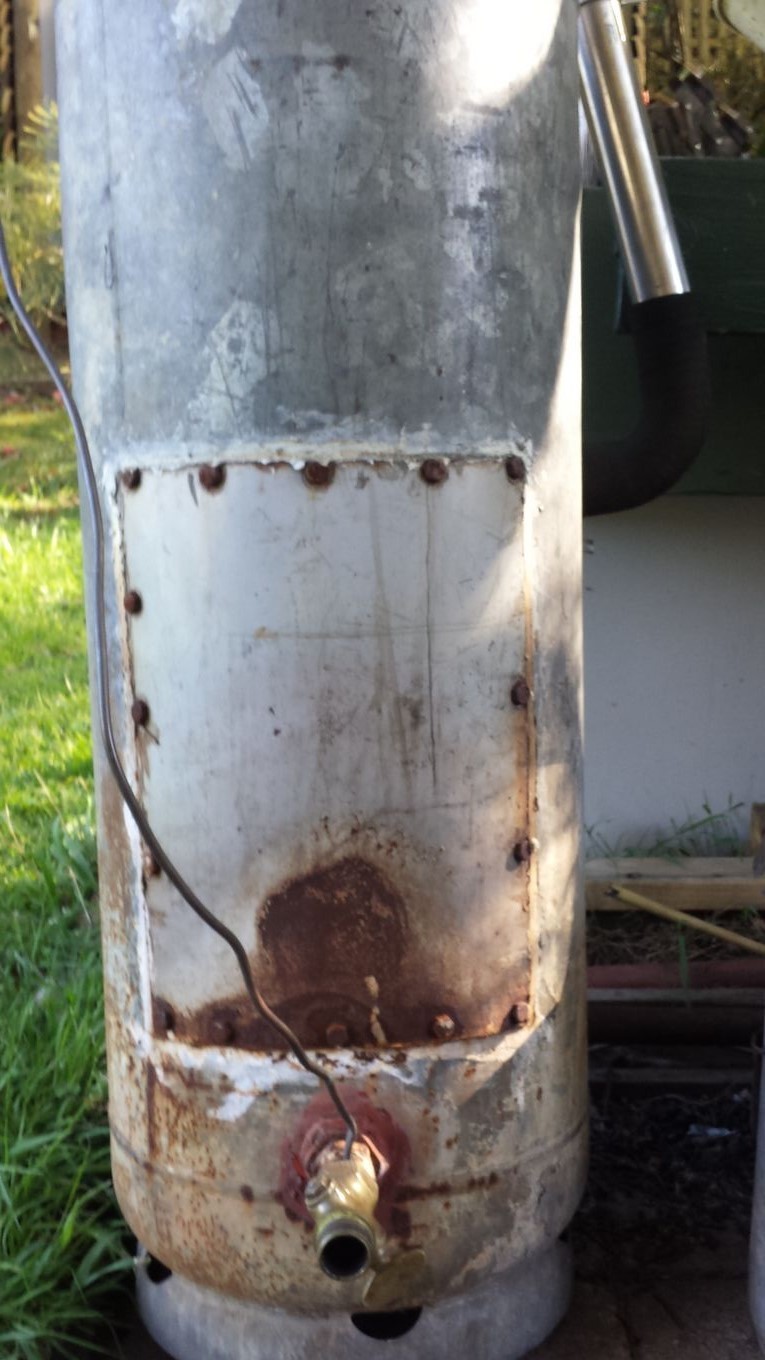
The hatch at the front is over kill ,I made it far to large but least I don’t have to struggle to get large clinkers and the like out and that has a stove rope seal around it that’s lasted a few years now .
I keep promising myself that one day soon I will build a nice posh looking unit , but this old thing just keeps working and working and so the old motto of if it aint broke don’t fix it applies
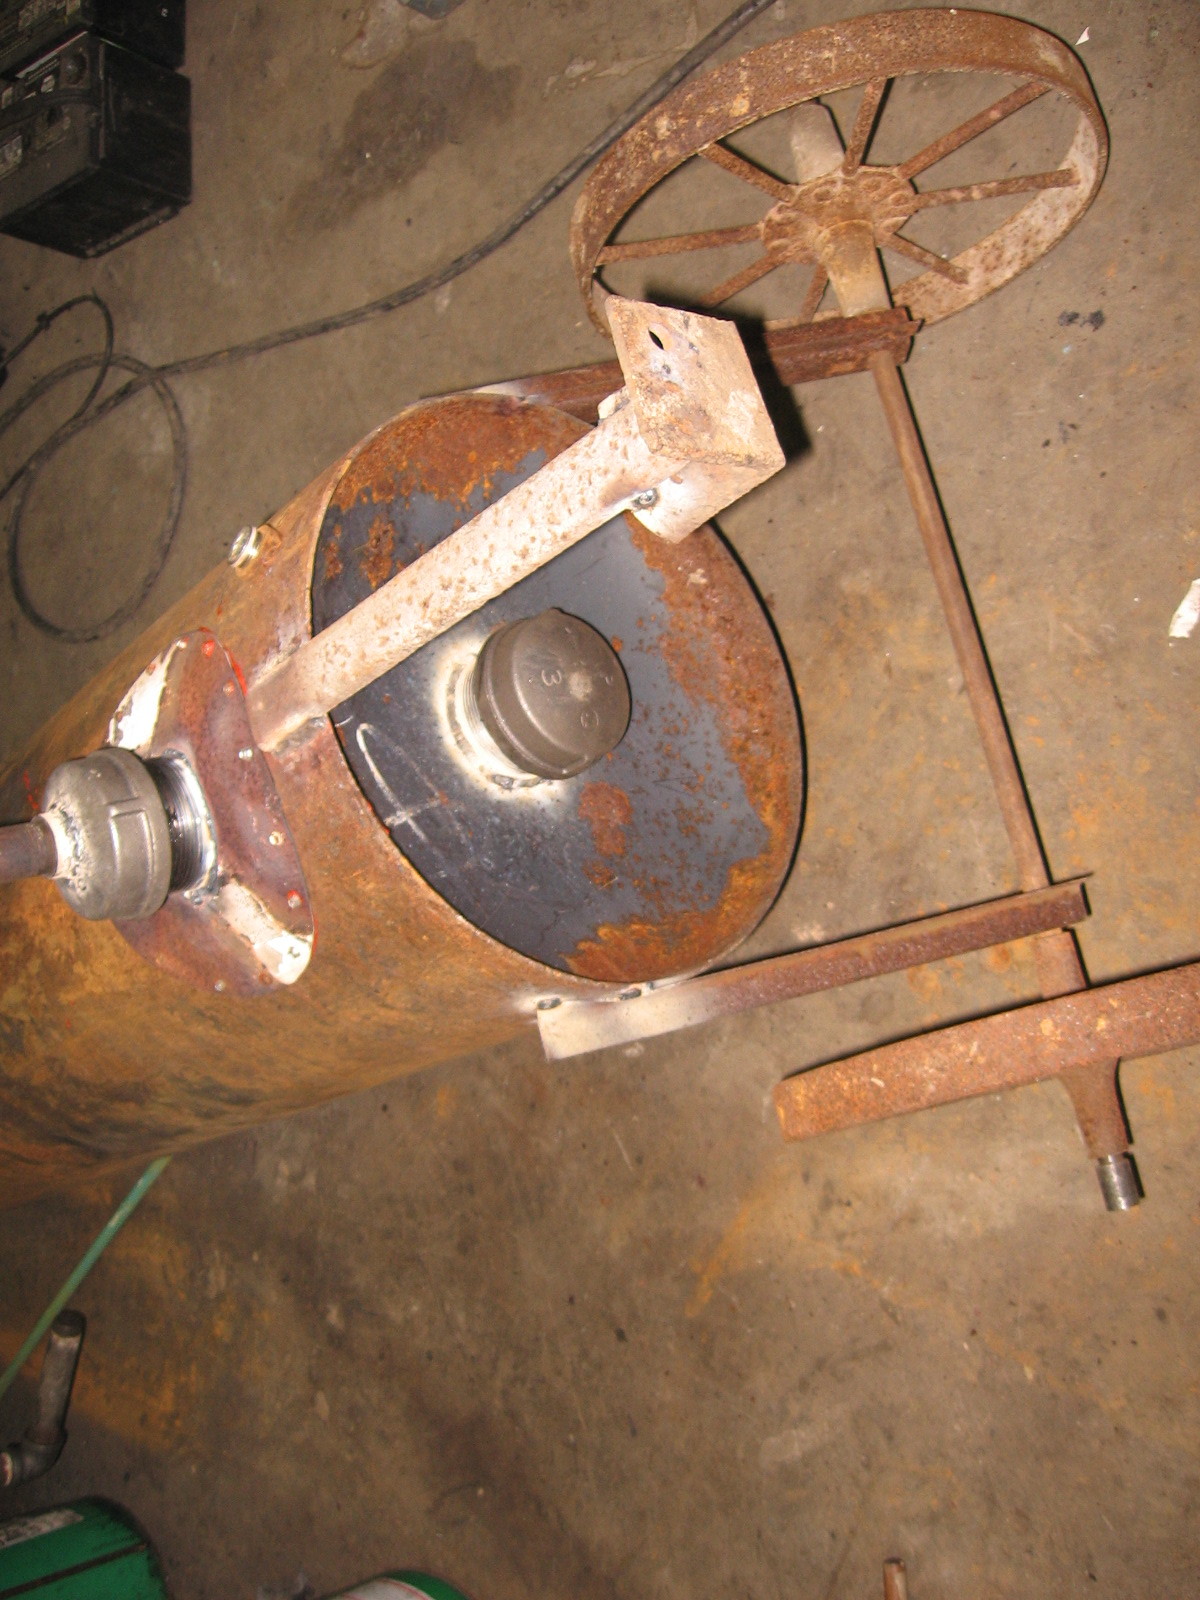
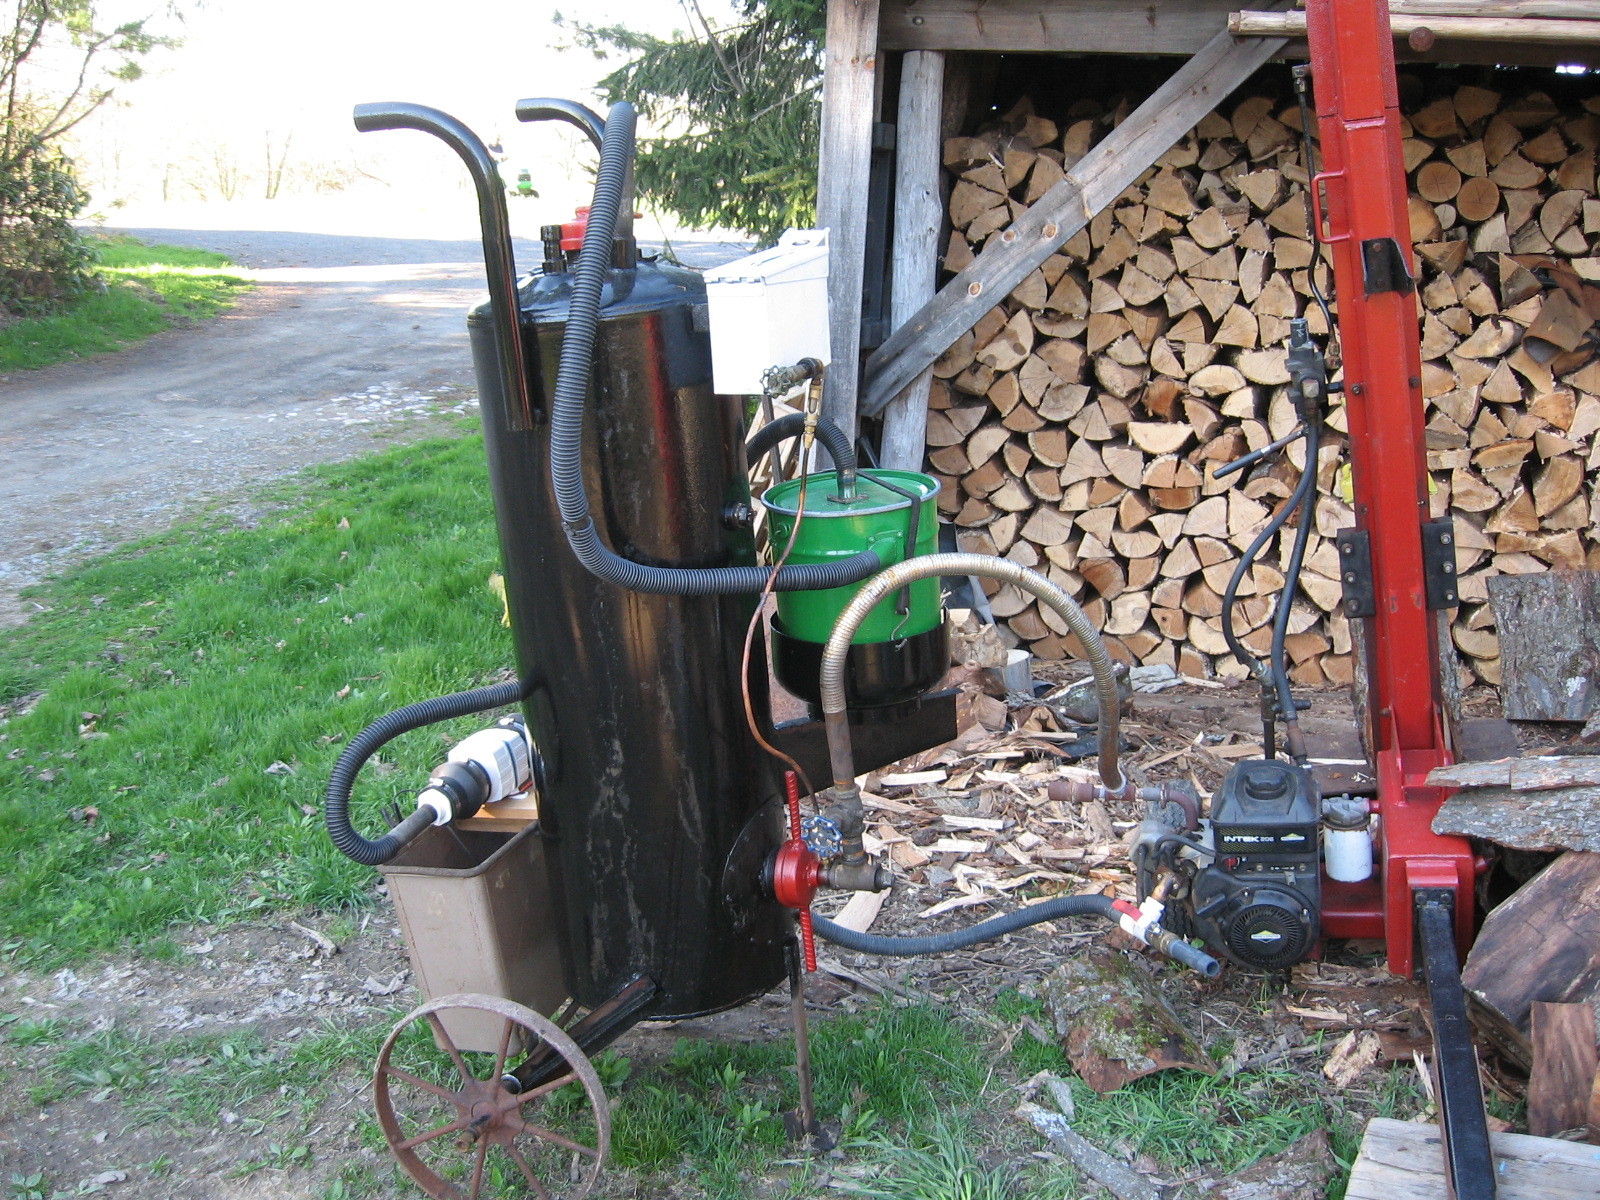
Hi Mart, Here are a few photos of the unit I made with a large propane tank. The nozzle is attached to a three inch pipe cap so it can easily be removed and serviced. The ash dump is also a three inch cap welded on the bottom. The unit is mounted on wheels and easily moved about. The engine you are proposing to run is small and this size set up will allow you to run for hours. I’ll also recommend a fluid drip to boost the BTU content of the chargas, Something little engines like in order to be easier to start and run,
Gary in PA
I use this method to mark and cut tanks. I’m terrible at gas cutting, so I tried the circular saw. Results almost perfect if you set up a reference plane and measure only from it. I set propane tanks on the deck and measure up to get a series of dots, then connect them using tape to set the line straight. Works great. I also built a drum roller to facilitate accurate results with little fuss. Water tanks usually have a flat bottom with a good edge to measure up from. Keep the saw blade on the outside edge, go slowly to avoid a wavy cut and gaps you’ll have to fill with weld, aggghh!
A few pics of my early lid at the bottom. Go to small engine section and check out “My first small engine run” for more pics and my latest design changes.
Pepe
Hi Mart ,
I have been using this tank now for 2 years and in that time I have only had to tip it on its side when full up of charcoal twice ,and that was to change out the nozzle, laying on its side just made it easier to get nozzle out without all the charcoal falling out , i don’t seem to have much ash at all and have never had to empty the tank , i guess all my ash must be in the form of clinkers , that i take out every hundred or so running hours , or whenever the nozzle needs changing .
I have never had a need to have a tank with a removable lid ,all the cutting and making flanges and then getting it air tight seemed a lot of hard work when all you need is a small filling hole and a small gas outlet hole on the top of the tank .
A small hatch just above the level of the nozzle is good enough , so if ever the tank would need emptying and it also allow access to the nozzle
The whole tank only took about 2 hours of cutting drilling and tapping the holes and welding the nozzle adapter onto the tank and a larger gas outlet pipe on top .
Dave
Dave and gary your gasifiers are charcoal
you are not using a safety valve on the gas generator. It’s not necessary ?
Gary I think the gasifier on the ford ranger possesses a safety valve
The water tank unit did not have a “safety valve” or puffer lid as it is sometimes called. I do use it on all my other charcoal gasifiers though. Yes the Ford Ranger also has the puffer lid. Basically it is a coil spring that holds down the lid. I’ve only had two chargas ignition events in the gasifier and both times the pressure was released through the nozzle. It was a real shower of sparks but no explosion. It makes me wonder if a puffer lid is necessary but for now I’ll err on the side of caution here.
Gary in PA
thank you for the answer
if “puffer lid” was incidental to coal gasifier would be even simpler
you seem to consider that the “puffer lid” is very important on the filter? (on the ford ranger )
Thierry
I must admit I was terrified of cutting into this I did fill it full of water, dumped the water and put in the baking soda and vinegar, then put the cap back on. Nice to be in one piece.
Hey, Mart,
As we say around here, looks good from my house. Seriously though, with a little practice following the line with the edge of the blade, you’ll get better. If you find yourself going off your line, STOP. Restart the cut on your line or wherever your reference is. If you keep going it will take longer to come back to the line as I think that’s what happened at the back edge of the tank where there is a slight dip away from straight. Yeah, I see it. Been there. In general it does look like a pretty good cut for your first try. Far better than my ragged gas cuts were. I also started using the thin .045" steel/SS blades from Dewalt. I use more, but I stray less which means less filling in with weld later.
If you noticed in the last pic of my above post I welded a cut off top section of the tank to a short straight section of the tank with a flange. Talk about a duh moment! Had I known where I was going, lol, I would have left the original top on, cut the feed hole and then cut out the larger “lid” from another tank using the grinder with a thin blade. The hole is 3" smaller diameter than the lid, so plan accordingly. I would now use a bigger feed hole and lid. Check (with a flat piece of plywood,etc) to see how far off your cut is. You might find it easier and a lot less work to add the flange and fill in the dips with weld rather than trying to flatten out the entire cut edge to get it straight. You’ve got to weld it anyway.
Did you ever feel (like I did) that backing up was the normal progression of things???
Pepe
Edit: Fellow gasifier enthusiasts, I want to add that I always try to cut to the outside of the line (in the waste area, if you will) and usually about 1" deep. Too shallow and the cut will tend to “wobble”, too deep and your response time to off cuts is longer and the miscut is longer. You’ll feel the sweet spot for the cut. I set the depth, line the blade up parallel to the ref. plane., hold the saw in place and lower the blade slowly all the way into the metal before moving forward. When doing this the blade will be following the line backward until it gets 1" deep. During this time it’s critical to lineup the cut. Now push forward slowly (you’ll have to get a feel for this) leaving the line. The other advantage with cutting to the line is that it leaves the line, so you have 2 points to judge your direction of cut. The front edge of the saw blade and the rear edge of the saw blade should both be just outside the line. If you start straight you have a good chance to keep the cut going straight. Have a stable setup to cut on. The cutting is slow, do not rush it, you’ll be glad you didn’t.
I have a method that I like to use for laying out square cut lines on round material. For smaller objects I will use a piece of heavy paper longer than the circumference of the object, wrap it tightly around, and adjust it till the overlap meets square. For larger objects such as propane tanks, I use light sheet metal. The strip should be probably 6 - 8" wide, 29 ga. Tighten with a ratcheting or cam lock strap, mark line and cut by method of choice.
I have access to sheet metal and a shear at my work, but it would probably be worthwhile to have a piece sheared at a shop, (or get one of their scrap pieces). It makes for accurate and straight layouts.
I wasn’t sure if the steel gauge system was used in Europe - it must be fairly universal even if not declared specifically, as the sheet metal trade and manufacturing processes are global. The numbered gauge system is very useful for those working with sheet metal, as each gauge has a distinct weight and mechanical properties.
Sorry for any confusion - 29ga will be .0135", or .343mm. Slightly thicker if galvanized. I wouldn’t want to use 30 ga, as it might buckle, a bit heavier would be ok, but it will start to get unyielding for the application after about 26ga. Obviously diameter will dictate.
Thanks for the tip on accurately marking round objects. I would have never thought of this. In the past, no matter how many times I try to measure, there is rarely a good reference point to measure from that is precise all the way around the tank. I sometimes have less than desirable results. I’ve done alot af grinding to true up the surfaces using a straight edge between both pieces before welding them together. Very good information!
So after visiting Lowes in the pipe section, I found a way of not cutting a hole on the side of the tank to reach the pipe. I bought a 2 inch coupler with a 2 inch to 1 inch reducer. Now I can just unscrew the reducer and out comes my 1inch pipe. I will have the 2 inch welded to the bottom of the tank.
Here is another way to remove the one inch pipe. It requires welding a merchant couple to a three inch cap. Then welding a three inch nipple to the tank wall.


 I am leaning back torward the spring lid top, I do like the idea of having a large hole on top to fill it up / empt.