Hi Jeff,
Great info, thanks for that…
3 Likes
If you research the construction of the nickel batteries, you’ll never match the design and construction at home, not even close. Perforated nickel plated cylinders, packed with nickel flake, and oxides, compact construction. There are instructables, but their product is just a shadow of a commercial cell, a science fair project.
The commercial ones are pricey, but actually cheaper over their 50+ year lifetime. They are also much more reliable, and proven, unlike any other battery tech. Which is why communications industry relies on them.
Maybe a new tech will beat them, but they’ve been saying the better battery is just around the corner for 40 years…
2 Likes
Lithium Iron phosphate (LiFe) isn’t an Edison Battery( NiiFe).
They used too, they switched to maintenance free lead acid because of maintenance issues, and they were half the price in the US, that was back in the like 80s, thus the only US manufacturer went out of business. They also only hold a charge for like 30 days. There are some drawbacks to them.
Robert Murray Smith has a video to make the Nickel oxyhydroxide from nickel chloride. Making the nickel chloride is probably be out of the home chemists league.
The chinese knock offs, I think are literally just copies of the old tech. There isn’t anything new about them. The patent expired.

2 Likes
This is where the Tree Cub project stalled. The loading arch was being modified. In the below photo it is C-clamped to the rear frame for more welding.
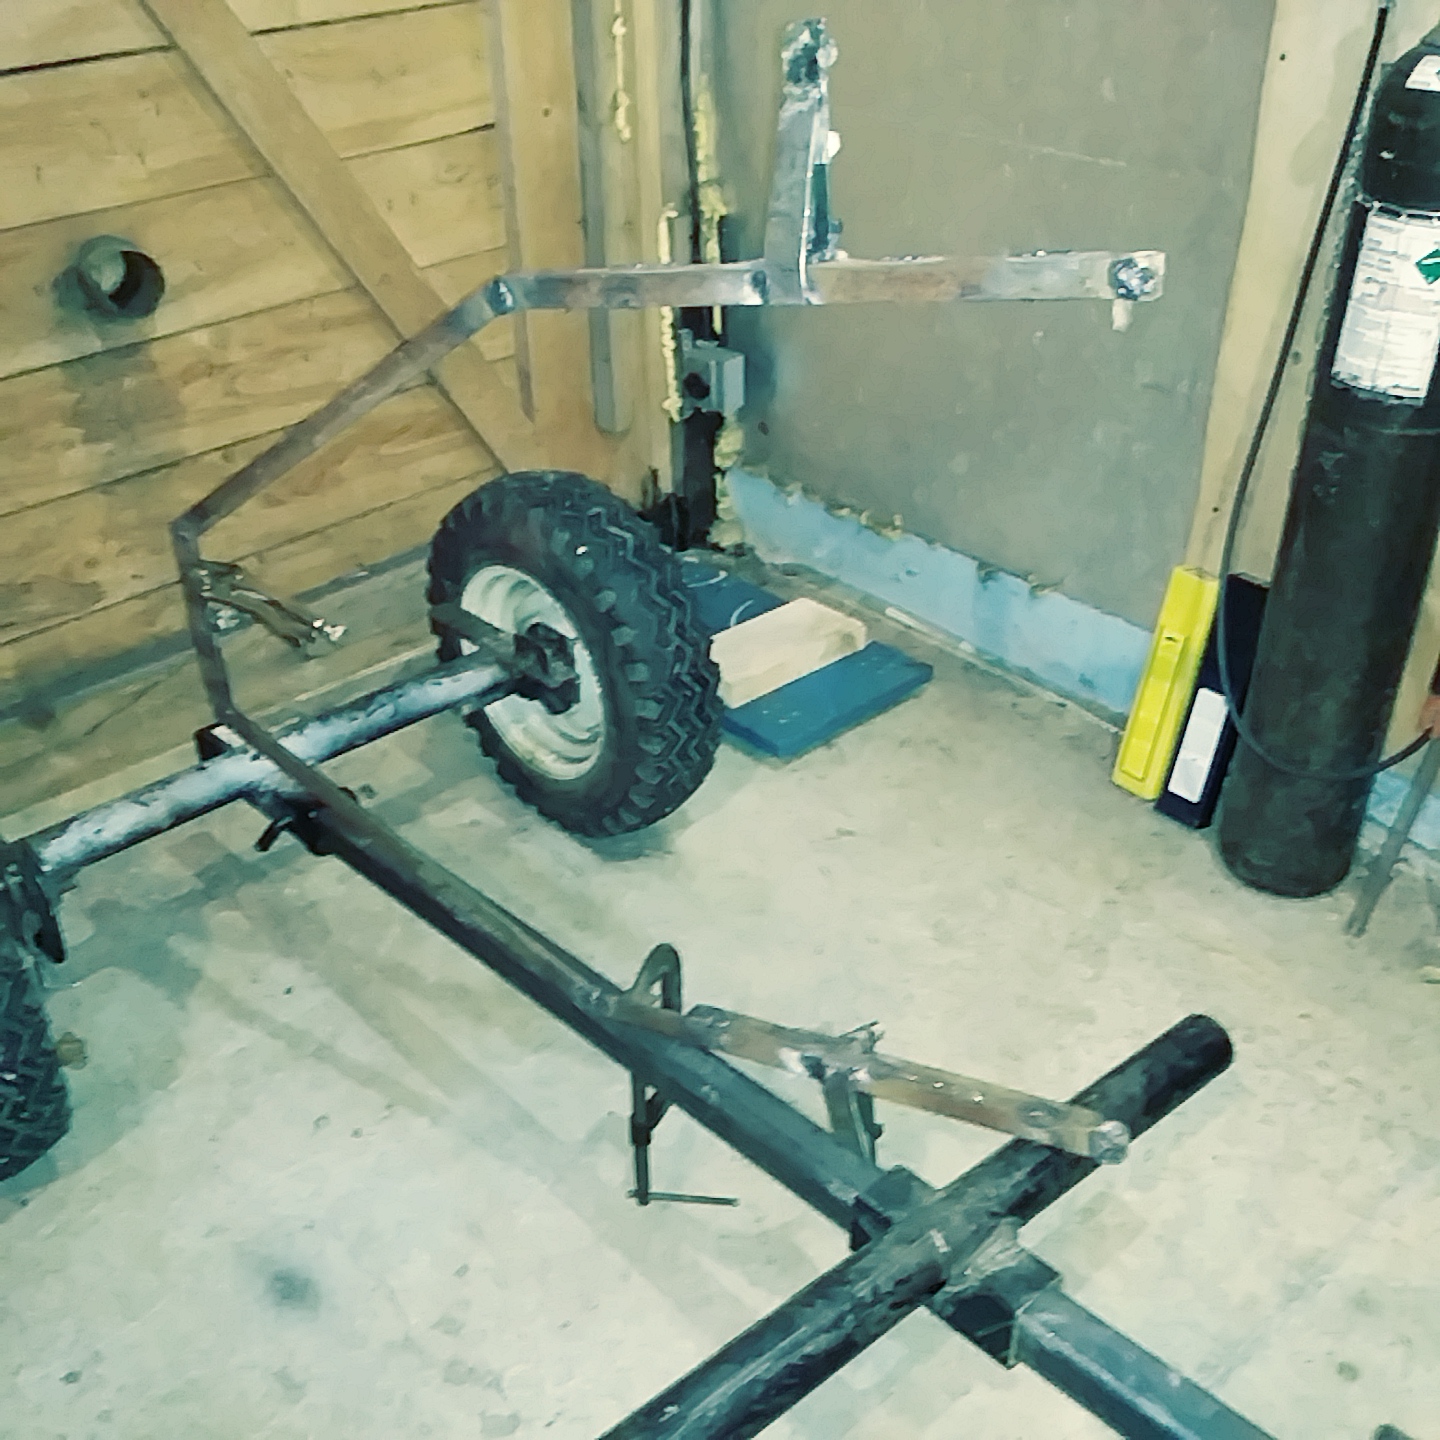
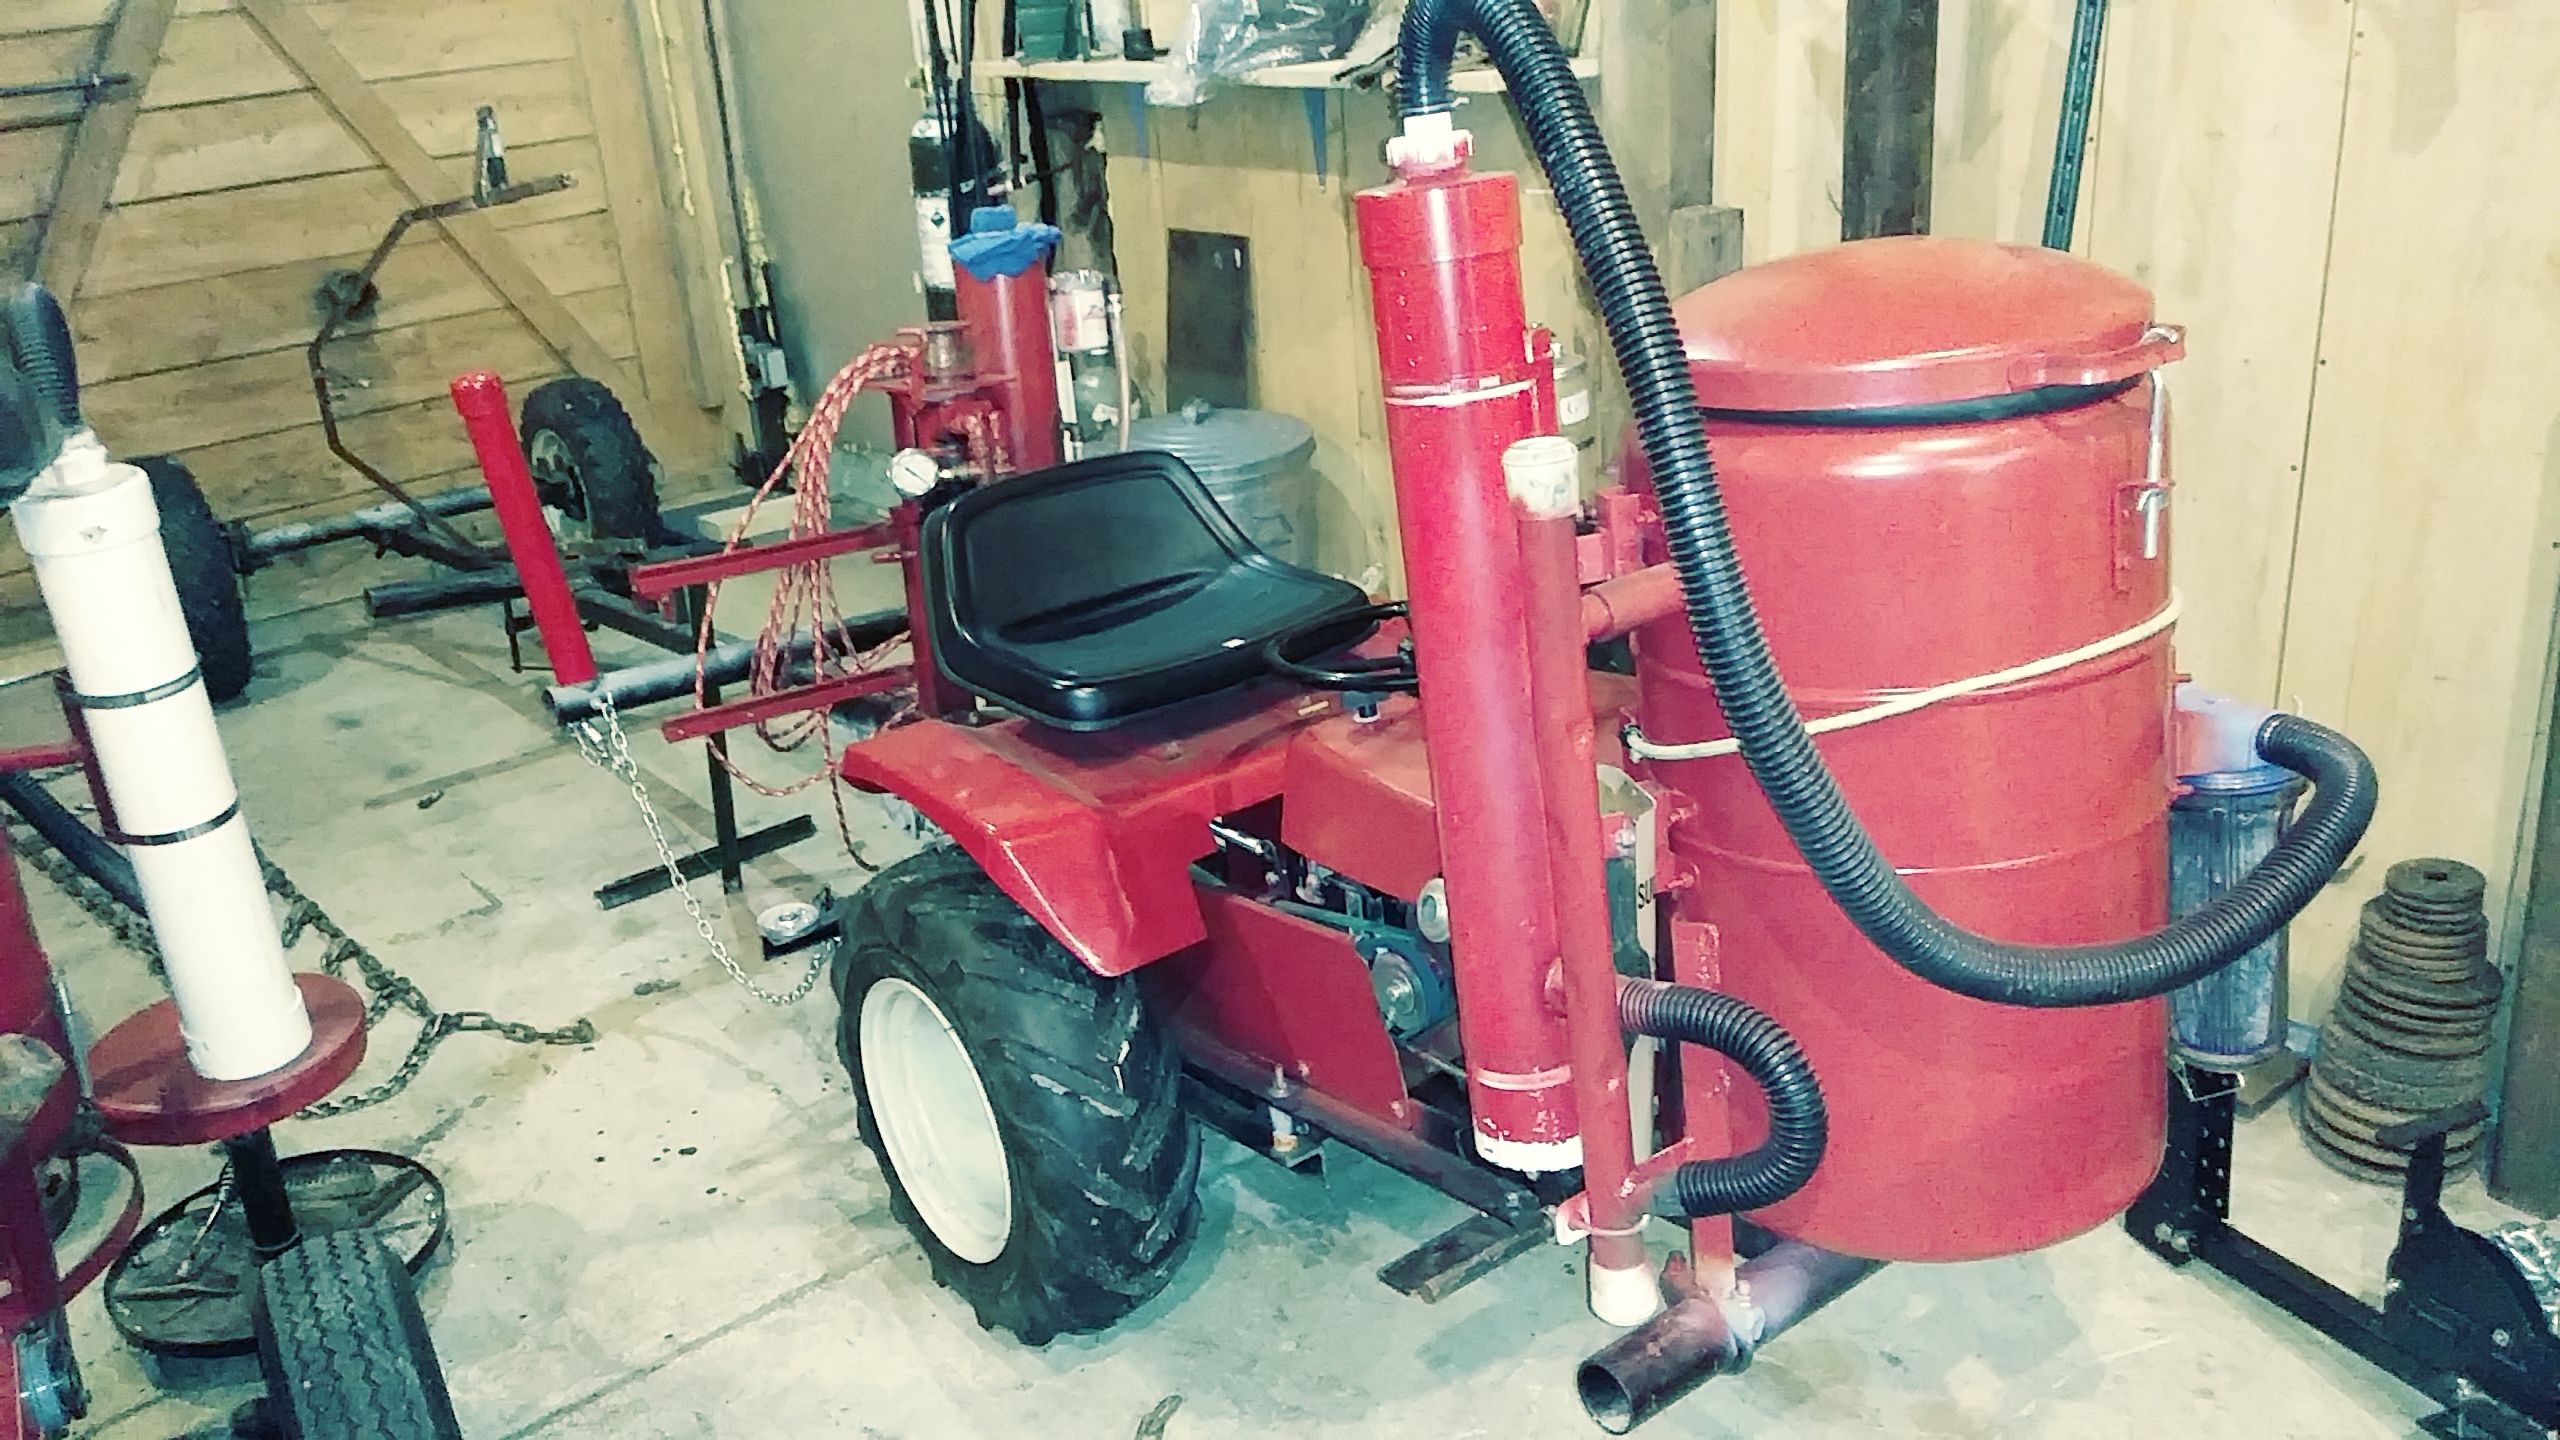
Just a photo of the machine in cold storage. I hope to install the new ACFC this spring and test out the modified loading arch. Photo below:
I enjoyed reading the battery comments above, thanks.
![]()
7 Likes
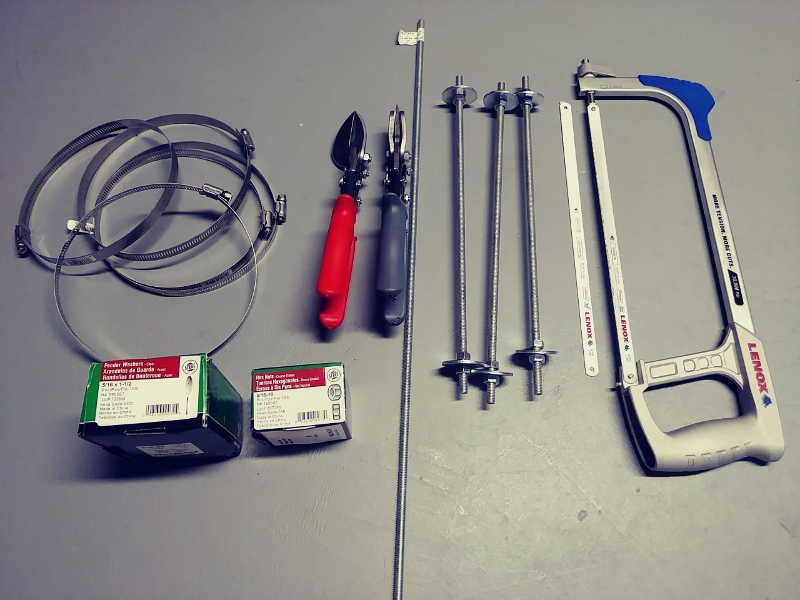
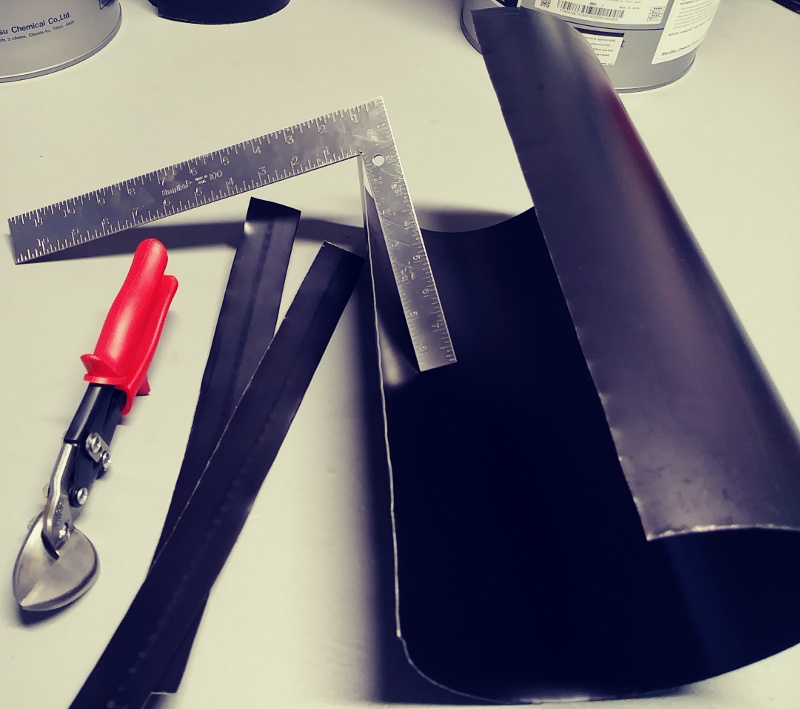
Stopped at the local hardware store today to make a tool investment. Cordless tools that is. The items upper left might look like large hose clamps but you really are looking at my new sheet metal slip rolls. Three all-tread spacers cut to length. They well provide support between the upper and lower pail. I decided to use 24ga sheet metal and to my surprise black flue pipe is 24ga. I have an appointment tomorrow, in town, so I’ll stop back into the hardware store to purchase two flue pipes to cut up. Some of these items are made in the US of A, surprise!
![]()
6 Likes
I have to adapt to not being able to work in my shop. I have a fondness for manufacturing jigs, not the type of jig that managers perform! This is my smallest jig to date.
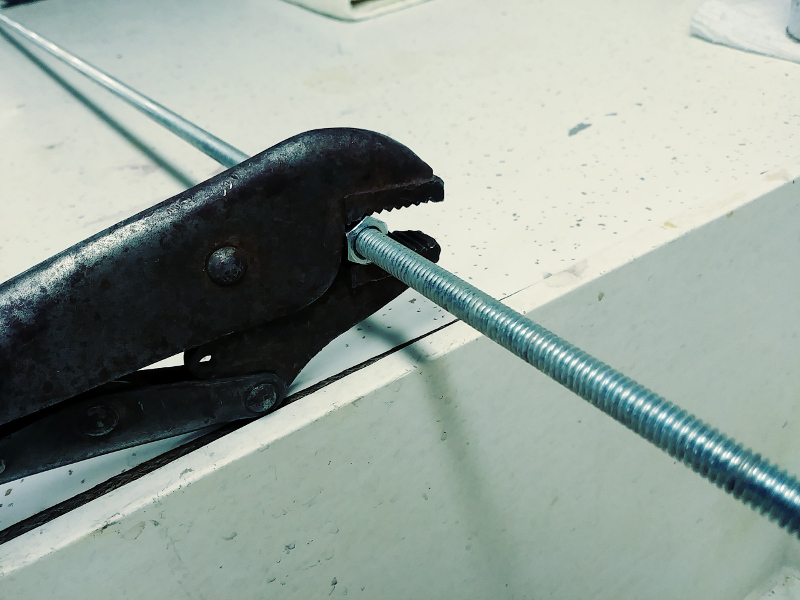
Problem, how to hold 5/16" all-tread while cutting with a 32 TPI hacksaw? Three rods cut to 14".
The cut was made with a hacksaw in the below photo.
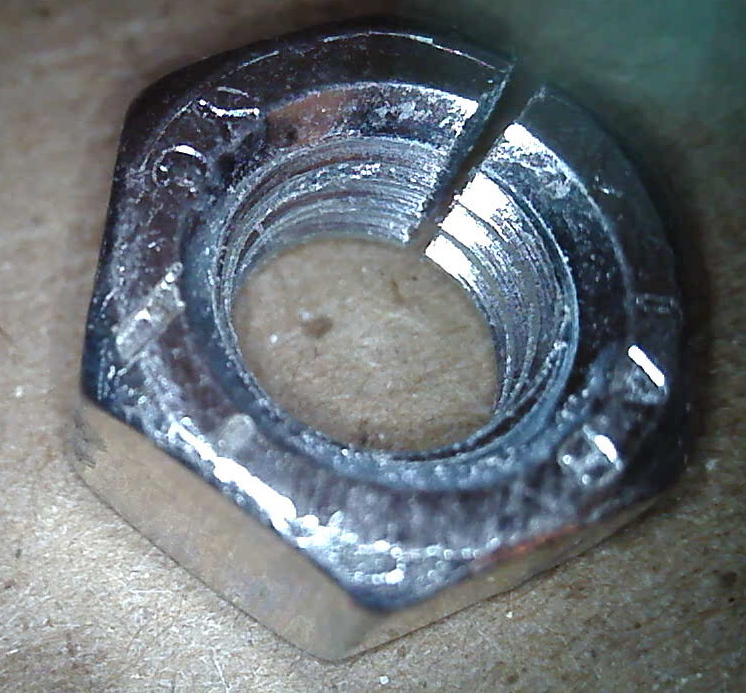
In the below photo the cut in the nut is not in view, shame on me!
![]()
10 Likes
Necessity is the mother of invention.
I like it
3 Likes
That looks like a proper hacksaw. Not a knuckle-buster! I prefer hand tools when appropriate.
2 Likes
Mike, I could not agree more. I have an old Sears hacksaw that is above the average but when I saw (pun not intended) this one and held it in my hand I could not leave without it.
![]()
3 Likes
The below photo is with the all-tread stand offs. Hint; first I drilled three holes in the top pail’s bottom. It was more of an eye ball drill hole marking so the distance between the 5/16" holes are not perfectly equal, I’m sure. I used those holes to mark the drill locations of the bottom pail’s lid holes. At this point I should have placed a felt pen mark on both pails to remember the hole index or orientation. No biggie, I can always rotate and check for hole alignment later.

Snow storm blowing in now. Thursday I was going back to Cleveland Clinic but I was able to reschedule for Friday!
![]()
7 Likes
Having fun in Belarus! Lucky to have flat ground, tire chains would help:

![]()
6 Likes
Most will agree that my flat washer views are extremely trivial but here it goes anyhow.
Most of the time this issue is only for aesthetics but for fixtures there is a practical side. Most common, if not all, flat washers are mass produced by stamping them out of sheets of metal. Stamping is a shearing operation and because of the plasticity property of the metal it will become distorted. So, there is a top and a bottom to a flat washer.
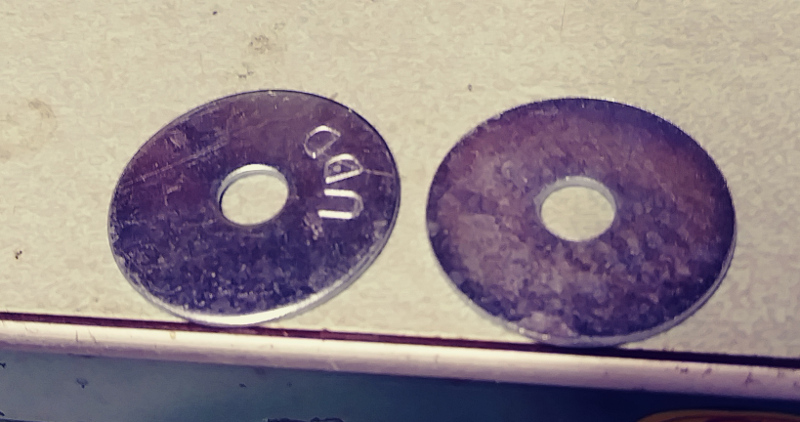
One side of the washer will have rounded edges, I call this the top. The other side will have sharp edges, I call this the bottom. For aesthetic reasons, if the washer is in plain view, it is nice to have all washers with their top up or in other words the top exposed. The rounded edge is produced when the shear die first hits the sheet metal and smears the metal toward the bottom.
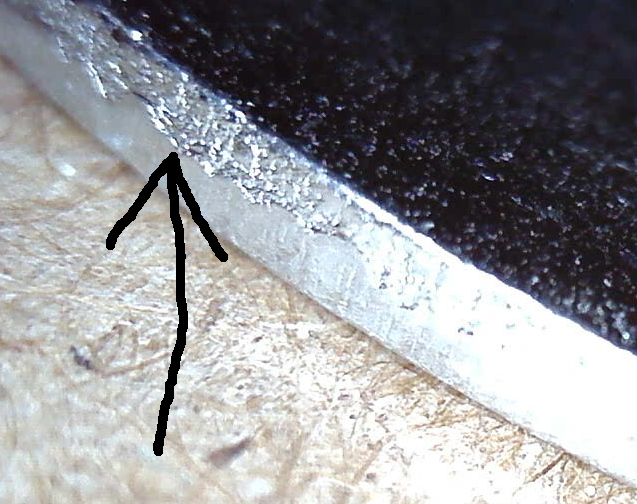
Photo below is a close up of the rounded edge:
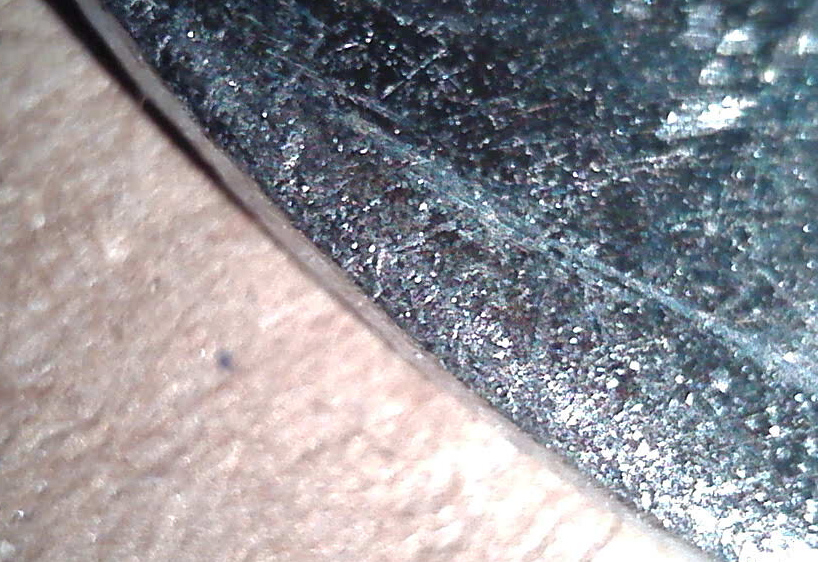
Photo below is the sharp bottom edge:
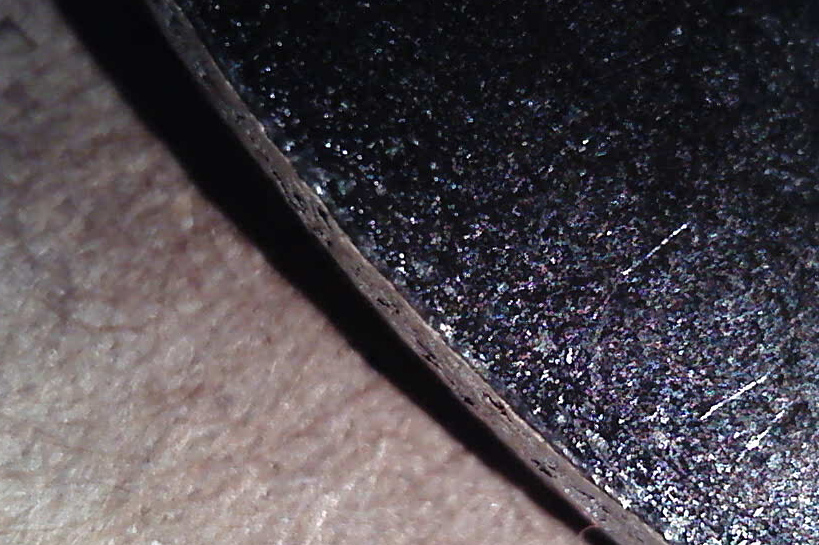
The sharp bottom edge is that way because of the continued plasticity flow of the metal. The practical aspect of this is when fixtures are used and frequently being fastened and unfastened with bolts and nuts. Especially when using hardened steel washers. The washer will have a tendency to rotate and if the sharp edge is facing your fixture damage can result to the fixture.
Bonus photo of the shear lap showing through the zinc (or what ever) plating:
Oh well, so much for my slant on Mr. Washer.
![]()
9 Likes
Always knew you were a bit of a perfectionist. 
5 Likes
This brings up a perfectionist oriented observation / pet peeve of my own.
If a sharp edge on anything is painted, the coating will tend to fail on that edge, as the film will be thinnest there. This brings me back to washers. A rounded side on a washer will keep a painted coating longer than the sharp side…
3 Likes
On the washers edges – it is, what it is.
Use what you got, for benefits.
Want to surface protect the clamped material and allow for some washer spin rotation to get best torque readings? Install washer rounded edge Down against the flat surface.
Want the washer to lock-in to he flat surface and remain in-place being a force spread out helper?
Install wire edge Down to cut-lock-in.
Want the best of all worlds? Install two washers stacked. The first one wire edge Up. The second one wire edge Down.
S.U.
4 Likes
I reaped a flat washer dividend greater than my investment. Thanks to the above!
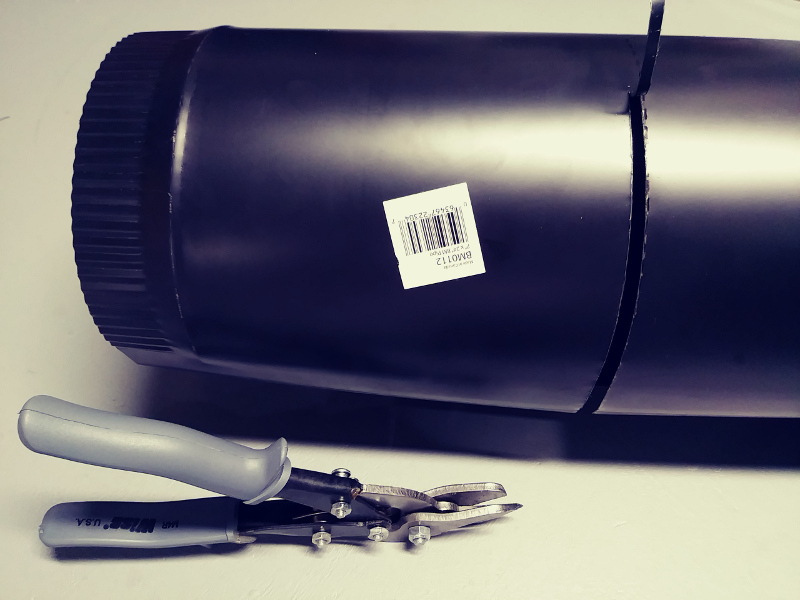
The below tin snips do a good job of cutting 24ga sheet without too much distortion.
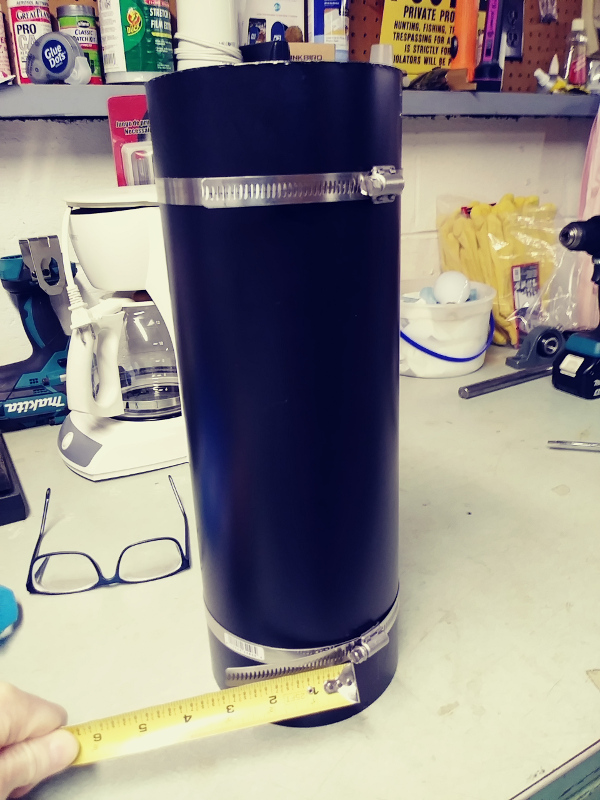
Below is the tube at about the correct diameter. Will fine tune later before riveting. Later I will look into spot welding to replace riveting. Has anybody used the HF spot welder or any spot welder? I measured the hose clamp tail to get an even diameter.
After becoming frustrated with trying to find the right sheet metal from eBay I found this online metal store:
Here is one online store that will fab stuff:
Prices are OK but shipping is a killer. Big help to order more than one sheet! Looks like stainless steel might be the way to go in the future. Looks like the information on the net says that stainless steel can be spot welded. I want to use stainless for the oxidation cup.
I’ll be gone all day Friday, back to Cleveland for another doctor appointment.
![]()
3 Likes
I’m pretty sure there’s no issue spot welding stainless. If it will weld, it should spot weld. And there certainly won’t be much issue with oxides.
Best of luck with the trip.
2 Likes
Yes I have used the small handheld spot welders.
These will work much better with a button of lower melting filler between the sheets to be spotted. Hint. Hint.
I recon the the auto body factory spot welders had huge watts to throw at it.
S.U.
4 Likes
SteveU, Thanks for the hint. Do I buy these buttons or cut small slices of brazing rod or something liking to that?
![]()