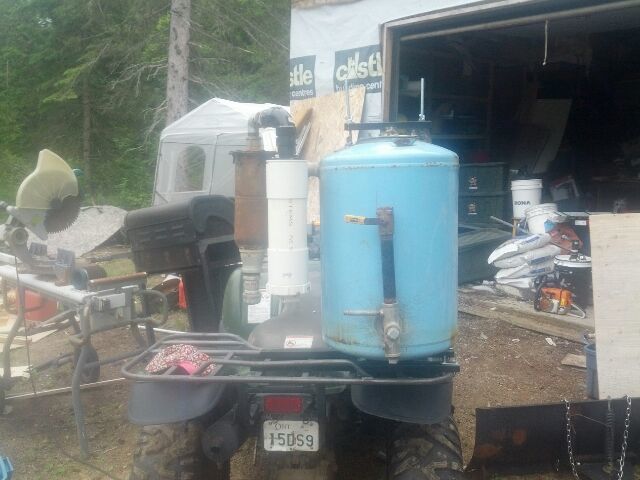
Well I finally started to put the ATV unit together. The ATV is a Kawasaki Prairie 360. The Main tank is a Water Pressure tank. The fitting was quite a dump find and perfect for a gasifier; it has a lighting port, a low cleanout for slag that drops out, air intake up high to avoid dropping coals and two 1/4 " ports for exhaust and maybe steam. The cyclone is a 4" body with a 3/4 " in, 1" out. Filter will be a pvc drain pipe unit with a water filter inside. The nozzle will be a little experiment; a 1/2 " nipple, a tig cup crazy glued to the front, then cast into refractive cement to hold it together. It will screw into a fitting in the tank to be replaceable. If that does not work, I will resort to Gary’s wrapped stainless design.
Pic one: the atv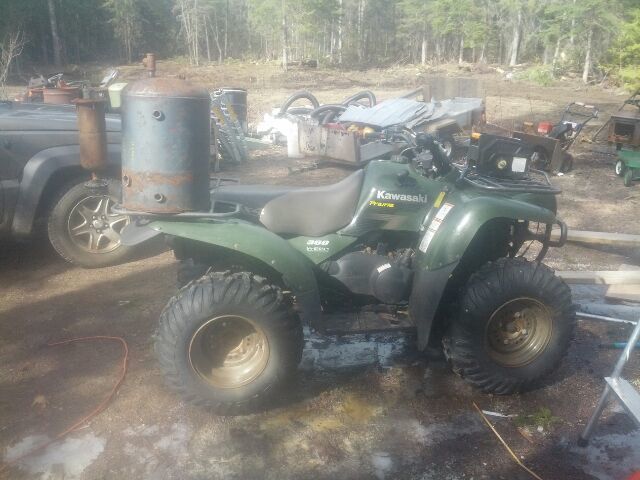
Pic two main tank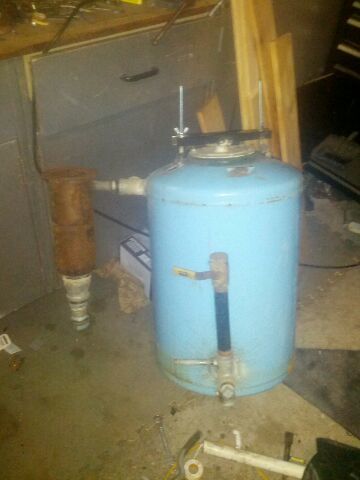
pic 3 nozzle smeared in refractive
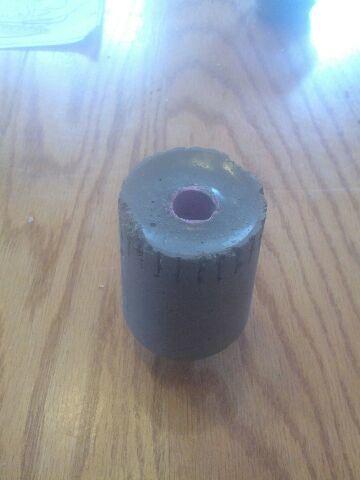
pic 4 nozzle in its form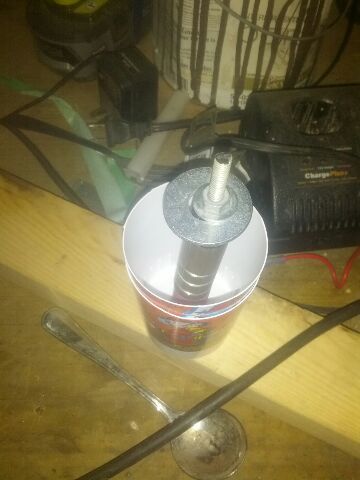
Pic 5 cast in refractive.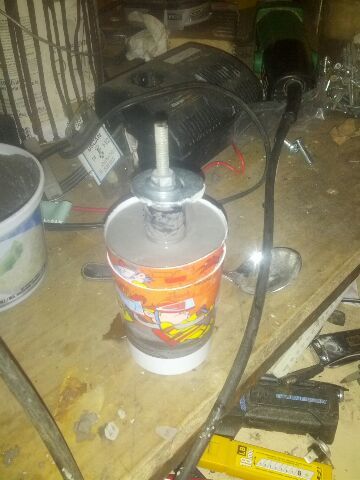
All right David!!! Just a little warning. With that extra weight on the back, it is easier to do wheelies. I had the pleasure of seeing Don Mannes pop a nice one at Argos. Fortunately he stayed with the beast while a crew rushed to help him put the front wheels back on the ground. 
I am now purchasing 1" by 8"long stainless steel pipe. It costs about $8.00 and when cut in half makes two nozzles. With exhaust gas cooling, these nozzles last for several hour of run time. Basically I’ve abandoned the stainless steel sleeve and the ceramic nozzle.
Gary in PA
Hi Gary, the refractive has worked really well for me on the tractor build but that one is aimed upward so it was easy to just pour. I don’t know how this one will last. Why did you give up on the fireclay anyways? Is it more fragile then refractive? I might just go the route you have with the tubing. For weight distribution I might add some weight up front.
Best Regards, David Baillie.
Very nice build! What year is the ATV? I am keeping my 2003 Polaris for this purpose. I do think charcoal is a better option than wood due to the weight and easy start up. I also think the charcoal won’t have such a negative response with rough terrain.
@glgilmore, Why did you give up on ceramic nozzles? Do they have a short life in a charcoal gasifier?
I wonder if this is the first ATV conversion… ![]()
Jeff
And another charcoal gasifier is borne…
Welcome into the dark world of enormous and endless fun

Looking great David…
Bill It is a 2003 with a dead front differential so just 2wd. If she runs well I might cough up the money to fix it. Its not a pretty build til she runs!
Jeff I doubt it is the first there must be others. Koen I caught myself starting to weld in sandals the other day thought of you on that one. I quickly put on real boots
Pulled the new nozzle out of the mold. With any luck it will be the best of stainless, tig cups and refractive. Hopefully not the worst of each of them…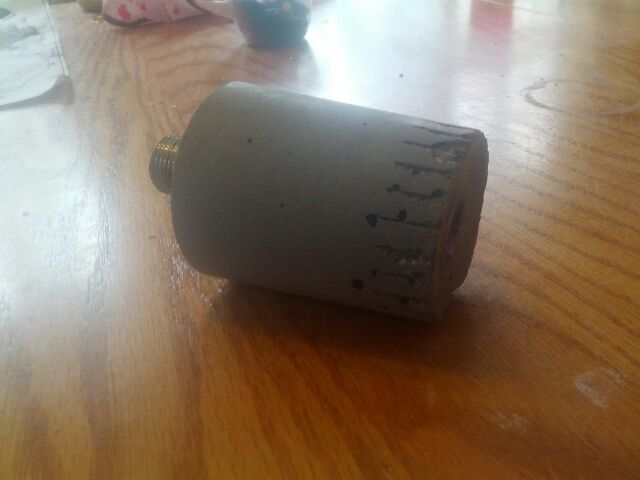
looks pretty good in there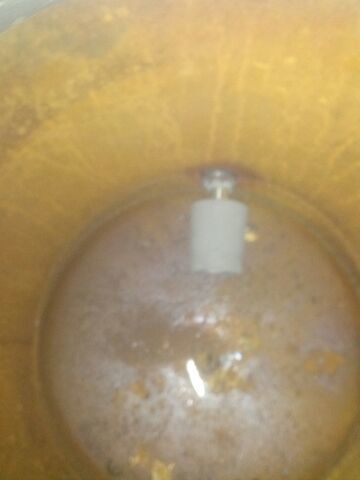
Is this fire clay David? Sure looks good. I am anticipating the outcome.
a 1/2 " nipple, a tig cup crazy glued to the front, then cast into refractive cement to hold it together.
I hope it works out. I can’t wait to see how well it works.
Hi bill, not sure of all the properties but it is a concrete based product that you pour and it sets. I think fireclay is just a high alumina content clay. High temp refractive is used in blast furnaces and kilns. My only concern is if it expands and contracts differently then the underlying stainless nipple. Still a ways away from firing the unit yet.
Best regards. David Baillie
Hi Dave
May be put it in the wife’s oven for an hour at max temp to let it set and cure before going in to the pits of hell in the furnace of a gasifier !
Just a thought !
One thought David…
When making something that could be hot in the center and cool on the outside, it is best to make the part in “pie wedges” to allow the difference in expansion between the interior and exterior. I do this on the ceramic Victorias and it has worked very well even with rapid starts. In your case I would hold the wedges together with stainless hose clamps around the outside.
Hopefully you won’t have a problem.
Stephen
Hi Patrick, I like to think it’s “our” oven but I won’t test that assumption. After a 72 hr cure I will put it in the BBQ for an hour to drive off any water. Stephen I think if it comes to that I will go the disposable nozzle route.
Thanks for the feedback, David Baillie
Finished the tank and lid , welded it to a mount and bolted it to the back rack. The white PVC is the final filter housing. Oh so slowly coming together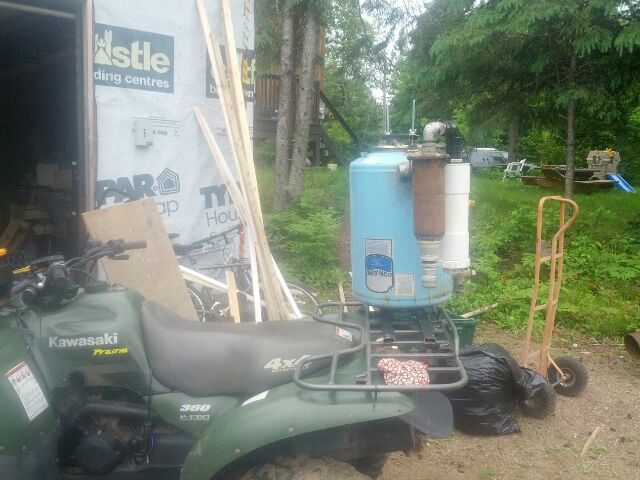
Time for the dreaded plumbing. Removed the air housing and was pleasantly surprised a 2" abs fitting fit the existing rubber fitting on the air intake.
First pic the original air intake box looking crowded in there.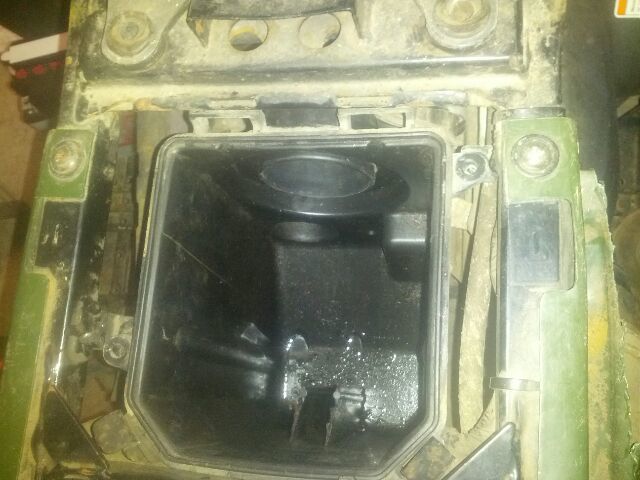
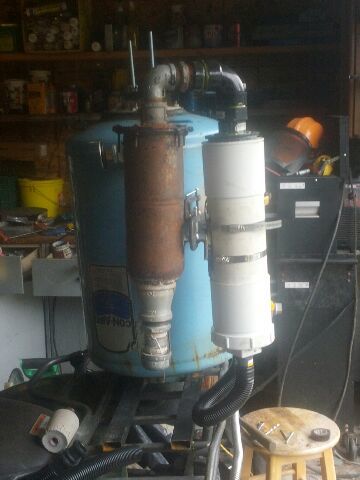
Second pic 2" abs elbow reduced to 11/4 to clear the exhaust pipe, drilled through the side plastic. Hopefully clear sailing now…

Finished the dreaded plumbing today. All set to fill and test fire.
Pic one back view Left to right Final filter, Starter blower, Main tank Attached to main tank air inlet is the exhaust recycling hose. Hose off final filter is looped to the starter blower.
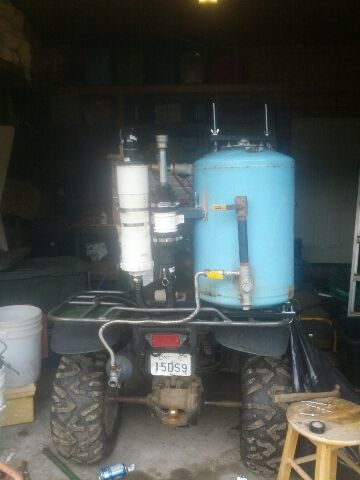
Pic two drivers side left to right Cyclone, final filter
Pic 3 from front looking back. Left to right Main tank, temperature guage, cyclone. At bottom right you can see the air fuel intake/mixer.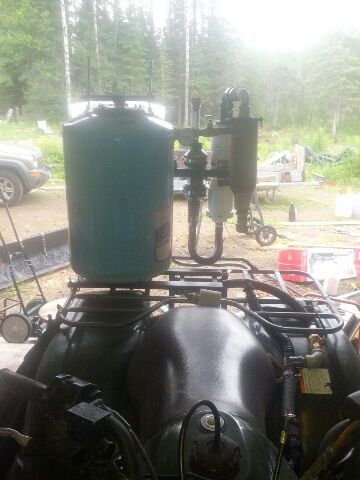
Flaring soon…
FIlled it up, fired it up and off it went… Never that easy of course. I could not get enough air into the mix at first. I had to drill some secondary air holes. I’ll replumb it for more air. Ran great though…
Video:

Very happy, enjoy!
Sure sounds like your on the right track. Amazing how this stuff just works and homemade too boot.