Hi Dave,
I didn’t go into that. Was trying NOT to write a tome.
I screen out the fines, which go on the lawn, and put the larger char back in the gasifier.
Rindert
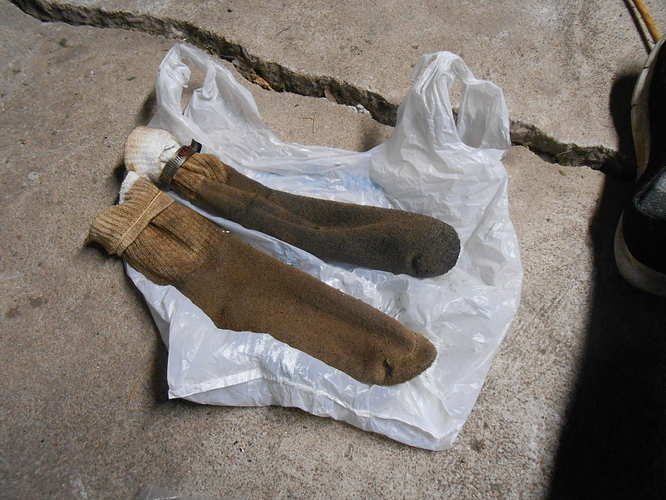
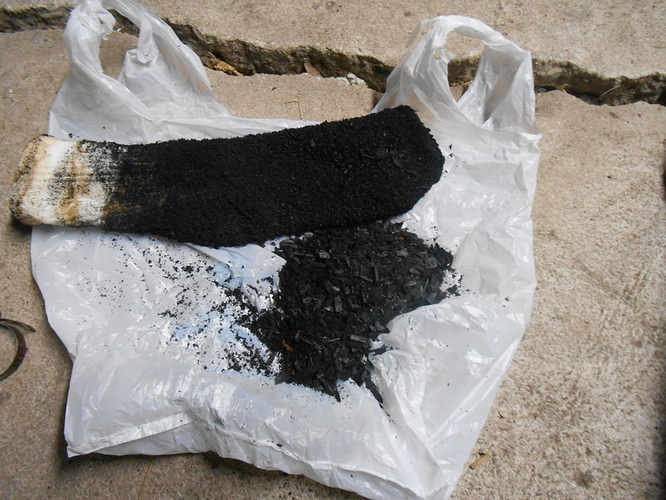
Henry, looks like those socks are doing the job. You can fill your wardrobe with new socks, and put the old ones in filter duty. You can certainly try making some cyclones. Seems small engines prefer small-diameter cyclones. Here is an interesting test by Northern Self-Reliance. 
Henry,
I think a cyclone is going to fill up with that coarse char really fast and clog. I think the gas might be moving too fast and dragging char along with it. Can you tell me more about your setup?
Rindert
dont miss the point of a bag filter. They are supposed to develop a “cake” This is actually what becomes your filter not the actual bag or your sock in this case. The dirtier it gets the better it filters.
Screen your fuel better that alone will get rid of all that dust. No need for a cyclone just a vessel large enough to settle out the heavy stuff is all that should be needed. Low velocity, larger vessel = no cyclone needed to drop debris
I have not built a cyclone in years and don’t ever plan too again. If you make bags out of silica cloth you can clean them out toilet brush and never need to remove them. Just sweep them like a chimney brush and dump out. Plus this is very fine woven material so it will filter better than those socks.
Hi David. I had to scroll up a ways to remember whose thread this was. Anyway it was suggested that you put a access port into your tank. I just got done building a charcoal unit and didn’t take the time to put one in mine. One run and I cut one in. Kind of an essential as far as my limited experience goes. Mine is a four inch ID pipe and I have big hands. I can reach through it and move my hand around inside the tank with no problem.
I do not have load on engine , Have chipped green wood , screened and had tremendous waste and decided to re screen at 1/2 inch and building new gasifier . 3 something inch Iron pipe 6 feet tall bottom sealed in mortar 3/8 hole used as nozzle , toilet flange as top 1 1/4 sump pump hose connected to top to sock filter , sock filter connected to valve tree , connected to engine , ran two gasifiers at once .
Ran two engines in separate runs both ran for hours and then would not restart because intake valve was seized by tar .
Had burn pile of wood from trees shading solar panels . but stopped burning in this spot instead used wood to fire retort that is safer then huge open fire . Stopping now for winter . will start next year with left over chips and trees I cut down that are now hidden in weeds .
I was making charcoal while running engine . It would be nice to bake bread while making charcoal . Think someone does that .
“Green chipped wood”, says it all for your valves tared problems, man.
There is nothing you can do on a small sytem that can compensate for this severe moisture system thermal-quenching overloading.
S.U.
I have to agree with @SteveUnruh. You must get all the tar out of your fuel first.
Here in Colorado it is so dry that finding dry wood is not difficult at all. But I know this is a big problem for a lot of people. I started a thread about it but not many entrys yet. Maybe when you have worked through this you can contribute. Wood Drying Methods
Rindert
I am making charcoal from the chipped green wood and reducing the weight of the green chipped wood from four pounds green to one pound charcoal . but how many days do you spend to make one pound of charcoal ? I do have to fire oven more then once . I can get two cans of charcoal made in one day but usually it takes a week . And not all the wood is made to charcoal and maybe there are small flakes of tar in the charcoal . and I used pipes that had tar in them from making charcoal to make valve tree when I ran out of parts and one inch pipe would not work .
Henry,
This is the cold hard truth. This is the way I have made chunks for charcoal. If I push myself I can reasonably make 20 gallons per day.
I don’t mind the exercise. This is way better than running marathons, and I have done that three times. And I might even do it again. However, it is not a time efficient way to make chunks.
I am working on a chunker. I have come to see that a chunker is central to any woodgas or chargas system.
Rindert
PS I have a 1970s Echo chipper, shredder, vacuum. It makes really good mulch, but I wouldn’t use it to make gasifier fuel.
I use a chop saw its way faster than that. Im way to lazy to do that!! Yaeh Marathon?? Im out of breath just saying that word!
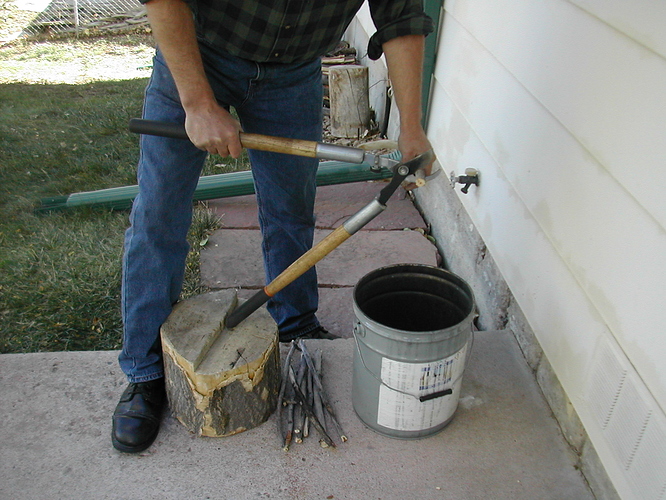
That is the way I make fuel to turn the green wood chips into charcoal . maybe I burn over 10 gallons of small wood chunks to make one pound of charcoal , otherwise I would burn this small wood in a pile .
You cut all your wood up before cooking it into charcoal? Once cooked, those little limbs (like on the ground there) would just crumble apart. I am all for getting ones exercise (even if it doesnt make much sense - like riding a bike that doesnt go anywhere) but that setup looks like a repetitive stress injury waiting to happen! 
Yep got that exactly one year ago, giging trugh rocks with a pick when l was diging out my well. Repetitive motion and shock wawes trugh the arm worn down my wrist tendon. Felt like there was sand in the muscle for 2 weeks. Swolen and painfull…
Henry your problem is a simple one to over come . Do not use wood chips unless of course you have a fully insulated retort to bake them in , chips are very hard to fully cook all the way through when you have a container filled with them , but if you fill your retort up with branches ,twigs even small chunks of wood be it fresh green wood or fully seasoned dry wood you will get much better and fully charred wood .
Dave
LOL. If that were going to happen it would have back in the 1970s when I used to throw about 1300 of those old 40lb square hay bales a day. I’ve done so many things similar. This old rack of bones just doesn’t break. I have my problems. That just doesn’t happen to be one of them. Repetitive stress injury’ isn’t that something people in Hollywood get? 
Rindert
What I did on my little char-gasser was to put a 90 degree elbow on the end of your nozzle pipe then put a SS pipe into that. Making sure it points up. then I took a cheap ss pet food dish turned it upside down and punched a hole in the bottom the same size as the ss nipple. Set the pet dish upside down over the nipple. You now have a heat proof nozzle.
My nozzle lasted longer than the gasifier tank
I was using. My first nozzle was black iron.
It lasted just five minutes!
I learned the uphill nozzle from Koen Vanluken. He posted pictures of a char. gasifier with a piece of ss sink drain pipe.
That he had a bead of ss weld around the rim of the nozzle. The end of the pipe was bent into a 90degree
Any ways look at some of Koen’s nozzles
You will see what I am talking about.
I used the SS fitting that connects the flex pipe to the gas stove. Mine was about 1/2" but you can get bigger SS PIPE fittings. As I said my nozzle lasted for 2 years. And 3 cheap metal bucket tanks! I ran a wood chipper shredder, but mostly cooked on the char gas.
The best wood source for fuel grade charcoal
is a pile of chipped , shredded wood from the local DPW, or a tree service company.
Spread it out on a tarp about 2-3" deep let it sit all day. Cover at nite.when the wood chips are dry use a TLUD to make your char.
Now screen the char through 1/8 th" screen
To remove the fines. Now you can fuel most any thing. Just use a good filter system to clean your gas.
Jesse
Side note: my gasifiers tanks were open head metal buckets. I was able to service my gasifiers from the open top. Then put the lid back on for making gas. I was using used deck stain 5g buckets. So the gas outlet was the spout hole in the lid. Just remove the plastic spout, and bolt a floor flange over the hole.
I took a 3/4"union and had it welded to a piece of 12 mil steel. Drill a hole in the center big enough to access the union from both sides.
Screw the nipple assembly to the back of the union then bolt the whole thing to the side of your tank. Making sure your nozzle points up
Hope this helps
Jesse


