I don’t see a category for wood drying on here. But it might make sense for there to be one. I think the topic is worth having a serious discussion about.
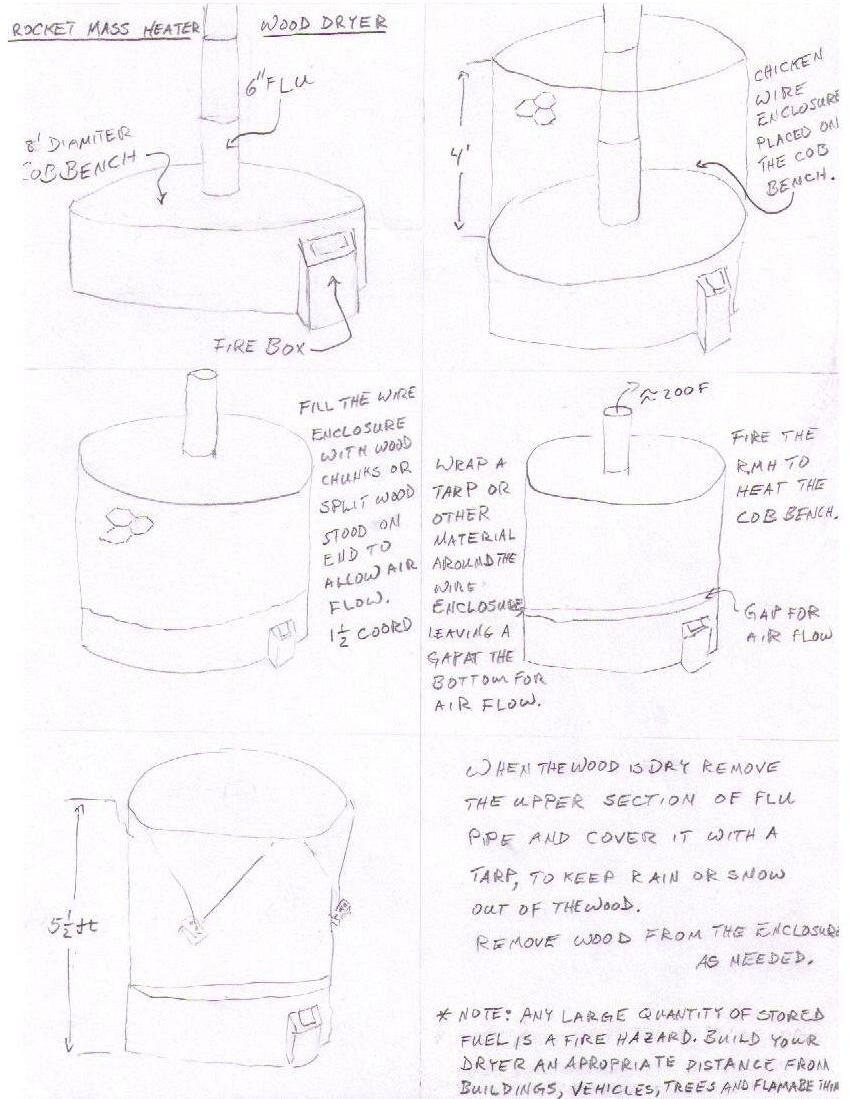
Here is a simple idea for drying a batch of wood that I’ve been thinking about.
Rindert
5 Likes
Here’s a short video that shows my drying method for wood CHIPS (not chunks):

Later on I learned to do a rough job of sorting on-site where I found the chips. That makes drying go a lot faster.
Pete Stanaitis
3 Likes
Farmers dry grain in big silos using hot air forced up through the bottom of the vessel. Your design looks pretty similar to those grain dryers albeit on a smaller scale. I’m pretty sure the farming version uses NG or propane but again, same idea.
You could the run the wood furnace’s inflow air past the hot chimney for some extra heating efficiency like a condensing home gas heater. That would require some method for diverting any water vapor that condenses though. Maybe not worth it.
I had ideas for a solar dryer where extra efficiency would be important. A counterflow heat exchanger would dump the water vapor coming off the wood but recycle most of the sensible heat into the inflow air with a heat top up from the solar. There is no pressure on the heat exchanger so it can be a pretty cheap/flimsy unit. I was thinking DIY with heavy duty aluminum foil and lots of layers.
2 Likes
I thought about that. But the whole thing about Rocket Mass Heaters is that they are efficient, cheap and easy to make. And since this one would not be heating a living space it wouldn’t need to be sealed to prevent carbon monoxide poisoning. It could be even cheaper. With experience, cost might be 50 dollars and one day of labor. Of course more permanent and or better looking things could be made by building this inside a shed & etc, etc, etc.
I’ve thought about using solar hot air panels feeding heated air into a grain dryer type structure. But people who would need this dryer the most, such as those living in Michigan’s Upper Peninsula don’t get enough sun to make a solar drying system work. Here in Colorado we have such a dry climate we actually have to water the compost pile or it soon becomes a fire hazard. It would only make sense to build a wood dryer in very wet climates.
Rindert
1 Like
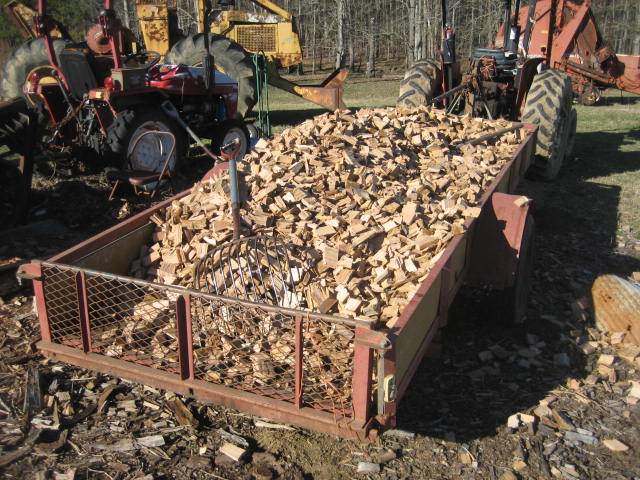
While chunking the fuel it is shoveled on a trailer. I then pull the trailer under a shed. A portion of the wood spread about 6 inches deep . This portion of the wood is usually dry in about a week and will be used or bagged. More will be spread out in it’s place but may not need to dry as long because it dried some in the pile. Before all is used out of the pile it may only need to be spread a day or so to be dry enough .
I try to get the moisture down to about 20%. The chunker will fracture the wood so that it drys much faster than if the chunks were sawed .
HAVE WOOD WILL TRAVEL
12 Likes
In almost all of north America wood will dry in natural conditions. The least work and larger amounts that can dry at once are the desirable goals. Wayne’s approach is hard to beat. Jo also has a good bulk system going.
Woodmizer marketed a solar lumber kiln, and decades ago Fine Woodworking magazine featured a drying kiln which used a dehumidifier and elaborate controls. But for just drying nature and a bit of time are unbeatable.
7 Likes
So Bill - That’s basically what I had in mind but with a heat recovery ventilator to speed things along and achieve a bit lower moisture content.
My thinking is just that - thinking. The doers seem to prove out that simple wood drying works fine.
4 Likes
I live off grid and won’t be installing any fans.
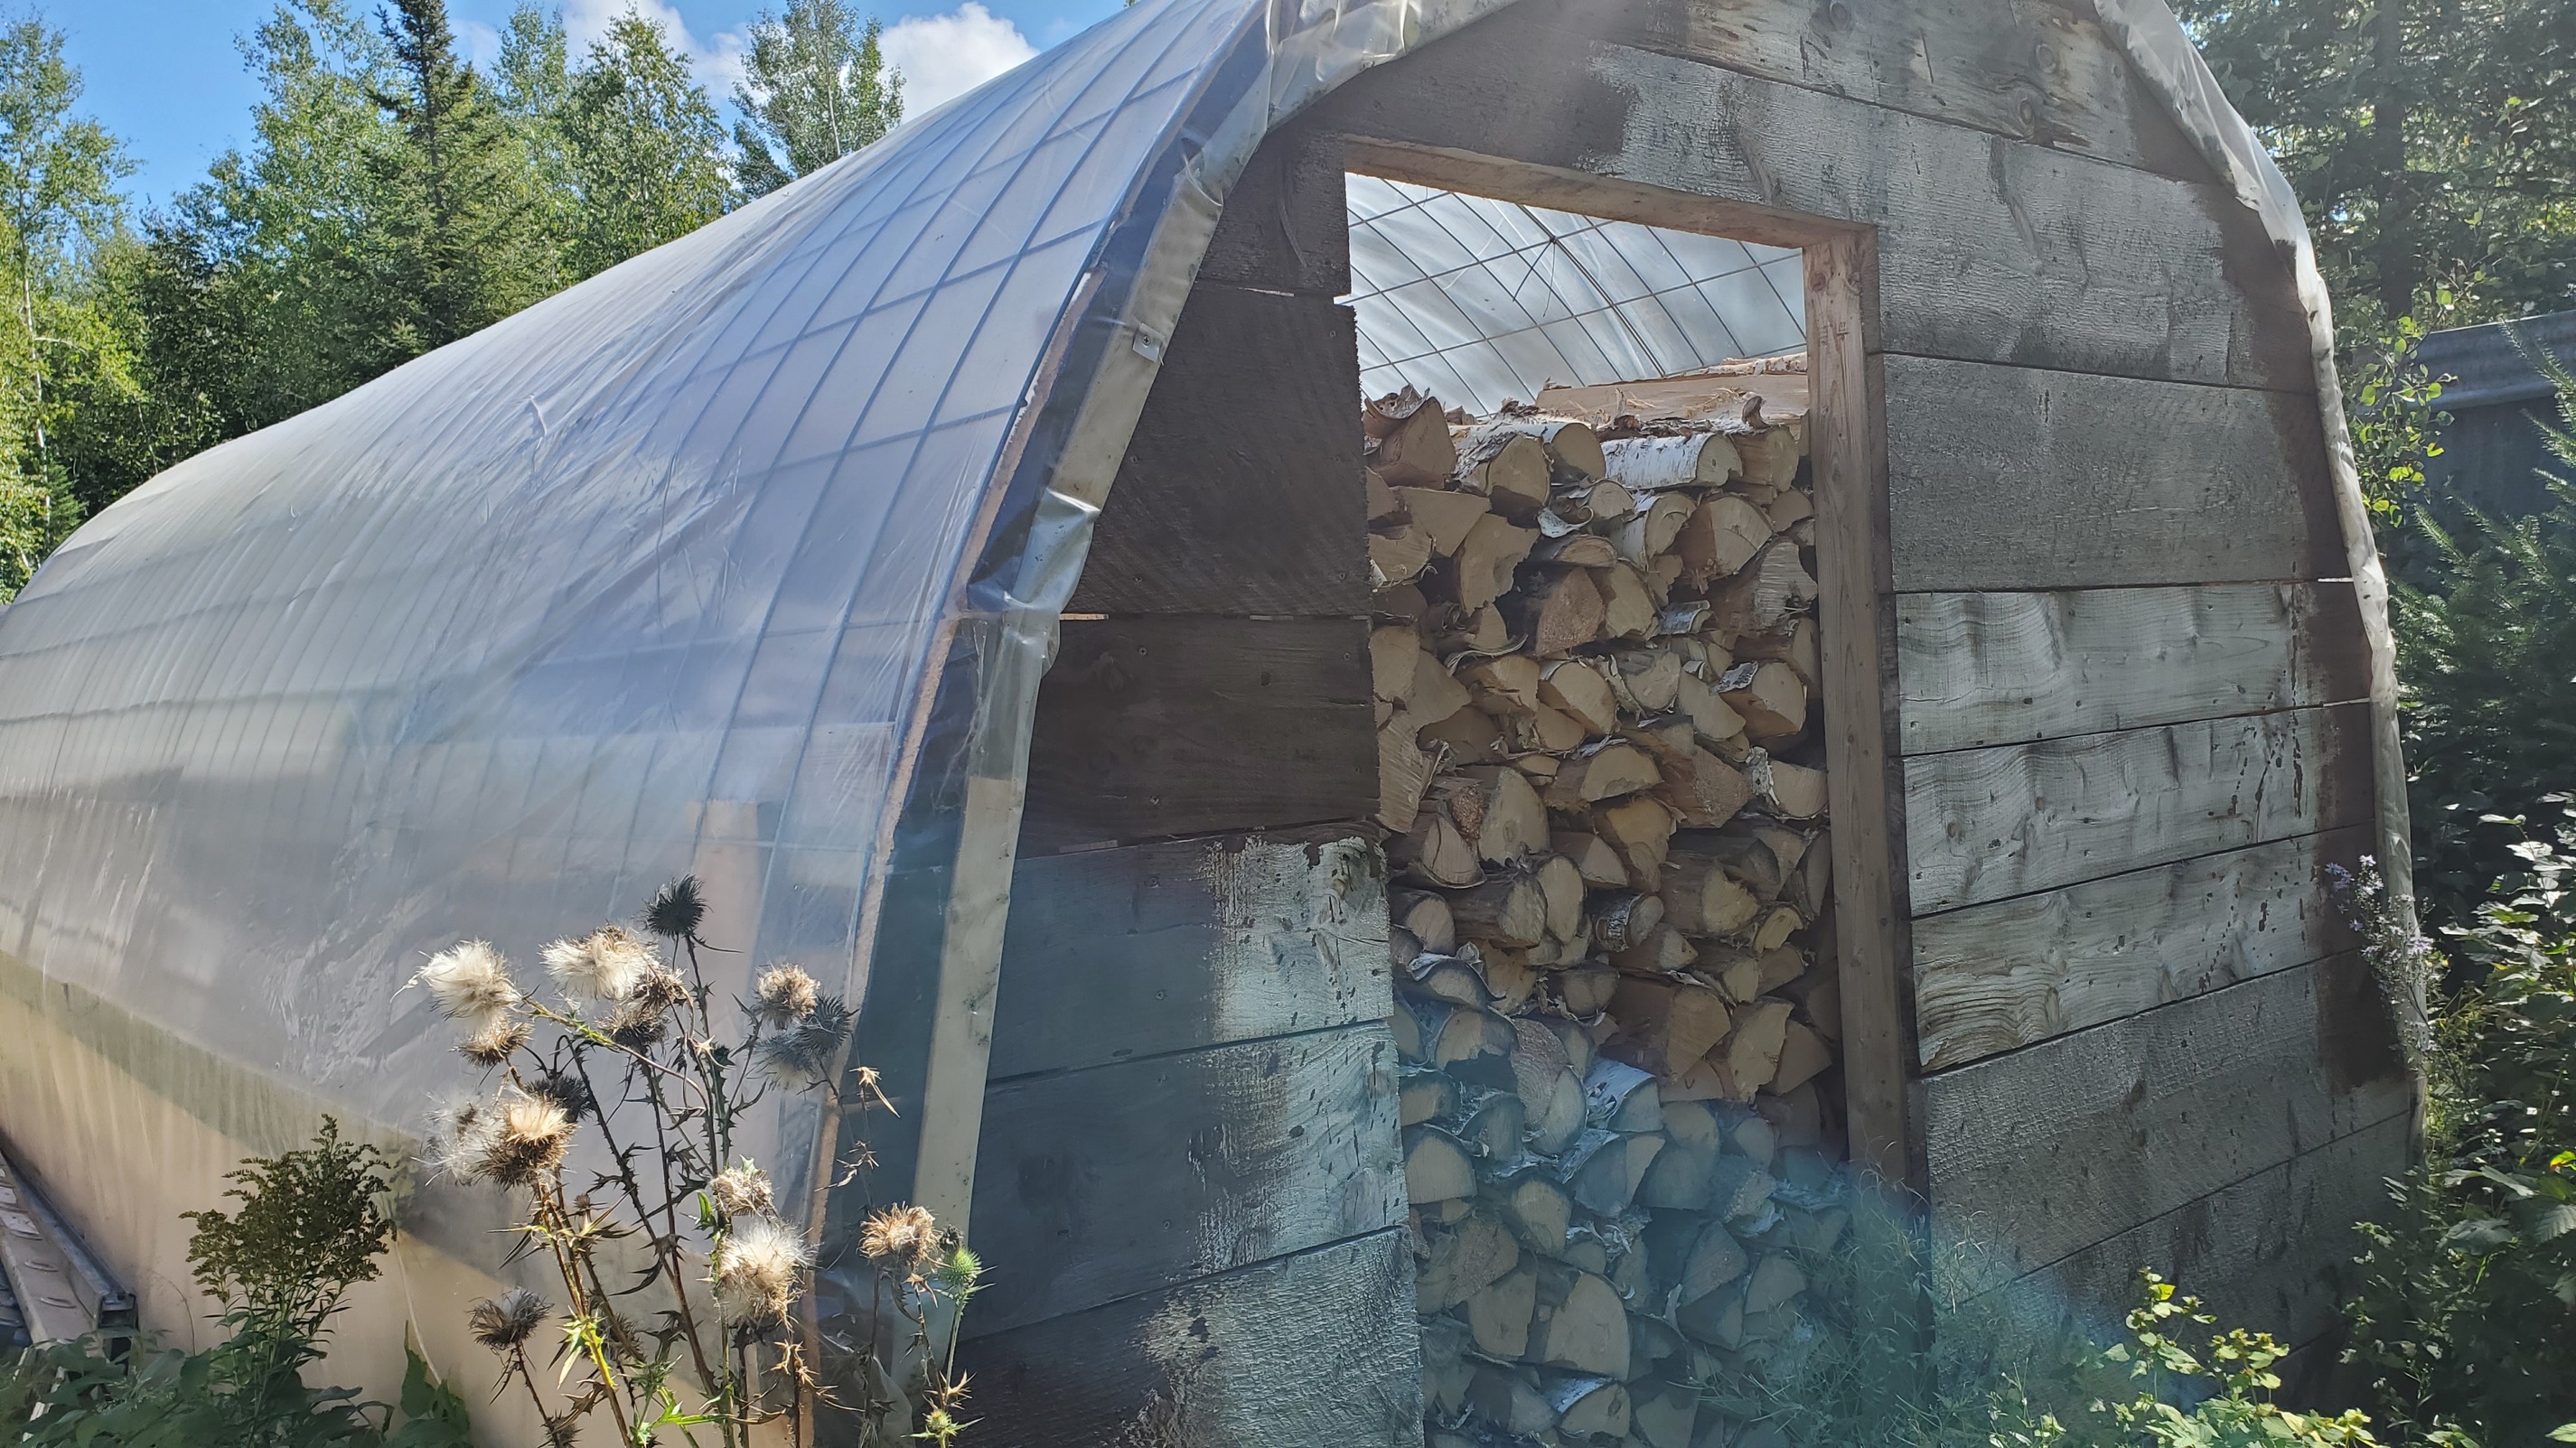
This wood shed faces East/West and the wind goes through pretty well. I put split birch and maple in here in June the other year at 40% and by October, it was down to 20%. I checked by cutting a piece in half and testing the fresh cut part. Throughout the summer, condensation built up on the inside of the plastic as it was drying. By October, no condensation.
6 Likes
FWIW, I have about 6000 bd ft of lumber that has been drying for as long as about 40 years. It’s in a metal sided pole building with a dirt floor. It all stabilizes at about 16%, using my Lignomat moisture sensor. I live in west central Wisconsin.
By the way, to test wood chip and small chunk moisture, I weigh a sample, then bake it in the kitchen oven for about an hour at a time at 250°F, reweighing and rebaking until no change in weight. Then calculate water loss, etc..
Pete Stanaitis
7 Likes
O.K.
Tied into some recent “run my small engine generator on wood” efforts.
YOU must have dried down 10-15% moisture wood!!!
How to get this?? This topics subject.
You engine produces wastes heat from it’s exhaust. Produces wastes heats from its jacketed cooling. From it’s lubrication oil.
Your generator head even produces some waste heat too.
And air-cooled engines even conveniently blow this heat out, and around.
So just from these system there is enough heats to reduce down 40% wet green cut woods down to 20% moisture.
Then woodgas systems can have their wastes heats from their hearth jackets, separation chambers/cyclones and cooling tube rails finish that 20% moisture woods down to a true perfect for woodgasifing 10% moisture.
Just-in-time delivered dry and warmed!!
Not speculation here. Done it. Do it in my wet, wet maritime climate.
And this does not have to be complex brainac; mad-fabber system done either.
Use expanded metals sheeting. Start by making up ~4 inch+ (100mm) thick rectangular baskets the height and width of your open frame engine generator. Sized to hook hang front, back, side of the unit. Even have one layed over the top.
Make up six of these baskets.
Take the first two with the wettest wood chunks/screened chips and edge V teepee them past the engine exhaust outlet. The exhaust must pass underneath this V teepee tunnel. Have to flip these top to bottom to dry more evenly.
Hang the others side, ends, and top of the open frame generator assembly with four more baskets.
Experiences will teach you when/where to rotated the baskets from starting wettest to the hottest ( engine exhaust) to the final finished dryest just air flow position (usually the carburetors end).
Screw up and your wood fuels will heat and smoke. Why you 2 hours cycle plan! To be there. Or the system stops from lack of fuel. Safely.
You can use the same baskets to hang around your heats shedding gasifier system parts.
You were smart, right?
You did make your baskets volume to be able for one basket dump-in fill of your woodgasifiers hopper, right.
Increase the basket thick ness until you get this.
Plan on every two loaded running hours re-fueling your gasifiers hopper.
WHAT THE REAL WOODGAS VEHICLE DRIVERS HAS TAUGHT US. Two hours: then system attend.
And this is when you will do your experienced learned baskets position swapping around.
Grid-down you; or someone else, will have the time then.
True off-grid?
Best to build for two; four-hours a day, fuel conditioning and and woodgas-making; and electrical generator running cycles. Schedule heavy electrical loadings for then. Water pumping and such. Top up charge battery banks then. Light electrical loads off of that battery bank in-between.
Just how I am wood stove now as I wrote in shoulder weather heat needing. Not continuous. Two lit up settled in fires a day. Using up first the wetted ground contact woods I have now. I finished dry down from a ~30% to 20% in-house behind the wood stove. I can handle 1 pound an hour of moisture vaporizing and sucked up into the stoves fresh air inlet in my house.
Have to have your shits together to have the confidence to actually drive way coming back half a day later without a caught on fire disaster.
Been doing this for decades with us both away working.
“But Steve, what about the wood debris showering down on my nice shiny new generator?”
Screen better. Make this your third to fifth position and you did shake them a bit at each positing changing, right? My aircooled wood splitter engine gets covered. Hand brush away. It just jacket sucks in blows out the rest.
“But Steve, what about 8-12 hours unattended operation?”
Walk before you do your traveling to Mars man. And then do your intermediate steps before that Mars trip. Learn to woodgas trot. Learn to woodgas run. Learn to woodgas fly first. There are actual thermal-chemical steps you must learn to climb. One step at a time.
Then there are the accumulating system in-use cleaning restoring challenges steps you must learn to climb.
Ash, soots, condensates and tertiary tars accumulations.
2 hours versus 8 hours these multiply by at least 4X.
S.U.
2 Likes
Too complicated, and labor intensive you say?
O.K.
My friend Ben Peterson for years make up different in-coming wood fuel “conditioners” using the gasifier gas heat to dry. Aluminum double walled vertical dyer evolving thru three generations - gone bye bye to scrap heaven. Horizontal flow, double walled chip drying bins out of carbon steel; three generations too. Gone to scrap heavens too except for one early prototype he gifted to me.
Finally. Finally. He listened to me about all of the engine’s and gen-head heats just being blown away; lost.
On his commercial Off-Grdder system he made up a hinged tilt cover (think like truck/bus tilt up engine nose covers) over the whole Kubota 3 cylinder; it’s radiator and exhaust; and its driven gen-head. Air sucked in through the watercooling radiator. Passing underneath thru, and out, the opposite end.
The system incoming wood chunks/chips dumped above onto the low walled roof of that systems enclosing cover.
Wood fuels heats dried down. Then the whole thing hinged up to pour transfer into a wheelbarrow or transfer buckets.
Just too simple, eh?!
Again, and again. The real secret is matching the to be dumping in new wood fuel loads to that systems true thermal capacity.
The many stated system designers claims, “Make hopper as large as you wish” is the operations hurdle you create for yourself to overcome then. Bridging. Hoppers tars gluing. Voids making. Real world thermal dynamics is a merciless beast. It cares not for all of your high hopes.
Match capacity to that systems available thermal then you have virtually none of theses. Bridging. Tars caps. Voids cavities.
Truly supply ONLY 10% or lower moisture woods and then the system can be really, really simple then.
Almost charcoal gasifier simple. Almost.
S.U.
2 Likes
Ok, my wood drying methods.
I try to take advantage of space and time. With firewood, most of what I burn have been sitting split and stacked for two summers protected from rain and snow. Only the south wall stacked wood I may burn after only one summer of drying.
Indoors I have room for about a 3-4 week supply of firewood next to the boiler room. In winter time I try to replace any empty space once a week, or whenever the weather allows. When it’s snowing or on super cold days I try to avoid bring wood inside. The minute the frozen logs get inside they get frosty and wet from condensation.
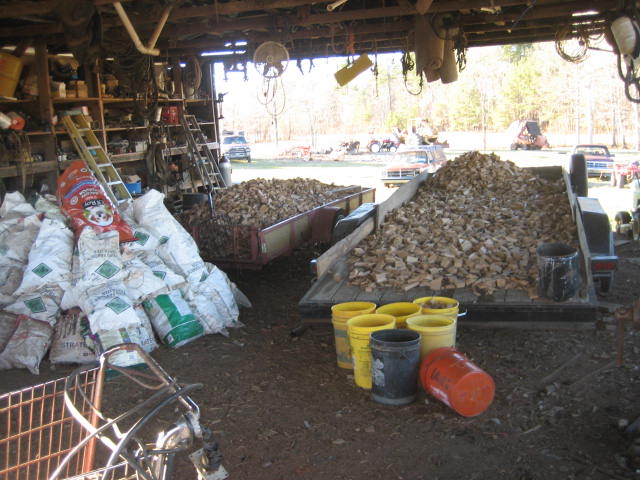
Chunks. A few days of pre-drying spred out on the trailer, a few months in the south wall drying cribs and another few months in paper bags stored in the (wood)heated garage. I try to keep around one hundered 20 pound bags stored at all times. With my driving habits I may avarage one bag a day. (During summer I usually by-pass the bagged wood and fuel the truck straight from the cribs)
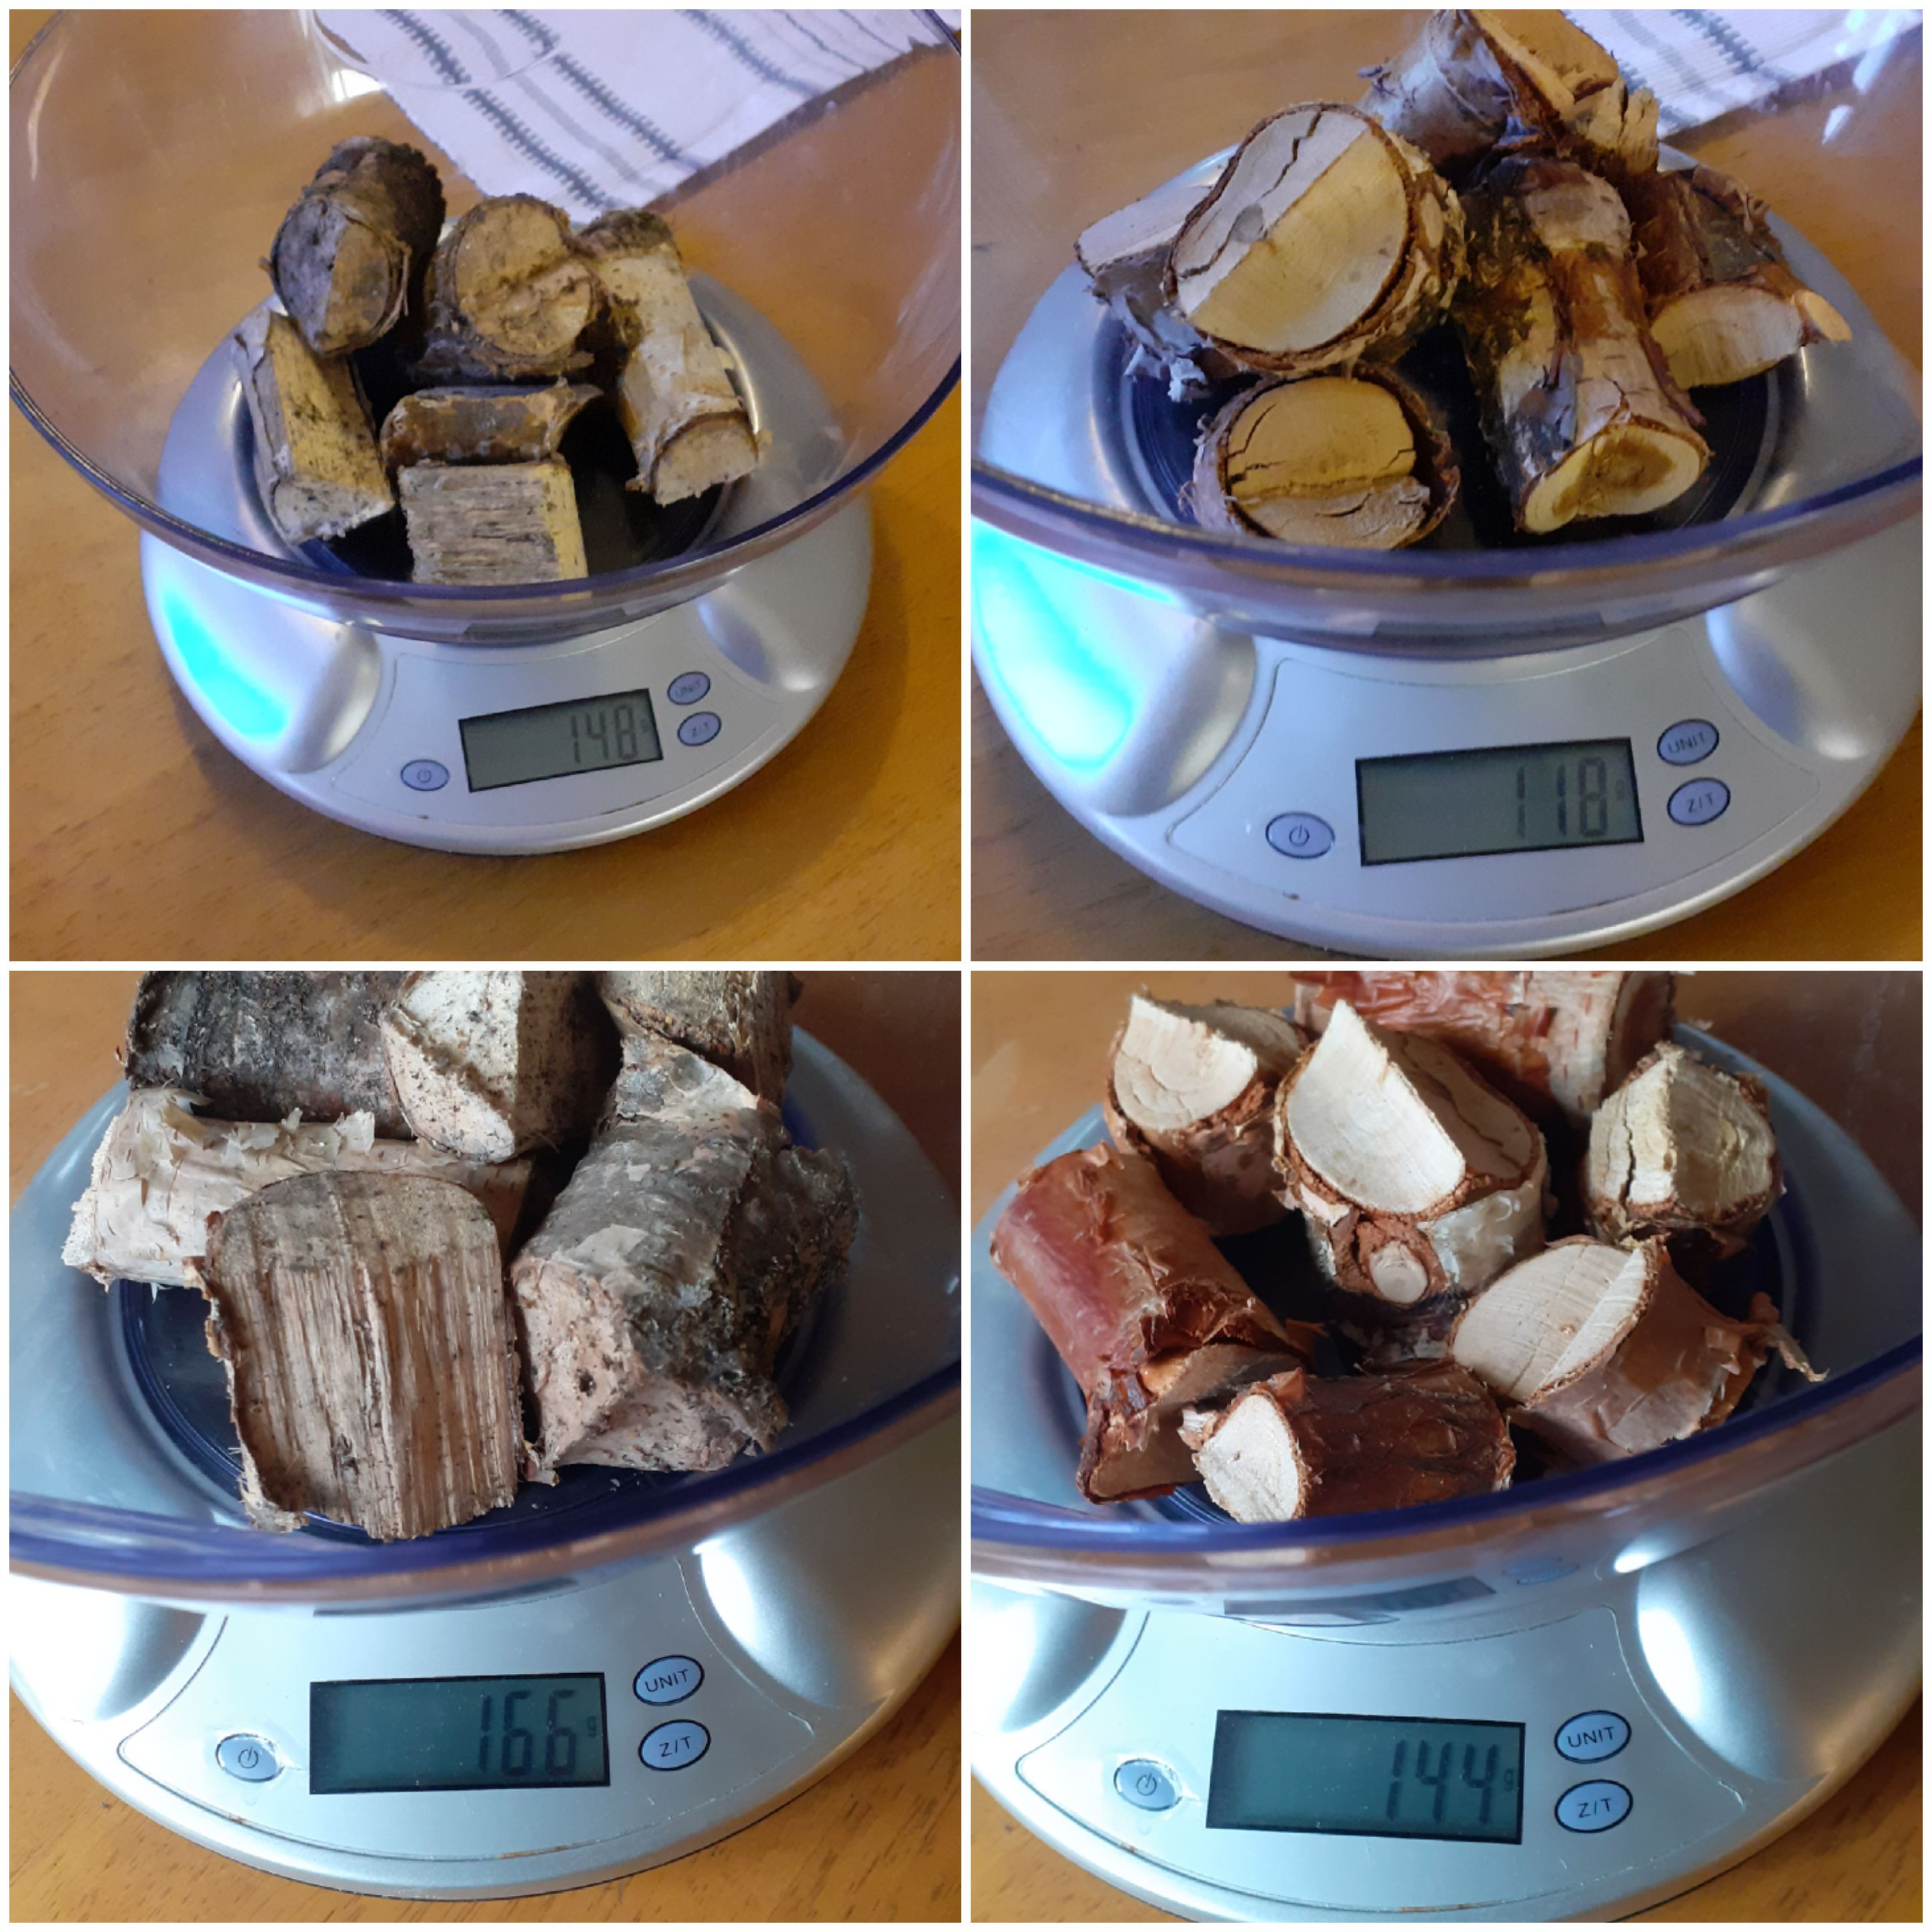
I never checked chunk moisture content until today. I took two birch samples and baked them in the oven for 3.5 hours at 125C.
Sample 1 (left pics): Chunked last fall, bagged early summer and sitting indoors since then. Weight loss 11%.
Sample 2 (right pics): Chunked late July. Heavily pre-dried in very nice weather on the trailer. Stored in the outdoor cribs since then. Weight loss 18%. (They probably picked up some moisture during fall)
7 Likes
Advantages to Drying with Superheated Steam
Utilizing superheated steam as the drying medium allows for the same efficiencies as a direct rotary dryer, typically heated by gas. And although this type of drying is not practical in all processes, for those that it does apply to, there are some significant benefits.
The definitive advantage to using superheated steam is that this type of process maintains an inert environment. As mentioned, materials containing volatiles can combust in the presence of gas, such as in a direct-fired rotary dryer. Utilizing superheated steam takes this risk out of the equation.
Another major advantage to using steam is that it simplifies the treatment of exhaust gas. With a gas-fired dryer, contaminants must be scrubbed from the exhaust gas in a complex scrubber system. In the case of steam however, the exhaust can be run through a heat exchanger where the steam then condenses to water, and the contaminants can be easily separated out.
Superheated steam is particularly beneficial in cases where a waste steam already exists. This not only eliminates the need for an additional boiler, but it also allows a closed loop system to be created, because the waste steam can be put back into the process.
2 Likes
You can dry chunks in a 55 gal barrel with holes in the bottom and the bung hole in the lid open. Set it in the sun for a few days. I do that with brush all the time. There is no need for the extra heat provided it isn’t too cold out. (I use a nipple in the bung hole kind of like a chimney to get a draft and in case it rains to keep water collected on the lid from running in)
4 Likes
Plastic or steel barrel?
Was the barrel painted black?
About how tall was your chimney nipple? And was it black?
You say few days, 7, 10, 15?
Your barrel is up on bricks, blocks?
I used a similar system to dry wood chips. Black painted plastic barrell lay on its side square hole cut in bottom 20" fan in the square hole
Seemed to work better when sucking air through the barrel, with the top opening closed most of the way. The air coming out of the barrel was quite warm . This method dried wet chips in about 5 - 7 days with the fan running all day.
But off at night.
Never tried it with the barrel standing up. Didn’t think I would get good air flow. To hard to stir the wood chips.
3 Likes
Hey guys,
Would it be practical to do things in such small quantities? 55 gallons at a time?
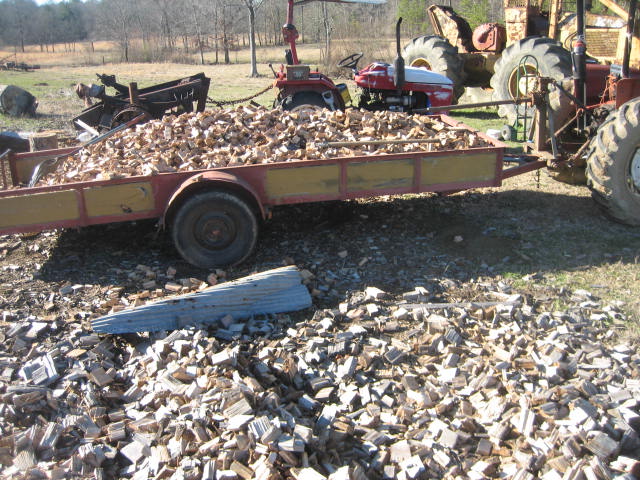
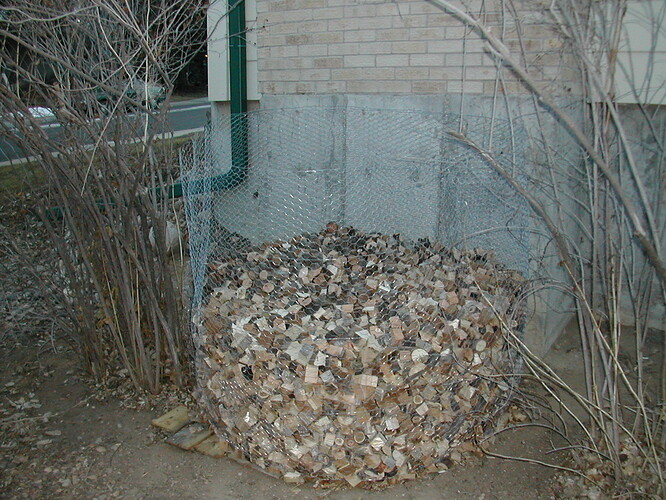
I grew up working on a dairy farm. We would put up enough hay for the cows to eat all winter; about 80K bales. When I made wood chunks I made 1500lbs for a dakota pu to drive about 1500 miles on.
Rindert
This is about half of 1500lbs.
4 Likes
Steel, rust colored barrel with about a 6" nipple, sitting on patio blocks. With the bung hole closed, I have seen water run out the bottom. I honestly don’t think plastic vs steel makes any difference unless you are planning on using the barrel as your retort as well.
For brush out of the brush pile, that was dried but was punky or wet. it was 1-2 days. For the green stuff, it is hard saying because I throw it in as I go so it doesn’t end up on the brush pile, but maybe a week.
I don’t know if (american style) chips would have enough airflow. you need an airflow tube/screen in the middle. It should be roughly every 6 inches, so like 2-6" tube with holes or screen right down the middle should work, because it is hard for it to pack tight along the curved sides of the barrel.
maybe maybe not. ![]() It depends on the use case and how many barrels you have and whether or not your neighbors approve…
It depends on the use case and how many barrels you have and whether or not your neighbors approve… ![]()
The chimney effects works to draw air through though, the barrel collects heats, and they are easy to move around for storage.
I am not making any claim that it is the holy grail. ![]()
2 Likes
Wow, that’s awesome. I did mine in 55 gal. barrels because I had a small city lot, limited space. And some restaurant employees that wanted to complain about anything I did
I set up my char gasser in my front yard, to run my chipper. It was a sunny 90 +f day had my son hold a picnic table umbrella for shade.
The employees accross the street couldn’t see what I was doing so they called the police and said I was building a bomb. Cops came had to shut down, educate the cops about char gas. Glad I don’t live there anymore!!! Cops left told the peeps accross the street to Fn mind their own business.
1 Like
Yup, I’m blessed to have reasonable neighbors. And I am very careful to make sure there are no mysteries about what I am up to.
Rindert
1 Like