Gussets for the backing plate.
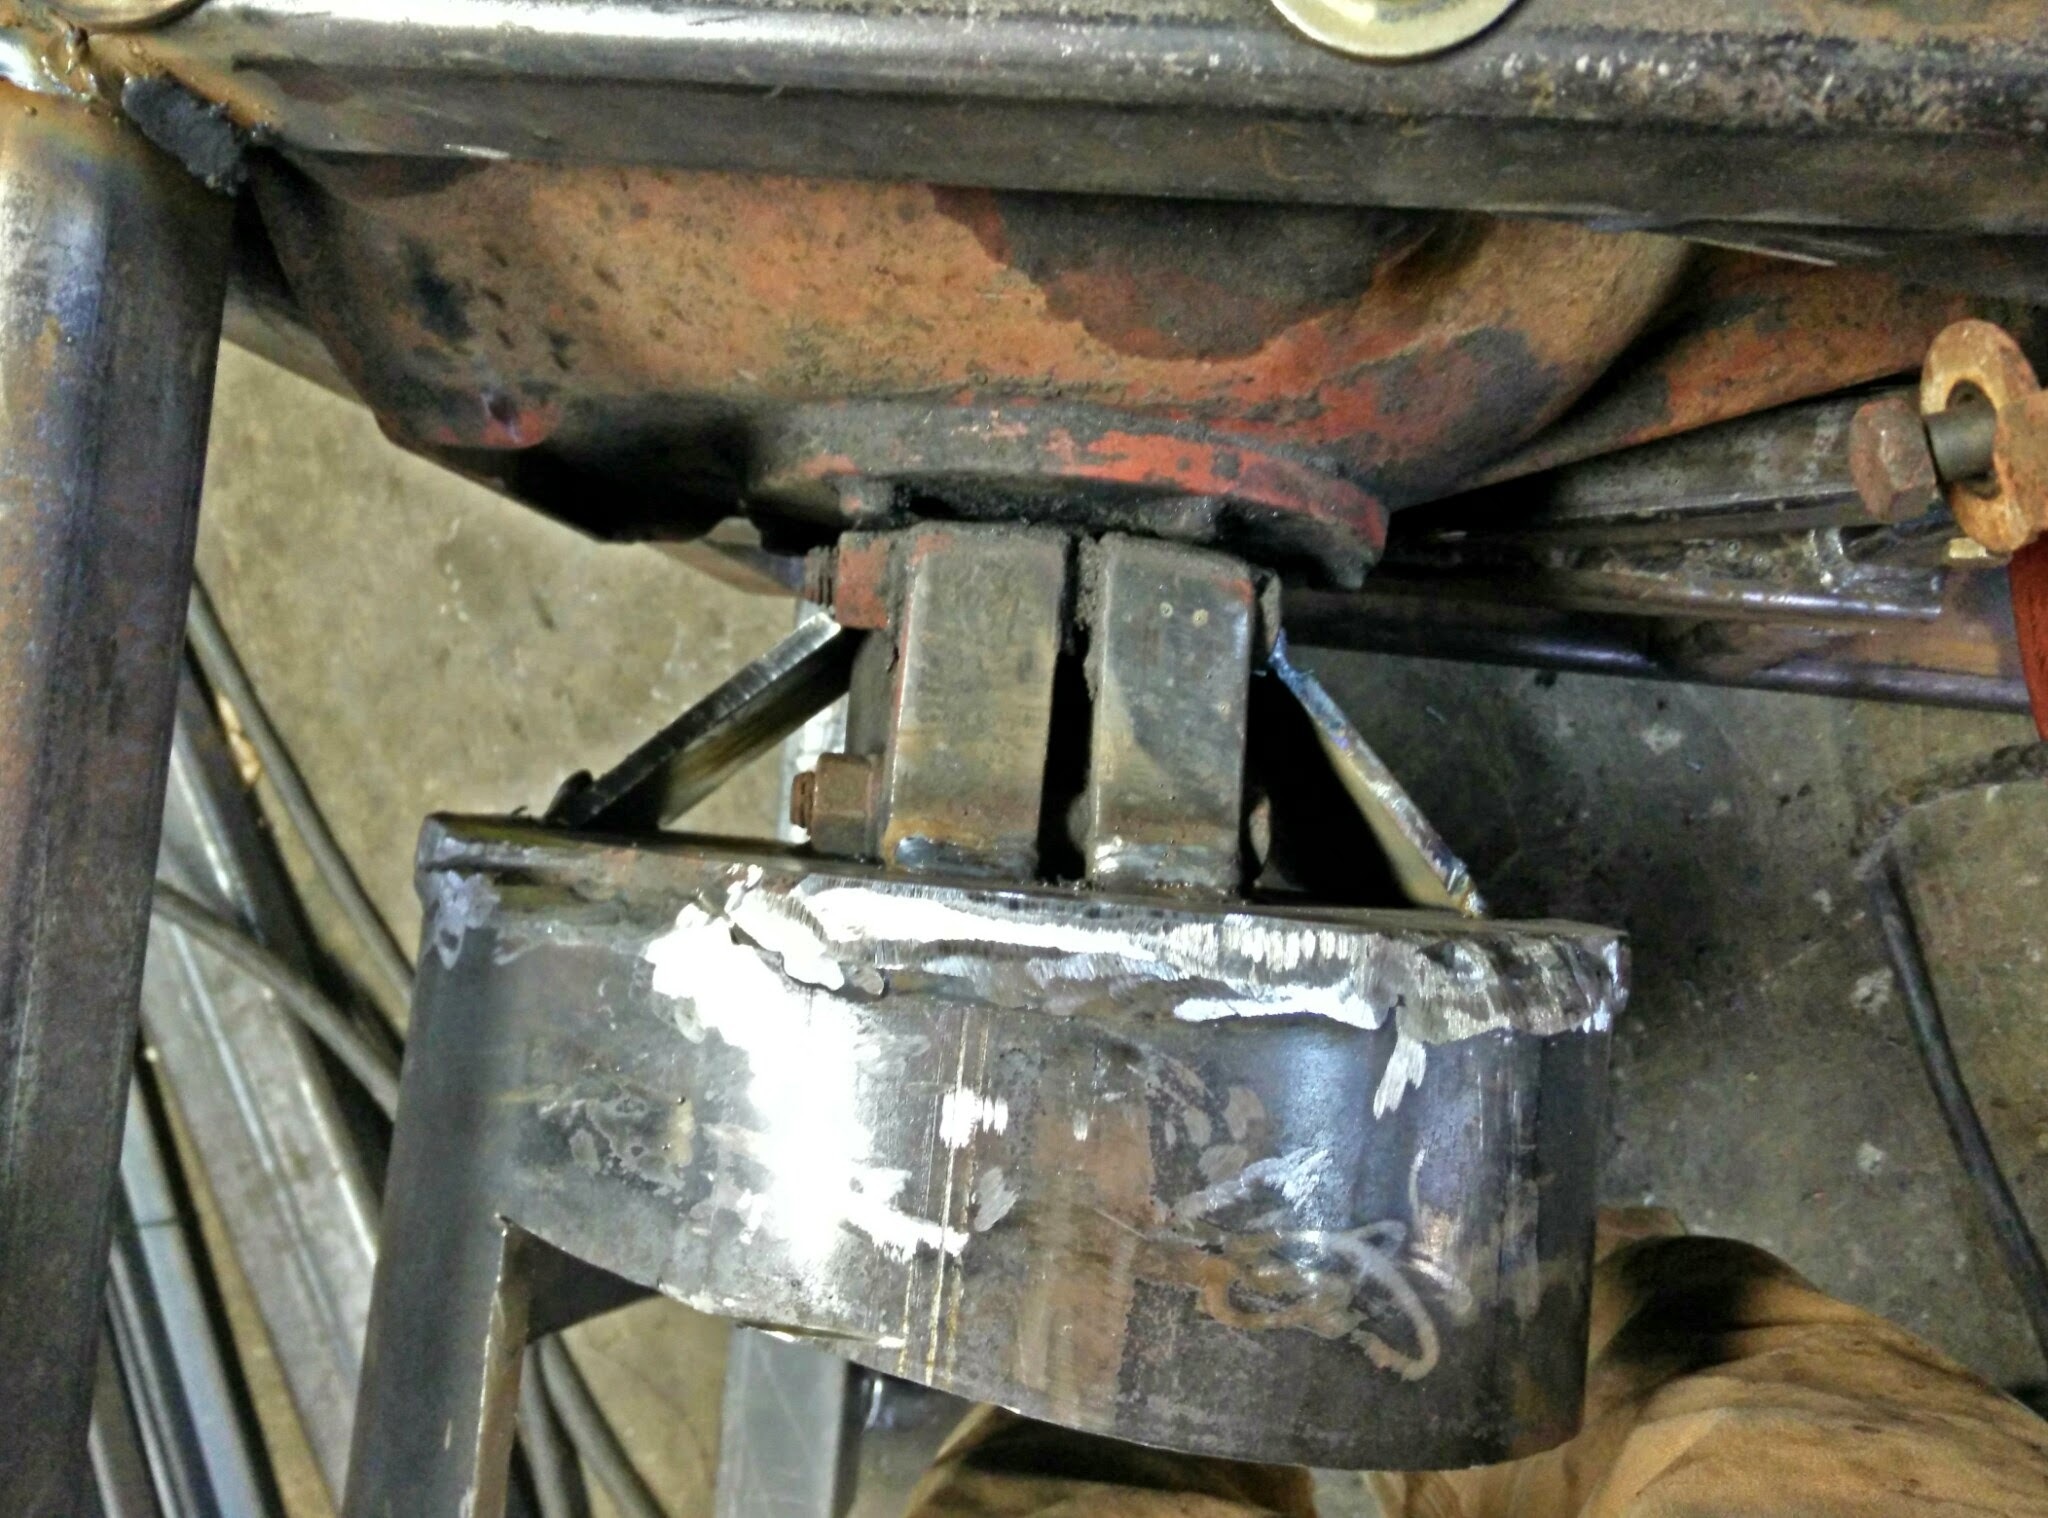
And the ugly side…

Gussets for the backing plate.
And the ugly side…
Looking really good Chris!
Thanks Don! It’s a work in progress.
A number 1 Joe!
Hey ChrisKY
Nice picture set.
Good citing on this designs inspirations and implementations.
Your welds are new trending to PeterC grade. (New metals helps much, eh.)
Best Regards
Steve Unruh (yes I read 'the do not sign posts" in the guide - well just call me an old goat set in my ways willing to be Net tracked for what I say - keeps me honest!)
Added some bracing to the anvil. These triangle gussets are just angle iron cut on compound angles.
Added a workrest and cut the notch for the splitter head:
Added a workrest surface, guard, and wear plate:
And made the groove that the cutter rides in:
Laying out the motor, so I can measure for the trailer frame:
Welded up the frame:
And set one on the other:
Axle mock-up on frame. About 50 lbs on rear of frame gives balance. I need to be able to move the axle back some to increase tongue weight and allow for more rear load before tipping backwards.
So @MarvinW suggested that I make a sliding axle, which looks like this:
Finally getting to test it out! The motor mount is temporary. Note the three trailer jacks for stabilization.
Mounted the motor on 1/2" plate. Hinge is offset for adjustable tensioning.
Adding the real motor mount, and a brace:
And the final motor mount:
Now for the removable tongue. This is the receiver, 3" square tubing:
And the tongue installed:
Axle and tongue both slide, and both have hitch pins to keep them in place.
Tongue retracted is nice and out of the way:
Time to address safety. This machine needs a belt guard and a blade guard. This piece was adapted from what I picked up at the steel yard:
And the blade guard is a simple curved sheet metal cover:
A motor guard will keep rain out:
Great build Chris !! Thanks for the pictures
On the bottom rail of the chunker frame, you added a piece to make it longer. Do you remember how long that piece was? I only tacked on the bottom rail in case I need to move it. I believe mine is at 12 or 13". Is enough working room from the side of the trailer?
@BillSchiller The drivers side stickout is 17.5, the passenger side (which I added) is 11.5. I was going for an overall length of 50 inches. Note that I made a measuring mistake on the trailer frame and only wound up with 49" width - doesn’t really matter but that’s why you see an inch sticking out on the pass. side. So it should have only been 10.5".
The way to balance it is with a hoist, lifting from the center of your rail. Yours won’t balance exactly there yet, since you haven’t added the anvil weight. I think yours is so close to mine, just copy my measurements pretty close and you’ll be fine. It’s not an exact science.
There’s plenty of working room around the work area, you’re near the tire but it can’t be helped. You need the frame to come forwards like that so the spring has somewhere to mount to. You won’t end up standing that close anyway.
Nice chunker there Chris! I like the bagger. Looks like that was easily made from just a square piece of sheet metal? Does that attach to the chunker so you can bag while chunking? I never saw one like that before; is that your idea? Did you bend a sheet of paper to figure out the shape? In your build pics I noticed a lot of metal working equipment in your garage and only one wood working tool that looked like a 6 inch jointer. What do you use that for?
EDIT: oops I looked at it again and noticed you called it a scoop.
Thanks Don! Yes, it’s a slightly trapezoidal piece of sheet metal. I did some CAD (cardboard assisted design) to figure that one out. The idea came from a fast food french fry scoop. Watch the kid filling your fry cup next time, he uses something similar.
Nope, this is designed to scoop wood off a flat drying surface, like a driveway or trailer. Bagger will come later.
Jointer was a freebee that is actually in the way, I don’t use it. There’s other woodworking tools around, mostly household carpentry type stuff. I can frame a wall but no good at making furniture. 
Been awhile since I updated this. In the meantime, I got some other springtime work done (more left to do), took a trip to Alabama, did my taxes, even moved a popular website over to a completely new platform… and whaddaya know, the chunker didn’t finish itself, it’s just been sitting there the whole time. Guess I should get back to it.
I’ve pulled out the gearbox for an overhaul. There’s some slop in the pinion shaft, which is not good for a long lived machine. I removed the bearing cover, and had to make a long spanner to remove two bearing locknuts.

After some deliberation, it appears that the only way to access the pinion is from the inside. Meaning the rest of the chunker innards have to be removed, just for access. Yes, this is as bad as it sounds… It’s OK, I think it’s worth doing as a learning process and simply breathing some life into this worn out gearbox. So, next step is to drain the oil and remove the output shaft, center chunk and then (hopefully) the pinion from the inside.
The oil in it is the consistency of thick pudding, I drained it as best I could but there’s a thick layer left in there.

With the oil mostly out, I started pulling bolts off. Soon enough I ran across one of those pesky locknuts again. This one was too much for my one tooth wrench, so I had to build a sturdier “box-end” type.
It took some doing, but I got it off. Unfortunately the shaft is still stuck.

So, I am gathering my tools of persuasion… something’s going to give. Gently. We hope.
So when you turn the flywheel shaft with your output shaft not secured, the output shaft doesn’t want to want to pop out?
Not quite sure what you’re asking… when I turn the flywheel shaft it acts against the ring gear and turns it. This makes a rotating force on the output shaft but no pressure in the direction I’m trying to slide it, parallel to the shaft.


