I’ve been talking about it for a hot minute but because the Mazda will take a while to be road worthy again I’m going to go ahead and get the Sierra ready. The fuel prices are killing me with this gas guzzler, and the Buick keeps leaking coolant for which I have next to no time to diagnose and repair.
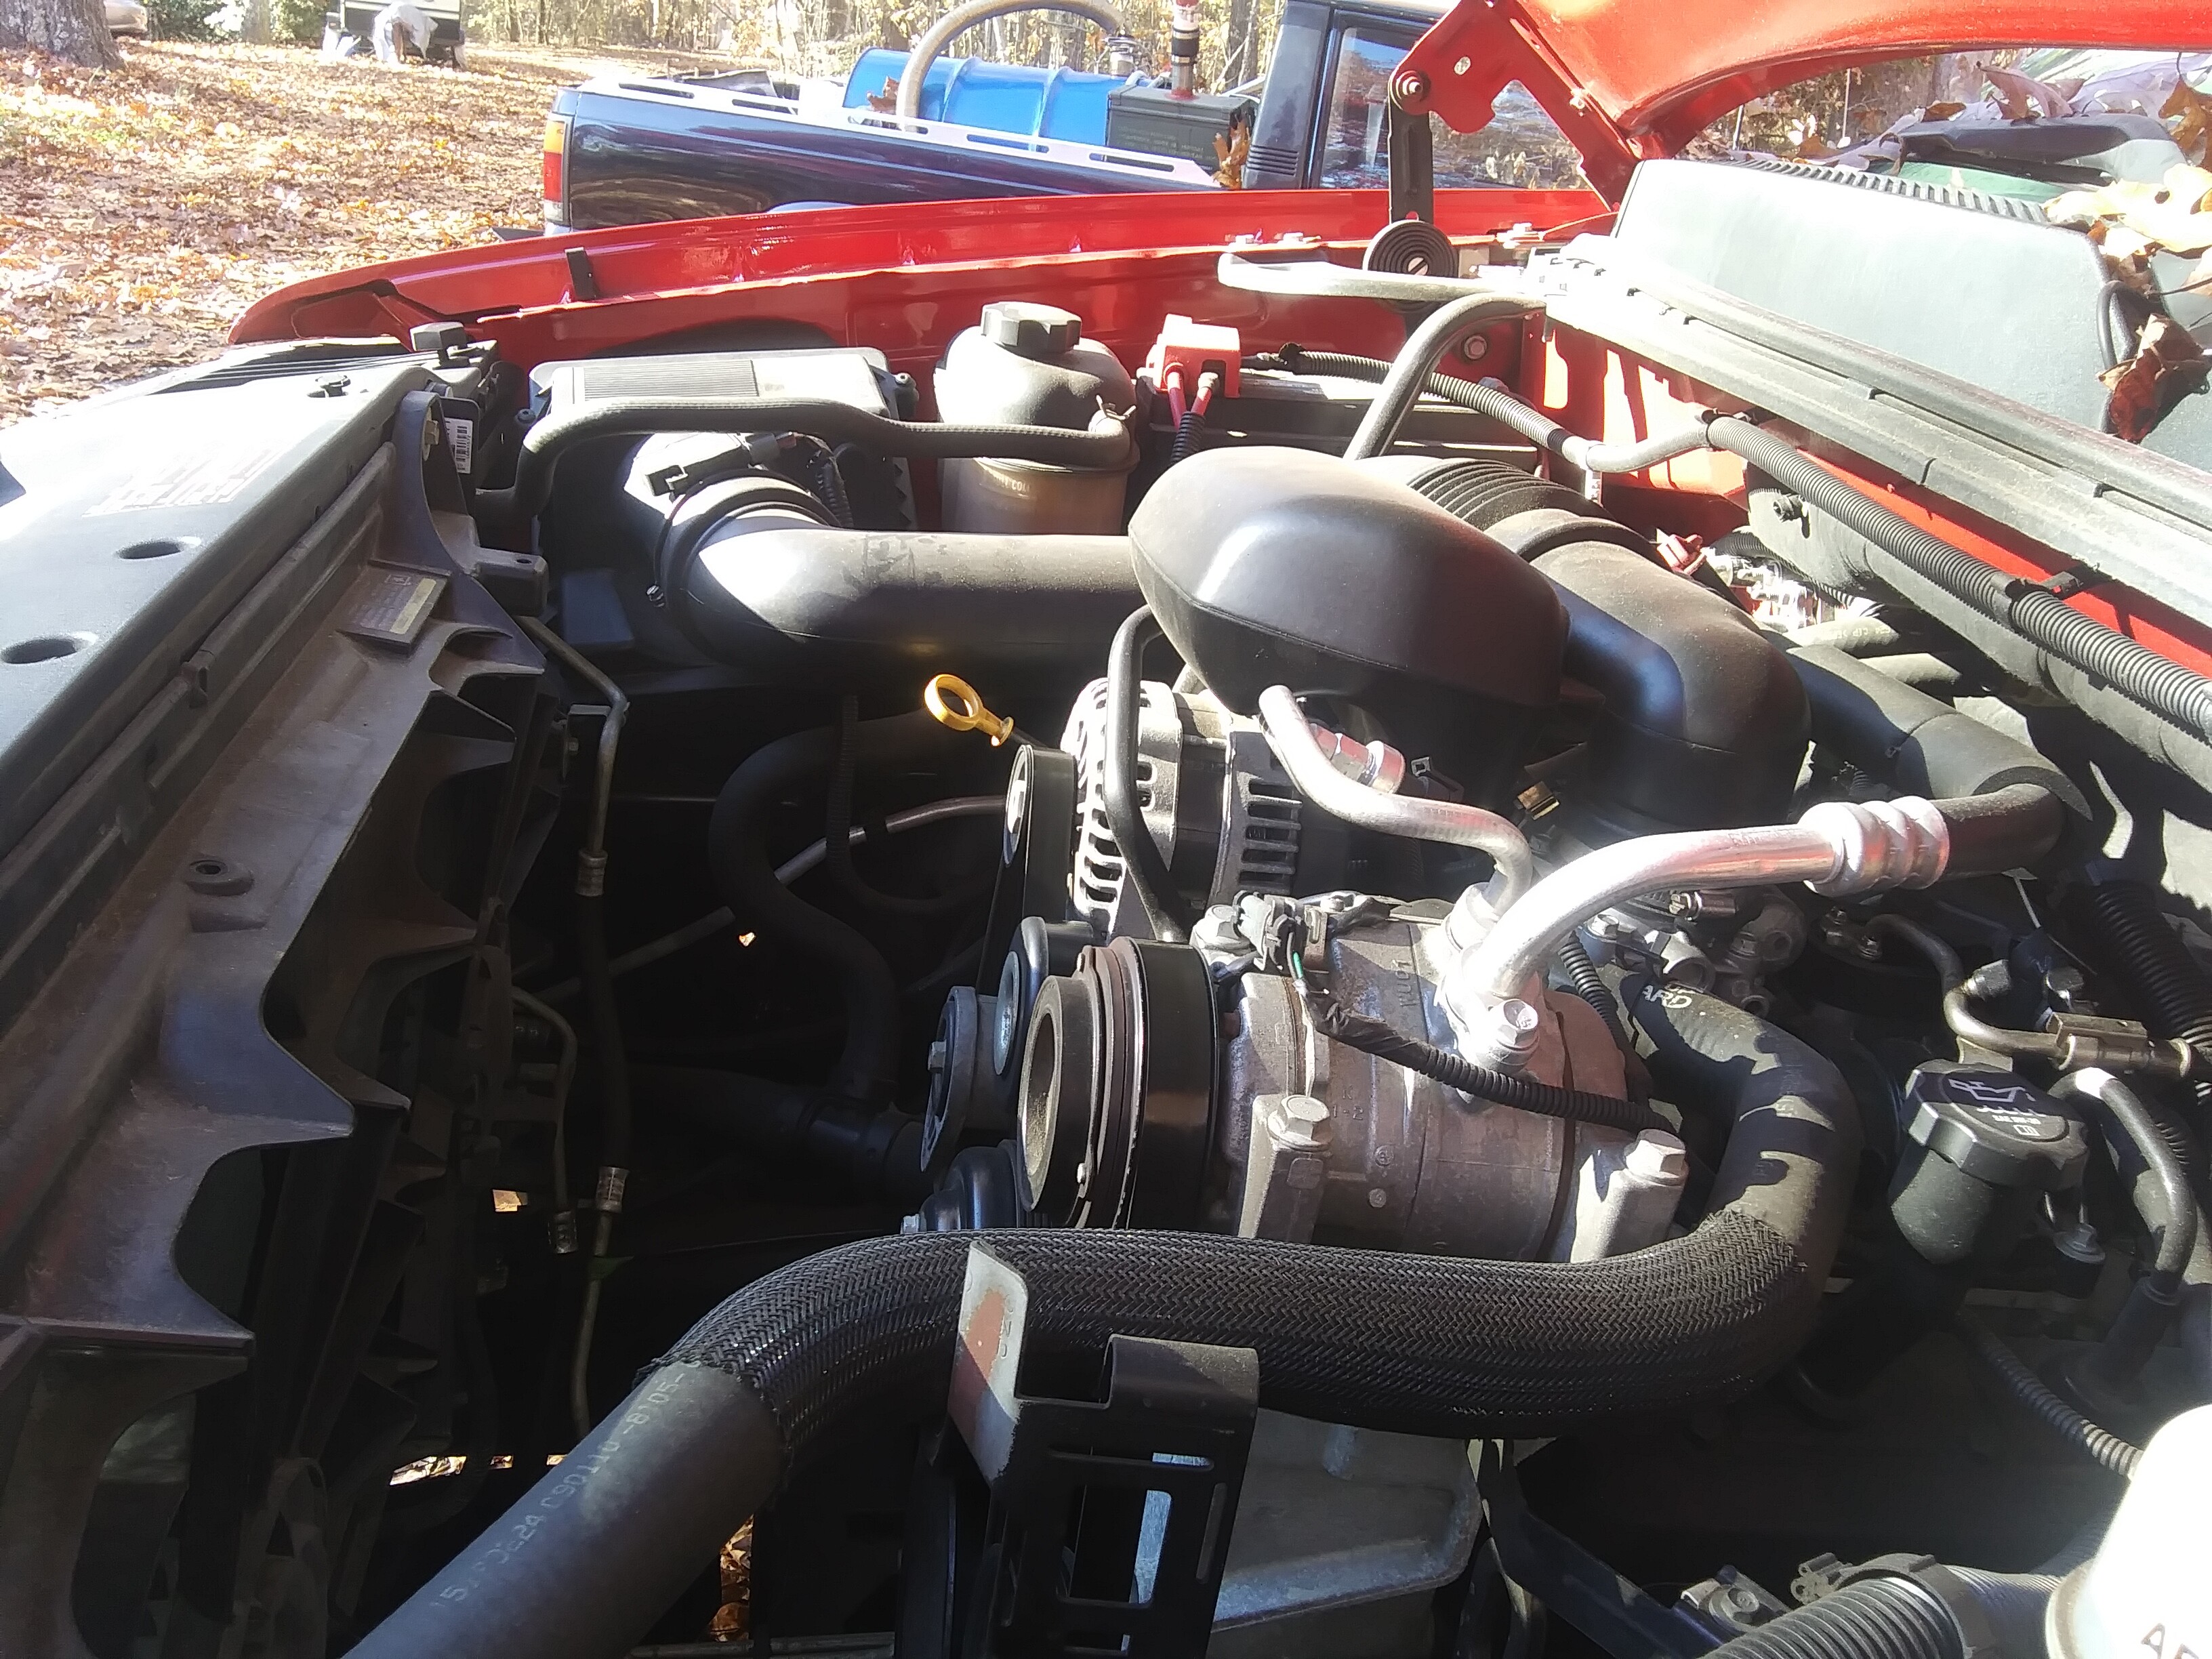
The Sierra is a 2011 WT(Work Truck) 4.3L.
I have never seen a 4.3 that looked like this. Most 4.3L engines have the throttle body closer to the radiator pointed forwards, but this one is closer to the firewall and pointed up. The air box has a stock “snorkel” that leads to just behind the passenger side headlamp.
I have already wired the injector and fuel pump shutoff switches, what I’m going to do next is plan out my air adjustment and gas plumbing. I can cut the long air cleaner snorkel and splice in my butterfly somewhere behind the MAF sensor. MAF is right after the air cleaner and I have about 2 feet of 3" plastic pipe before it reaches the throttle body.
I intend to get a reece hitch mounted luggage rack to place the gasifier and hopefully also the filter, making it easy to remove for inspections. I’ll have some modest cooling pipes before filtration just because it’s a bigger engine pulling on an updraft gasifier.
I am going to add a thermometer at the gas exit so I can gauge how much I have in the hopper.
My main idea is to make the gasifier sit on the luggage rack so I can have bed space to hold fuel. I plan to get a rigid bed cover to keep fuel dry. The reason why I’m going for charcoal is for the shorter startup times and because it’s what I know the best.
The real challenge will be making the reactor short enough that it doesn’t make too much drag. I have originally planned to use a sideways 55 gallon drum as my hopper but I think I will opt for a shortened upright 55 gallon drum instead. I’ll have shorter distances I can go on a hopper but I will have an 8 foot bed to be able to store bags and bags of fuel.
I’ll upload some images shortly of the engine compartment.
Where I have my hand is where I could splice in the air adjustment and gengas in.
I’m going to worry about plumbing first. I can test if it will take gengas well by using the Mazda’s old updraft. Then I’ll go about getting the reece adapter and luggage rack.
I do have one other way I could mount this gasifier. A 55 gallon drum sits below the top of the cab, so I could just mount it similar to how I did on the Mazda. I need to think of a more rigid way to hold it down than with ratchet straps however. Probably just weld some plates to the base and bolt it down.
For fuel storage I guess I would just make some dry boxes to hold the bags. This method would be cheaper and give me longer distance per refill.
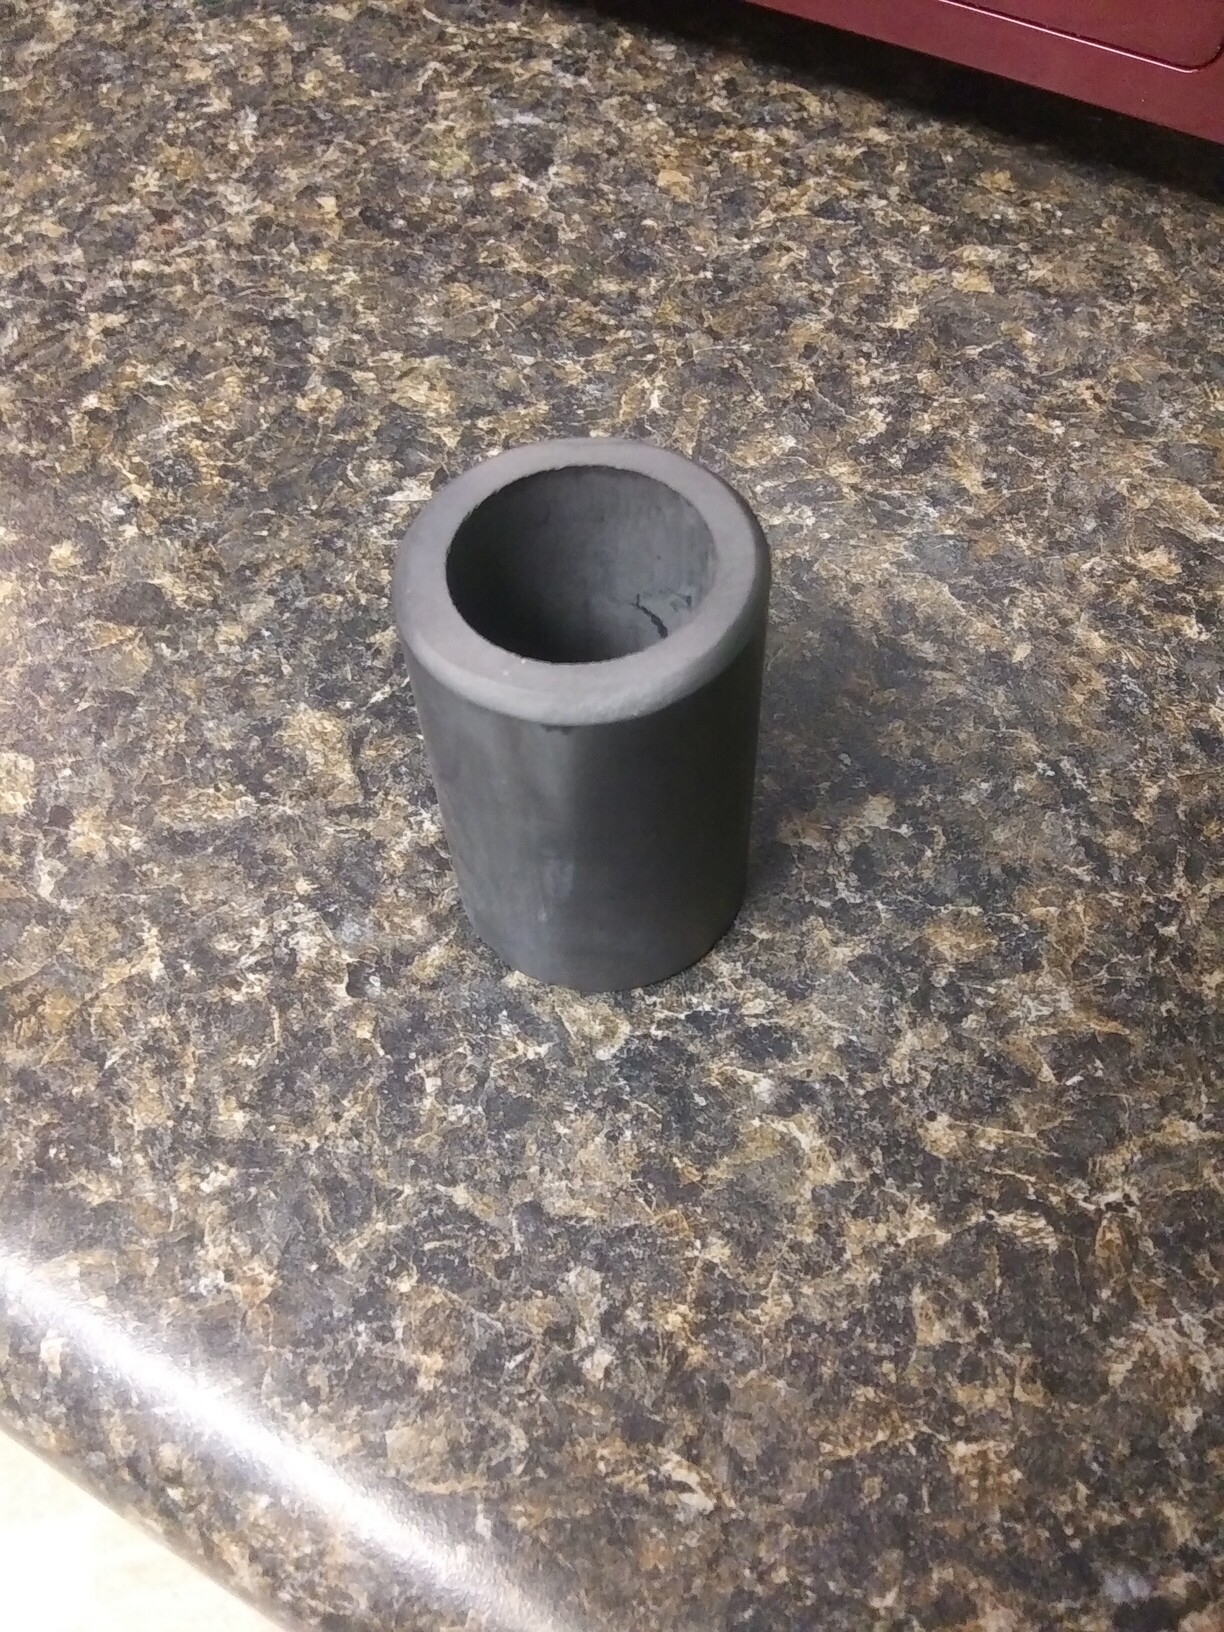
My super top secret weapon for getting the Sierra to run on chargas. I’m finally trying out the hexoloy silicon carbide fancy tubes for my nozzle tip. It’s .1 shy of 25mm which according to Koen’s spreadsheet is adequate for my 4.3L.
I’m going to make the air entrance come in through the side and elbow up. That way there is a place for water drip to be introduced like a Flute. Gives it dwell time to flash to steam.
The guys that have used these say to just drop it into a plumbing fitting so that’s what I’ll do. I may do a sealing bead of muffler sealant silica just so it won’t bounce out of the fitting but it won’t be glued all the way, to allow for thermal expansion.
I need to think of a more automatic way to add water drip. I think I’ll finally attempt to make a wide open carburetor for adding water. I can cast it out of aluminum and use a stainless steel straw or hypodermic needle as the jet. Only hard part for me will be figuring out what the throat size should be to make it a real carburetor. Maybe make the smallest part of the internal hourglass the same size as the nozzle ID(25mm).
I already have a simple drip mechanism so I always have something I can fall back to.
Cody,
For a different project I was working on, I bought a 24 VDC solenoid valve for a home irrigation system. I was going to use it for low pressure compressed air. You could put something like it on a switch, maybe dribble water on a foam pad in the intake like a whole-house humidifier… Obviously, a spray from a carburetor would be a more elegant solution!
I’m thinking to take the pipe that will hold the nozzle and sleeving the opposite end down with the next size down, chamfering just a bit so it isn’t a sudden step, and then drilling a hole for a basketball inflating needle as my jet. Since the jet uses regular threads I can attach a hose for a tank.
I’m hoping to have a tank sitting on the floor of the bed and the vacuum at the air entrance is enough to feed itself like a Briggs and Stratton style carburetor on push mowers.
Great summary article of a true DOer, Steve Bowman.
The most complete I so far read.
Never have been able to find a copy of his book, “Son of the Red Centre”.
Best Regards
Steve Unruh
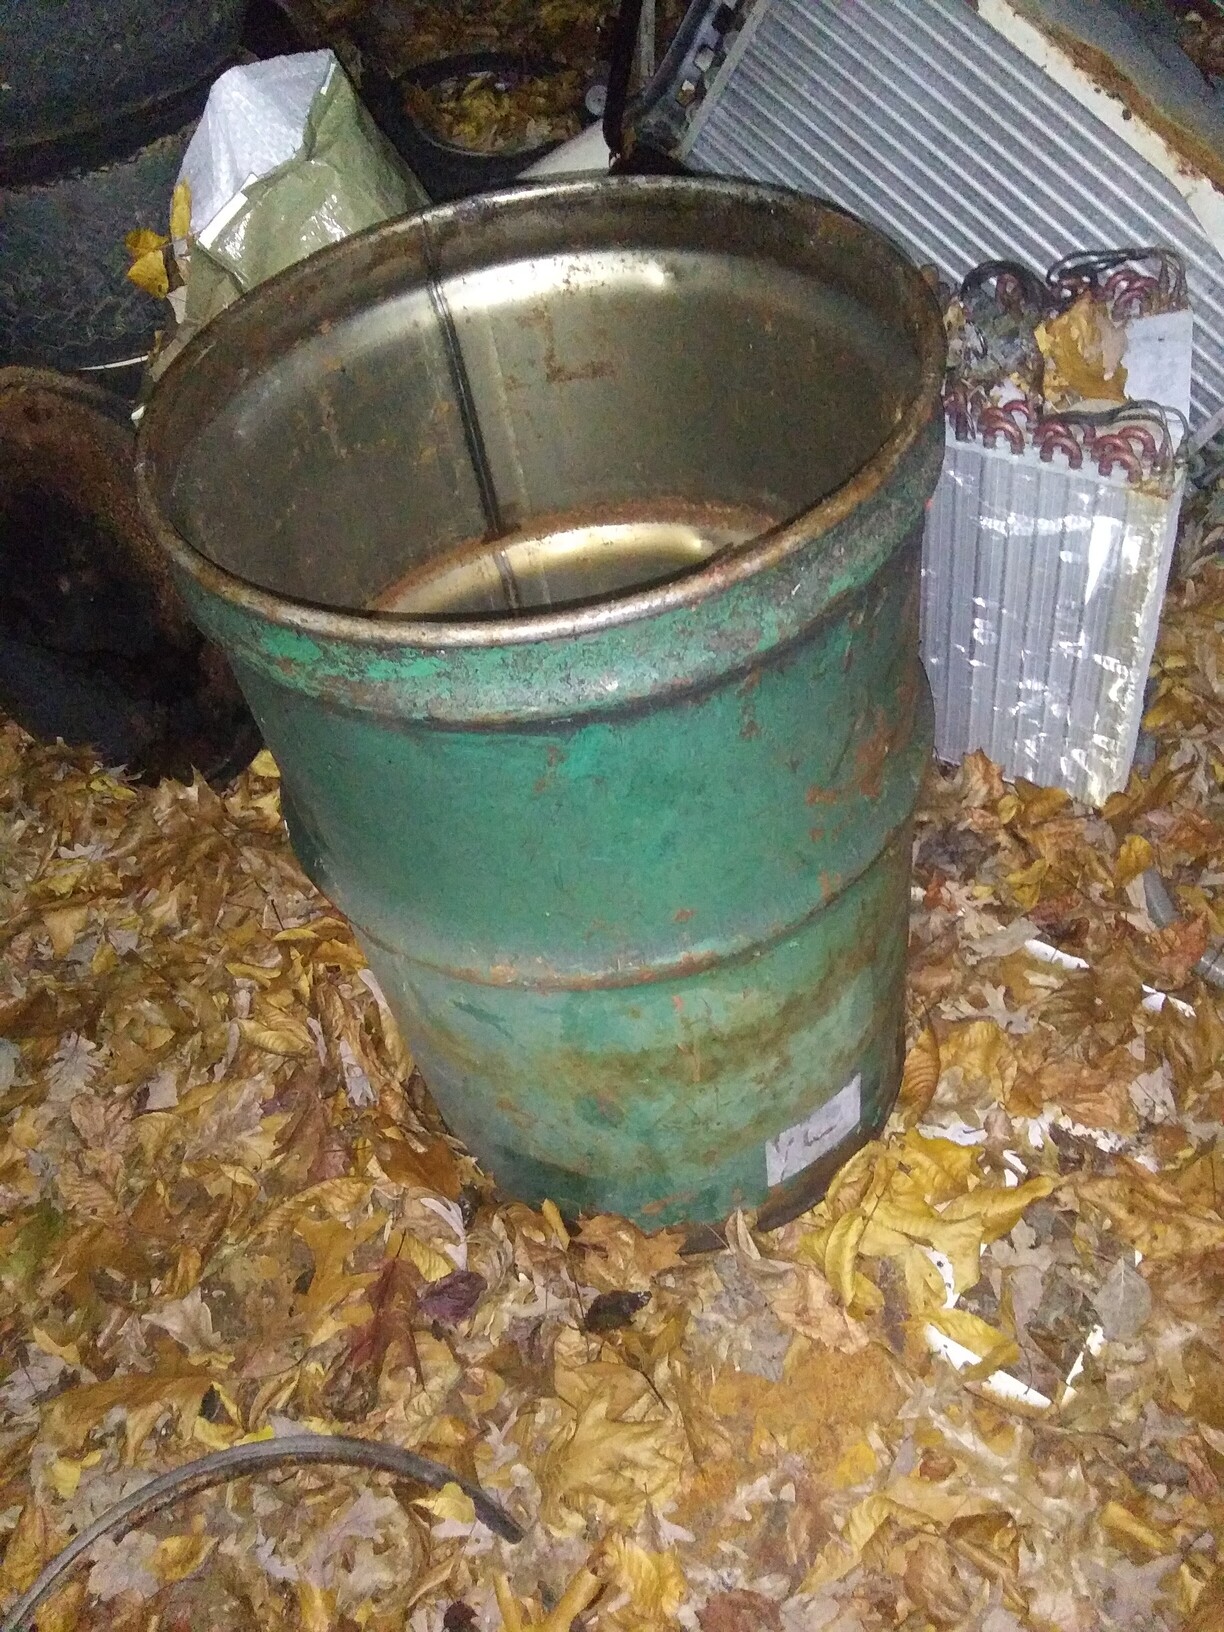
I really like what Kristijan has been doing with his latest charcoal reactor, using old school Imbert style form factor by having the entire outer jacket act like a drop box for dust. Luckily with my Sierra a 55 gallon drum will sit in the bed and still have room left until you reach the top of the cabin. As easy as it would be to just build another updraft I do need some wiggle room in case I accidentally throw in brands. I could make a jumbo restriction using part of a brake rotor, I have a pair that measure 9" ID. It would really act as a way for ash to build up on the bottom to protect it.
I could either salvage my DOM tubing and make another double flute, or buy a few 90 degree elbows of thick wall conduit pipe and make a ring nozzle using a few of my heavier wrist pins. The wrist pins would be helpful to gauge if the reaction is too hot and burn them away. Long enough to give me a warning for repairs or re-engineering.
I don’t think a singular nozzle would be beneficial personally speaking. Would leave too much room for moisture to slip through or at least that’s where my train of thought leads. Single nozzle pointing downwards I would be afraid of it overpenetrating and putting too much heat into the bottom.
Here is some of my plan. I can use one of these brake drums as my main burn chamber, with a square ring nozzle above the rotor portion. I will cut a hole in the bottom of the grease drum for the brake drum to sit in, using the rotor as a shelf.
I could either punch out the hole in this brake drum and make it an open tube or leave it as a semi restriction.
Next I have an idea to make a grate just maybe an inch or so less in diameter than the 55 gallon drum. Gas will still flow up the 55 gallon drum but this will allow fines and other undesirable stuff to separate from char. Like a sifting grateless unit if that makes even a bit of sense.
I’m already at a good start because even with the thickness of the rotor added to the total height for mocking up the grease drum is below flush with the 55 gallon drum.
Inside diameter of the rotor is 9", inside height is 5", center hole is 5". If I were to cut out using the bolts for a bigger hole it would be 7.5".
To picture the grate, look at some of the more classic full jacketed Imberts but without a reduction bell. My only pondering is if that burn tube will be sufficient or if I will need to have the ring nozzle mounted higher? I’d like to have it resting on top of the brake rotor.
All of the charcoal gasifiers I have seen have a fair bit of volume below the nozzles, yet Kristijan is using his mini WK tube with no issues it seems.
I’m thinking of having the holes pointing upwards at either a 20 degree angle or maybe a 45 degree angle. One reason is to prevent bridging and also to add some volume of the reaction.
I’m wondering if I should just make an ash cone instead of using that heavy brake drum. The drum itself weighs a good bit. Why use heavy cast iron when I can just use the ash to protect the bottom? I have that golf cart rim split in half now, the end without the bolt flange has a narrow ID of 6" and bells out to 9".
Like Kristijan I will also be using plumbing for the fresh air so I can experiment with different nozzle designs and angles. I am thinking of finally making a Showerhead nozzle using 2" pipe with a cast iron pipe cap that has holes throughout. In my hillbilly theory it would prevent a huge jet from going all the way to the bottom and burning through the grate and that the cast iron cap can withstand the heat for a reasonable amount of time. If it could last a year or more before needing to be changed I’ll be happy with that.
How tall do you guys think I should make the ash cone? Full length of 3.5"? I just don’t want to worry about heat rotting the bottom of this grease drum, I’m afraid of never finding another one for a long while.