Wery interasting! Love to se it. How will the nozzle be oriented?
1 Like
Ray, in another thread you said you and Martin Payne had built a Gillmore Gassifier, What size pipe did you use for air in and gas out? Did you use only pipe fittings or did you have to weld or otherwise get the air in/gas out connection air tight? If I can just get a clue on these questions I can start construction. So few people have ever done air in from the top there’s not much info around.
Imeasystreet,
We used a Sch 40 2" pipe for output air, and a 1 1/4" pipe inside that for the air input. I believe I welded an extension of about 6 inches onto the small pipe after this photo was taken. We wanted more distance for the gas to flow through charcoal before it exited.

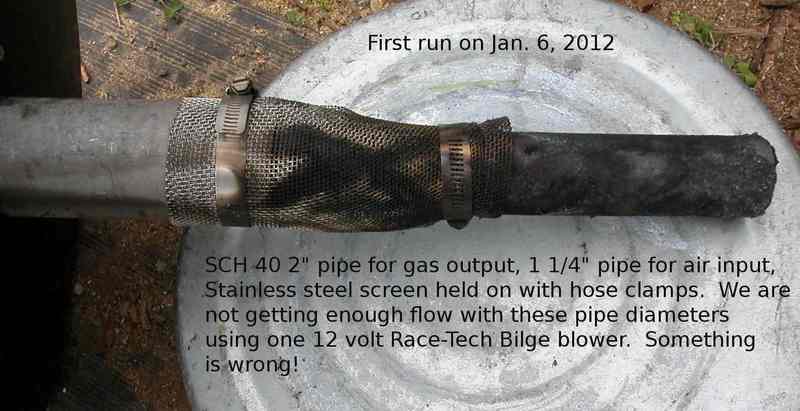
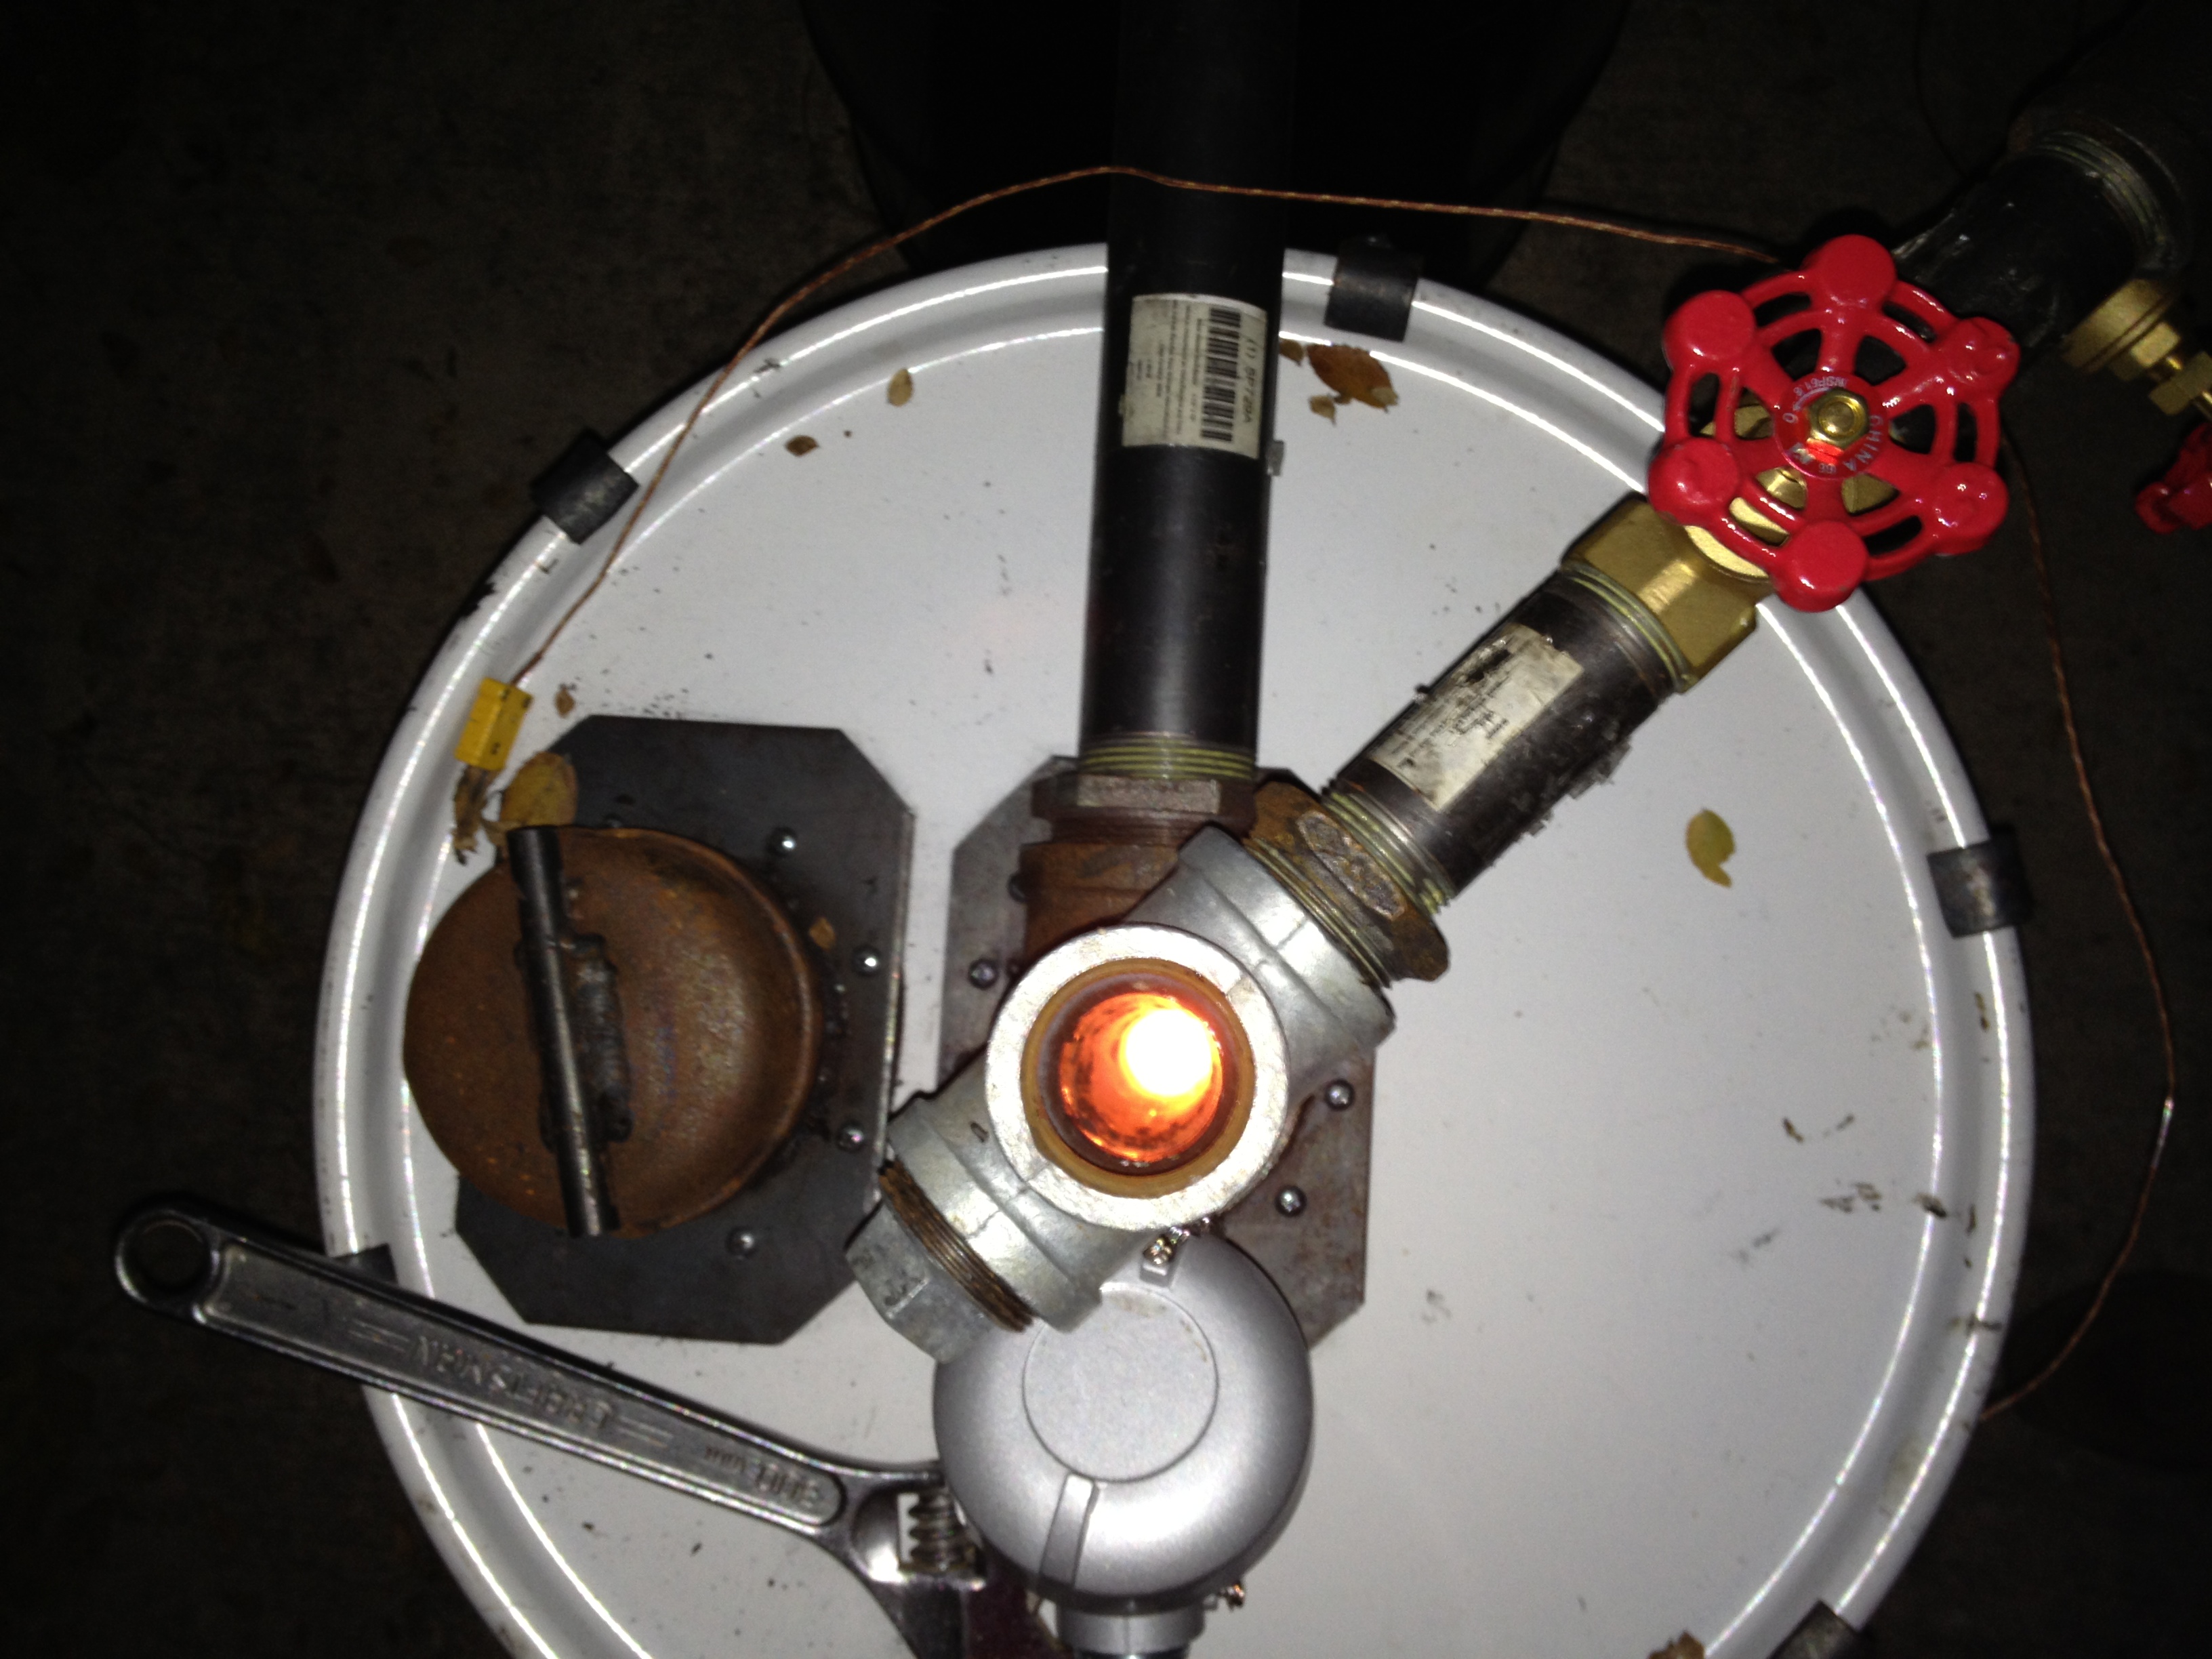
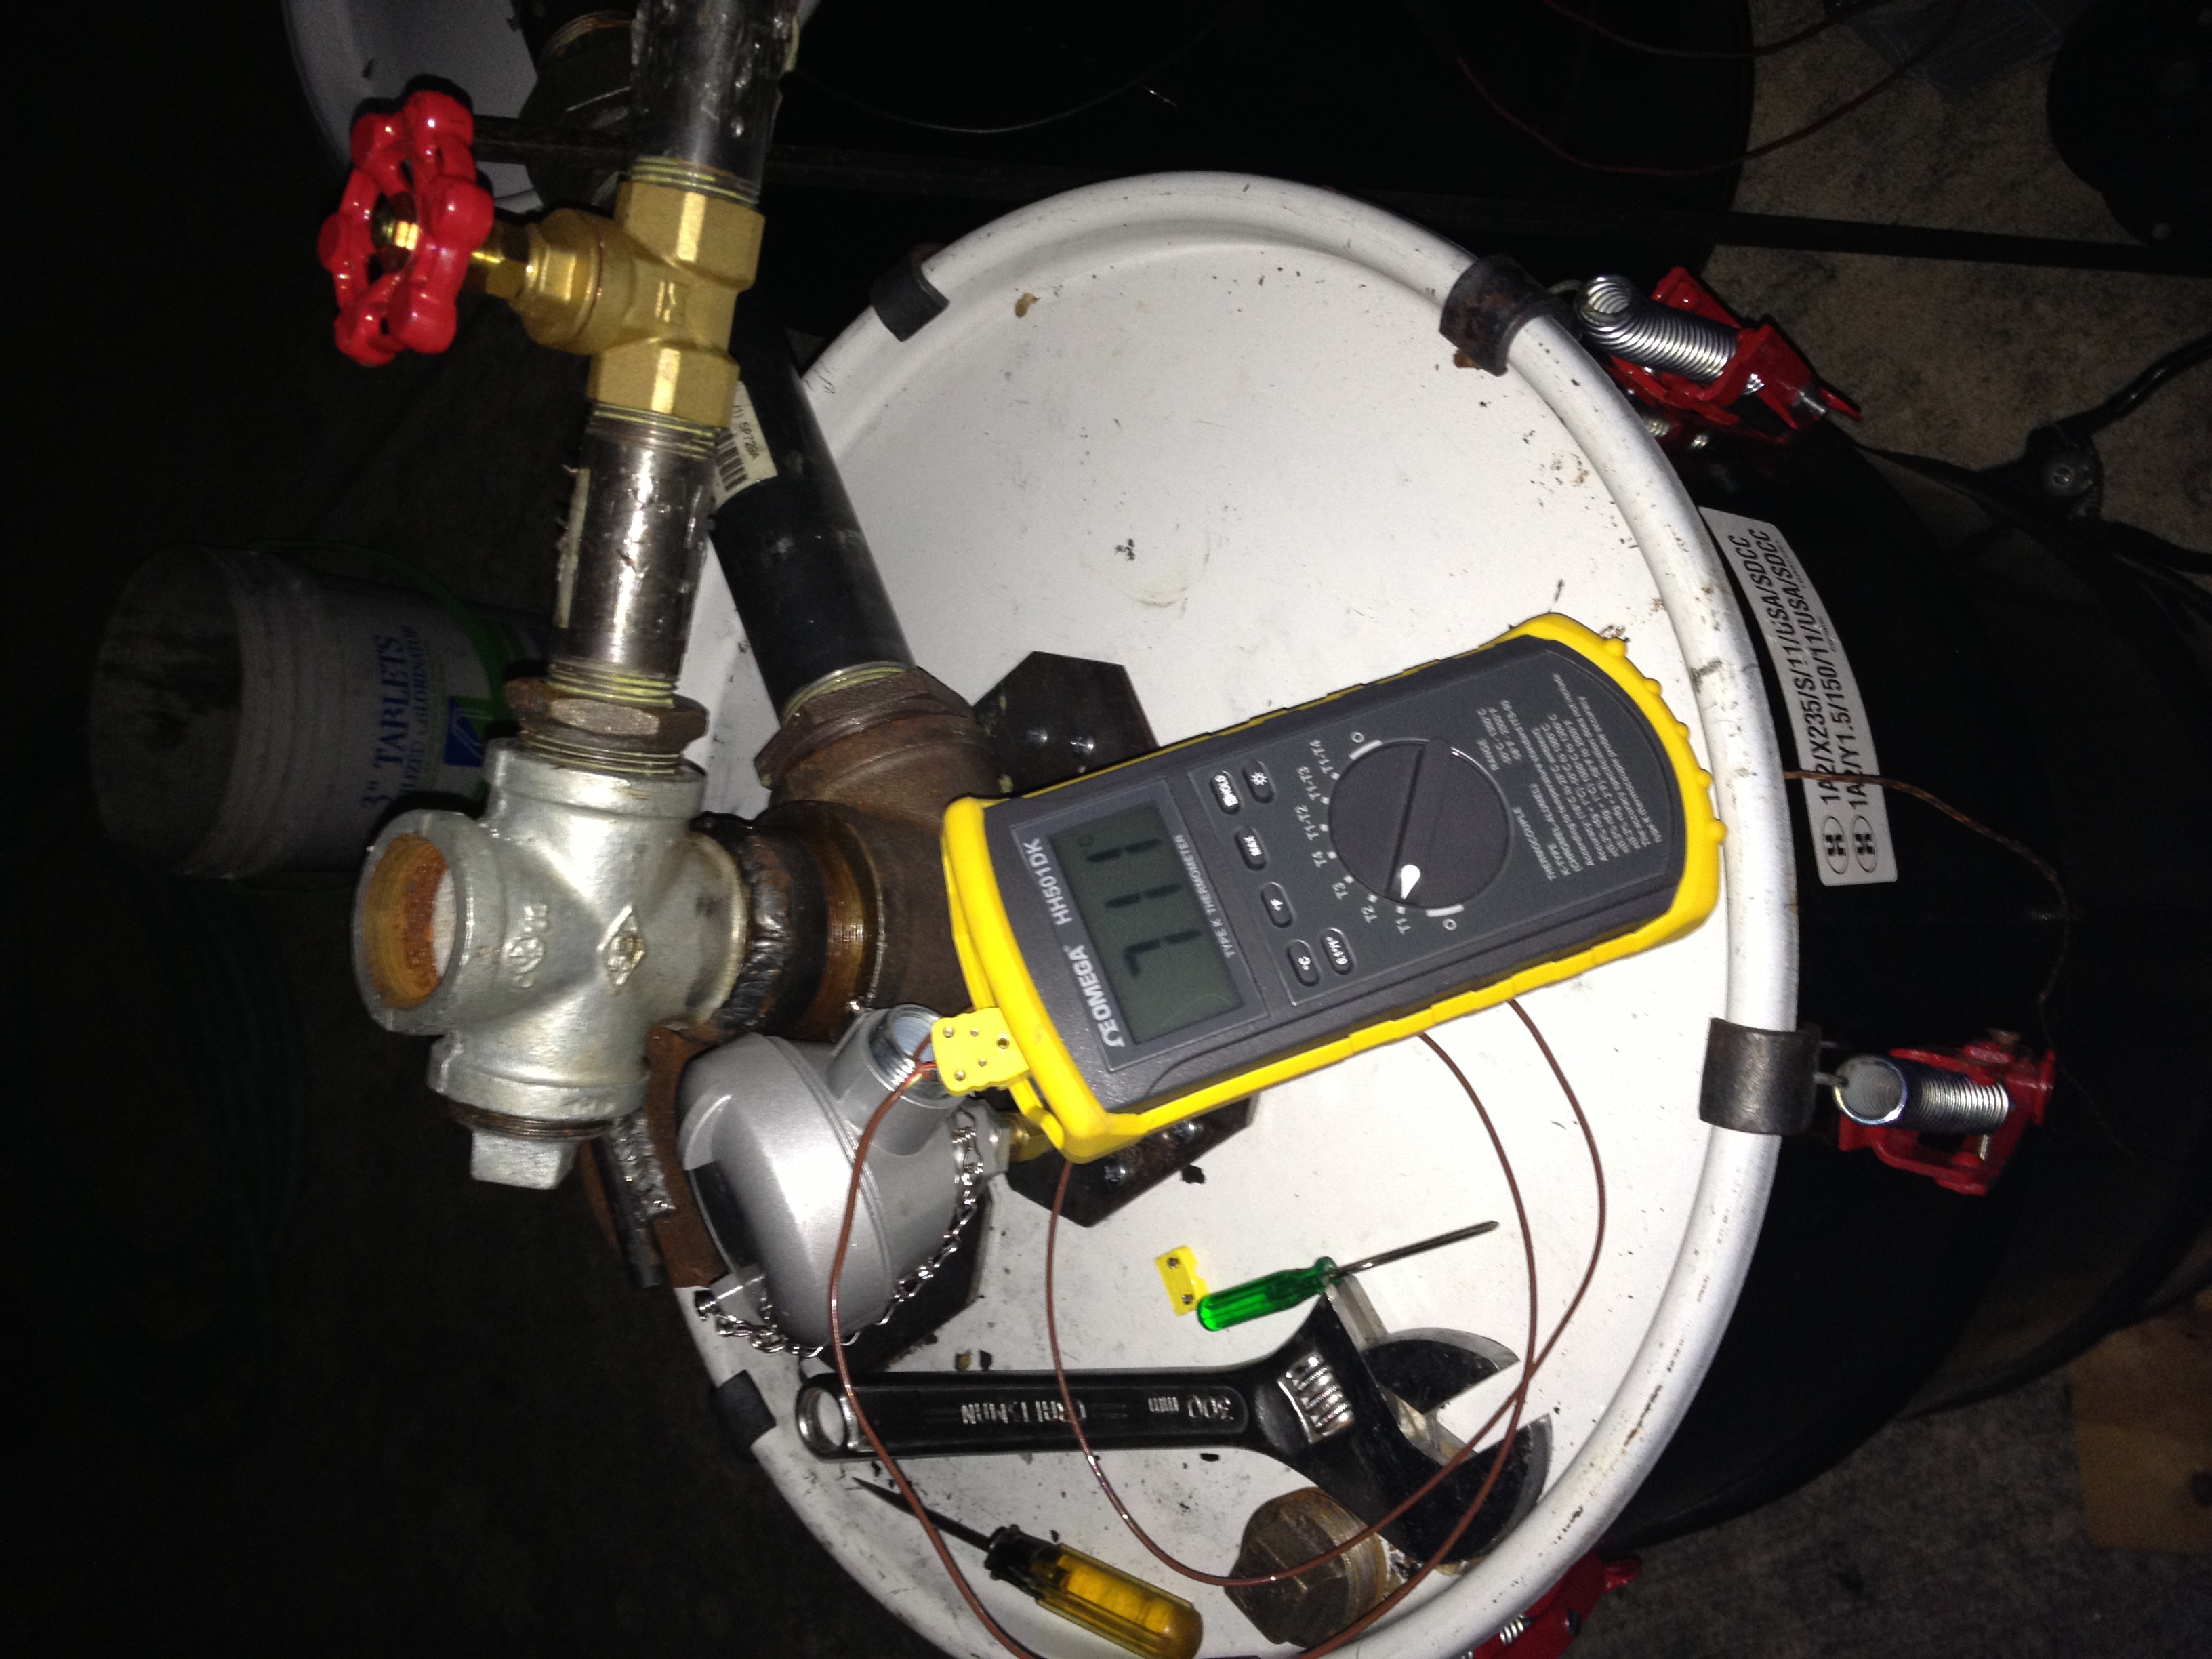
The last three show you how the pipe fittings on the top were done.
5 Likes
Ray, thank you very much. The gods of obtanium today gifted me with two 15 gal barrels with removable lids that have 2 inch bungs in the middle. Now I can begin construction.
4 Likes
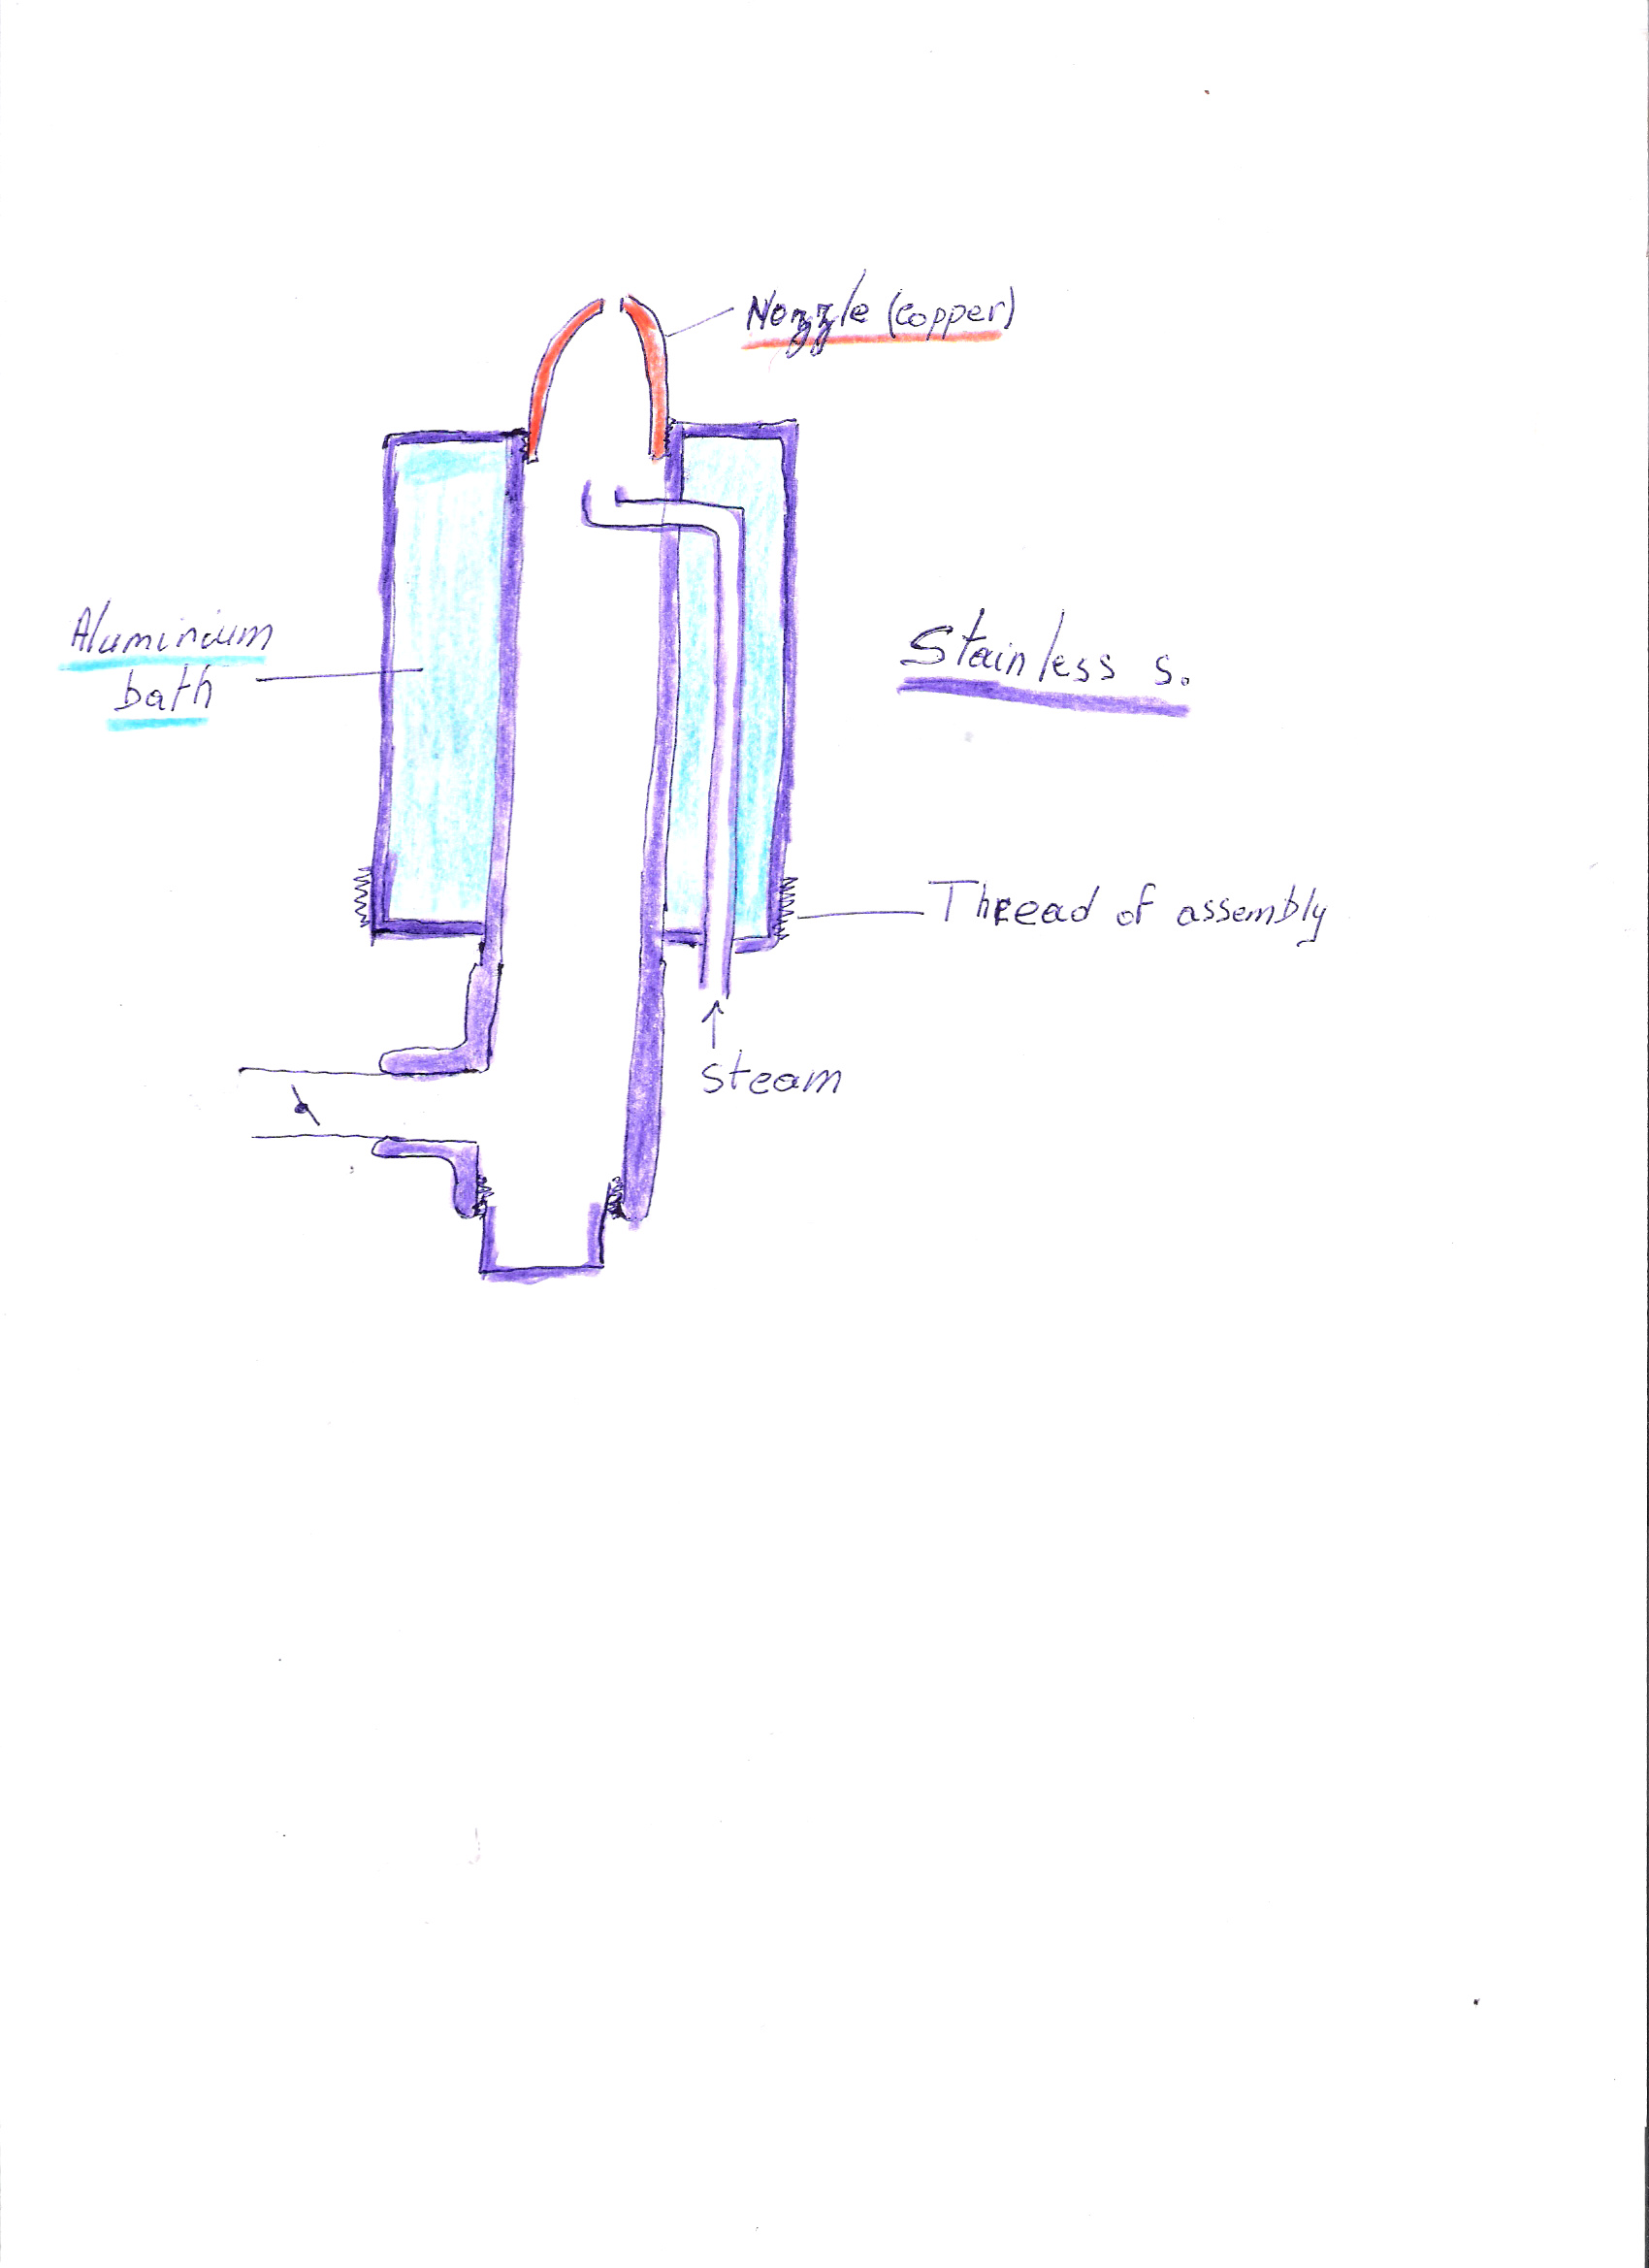
The nozzle is vertical here is a skit.
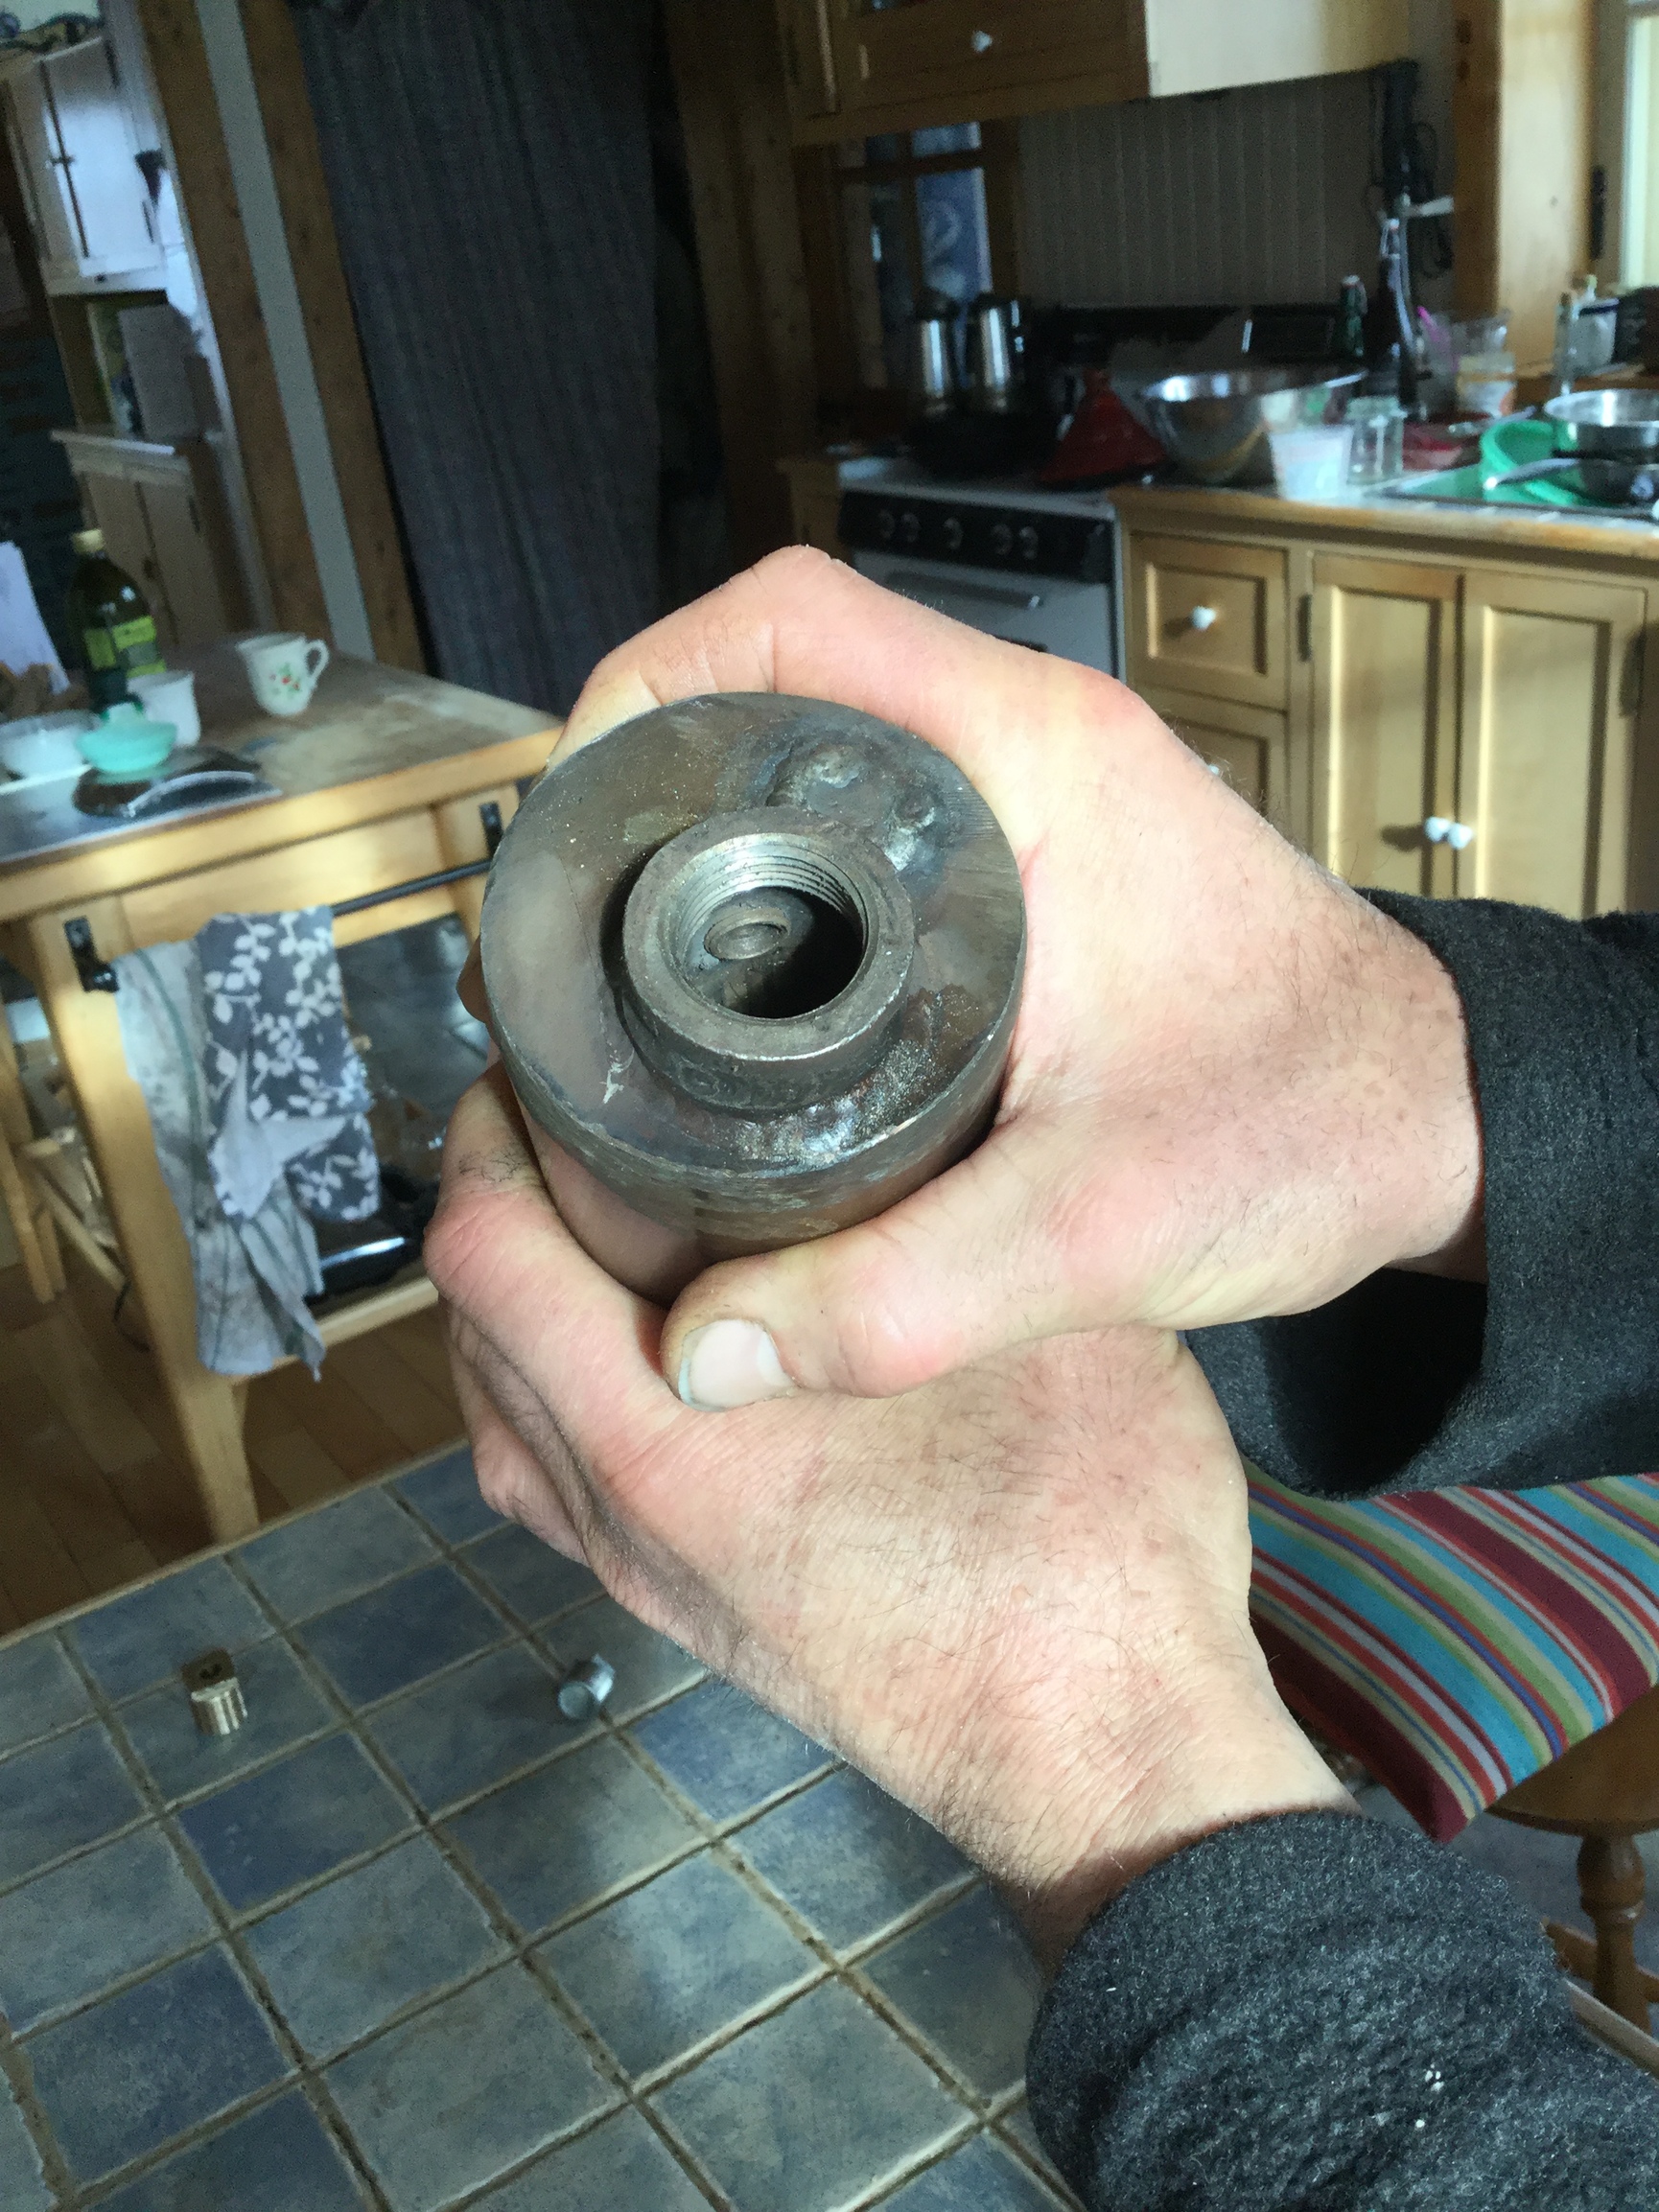
I would disassemble the nozzle at the week end to make some photos.
2 Likes
Pretty sophisticated there
Thierry. There is one thing that I am not understanding and that is the aluminum “bath”. When I think of bath I think of liquid. Are you thinking that aluminum will melt and absorb and carry away the heat from the nozzle?
1 Like
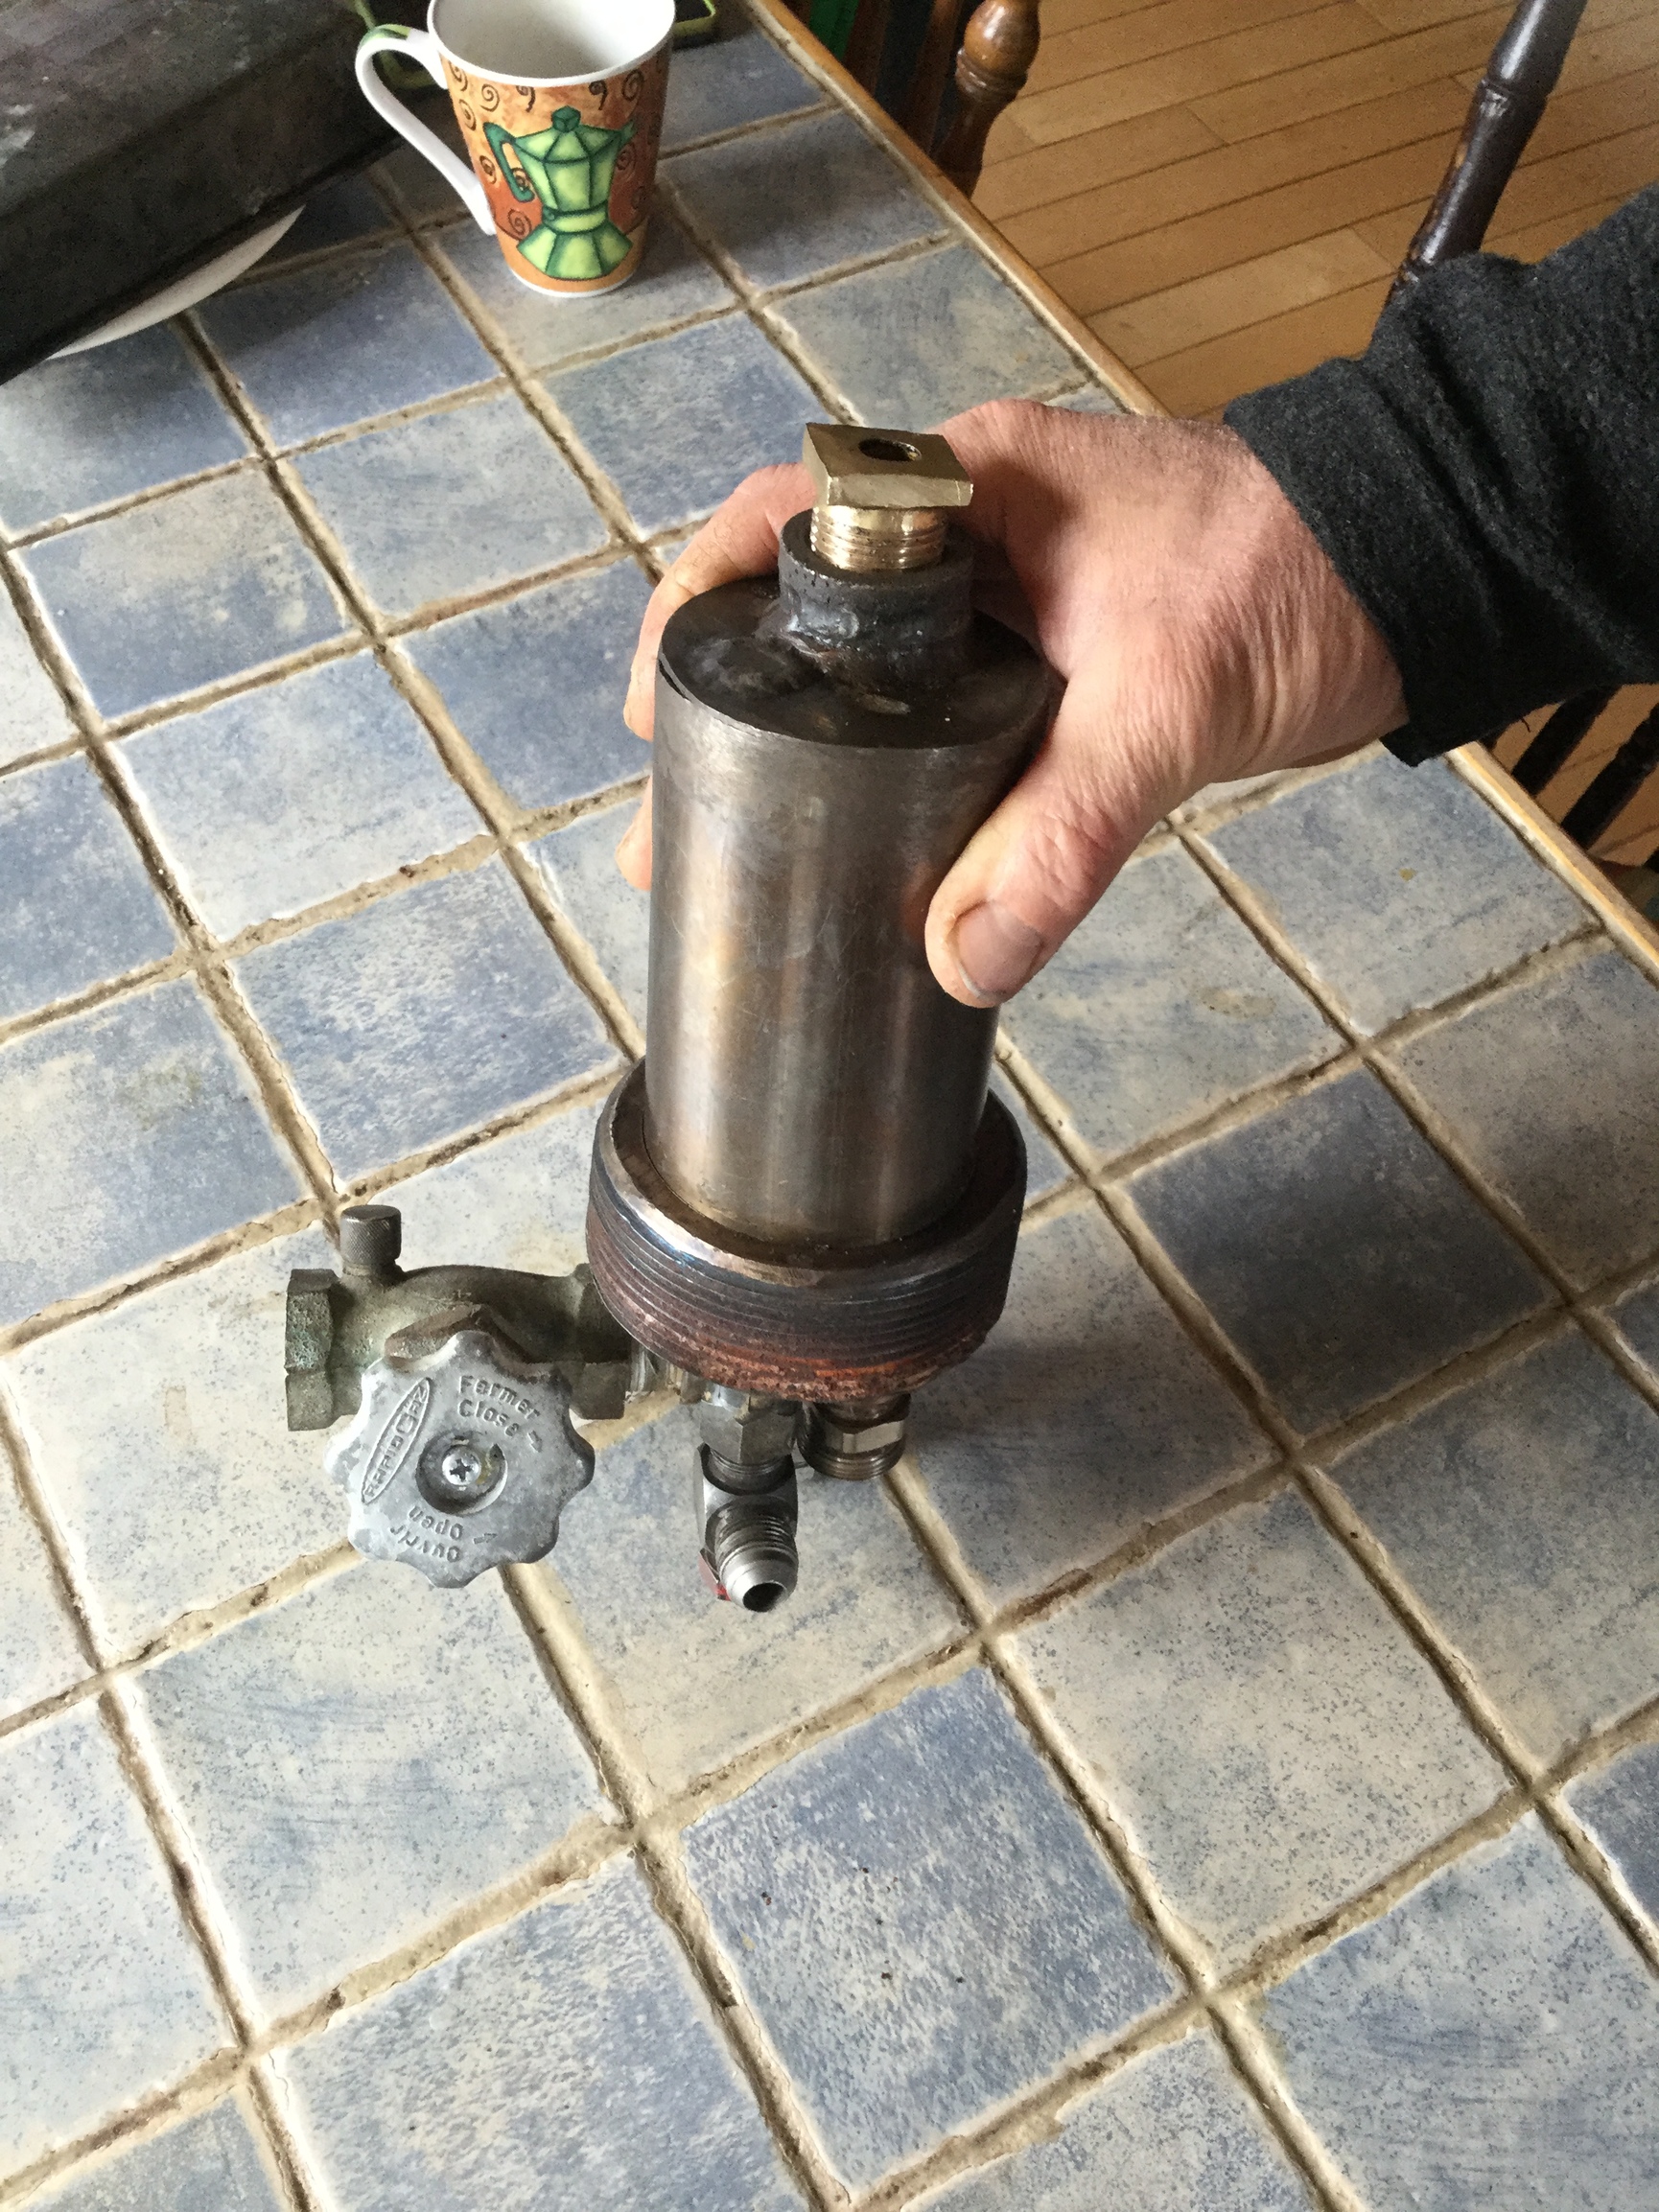
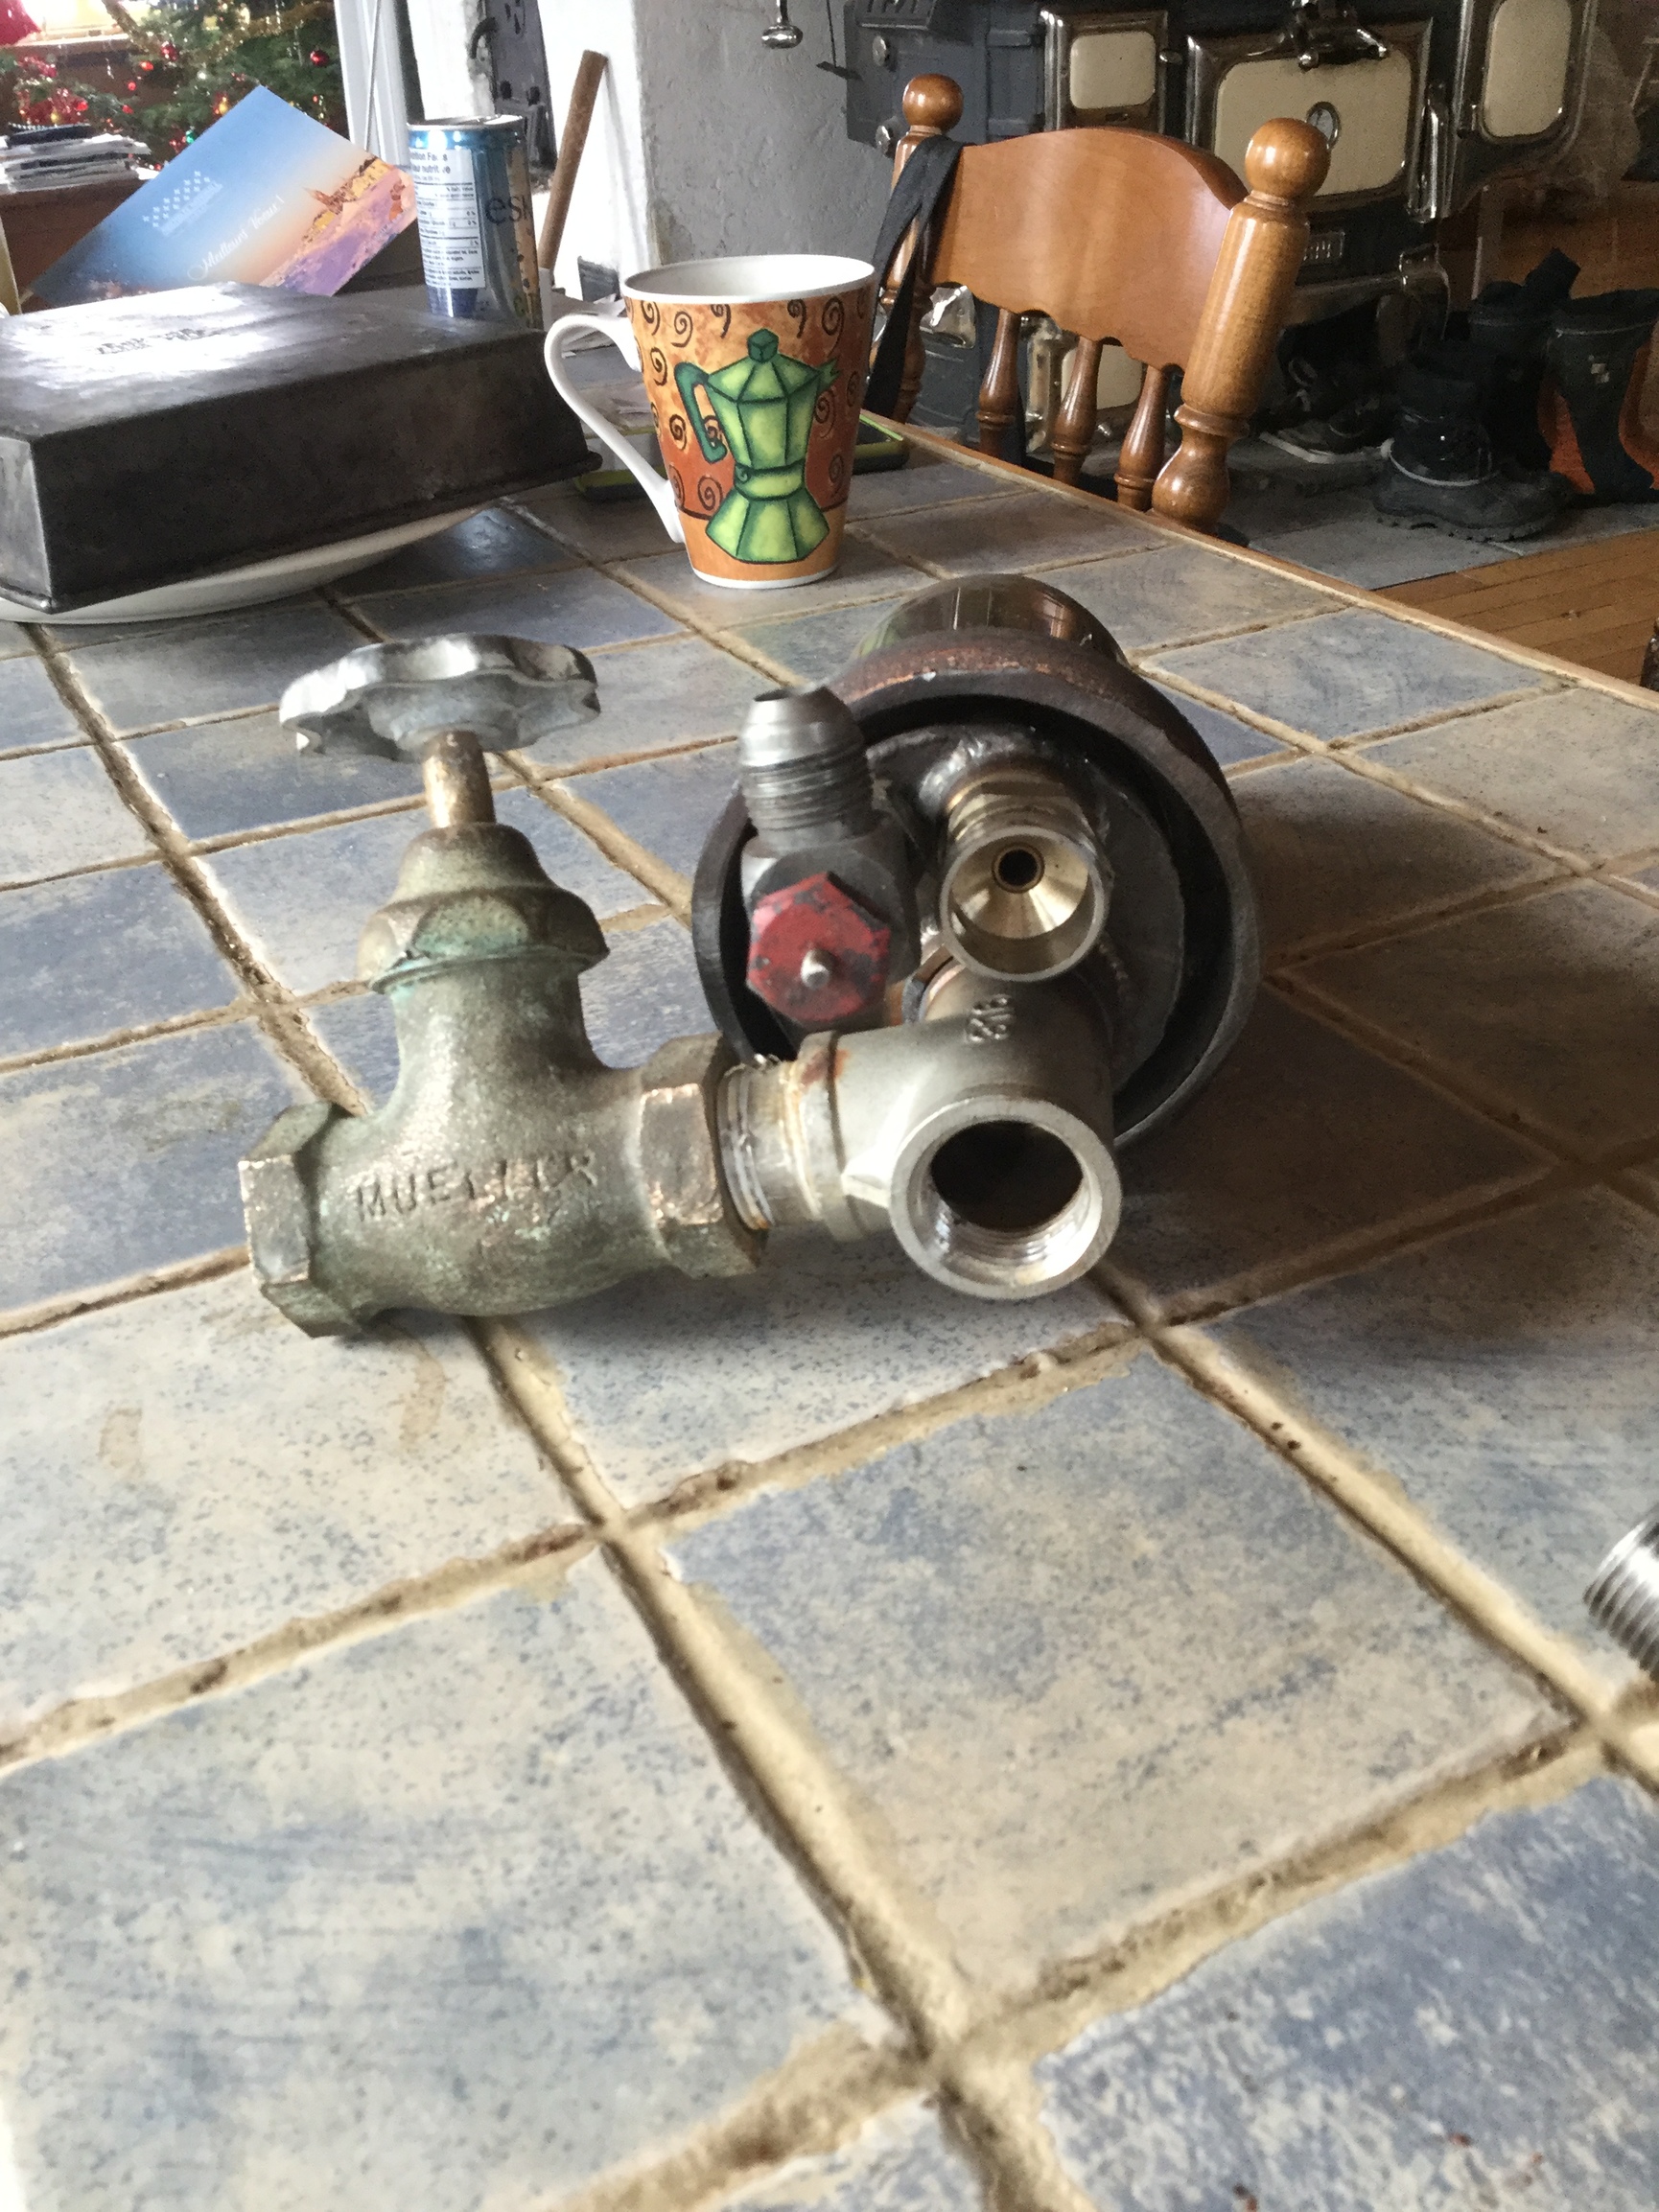
It sounds like you filled the larger stainless pipe with molten aluminum, to essentially make a heat-sink around the inner stainless nozzle pipe? Within that aluminum casting you have included another, smaller steam tube, but it is unclear from the picture and the sketch if that tube goes into the nozzle, or comes back out again as a heat exchanger. Could you explain the two compression fittings that we see on the third picture?
Very nice looking work, though. I look forward to hearing how it goes.
3 Likes
I have not tested this new nozzle yet
Hi Don
Aluminum melts at 660 c, it is a very good coolant. As it has been melted it is in perfect contact with all the pieces of the nozzle. I hope that aluminum will absorb a lot of heat and transfer its BTUs to steam and primary air.
Hi Carl
You understood well
In the sketch, the small pipe between the bottom vapor passes through the aluminum bath and exits into the primary air pipe.
On the first picture, we see the exit of the small steam pipe in the primary air pipe
The compression fittings are one for steam and the other for installing a thermocouple
Thierry
4 Likes
I remember you talking about a “metalic bath” nozzle a while back!
Looks great! Proffesionaly made.
If you make the steam pipe as a coil, you culd superheat the steam eaven more (and cool the Alu) wich will alow you to use more of it, produceing richer gas.
The only weak spot l see is the copper nozzle. It has to have good mass and contact with the 'bath" to bot overheat.
Do report once you test it!
2 Likes
Interesting, A molten bath of aluminum to cool the nozzle. The problem that may occur (this needs tested) is there is nowhere to dissapate the heat other than the air entering the down pipe or the steam. Inother words, the aluminum melts (which adsorbs heat) until it is melted. But the temperature in the charcoal oxidation zone is upwards of 2500F. What happens when the molten aluminum gets that hot? What about the stainless steel pipe holding the molten aluminum? It may start to oxidze. Will the molten aluminum build up pressure? I just checked the vaporization of alumunim and it is north of 3500 F so no problem with it boiling away. The copper nozzle on the end is something I do not see as necessary. This design looks promising. You definately did some nice work putting it together!
Gary in PA
3 Likes
Here are some photos of my Kalle style unit built several years ago. The down pipe is 1.25" and the annular pipe is 2". The nozzle is made from fire clay and sits loosly on the end of the pipe.
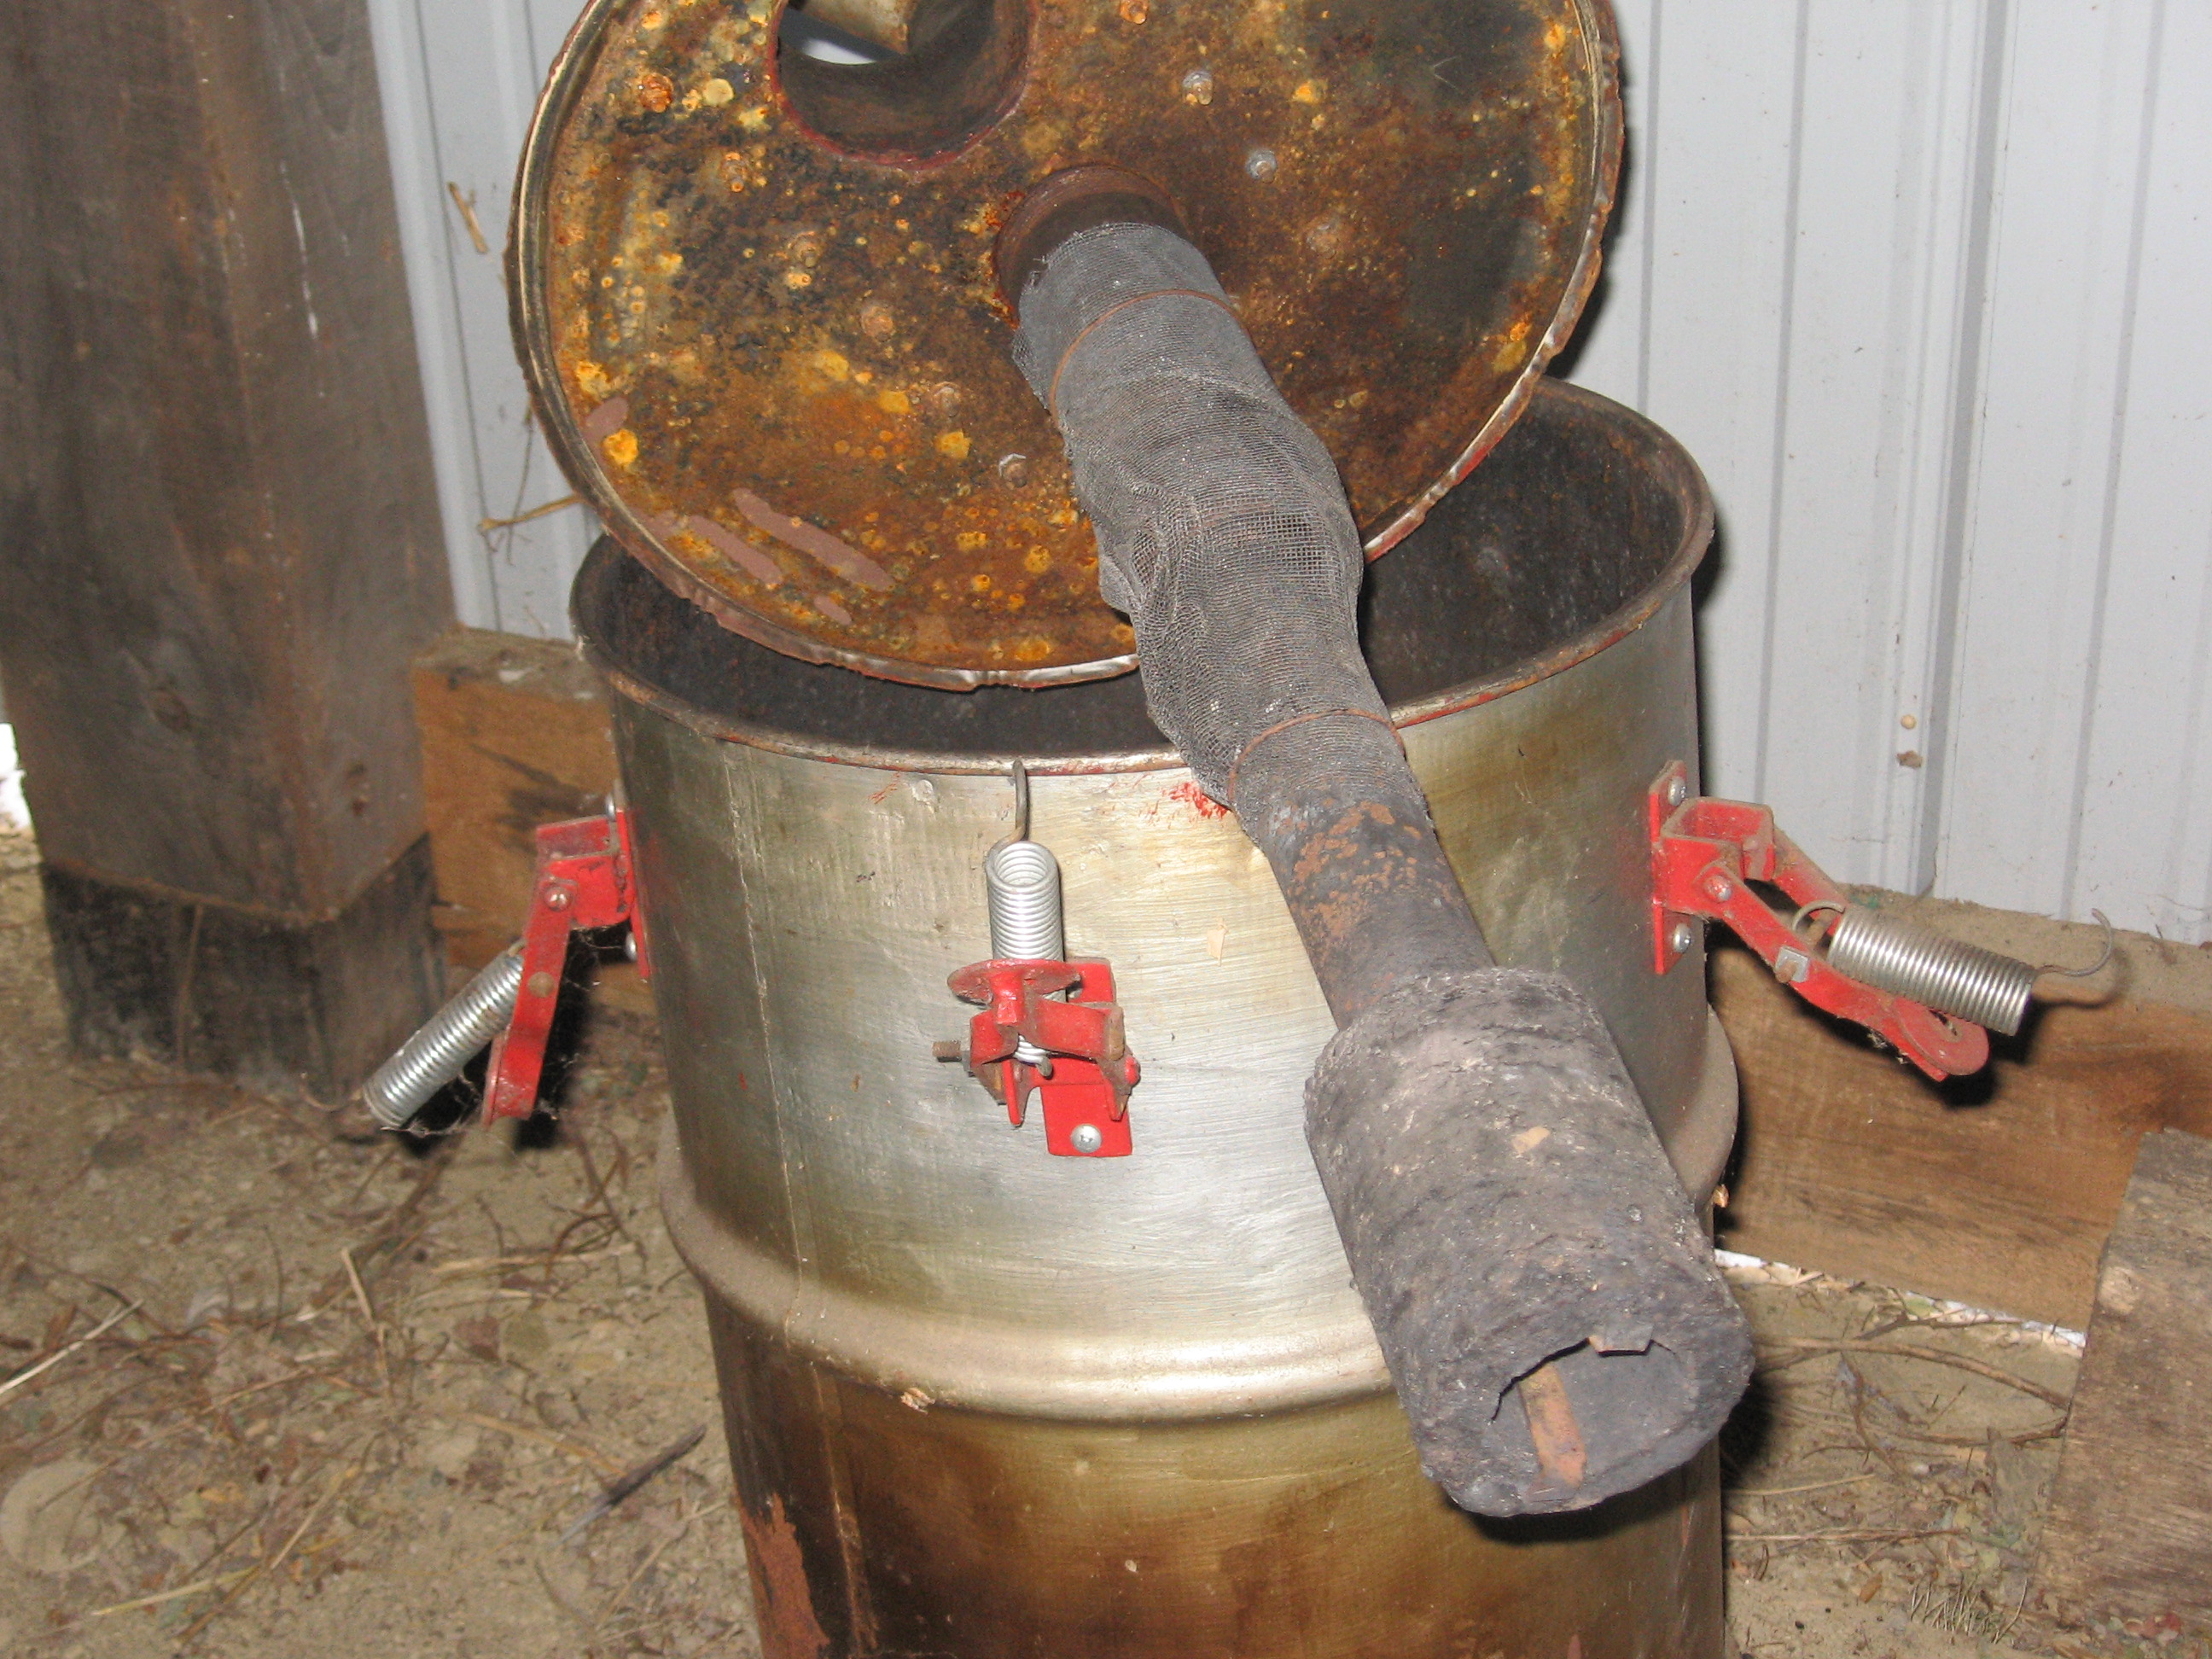
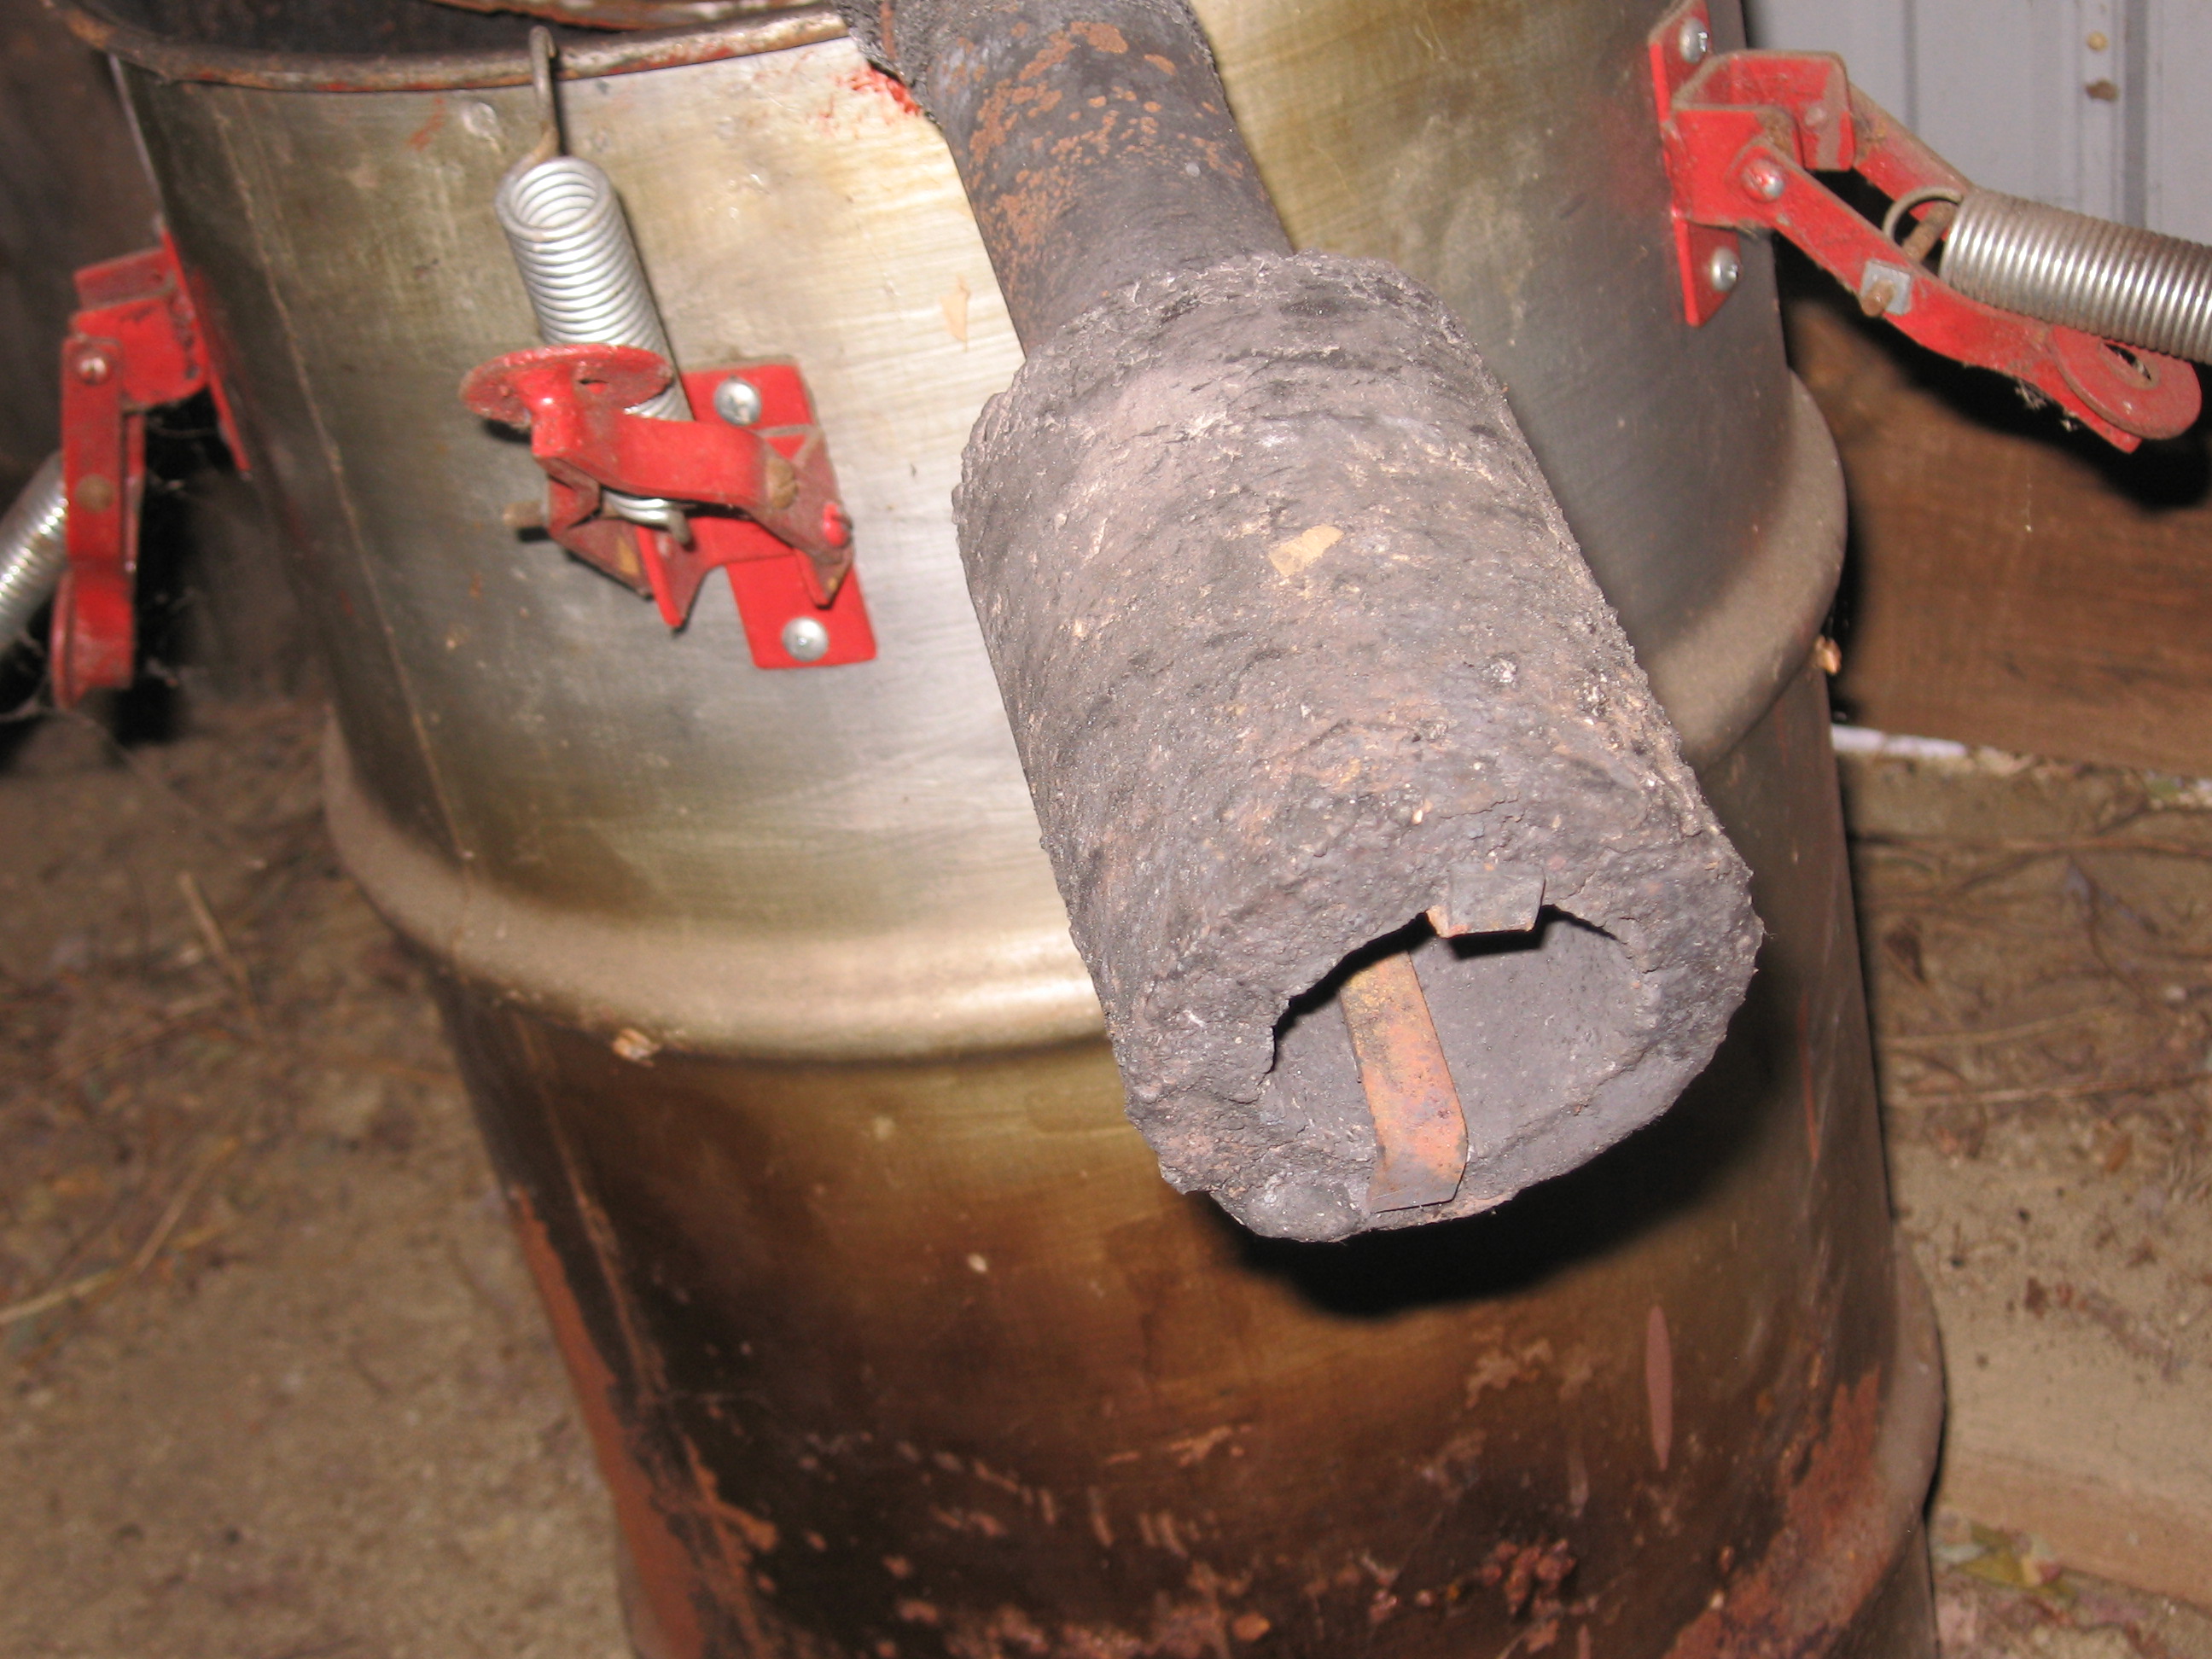
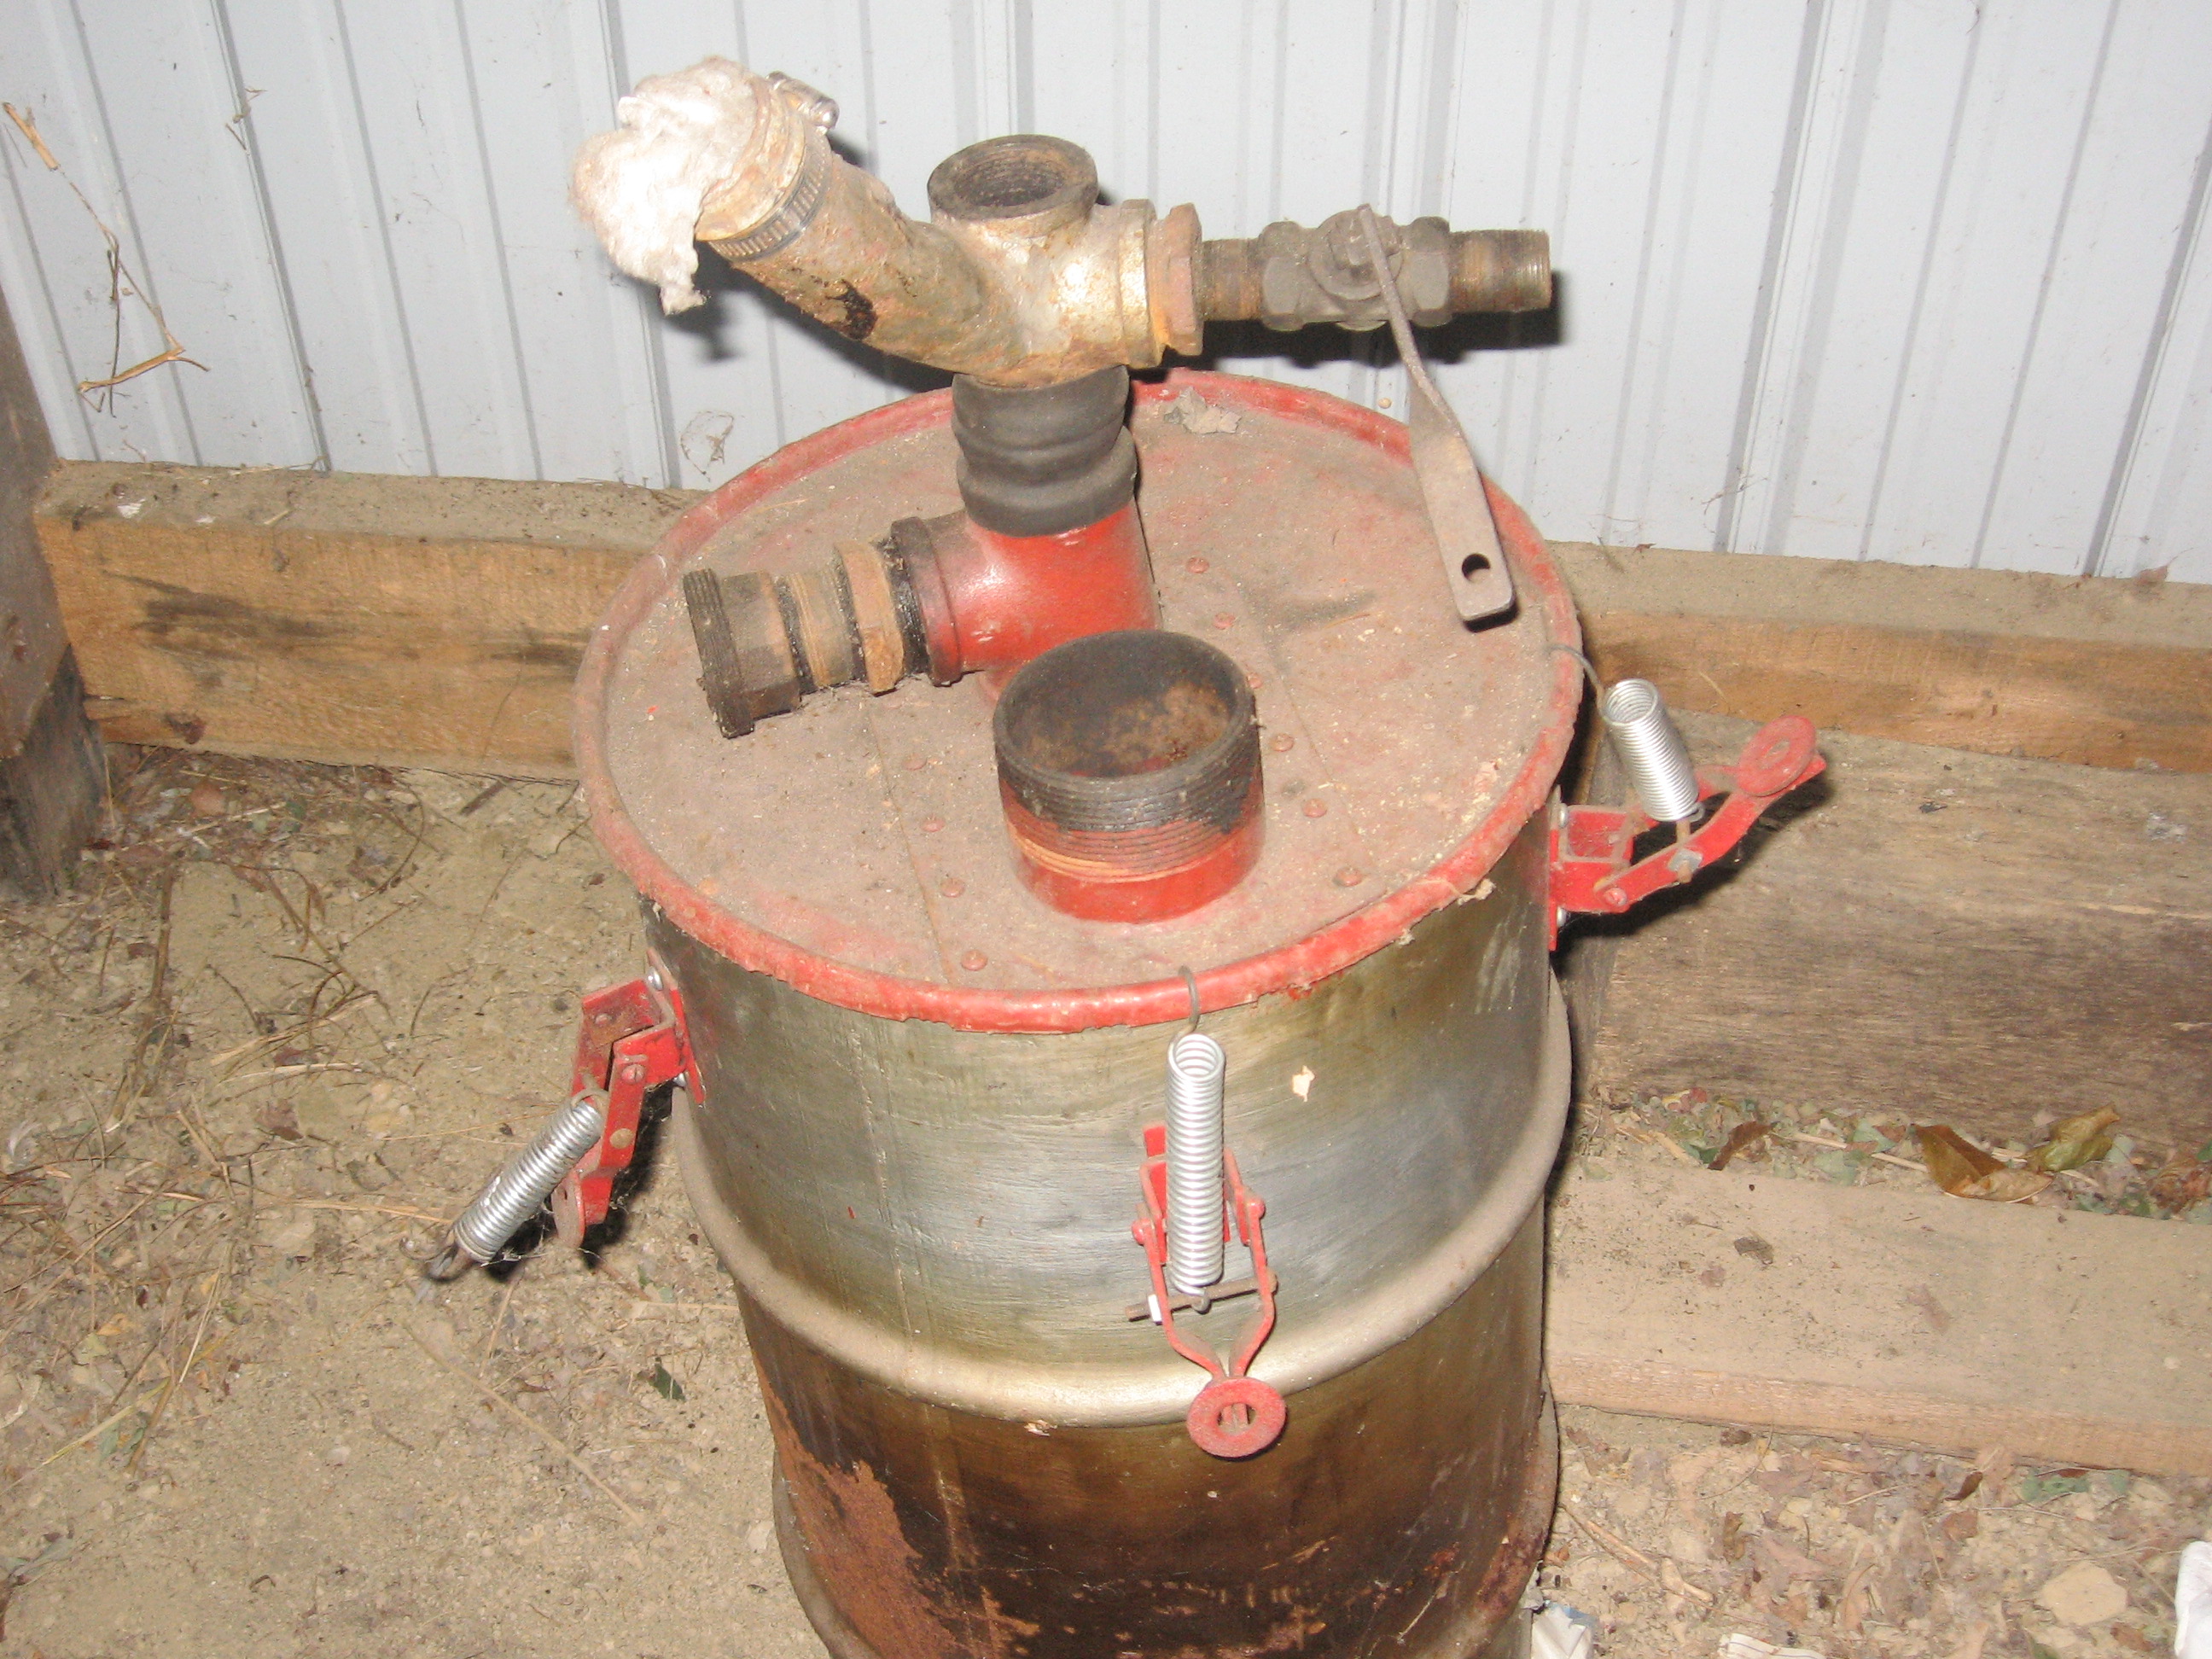
Gary in PA
5 Likes
It’s my concern too
but I had this beautiful copper fitting with, on the inside, a perfect conical retreat. I decided to test it.
I would change if the test fails
4 Likes
Thanks Gary.
15 gallon barrel?
How far from the nozzle to the bottom of the barrel?
My 15 gallon barrel had a bung in the center of the lid and I was able to assemble the down pipes just using fittings. I did however use 1 inch for the air pipe. It seems that 1 inch is considered the correct size for small engines and that would also give enough room for gas out with no restriction. At some point, with 15 gallon barrel, I may mount it on a 4-wheeler. Do you have an opinion on whether 1.25 or 1 inch air supply would be better? I can change the size of the air pipe and also the lengths of both the air in and the gas out pipes.
I like your idea of charcoal in at the top and out the bottom. From what I have read it takes longer to restart after a run due to stratification. With your design it would be really easy to dump and reload. That makes it easy to examine the charcoal for clues and get a new start.
g
1 Like
Hi Thierry, is there any up date on testing your nozzle design?
Not sure if you have your own thread on this or not, you can answer there if you like.
Bob
Hi Bob
I will test my nozzle surely one of these days, rest assured!
I’m also looking forward to you:smiley:
2 Likes
Lots of SWEM when driving the Dodge Dakota truck (wood gasifier), and some day SWEM with my Charcoal Gasifier going down the road.
Bob
2 Likes
Hi Everybody.
I have started a new topic with a collections of my drawings, part list, spec’s sheet, and/or operations procedures, it is call: “Drawings of charcoal gasifiers for vehicles”. In this new topic is included the work I have done related to Gary Gilmore Kalle build.
4 Likes
You could use Nitronic and Tungsten as components for the needle, but the expense is a good deal higher.