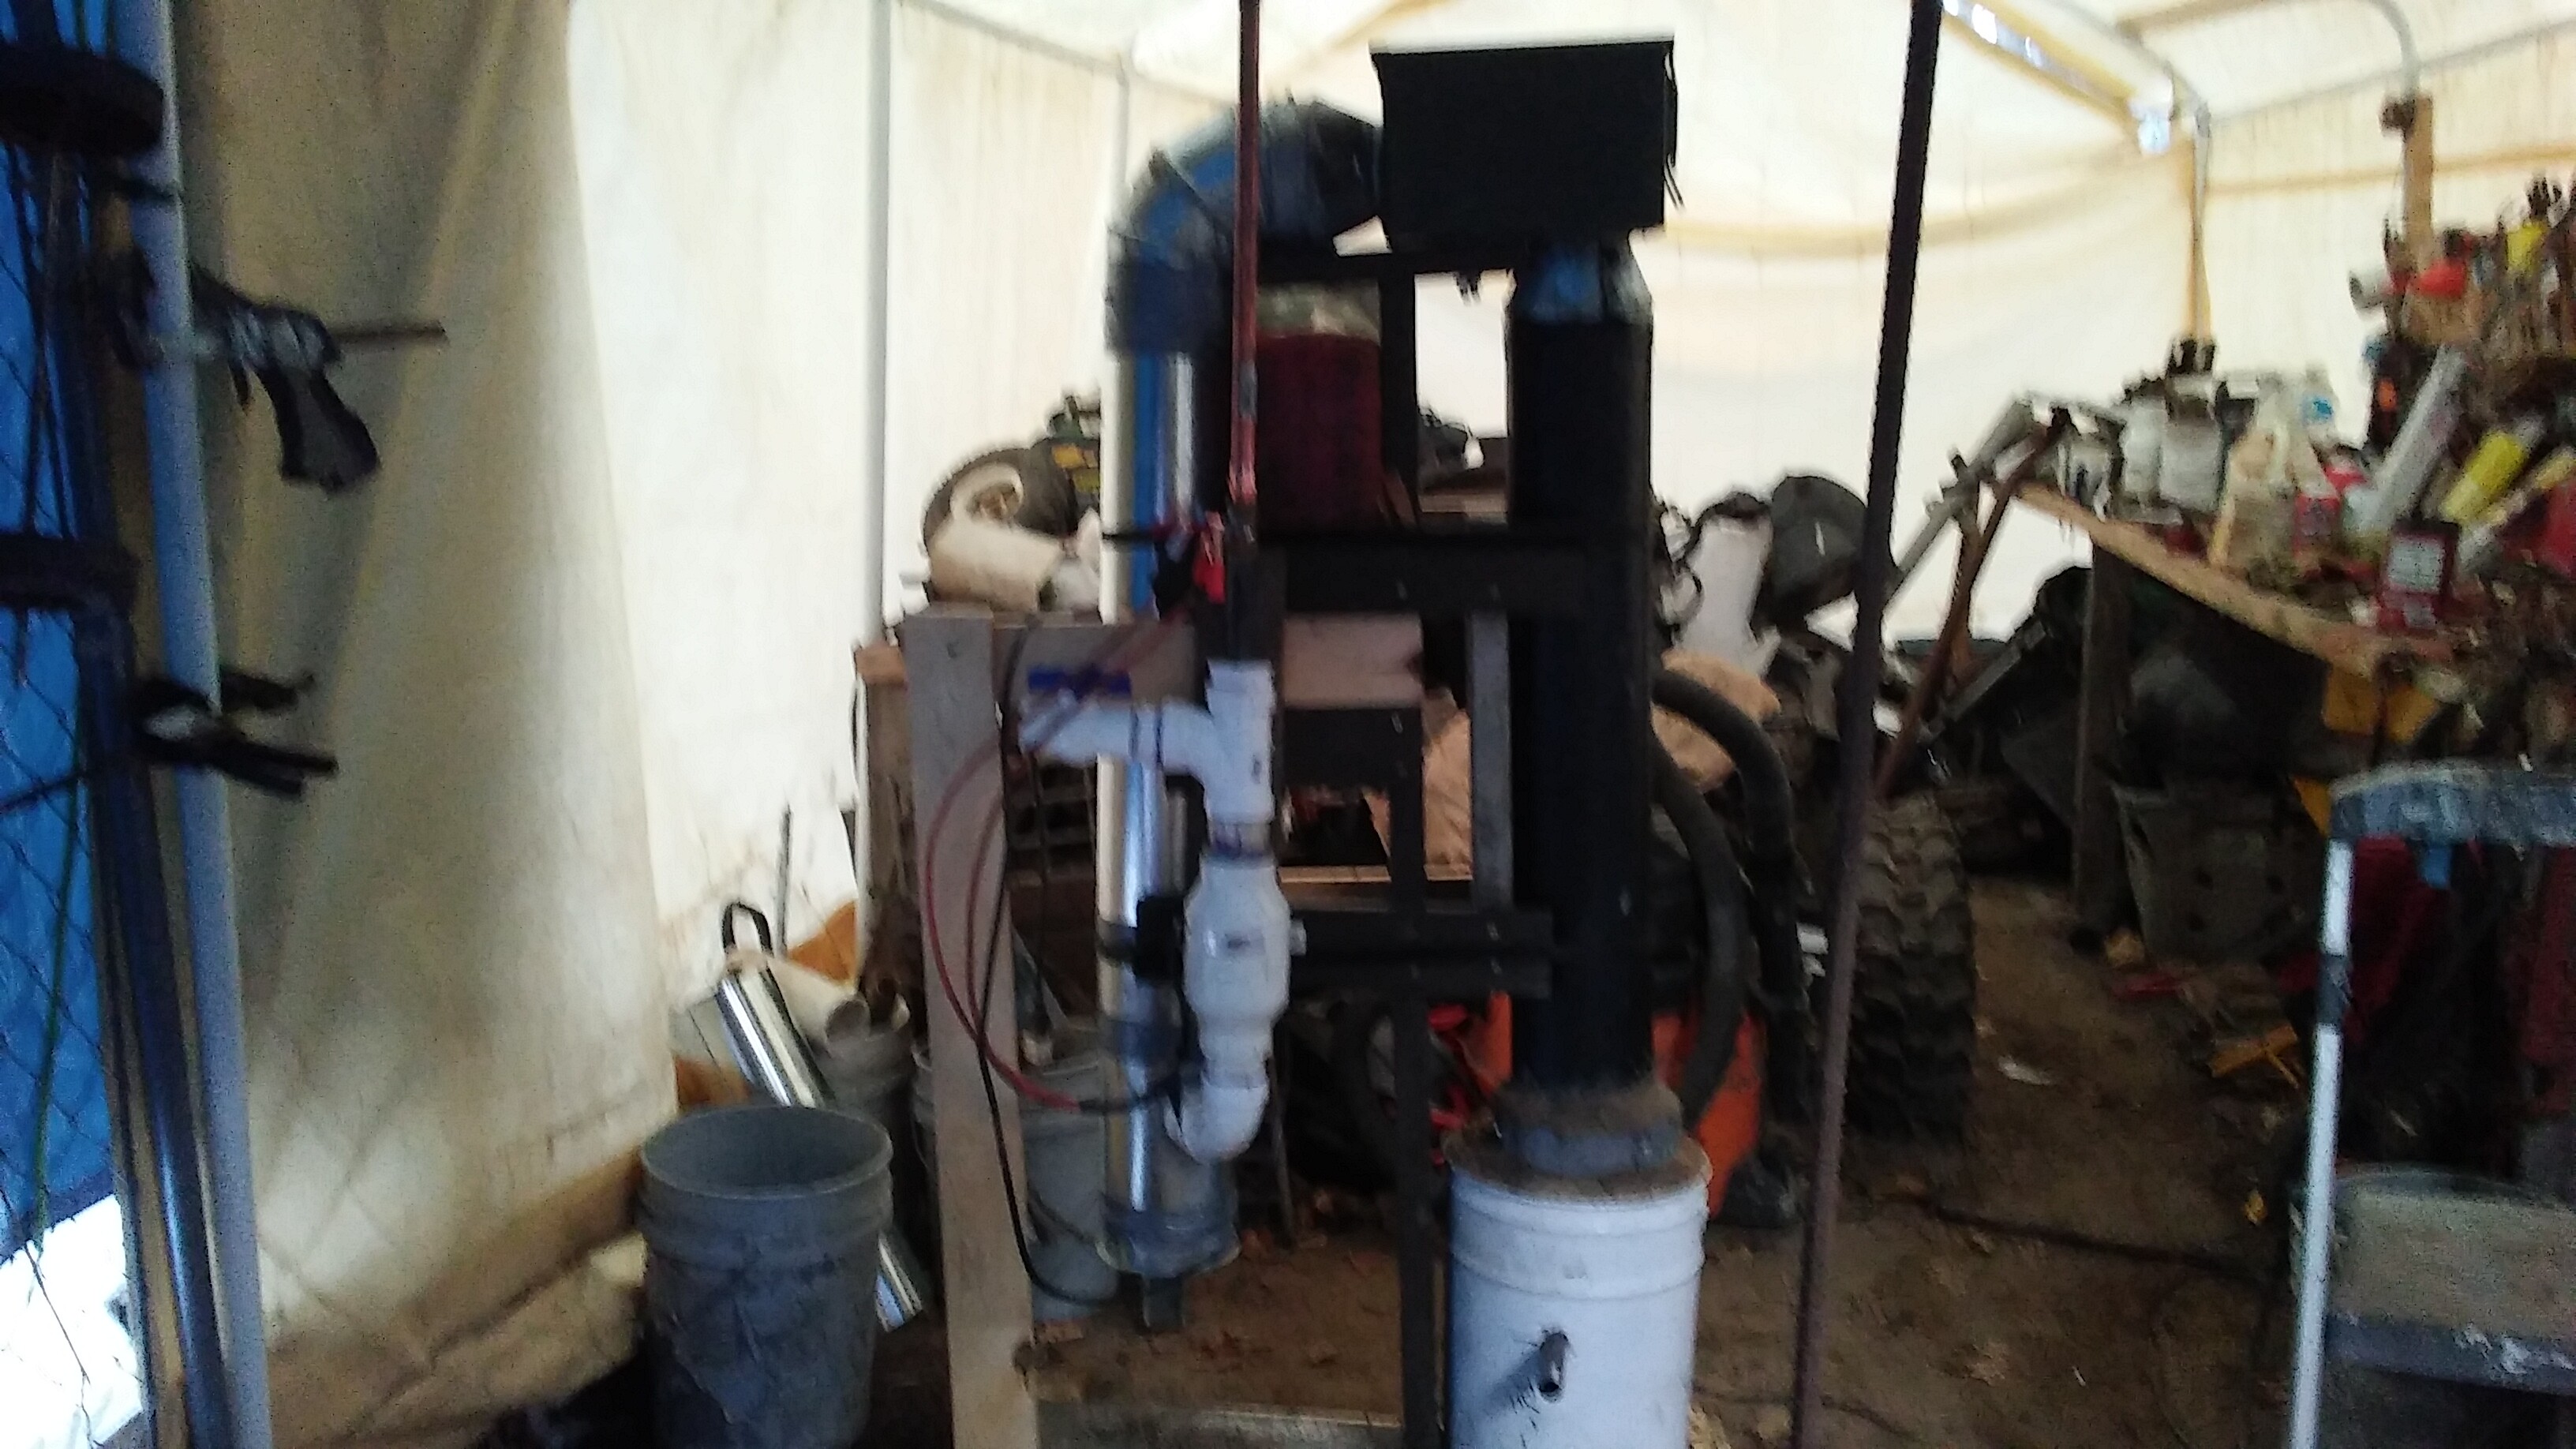
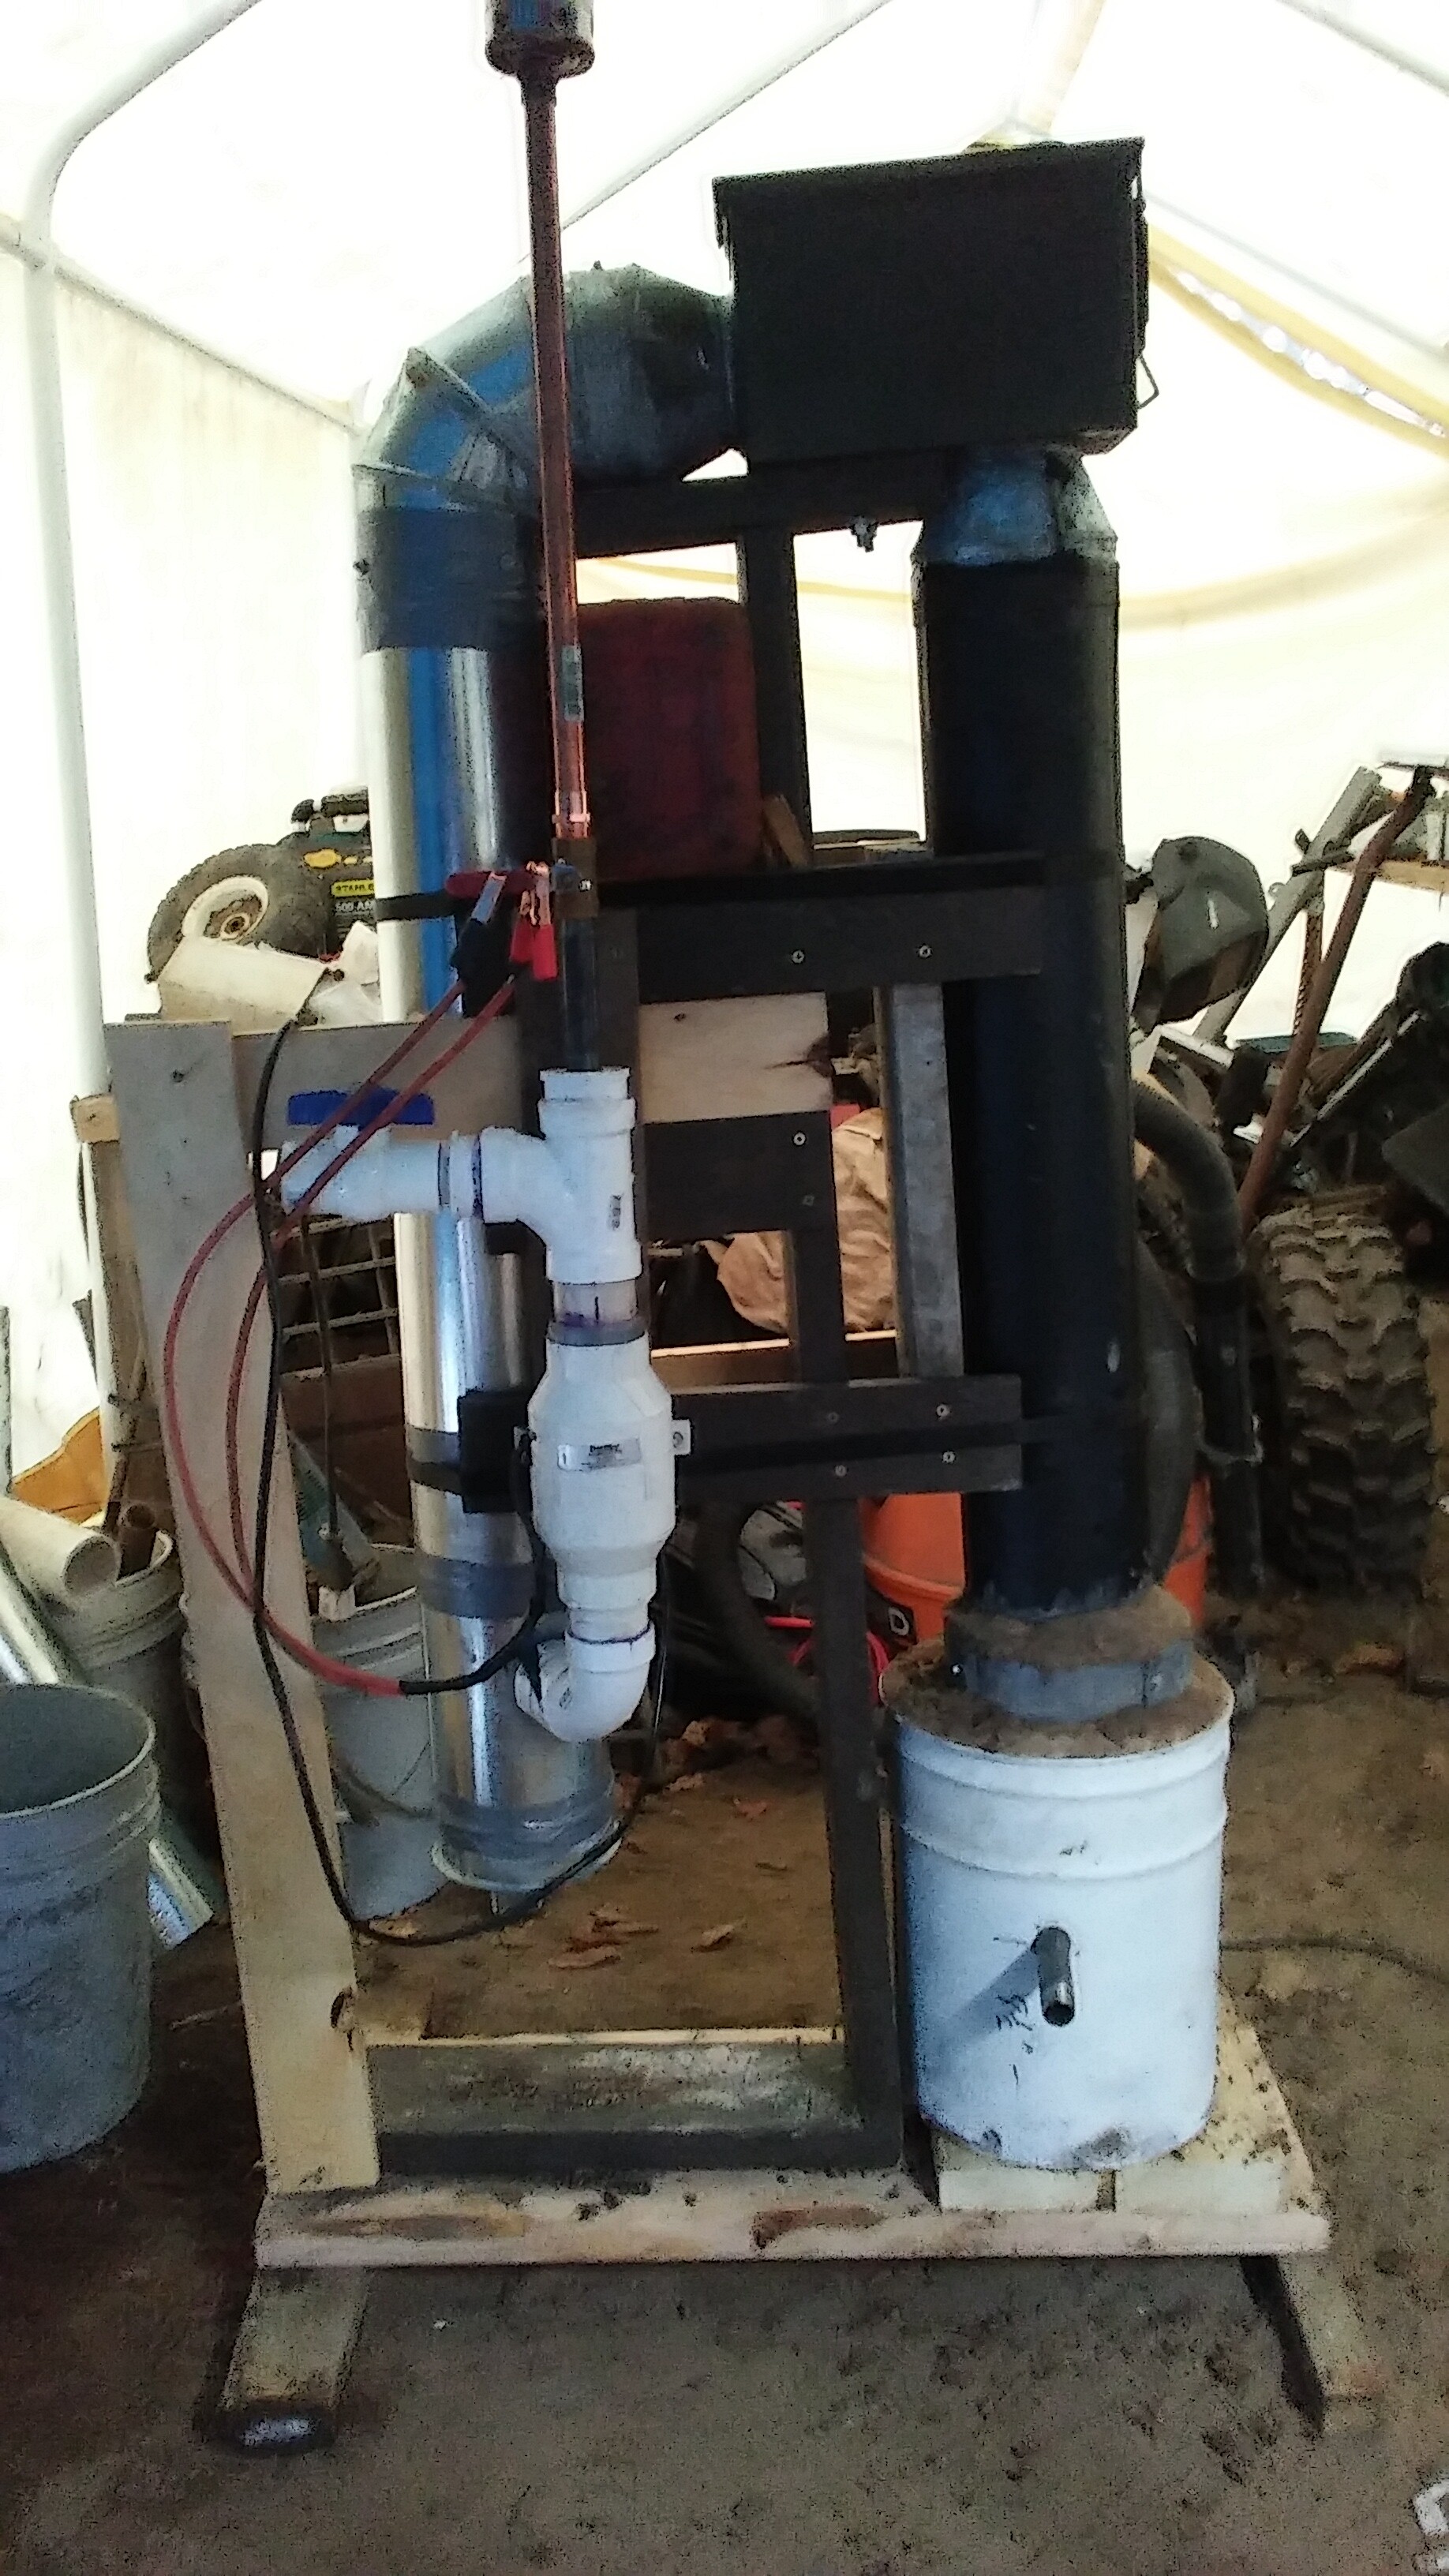
This is the project I’ve been mentioning for the past couple weeks. It is intended to be built with a few easily bought or scrounged parts. Designed as a no-weld so it’s intended end users, being my associates on a couple homesteading sites, could put it together and have power if the grid went down. I said if, but really meant when. Not sure if it would be worth a lot of build data to experienced wood gasers. If anybody wants details I will comply. I have pictures of every little boring process. I have already put some question pictures on the Things that make me go huh thread. I’ll redo them here. The preliminary pictures are just the rough build as it stands. Still need to work on some fit and finish.
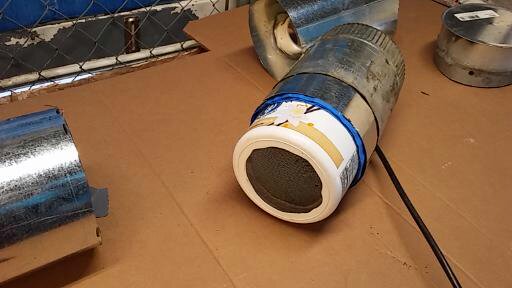
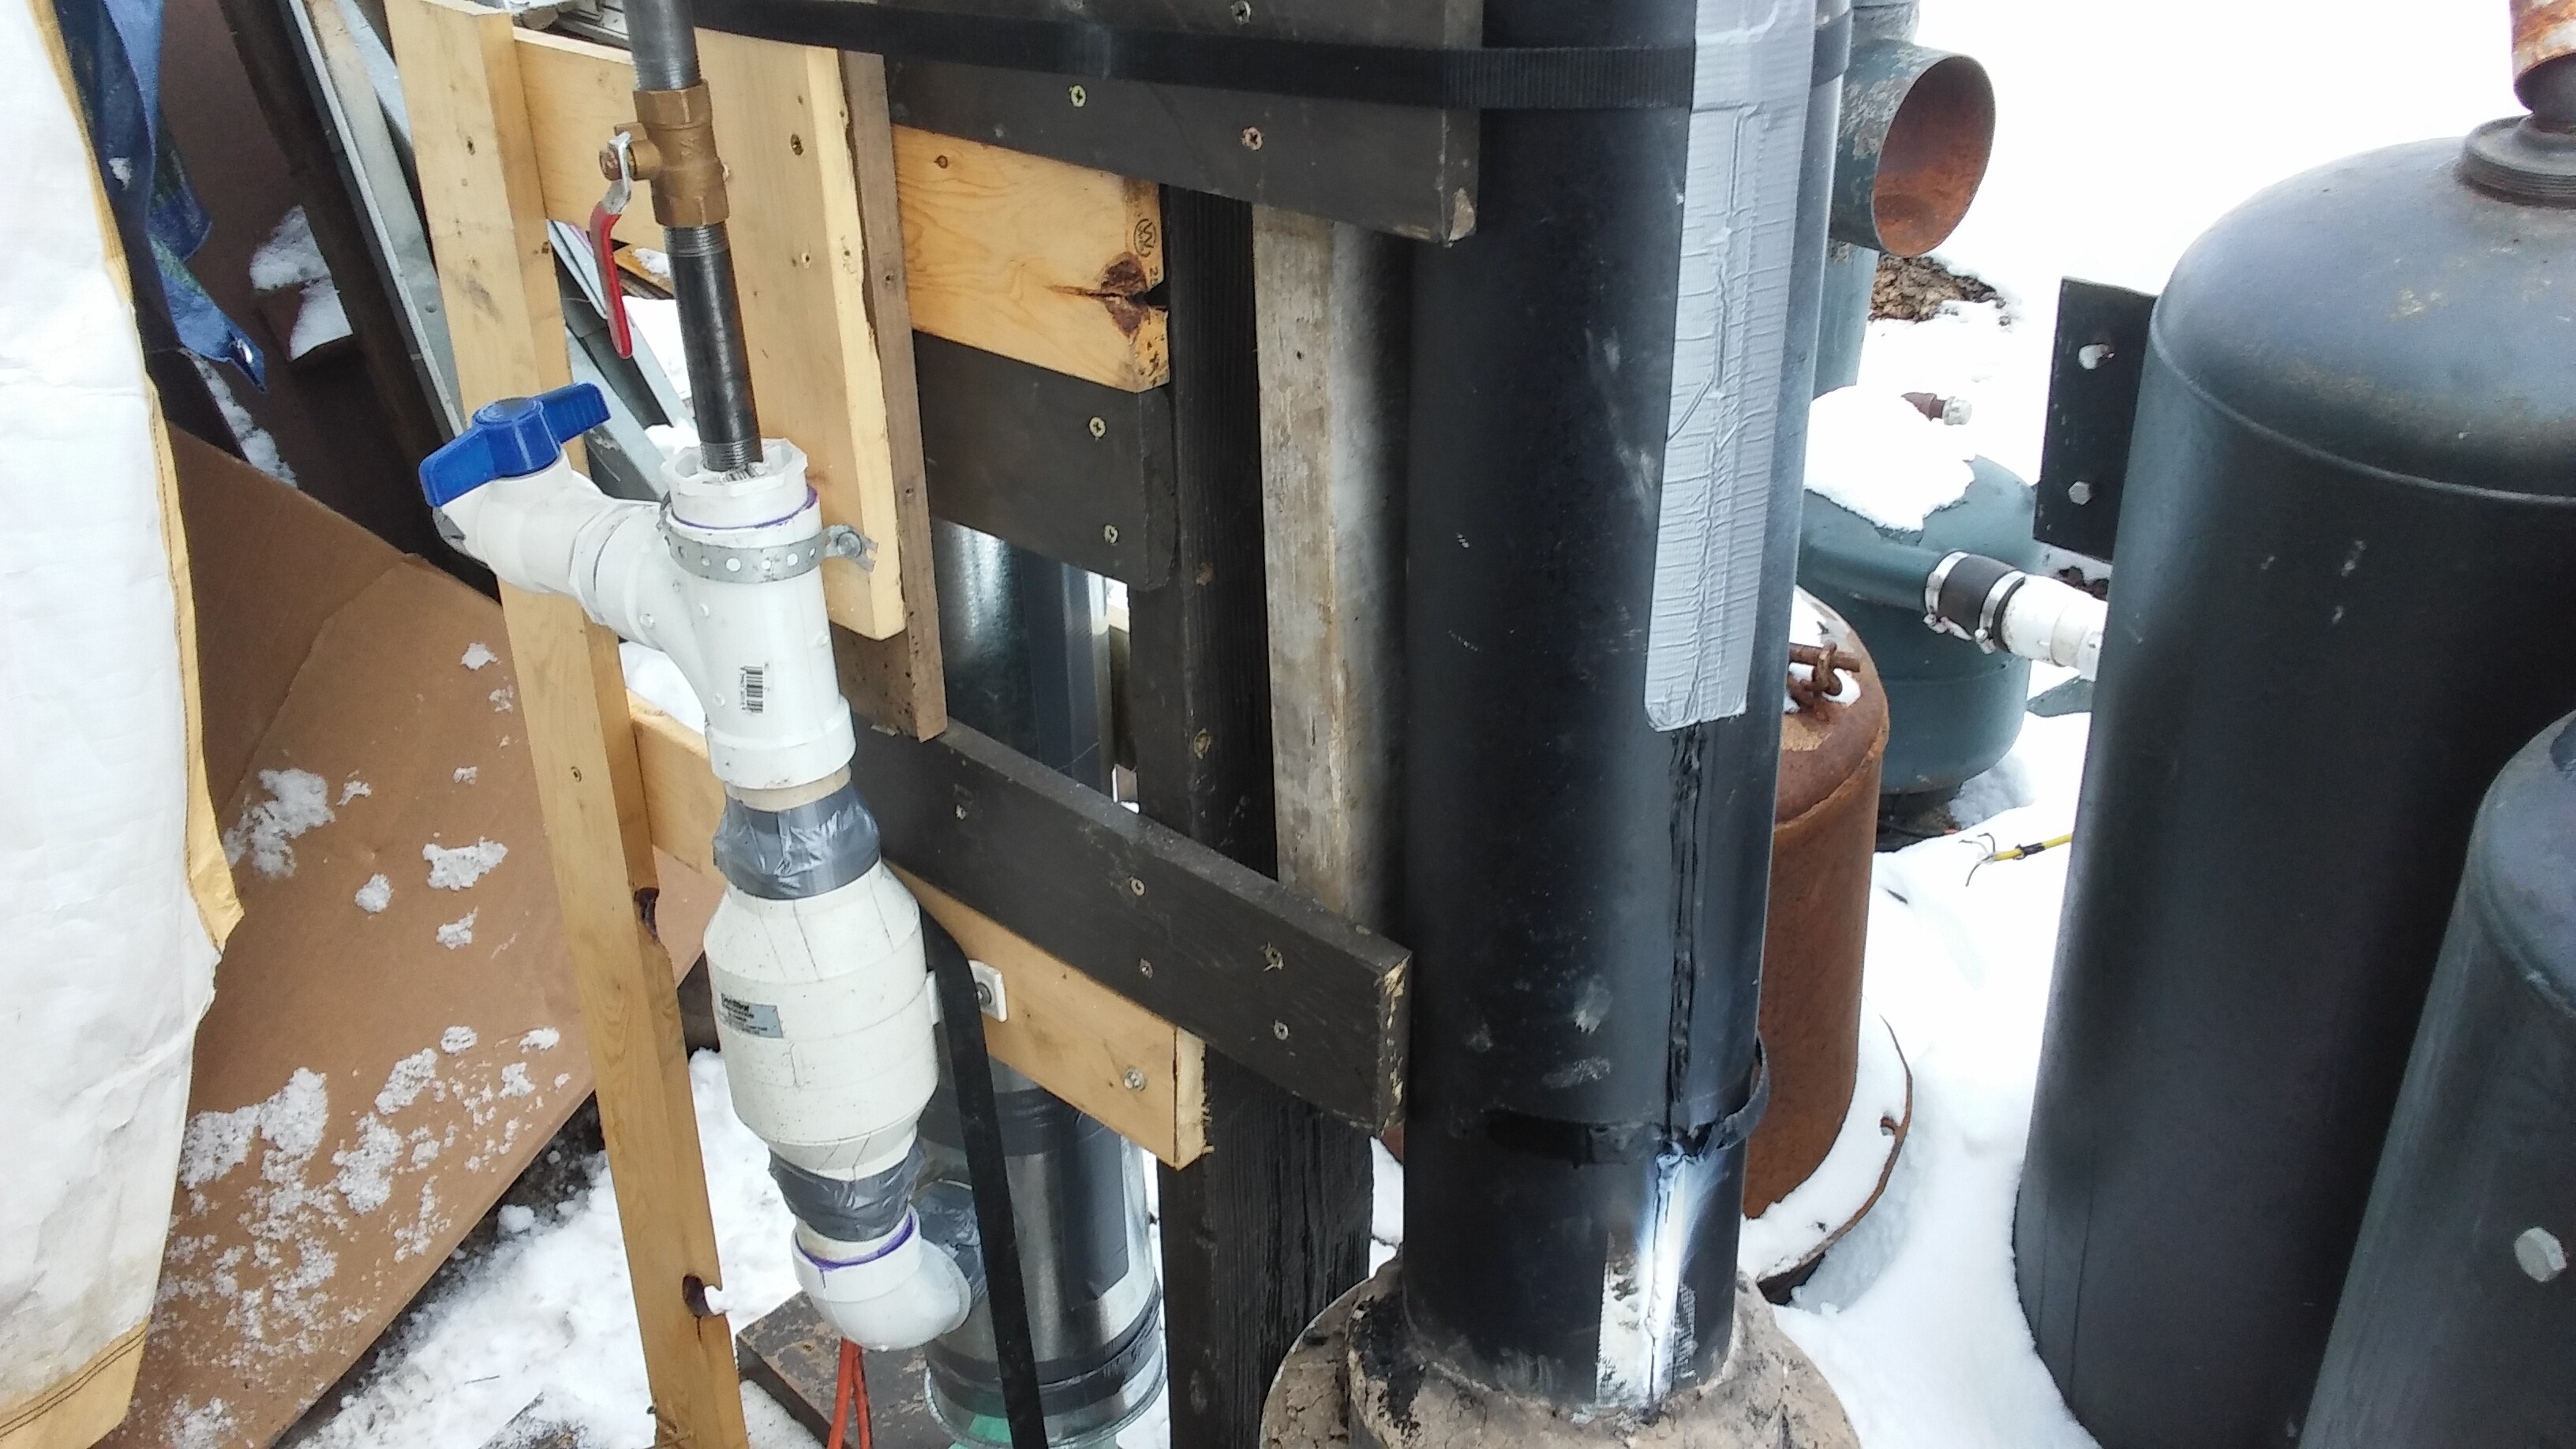
The black pipe is the charcoal hopper. The silver duct is the filter. The only two parts that didn’t come from Menards were the bilge blower and the Harbor Freight ammo box. The bilge blower is to provide 12 volt suction but there is also a duct fan below the filter media in the silver duct so the bilge blower is not absolutely necessary.
I like the thought of a “one shopping cart” build. Sounds like sort of a fun way to standardize a simplefire. I will say that I think your filter looks overkill to me. You could probably get away with cramming some filter media into the ammo box, or at most using some 4" pvc with a sock filter inside before the pump. I bet a section of furnace filter would work pretty well, if you just flicked the dust off each time you filled the hopper. I know you like making things complicated, but its called a Simple fire for a reason
Have you tested this unit yet? What sort of an engine is it going to run?
I pretty much agree about the filter Carl. I had the duct and duct fan already and I don’t really know how much filter media is required so I figure go big or go home. Actually there is a pre-filter in the ammo box.
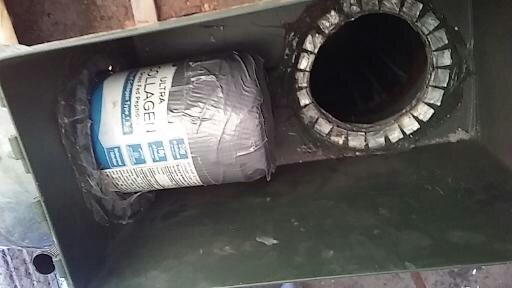
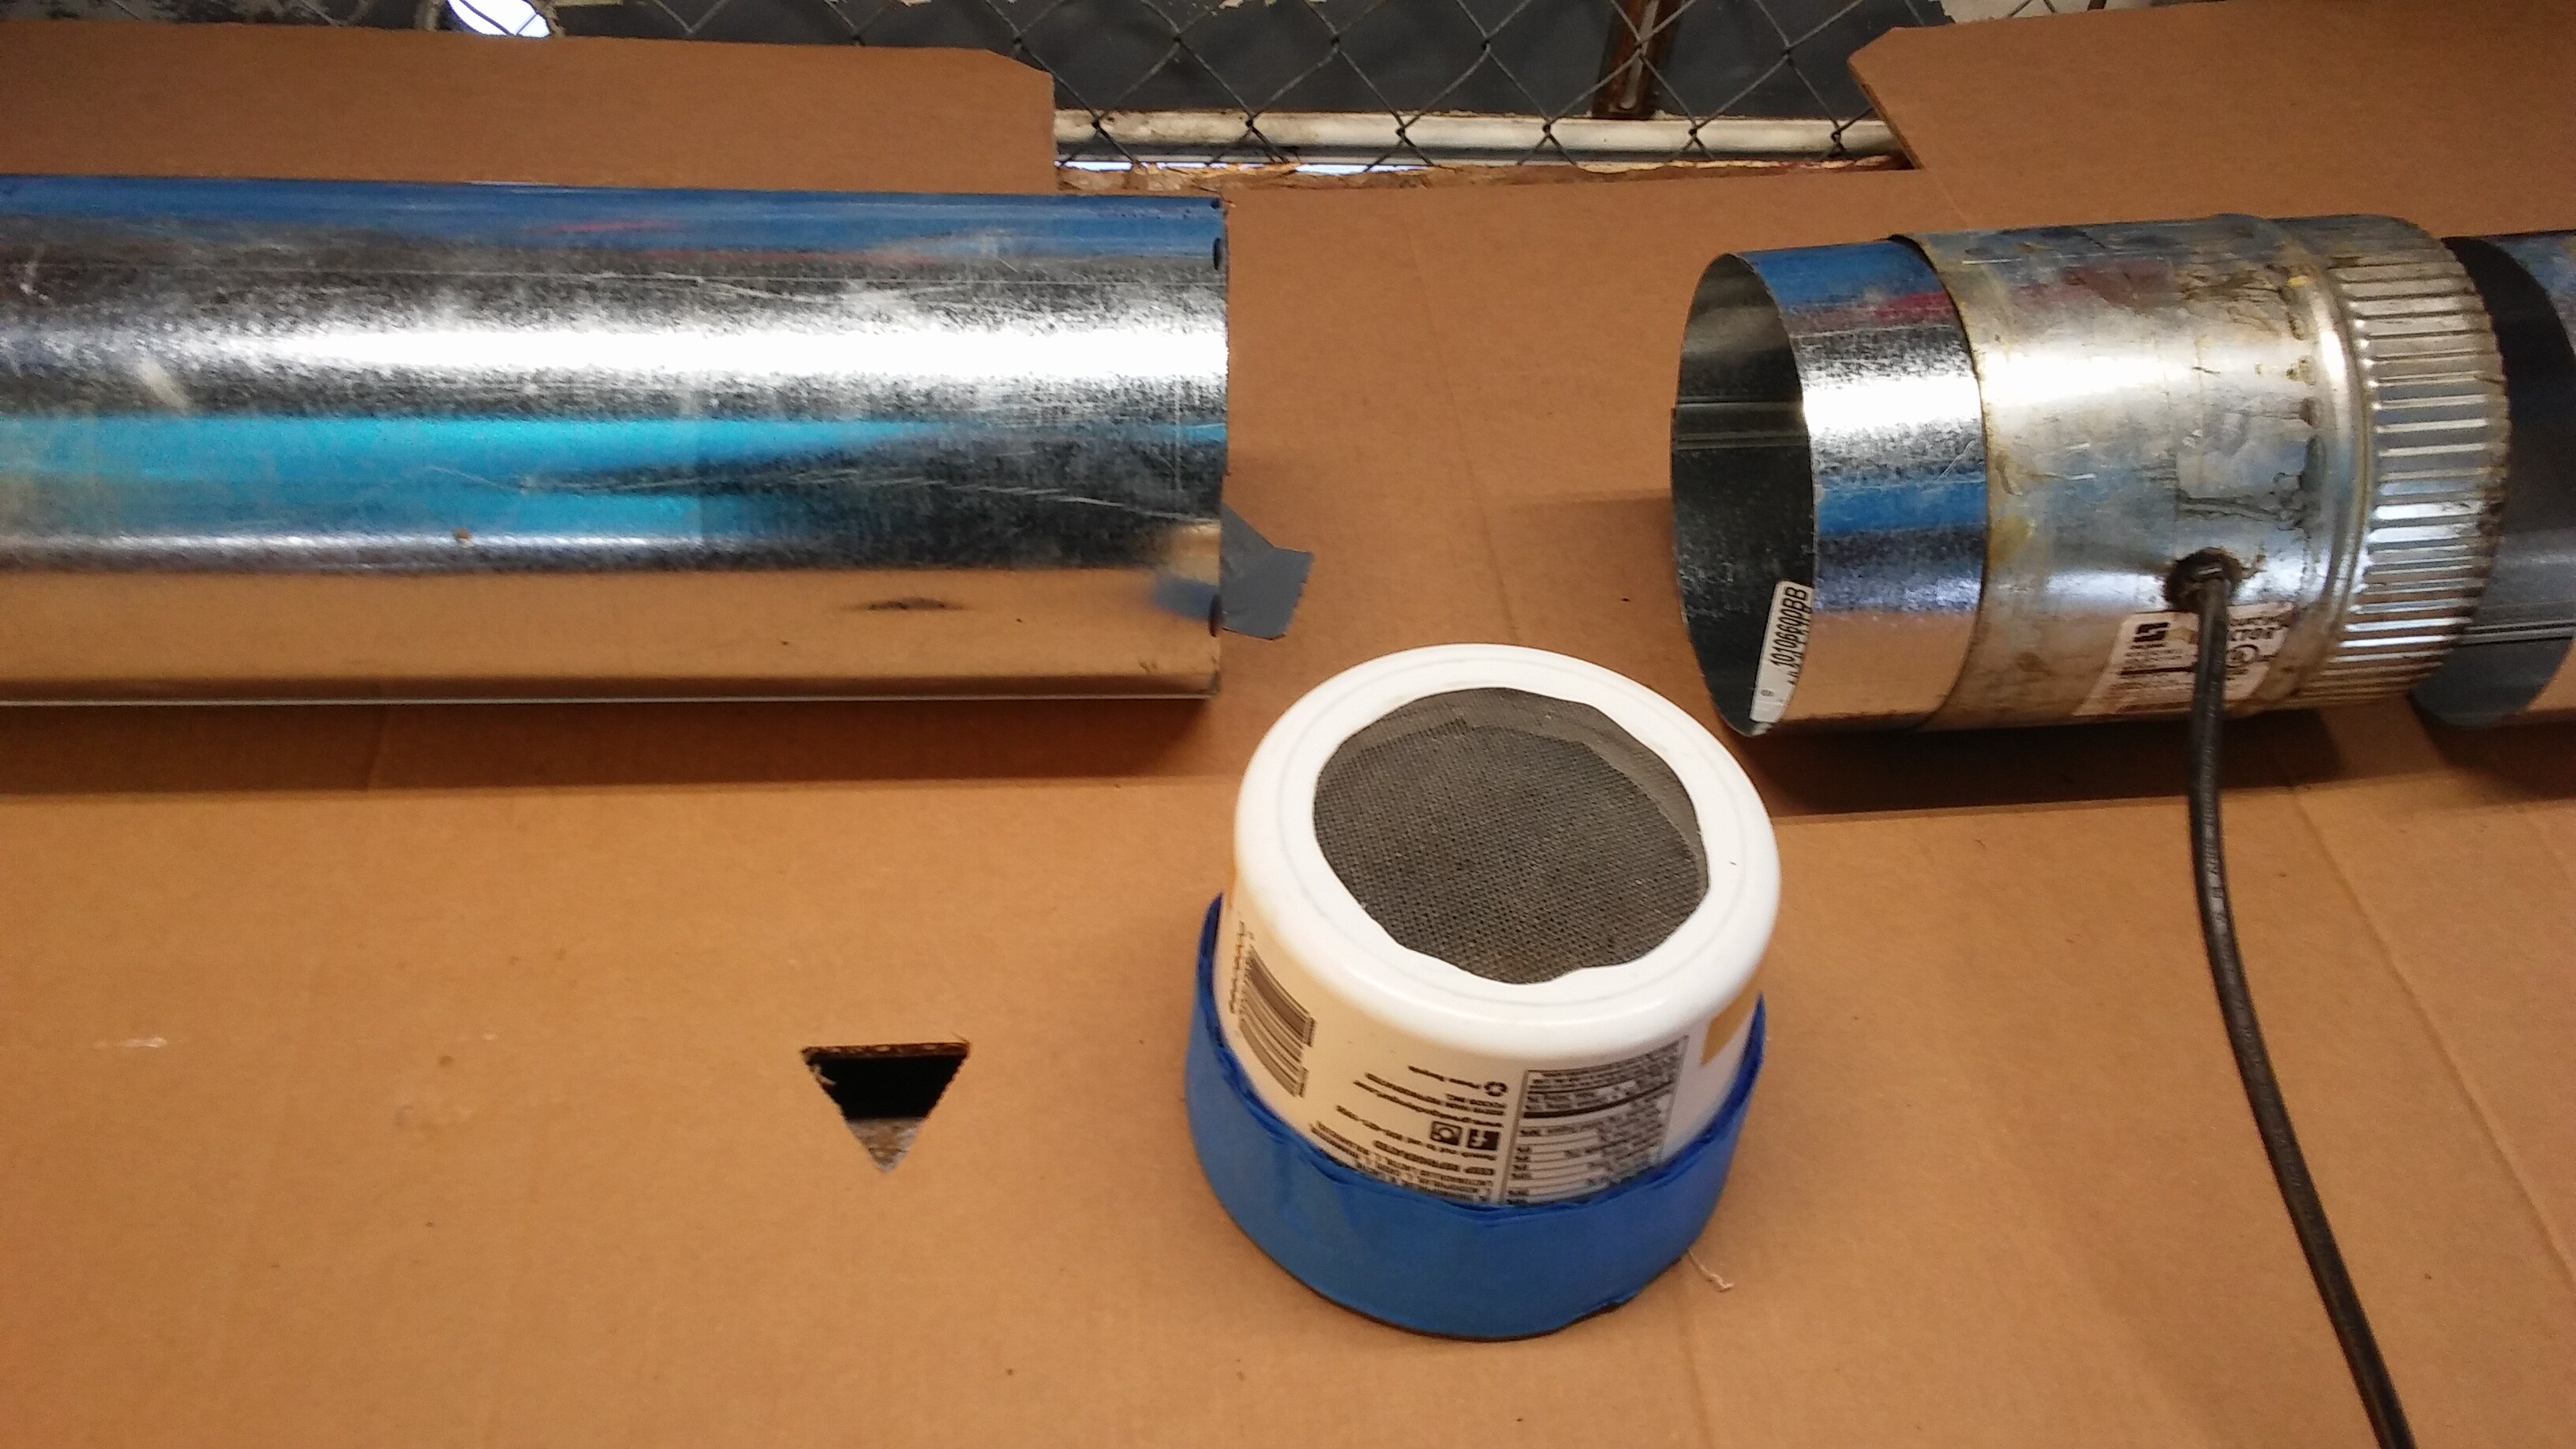
That’s a plastic container of some sort with the end cut out, a piece of window screen taped over it and stuffed full of steel wool. I’m going to test it on a 420cc preditor off my saw mill.
Tom i don’t think steel wool will be much good as it will quickly rust away and small partials will get sucked into your engine , you would be better off going with stainless steel pot scrubbers , or just use some open cell foam and or lambs wool .
I read how you like to challenge yourself and over complicate systems and that’s fine , just make sure that your system is 100% air tight and your good to go , any problems will flaring or engine not starting or running poorly then air leaks will be first on the list .
all the best
Dave
Thanks Dave . I know you are right. I sprayed the steel wool with WD 40 before I put it in. I do have stainless scrubbies in my foam crete gun but they are not something I see in the stores I frequent. The ones I have in the gun I ordered on-line. I was planning on running this thing which is why I used the steel wool. Now I don’t like how it looks so I’m going to do some simple modifications. I’m not real clear on why wool is better than cotton or any other fabric. Also I know a lot of people use foam. I just don’t see how you get any volume of air through it.
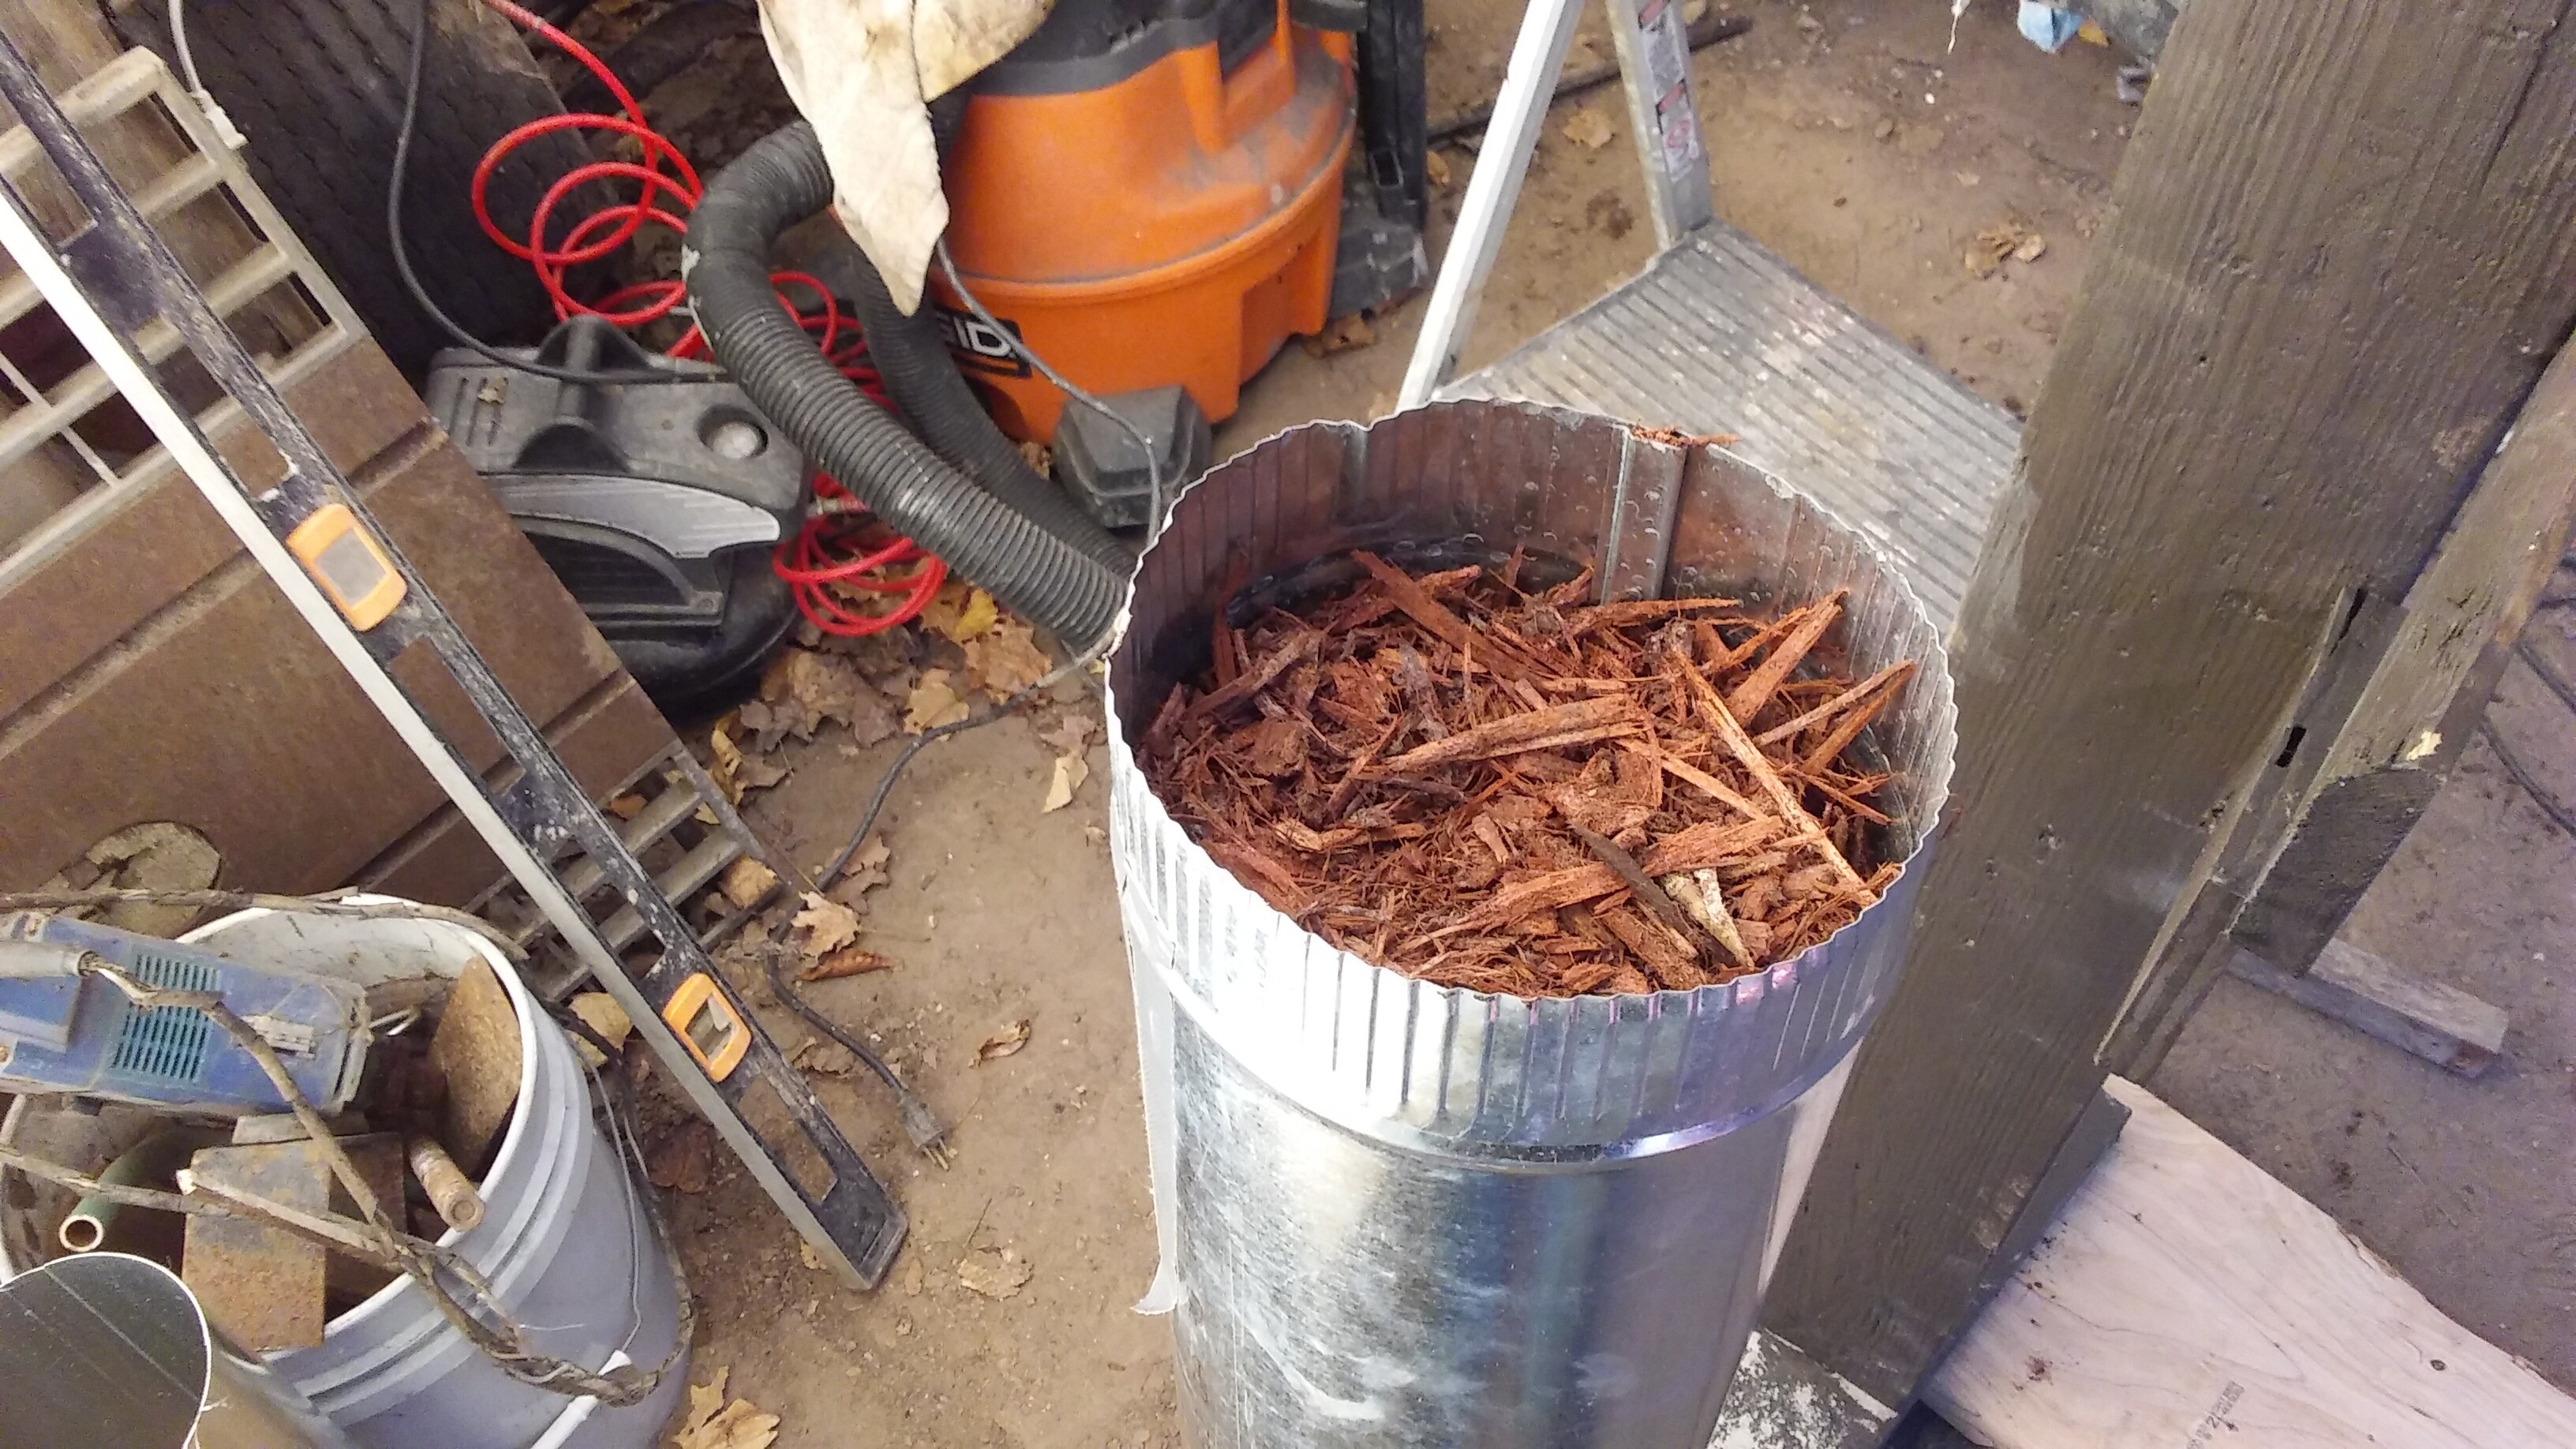
This is the filter assembly. Most of it isn’t filter media. There is the end cap clean out, the section where the gas exits. The duct fan, a cut up yoghert container with a screen it to hold back the filter media which is just shredded mulch. I don’t like how it looks coming out of the Ammo box. I’m going to change that to a four inch elbow before the transition to the six inch duct. Learned my lesson about air leaks. Every seam is siliconed and either duct taped or sprayed with flex seal.
Hey TomH
Sheep’s wool is about the actual fibers, how they are made. Tubes with overlapping shingle type outers.
Wad up and put a double handful of 100% loose woven sheep’s wool fabric into a bucket of water. Plunge it until no more bubbles.
Do the same with a loose woven cotton towel.
Now just edge hang them up to drip out and become pass through permeable again.
The sheep wool will gravity drain out.
Cotton wicks up.
Do a spot drying test with the wife’s hair drier.
Do not just trust me. Don’t just believe me. Prove me.
Then do a still wet burn test with a torch.
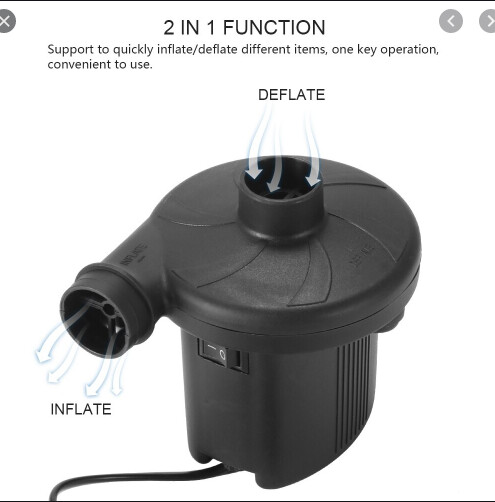
Tom , you said u want to make it simple for all the local homesteaders , so please lose the inline ducted fan ,do not use it at all its not needed in your system i can see only problems with air leaks , if it was me i would not even have a bilge blower fan in line ,i would come straight out of your gasifier into your filter tube filled with some old woolen socks or a jumper/blanket cut down to fit your 6 inch tube not overly packed take the open cell foam cut into a 6 inch round made to plug fit the tube and then seal the filter cannister lid with a outlet for a 1 inch sump pipe there i would use a mattress pump to start it once you have gas then onto engine .
Just another way it could be done not trying to be smart just want to see you succeed first time with a smile
Dave
I’ll have to see if I have some wool around Steve. I mostly dress in polar fleece made from shredded up milk jugs. I never liked the feel of wool on my skin. Pretty sure I have some wool socks that were gifted and I never wore. I’ll replace the steel wool with those.
I’m taking your your suggestions under advisement Dave. Koen also mentioned that much less suction was needed for a system like this as well… Both the Duct fan and the bilge blower are 130 CFM. That type bilge blower worked fine on my other charcoal unit. Don’t see a problem with air leaks from the duct fan. It has a cord that comes out of it with a grommet. I buried that in silicone. It’s already put together so I’m going to test it as it sits and if I have a problem I’ll pull it out. Can’t see how it adds any complexity. I don’t understand about the mattress pump. Isn’t it pulling outside air into the system? I’m not discounting these suggestions. You guys have been running these for a long time now and have certainly done all the trial and error. Only tools used on this build was a 41/2 in angle grinder, a drill motor, a measuring tape and a pair of right cut tin snips.
Had other things needed doing today so I didn’t get at it. Tomorrow I have to contort myself under the dash and pull apart the blower fan on my wifes Nissan Rogue… Mice have got that bound with carpet insulation again. That is a horrible, half day job. Hope to run the first test on the gasifier this week end. Still have to make a flange to bolt to the carb before I can run an engine anyway.
Hi tom , this is the type of mattress fan i am talking about , they come on 240/110 or 12 volt dc , all you would do is place the pipe that normally fits onto your carb on the top where it sucks .
Thanks Dave. I like the looks of that. I wonder if we gave one of those around here somewhere. I know we have a blow up mattress for horrible idea that someone may want to visit and spend the night. Anyway thanks. I’m going to get a few of those to have on hand. I now have to decide whether to make an even simpler Simple Fire or the down draft charcoal unit that’s discussed in a different thread.
Tom you have already made a fantastic looking updraft unit i seem to remember , if that ran as well as you had hoped it would , then while idea’s are flowing now might be the right time to have a crack at the downdraft , i am trying my best to get all the items i need to have another go at a downdraft ,so it will be good to have a few builders all seeing what they can come up with , just have to find the time as well in the next week or two .
Dave
I used Gary Gilmore’s simple fire with Koen’s vertical nozzle.
I would love to build one of Koen’s
Vertical pipe char gassers. So simple! And with proper forethought no welding.
Like most of you I just don’t have the time or money.
Just broke drivers side front axle on my truck today. Going to cost hundreds to have it fixed!
Got to love life off grid. Where its a 4 wheeling adventure just to go to town!!! Ah well if it’s not one thing it will be something else!!
What kind of front axle do your have. If it’s from a one ton or some 3/4 ton trucks it will pull right out of the tube with out taking the cover off the pig. If it’s from most half tons you will have to take the cover off and pull a C clip to release the shaft but I wouldn’t pay anybody a hundred dollars an hour to do it. I look it up on You-tube. Not as hard as you might think. Anything I can do, anybody can do. If you have the money to spend and you have to pull the cover, pull the differential and put a locker in there. Double your traction.
Fired up the gasifier today. Did not work. Chased leaks but obviously didn’t find all of them. I’m using a flute nozzle with three holes for the first trial. No water drip.
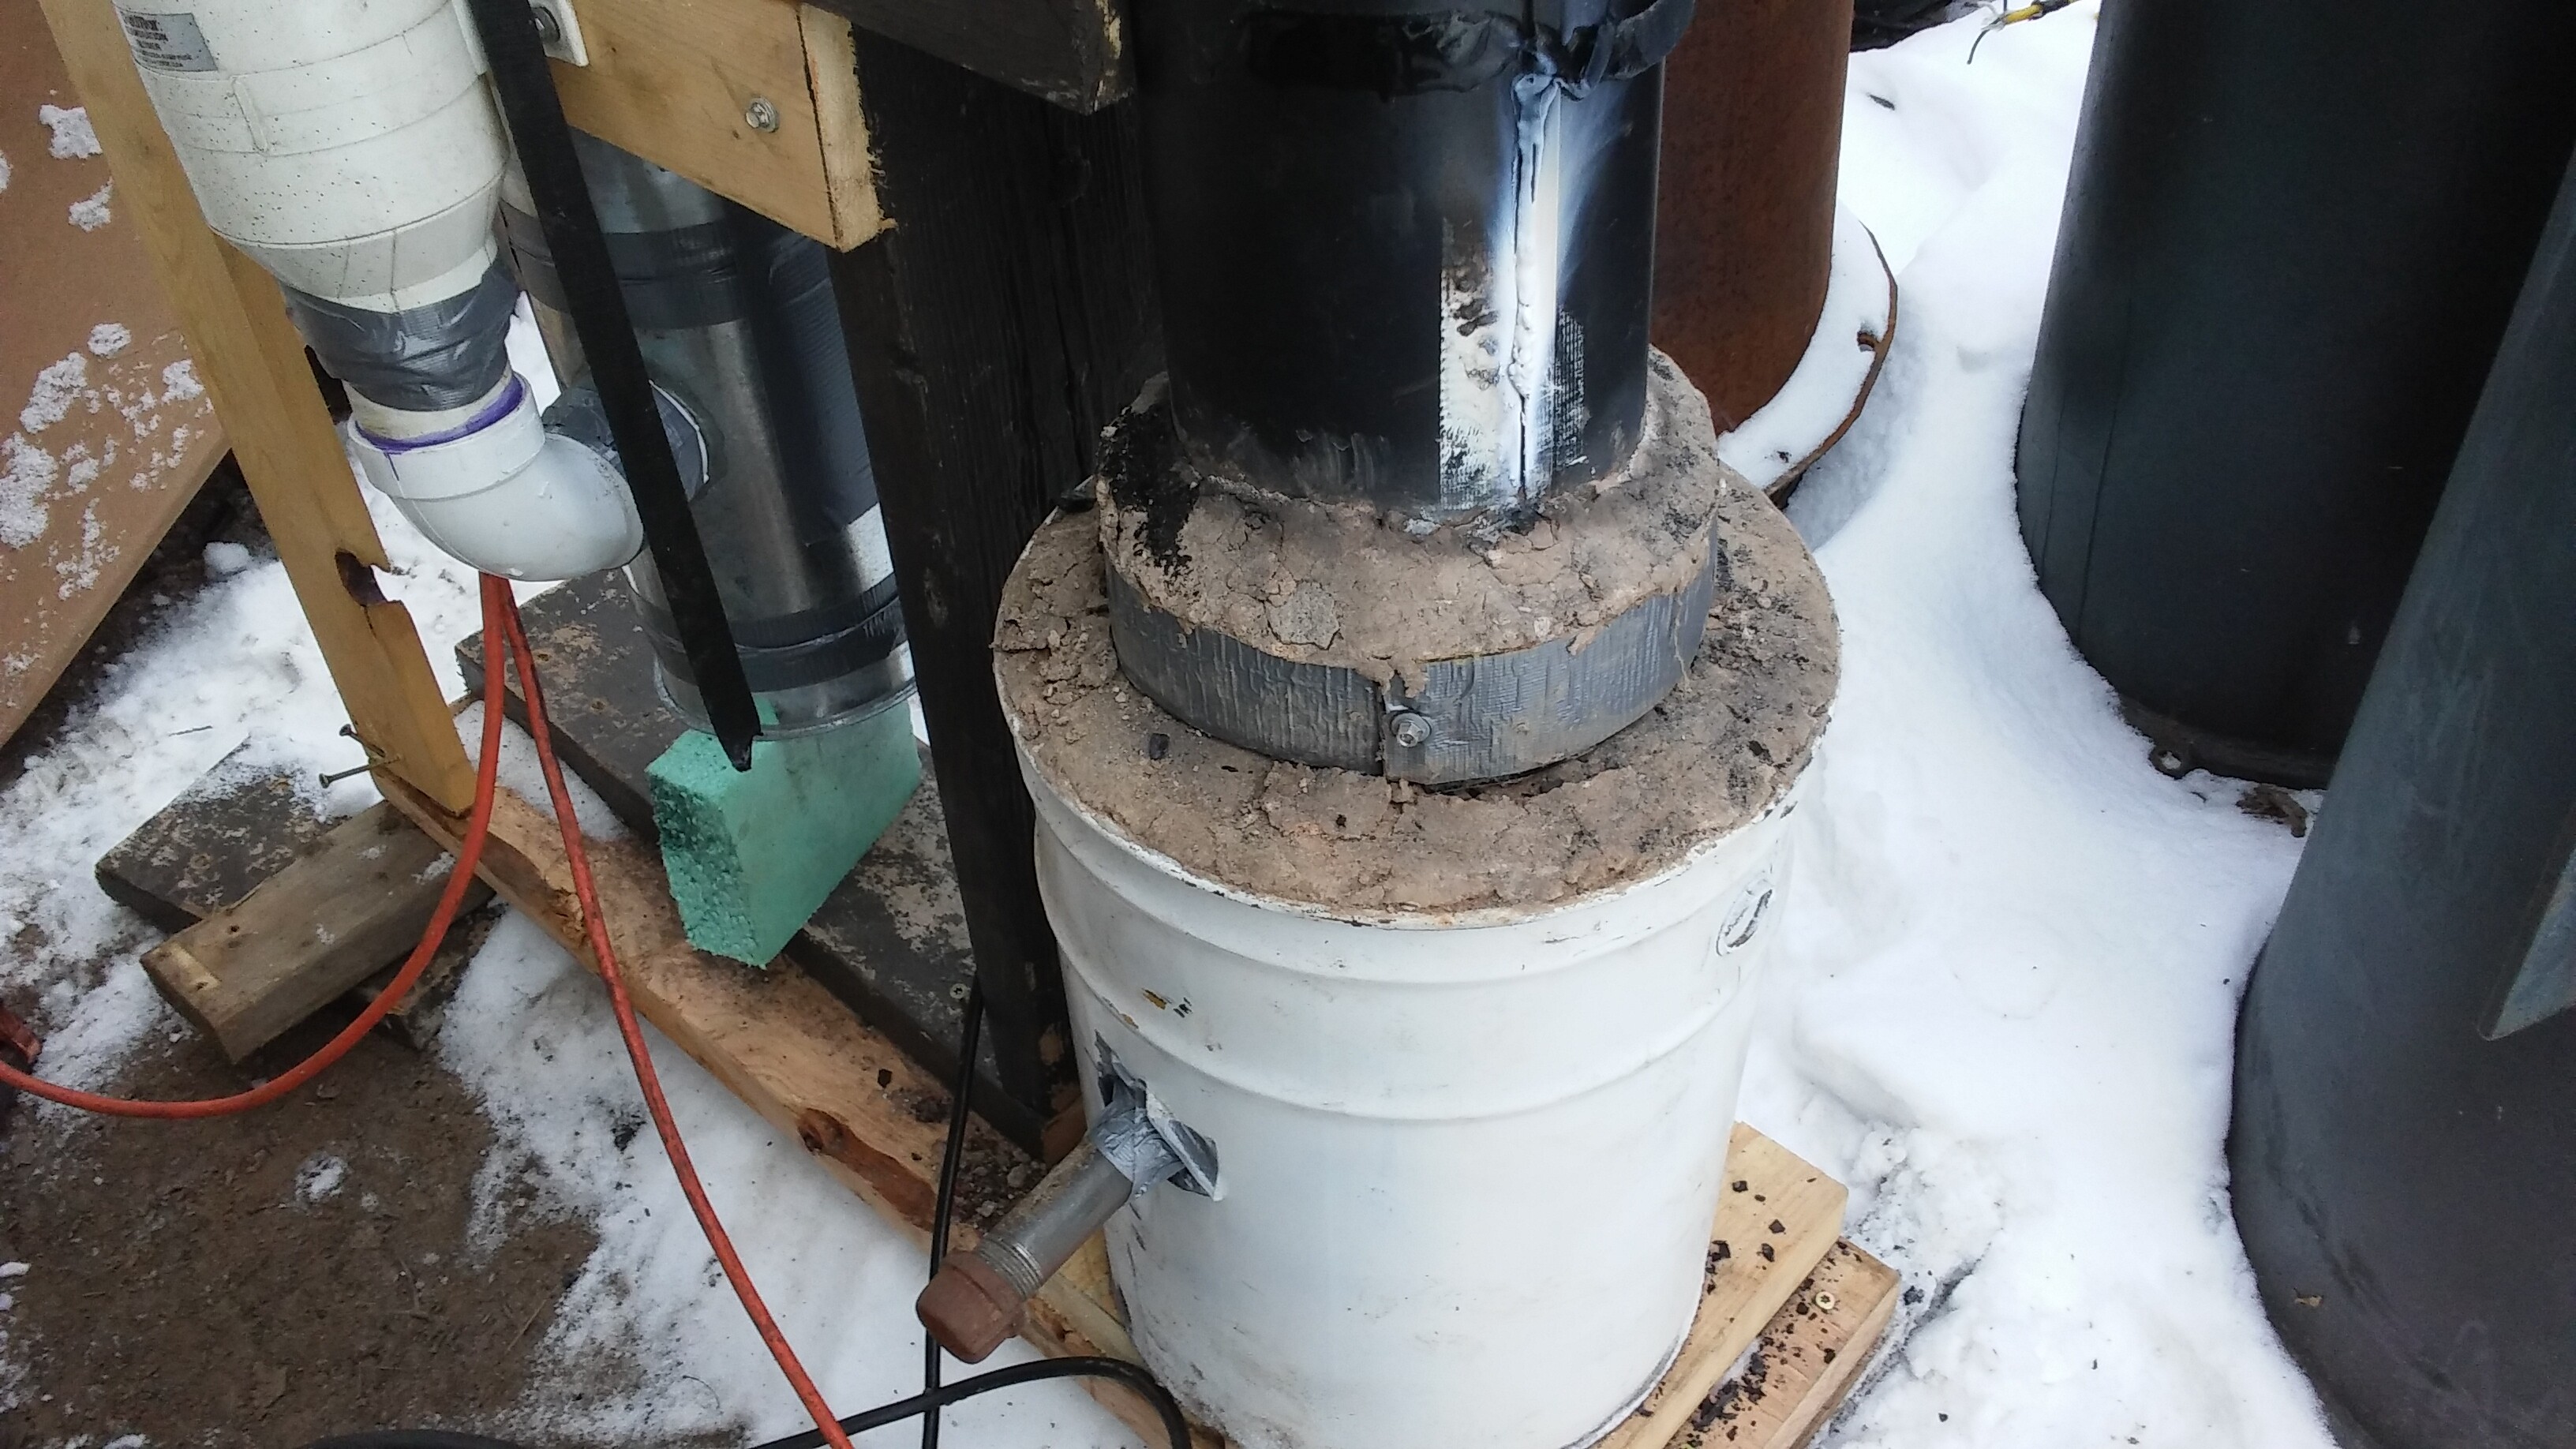
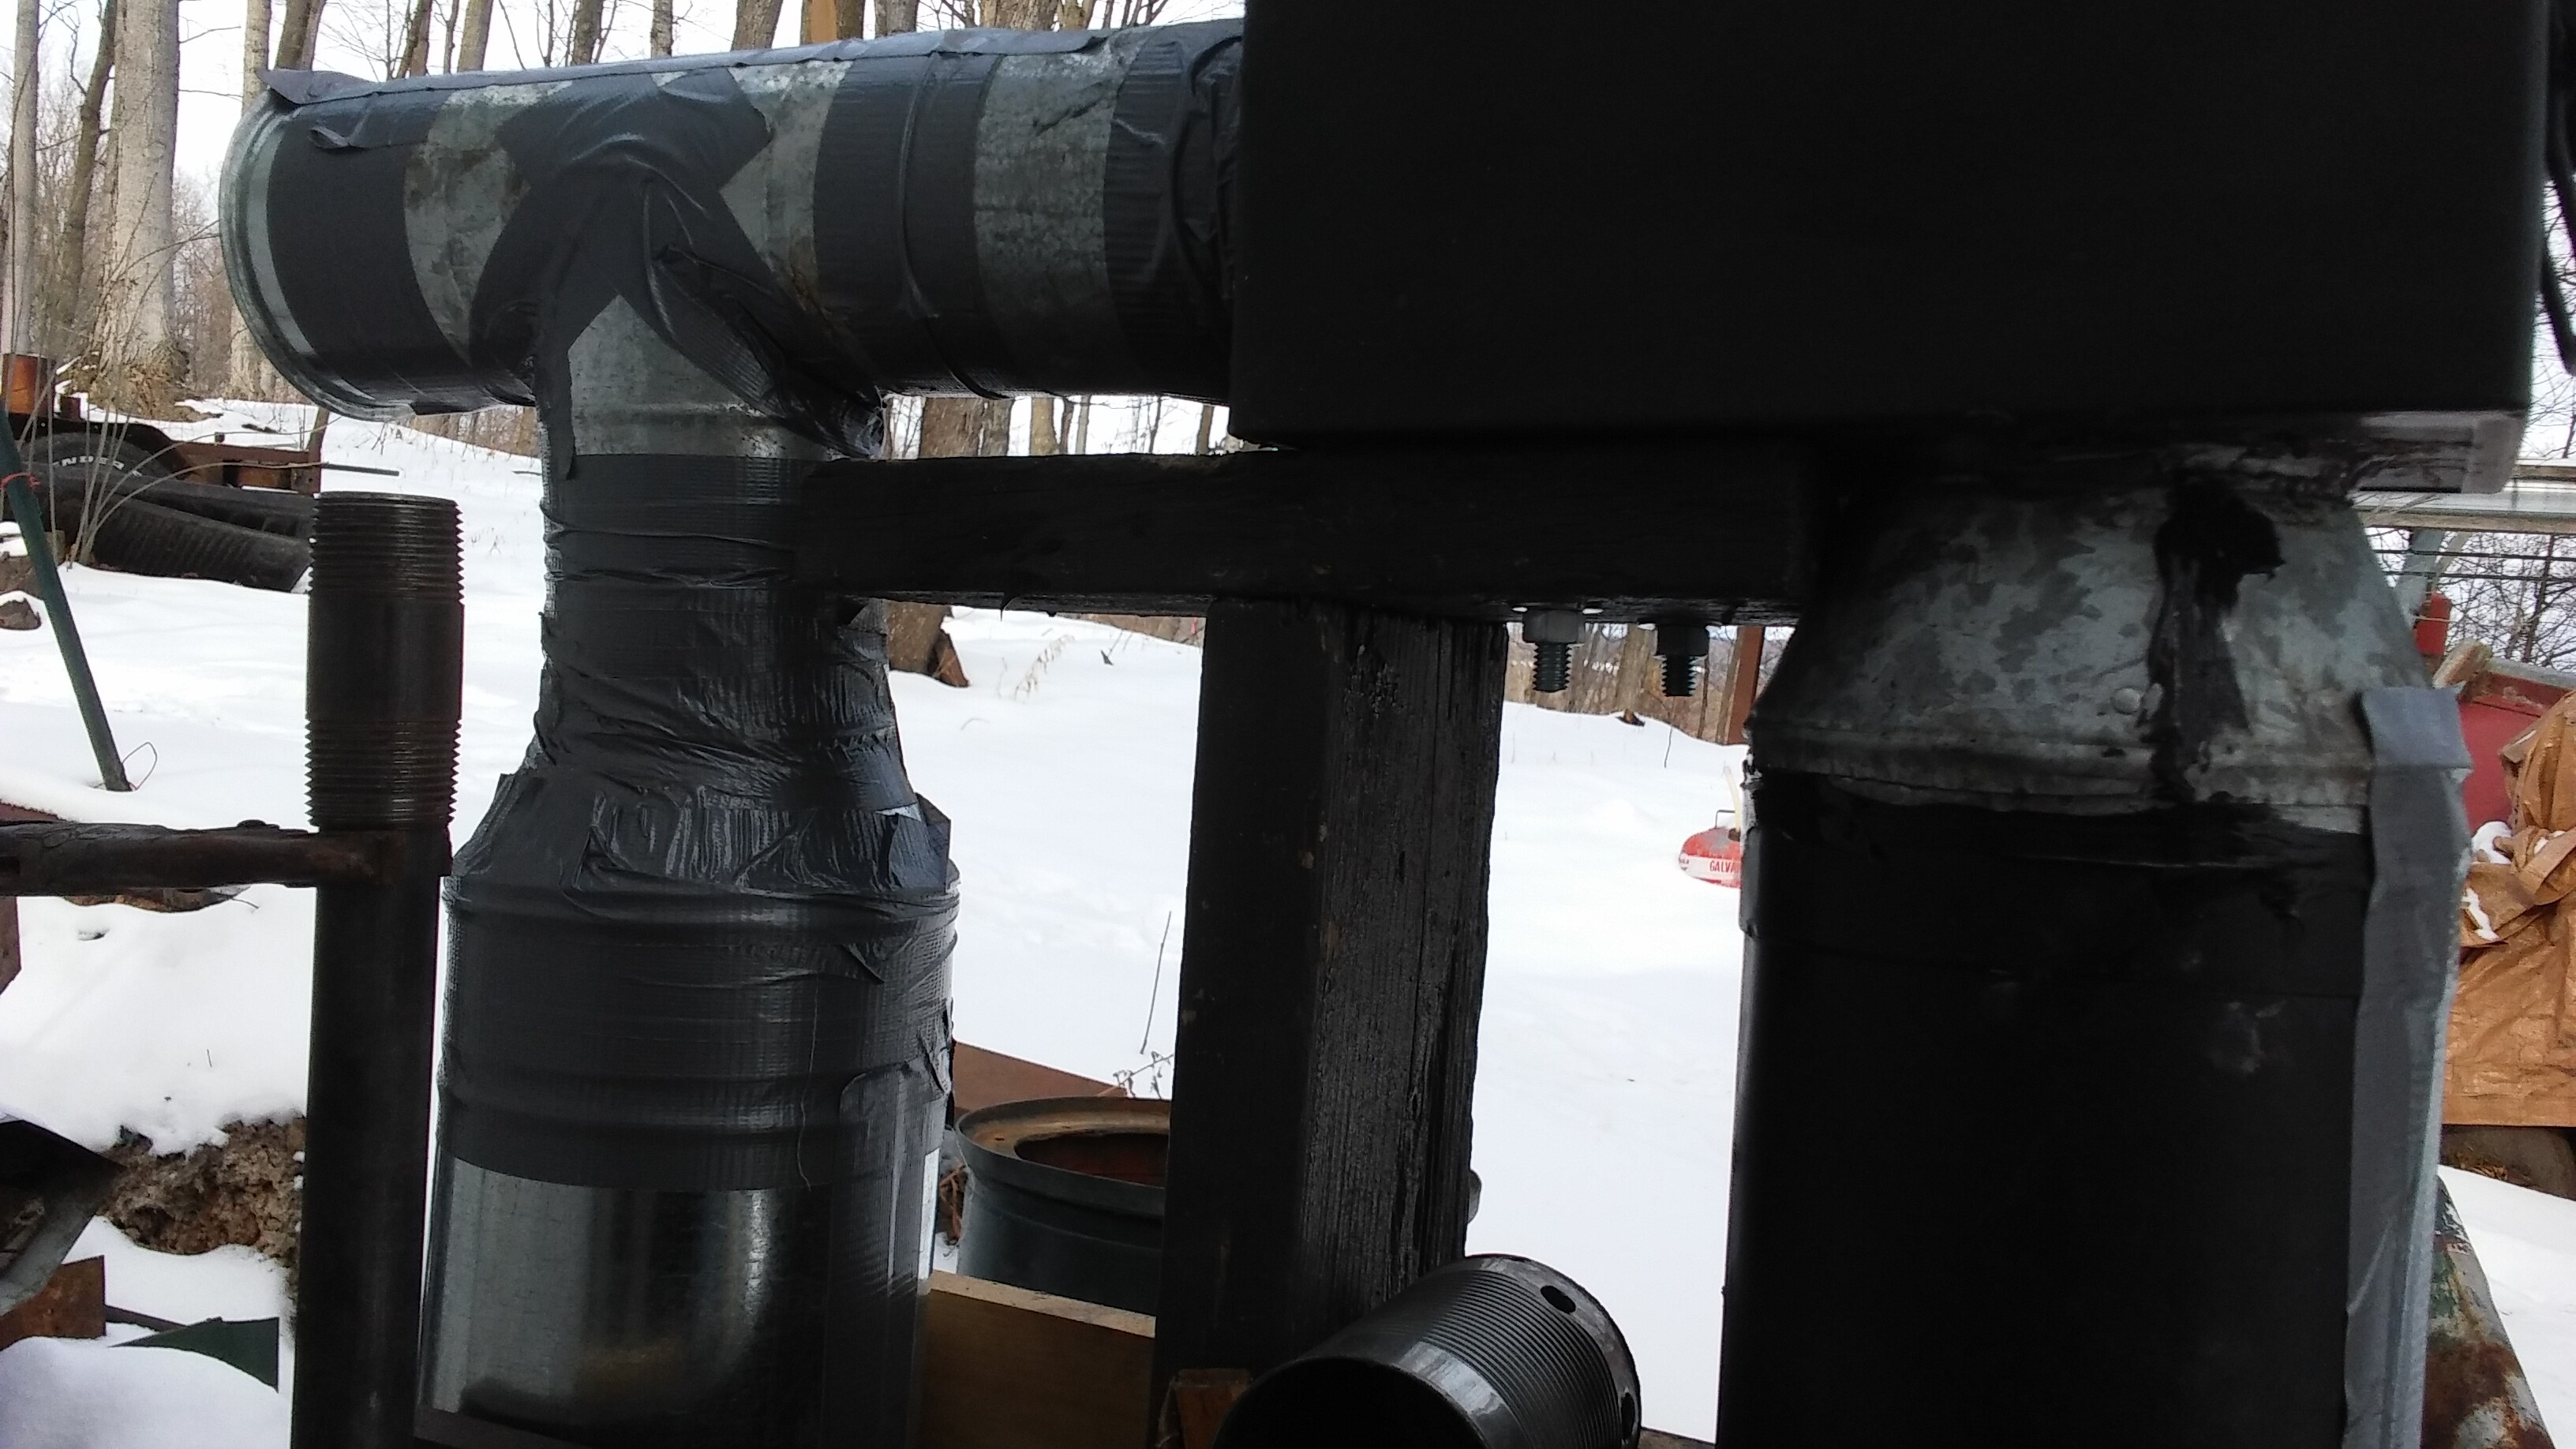
I started out using the duct fan as a blower. Heat in the reactor was tolerable with that. Then I switched to the bilge blower. That created so much heat that the area in the photo hit around 800F which was hot enough to burn away the silicone high temp sealant I put on the stove pipe seam. I sealed the seam even though I figured the pipe itself should be air tight.
The area between the white burn section and the duct tape dropped to about 200F very quickly and the rest of the pipe around 100 to110F. I think Koen and Dave both mentioned that it would not need as much suction as the bilge blower provided. They were right of course. I have a half roll of duct tape on this thing. Should not be any leaks. The one place I may have forgotten about was the bolts through the bottom of the Ammo Can.
Couldn’t do anything about that until it shut down. I took the bulbous elbow from the front of the can out. Too many seams. I changed it for the smaller T. I’ll get the leaks figured out but then I will probably rework the filter end and eliminate the duct In favor of a flex hose and bucket filter. I haven’t seen the screw on bucket lids at the box stores but they may have them. I’m sure I’ll get it sorted out tomorrow. Hard to work outside at 20F. The cob collar in the first pic is to seal the connection of the hopper pipe and the reactor. The outside of the bucket never went above ambient temp. I may extend that collar filled with cob up past the hot zone. I’m using that so that when I want to look at the nozzle or change it, or clean out the ash, I can just unscrew the collar and knock the seal off with a hammer.
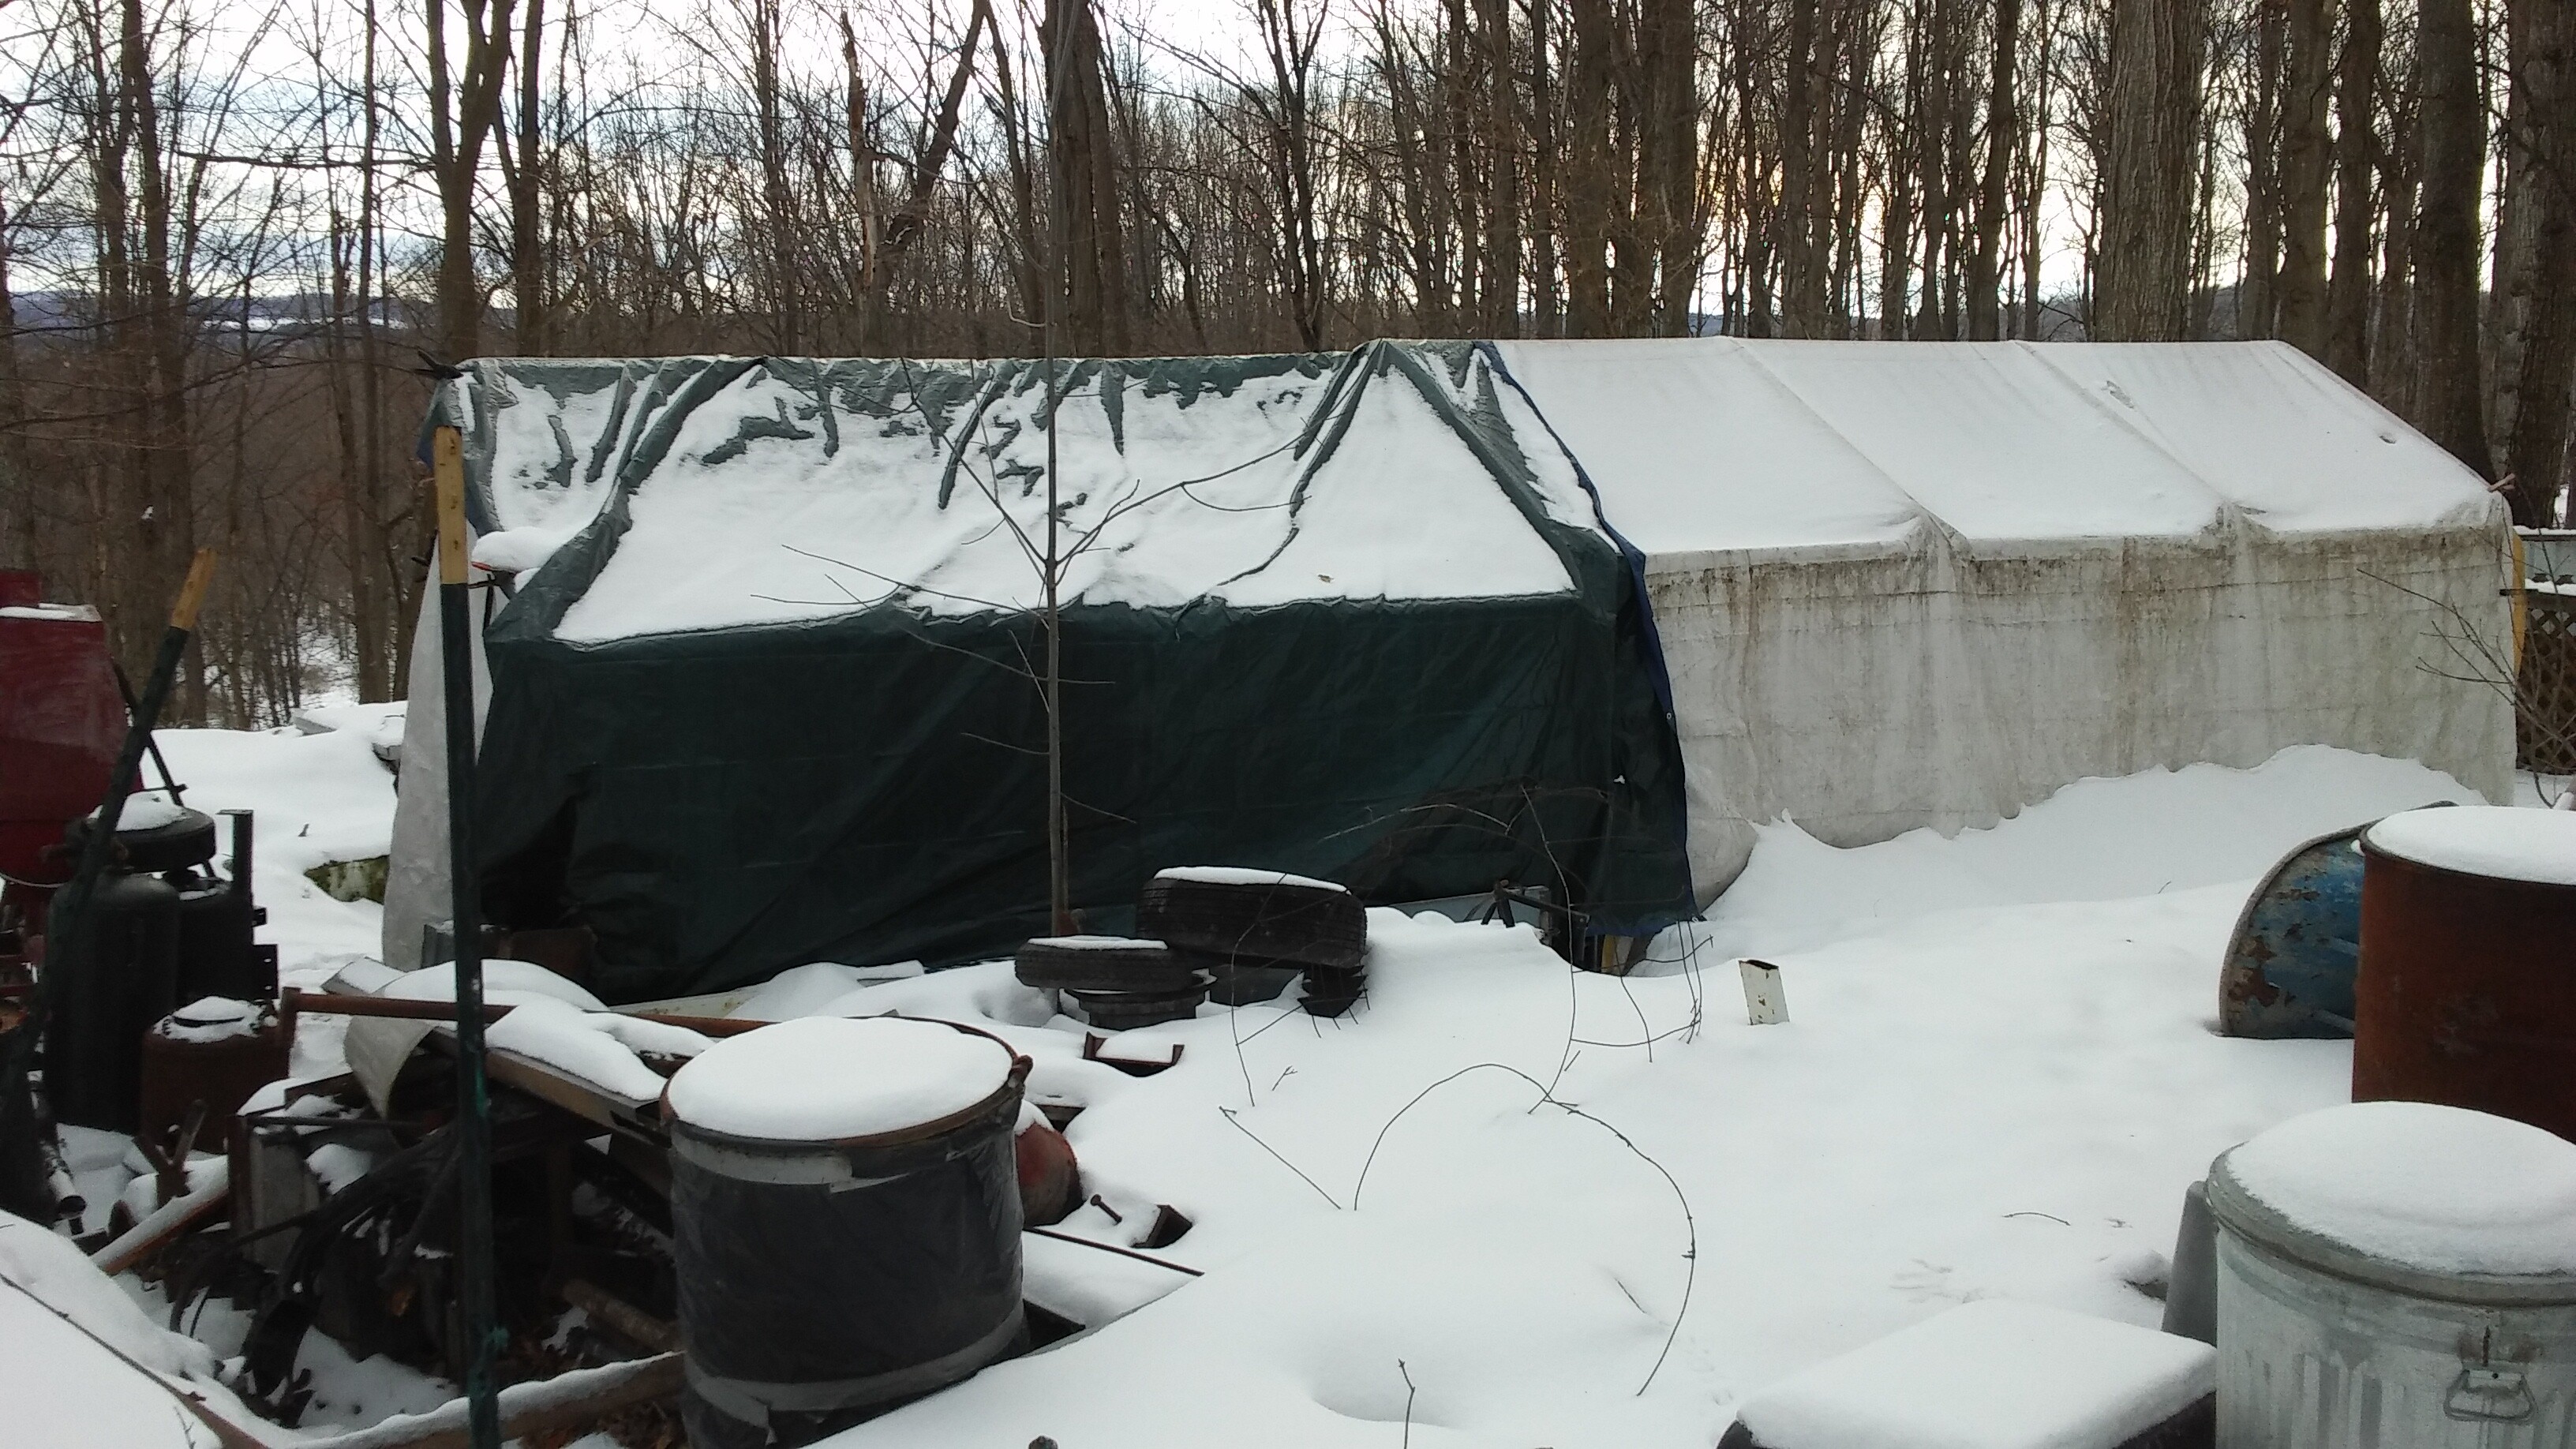
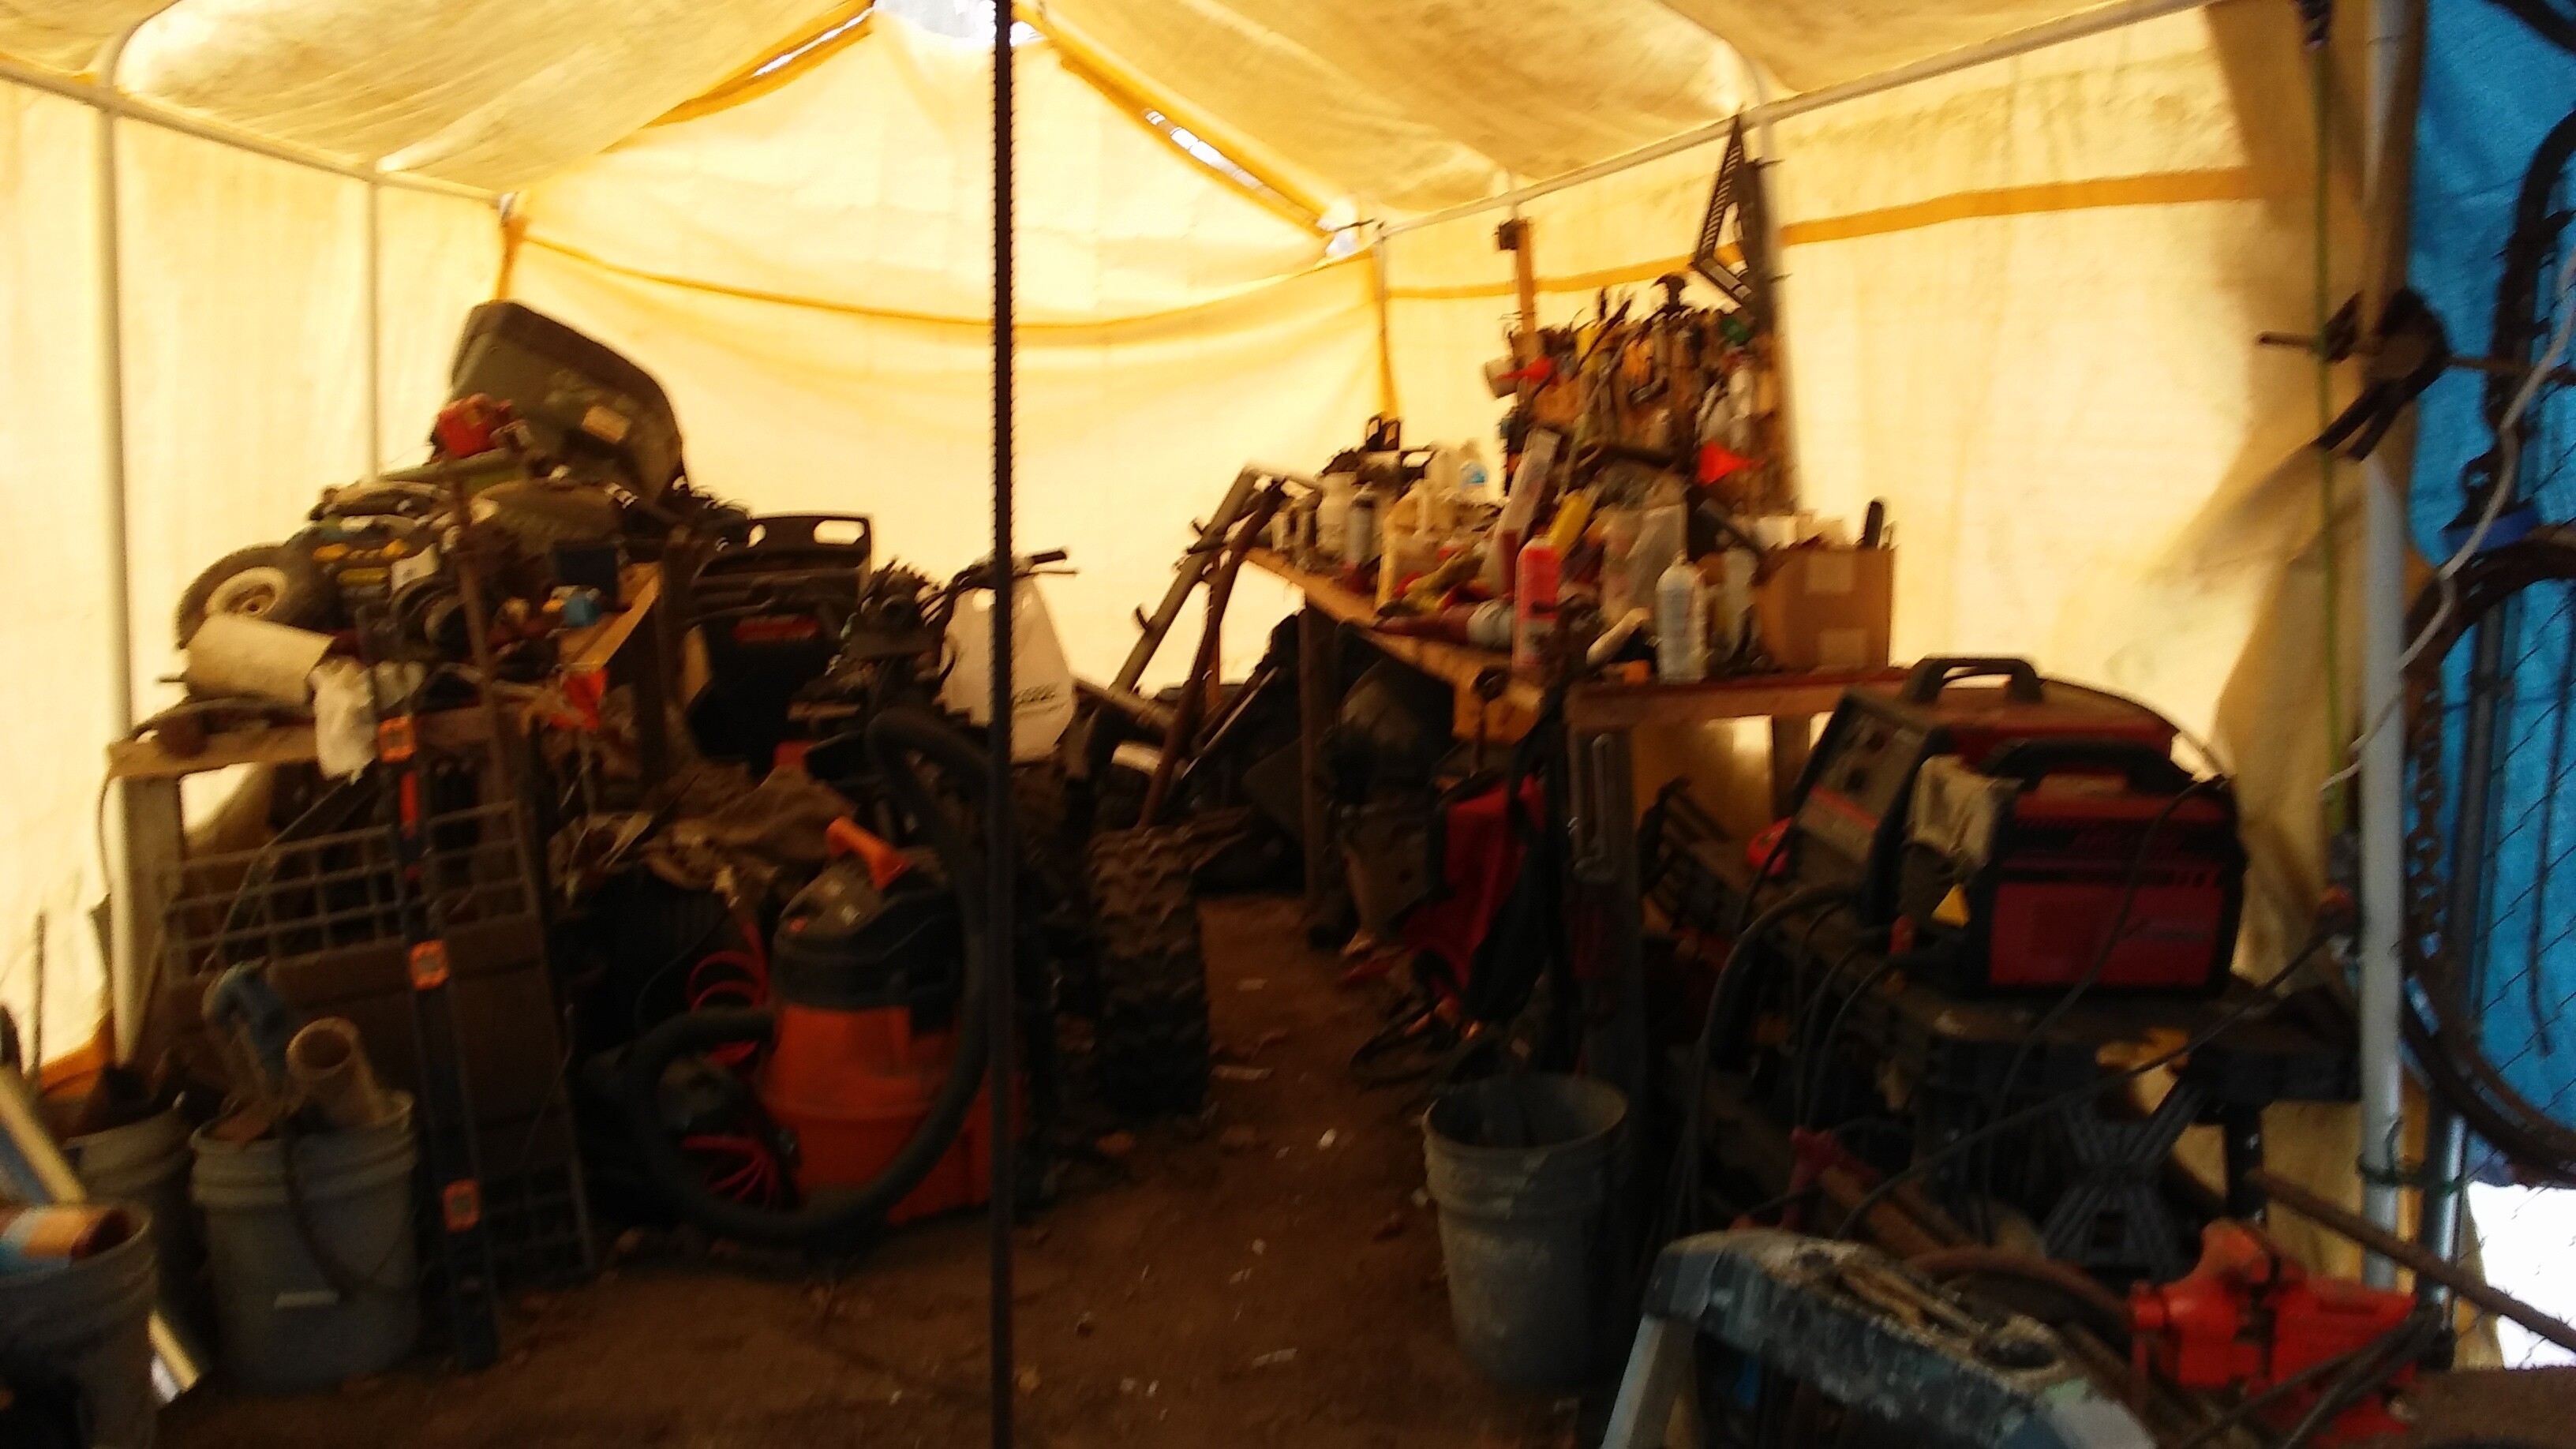
This is a couple of yards down the path from where I used to have a Bridgeport mill and Machinists lathe. I did think it was pretty crafty to take chain link dog kennel panels and make the second covered section. Someday I’m going to die. I hope my son’s appreciate that I’m leaving all this to them.
“Needs must, when the Devil drives the sleigh!”
And I open air in a one day assembled 21’ x 41’ square tube framed, sheet steel roofed “car-port”. (I am avoiding ~$16,000 in permitting and such like property taxes for a new building).
Added side walls a few years ago. And one Public Works Mangers ago. County drone hasn’t notice these yet.
One more Public Works Mangers changing ( the previous’s Helper, promoted) and I’ll add an end wall. Then from carport to a shed classed. With your blue tarp curtain on the other end wall; from the county road visible. Hillbilly-poor, no need to tax me.
Then finally I can wood heat it.
Dem$$$'s devils are the worst, eh?
S.U.
Hi Tom ,
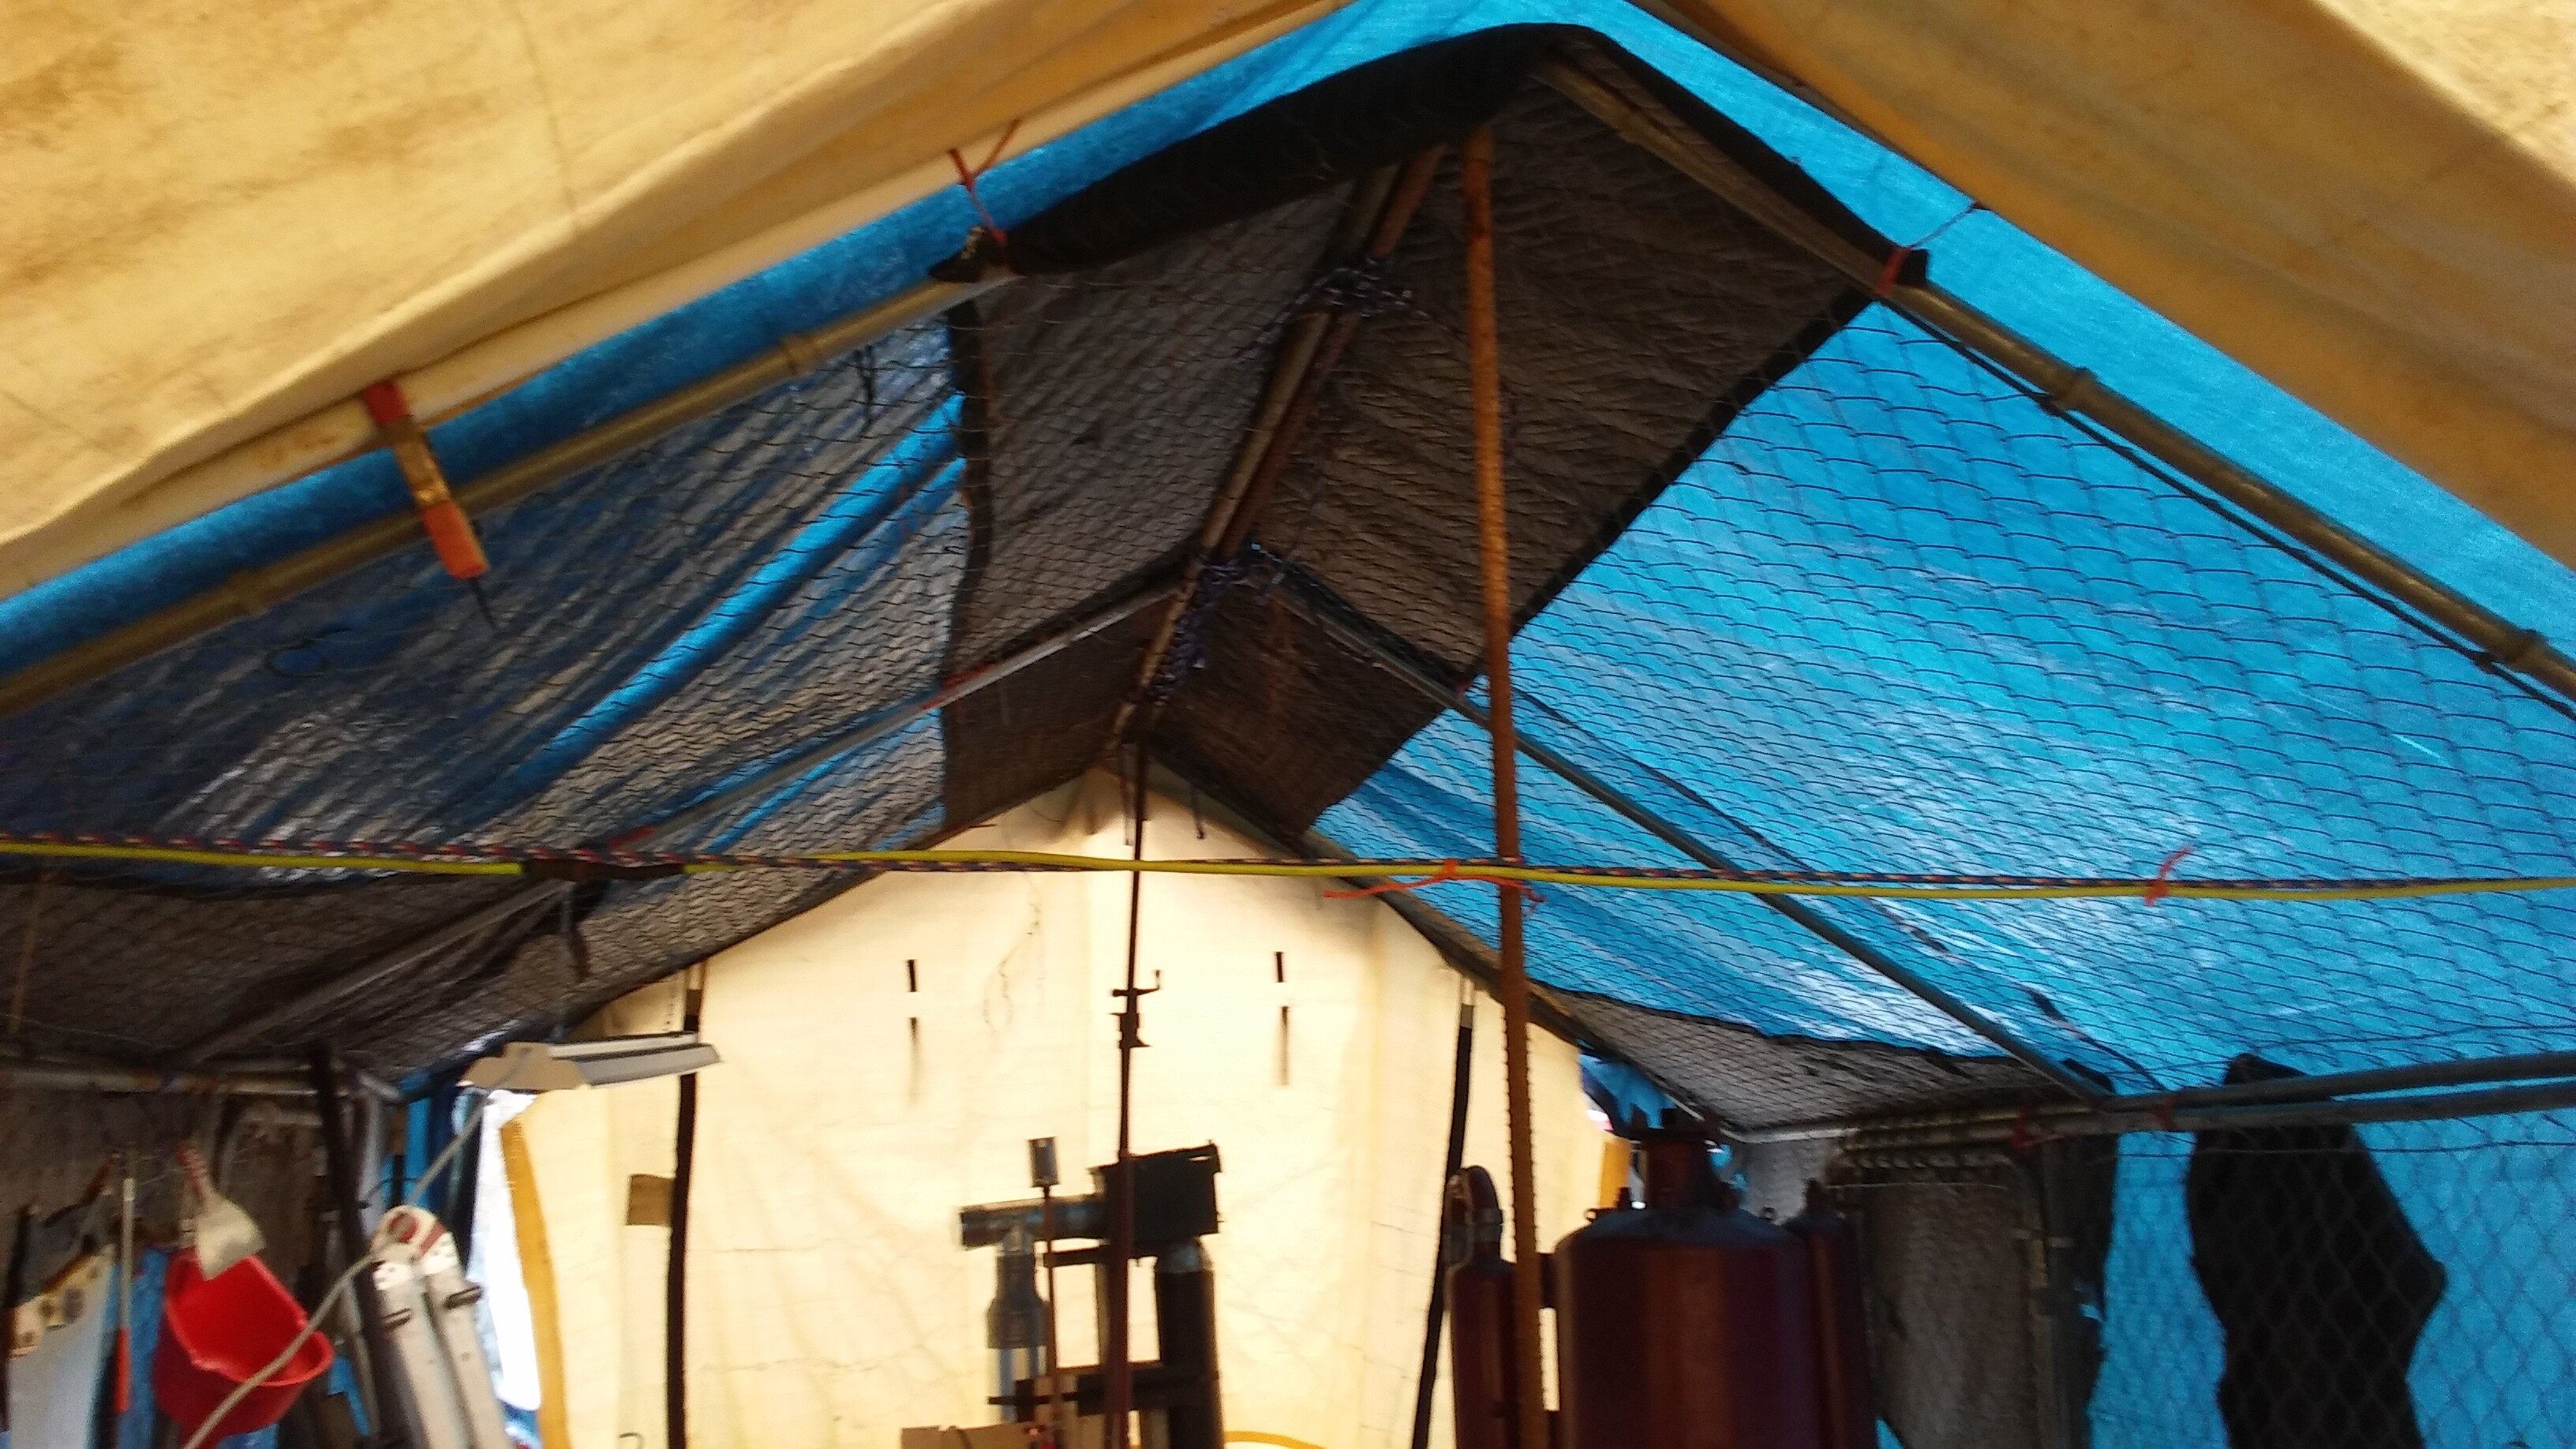
I see what you mean about the tarps, are you going to rebuild your shed that burnt down ? i hope you did not lose too much but i guess there will always be something , i would be happy if i could get under any kind of shelter some days even yesterday it was so hot outside i could not do anything till late afternoon when a cool change came through , today we have rain rain and more rain oh and clouds
at ground level and about 20 degs c cooling down from yesterdays 35 degs .
Those air leaks will be the main problem you will have for sure , and if you can reverse the blower and slow it down so it does not blow so hard and allow it to blow backwards through your system and pipework and then spray spray spray everything with soapy water and watch for blowing bubbles you wont need a powerful blow just a good breeze one will soon show those bubble .
Fingers crossed for you .
Dave
You can have a under 100SF shed here without permits Steve. I have a couple of those for storage mostly. One is set up to work on small engines. I doubt I’ll ever have another shop Dave. Things are such now that, as Steve mentioned, the local officials want to tax you and meddle in your business at every turn. My biggest regret is that just before the fire I had squirreled away enough money to buy a Bendpak hoist. In my dreams I work under a raised in the air vehicle. I never liked doing it, but somewhere down the line I developed a phobia about laying under a car or truck. If I have to do it now it better not take more than about a minute to get it done.
I intend to do just what you recommended today. 1 AM and I’m still awake again so I’m hoping I have enough energy to get something done. Maybe some body has everything work perfectly on the first try. Never been my experience. Right now I’m betting that those bolt holes may be the problem. They are the only things not wrapped in duct tape now. Who would have thought what even the small amount of air they could bring in would dilute the gas enough that it wouldn’t flare. I am enjoying the gasifier learning and building process though.
If you guys in the welding discussion read this I recommend you go watch an industrial robot weld sometime.