I didn’t look at the details of the grinder, but it did look fun.  He probably needs his own thread for that thing.
2 Likes
I had overlooked Jakob’s charcoal making system. I just went back and viewed all the vids. Good stuff! I’m going out now to light up my TLUD.
2 Likes
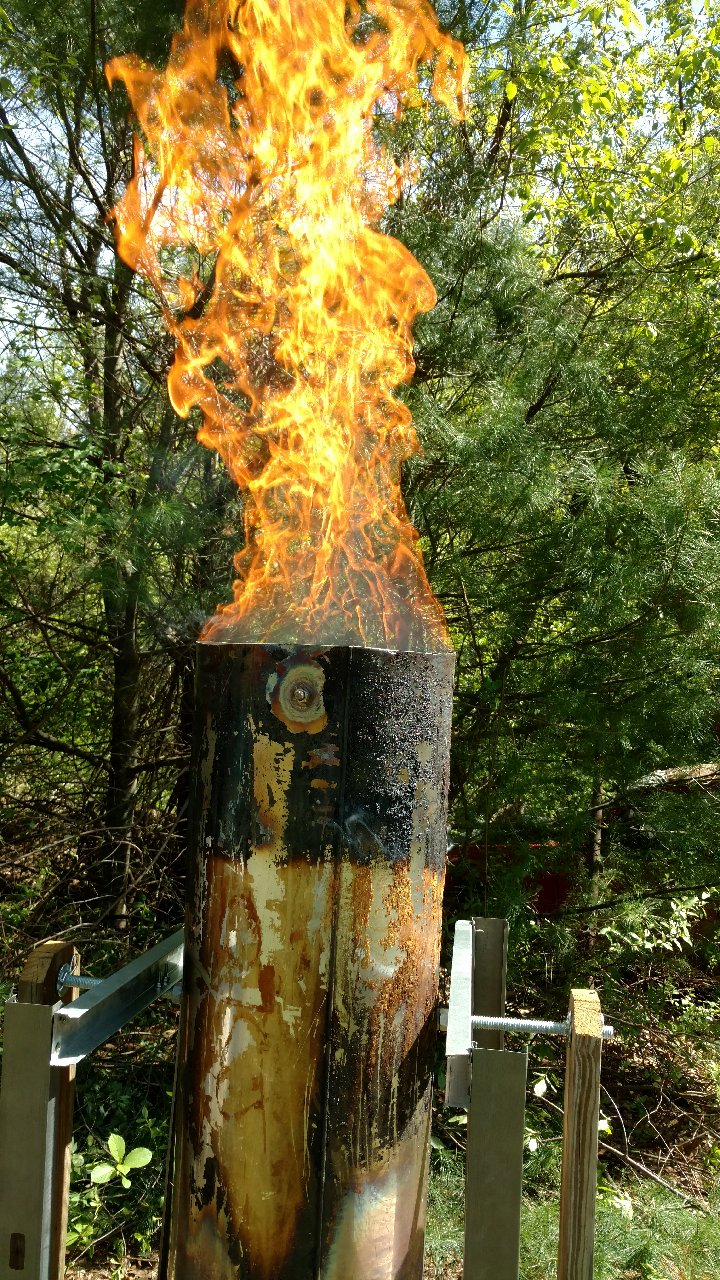
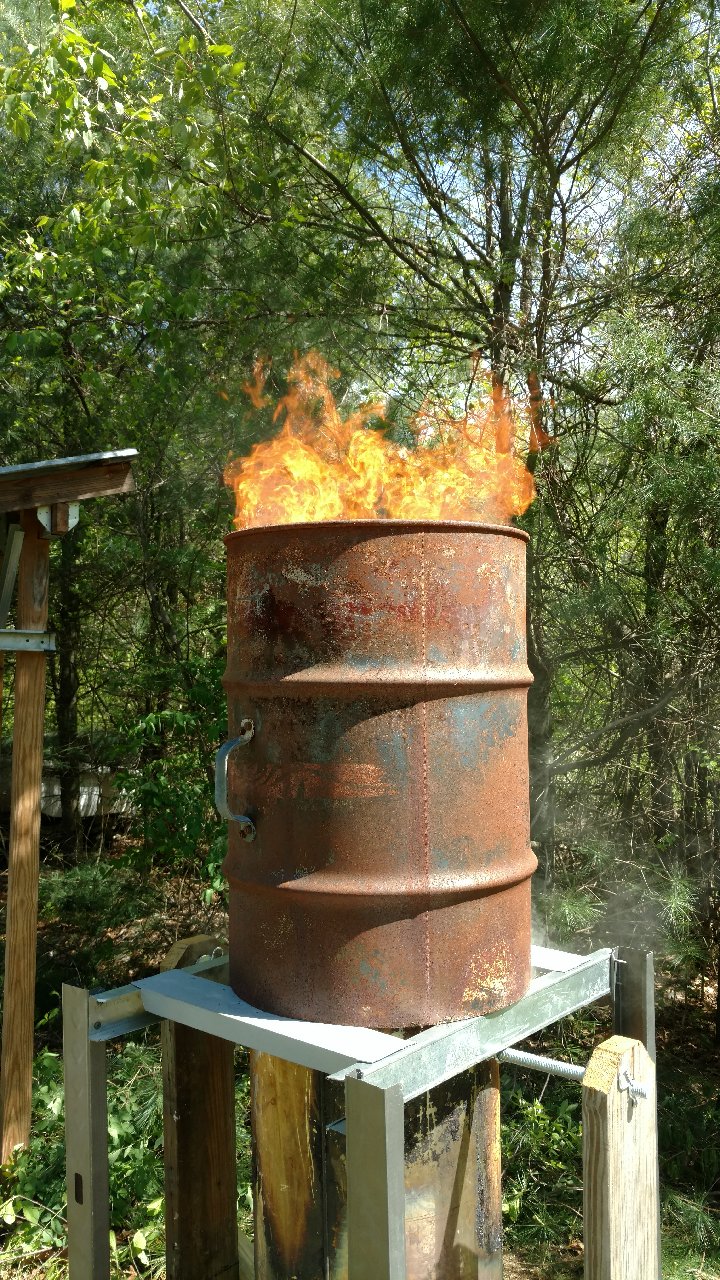
OOPS! Well I messed that up. Started nicely.

Then several problems. Wet wood, so I dumped a bunch of charcoal lighter fluid on top. Bad idea! I forgot that last time that I used this method, I had to reduce the fan. With fan hooked to pipe and on low there was still too much air. The lighter fluid ignited and the flame travelled with it to the BOTTOM. Now I had a BLUD Bottom Lit Up Draft. Notice discoloration at bottom of tank.
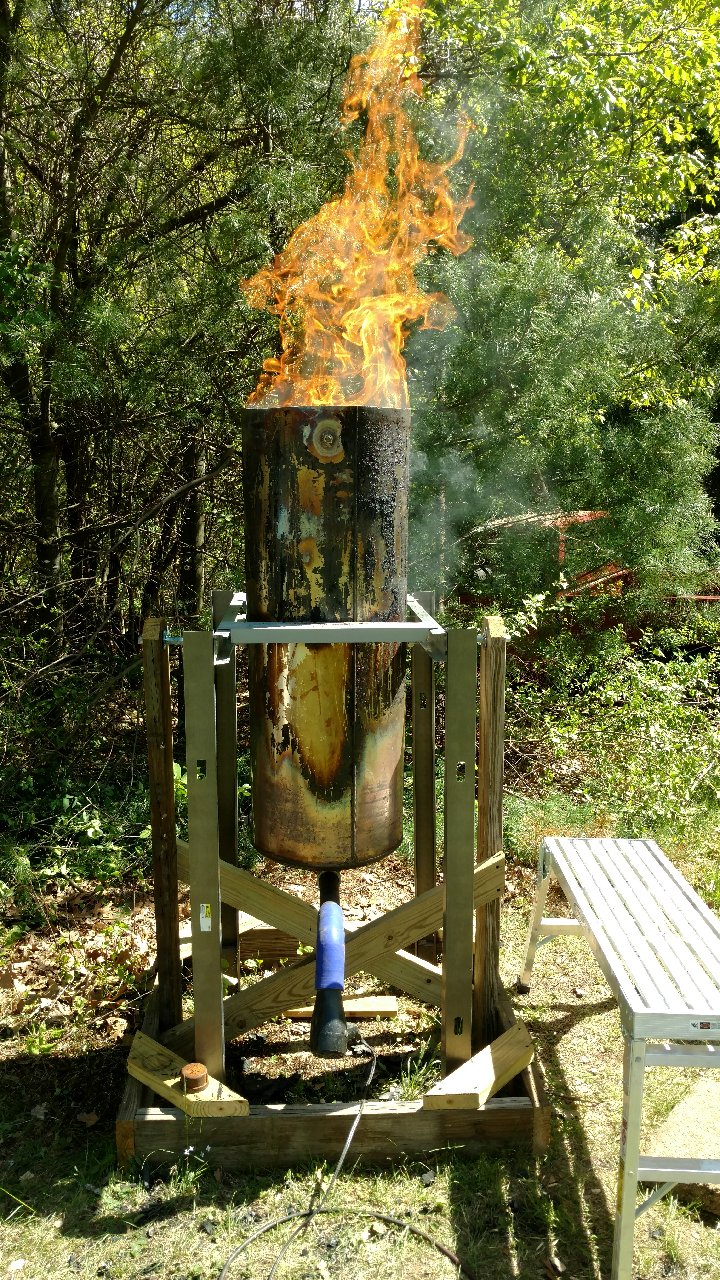
So now I had to use a torch to ignite the smoke.

finally settled down.
Shields worked good.

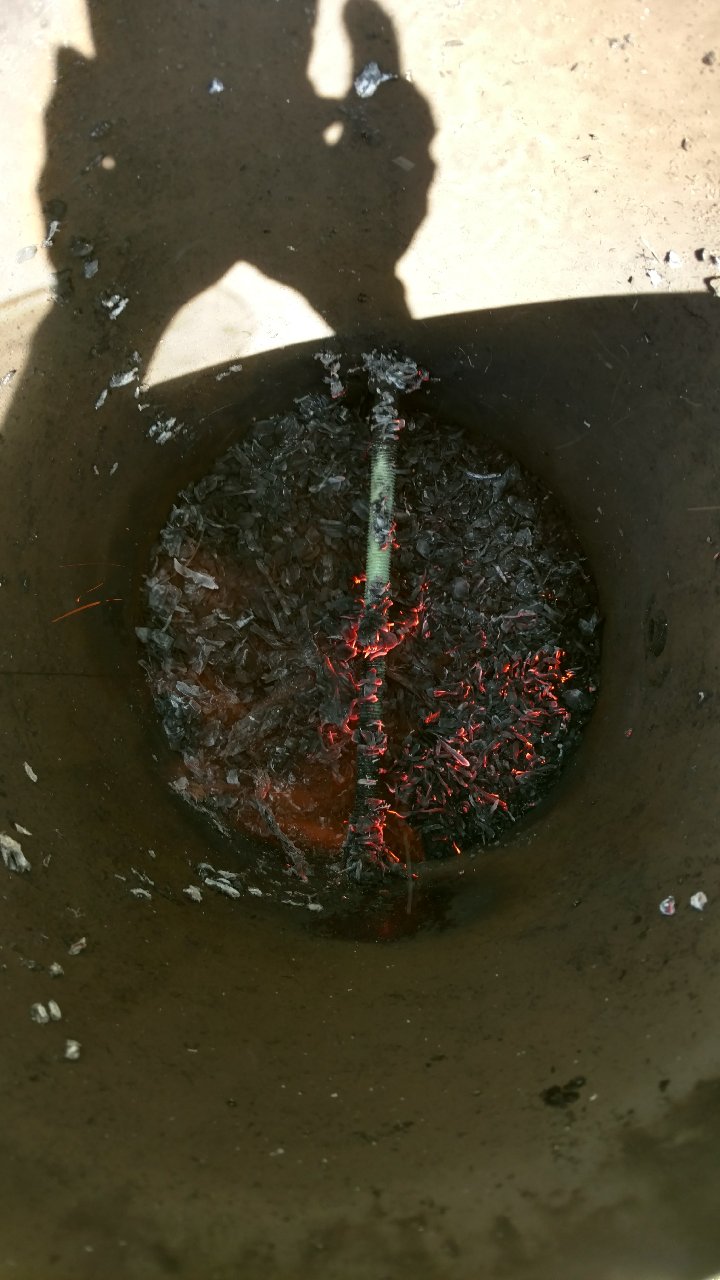
At 1 1/2 hours it calmed down to a nice burn. When yellow flames stopped and wood was glowingI shut her down and sealed top and bottom.
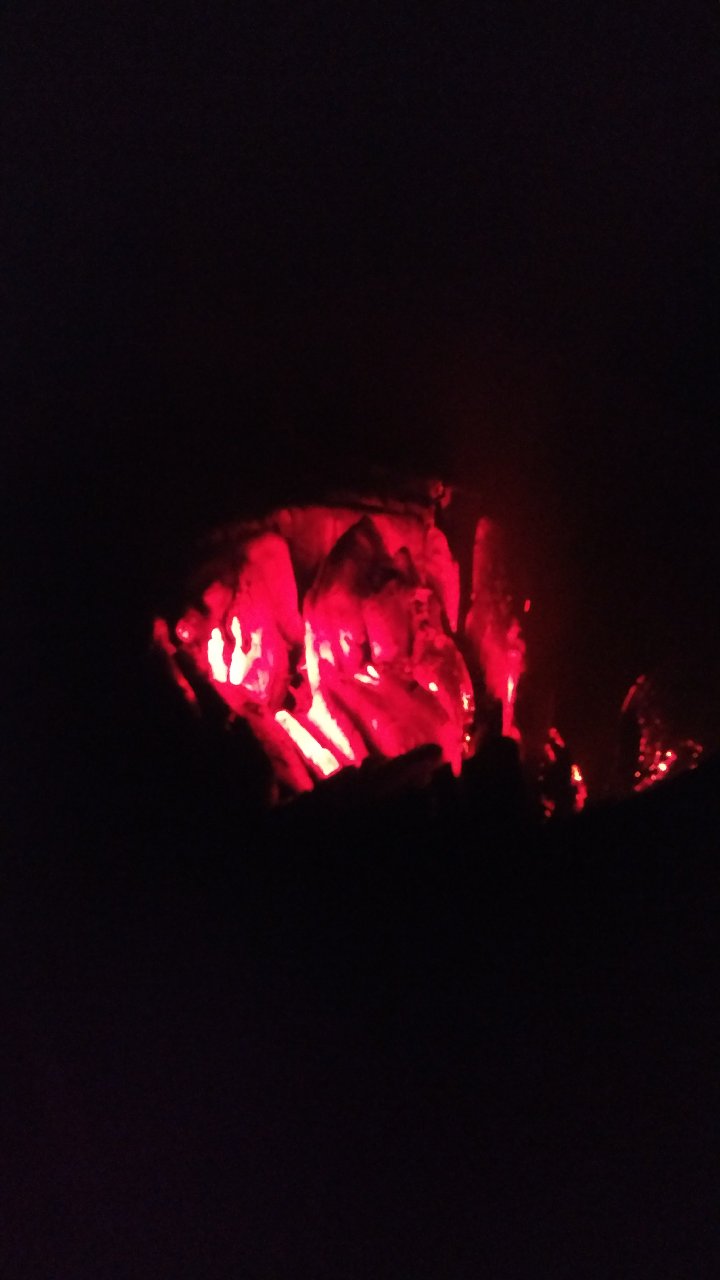
Next time use dry feed stock, and reduce fan to just enough to sustain pyrolytic front moving from top to bottom like a good TLUD should. Oh well, live and learn.
7 Likes
what did you put on top of it for the ring? Do I see a tree on fire too?
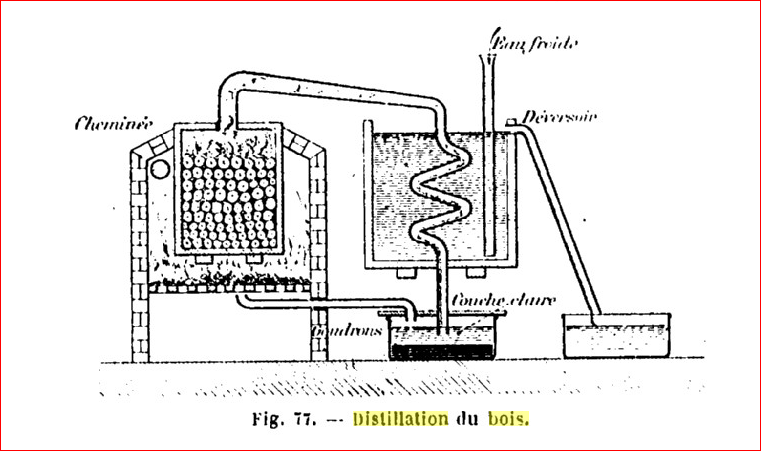
a French technique of the 19th century, absolutely everything is used during the distillation of charcoal and recovered, the pitch, pyroligneous juice ect…the pitch mix with the charcoal dust finally to obtain carbonite by the After a change to a ball press and then dried in the sun, a volume of wood is put in at the beginning to raise the temperature of the hearth and then maintained by the distillation gases.
simple and perform, respecting nature, our elders were far from devoid of good ideas.
9 Likes
The “ring” is the bottom 4 inches of a 55 gallon drum with several 1 1/2" holes in it. Just something lying around from a different project. The ring was not needed for my previous setup which was burning from top to bottom with good fan control. Trees were nearby, but no trees were permanently injured (except the ones inside the TLUD)
4 Likes
The ring looked like it fit on rather nicely. It looked like a squirrel nest burning in one of the pictures, thus the question. I singed the oak about 30ft up when I tried part of a 55 gallon barrel with a gap then a part of another 55 gallon barrel in mine. the flames weren’t that high but the heat was that high. you could see the heat waves and the leaves rustle from it… 
1 Like
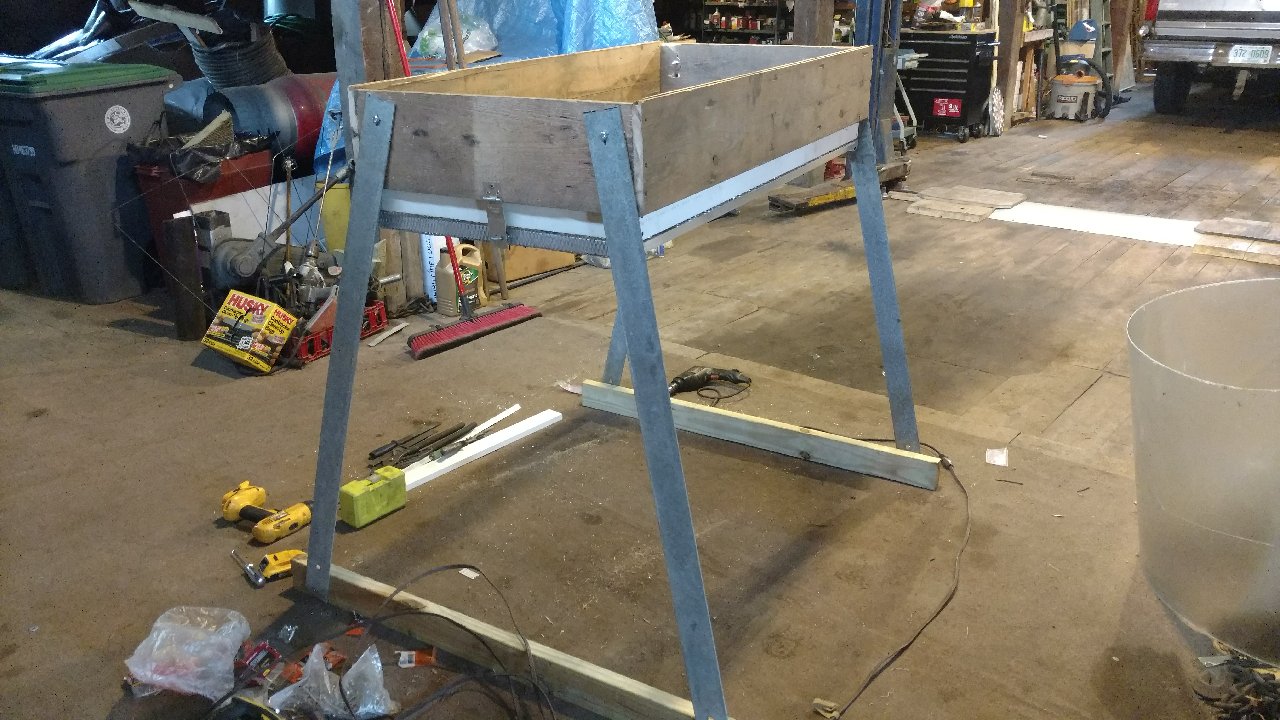
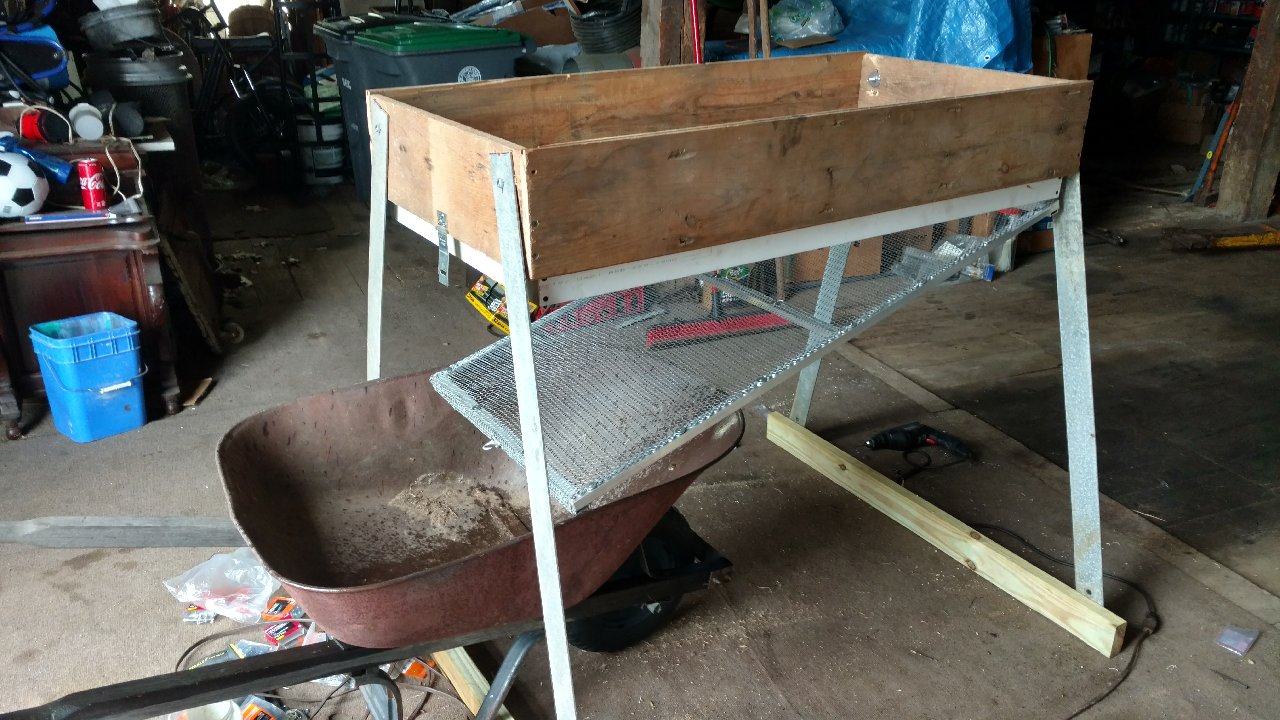
For some time now I have been sizing/classifying wood chips before carbonizing/pyrolyzing them. I was using a screen-bottomed box, hanging by ropes. A few months ago, I came across a sketch of a screen/grizzly/classifier for placer mining that used thin steel legs to allow easy shaking. A few days ago my prospecting hobby bumped into my gasifier hobby. I suddenly remembered some galvanized 1/8 X 3 inch steel that I salvaged several years ago from an above ground swimming pool. This setup separates chips into large mulch for walking paths, medium chips for gasifier fuel and small chips for garden mulch. The thin legs allow much better shaking action than the ropes did. I have freed up precious barn space and I can take the screen to the chip pile. A piece of fiberglass solar glazing on top turns this into a solar chip dryer.

8 Likes
how are you shaking it? Manually?
It reminds me a little of the leaf driers we teach for making leaf powder and leaf concentrate.
Billy,
Yes, by hand.

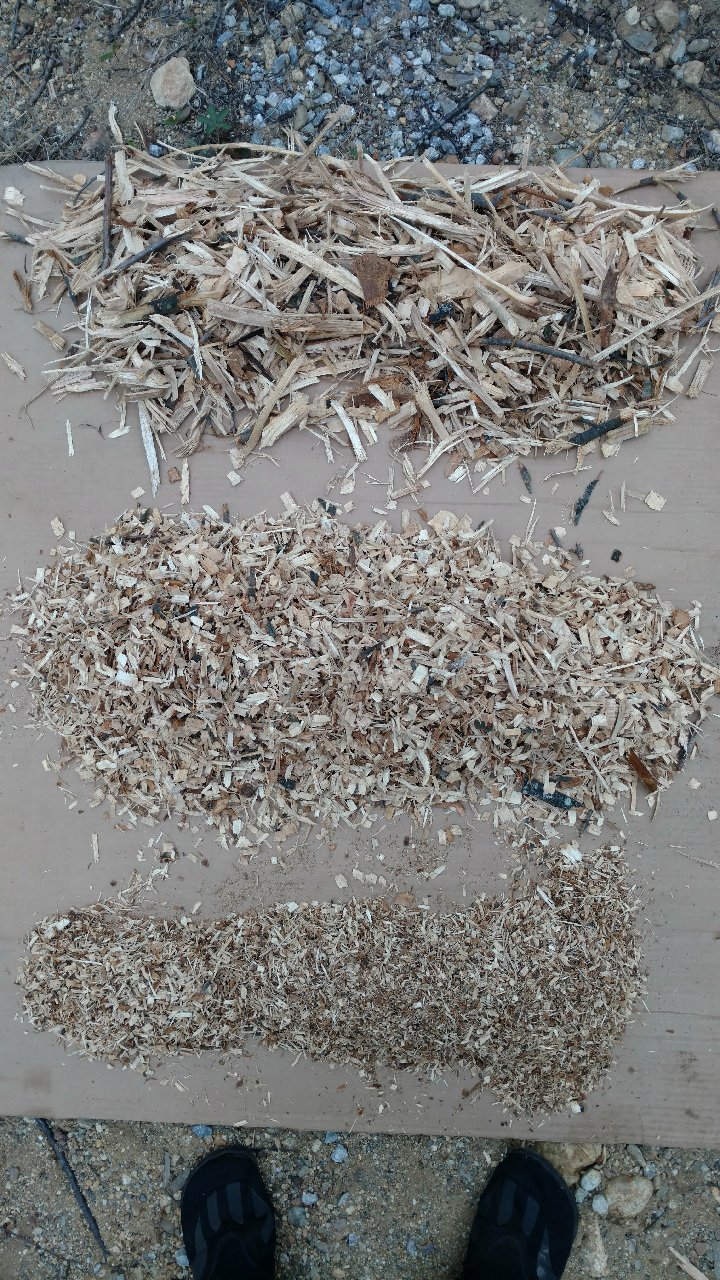
The three classes and relative amounts:
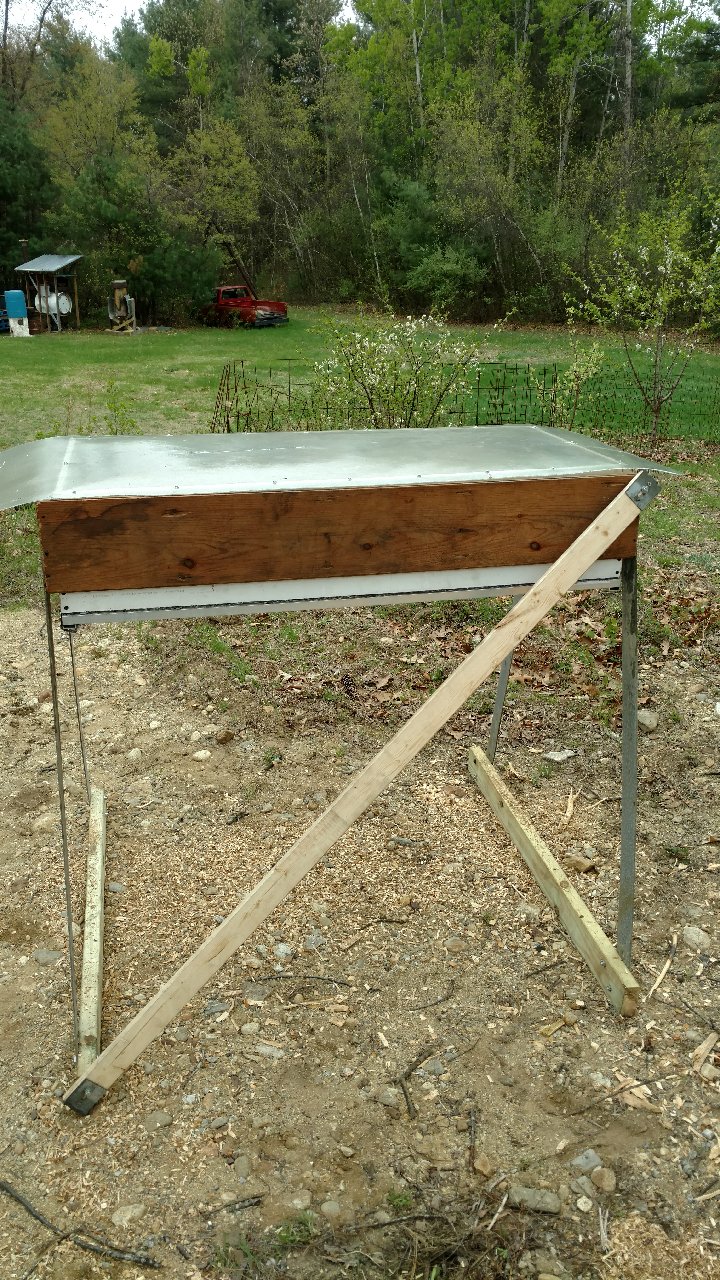
Brace to prevent wind wiggle and glazing for drying fuel chips:
5 Likes
What size screens are you using? I would guess the two smallest sizes might actually run through a gasifier like matt’s carburetor set up. I realize that defeats the whole purpose of doing what you are doing so Rock On!
2 Likes
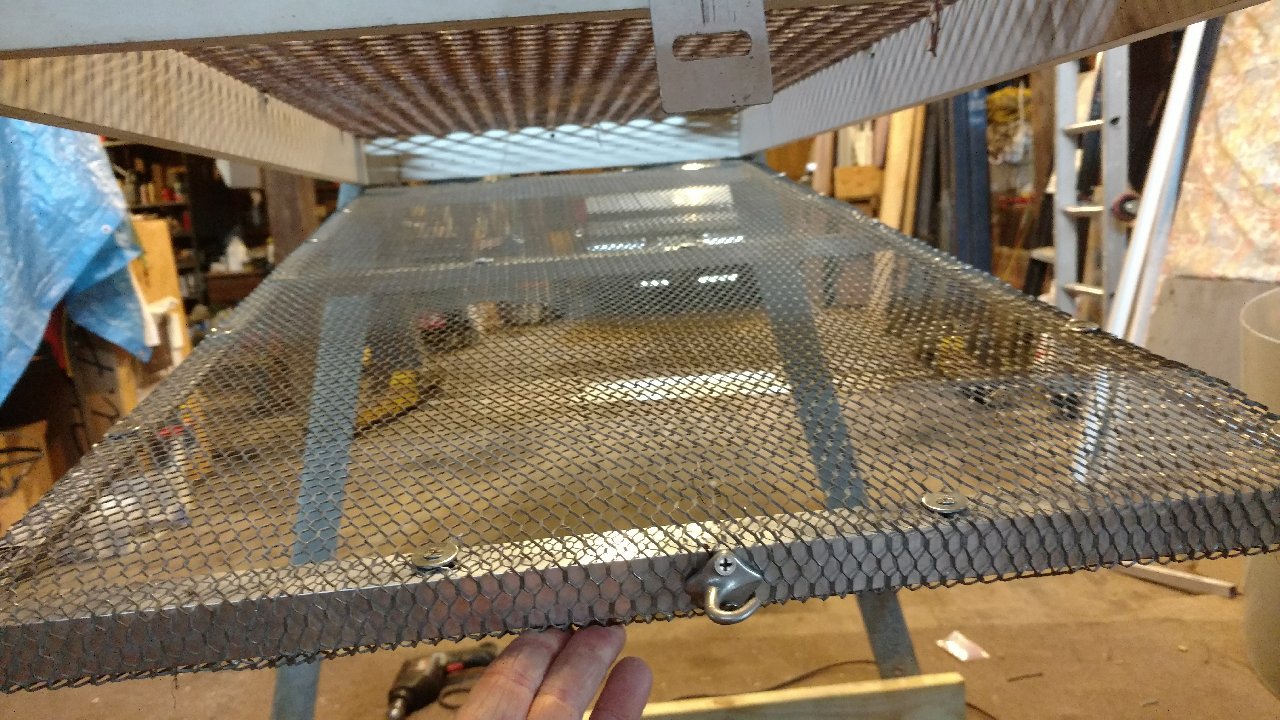
The screens are diamond expanded, approximately 3/4" x 1" and 3/8" x 1/2". These middle size chips (between the screens) shrink a bit when pyrolyzed and go straight into my charcoal gasifiers/reactors.
As soon as I get enough chips screened and dried, I will rerun the giant TLUD with a proper fan control and report on the results.
5 Likes
We have found that the smaller sizes actually work quite well in a little gas can gasifier stove I built a couple weeks ago.I will try to bring it to Argos. It burns the 1/8 stuff mixed with 3/4" cubes of wood and chips really well and insulates quite well. I want to try what you are doing with the wood chips. What kind of time does it take to sift it by hand. I know when we sift clay by hand it burns up quite a bit of time.
2 Likes
The video was the complete actual sifting time for the three classified samples shown in the picture. That was my first test with this classifier. All I know so far is that it is much quicker and less energy intensive than my old rope hung version or my older wood on wood sliding version.
4 Likes
I was kind of wondering whether the second screen was actually needed if you just ran it in a gasifier.
It seems pretty fast, do the pieces stick together? I am wondering whether it would be conducive to running it at an angle with a vibrator type of motor like a grain separator. Then you can spend your energy shoveling it on, instead of shaking it. Not that it works with your overall goal, just wondering if you think it might work. ![]()
1 Like
Second screen is needed to create somewhat uniform size which aids the gas flow in a retort and even progression of the pyrolytic front in a TLUD. Without this second screen, fine charcoal particles would also clog up the gasifier.
I think an angled shaker screen would work. Somewhat expensive, but effective, shakers are used on hoppers that spread salt and sand on roads in the winter.
1 Like
Hello charcoalers, I have done some experimenting with my clay lined charcoal kiln, but I have stopped up the holes, and Im using it as a pyramid kiln now. This seems to me to be maybe the best way I have yet tried to make charcoal without smoke. Here is a short video of me loading it.

The insulation makes it get really hot, so the burn is always quite clean. (Although I suspect it would do just fine without). I add wood every 15-30 minutes - as much as 5 gallons at a time. It does not really need to be tended, I did this batch today while backpack spraying, and would just toss on more wood when I was back to refill.

Once it gets up to the top, and mostly burned down, I put on a scrap of sheet metal to burn off the last woodgas without letting as much air in to the charcoal. This takes a little longer, but I feel like it is worth it. I weighed wood in and charcoal out on a small batch yesterday, and got an impressive 24% conversion by dry weight.

Todays batch took me 3 1/2 hours, but I got almost 3 hours of other work done, so it is pretty time efficient if you can work on something else nearby. I will weigh the yield of this batch tomorrow, but it should be in the neighborhood of 30 lbs - or roughly one 30 gallon steel garbage can full.
I am going to try and improve on the clay lining, as it has an annoying tendency to flake off little pieces, and it needs a bit of patching up after every couple of runs. Scooping out the finished charcoal is also kind of a pain, but not terrible. If I devise a more robust lining, it could maybe be tipped over. Otherwise, I feel like this is the best method I have tried so far. It is very similar to a cone kiln, but I like being able to partly cover the top at the end to finish the brands, and then cool it in place. No handling searing hot coals, or dousing with water.
8 Likes
I am not totally convinced it is true with Matt’s design since it is essentially a DRiZzLeR with a top on it with airflow regulation. I understand 100% why you are doing it, thus I am not suggesting you do it. ![]()
I was thinking just a simple unbalanced flywheel, for the vibrator, then you just need to buy/acquire one big piece with the same size opening, rather then two smaller pieces with different sized openings.
Here is more then I ever wanted to know about shaker screens.
3 Likes
Sweet Success! Giant TLUD with dry, fuel-sized wood chips. Notice clear line between hot (black) and cold metal indicating even progression of the pyrolytic front. This time running properly from top to bottom.
Using a router speed control with blow drier on low.

Although there was no smoke I placed a secondary air mixer on top to see how it performed.

Normal flame height without air mixing drum:
The only smoke is from the old styrofoam residue burning off.
I filled the TLUD to overflowing. With fan assist it lit quickly and the complete burn took exactly 30 minutes. Char level just below the axle rod.
sealed for cooling:
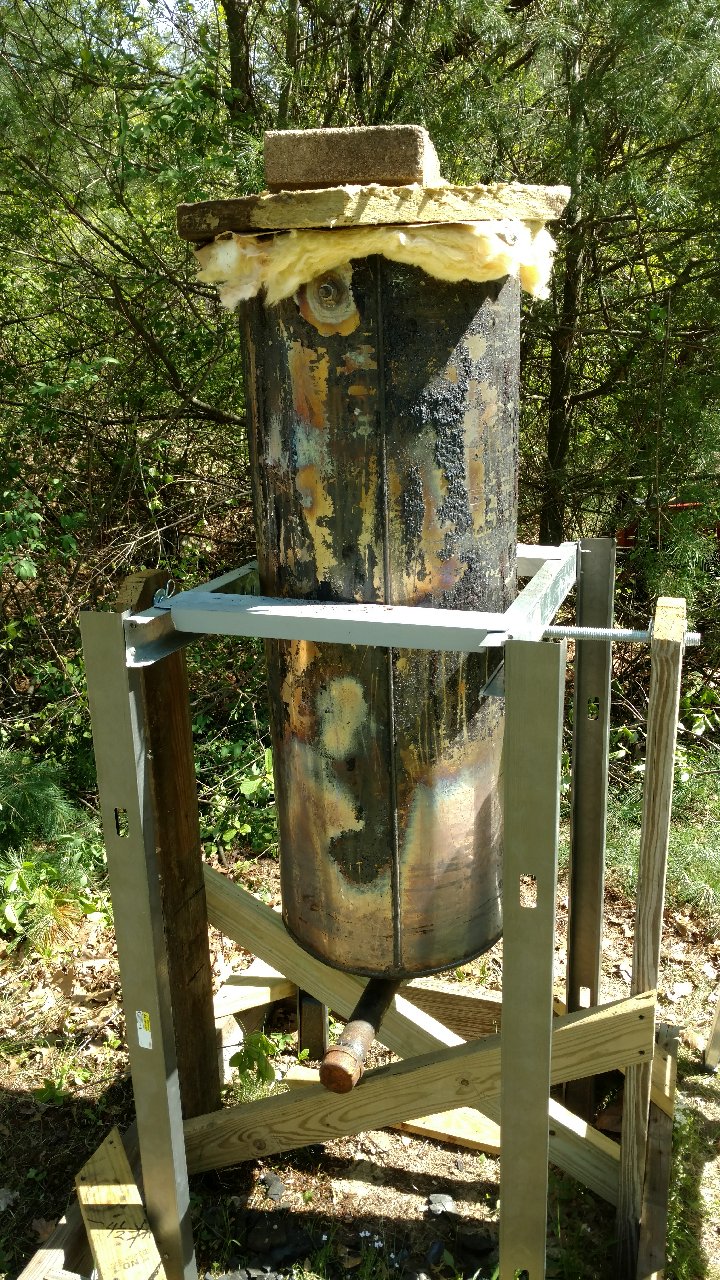
90 minutes after shutdown I can lay my hand on the tank for a second or two. Shields were not needed to protect wood supports.
15 Likes