Oliver, I use my horizontal retorts with pallet wood and <2" sticks. My vertical retort is great for wood chips. I don’t do anything with the steam and condensate. For smoke free operation, the curtain kiln is the best.
2 Likes
Hey all, I liked all the interesting ideas bouncing around in this thread, and I borrowed what I could as I launched into my own retort project. I have been making charcoal with a really inefficient retort, and I think I was burning almost as much wood as I was putting into the barrel. I did not really produce very much smoke with my setup, although it hardly matters where I am. Once I get up and running I am going to take some good measurements: Pounds of wood into the retort, pounds of wood burned to get the process going, and pounds of charcoal. Anyhow, on to the build:
I really like the look of the Hookway system, but I think Bruce is onto something with the horizontal arrangement for ease of unloading. It is nice to be able to just shovel the charcoal out when it is done. I envy that section of stainless pipe you found, btw. What I was able to find locally was a section of 6"x 5" steel box section with 3/16" walls. I welded one end closed, then cut out a hole for the chimney, and the gas inlet. Here is a picture of the firebox:

I saw in the video of the Hookway retort that he had used a short section of pipe leading down into his firebox, but when the wind shifted, it would allow the smoke to billow out the end. I decided to do this as well, but put a bit of an angle on it, so that the gas would be directed as a jet in towards the chimney, and over the hot coals.

I used a chimney cap that bolts down to tapped holes in the little tabs in the firebox - 3/16" material was hard to weld, but it was great for tapping holes to bolt things on. I also made a flange for the door, since I wanted to be able to feed the fire and load from the same side. I welded on some captive bolts, and put some stove gasket on it, so that the door can be cinched tight, hopefully making a good seal

Here it is assembled, with the door clamped and bolted on.

I added the threaded floor flange, which will have a 90" fitting, and a lid to allow steam to escape at startup. The chimney pipe in the back I sealed with more stove gasket after I took this picture, and I also made a simple little steel cap that fits snuggly over the opening to the firebox to seal the system during cool down.
The next step is to devise a way to insulate it - I have 2 ideas, one is to take the paper off some extra fiberglass insulation i have laying around and attach it with chicken wire, the other is to build a dry-laid box out of cinder blocks, prop it up inside, and fill all the space around it with perlite (which I also have a large quantity of just laying around).
I am really excited to get this thing fired up, and would like to hear any ideas or comments. I am not sure if the thick walls of my firebox are going to be a problem (it was the thinnest material available in that size). I worry that it might be inefficient as a heat-exchanger, and that too much heat might go up the chimney. Any thoughts?
7 Likes
Roxul should take the heat better then fiberglass I think. I really like this one it’s pretty.
Looks good. You will probably find that this system burns hot enough to break down regular fiberglass. The only thing missing is a grate in the firebox to get air in under your kindling. Use a blow drier or other fan to accelerate your kindling burn or you will have a long wait to reach a self-sustaining fire in the tube firebox. I often find brands in the bottom along side the firebox tube so I have laid bricks along each side to raise the feed stock up a bit. I use a long piece of threaded rod with a half round disc on the end to scrape out the charcoal. I picked up some more of that free SS pipe yesterday. Check with woodstove shops for leftover pieces from chimney lining jobs.
1 Like
Because the heat may warp your lid, I would bolt a piece of angle iron reinforcement to the lid horizontally just above the cutout opening for the firebox. I also install lid insulation inside the lid with a sheet of metal to hold and protect the insulation.
3 Likes
Thanks for the input Bruce, reinforcement on the lid sounds like a good idea. I will think about some sort of grate, I am thinking maybe several short sections of angle iron side laid by side, with slots cut perpendicular to the length? End-on it would look kind of like this: /\ /\ /\ /\ /. I also have a couple of little blower fans that I will try using to get the fire going.
I was wondering about that: will regular fiberglass break down really quickly? Looks like Roxul is available down at home depot, I might have to go pick some up. I am thinking perlite is going to be too hard to contain without building a sheet metal shell around the whole thing.
3 Likes
I use Roxul for various stove and retort projects. It comes in batts and boards. Our local Home Depot has boards and Lowes has batts.
2 Likes
Hi guys, I´m always interested in this subject.
This system has worked fine for us; totaly smokeless. I posted it in “Biochar the Science Behind It”
Here it his:
Reactor working, notice the intensity of the gases, the steel barel is red hot.
")
Reactor working. We just lite it, and go to sleep, next day it´s cool and of (self extinguished), and biochar is DRY, once its pulverized it wil ABSORBE the “soup”.
")
This is the next day after the burn.
")
6 Likes
Yes, the barrel in a barrel is tried and true. That was my first kind of charcoal maker. My retorts evolved as I looked for a way to pyrolyze more challenging feed stocks like pellets and wood chips. I have come full circle now. My latest rig is a used super store hot water tank standing vertical inside of 55 gallon drums with a blower to assist the TLUD operation. Free wood chips are the feedstock. I’ll post pictures if it works.
4 Likes
Carl, I really like the pipe flange for the steam outlet. If you decide to try roxul (aka rock wool) insulation, pick up a serrated bread knife at a good will store for a buck. Other cutting methods are a pain, but bread knife cuts are effortless.
1 Like
I got a bag of rock wool insulation by another manufacturer because it came in longer batts than the Roxul stuff. I put together a steel frame for the barrel to sit on, and my plan is to use chicken wire to hold the insulation in place over the sides and back of the barrel. I might put sheet metal on the top to keep the insulation dry, as I dont have a good spot right now where I can keep it completely out of the rain. I did add an angle iron brace to the front of the lid, and I am thinking I will try and affix some insulation to the front. The forecast is for 4 inches of rain over the next 2 days, though, so I might not get it fired up until early next week… I will post some more pictures once I get it up and running.
2 Likes
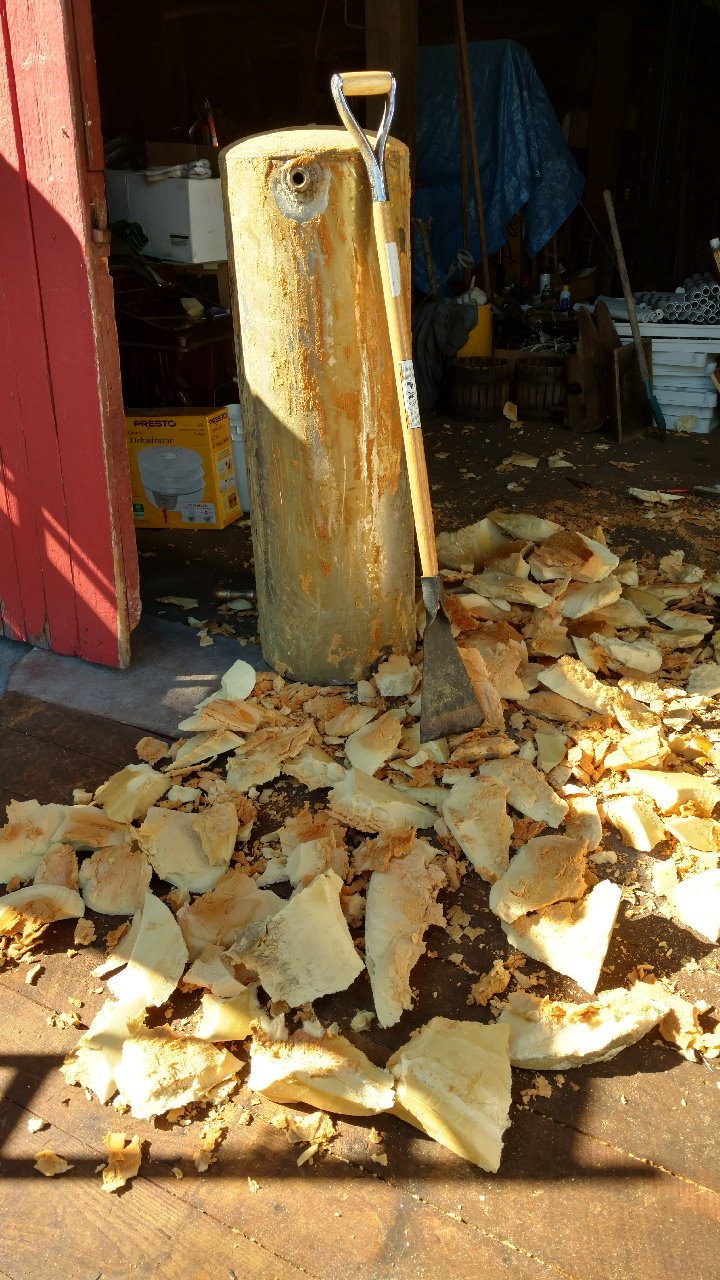
Chopped the styrofoam off superstore tank:
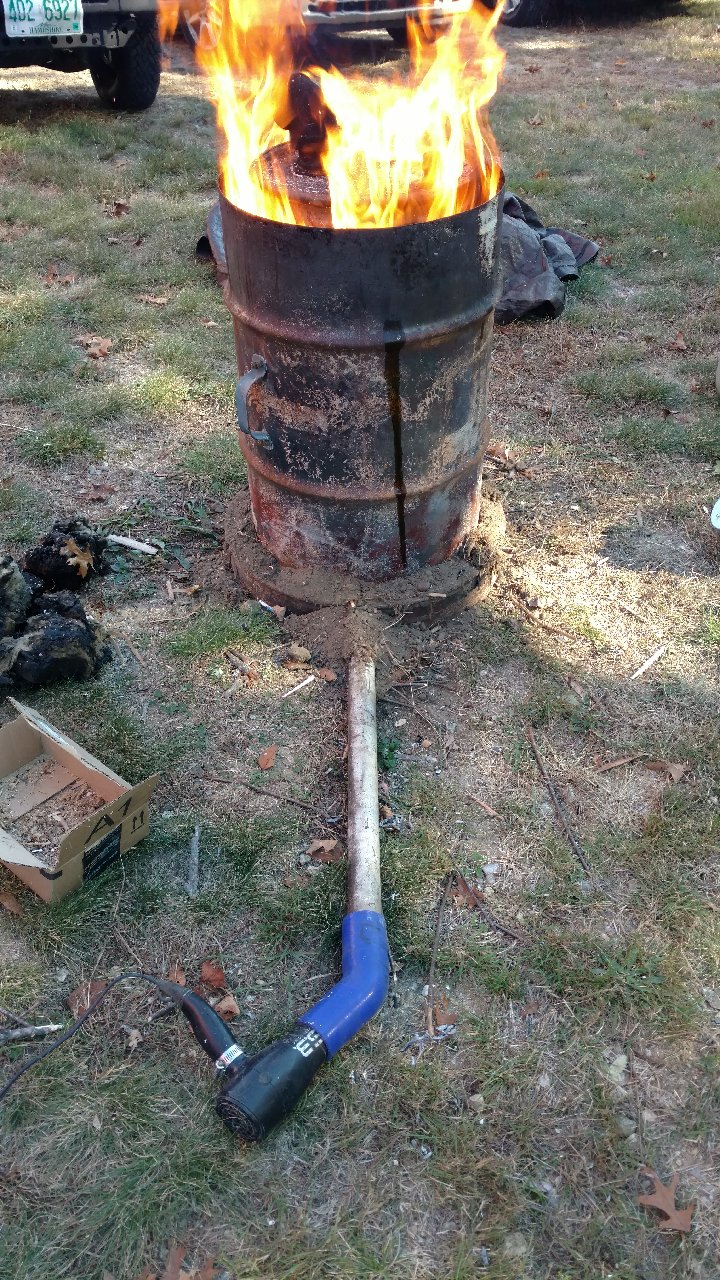
Before committing this nice tank to a particular charcoaling method I decided to run a comparison test. First up is a barrel in a barrel with fan assist:
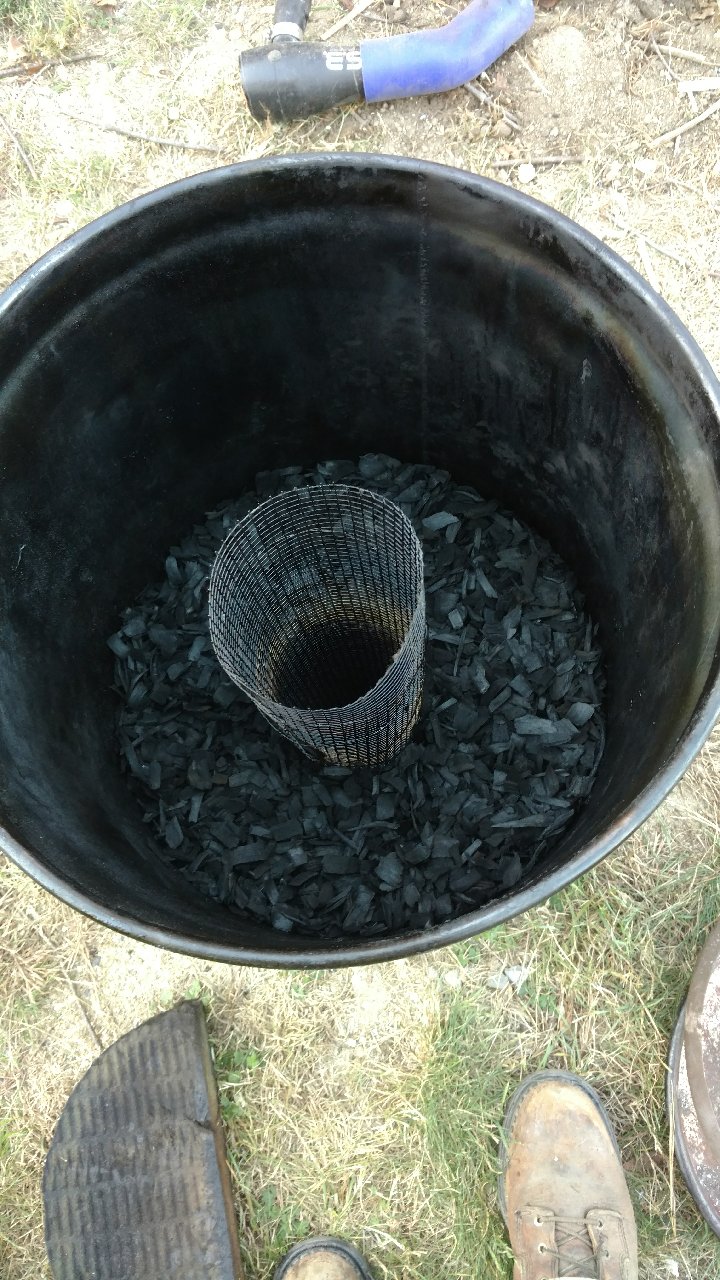
Since my feedstock is small wood chips, I added a screen tube to aid gas flow and avoid unpyrolyzed chips in the center. Worked well.
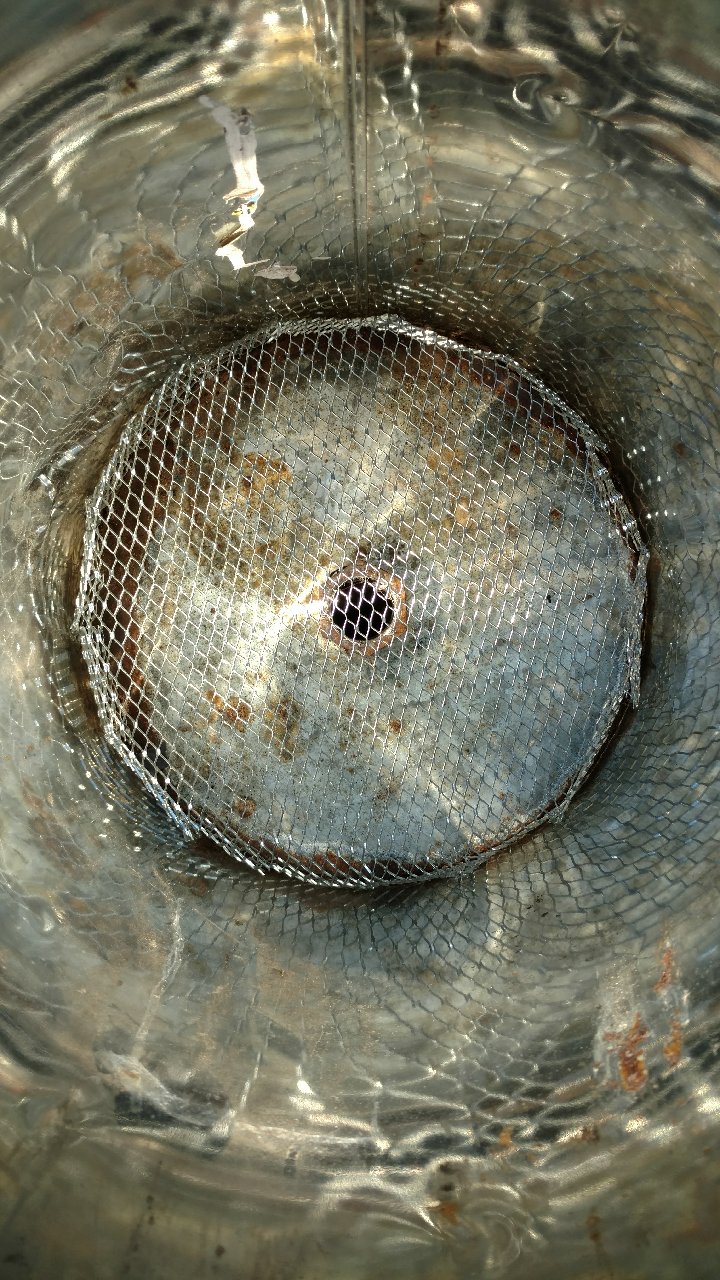
Next up, fan assisted TLUD (Top Lit Up Draft):
Simple setup with 1 1/2 inch pipe plumbed to center and screen to spread air evenly across bottom of fuel bed.

Away she goes.

When the flames stop, seal top and bottom.
Observations:
Barrel in Barrel method is much more complicated in terms of fabrication and startup. The charcoal quality is high and the amount of charcoal produced is about 1/2 of the inner barrel volume. But this method required extra fuel between the barrels as the heat source. This method also required venting steam. This method took about one hour of attention from setup to fan off.
TLUD method is simple and quick. Fill it up and ignite. Charcoal volume is about 1/3 of the barrel volume and has some ash that must be sifted out. Total elapsed time from setup to fan off was 30 minutes.
Keep in mind that I am looking for the best method for making fuel-sized charcoal from free wood chips. I still prefer my converted and insulated oil-fired hot water tank for this feed stock. Since this kind of water tank is not readily available, I’m looking for a method that is more reproducible. What method would I recommend to a friend who wants to make engine fuel from wood chips? I still use my horizontal retort for pallet wood and sticks. For a smoke free setup using feed stock of various sizes, the curtain kiln is best. It is possible that the fan assisted TLUD might work well for pallet wood and sticks, so I will probably test that eventually. I know that the natural draft 55 gallon barrell TLUD with afterburner is the method of choice for sticks, but I would recommend hooking up a variable speed fan to compare speed and quality.
Conclusion:
Both methods produce engine grade charcoal and are smoke free without an afterburner.
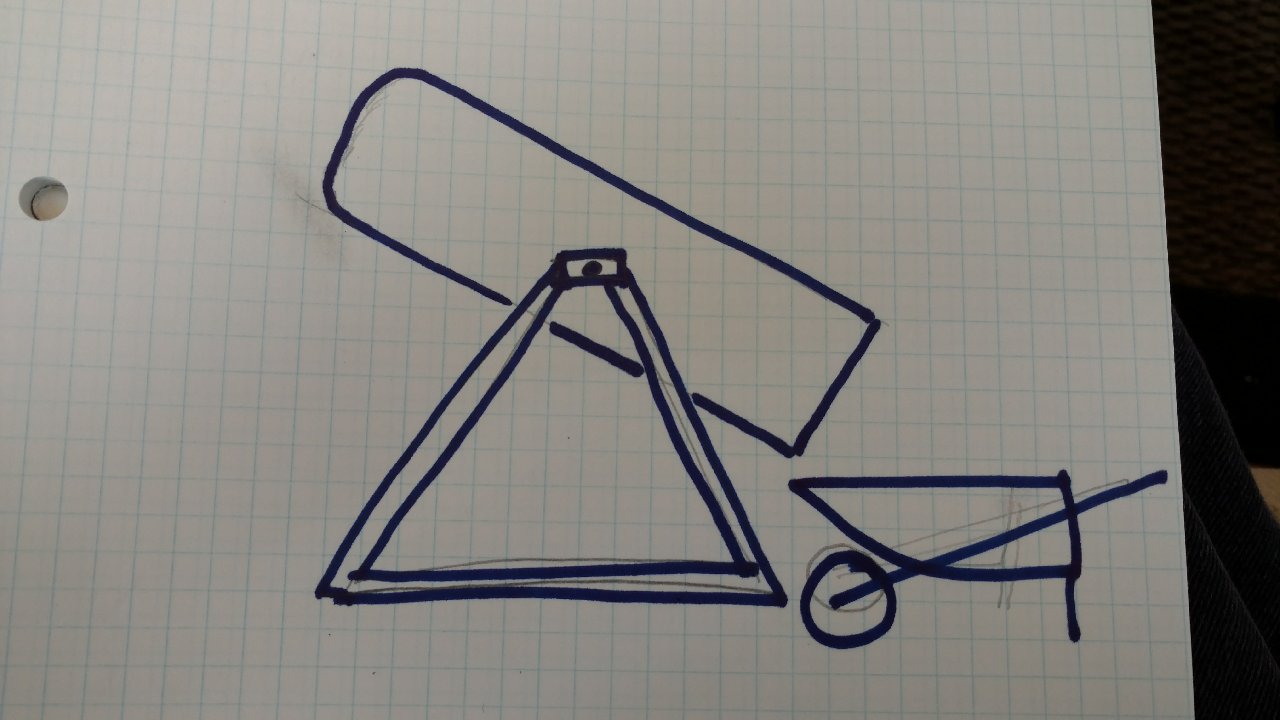
For a down and dirty simple process to convert wood chips to charcoal the TLUD is the winner. The amount of charcoal produced is similar when considering the extra wood used in between barrels. The process takes 1/2 the time. The TLUD Is simpler and cheaper to construct. BTW, the fan-assisted TLUD serves as a feed stock dryer by pushing air through the chips before burning. I’m now thinking of building a frame to suspend my SuperStore tank with a pivot at the halfway/balance point. This way I could simply tip it into a wheelbarrow.
13 Likes
We are gong to start this process of r&d-ing the fastest method ourselves. soon…one difference will be that we don’t care about the smoke so much, just how little time and effort we can put into a given amount of finished charcoal. I am glad you are doing this, and thanks for posting it…Billy
2 Likes
If you decide to try the TLUD approach, remember TLUD could also mean Truly Loves Uniform Dimensions. In order for the pyrolytic front to progress evenly, the fuel size should be fairly uniform. For my purposes, I screen the wood chips to remove stuff that is too big >3/4"and too small <3/8". For sticks or lumber, similar diameter sticks packed vertically works best.
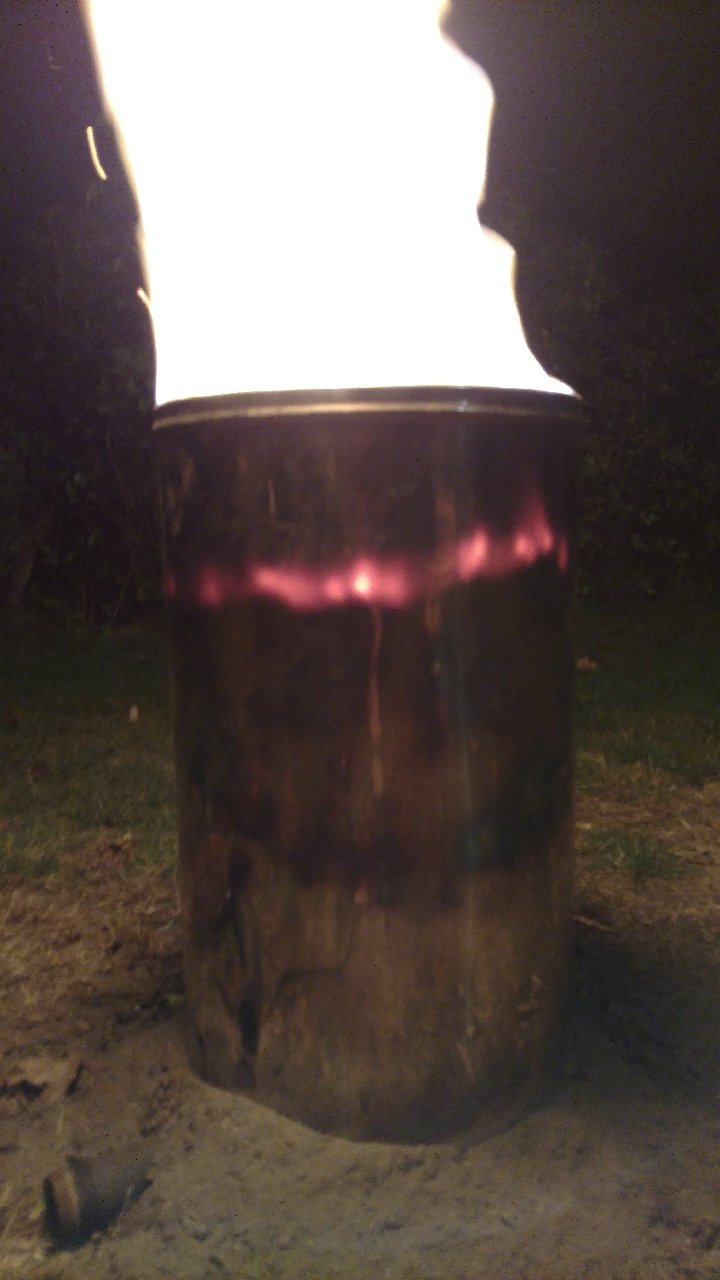
Glowing pyrolytic front visible through the hot side of the barrel:
Startup with blow drier attached to pipe on low speed gives big fire:
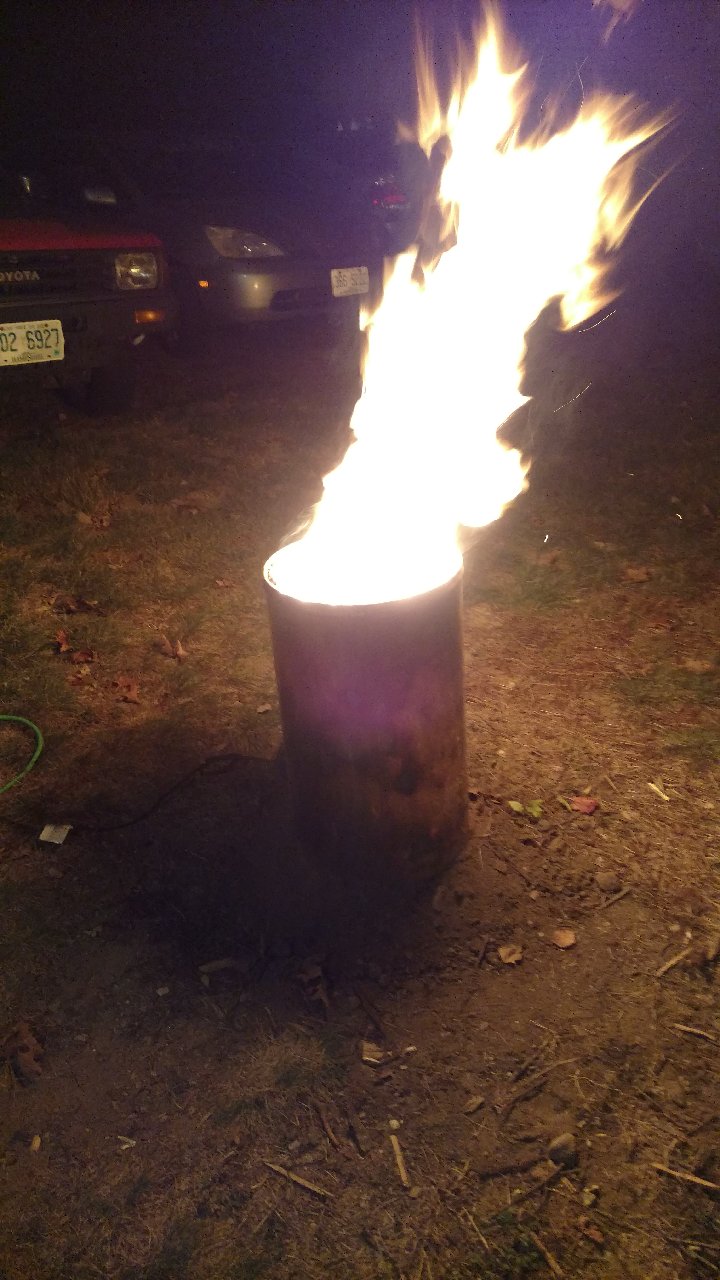
I then adjusted airflow by moving blower away, but still blowing into inlet:
With this dense feedstock fire will go out without fan assist.
This is the slower controlled burn rate with reduced airflow:
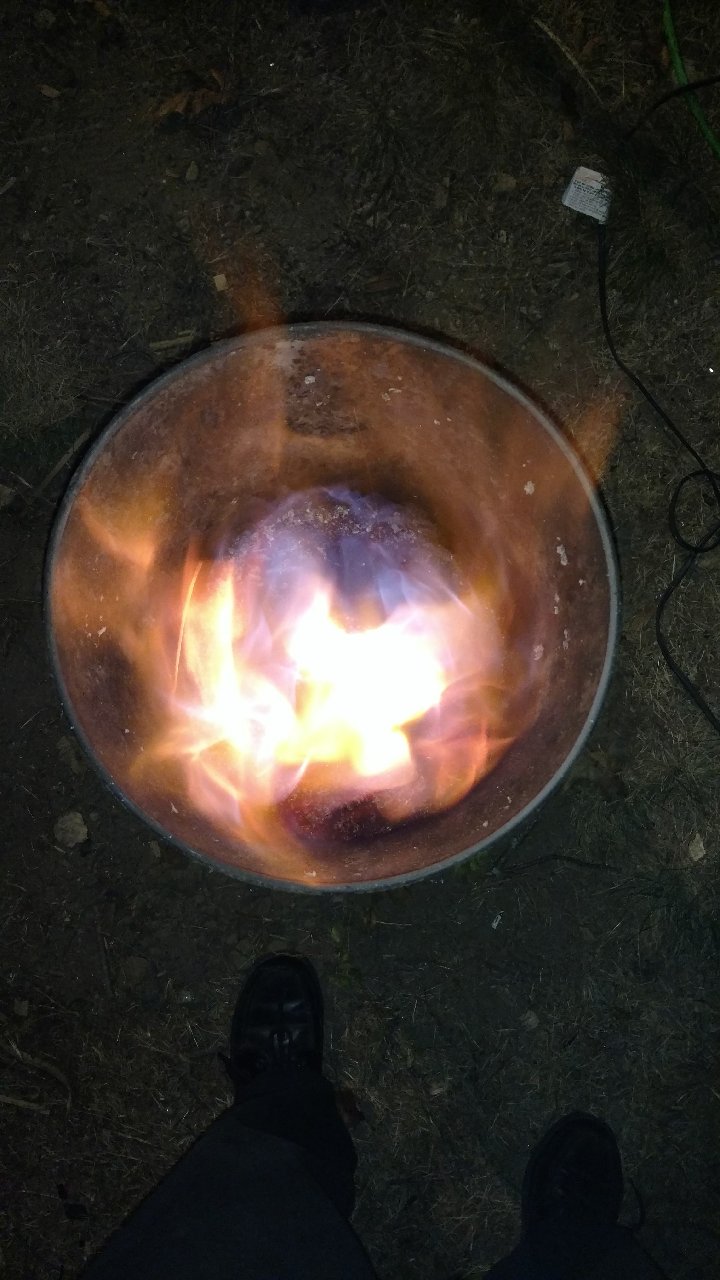
When yellow flames die down and you see mainly blue flame (carbn monoxide from burning charcoal) it is time to shut down and seal up:
10 Likes
I like the pic of the pirolitic line wery much! Thanks for posting
1 Like
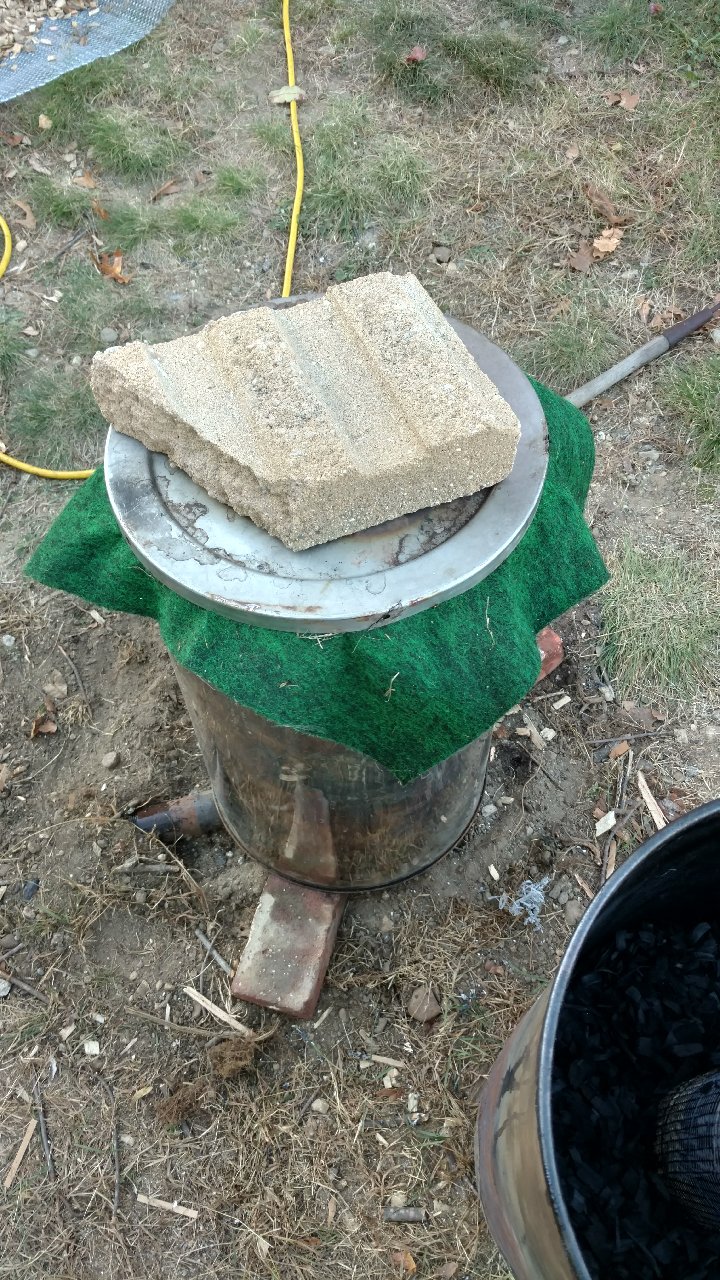
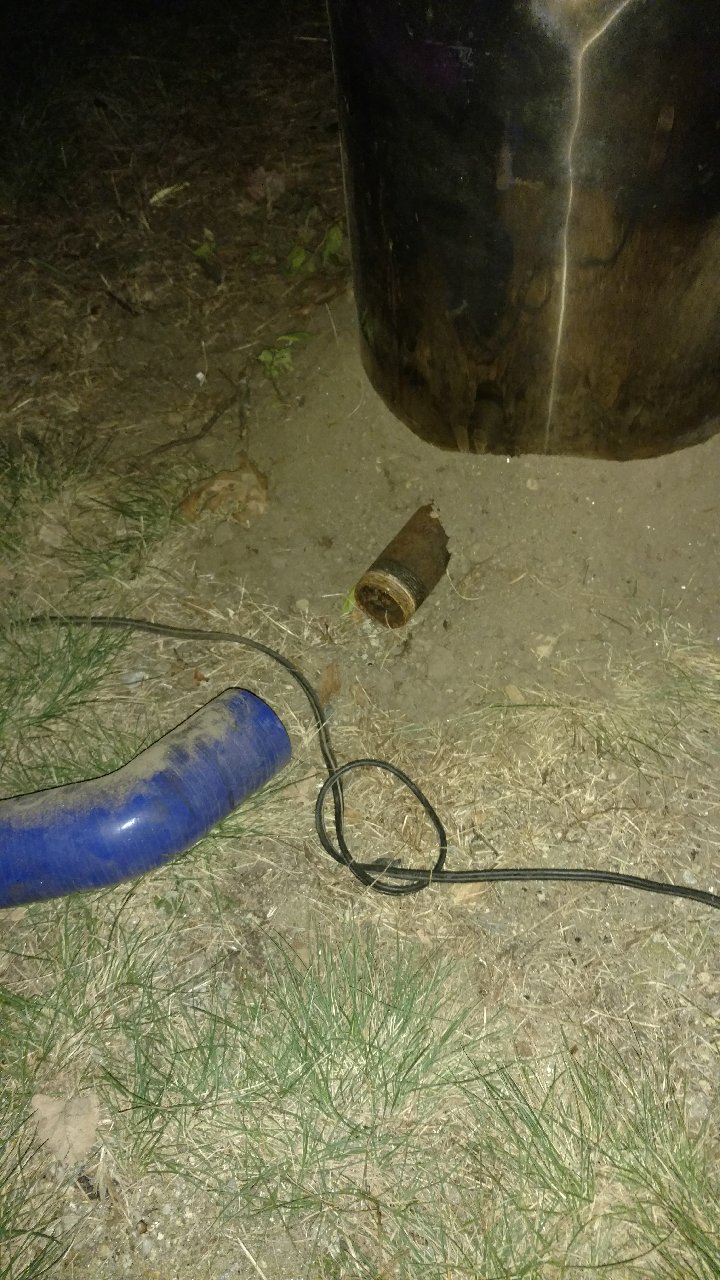
Okay, had some time to put the insulation on my retort and fire it up today: So far it seems very promising. I loaded the drum with about 100 lbs of madrone wood that had been cut into chunks last winter. I neglected to check the moisture reading on it, but I assume it was fairly dry - maybe 20% moisture. Here it is

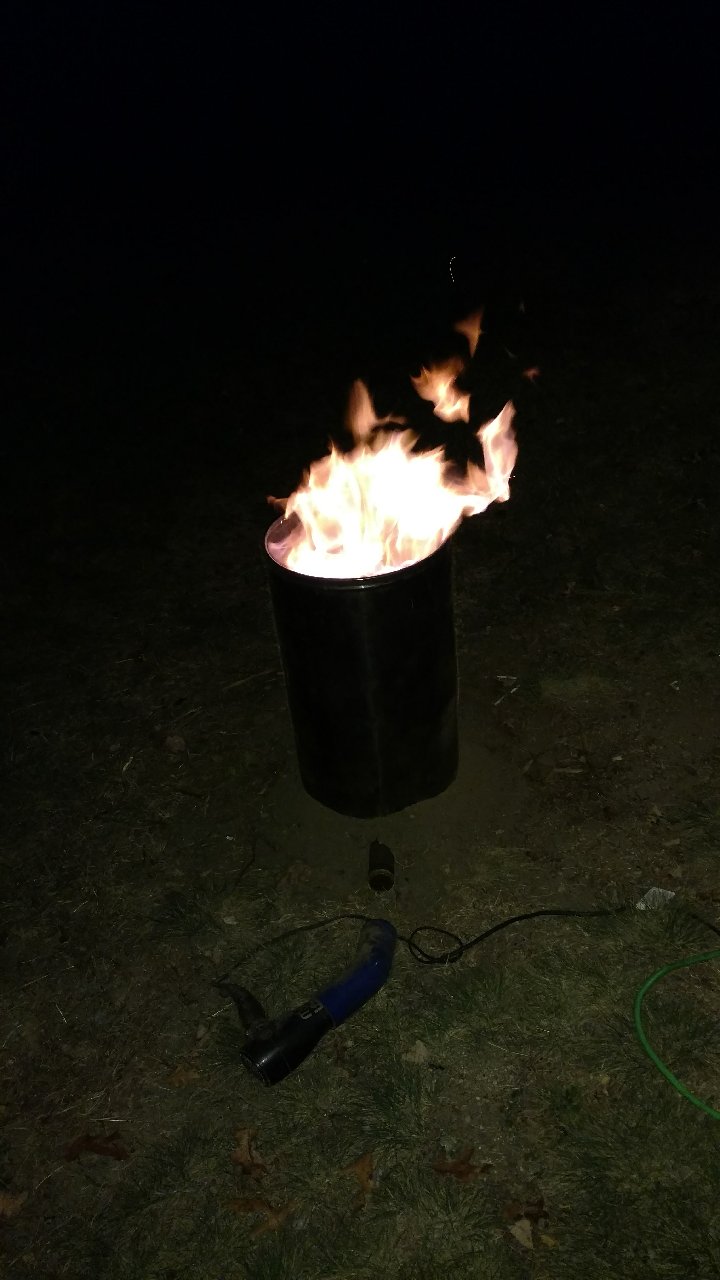
I used about 15 lbs of wood during the burn, which I chopped down into little kindling pieces and fed into the firebox. It was maybe a little more than half of a 5 gallon bucket. I had a little trouble gauging when to close the steam vent, and since it is only 3/4" once a lot of wet smoke was being produced it started escaping out the vent in the firebox as well and that really damped down the fire. I used a blower fan to get more air in, but what I discovered was that there was so much woodgas being produced that it was using all the available oxygen, and the coals that had built up in the firebox could not burn and were blocking too much of the chimney. I raked some out with a t-post, and managed to get it burning the gas pretty well at about 1 1/2 hours into the burn. I posted a video of it in action:

I need to fix some gas leaks around the chimney - and I might insulate this area with ashes, as the insulation started to melt. I am also thinking I am going to build a sheet metal cover with an even larger stove pipe, to try and create a draft that pulls all the smoke from the lid and also the steam vent up and into an afterburner. I think with a little tweaking It is going to be a really efficient retort, which will hopefully produce little or no smoke, and a nice clean flue gas that I want to do something with. I am thinking of using all the heat to kiln dry the wood for the next batch.
8 Likes
I like that set-up oregoncarl, heck ya, simple but effective, ONLY 3 gal. of tender to get with it …that is outofsight…!! The chimney insulation on fire was a nice touch! We will be watching for your ‘wood-drying box’ part of your project, for sure for sure.
I wonder if you can find a stainless steel, heavy thick spatula, a huge spoon or whatever, that might flatten out somewhat and lay nearly flat, covering the ‘vent’ port [while the batch is pouring out CO2&moisture], and when the time is right, adjust the spatula handle a little till the vent opens up for normal gasifier service? I would call it a spatula valve, which sounds more classy than a ‘bean pot spoon valve’…just saying.
Way to go! I look forward to seeing your charcoal. For what it is worth, my steam vent on my 55 gallon retort is 4 inch. 2 inch pipe would probably work OK. I have 1 1/2 inch on my 30 gallon retort. A 2 inch pipe has has 4 times the cross section area of 1 inch pipe. Oliver’s spatula idea might work, but the little pipe flange outlet will still be creating a lot of resistance. Congratulations.
FYI, I let the steam and wood gas vent until it flares well on its own then close it down to force the wood gas down into the combustion chamber.
1 Like

Sorry the picture is a little washed out, but you get the idea. It really settled down a lot, so I could probably pack more wood in next time. I was afraid that the dense wood would have had a hard time fully pyrolyzing, but it was 100% cooked. I checked the moisture with a meter on another piece too, and it was 20% on the outside, but only about 15% in the very center. It must still be soaking up moisture from the air as autumn sets in. The yield was only about 22 lbs. If I used 115 lbs, including fuel wood, which is at say 17% moisture on average, then I used about 95 lbs by dry weight. That gives me a conversion rate of about 23%.
When I loaded up the retort I didnt test fit the lid, and then once it was full of wood it pinned the firebox in place, so I was unable to get all 4 bolts secured, and ended up running with only 3. I did find a couple of pieces of charcoal with just a hint of ash on them at the bottom where the gap was, so I need to make sure that gets properly sealed next time.
Oliver: I did think about some sort of valve, but with the angle I have on my tube, It might be hard to get it to actually seal.
This I think is the biggest problem with the current setup- I was hoping that since it was a very short section it would not introduce too much drag, but it needs to be bigger. I will make some modifications for my next run.
This had been my plan too, but in my haste to test the system I didnt wait for an approved burn day, and it was starting to create a fairly large quantity of smoke. In trying to burn the evidence, I think I rushed it a little bit. ![]() It seems like an afterburner is key to smoke-free operation, so I will focus my energy on that. The fact that the lid seal always seems to leak a bit of smoke leads me to think that a shroud over the whole thing is going to be the best way to suck all the smoke up into the chimney.
It seems like an afterburner is key to smoke-free operation, so I will focus my energy on that. The fact that the lid seal always seems to leak a bit of smoke leads me to think that a shroud over the whole thing is going to be the best way to suck all the smoke up into the chimney.
3 Likes