Carl, I’m sure enjoying this topic and your good work. Since the electric is 400 feet away, maybe you can find a cheap cordless leaf blower to rev things up a bit in your blast tube. If you decide to go with a TLUD, you will find that a little fan assist on the air inlet will do wonders for performance.
3 Likes
A modest chimney should address the draft and performance of a TLUD.

Chimney draft effect can’t be discounted on any system, potential major free boost, arguably transforming waste heat into direct mechanical draft, improving system efficiency.
3 Likes
Hi oregoncarl, both Southerland and Tait make valid points, getting the heat value UP, quickly & sustained, I think you need to see your fuel wood white hot, not yellow, then back the blower down if your apparatus is melting or something. OK 400 ft. …no problem!!! … DON’T DO THIS: can you find one of those ‘cyclone attic vents’ they are going to suck like crazy on top of your chimney…rofl OMG. Ya it would be nice if you can find a steel one, on account of alum. is going to fail…but you could 5X the draw with a cyclone. And yes, it is AGAINST THE LAW TO FIX A CYCLONE UPON A CHIMNEY—JUST SAYING! you will need a brake of some kind to lock it down as things get thrilling, a much longer chimney, [not necessarily vertical] might get some of the intense heat off of the cyclone, because the heat rolling thru it is going drive it hard!, probably moreso than your average prevailing winds…or just get an extension cord, ummmm most refineries has an extension cord stretched out…hahaha! Maybe on the ‘coals hold’ thing, make it where it will slip fit the tunnel and just be a free standing thing separate from the lid, give it some legs and a heavy chunk of firewood to hold it against the lid. Heck I don’t know, did I mention I’m just an armchair wannabe, I know not if any of this stuff will work for sure for sure.Untitled2|690x412
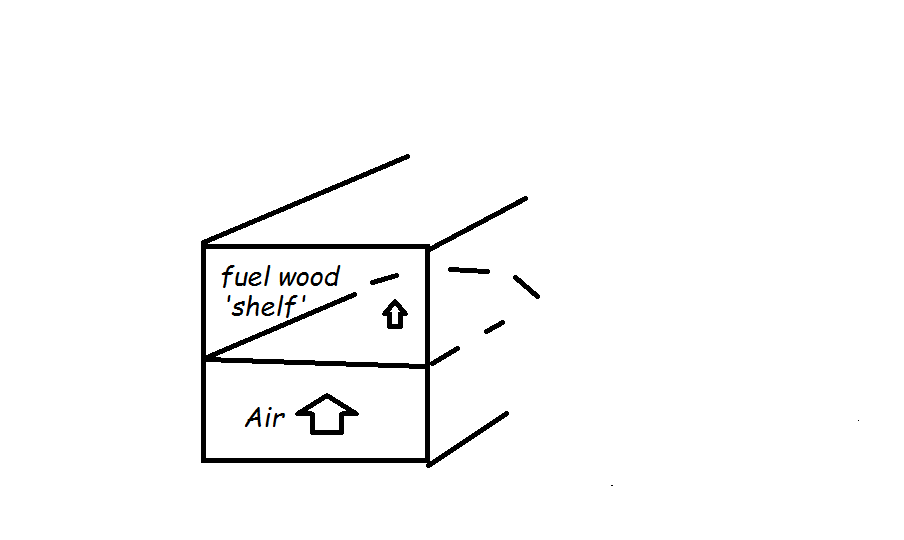
One other approach to the burn tunnel clogging…try a piece of sturdy steel mesh or plate in your burn tunnel, it becomes a ‘shelf’, load your sticks upon that thing, allowing ash to fall down thru it, and easily scraped out with a crooked stick. Maybe my pix will make it clear what I’m trying to say.[
2 Likes

This our giant kiln, we named it THE BEAST, it´s big. The drawing is this this:
![YU3g4BJBfb56JJ2X0fa1g8U6[1]](/uploads/default/original/3X/1/6/164bf72f1c7703d71c91f9f9ff4ba171223aa395.jpg)
I hope it can be understandable-
4 Likes
It looks pretty good to me. It just needs a moisture vent out through the back or up through the top. Once the moisture is driven off and the gas will light, close the vent with a valve or cap to force flammable gas down to the burner. A little insulation on the door/lid would also help.
2 Likes
The diagram shows adobe bricks for the walls, but I couldn’t make out what it says the floor consists of.
Good design.
From videos that I have seen, once retort gas is produced, there will be more than enough to maintain the reaction. If all of it is burnt below it will probably lead to destructive temperatures. It might be good to think of diverting some for drying or other purposes, possibly heating water? But how much hot water is useful?
2 Likes
Hello Abner,
Your diagram shows brick kiln surrounding the steel charcoal vessel, will you consider the brick roof, perhaps as an arched roof? A flat brick roof is very heavy, difficult to support as the unit becomes very hot, a flat brick roof is subject to cave in easily & difficult to build.
I am unclear about something, will you intend to fill the area between the steel charcoal vessel & the brick kiln as a combustion chamber? Filling between the walls of the brick and the steel vessel, with biomass to bake the contents within the steel vessel, to make charcoal is that what you intend?
I like your steel manifold.
Oliver
1 Like
I know i have spoken about how i am doing my charcoal at the moment and i will update on that in a moment , but one thing i do remember from early playing of the rocket stove type fires was a few years ago i tried to make a pizza oven rocket stove ,it was a rocket tube going up to a barrel within a barrel and sealed with insulation and so thought it would be fantastic and quick , well nearly 40 or 50 min after lighting i got a nearly cooked pizza , after much head scratching and playing it came down to just one thing , the size of the burn tube was too small , it was 4 inch square tube and for some reason just had a limit and that was it no way would it get hotter unless you used forced air .
So this year i had 2 very large mountain ash gum tree’s taken down in my garden part of the deal was they could leave all the branches and i would do those as long as they cut the trunks into manageable round for me to split , so i needed a way to use these branches up before the fire season hits us . Eucalyptus leaf’s are the most frighting thing i have seen once burning its like holding a cup of petrol on each twig as it burns , so decided to go ahead and make a Hookway design type of retort using a 55 gallon drum with a 4 inch round flue pipe through the middle and out of the side at the top of the drum, , again my mistake it should have been 6 inch flue pipe , but i used what i had to hand and this drum just sits on steel plate with a hole in the middle that matches up with the hole in the drum and under the plate i dug away the earth and light my fire there , if the pipe was larger then even more of the fire from below would get drawn up and through the barrel , as it is if the flames get too high they just allow as much as they can to pass through barrel and the rest go up the outside this is how i make a drum of charcoal with pretty good results and very little loss in volume , and ALL of the branches that are cut up to around 6 inches long and range from half inch to 4 inches in diameter , i see a small amount of steam coming from below where the slits are in the 4 inch flue pipe , and when it does start to smoke as long as there is plenty of air flowing through it tends to set alight and then once fully gassing it makes a lovely flare stack on the top of the chimney ., when i get through all this green stuff i want to see how much better it does dry wood , btw because i am trying to burn the leaf’s and the smaller branches ,under half inch its a long process as the gum leafs themself make some black smoke so i only bur 1 branch at a time and so my drum of charcoal can take 2 or 3 hours in hand
feed burn time before it will self burn .and then thats about 1 hour .
Dave
4 Likes
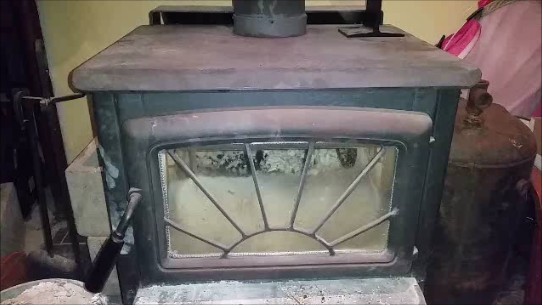
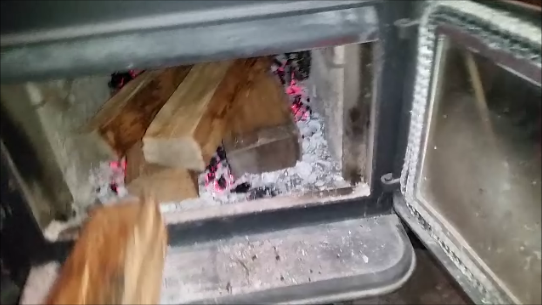
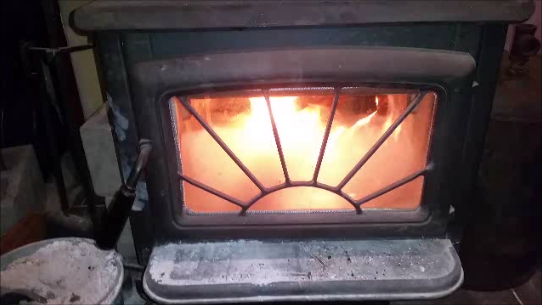
It was -27 C this morning and a balmy -20C right now so its a perfect evening for making char. I’ll have to stop soon as the house is at 23 C and getting too hot! I do want to build an outdoor boiler like my friend Wyatt and make barrels worth of char but here is a nice easy way to generate 5 to 10 gallons of engine grade char a day with no special build while maintaining good heat harvesting.
Cheers, David
Here is a link to the video

And some pics for the dial up crowd

6 Likes
Ha, l skrach every bit of char l can get too now. Includeing my outside boiler. Its not exactly good at char production as it gets all its air trugh the grid on the bottom, burning the char, but l found leaving some ash in to plug the grid will boost char production.
2 Likes
David thanks for the video , that is more or less how i make the bulk of my charcoal during winter time , the one thing i would recommend though is instead of shoveling your coals into your container down on the hearth , get hold of a couple of old saucepans with lids small enough to fit inside your fire to the side allowing you to shovel each side’s worth of charcoal into the pot ,that way when you shovel it the ash that was going up into your living room will instead be sucked up your chimney . i then carry my pots outside to cool for 20 mins before dumping into a larger 20 gallon pail and start all over again .
Dave
4 Likes
Initially I needed charcoal to run a forge. On the journey to find out how to make charcoal for that purpose I discovered biochar and gasification to fuel an internal combustion engine. At the time, it seemed that the 2-barrel method with 30 gallon retort inside a 55 gallon barrel with a 6 inch chimney was the best choice. I couldn’t find a 30 gallon barrel with a removable lid so I had to fill the 30 gallon barrel with wood, place the 55 over it on blocks, and then insert a rod under the bottom of the 30 to hold the barrels in place while I turned the barrels so the 30 was upside down. In the videos it looked easy to flip the barrels without the rod but I didn’t have much luck doing so without getting wood under the bottom of the 30. After a burn or two I became unsatisfied with that method. It’s a royal pain trying to stuff fuel between the barrels, and I had some charcoal that wasn’t completely converted because there wasn’t room for enough fuel between the barrels to complete the process.
At that point I cut a 1/3 section of a 55 gallon barrel, with an expanded metal grate set on 4 bricks and an access hole in the side for addition of wood, as a firebox beneath the original 55 gallon barrel. I cut the firebox barrel just above a rib so I simply stacked the 55 gallon barrel on top of the firebox. The original 55 gallon barrel had holes cut around it’s bottom perimeter and sides at the bottom to allow air flow, yet the middle of the bottom was solid so that no air could enter the 30 gallon retort. With that tweak, I no longer had problems with an incomplete conversion and it was easy to add wood.
When to bottom of the original 55 gallon barrel burned/rusted out I had to find another way to support the 30 gallon retort inside the 55. I used ½ inch rebar welded together in a triangle set in notches in the top of the firebox. Four legged tables can rock, three legged tables do not. However, the ½ inch rebar would get soft and bend under weight so I had to weld angle iron on them for more strength. I eventially make 2 rebar triangles to make a star shaped support. Since I needed a bottom for the 30, I bolted a disk blade slightly larger than it’s diameter for a removable bottom/top. I bolted the center hole in the disk blade closed because the gasses exit between the disk and the barrel and I have a few holes drilled in the top now bottom of the 30. The disk blade was a lucky coincidence. It’s heavy enough that I doubt it will burn out any time soon. It’s also curved, so it settles nicely onto the rebar/angle under heat and directs the flames from the firebox and gasses from the 30 up.
That worked pretty good but it still seemed that I had more smoke out the top than was politically correct so I stole an idea from Gary Gillmore and used the remaining 2/3 barrel set on a rebar spacer as chimney. It’s not completely smokeless, but it smokes less…………less than cooking a hamburger on a hibache.
As assembled and ready to fire: 1/3 of 55 gallon barrel as firebox with grate on bricks and support for 30 gallon barrel, 55 gallon barrel with no top or bottom with air holes around bottom sides, 30 gallon barrel filled with wood upside down with disk blade as bottom, rebar spacer for air on the 55, 2/3 55 gallon barrel as chimney.
After lighting the wood in the firebox, the 30 will off-gas in 20-30 minutes and burn is complete in 2 ½ -3 1/2 hours. Off-gassing is not strictly linear and regular, small and dry to larger and damper, means that once off-gassing begins to burn on its own flame, at least a small fire must be maintained in the firebox. The off-gassing process will start and at times diminish to the point that the burn will not continue to completion without a source of heat and flame in the firebox to maintain off-gassing. It’s possible for the off-gas burn to take over and burn very vigorously for such a duration that the fire in the firebox will nearly go out before off-gassing is complete. Once the burn is complete I just walk away until the charcoal has cooled completely. I have fired twice a day by dumping the nearly cooled charcoal from the first burn into an airtight 15 gallon barrel. Depending on the size and moisture content of the wood in the retort, approximately 30 gallons of wood is converted to 15 gallons of really good charcoal while burning 15 gallons of wood in the firebox. . I suspect that if you want to start a fire and leave it completely unattended until complete, a larger firebox (2/3 barrel) with more wood would get the job done.
This retort isn’t for the faint of heart. Although I’ve never seen red metal other than the 30 gallon barrel supports, it gets HOT. Laser thermometer readings on the outside barrels were around 250 degrees, but internal temperatures were higher. The thermometer I used goes to 900 degrees and then simply says “higher”. Pointing the laser through cracks and holes, in some places read “higher”. With good dry oak it sounds like a jet engine when it off-gasses and the flames may be 8 foot high. Considering that flammable wood and wood gas from the retort is at roughly a foot off the ground, it does get warm.
1 Like
Rather than split and chunk and eventually size firewood to make charcoal, why not use the little stuff that’s left in piles instead? Kon-tiki II is an open burn deep cone kiln with a surrounding air shroud. Put a hopper underneath like Don does or an auger like in post 148 in this thread. Then just screen the results for size. Fines to the garden, then engine gassifier stuff, then larger charcoal for cooking or forge.
https://www.youtube.com/watch?v=U1aQZw08fSE
If you have long stuff, burn it in the middle then toss in the ends. Green wood and wood that is larger diameter can go in too, but may need to be re-fired in later firings until done.
This idea appeals to my lazy side.
1 Like
Sorry, I don’t know how to edit a post.
I live in farm country, the other day I saw a round self feeder for hogs about 4 ft tall maybe 5ft diameter with a sloped bottom inside that I’ll probably use for a test on this idea. There are also larger grinder/mixers that should work too and they already have an auger at the bottom.
1 Like
AH, Yes, In my younger days I worked on a hog farm. I remember those feeders. you would have to make sure the flapper doors were sealed up good, or remove that part altogether. The feed grinder would be great too. You could pull it right to your brush pile.
1 Like
Hi David, efficient and using what you have, just in a different way! Just a thought, instead of placing raw fuel on top of hot coals, move the hot coals to one side and the raw fuel on the other side. That could provide a slower release of the fuel at start up. Of course that may not be of any value to your situation.
Cheers!
yes, especially since this biomass rotates more often and rejects its CO2 quickly in the atmosphere.
to burn these little framework and to make charcoal, even without valuing the btu produced by charring, is all in my opinion acceptable
1 Like
this mutt is no good
according to kon-tiki- presentation.pdf they only made 700 liters of biochar in 5 hours(37 gallons per hour)
1 Like
If I could make 37 gallons an hour I would be very happy and play with charcoal much more.
1 Like
Since my 3 qt. bain marie works so well at making pellet charcoal in the wood stove, I decided to try a 6 qt. version for the wood boiler. To hold things together and allow good gas flow to the bottom, I used a piece of 1/2" pipe with 1/4" holes.
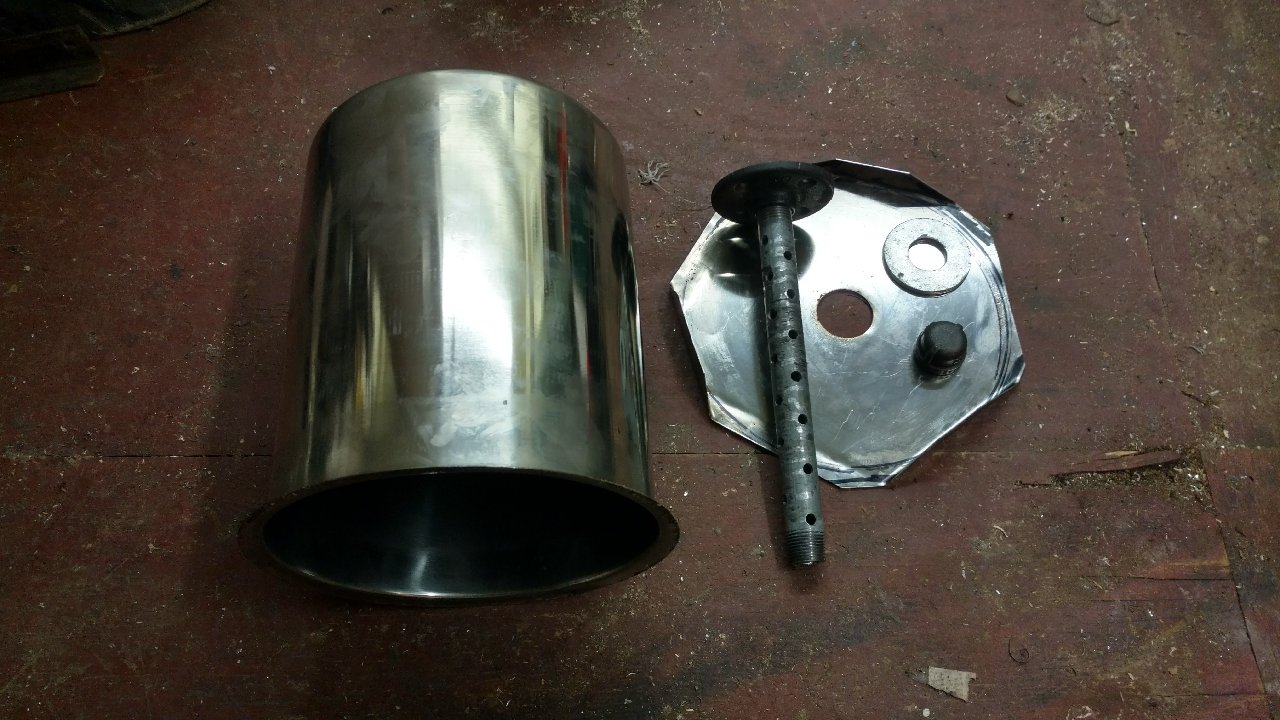
The pipe cap is screwed on tight and the flange is hand tightened to hold on the homemade lid
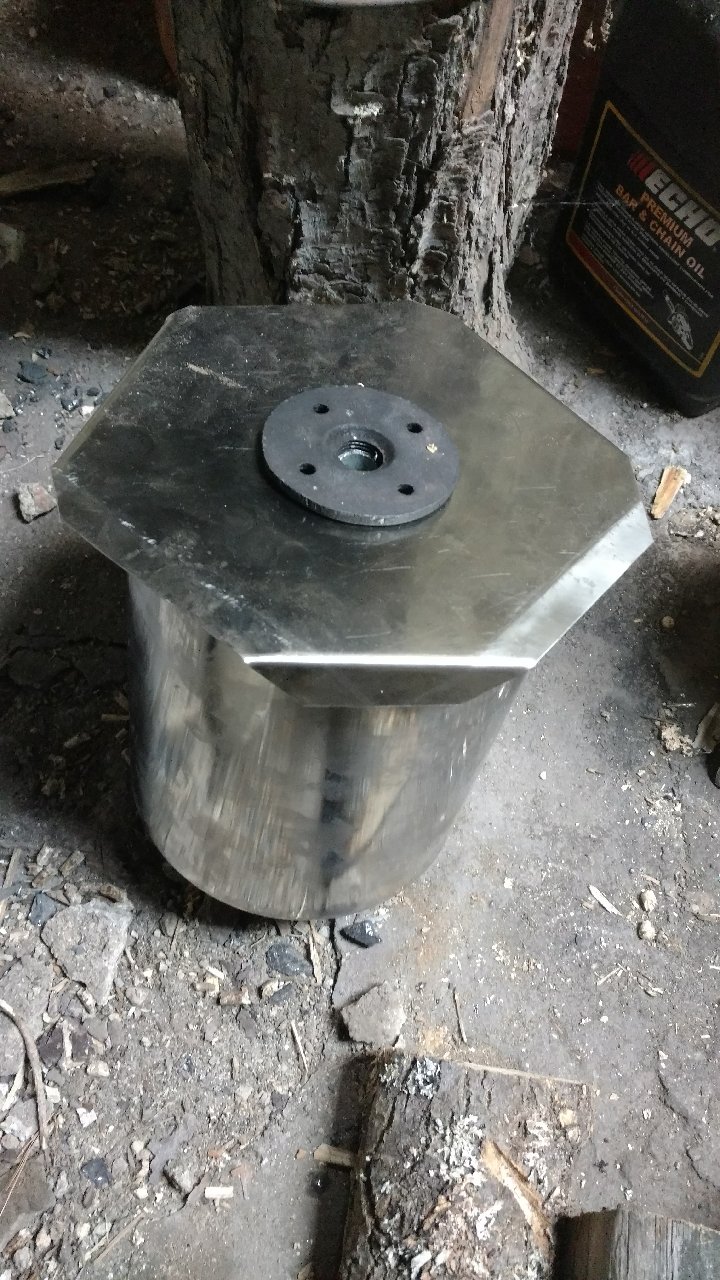
Set in the firebox and build a fire around it.

There is room for two of these, but I thought that I should test it before making the second one.
9 Likes