My first small engine run

Put the engine under some kind of load… doesn’t take much woodgas just to make an engine run… just my 2 cents

1 Like

You aint messing around with that vibrator!!! Very nice!!

2 Likes

You are havin way to much fun Pepe, I like that swirl flair! Very cool! Herb H

2 Likes

Hi All,
The morning after results of burn 3.

@17s note the new lip on the top of my hourglass hearth. There’s some charcoal on it, but it went through the hottest temps of the burn and hasn’t distorted yet. One of my improvements, see reply # 360.

@42s I discover there’s a drain problem.

@57s A quick shot of the cooler condensate. You’ll have to pause the vid to really see it.

@1m06s when I said it’s full, it was only full from the valve up, since the valve remained in the closed position due to a bad handle.

With the moat drain plugged, the cooler did a stand up job of capturing the moisture. This was a good burn n learn.
Pepe

2 Likes

Put together my new drain. The drain hole is 1 1’2" but the valve is 1 1/4". The main body is 2". A street el brings the shut off to the front. I could turn it a quarter turn to the right if necessary. to get it out of the way. I still have to insulate that heat shield around the hearth area. It sure looks better than the old one.
Pepe

2 Likes

Hey Everyone,
What a pleasant surprise I got this am when I started stripping a Reliance brand hot water heater. The shell has a plastic coating before the insulation is installed, so it comes off basically in one piece. First time I’ve seen this.
Pepe

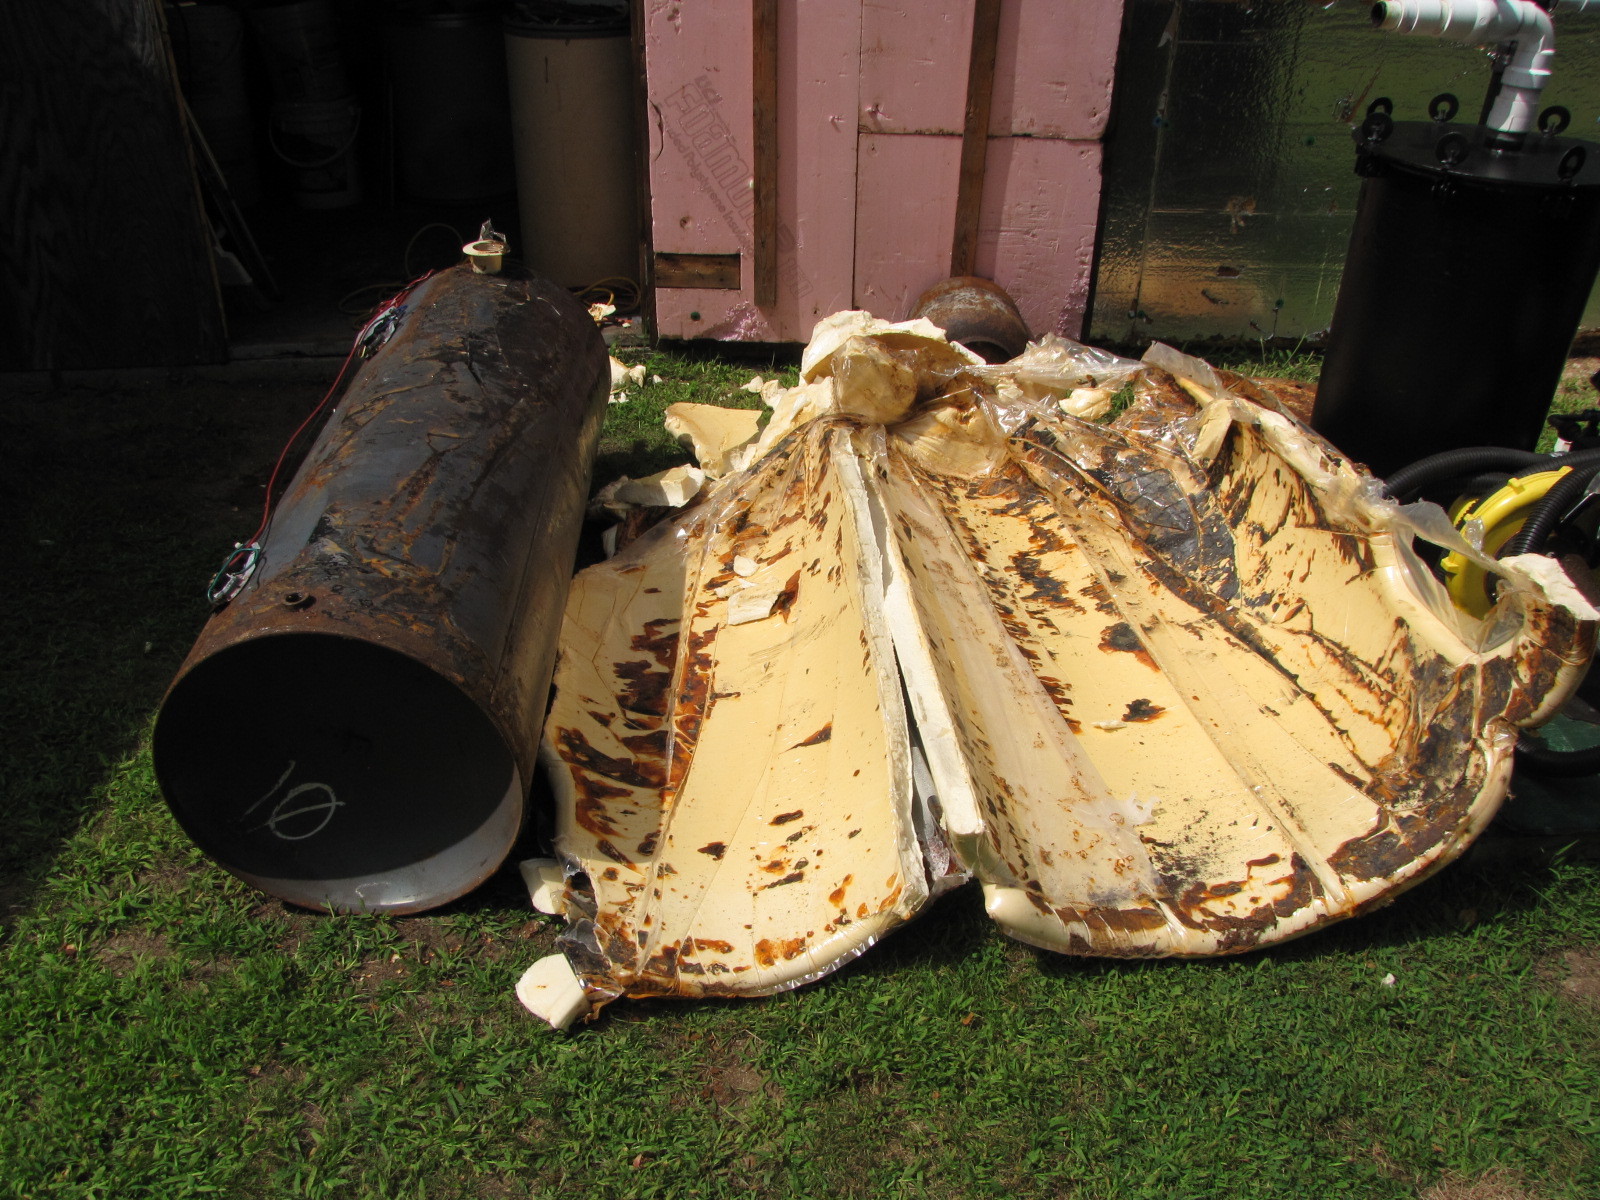
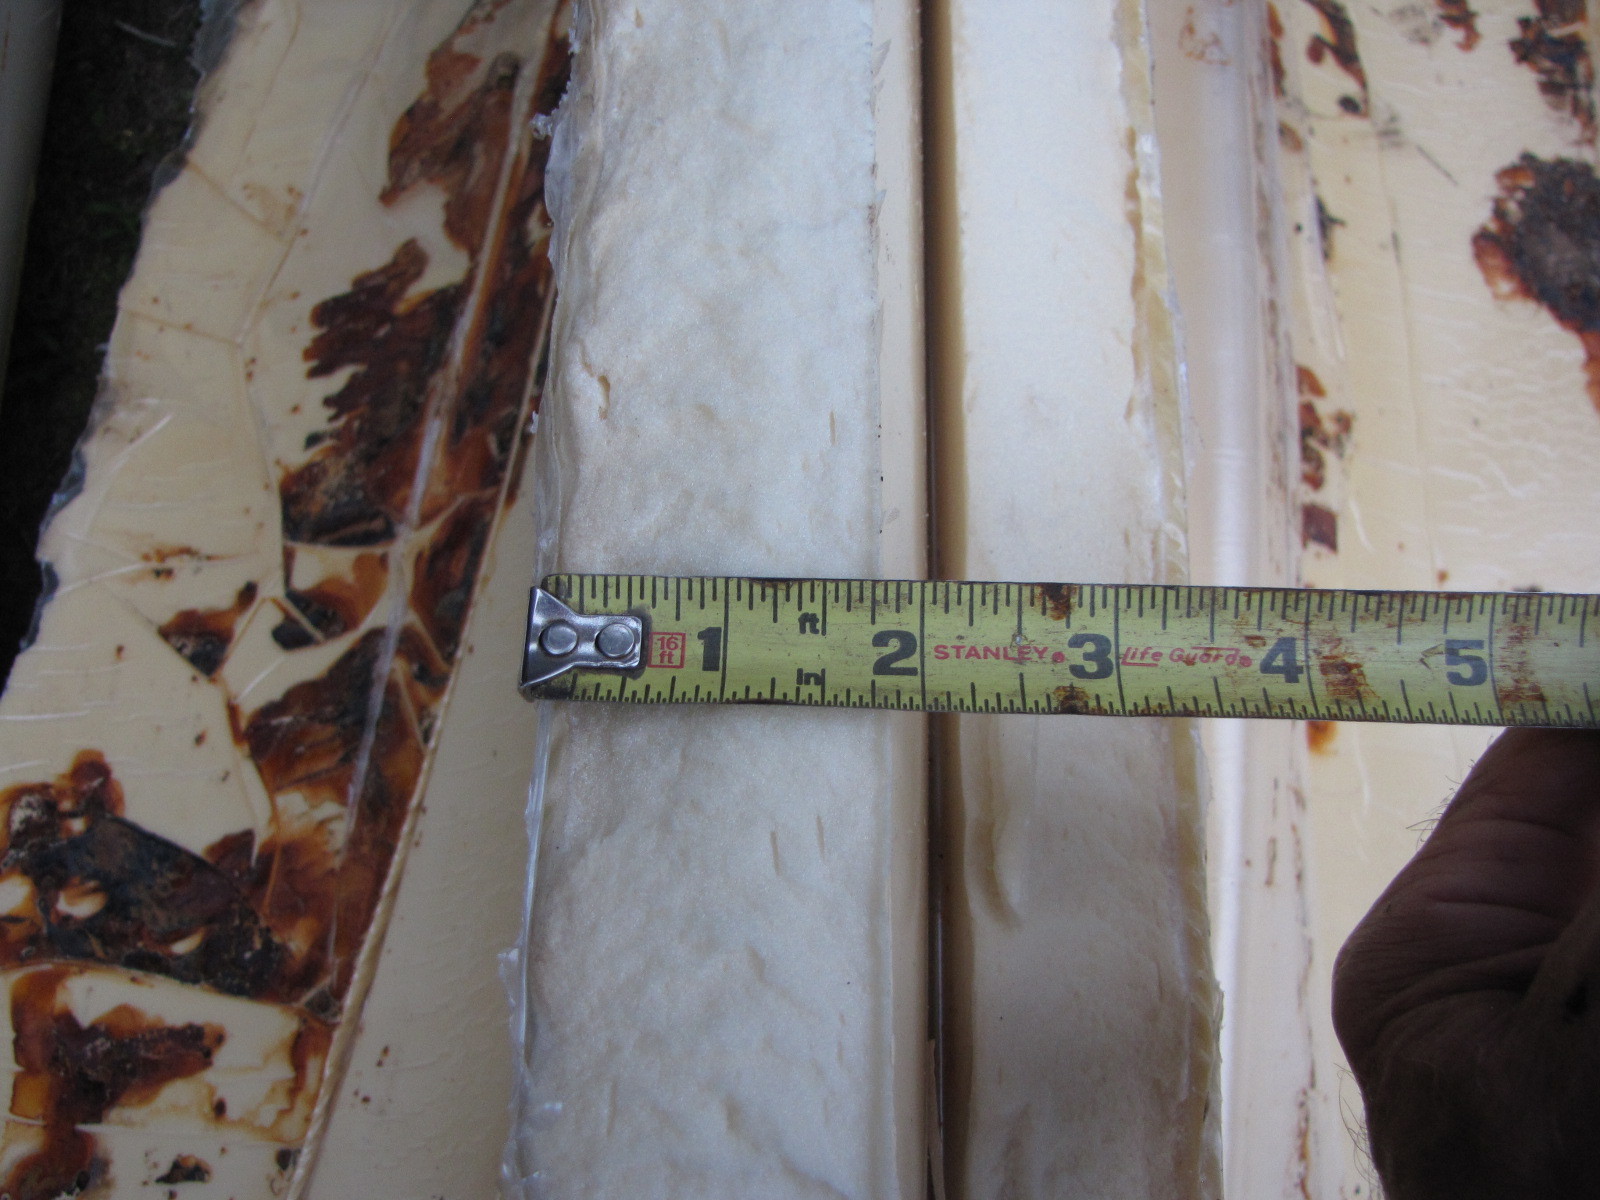
This is 2" stuff, top notch. The bare tank is 20" diam.

4 Likes

Aren’t you the lucky one??? If you go for a hot water heater that is in tack, how do you know what diameter the tank will be. Do you go for a certain gallons. I have never used a hot water tank, but my be thinking about it.TomC

1 Like

It’s been my experience that most of the ones I’ve used have one inch of insulation. OD 20 inches tank size 18 inches . Your mileage may vary

2 Likes

You can poke a nail into the insulation to find the thickness, then subtract that from the overall diameter.

4 Likes

Yep the 18 inch dia tanks are usually the shorter 40-50 gallon ones.

Hey All,
My wife picked up a some goodies for me at a local auction. The first item is a medium size squirrel cage fan I can use for drying fuel or moving air around. Five bucks and it runs well, just needs some minor housing bracing work, cleanup and paint.

This baby puts out a lot of air for its size.

This unit had one slightly bent fan blade and scraped when turned. No one bid on it and my wife got it for a buck, $1.00. Can you believe it! I took the cover off, used a pair of vice grips, tweaked the offending fan blade and it runs great, no vibration at all.

I’ve never seen a motor so adaptable to cycles and voltage.

The inlet is 3 1/4" and the OD is 13 1/4".

The fan has a 7 1/2" diameter and the ID is 11 1/2". Note the balancing weight attached to the top blade, quality unit. The outlet is 2 3/4". I’ll make a gasket for it, fabricate an inlet cone and give it a try. I really hate attaching anything to such a nice antique.
Pepe

2 Likes

Good wife! But guilty of aiding and abetting your habit.

2 Likes

That forge blower looks really bulky. I just don’t know how you’ll store it. I do happen to have plenty of space next to my homemade forge and I wouldn’t mind keeping it safe for you. :wink:

2 Likes

Too bad UPS doesn’t take bulky stuff, drats. Here’s another really bulky one, same size, but powered by armstrong. Price was armstrong, too. My wife gave a C note for this one at the auction, someone else wanted it, too. Drats.
Pepe

3 Likes

I really like the forge blower.

Hey All,
we’re going to be sunny and almost 50 this Sat and Sun. I’ll probably burn some wood before I retire my unit for the winter for teardown and further mods. One of the mods will be heat gathering shroud over the 3 hottest cooling pipes on my cooler. They are all in one row simplifying the duct construction (basically a rectangle). The harder part will be connecting the 2. Here’s a view from the front of the unit.
Here’s a link to the site I use for titles, etc.
http://wigflip.com/roflbot

Pepe

1 Like

What is “spai” over on the right side of the picture? O.o

Hi Brian,
SPAI is a single port air inlet on the circular manifold enclosing the tubes to the nozzles. This unit was a fluidyne design (third pic) before I started modifying for the better. This is the point where my experiences and reading finally began to come together, namely “preheating incoming air” by putting the air inlet tubes in the hot exhaust gas stream. It works and was well worth the effort. (last pic.
Pepe

<img src="/uploads/default/original/2X/f/f48ee861b76deb1afa9b089cda61ff3736a6569b.JPG" width=“666” height="500>

2 Likes

This is the last pic for the above post, don’t know why it didn’t post above.
Pepe

Hey Everybody,
Refer to the chart on comment 411, August 18, 2015 @ 5:22pm. When I find my hard copy, I’ll post it here.
I took a few minutes to analyze my temperature readings from 5 places on my gasifier.

  1. The PREHEAT temp peaked @235*F @ 9pm. It stayed fairly constant to the end.
    There’s a reason for this that I finally recognize after all this watching and reading.
    I’ll get to it after I tell you the other temps.
  2. The BURNER OUTLET temp peaked @ 600F @8:45pm, cooled on & off 20-35F, but
    remained fairly constant to the end. There’s a reason for this.
  3. The CYCLONE OUTLET temp peaked @380F @ 9:00pm and only cooled 30F in the
    rest of the run. There’s a reason for this.
  4. The COOLER OUTLET temp peaked @ 175F @ 9:00pm and only dropped 25F in the
    next 45 minutes. There’s a reason for this.
  5. The HOPPER TEMPERATURE was 225F @ 9:pm and remained mostly constant
    almost to the end when it rose to 285
    F.

The next day I opened the hopper and found I had burned down to the restriction. In my head I guess I had burned a half hour or so too long. OK, now do the numbers tell me anything. Yes, another piece of the 75% . Here’s what happened. When the fuel load was consumed down to 4"-6" or so inches above the nozzles, pyrolysis stopped (no wood left to pyrolize) and the charcoal/char bed became the fuel and burned up. The preheat, burner outlet, cyclone and cooler temps stayed constant because to them it was business as usual (heat).

The only real trend I think is the cyclone outlet temp. It peaked @ 9:00pm and steadily declined to the end. I will probably watch for this decline trend and let it run for another half hour. This kinda jives with my half hour too long guess from looking where the burn ended. Darn, I guess I’ll just have to burn some more wood
Pepe
After you bring up the picture use the arrow key on the upper left hand corner. Click once to enlarge, then click again to close the picture. I usually don’t have to use the back arrow key but I chose the wrong capture option from the choices circle. Here’s a link to the site to download Gadwin Print Screen. In the instructions you’ll see a circle with choices on how to capture what you want. This is Gadwin Print Screen 5.4, it’s free.
http://www.gadwin.com/printscreen/

1 Like