Pepe,
Actually I am thinking of using my lid as the relief. Something like the drawing here.
I am going to weld a rod on the inside diameter of the collar for more rigidity. It should also help with sealing the lid.

Pepe,
Excellent lid!
Your point of force is at the center of the lid therefore you will have an even distributed load around the gasket perimeter. The joint is loose so it will self center and the spring loaded arm will also function as a pressure relief. In the food industry we call those access manways. When I built mine I used an air cleaner from a 76 dodge. It had the perimeter gasket on the lid and I used the housing with the rolled bead. I welded a dome top on it and put a cross arm on it with a spring load similar to yours.
Bill has the right idea as well.
1 Like
Arvid, That looks so neatly done. I can’t wait to get my unit on my trailer. Bill, you’ve got me thinking about our designs now. In both cases what really insures that the lid will come down straight after a burp? Mine’s on a swivel, so after I get my gaskets set in place I will close the lid and lock nut the swivel in that position. I may also use your idea with the following addition. Add a rod guide for the lid as shown in the pic below. Tack weld this on over an extended period so as not to warp the lid from excessive welding. In order to adjust the spring tension you could use a bolt coming up through the bottom of your lid and out the top of the rod guide with enough threads showing to adjust the tension. This length will take some experimenting. Try using a long threaded rod at first to get this tension (and rod length) down pat. And just when I thought I was done, lol.

Thanks Wes, This lid operation deserves our attention. A rolled edge on a gasket, perfect. I wonder how big they make 'O" rings?
Apparently pretty big, I just found this site. I didn’t check any prices, but I think they would scare me.
http://www.applerubber.com/products/o-rings.cfm?gclid=CKHOz8aTzL0CFYN0OgodxDEA8A
" . I wonder how big they make 'O" rings? "
Hello Pepe ,
For some applications I have used the O ring out of the top of a plastic 5 gallon bucket.
1 Like
Hi Wayne, I’ve got buckets all over the place and never think to use those gasket parts I think for some applications (low heat), you could cut them to the length needed and glue them together with high temp silicone. Thanks for the tip.
Pepe,
That is real close to what I was thinking. Although you draw much better than I. I was also thinking about a brake shoe spring or two? I’m just not sure how much pressure is needed or what is too much. I guess that’ll come with experience and some trial and error. I was thinking of using a rod and sleeve for the guide but I like your idea with a bolt for an adjustment. When I was over at Mike Larosa’s yesterday, I noticed he used a small trailer spring for the arm to span over the lid.
Hi Bill,
I think a brake spring is way too much spring. I used a 6" or so section of spring from a door closure and it works well. I have a cup at each end to contain the ends of the spring. They are drilled out to the rod diam. I would estimate the pull needed to latch my lid is about 6-8 pounds. Door closures are under a lot of tension, be real careful opening them up. Trailer springs should be good for the arm, but I’ve never welded spring steel. Ask Mike about that.
we have used a small block chev valve spring in that roll in the past
Thanks Pepe and Arvid.
Pepe, Mike used it just like you said, as an arm, not welded.
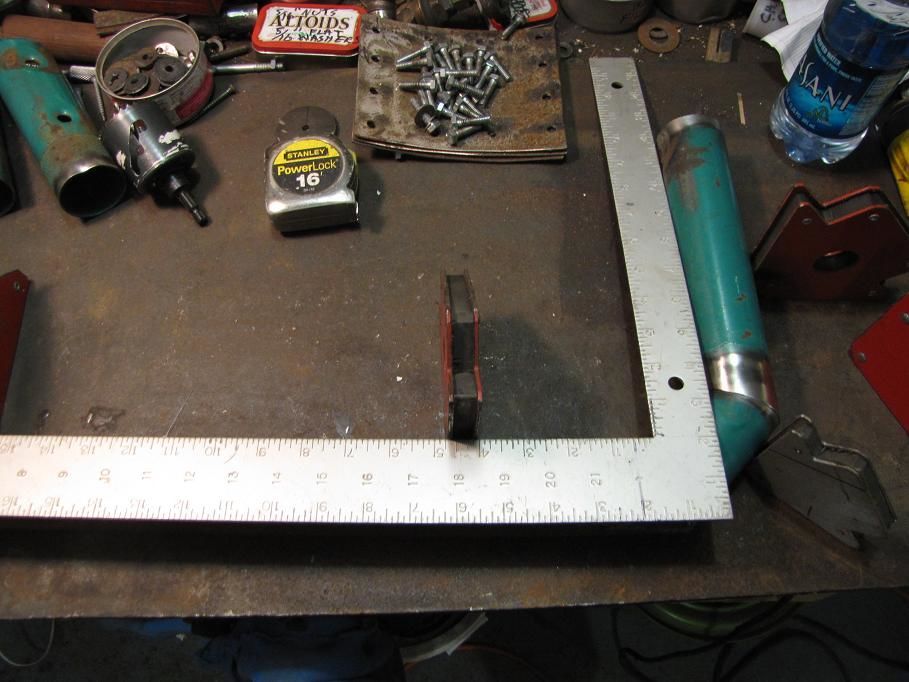
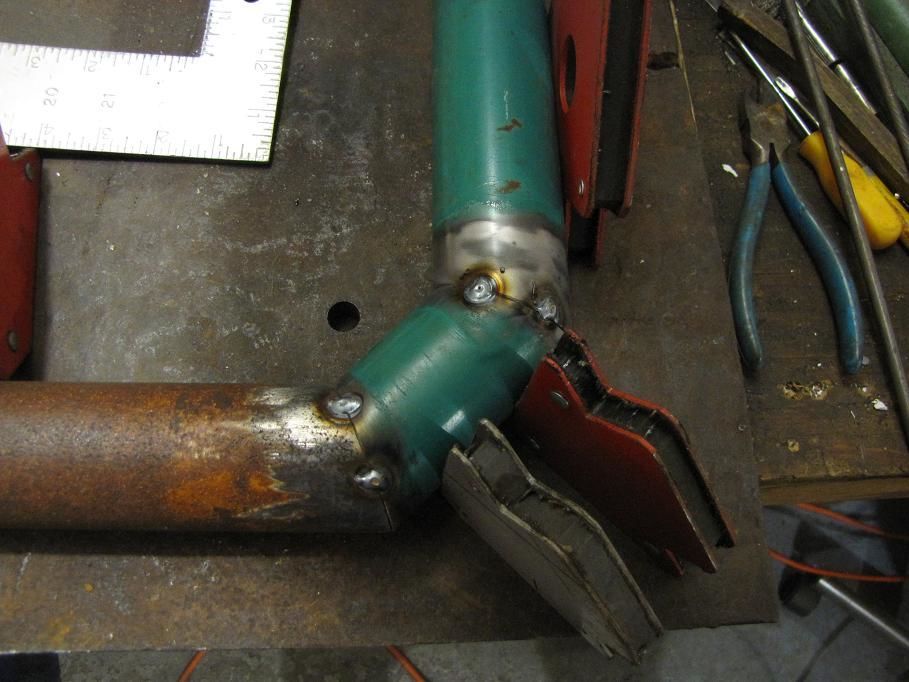
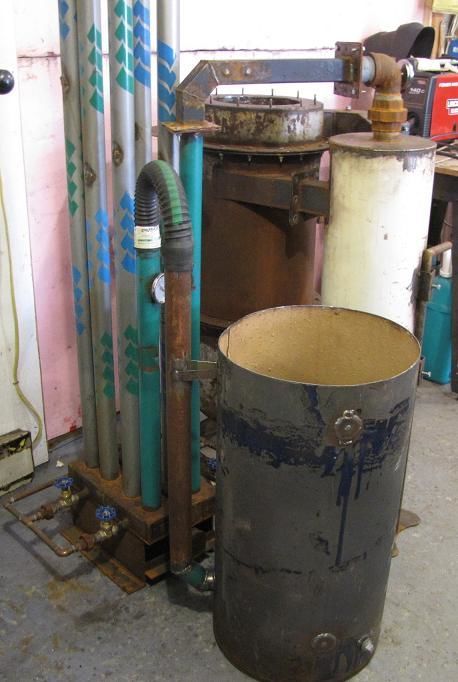
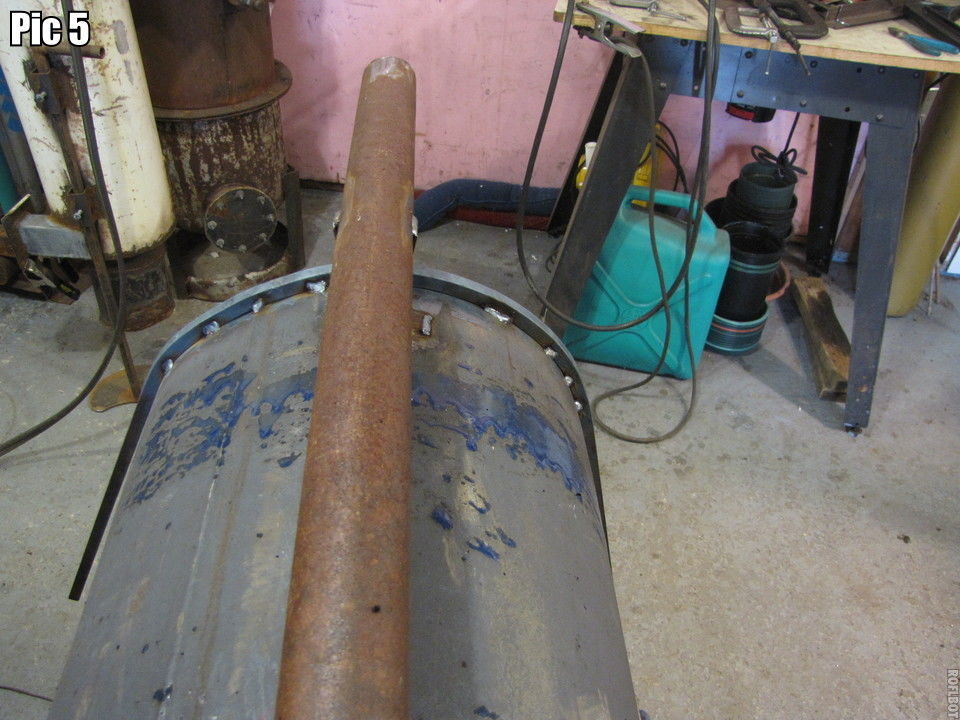
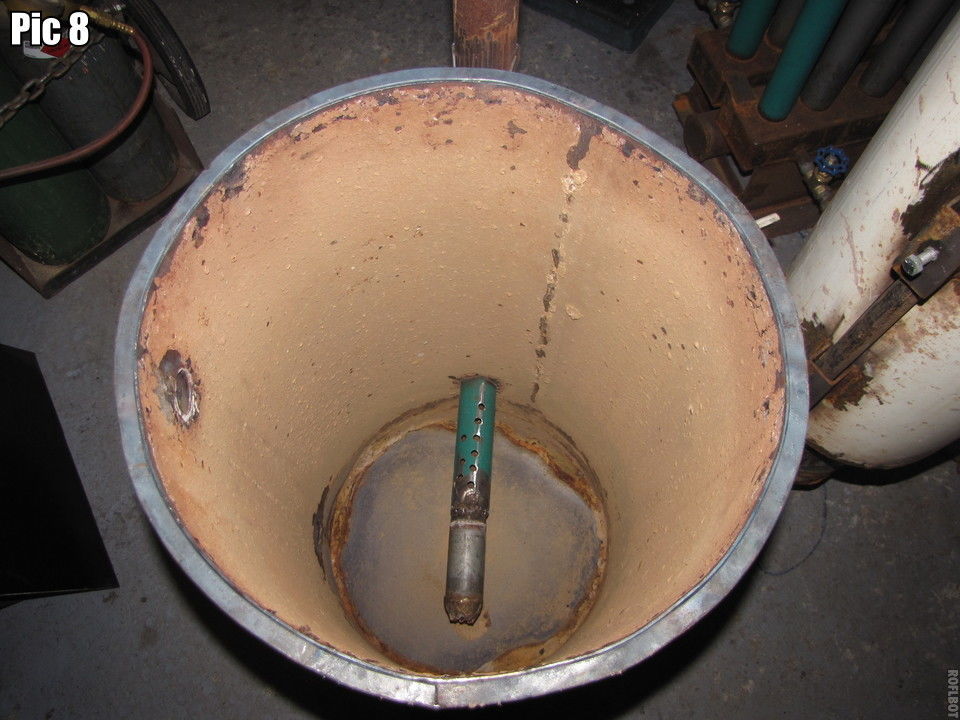
I put the gas inlet tube (2’ diam) together and installed it on the filter housing. Pictures show how I laid it out and kept it square and straight. Love those magnets for mock up. Did a test setup and I still have a 4’ x 4’ foot print. Gas diffuser has many holes and the extension necks down nozzle like to a 1’ diam hole. I’m planning to to use lid fasteners like Dan Cox’s. I started some gaskets Dan Cox style. I have rectangles and squares that I will cut to fit. I’ll post a filter medium loading diagram soon. What a gorgeous day here, sunny, light wind, mid 50’s, river roaring in the background, no traffic.

Hey Pepe;
Looking mighty fine. Won’t be long now before you are out in the warmer weather showing us that baby running. Dan
Thanks, Dan. Yes, we now have ground with patches of snow thank goodness. The soil is still frozen at the 1 foot level. Last Apr 27 I was planting potatoes. Those forged bolts you used to secure your filter lid certainly are pricey, ouch! I’m going to use regular eye bolts, heat them to fit a 5/16" bolt and tack weld them shut. I have a 16" filter so I’ll need a bunch to secure it air tight. I need to build up the filter edge also for a rope gasket. I may use a narrow flange. Time consuming.
Pepe
I have to confess Pepe, I did not build that part. It was like that on the container when I purchased it. The filter and the condensate tank were one piece when I got it, the bottom of the old condensate tank was one end and the top of the filter(part you are making) was the other end. Saved me a lot of work coming in a useful configuration for sure. Your eyebolts should do just fine, good luck. Dan
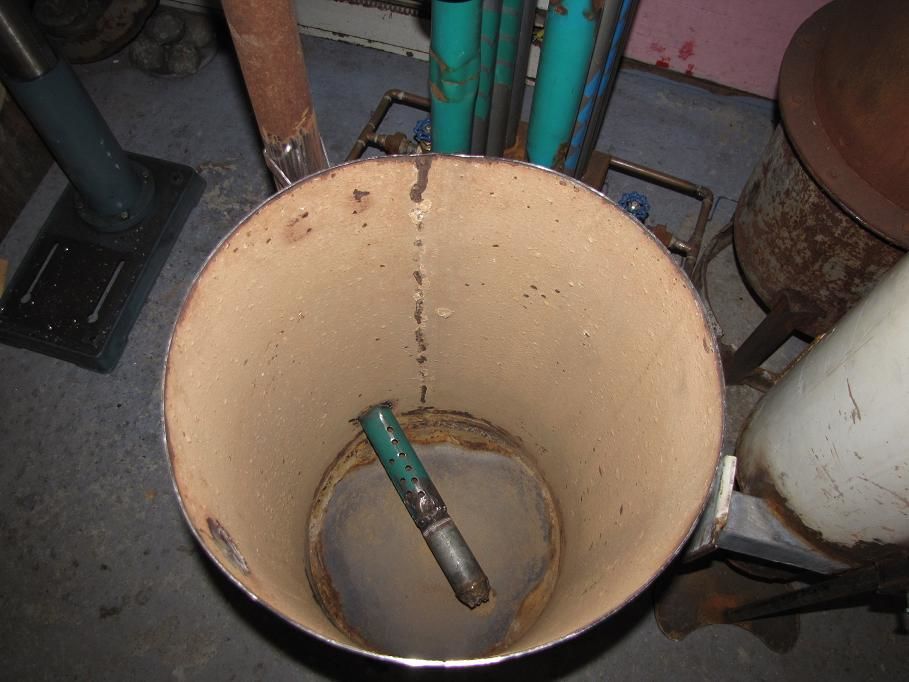
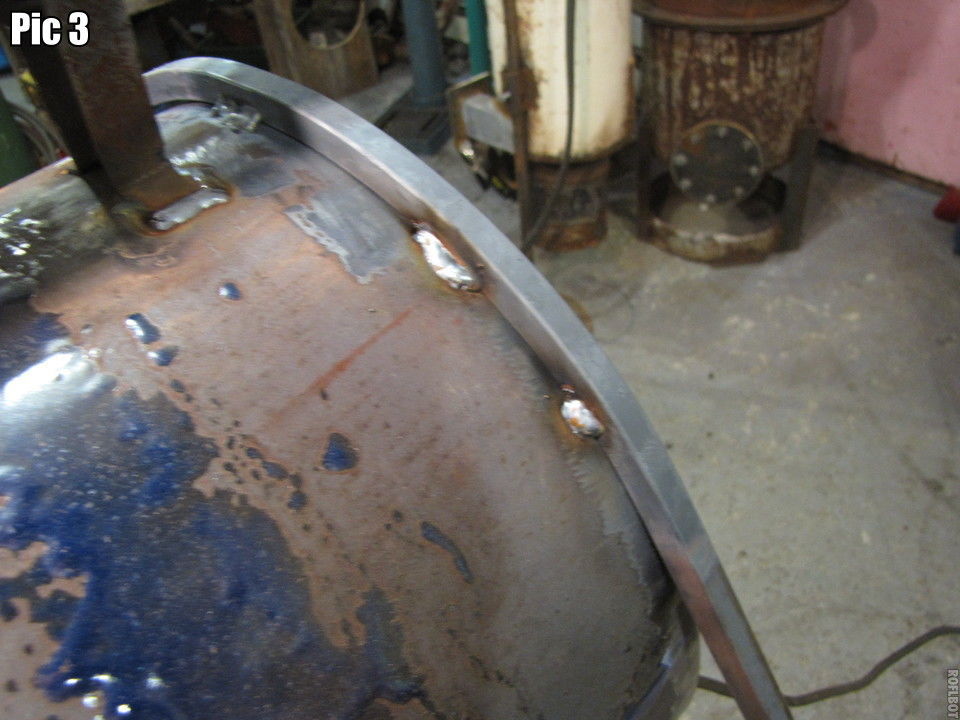
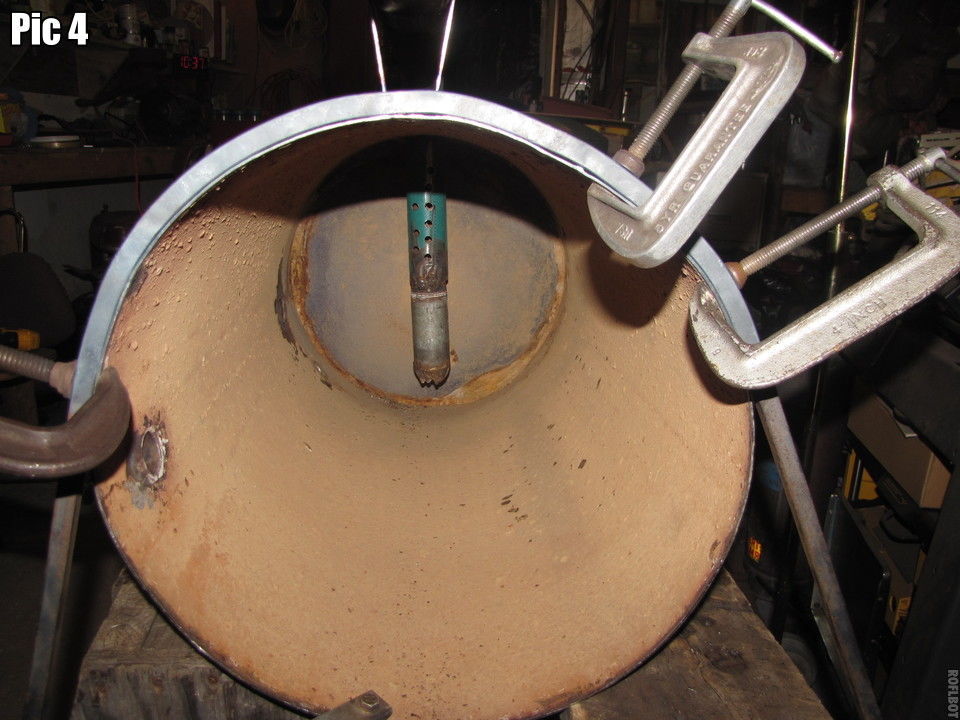
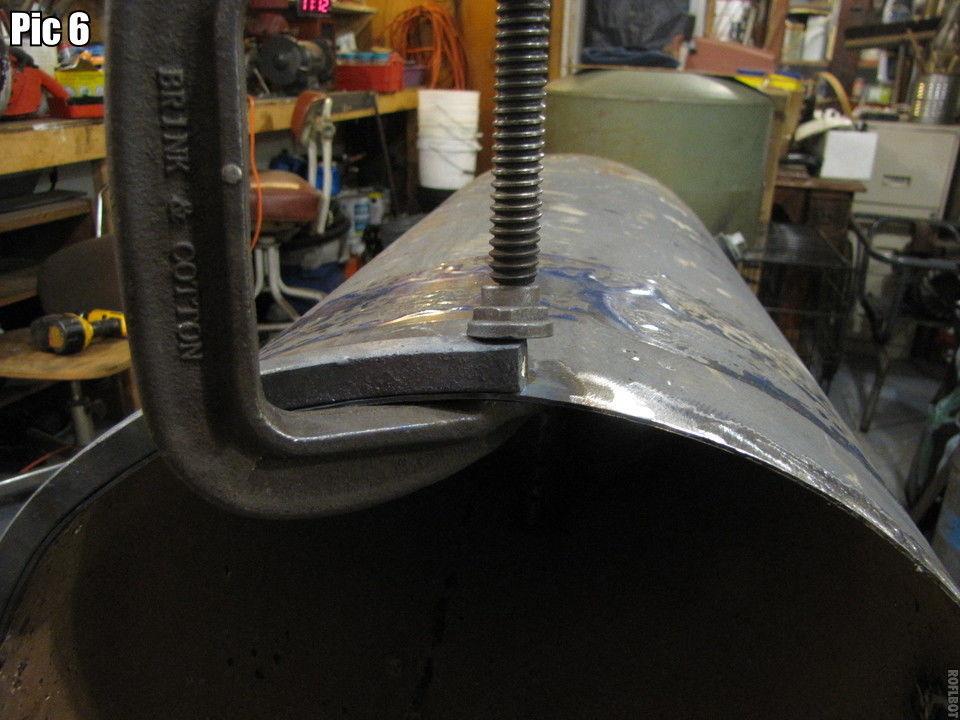
I got a piece of 1/2" square stock to form a lip on my filter. I measured the circumference and added an inch. I lined it up as best I could (this is critical for it to meet itself) even with the top of the filter body and tacked it in place at its mid point. Then I heated it red hot and sloooowly bent it to the curve making sure it stayed flush with the top of the filter body. I was working with a 3" long red hot section keeping the torch moving over the entire 3" and slowly advancing as I felt the bar bend. Keep steady pressure on it you’ll feel it move. Watch how it follows the curve, slow is the word. I bent 6 “-8” of it and tacked it down. I finished one end and started down the other side. I cut the overlap to fit, heated the last inch really red hot and pulled it into place with the clamp. Then I welded the lip underneath to the filter body. As Bill pointed out keep the heat on the thicker metal to avoid burn through. I need to grind a few spots where the shell sticks up maybe a 1/16". It’s a nice flat lip now, which I will seal with a flat lid and high temp silicone in place. Next, onto the flat lid with flip up clamps to seal it down. Auto darkening lens bit it, so I had to go to the burgh. Ran out of acetylene, too, but the guy’s only 4 miles down the road. Actual stay right at it time about 1 1/2 hrs. Uhh, yeah, I know, do the lip before the inlet pipe, right. lol.


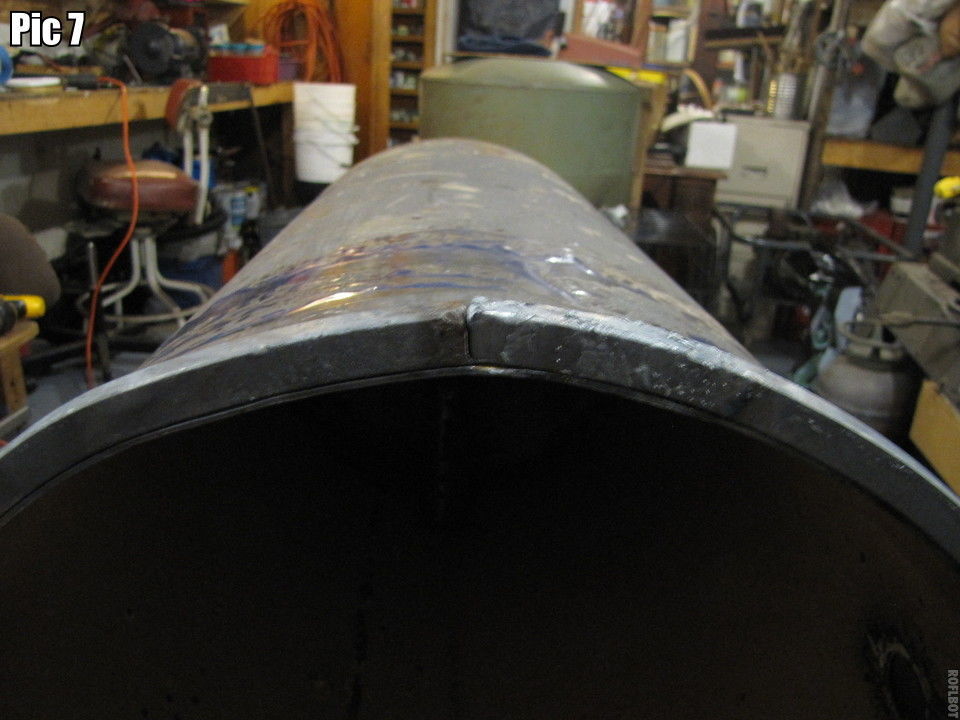
Wow! Make do with what you have. Turned out very nice Pepe!
1 Like
it’s good to see i’m not the only one that needs to build a ring rolling machine.lol thats hard crafty work there but it"s what it takes to make a nice flange surface by hand.
nice job
1 Like
Thanks for the comments, guys. Bill, I got the MEN bug way back and have been a DIYer ever since. It’s amazing the resources available on the curbs in America. And of course I can’t forget my Seabee motto, “Can Do”! Dan S., I have plans for a roller and am on the look out for gears. I might even try a chain drive if I can’t find gears. I built a simple cone bender for my hour glass hearth. Takes some practice to get it bent smoothly. My first ones weren’t too smooth, more like 30 sided!
I am in desire for a roller too Pepe. Are the plans yours or would you be willing to share the plans? I’ve been in a look out for a used roller but can’t seem to find one. I want to be able to roll 14 ga. sheet steel and also rods. I haven’t really worked with metal until last August. I have always been in woodworking. Now that I started with metal , it’s like it opened a whole new world for me and I really enjoy it.
Bill, We have parallel lives. I did building and remodeling most of my life, but since VGW I have become a steel worker and love it! Yes, a whole new world.
The plans are someone else’s. Check out this guy’s plans. Really a silent tutorial, but pretty good for ring rollers.

This guy is pretty good also.
