That is so freaking helpful! I’m sure it helps you as well.
1 Like
you should send it to Chris in PDF and see if he would add it to the LIbrary for you and the DIY guys that are admiring you 
2 Likes
Matt, I’ve never done the pdf conversion. If I highlight the picture (in a file) I have an option to save that picture as a pdf file. So, do I convert all 3 photos to pdf files? Then what , stick them in a folder? When I highlight a folder I find no option to change it to pdf. I know I’m missing something, can you fill in the blank for me?
Thanks, Pepe
1 Like
Its real easy, here is a little trick!! Go “print” just as if you are going to print the document. Once you have the printer dialog box up you should have the option to change printers. In this dropdown should be an option to print to PDF. This basically just saves it as a PDF Give this a try and let me know. Cheers!!
1 Like
You can’t upload pdf files here so I sent a message to Chris with the original pics. I did find a pdf conversion program on my computer, however. I did read about the trick you suggested. Thanks.
2 Likes
OK, the index has been created, and added to the first post in this topic. I’ve actually added links to Pepe’s descriptions, to make it easier to jump around the thread.
4 Likes
Wow, Chris, That’s exactly where I wanted it to go. I can reference a comment from here in an answer and the reader can click right to it. Thanks, Pepe
3 Likes
Hello Gasifier Enthusiasts,
Not sure what to build or how to do it, then check out Jim Mason’s APL open source GEK construction videos for some ideas.
GEK Fabrication (part1/5) Barrel contents. Parts 2-5, accessory parts, gas cowling, cyclone and reactor in 4 to 10 min segments. Lots of pics of parts and assembly, great “how to” even if you don’t build a GEK. A lot of the ideas for my unit came from here. Some people think the GEK cyclone is just a tube, here’s proof it’s not.
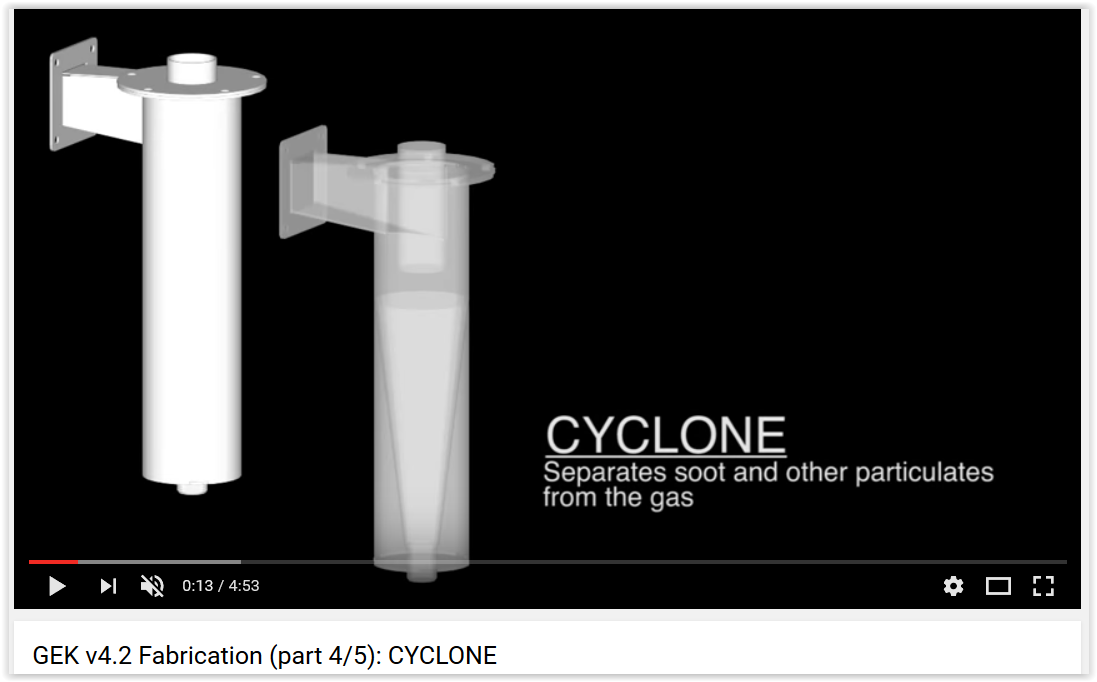
Pepe
Click on the Youtube icon in lower right corner to watch part 1 and have access the other vids parts 2-5.
 - BARREL CONTENTS")
1 Like
BOOKMARKING! :o that’s really great, @Chris!
1 Like
Just ran across this pressure calculator some of you might find interesting to use.
http://hyperphysics.phy-astr.gsu.edu/hbase/pman.html
5 Likes
Yes, let’s bump this topic to the top of the list.
3 Likes
Thanks Pepe for bring this post up again. I have been having a terrible time getting my truck to run since I put in new nozzles/ restriction/& reduction/grate. I could generate a lot of gas in the hopper when running my starter Kirby on blower. But when running on vacuum, I got very little smoke/gas. Yes in the process I found some little leaks but nothing major. So I put taps in in different places to hook a hose ( vacuum) to. took readings at various locations. The Kirby was pulling 16 in. H2O. Hooked the system up and vacuum at the Kirby dropped to 4 in. Hooked up to where the gas line goes to the engine 4; coming out of the hayfilter4; going into the hay filter4; the hopper was 2; the ash pit was 3+; This took me to the point where I had to start taking pipes apart to individualize test. Going into the ash pit of the gasifier 4; coming out of the cyclone 4; going into the cyclone 10. Shazam!!! All that work to find out the glass jar on the cyclone was not tight.
Still that 10 compared to 16 at the Kirby says I have problem yet. Where the gasifier is bolted together I have 3 rings sandwiched together and I saw smoke coming out in a couple places when the blower was on. I spent a lot of time trying to flatten one ring out that got warped when I was cutting off parts from my last construction to reuse. Was hoping that when I bolted the rings together they would all smash together but no such luck. As I look at it now, the gap was to large for the gasket material I used to fill it. Don’t want to have to cut the ring off and make a new one. Thinking I will leave them all sandwiched together and take the “fire axe” to the ring where the gap is then quench it to try and shrink the metal. Fingers crossed! TomC
3 Likes
First time I’ve ever heard someone using a fire axe to fix a small air leak 
6 Likes
I have used thin layer of hi temp silicone on those type of leaks and as long as you keep it under 700 they last for a year
5 Likes
Bill,
In regards to your flame color being purplish/ blue etc, I found one of my runs posted on my youtube site:
Note that my fan is bypassing the final filter for startup. I’m not sure why I did that.

5 Likes
Hi pete thanks for the direction too the monerator pages, is the moat wall the inside hopper wall for the condensat,?And does the iner condensate wall go down past the spoked funnel ?Thank for explaining.
Thanks again pete for the explaination, I bet that extra long burn tube helps quit a bit with the cooling being farther from the heat.Does the monerator hopper cooling design use a inner wall of tin too help with cooling collecting as jo’s hopper design.? THANKS.
Yes, the moat wall dams up the condensate and there is a drain in the moat floor to the outside. The moat bottom is also the bottom of the hopper. The inner condensate wall does not go down past the funnel, but that hole is the top of the firetube. The spoked funnel rests on the hopper floor. The hopper floor is where it bolts to the top of the burner unit. If you scroll through the monorator pages I mentioned, you can get a better sense of how it all fits together.
Pepe
1 Like
Thanks pete i looked through them and must have over looked a few things, I now have the whole picture complete of how you build this type unit. One othe Questain on the funnel, did you have too put 1/4" screen or so on the funnel too keep from wood snaging the rods, looks good and solid design for sure.I apreceate the help getting this hopper design learned.Its all clear now as too the design features, THANKS.
1 Like
I have no screen, just the rods. My exterior hopper vibrator run for 10 or 15 seconds 3 or 4 times an hour keeps everything “flowing”.
2 Likes