This is my small-engine simple fire, made with off-the-shelf parts and with no welding. My welding setup is a huge ordeal (long story), so I never have time to practice. So, I decided to see how far I could get without welding.
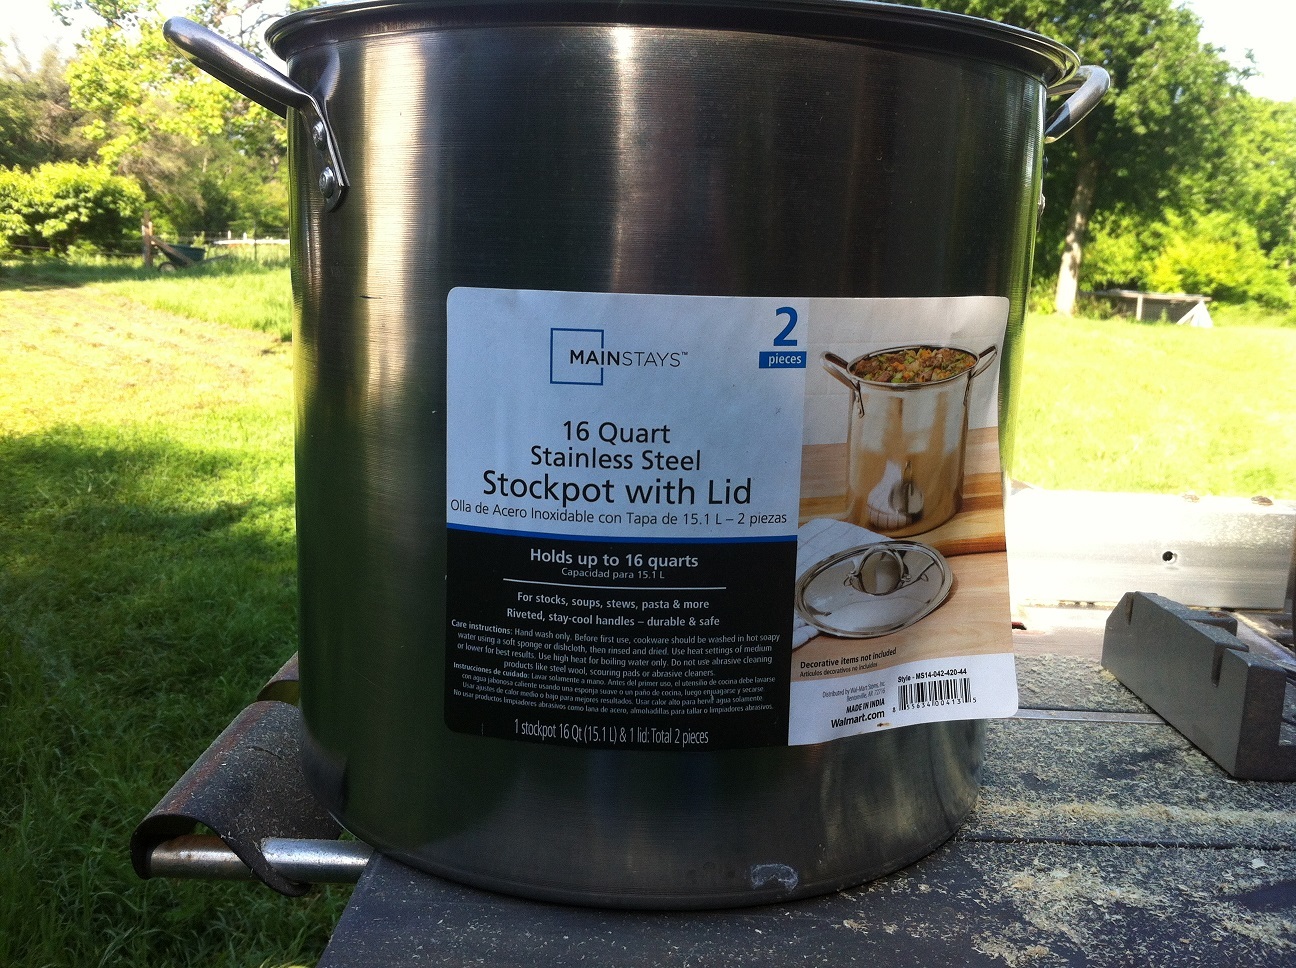
The basic unit is a cheap stainless steel stock pot from the local big-box store. I am using ½” pipe on the bottom of the pot for my inlet/lighting port, and 1” pipe on the lid for my outlet. I punctured the stainless with a diamond-tip punch, drilled the holes to size with a titanium step drill, and used my angle grinder to de-burr the edges.
I am attaching pipe flanges on each end, sealed with RTV and attached with stainless steel hardware. I am using 1-3/4” preheat hose for exhaust return on the inlet side, and for the outlet. It fits snug over the 1” pipe coupling. I am holding the lid down with springs and galvanized steel electric fence wire. Wouldn’t be redneck if there weren’t some “baling wire” involved. I am planning to use the top side of the 1” tee coming out the side bottom for a fluid drip – waste oil, water or both.
I expect to run about a 5hp engine with this - I have a couple of push mowers as test bed.
Before I light a fire in this thing, I have a few questions for you experts out there:
Am I going to have issues with the aluminum rivets holding the handles on the pot? That’s the only thing on the inside of the chamber that is not either steel or ceramic.
I have sealed the flanges and screw holes with RTV on the outside, but do I need to do it on the inside as well?
The top of my ceramic nozzle is no more than three inches from the bottom of the pot, about 6 inches from the sides, and about 10 inches from the top. Is there going to be enough charcoal insulation to keep the pot from getting too hot?
With a 1” outlet and a ½” inlet, I am hoping the inlet suction will be sufficient to prevent any hot char from falling out the inlet hole. Is that a safe guess?
On the bottom inlet, I have two pipe nipples screwed into the flange. There’s only enough threads for a couple of turns for both nipples. Do I need to “dope” the threads with RTV to make a good seal?
Alex, that looks great. I have no answers, only questions, as I think about building one of these. A got a heavy SS pot at the junk yard last year. Tell us about the nozzle, and the seal of the big lid.
Hi Alex, no game stoppers that I can see. A few things I found. I used stove cement instead of silicone for the gasket for the air inlet layered with aluminum foil. 10 inches above an upturned nozzle might be a range limiter time will tell. Keep you charcoal small probably 1/2" minus down to an 1/8th. I hung a bucket under my tractor nozzle with some water in it to catch any char that escapes. Have fun, David Baillie
No. 8 TIG cup ** ALMOST** fits the 1/2" pipe nipple threads, but are actually machine threads, as has been discussed previously. I tapered down the threads a little with the flap sander, and the pipe inserts far enough to be held in with friction. Nothing structural here, so I think it will hold. I believe @don_mannes is using the same technique on his charcoal lawn tractor .
As far as the lid is concerned, It has enough of a lip on it that I am going to try some Fiberglas stove rope, saturated with RTV, or maybe furnace cement, like @dbaillie says . That’s going to be my weekend experiment. I’ll have results, and hopefully some fire and smoke by Monday.
Alex, I don’t think you need to worry about the rivets on the handles as far as heat is concerned. The lid does need to make an air-tight seal. I found some thin RTV tape that works well, but each time you reload charcoal, the tape gets messed up. (It needs to be inspected each time. I smooth it out with my finger because it remains sticky, which is part of the problem.) Perhaps you could adapt a rubber O-ring from a five gallon bucket to seal under the lid of the stock pot? I would add more wire hold downs. After you shut off the motor, you will need to seal up the air inlet at the bottom of the pot, else the charcoal will burn. I use a threaded pipe cap to close off my air inlet. After you run a lawnmower engine for 30 minutes or so, you will have a good handle on how much heat is generated below the nozzle. It will be warm, but if you think it is really too hot, a 1/2" layer of ceramic wool insulation could be installed.
I cut stove rope to length, hang it up like a dead snake, wear rubber gloves, and work RTV into the rope. Put a thin layer of RTV on the lid, lay the rope in. and place it on the pot with a little weight. If you stretch a layer of Saran wrap over the pot first, the RTV will not stick to it. After it drys, I apply a film of cooking Pam spray as needed to keep it not sticking.
Has anyone tried food/medical grade silicone tubing? Seems like you could split one side of it lengthwise and wrap it around the rim for a good, reusable, airtight seal. I’ll stop at Lowe’s on the way home and see if they have anything close to this.
Could you stack two of them together? Cut the bottom out of the top pot…
When I had about a 3/4" hole in the bottom of mine charcoal would fall out. Small charcoal that is. I also use a water pot for that reason and to humidify intake air.
I’ve been using water glass lately. Works with ceramic blankets. Last use was to make sure my weld was sealed near the inlet. Just poured it in and turned my tank around until the weld was covered.
I have been thinking about this all day. I like the simplicity. I just wonder about how shallow the pot is and the vertical inlet. How long can one use this before the lid gets really hot? Can a ceramic ‘umbrella’ be held up from the stem? I’m thinking like a piece of tile. That could solve the possibility of charcoal falling down into the inlet. I have never made a charcoal gasifier, so I have no idea.
Had a few interruptions (rain, gardening, “honey-dos”) and was not able to light off my no-weld SimpleFire over the weekend. I did pick up a silicone oven mitt (rated at 450F) that I’m going to cut around the edges to try to come up with a non-sticky reuseable seal for the top lid.
The other obstacle was that I didn’t have enough graded charcoal the right size to fill the chamber.
QUESTION:
If I fill the bottom (below the nozzle) with larger chunks (which I have plenty of) and save the smaller graded pieces for the area at or above the nozzle, what problems am I going to encounter?
Putting some larger pieces on the very bottom of the pot, up to the nozzle is o.k. After a few runs you will dump everything out to do an inspection, and at that time you can re-screen the charcoal. There will be some fine stuff and some very hard slag (like glass), and your charcoal will be smaller (on the average). I have noticed that the larger pieces will often have uncooked wood in the center, but you quickly get the feel of that by breaking a couple of hundred of them with your fingers. (After that, you won’t even have to break them…you just “know”.) Save charcoal with any brown showing for your stove, and do not use it in the gasifier. I am 100 miles South of you, and we have had nothing but rain for the last week. Still managed to make about 5 gallons of charcoal in my 9" TLUD stove…
Hi Alex, Welcome to the wonderfully addictive world of charcoal gasification. Based on my experience, I’ll take a stab at your questions. 1. Aluminum rivets will be fine. 2. RTV sealed on the one side is fine. Just have to keep everything air tight. 3. Not a real simple answer. Keep your nozzle as low as possible. 1/2 inch off the bottom of the pot would be better. You want as much charcoal as possible between the oxidation/reduction zone and the gas outlet as possible. The greater the distance, the longer the run time. 4. Agree. 5. No problem here unless too much air can leak in after you shut the generator down.
A big issue for you will be getting an air tight seal on the lid. There are lots of good suggestions given and your silicone mitten may work really well. Tempertures at the lid around shut down time will be about 200F. Maybe 300F.
You have big charcoal but not enough engine grade charcoal? Why not just spread you large char out and drop a sledge hammer on it to break it up? Make a screen of 3/4" square mesh and sort it out? Having charcoal from 1/8 to 3/4" in size is critical to successfuly running a small charcoal gasifier. You are very close to making this happen. Have fun!
Gary in PA