Hi Dave, I hope all is well down under. It must be getting cool there. Have you been able to try the new tungsten nozzle?
2 Likes
Hi Bruce , no not cool ,but freezing at the moment ! , i am still running the old nozzle the hexoloy silicon carbide tube one that i put in around Oct / last year , in fairness we have not had as many cloudy days since then and so i guess this nozzle has only had around 60 hours since then , last week i once again struggled to get the gasifier running and so decided to tip it over and empty out about 150 liters of charcoal from the drum , and yes once again i had a volcano sat over the nozzle blocking the char from lighting up properly , thinking that my nozzle was probably toast as well i gave it a big whack from above to remove it and low and behold the nozzle still in place down below was still in great shape , so i decided to let sleeping dogs lay and refilled drum and carry on running this before changing over to the ones you supplied , and looking at them i feel that they also will work well , but i like to run till destruction before chopping and changing , but as soon as i put it in the new one i shall let you know .
Dave
6 Likes
Dave, Thanks for the update. I hope you get plenty of sunshine and never have to test the new nozzle. Grace & peace, Bruce
5 Likes
Thanks Bruce , i ran the gasifier right down on fuel yesterday till it was so hot the rain water on the lid was starting to boil , as soon as the rains and wind die down here i shall open it up again and make a few changes inside my reactor that i have been working on , if the nozzle still looks ok i shall just keep running it for a while longer , but i am really keen to try the other nozzles in a new down draught unit that i am collecting bits for . but one way or another i shall use them on one of then units for sure
Dave
5 Likes
Dave,
I have just been looking back through this topic to learn more about how your gasifiers are set up. Have you shared anywhere how the bottom of your reactor is set up as far as how the plumbing is attached and arranged on the inside and out? Also I’d be interested in knowing what your filtering system consists of. it seems your system is a workhorse of sorts and I was just wondering what set-up has proven to be durable enough for daily use. Photos and a walk-around video would be nice whenever you might get the time.
3 Likes
I don’t want to miss what Koen just shared under “Some school in Thailand.”
3 Likes
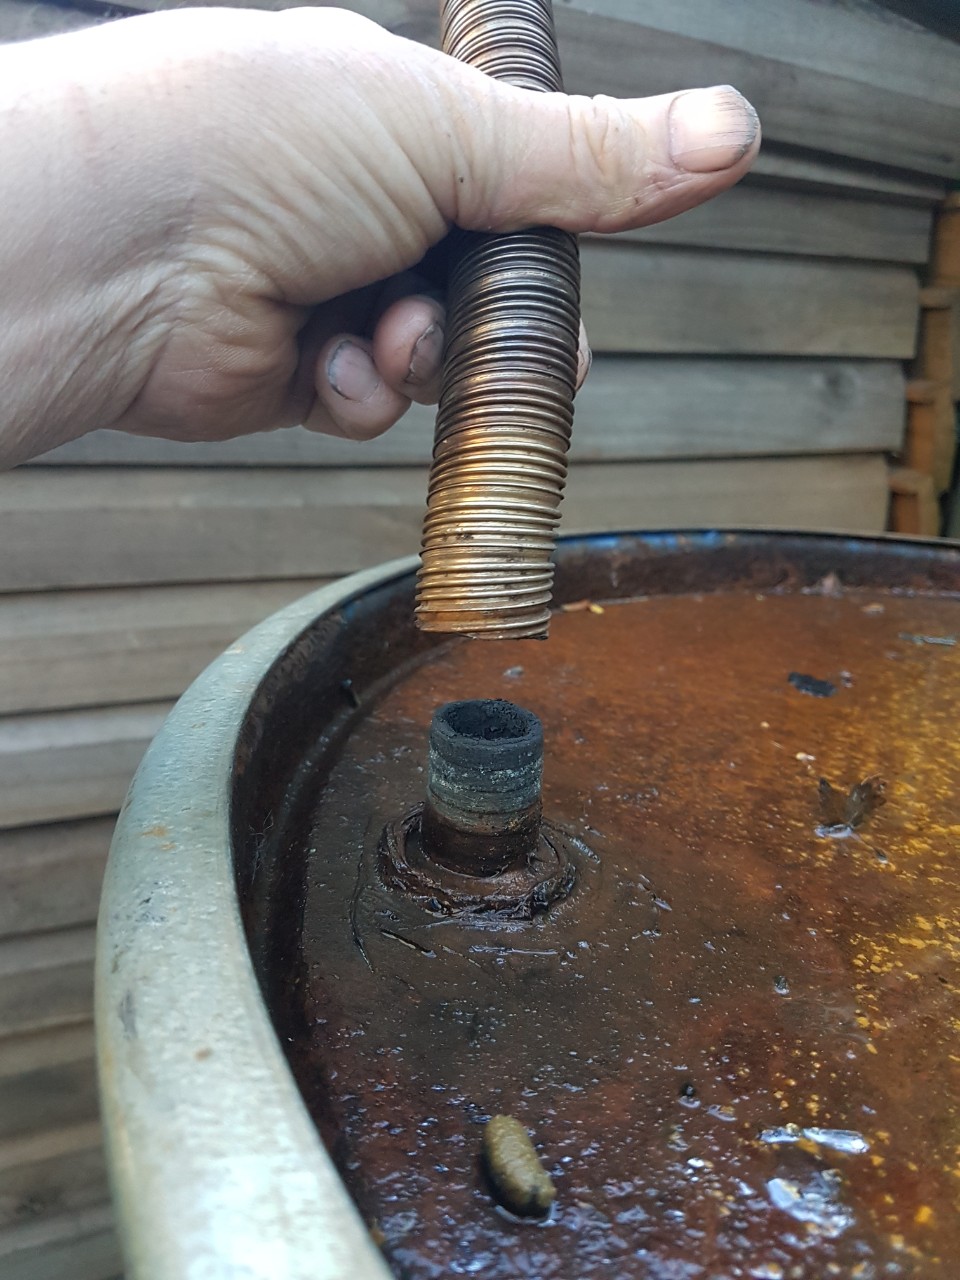
Hi Steve , i am in the process of changing a few things on my setup ,so that may be the time to try and get some photo’s of the nozzle and how its set up through the drum , but in the mean while its so simple i don’t get the chance to update the build that often and while its working so well i leave it alone , we are going to have a sunny day today , so if i get a chance today i will empty my drum of charcoal and show you the inside and how the nozzle sits inside , i am sure it will have another build up of molten slag around it so you should get the idea and the only downside to me not using water drips or egr , is that i have to poke through the slag formation after a week or so from below , or do what i will do today and empty drum and take it out .
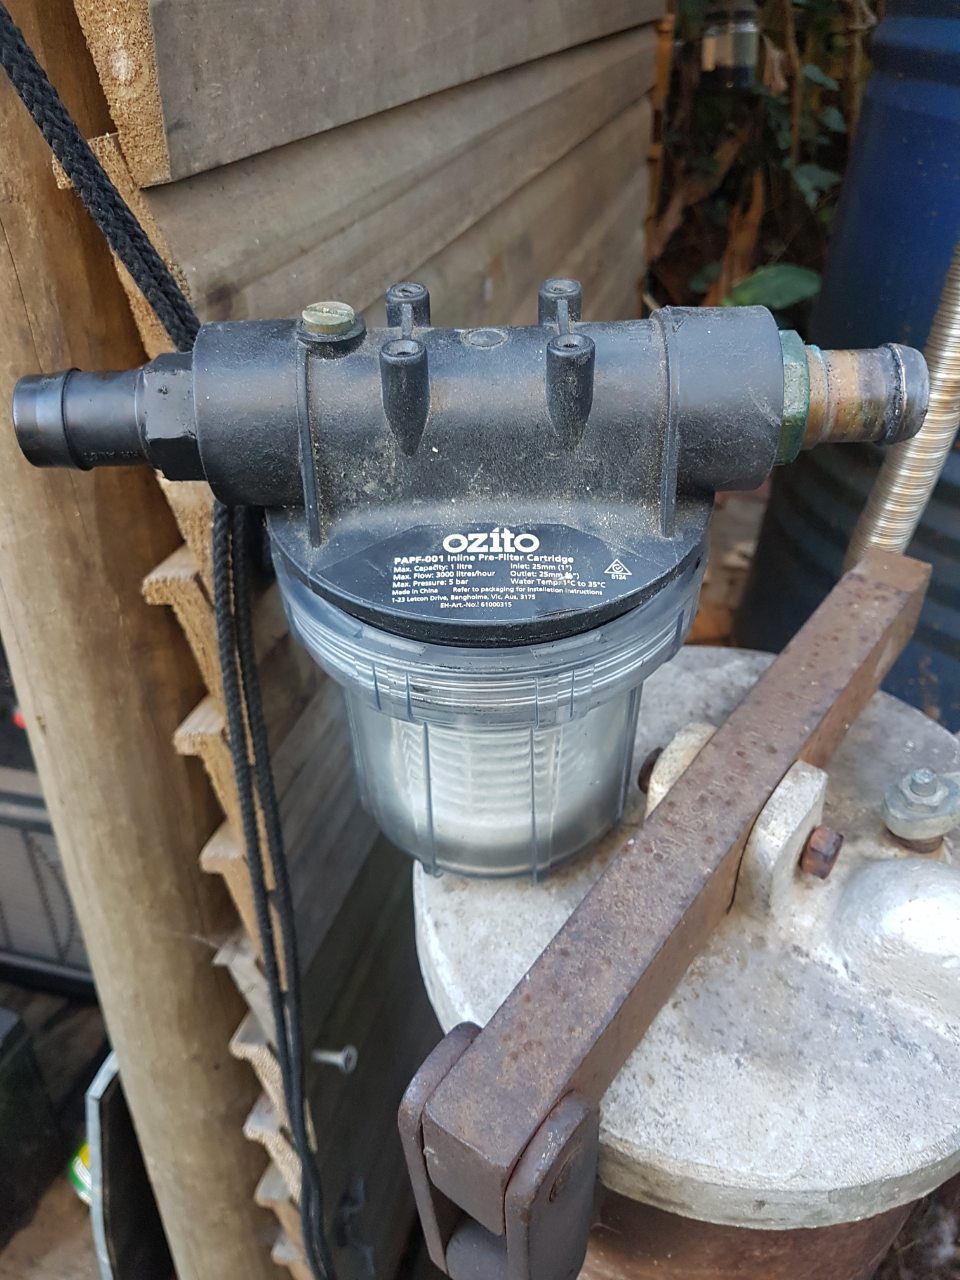
As for filtering i used to have just a simple 5 gallon plastic screw lid container filled with lambs wool and connected with plastic hose pipes , but it was only good if you ran for about 3 hours and then it was starting to get too hot , so i now use a 1 inch flexi stainless steel out of the lid of the 55 gallon drum over to a cyclone that helps drop the fines out before i send it down to my small gasifier that is now being used as a filter tank , its 8 inch dia by about 3 foot high made of mild steel with a aluminum lid where the gas comes out having passed through open cell / and a layer of lambs wool with a pile of pan scrubbers sat on top to save sucking anything up into the plastic oulet pipe that then goes for about 5 foot to a in line fine filter and then into the air mix valve and engine’s .
I just nipped out side and took a few photo’s to explain my ramblings better .
This is the 55 gallon drum with everything in place

this is the lid and outlet pipe , you can see how discolored the stainless pipe gets when its been run for 5 or 6 hours loses that lovely new shiny look
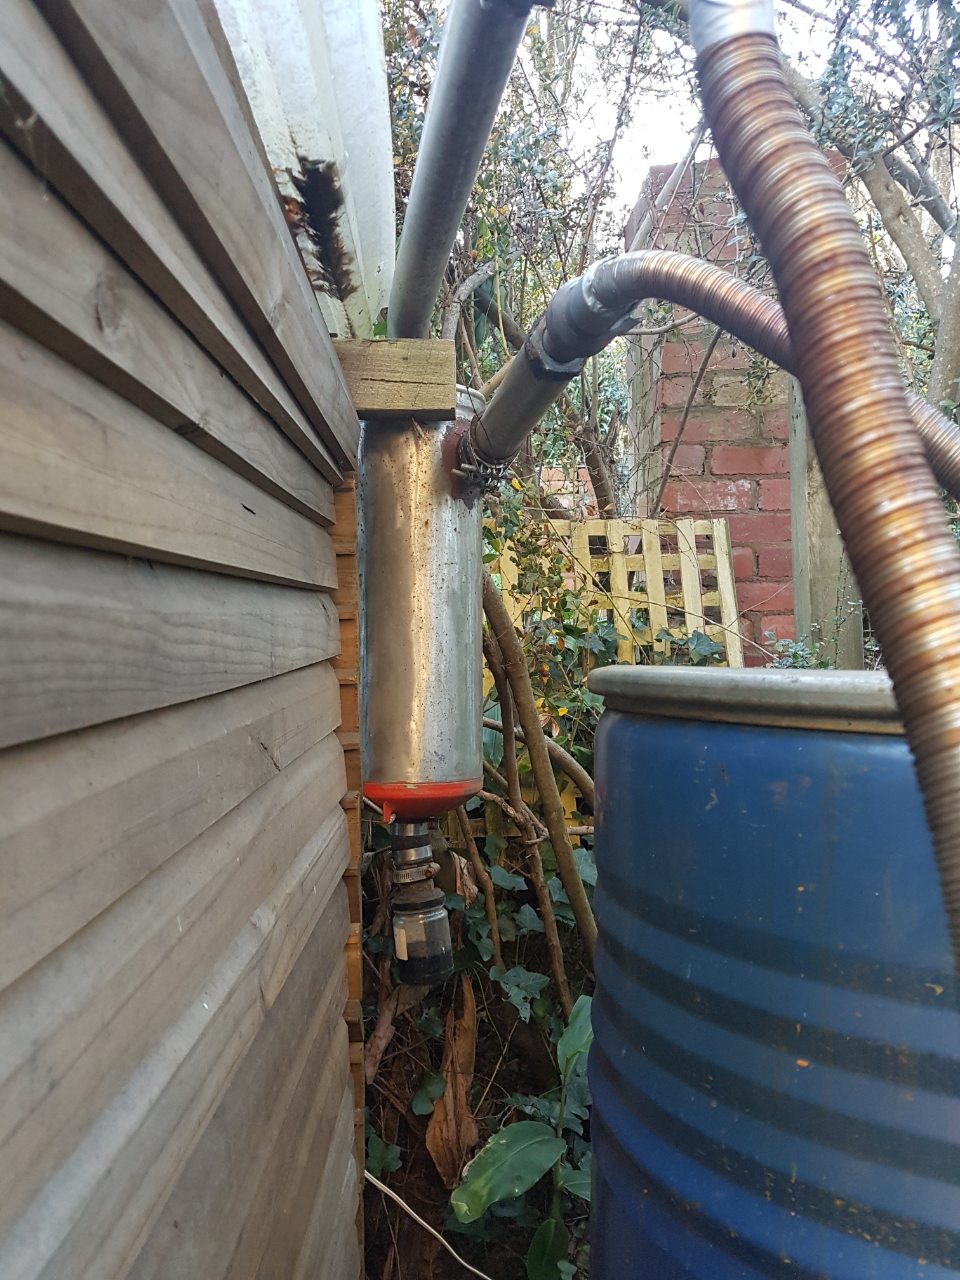
This is my small gasifer i use for running very small engined generators , but not used it in ages so now its a extra filter .


Soon as i get a chance i will empty drum out and show you the nozle set up from inside and below , may not get a chance to video it running for a while but if i do will put link up , the next few days i am testing out a new insert for my drum to try and get a better run time from the large barrel .
Dave
9 Likes
Dave,
Thanks for the speedy response to my request. I’ll keep your set-up in mind whenever I decide to make improvements to my gasifiers. It’s simple and durable—I like that. I look forward to checking out the other details when you have the time. Thanks for all your experimentation with nozzles. I look forward to more endurance test reports from you.
4 Likes
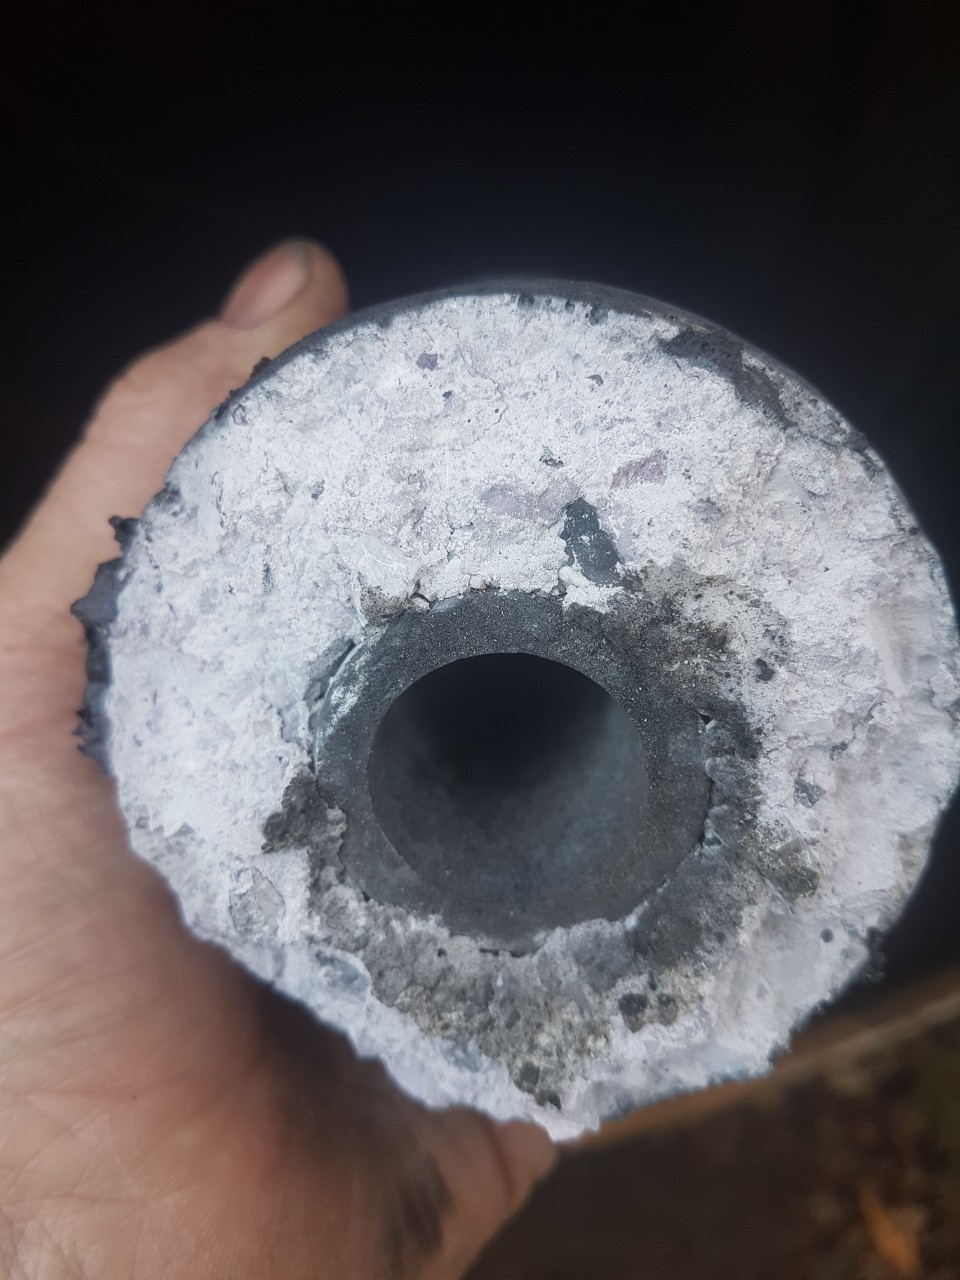
Steve i did the dirty work so here are a few more photo’s starting with the empty inside and nozzle covered as i knew it would be in molten slag
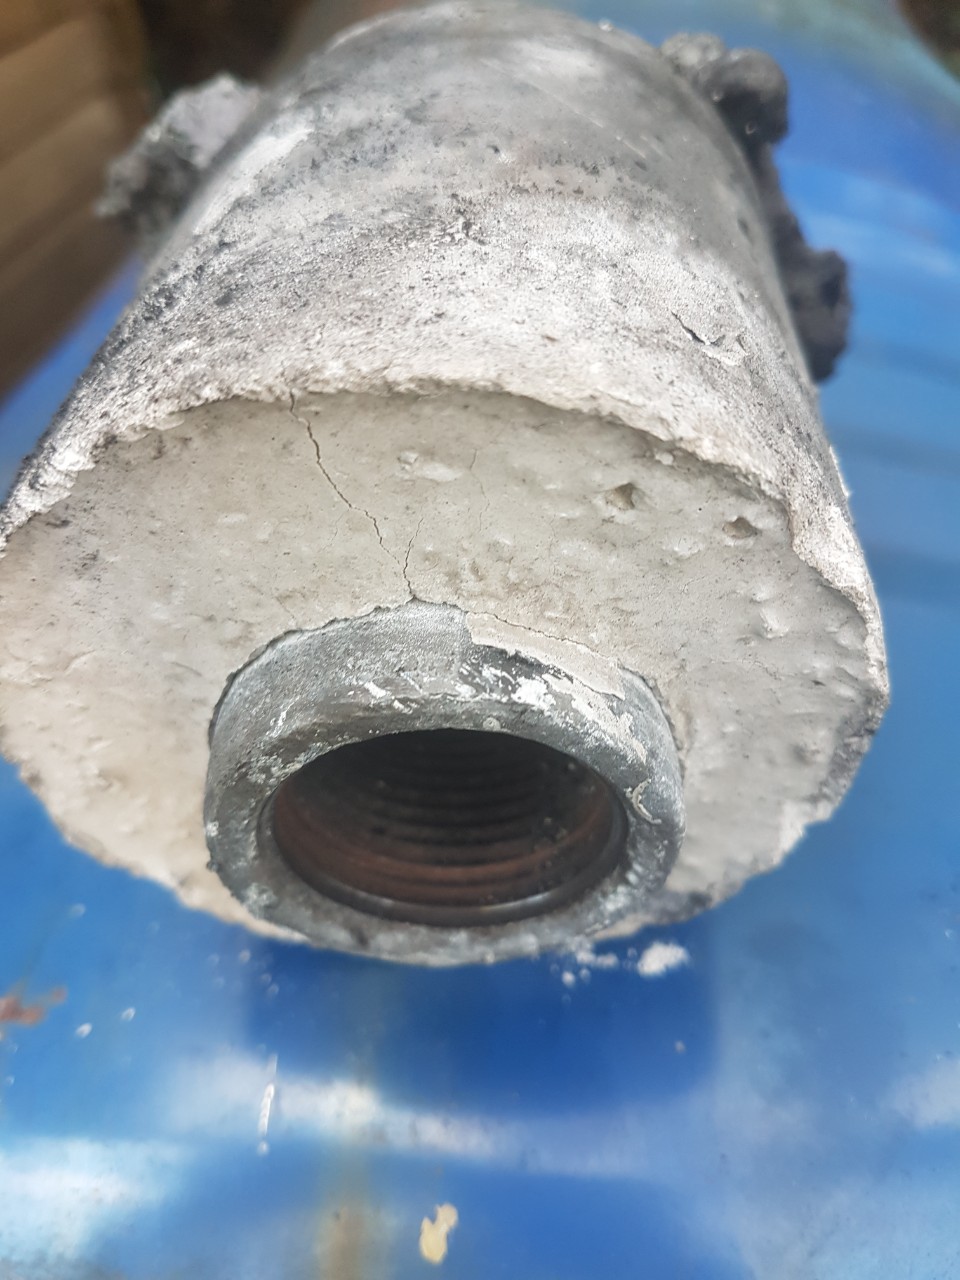
This is the under side of the drum , i use 1 inch fittings normally but i used a reducer to 3/4 for the shut off tap

This is what i have going through the drum and fixed in place with a washer and then tightened up the reducer onto the drum for a nice air tight fit
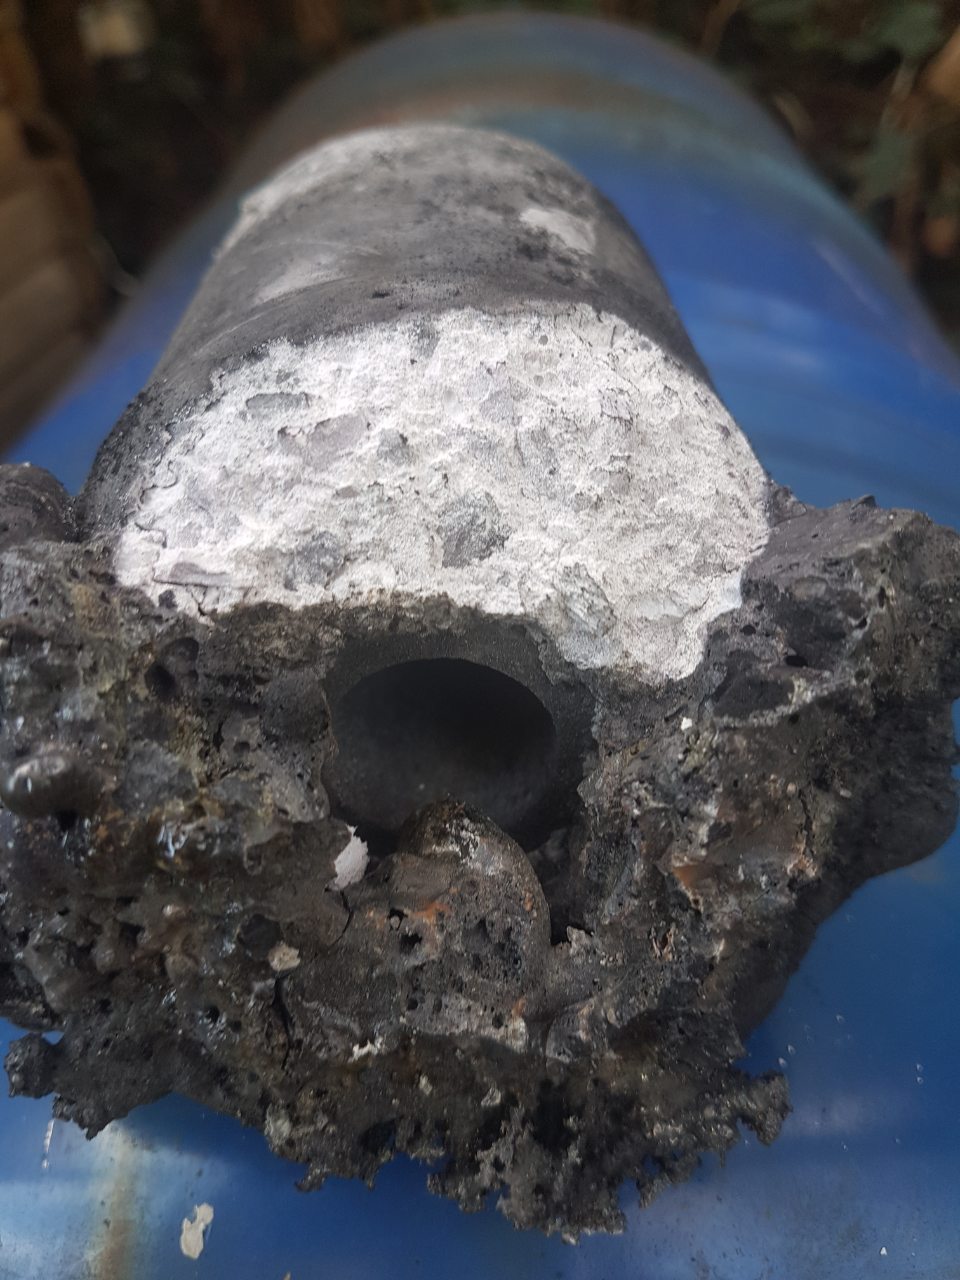
This is the bottom of the nozzel cast onto a 1 inch fitting allowing it to be screwed on and off the male fitting in the bottom of the drum
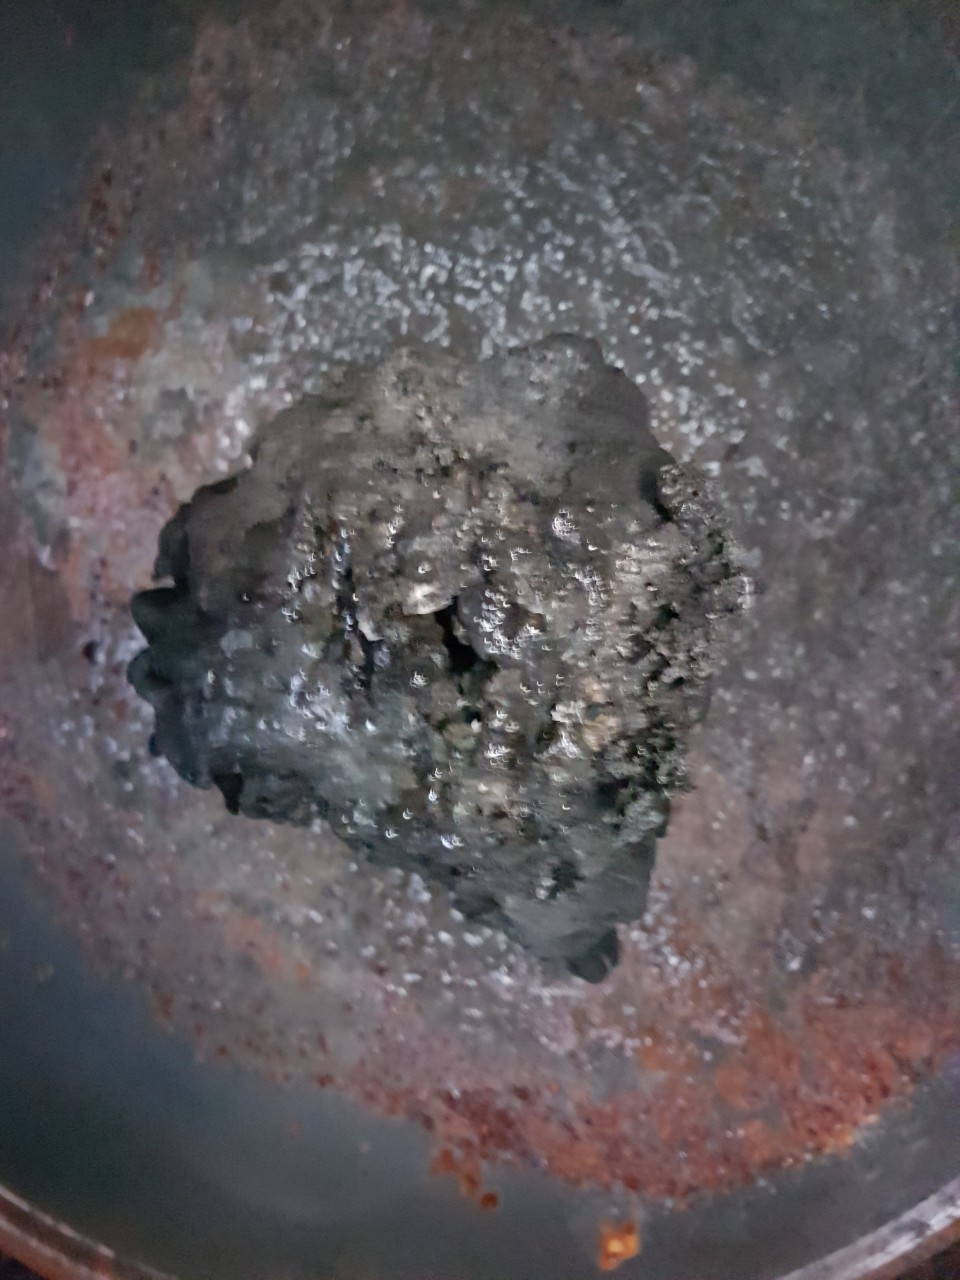
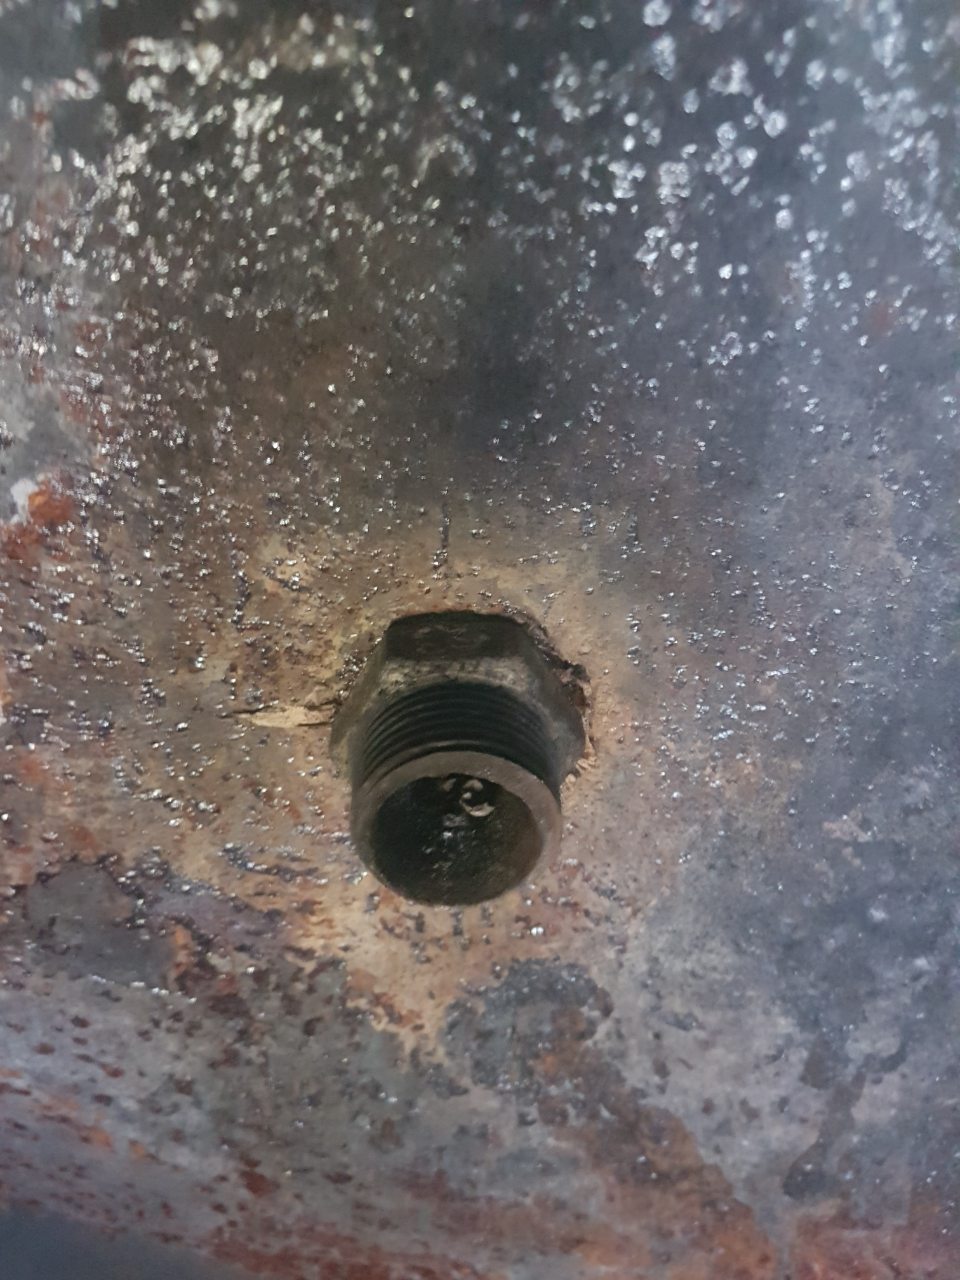
And this is the working end of my nozzle , this nozzle has been in since oct 2018 , normaly i dont take it out and just lean in with a hammer to smash off the molten slag and clinkers , but when i did that this morning a small piece of the refractory came away with it so i unscrewed it to try and get the rest off without damaging it too much
and this is what it looks like without the molten stuff around the tip of the nozzle , to say i am happy with the condition of the Tungsten carbide nozzle is a understatement , its had a lot of hours run time as you can see by just one of the molten volcanoes ,i have taken off 3 the same so far over the past months
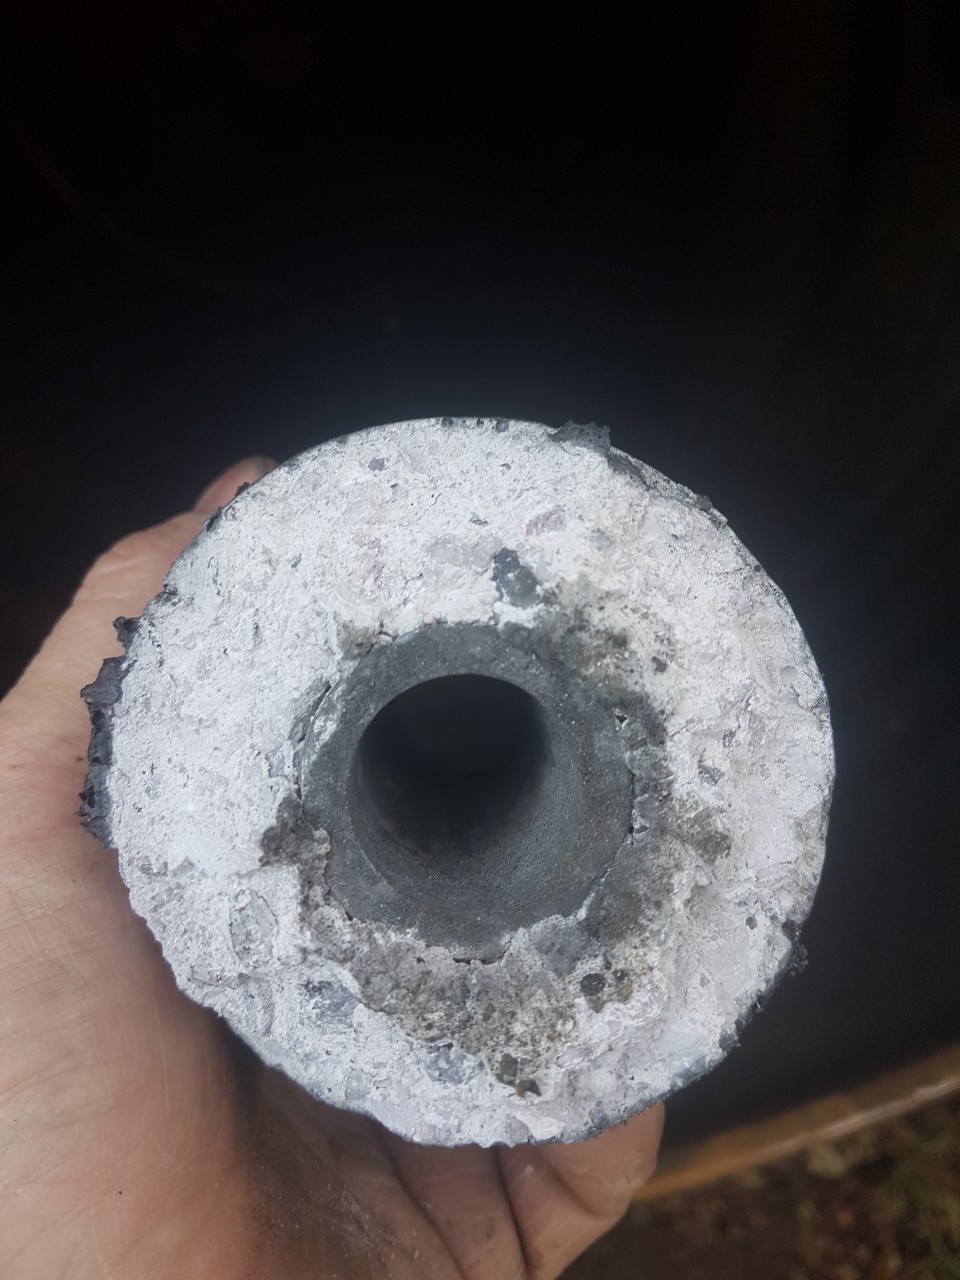
I just tried looking up run times for this nozzle but i cant find my sheet of the run times so i cannot give a honest hour run , all my other nozzles have always managed at least 80 too a 100 hours when made in a similar way using refractory to encase what ever nozzle tips i have put in , so i am guessing this one has more than that on it and i am about to replace it back into the drum ,once i have made a few mods to the inside of the drum .
I just realized that this nozzle is the one i bought that Steve smareca showed for sale on ebay way back in sep last year .
Dave
12 Likes
Dave,
Thanks so much for the photos of your gasifier detail. What refractory cement are you using to attach the nozzle? Is this the same material you have used to cast nozzles in the past? Can you recommend a current source? Also, is the nozzle plumbing only going through the bottom of the drum or do you have other layers of sheet metal in the bottom?
7 Likes
Steve , the refractory cement was bought at least 4 years ago from typical furnace / pizza oven supplier here in Australia , when i told them what i wanted it for the recommended i go with a lower amount of alumina , i think i asked for a 90% and they recommended i try the 76% alumina content as it is less prone to thermal shock , even after all these casting i still cannot help but make the mix too wet and that in turn makes it slightly weaker , hence why some breaks off some of the surface when i cleaned the molten slag off .
All i do is sit the 1 inch galvanised pipe fitting in the bottom of a standard 400 gram soup or bean tin can , then i sat the carbide nozzle on top of it and then i use a sloppy mix of the refractory cement around it till its fully covered and allowed to air dry for about a day then i peel the tin can away and leave it for another 2 days some where warm , then i sit it in my wood burning stove at night while the coals burn down a few times till i know its as dry as can be .
This is the grade i bought
I asked how long it would stay good for once open and the guy there said try use it up before 2 years , i think that was in early 2015 , and its still working fine for me and i paid AU $70 .
Yes the plumbing fitting just goes through the base of the drum no other layers are there , i did wrap some fine glass rope around the washer to act as a gasket when i tightened up the fittings so they are nice and air tight .
Dave
11 Likes
@d100f great to hear!
Thanks for the feedback…this is great news for longevity to say the least.
7 Likes
See “Mike’s venture into the dark side” topic for his water-cooled nozzle design.
Since copper’s thermal conductivity is more than 8 times that of steel, my favorite is still thick-walled copper.
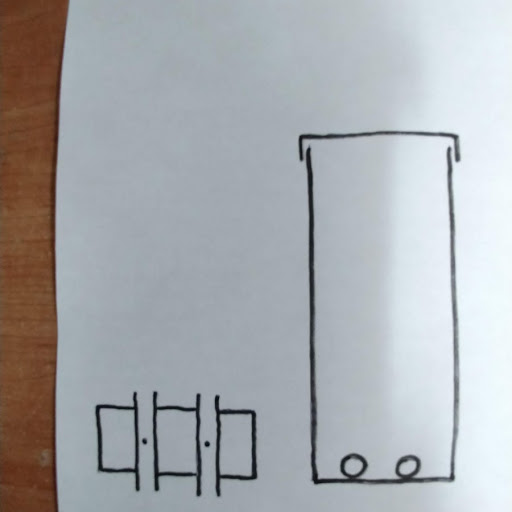
I have an idea for building a durable and affordable flute-style (Kristijan) nozzle. My plan is to use a 1-1/2" schedule 80 pipe then lay a 1" round copper bar (or other long hunk of scrap copper) inside to “pump” heat from the nozzle to outside the reactor.
6 Likes
Hi Bruce, can you draw up a skech? Not quite picturing this in my head of what you are talking about. Thanks.
Bob
3 Likes
My concern with that plan is, there wont be enough contact beteen pipe and copper to transfer heat between them effectively. Also, the copper will be laying on the bottom, but the max heat is on the top.Then again, the sch 80 pipe has been proven to work on its own.
5 Likes
How much of the heat in the pipe might be radiant heat too? I think it should improve heat transfer. It’s an essy essy experiment anyways.
What about going the other way, are there pipe sizes where copper could clad a steel pipe?
3 Likes
Andy and Garry,
Thanks for helping me think about this. This morning some of my pieces of junk bumped into each other in my imagination. I have a tall military surplus ammunition can (30" X 6" X 11") that I’m thinking about using as a test reactor. I’m thinking of placing two 1-1/2" schedule 80 pipes parallel and five inches apart across the bottom and through both sides of the can. With a 1/2" hole in the middle top of each pipe and each one brazed where they pass through the can walls. This will give me multiple options for testing.
7 Likes
For a helpful update on charcoal nozzles see posts 255-260 in Toyota Corolla Vehicle Gasification Project. There Steve Bowman gives pictures and discusses the Leitinger nozzle with the inventer.
6 Likes
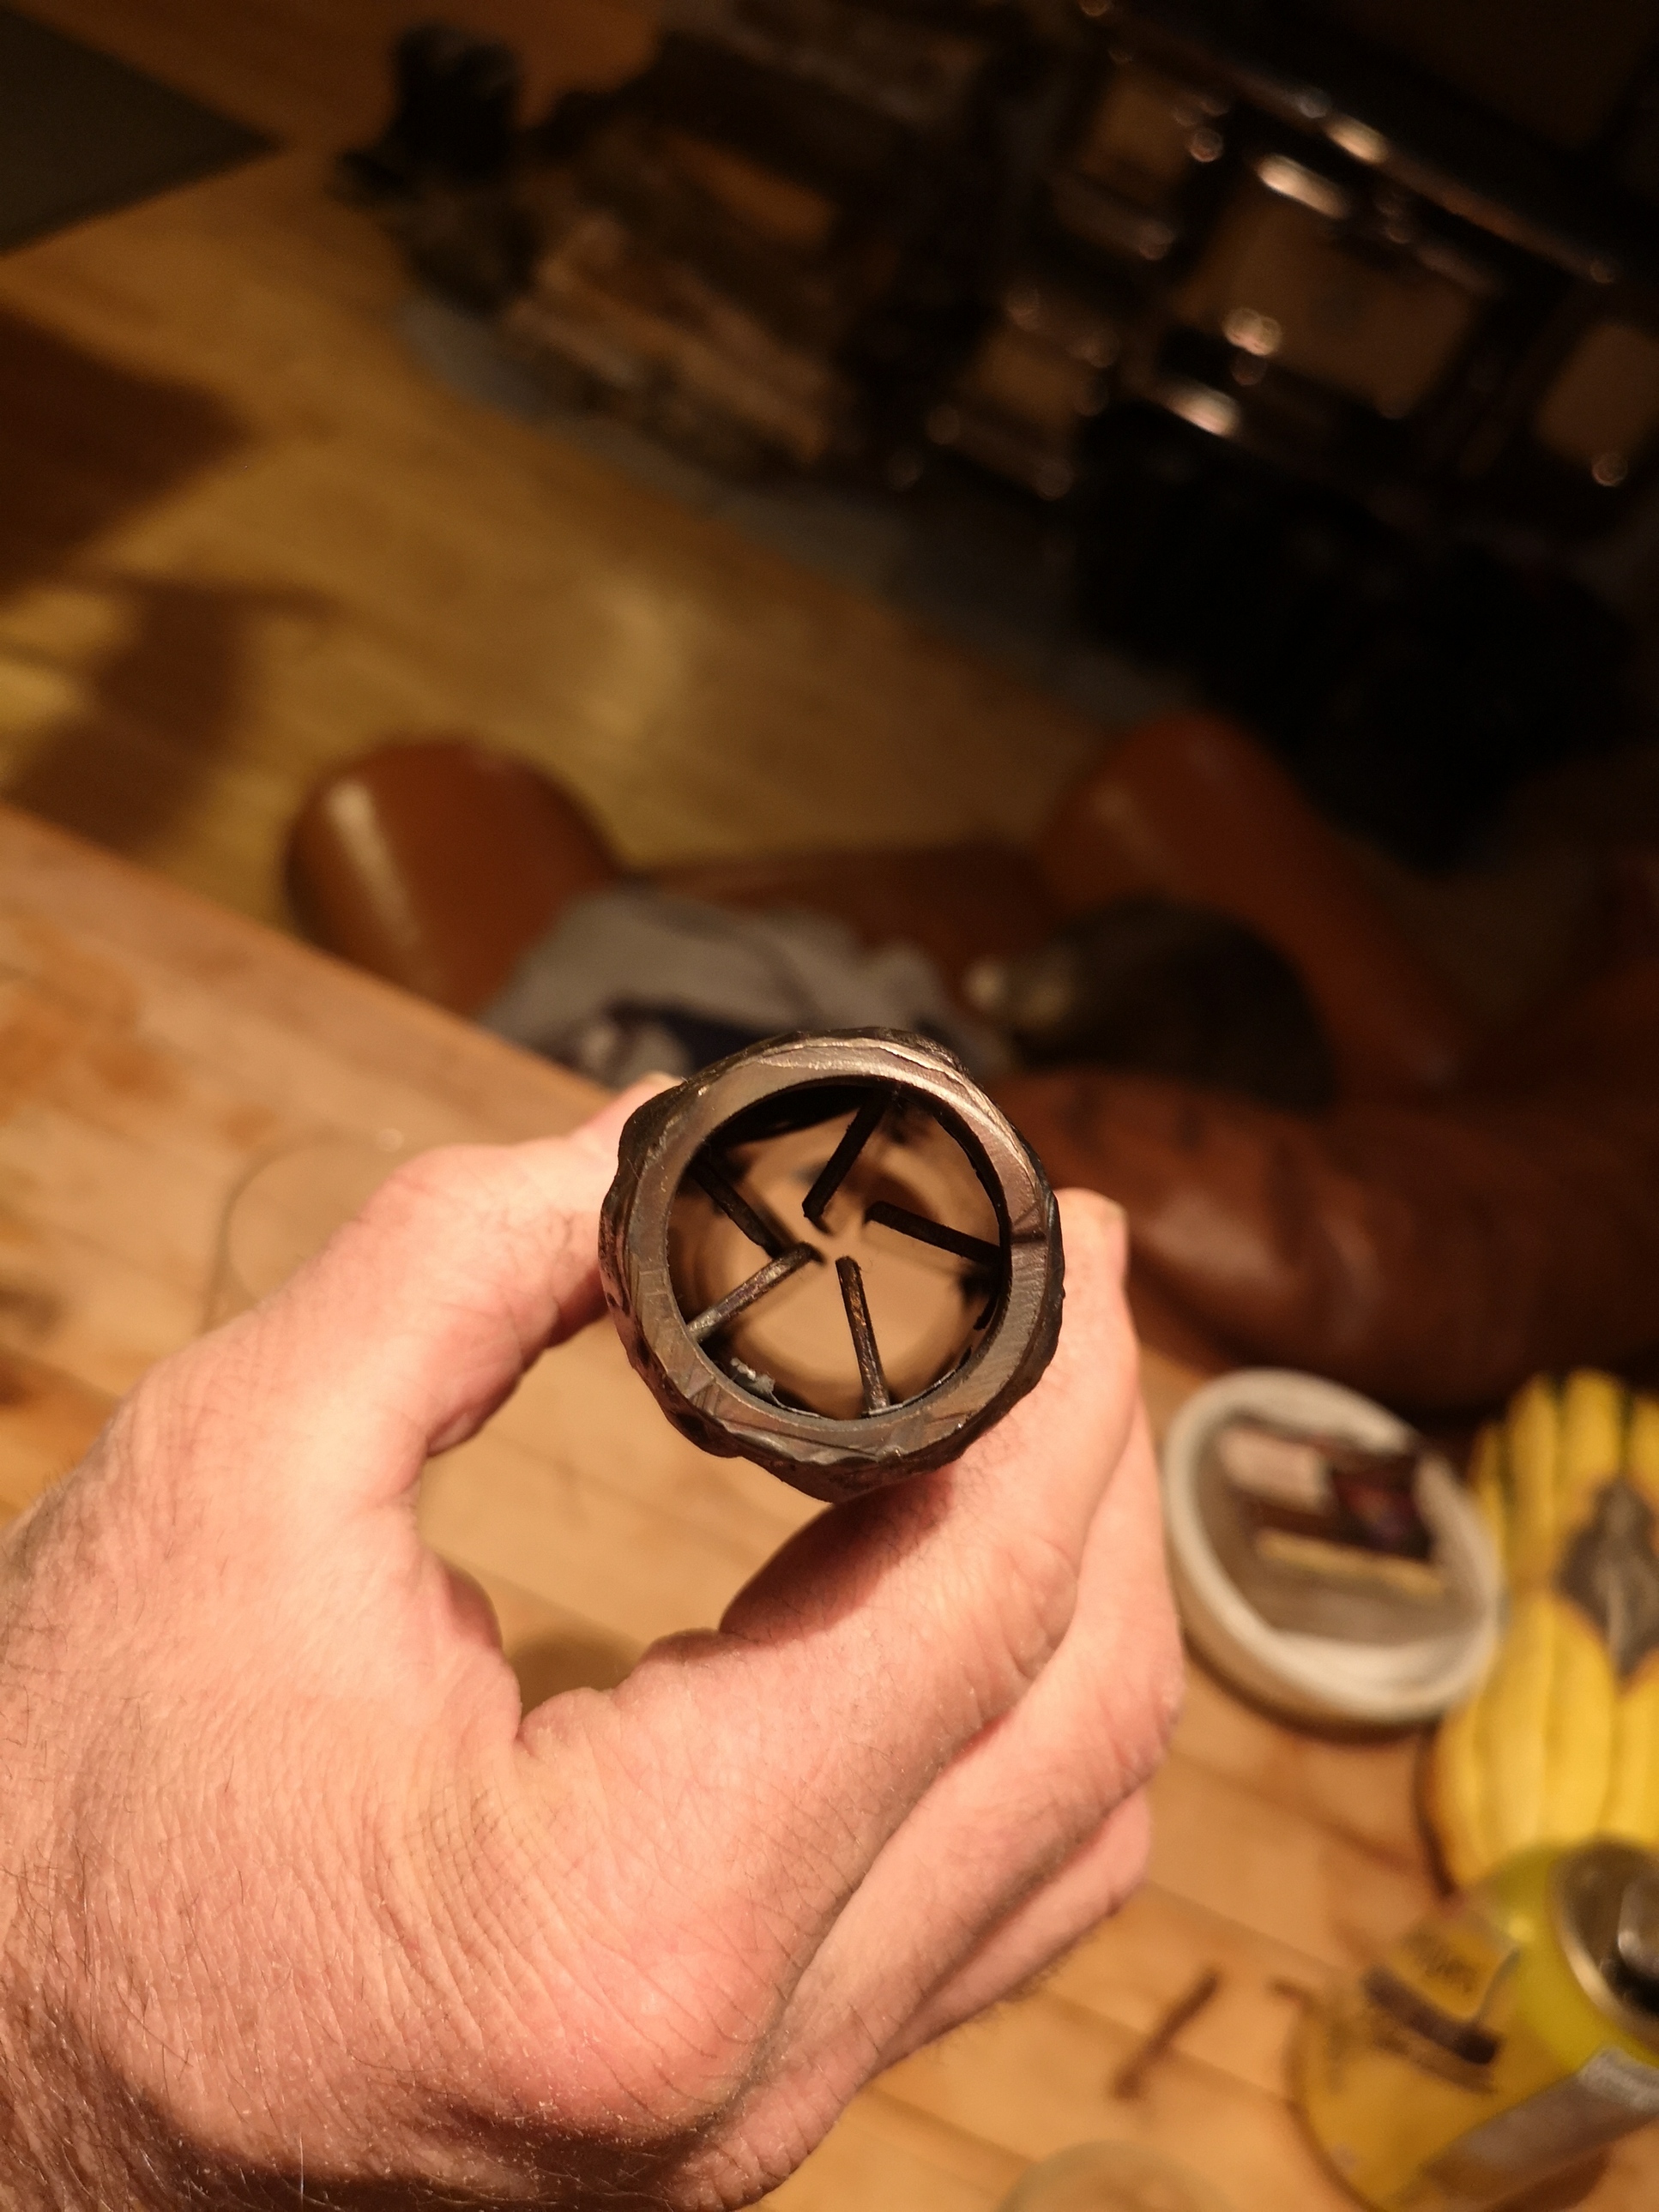
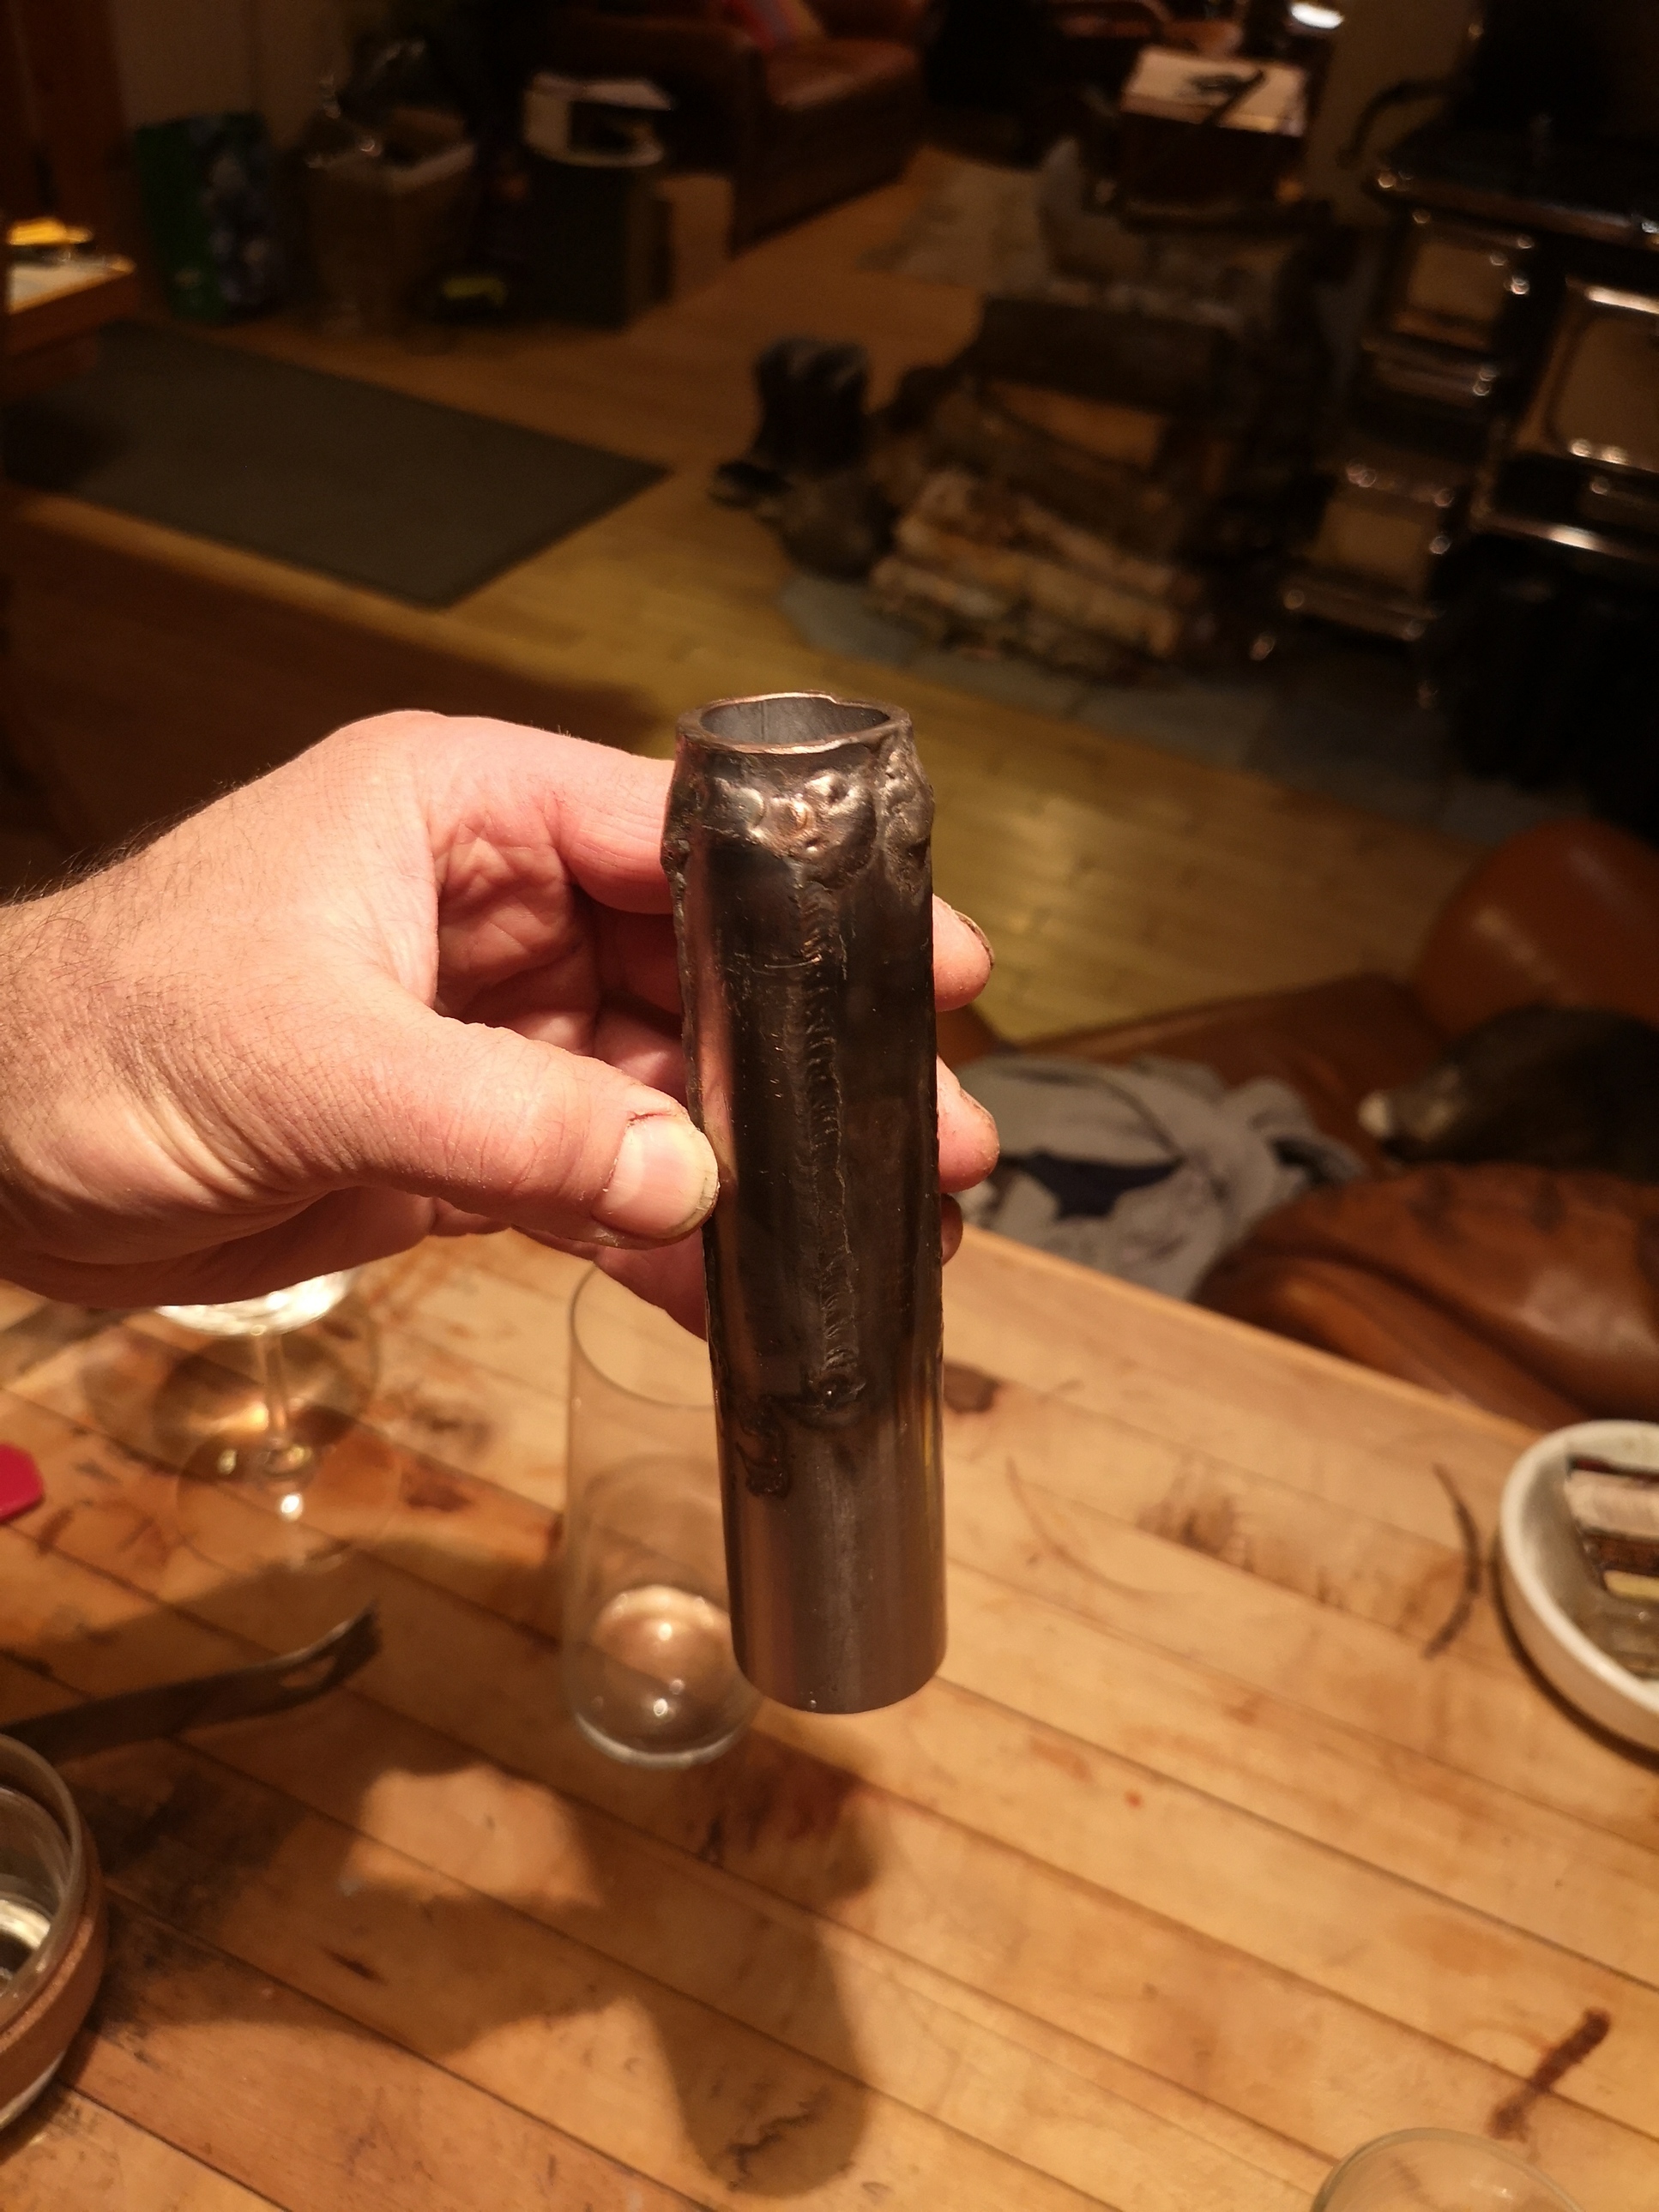
here is the new gas generator nozzle for my pickup
I still have to build a fixing plate and a closure cap
I welded five cooling fins to the nozzle to help cool the nozzle and preheat the inlet air
I can’t wait to test this new nozzle I will keep you posted as soon as possible 
Thierry
9 Likes
This is something I have not seen before, internal cool fins on a nozzle. Yes keep us informed on this. Maybe there is, something that has not been tried yet in the world of Gasification nozzles.
Bob
7 Likes