Could it be that the liquid in both ends of the transparent pipe does not have the same density? The dye would not have been diluted homogeneously?
2 Likes
I thought that too, and I squeezed the crimp out with pliers, and it still was off. I opened up the filter housing thinking that maybe there was a little residual pressure in the system - still nothing. I thought maybe the whole assembly was out of level, so it just looked wrong - but no, a spirit level confirms that the discrepency is real. @trigaux, a drop of dye seems unlikely to have changed the density (viscosity?) enough to cause it, but i am at a loss.
If I build another one of these, I might opt for larger ID than 1/4, as it seems to me that there must be some surface tension or friction related explaination. The bend in the bottom maybe being too constricted so that the water column doesnt have enough weight to force it all the way back down?
3 Likes
Hi Carl , a quick fix for your size reactor would be as Koen mentioned would be to reduce the size of your feed stock down in size and or as a temporary measure wrap some insulation around the outside of your reactor to contain as much heat as you can .
Dave
3 Likes
I have been mulling over this discussion about heat in the reactor, and went back and reread the whole original thread on nozzles to reacquaint myself with what has already been discussed. It dawned on me that I do not really have a very good “big picture” idea of what it is that we are actually shooting for in the reactor. It seems to me that I need to answer the following:
1: The ideal temperature in the lobe - With the heavy steel nozzle, or Dave’s tungsten carbide version, we seem to have overcome the difficulty of catastrophic oxidation or outright melting, so what temperature are we looking for to create the best gas? It we are creating fused clinkers that suggests that without EGR the lobe must be reaching around 1300 C, right?
2: Where is the heat actually going inside the reactor? We know we are limited to around 50C on the outlet gas, or else it becomes too dilute to run the engine, and our plastic hoses start to melt. I looked up the heat capacity for charcoal (.24 BTU/(Lb * F)) which its similar to clay or stone, about twice the value of steel. But, its density is quite low, maybe 2lb/gallon? Okay, going back to standard units here… I have ~8gallons of charcoal = 16lb, and assuming 60 F of acceptable temperature rise (120F max minus 60 degree ambient) If I am doing my math right
BTUS = (lbs * F)/.24 or BTUS = 4000.
In another thread, @k_vanlooken you said
So what I am arriving at is that gasifying 1lb of fuel should liberate enough heat to bring my hopper temp up 60F (assuming no outside losses, no loss to the steel parts, etc). That actually seems like it might be about right, once you figure in those other heat sinks. I am getting to that temp before I manage to burn more than a gallon. (of course all these values are quite sketchy)
I drew a couple of reactor diagrams to try and illustrate what I think you are talking about (please correct me if I am wrong).

Koen, you say
By this I imagined you meant something like figure 2 - fins on the reactor are dumping heat and thereby pulling down the reaction temperature all the way to the lobe?
In figure 3 I imagined a layer of insulation keeping the heat from escaping as Dave suggested, which would presumably raise the temperatures throughout the hopper.
So what I am wondering is; if the goal is to keep the heat in, is the only way to increase runtime to add more mass of charcoal? Could heat be bled out of the system higher up in the hopper where it wouldnt interfere with the reaction? Also, how does the size of the charcoal factor into this? Is it simply increasing the density by being more tightly packed? For that matter, could I store my engine grade charcoal in the freezer?
Lots of questions, but that just means there must be lots of answers 
3 Likes
bear with me for a week at least, until the bandages comes of, then i can type with my right hand again…
5 Likes
Carl , my first attempt at a charcoal Simple fire was in a 25 liter container the same as yours i think , what i found was was that it would run a lawn mower engine no problem at all for nearly an hour or more before the whole thing got too hot , but once you put that engine to work and actually load down that engine then it changes quickly and maybe 15 mins worth of run time before mine got too hot .
I think for proof of concept the small reactor is worth having a play with to get your feet wet , but once confidence in your design is sorted then i think the whole system should be upgraded to a much larger version one that will have a run time of maybe 2 hours with no real change in temps .
This is my findings on my systems and may not be the same as others so take what i say with a pinch of salt , also no water or EGR and all charcoal around 5/16 up to just about 3/4 in size.
My 100lb propane tank with a horizontal nozzle would run my 7kva generator under load for a MAX time of 2 and a bit hours before it was starting to get hot up top , i would then get another 1.5 hours out of it before the top was too hot to touch and gas quality was bad enough to stop the engine , i would always have maybe about 10 inches of charcoal on top of the nozzle left .
My smaller portable gasifier was a little under 9 inches in dia and 30 inches high with a vertical nozzle in the bottom going in about 2 inches , this ran my small inverter generator for maybe an hour under about a 1.5 kw load before getting too hot to run anymore due to the hoses starting to collapse under the heat .
The largest simple fire i built was from a 220 litre drum with a vertical nozzle from the bottom and going upwards about 4 inches , this has the longest run time , but only just
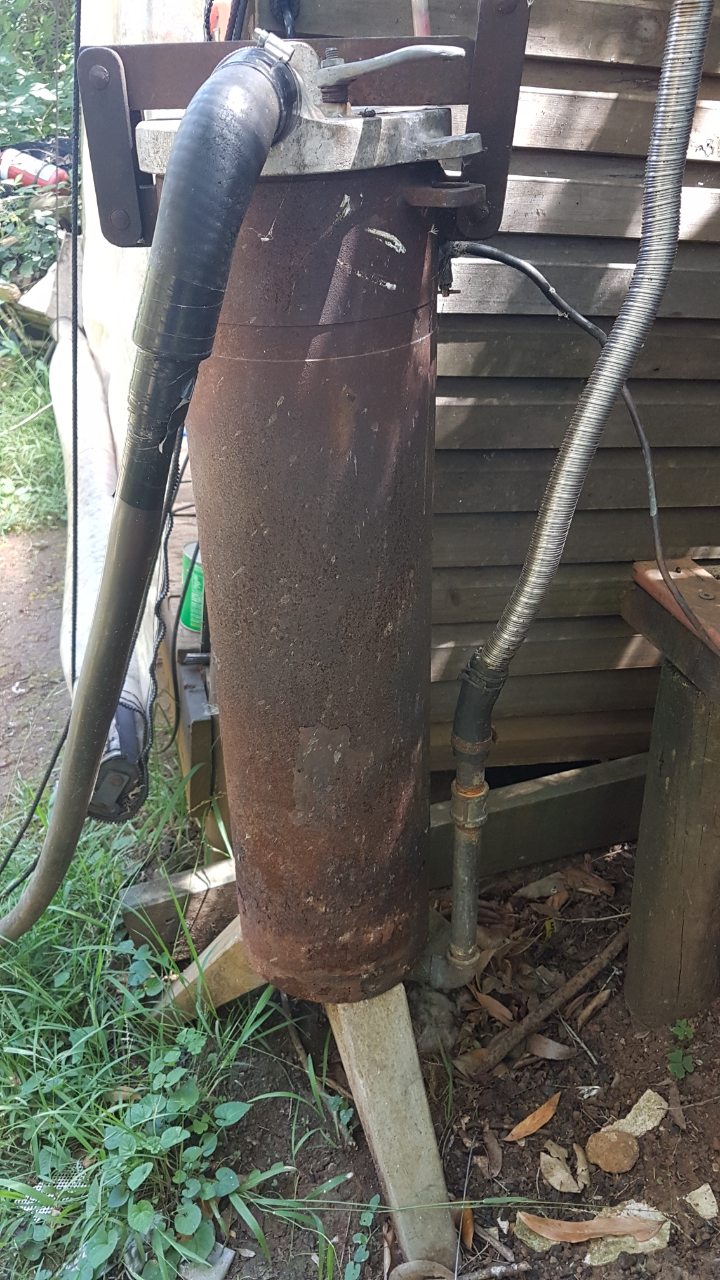
what i have noticed is that from about 2 inches from the top full of normally graded charcoal this will also only run fully loaded for just over 4 hours before it starts getting very hot up top but by then the batteries that are charging off the generator are coming up to 80% DOC and so the current drops off and the generator isn’t working as hard and so will run for another 1.5 maybe before engine stops due to hot or no gas , again there is about 10 inches of charcoal left on top of the nozzle , if you look at the photo of the blue drum you can see a plastic label half way up the drum and the bottom half of the label has melted but not the top part , so thats as far as the real high heat travels on my drum .
I think the best sizes for charcoal and reactor would be as Koen says try and get charcoal around corn or thumb size and a reactor diameter of around 12 or 15 inches by about 4 or 5 ft tall would give a perfect run time of around 3 or 4 hours .
One day i will do some better pics and video’s of my running systems but this is just so you see what i am talking about , the small Gasifier i use a extra filter and cooler while running the larger one .

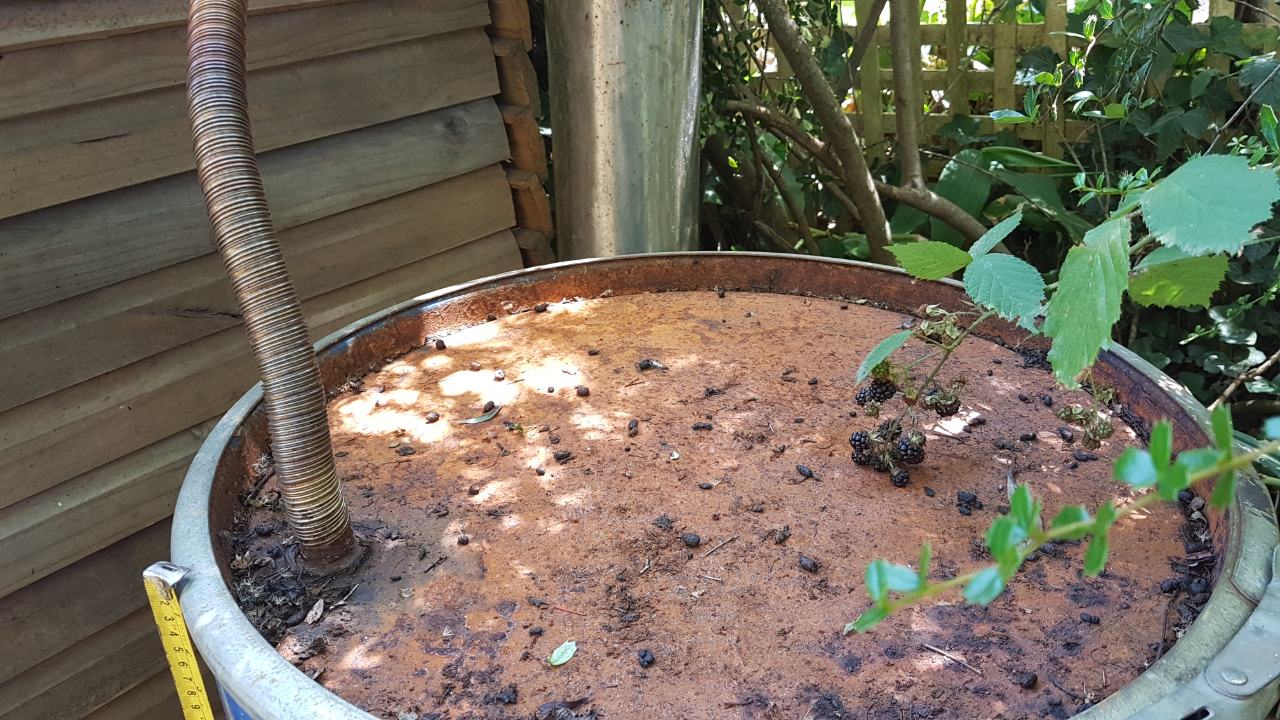


As its been in the 30’s and 40’s c the past couple of months i have not even been near to clean up the brambles and posom poo around it let alone be able to run it in this heat .
Dave
7 Likes
Dave, Thanks for the pics and explanation. It is so helpful to have someone like you who is actually using this technology for real work and can give great advice.
4 Likes
Thanks for the great runtime info, very interesting. I am really excited by the idea that the simplefire is starting to mature as a technology -especially on the topic of nozzles. Going back and reading the early posts there were so many unknowns, and a lot of good experiments have been done. Now, it seems like the basics are starting to be understood, and so the question becomes “what is the next thing that we make it better?” (dont worry Steve U, I did not say perfect ![]() ).
).
There is a nagging feeling in my mind that there is a heat problem. Basically that too much fuel has to stay in the hopper just to keep the heat from escaping the lobe. I realize it will never be possible to run a charcoal hopper as dry as a gas tank, But it is a topic that I feel could be expanded on and studied. Perhaps this should be split into a new thread?
I was looking at your dimensions on the 55 gallon drum, and from the picture it looks like its about 36" tall. It sounds like you fill it to within 2" of the top, and have 4" of dead space at the bottom:
With the 10" left on top of the nozzle at the end of the run then, you have used about 55% of the volume of your fuel. That is heaps better than i suspect is possible with a smaller hopper (I did some math on my run today, and came up with a fuel consumption of only 19% before the temperature started to climb at the outlet) I realize that with a stationary application this is not really very important; it is at best a nuisance when you want to dig out the nozzle and clean out clinker and such. What I am curious about is if there are simple enough ways to better the fuel consumption percentage (and if anyone else thinks this is worth exploring ![]() ). Anyway, I will post some numbers from my tests when I get a chance to type them up.
). Anyway, I will post some numbers from my tests when I get a chance to type them up.
3 Likes
Carl , one thing i forgot to mention , and i guess its the same even for the smaller reactors , that on my large drum as fuel is used up it takes new fuel from the center outwards and so i end up with a very low level of charcoal spanning maybe 14 inches in dia from the centre above the nozzle and the outer dia of the drum stays pretty well high until you give the drum a good shake and get the charcoal to fall down and build up some more height , on my 100 lbs propane tank it does not seem to be as bad and so i am thinking a taller but smaller dia drum is really needed to get the longer run times , or a good shaking or bashing of the sides after a few hours will help the run time a bit better .
Dave
5 Likes
Besides shaking, weights have also been used to help the char descend evenly. I use two half round weights on chains in my MGB reactor to push the char from the edge into the center. Maybe 3 vertical rods near the perimeter and a weight with three holes or three separate weights descending on the rods. I’ve also wondered if there might be a way to use an insulated weight to help keep the heat isolated to the bottom of the reactor.
2 Likes
A rotating paddle could be arranged to level or even push fuel to the center.
1 Like
Or, you can equaly divide 3 smaller nozzles on the floor surface and have 3 lower glow lobes instead of one big one and 3 char cones that in the end connect to one.
Actualy this is one of the reasons l developed the pipe nozzle in the first place. I had to put a short and wide hopper/gasifier in my Seat Arosa.
Carl l agree. We achived so much! And l have a feeling we are close to some big changes yet still.
I will make a more in depth report when l aquire material and time but for now, l think the evolution is moveing away from updraft char gasification. Yes, a simple fire is fantastic for beginers, emergancys and as a demonstration, but for a system we rely on dayly, we have better options.
For now let me just say with a downdraft charcoal gasifier, l have doubled my range with a hopper allmost half the size of the one l had with a updraft 
6 Likes
Interesting idea with the weights, Bruce, I definitely also see an inverted cone forming in my hopper. As for insulation, I am not sure if that would greatly alter the heat flow if it was situated inside the reactor. Seems to me that the excess heat we are generating has only 3 places to go:
1:into the thermal mass of the charcoal (and the reactor mass)
2: radiating to the outside from heated surfaces on the reactor
3: into the gas leaving the reactor
The produced gas is presumably quite hot as it exits the lobe, and it is then dumping heat into the charcoal as it exits. Once that charcoal gets up to temperature, the outgoing gas is going to overheat quite quickly. Adding more charcoal into the hopper means more thermal mass, and I suspect that a long narrow form factor is also creating a higher surface area to volume ratio that helps dump some of the heat to the outside.
Rather than over-complicate the hopper, does it maybe make sense to just have a gas cooling system?
2 Likes
Carl, with a updraft gasifier, you recycle heat back in the gasifier via fuel preheating. But since you only use air (no water or EGR) this energy is wasted and it acumulates in the gasifier. I had a insulated hopper and this effect can be seem there even more. Once the hopper got to high temp (with plenty of char available!) it never went down again. Heat has acumulated and risen to a dangerous level no matter what l did. Plus, ash starts to push the glow lobe up as it starts building on the bottom.
5 Likes
Indeed, balancing the speed flow of the descending new cold charcoal with the ascending hot gas exitting the glowing carbon lobe. Dumping most of the heat from the gas in the charcoal, saving quite a bit on energy/charcoal consumption. Hence why i started with the vertical nozzle in the first place…
Its fun to play around with all the designs what come up during the builds, it looks as anything will work, as long as the fuel has been taken care of well…
5 Likes
Hi Jeff , do you mean that yours will not empty like mine from the middle outwards ?
Dave
1 Like
Hi Dave,
The fuel in the top hopper travels down the center fuel tube to keep the middle crater filled with fuel.
Solar-Fuel, onward !
6 Likes
Okay, I wanted to run the gasifier again with the new 1/2" nozzle to confirm my findings from the first run. It would seem that the hole is now too large, as the vacuum pressure has fallen to roughly 1" (25mm). On the first run I ran it with a load connected from about the 8min mark. The watt meter recorded 27 minutes of runtime and a total load of 200 watt hours. Thats an average of 440 Watts, and the engine definitely had less power than with the smaller hole. Poking the nozzle out helped it bump up its output a bit, but it was not able to maintain a voltage much over 100-105 VAC.

I also recorded the weight at start and finish, it was 24.7lbs empty, 34.4lbs full, and weighed 32.6lbs after my run. I also measured that my charcoal is roughly 1.3lbs/gallon so it should have a 7.5gallon capacity. Fuel consumption was 19% of the available fuel.
I cleaned it out today, loaded it with fresh char, and confirmed that these numbers are about right. It cannot keep up with the 600w heater element - so the voltage drops and it puts out more like 450w, and vacuum is still roughly 1".
I went back and looked for that spreadsheet you had posted before @k_vanlooken and when I plugged in my values what I came up with was that the original hole size was about right (unless I changed something that I shouldnt have?).

So now, the question I have is: which is more important, 40mm of vacuum, or 25m/s airspeed at the nozzle?
5 Likes
Hi Carl,
I used imbert table line C (30 hp). I used five 1/2" nozzles on my first imbert. The table called for
12mm which I felt was way too big. I wasn’t impressed
with the performance. It didn’t seem powerful enough to really “blow” (fan) the
flame. The easiest change for me was to replace the 1/2" nozzles (drilled caps)
with caps drilled out to 5/16". This worked fine for me, “velocity wise”. I figured I
could reach in later to enlarge the holes if necessary. So my experience would
be to increase the velocity at the nozzle (smaller holes). The imbert dimension table is time
proven and it’s what I based my build on by horsepower, (except decreased nozzle diam).
Learned a good lesson about “removable” nozzles saving a teardown just to
change the orifice size.
Hope this helps.
Pepe
I just noticed you have 4 nozzles blowing toward the center, each
opposing pair of nozzles butting air streams, so to speak. Odd numbers of nozzles
“blow by” each other (imbert). I’ve never used an even number of nozzles, so I
can’t really say it’s wrong or not right.
3 Likes