May I recommend putting a bottom on the first section right behind the hitch. I carry s bunch of stuff there. Straps binders chain etc.
3 Likes
OK, so here’s my initial experience with phosphoric acid, sometimes sold as Ospho. I got it as “Klean-Strip Prep & Etch”… whatever, it’s basically the same stuff. The operating principle is, the phosphoric acid eats the rust, and converts it to black iron phosphate. This makes a coating which preserves the remaining metal.
The frame I’ve been working on has been outside for many many years. In that time the rust has hardened off pretty good, made deep pits, and is not active on the surface much. Still, to see what happened I went in with about 4 coats of acid, each time letting it dry for a few hours. It never completely dried however.
I could definitely see the rust getting darker, not black though. Some areas refused to change color. A few spots got fully black. Fresh metal seems to be unaffected, only getting a dull grey color. After several coats, there were tiny spots of dried acid showing up on the unconverted steel.
Here’s the trailer at about this stage.

Last night it rained pretty good. This morning the trailer was dripping with white, like a flock of pigeons had camped there for the night. Not a pretty sight! But, it turns out this is the normal reaction of excess acid and water, it makes a white powder. It must be removed before painting.
I decided to use a flap disc sander to start removing the dust. Only lightly did I start sanding, and I noticed a lot of red dust coming up… that’s right. The rust under the surface was still there, unconverted. Hmm…
My conclusion is, you can’t convert old rust that has… over-oxidized? cured? It seems to shield the rust underneath. Not sure the chemical process here. But clearly underneath the skin, the familiar red rust is alive and well. I’ll have to uncover it all, and try again.
So the next step is to sand the rust down, and then reapply the acid. Should have started there really… Fortunately I’ve got plenty of acid left.
3 Likes
that stinking rust is like cancer hard to get rid of I feel your pain chris . paul from the snow belt I mean rust belt 
1 Like
Nice job on the trailer Chris .
From the pictures it might be a little hard to tell where the undercarriage is mounted . It is very important to have plenty of drawbar length on a drawbar type trailer . The more distance from the trailer hitch back to the center of the undercarriage serves as leverage to the load . The greater this distance the more stable the trailer will pull. If I were building the trailer I would measure the entire lenght of the trailer including the drawbar and mount the undercarriage about 75 % to the rear.
If a drawbar type trailer is too well balanced and loaded while being pulled they can get into a harmonic condition jumping from one side of the road to the other ( I don’t know the proper name for it I just call it the " Hutchy Cutchy ") If one can catch it quick enough with trailer brakes and going to WOT on truck
sometimes it will correct , other wise hello ditch 
Also the shortest distance from the back axle to the hitch on the towing vehicle is good along with plenty of distance from the rear truck axle to the front axle ( leverage )
8 Likes
What Wayne said.
The old rule of thumb was 10-12% of the total weight on the tongue. When I built mine, I copied store bought trailer and put the front axle right on center of the bed not counting tongue. I works very well with no Hutchy Cutchy.
2 Likes
Hutchy Cutchy hmm
Is that shorthand writing for cleaning your load out of the neighbor’s pasture, uprighting the trailer ,fixing the fence, and Thanking God you didn’t roll the truck in the process?
Oh I left out the roll of toilet paper:smiling_imp:
Don’t ask me how I know this
Luckely the trailer jumped off the ball, no safety chain ,and one yard of concrete in the trailer behind a Mazda pickup
Young and DUMB
6 Likes
The rear axle to the very back is 75 inches, the hitch ball to the front axle is 124 inches. I’ll definitely keep it front heavy.
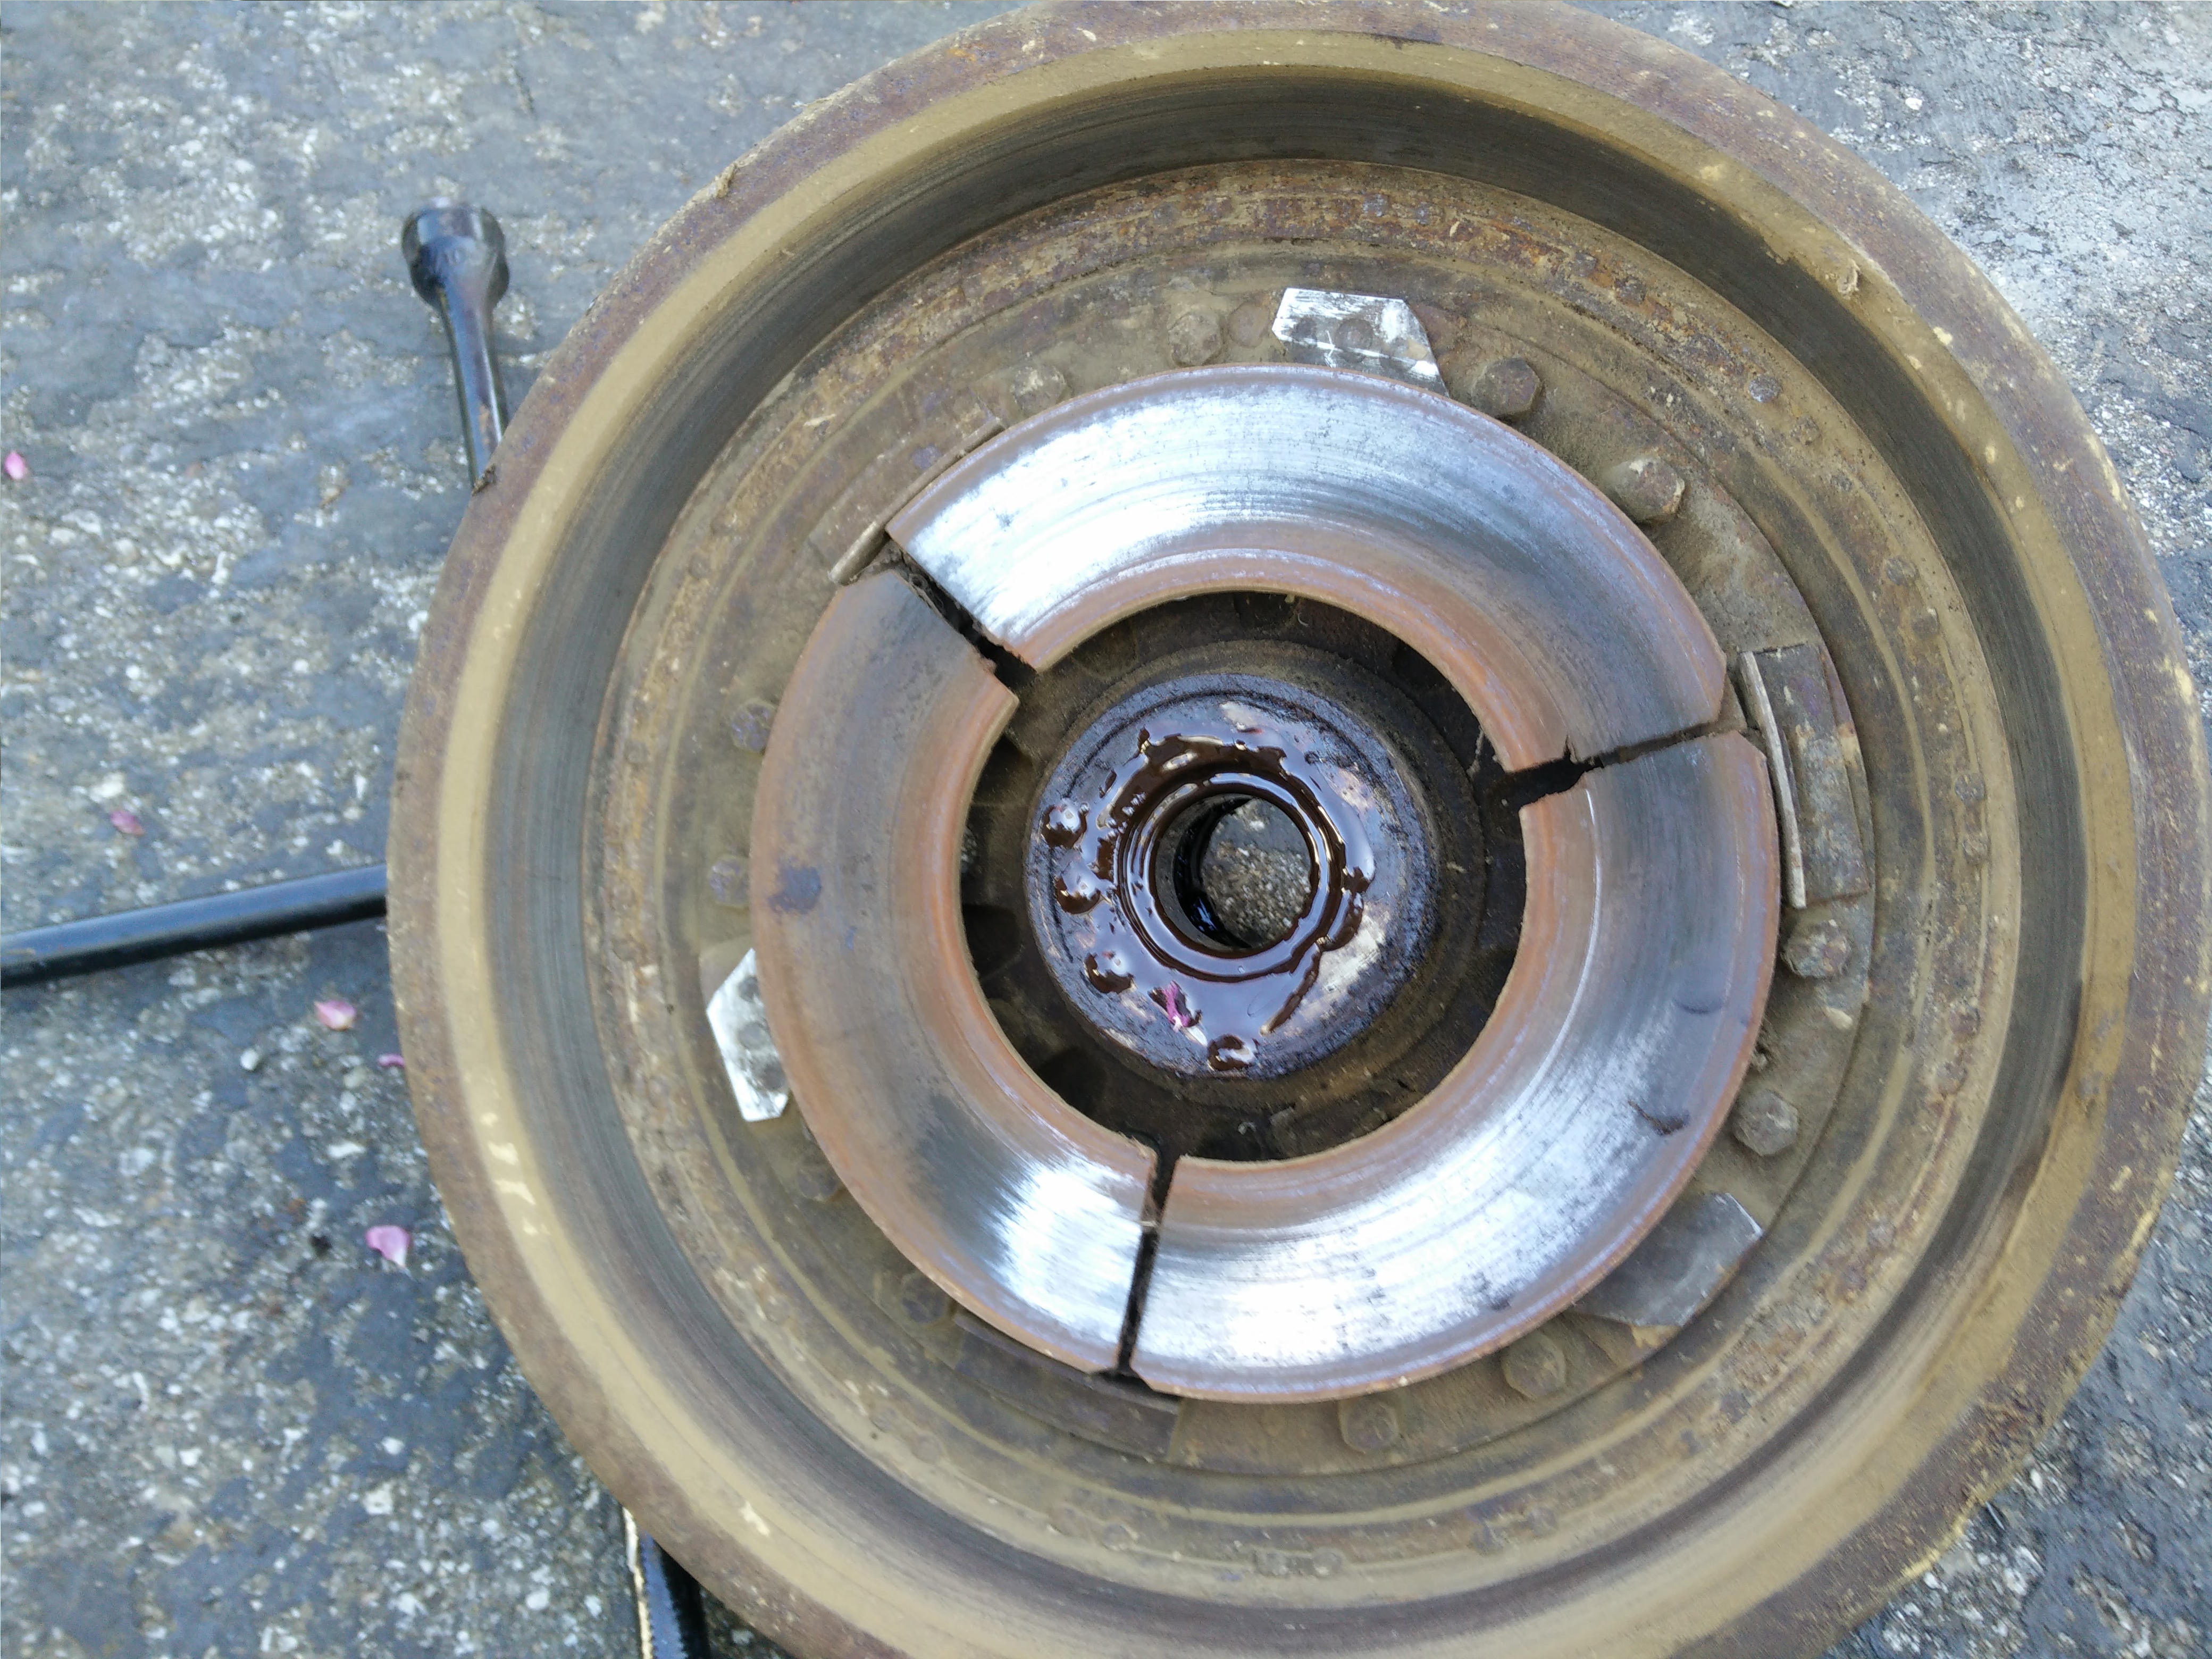
Tonight I pulled the brake drum off, to see what’s what, repack the bearings etc… I found a setup I’ve never seen before.
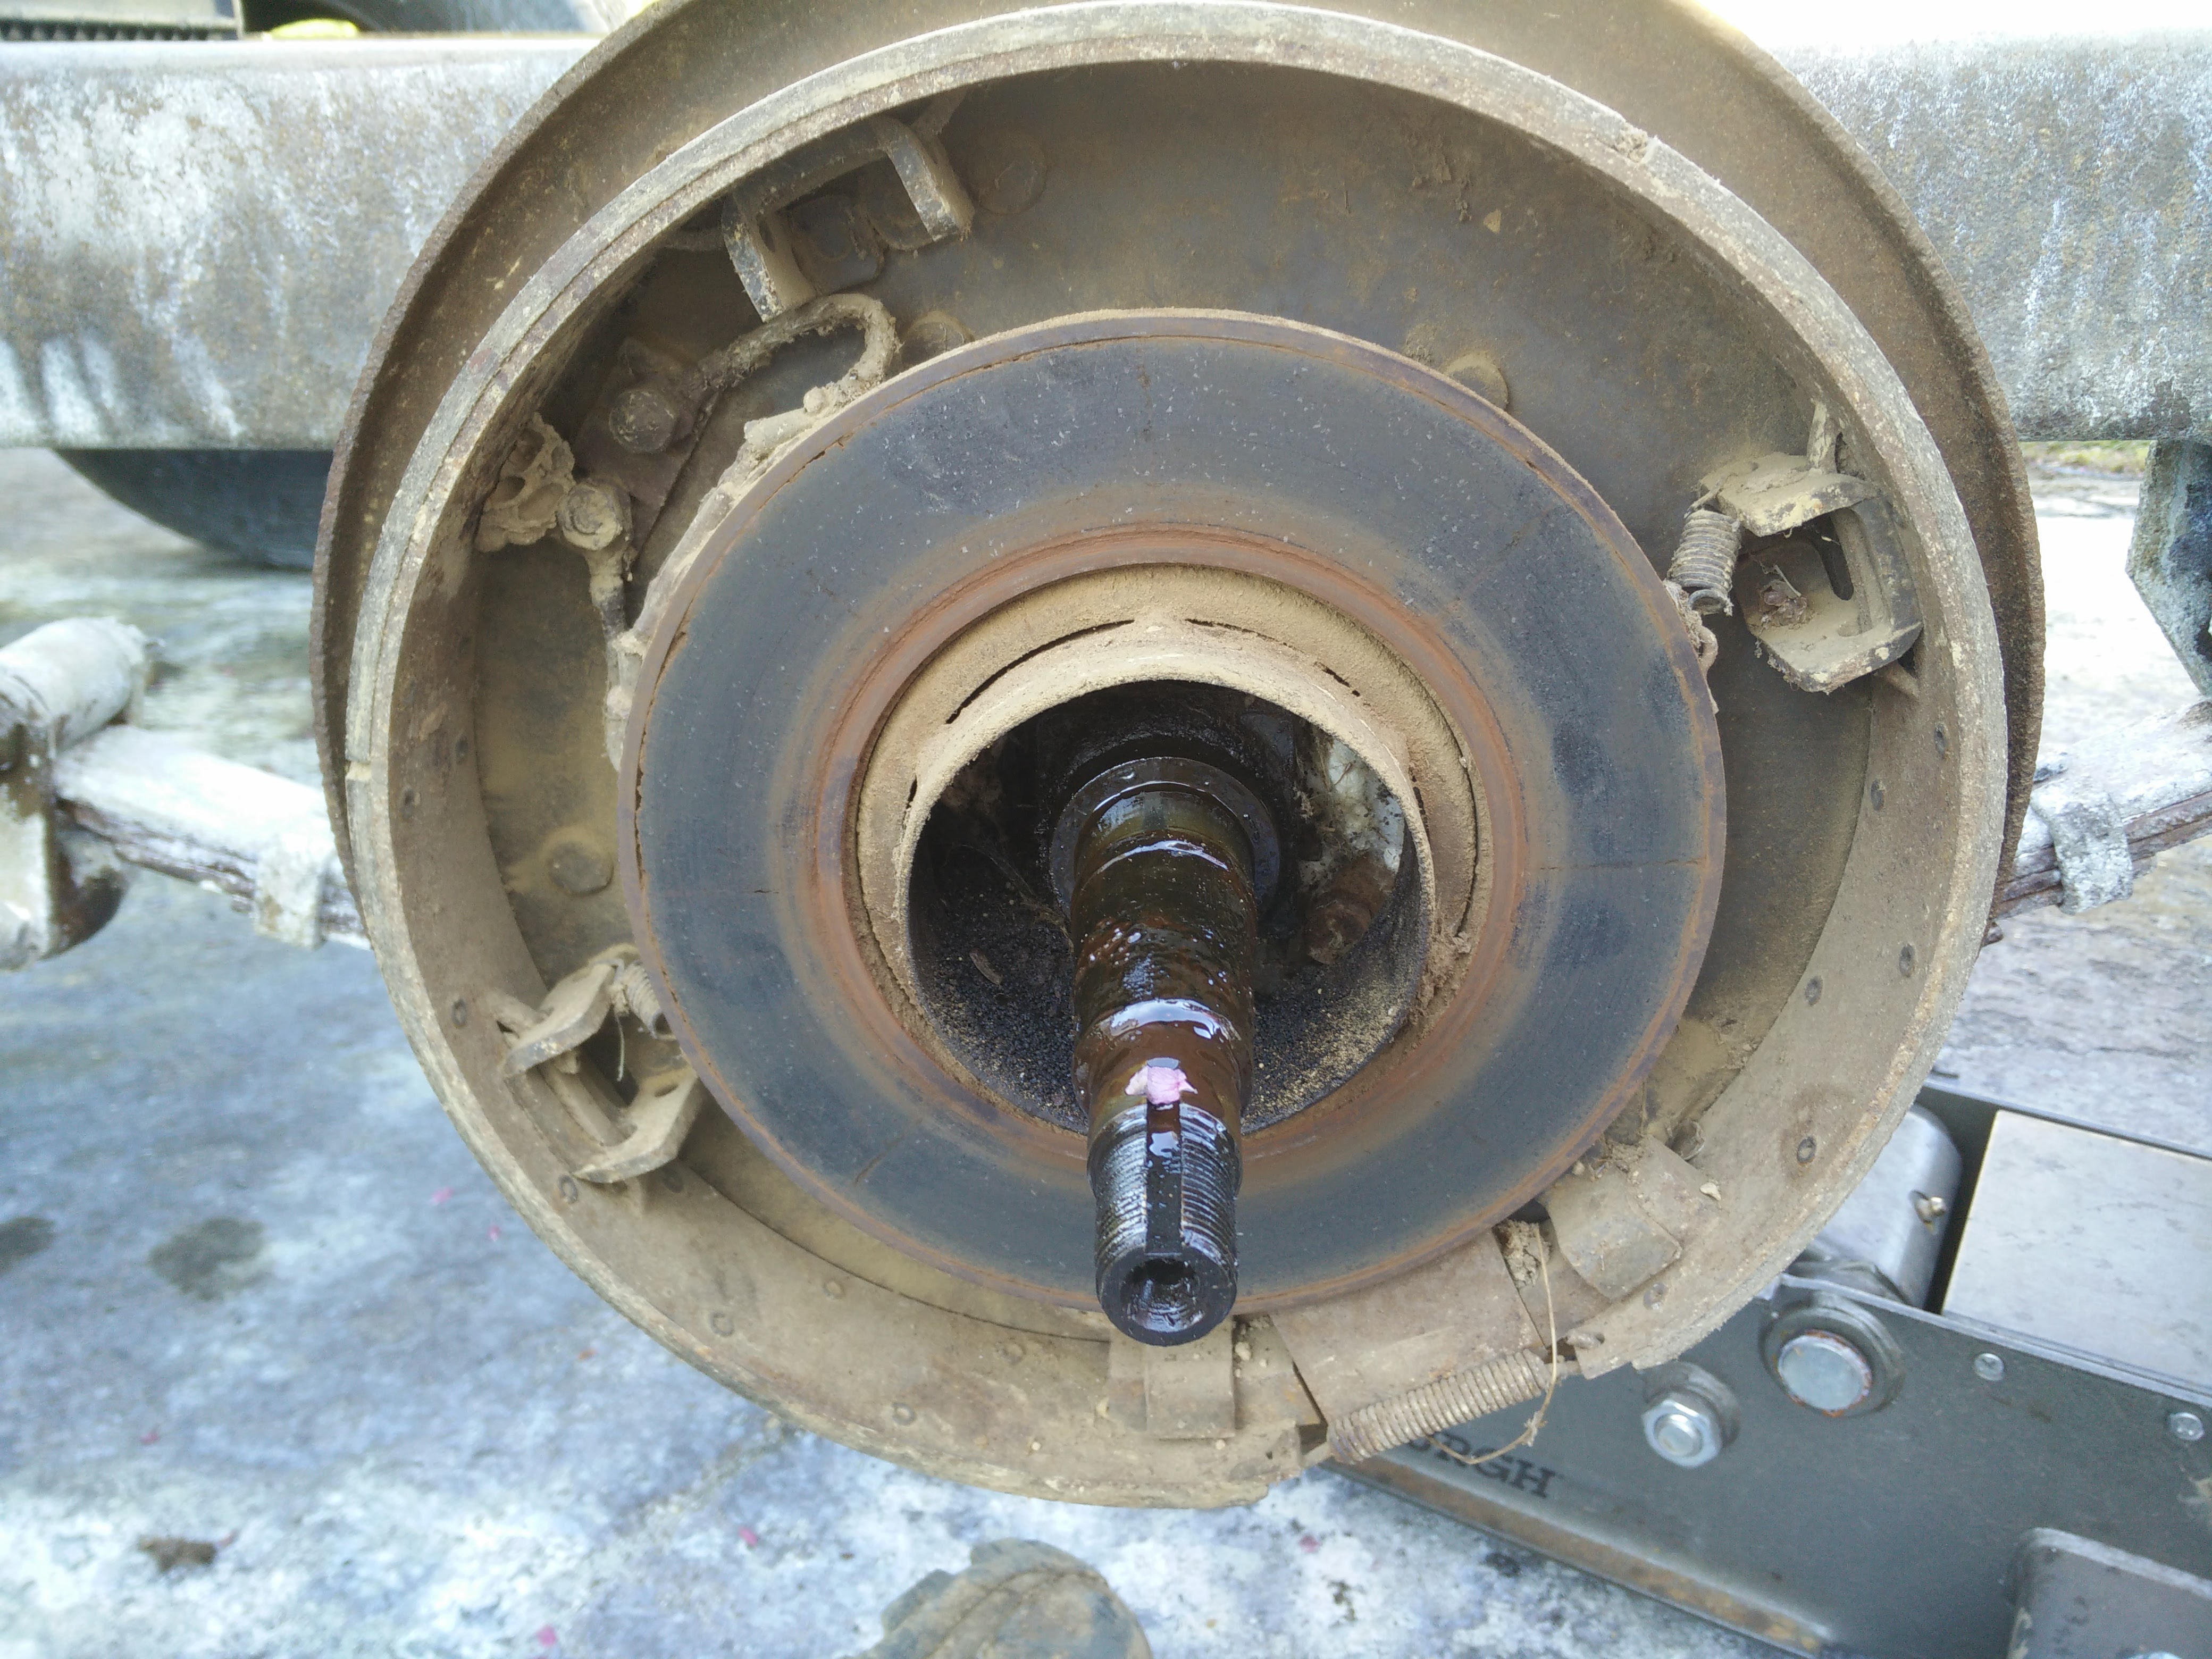
Drum side:
According to this guy, it’s a Warner brake, dating this axle to the 60’s or even older. Apparently they work great, and are relatively heavy duty. Very simple design compared to the usual.
I did put power to it, it stopped the hub turning. Seems to work OK, I’ll have to try it under load to really know.
Anybody had experience with these?
1 Like
Looks like mine.
ElectroMagnetic on the backing plate that when energized pulls the disc in the drum to it engaging the braking surfaces. Look at the"drum plate and make sure it moves freely noticed a uneven wear pattern there. Maybe one of the “hinges” is a little hung up.
After that put a brake controller on the truck and go for it. You can adjust the control for the weight of the load
1 Like
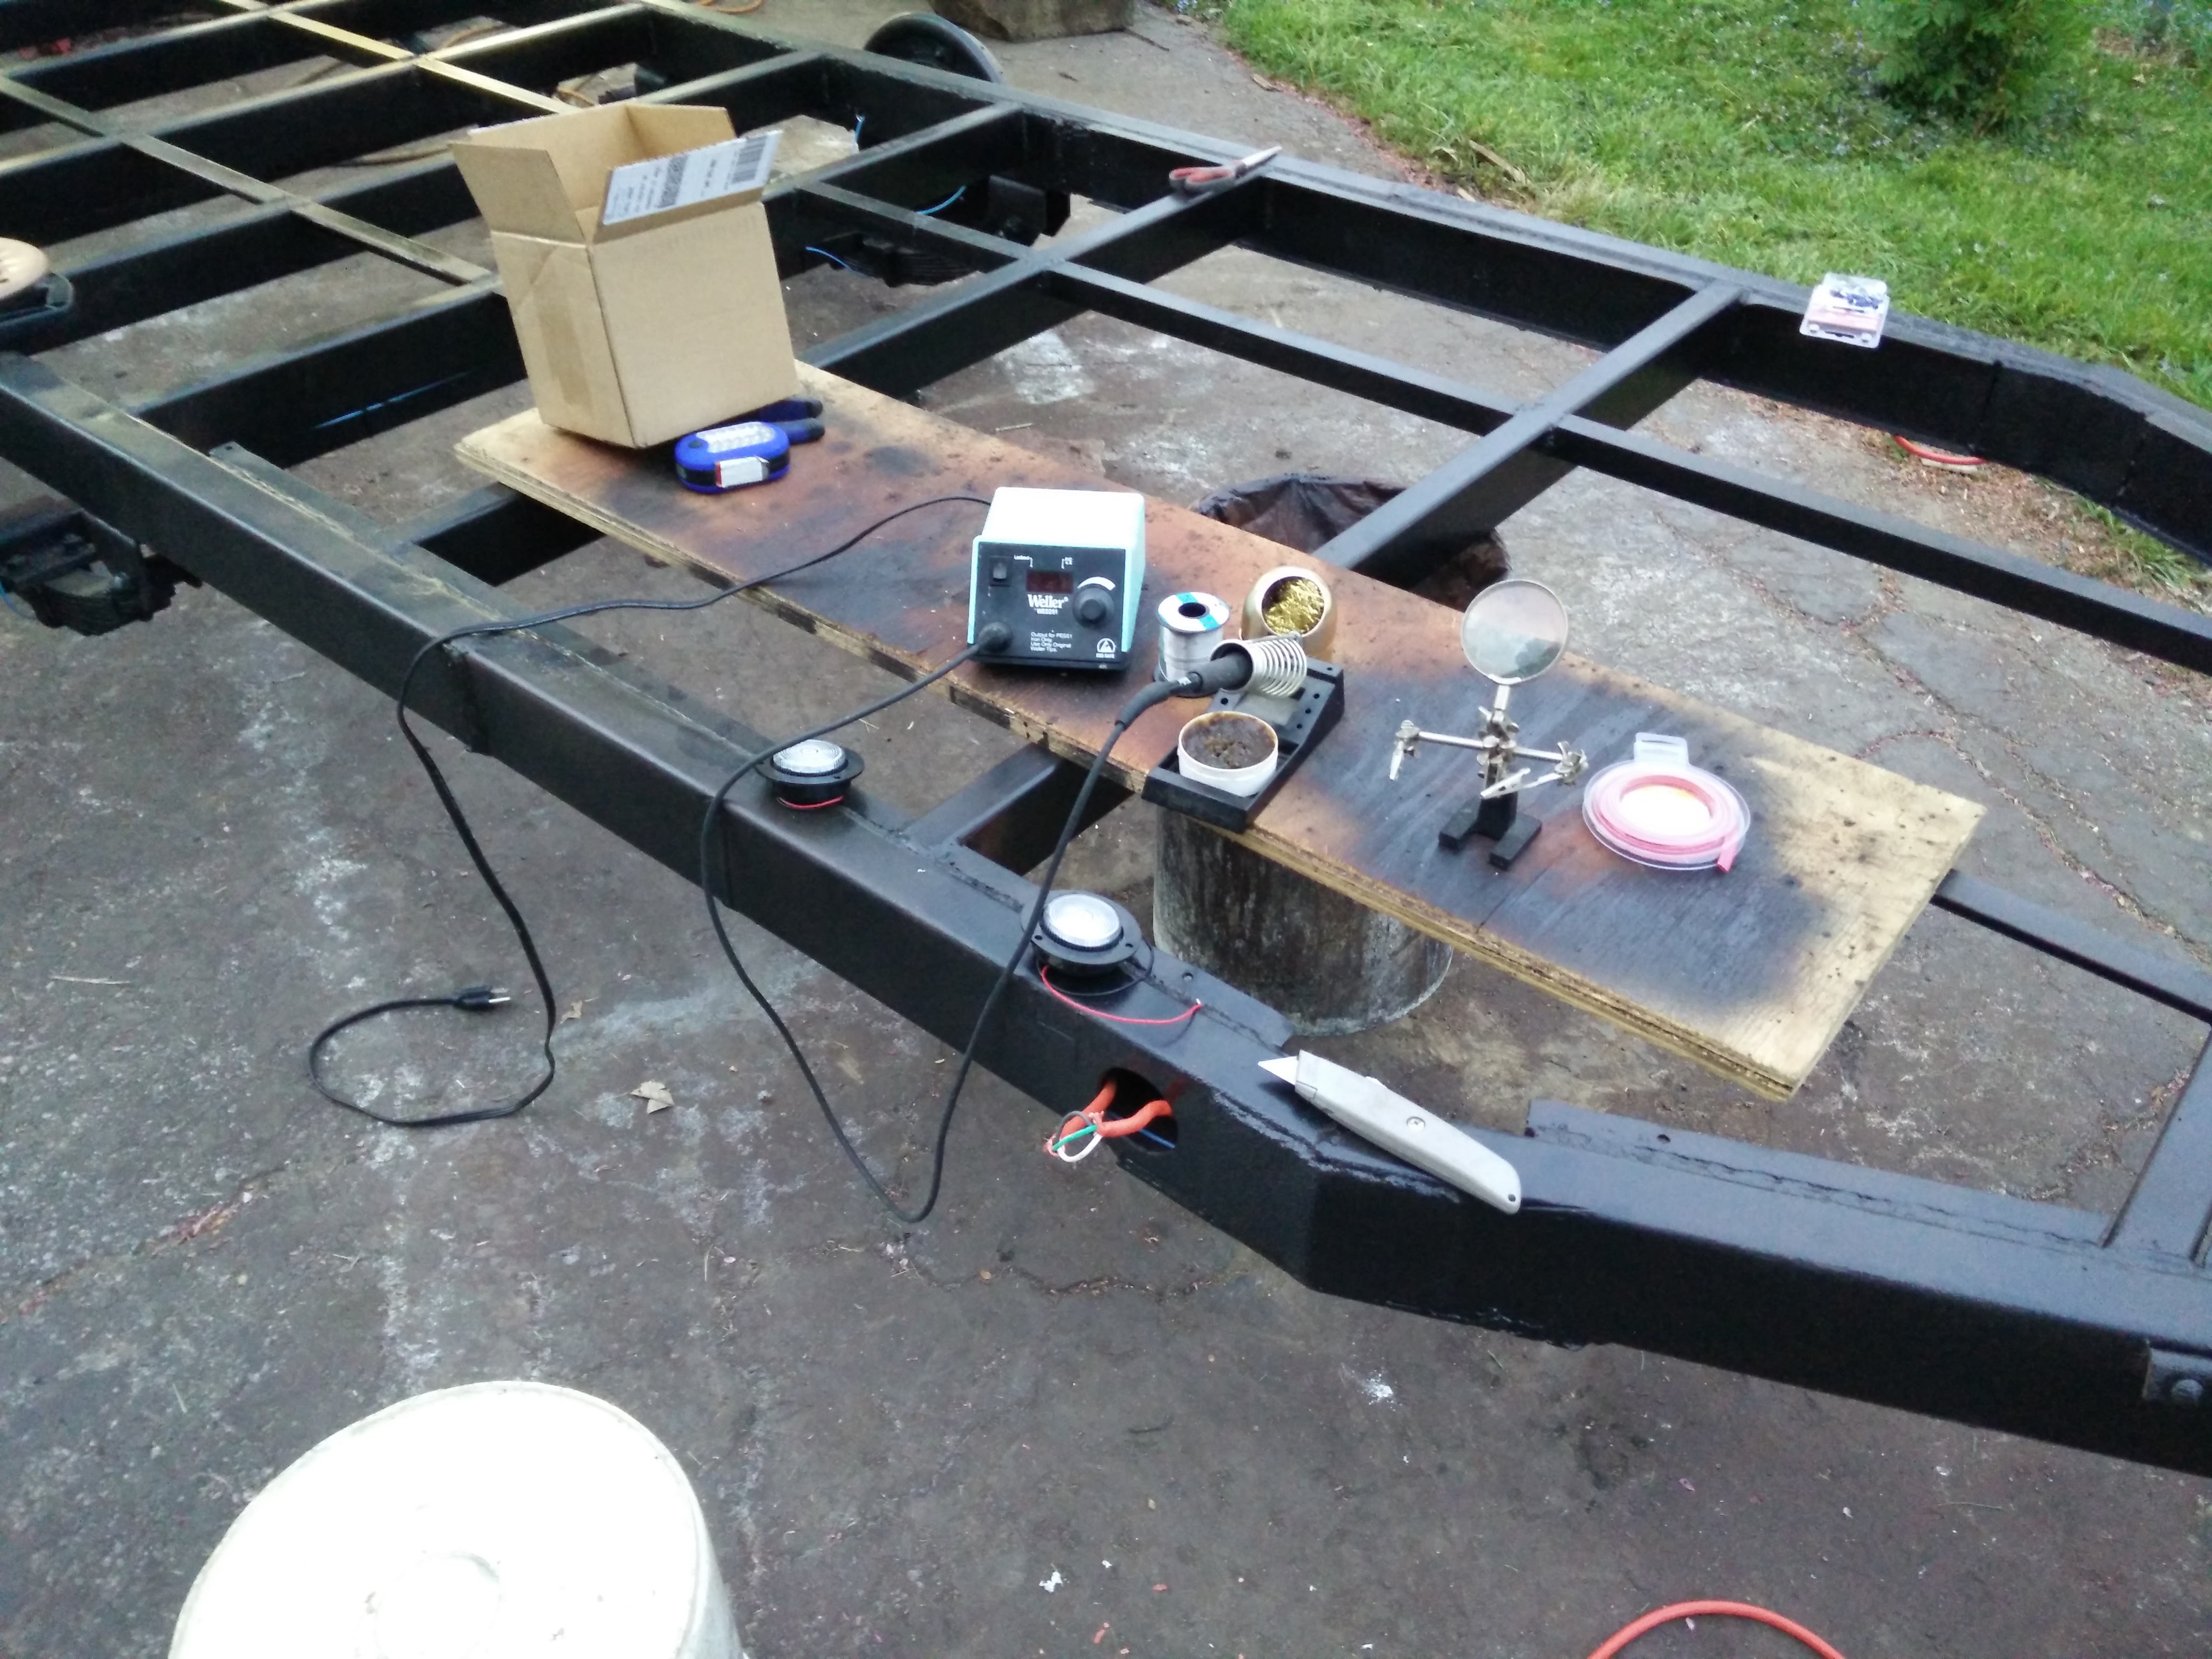
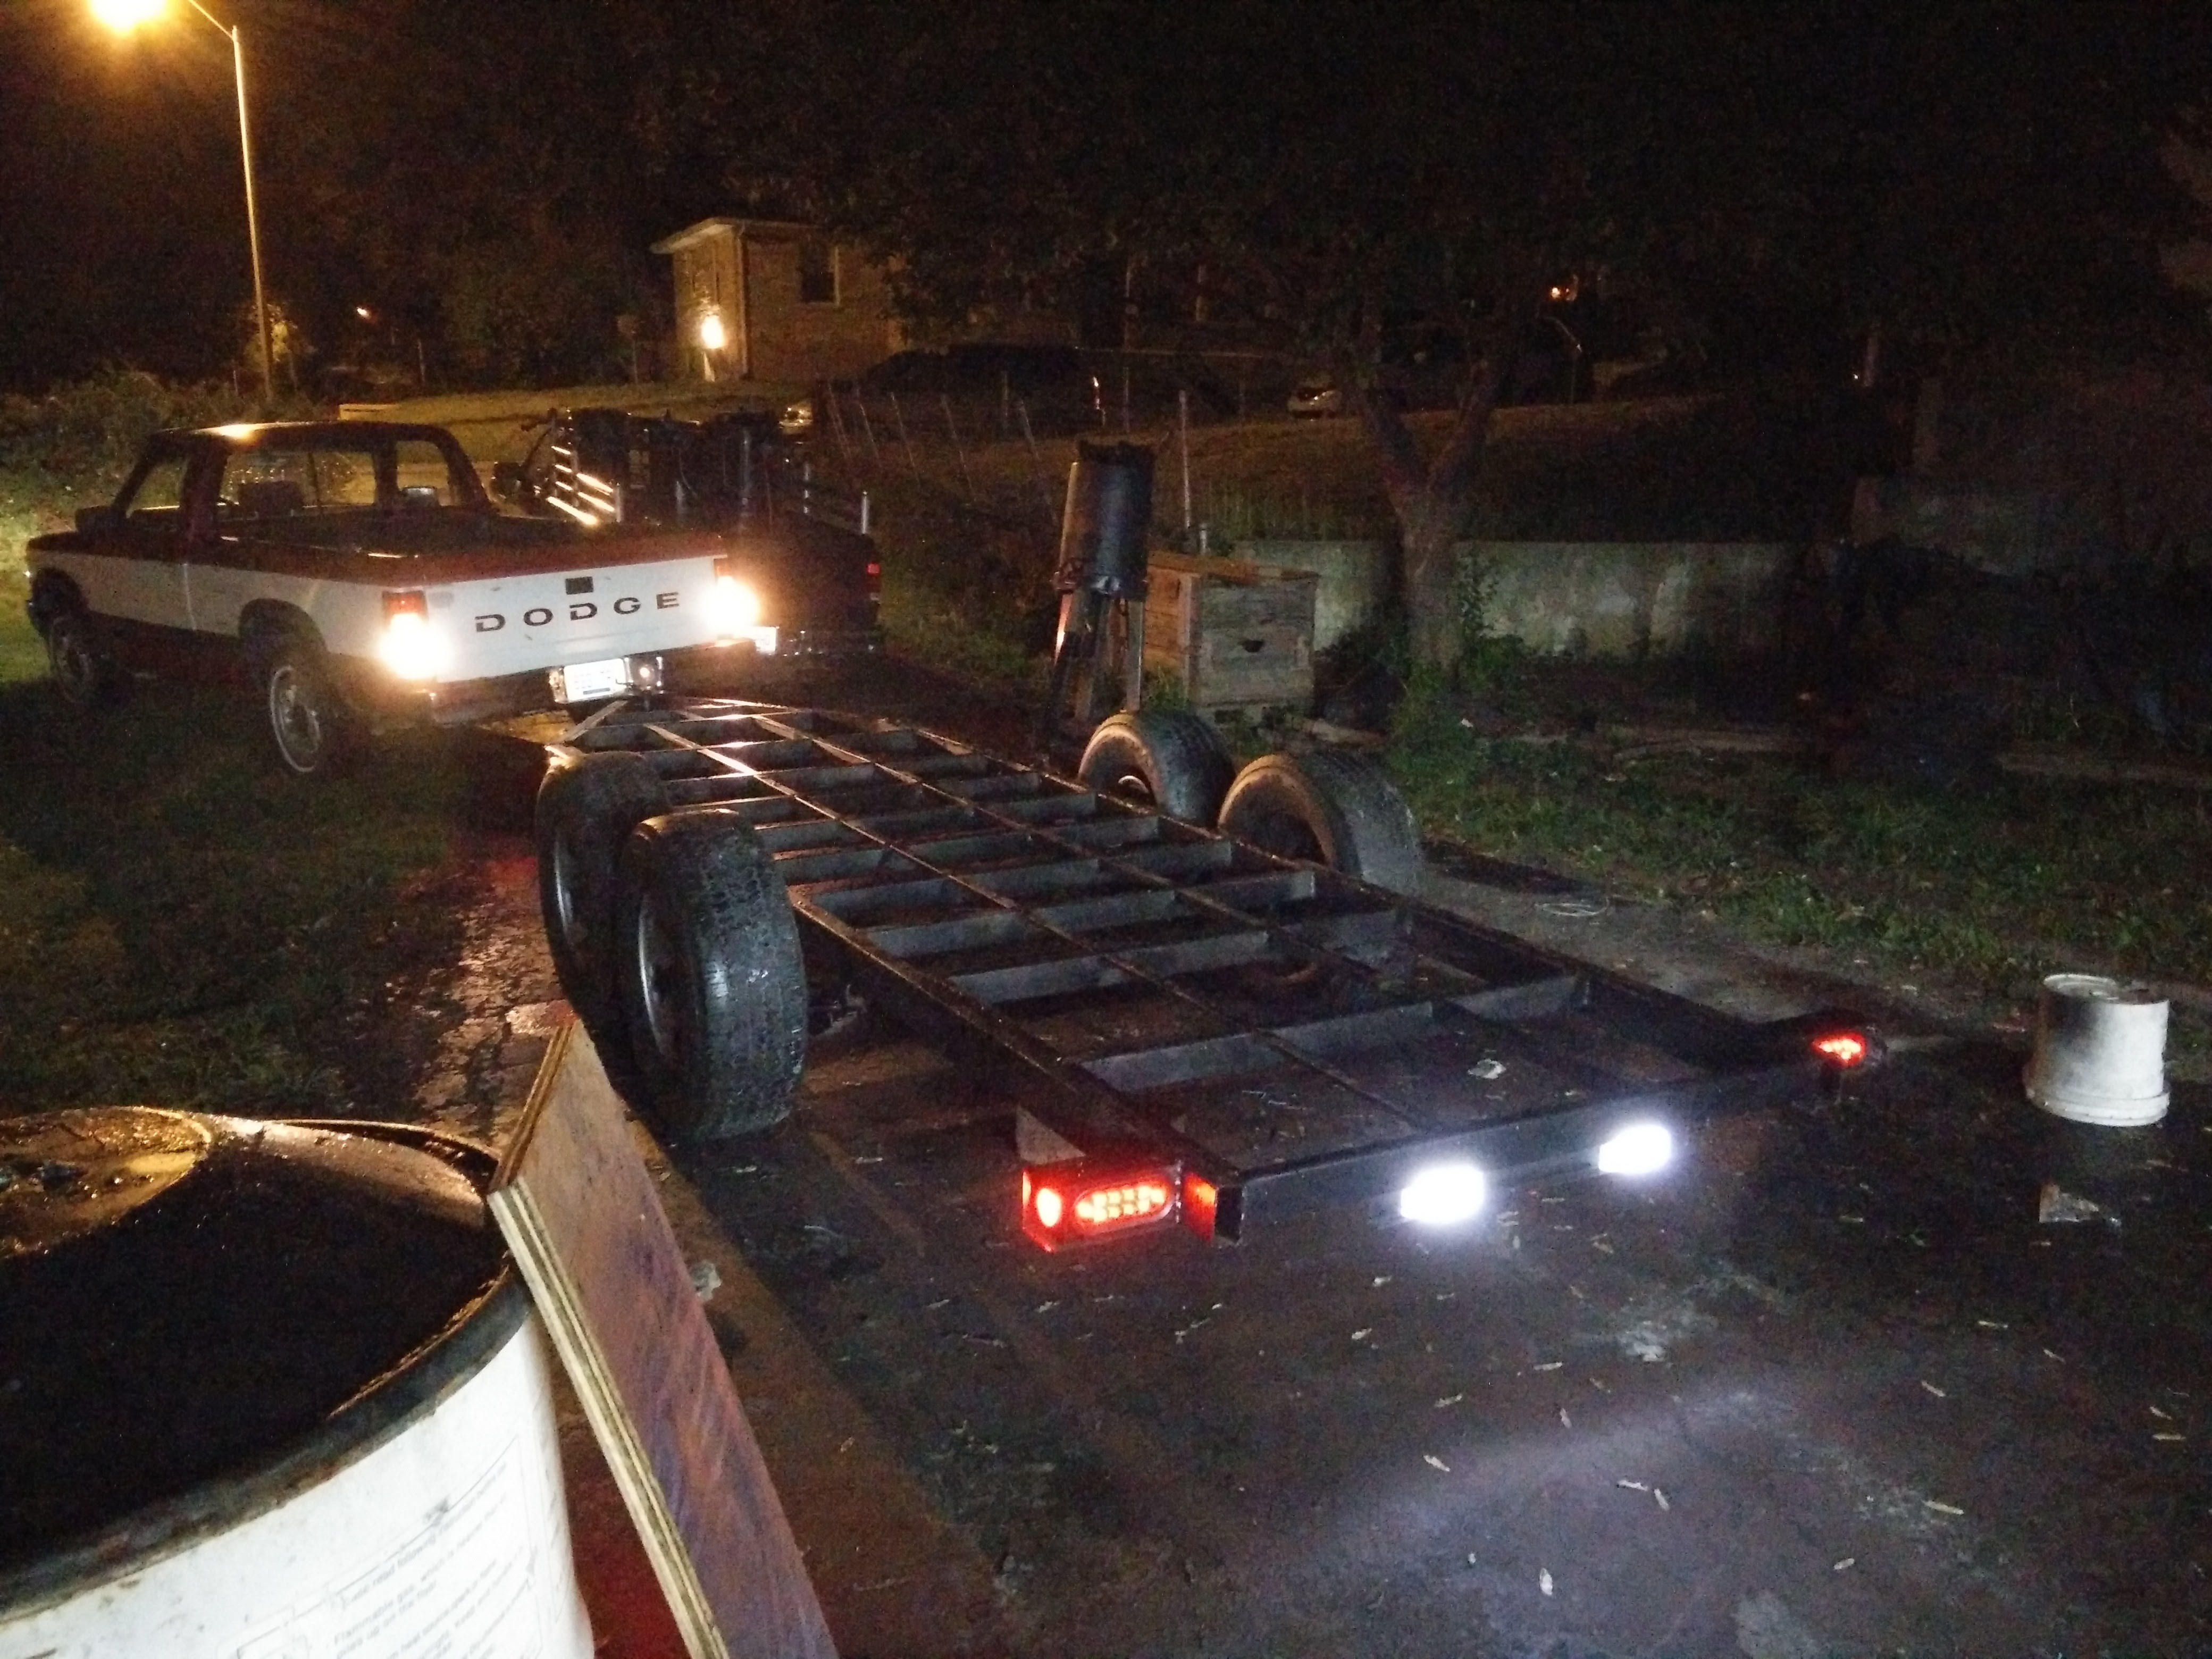
Back in black. Yes, this is how I wire everything… Solder and heat shrink.
We have lights!
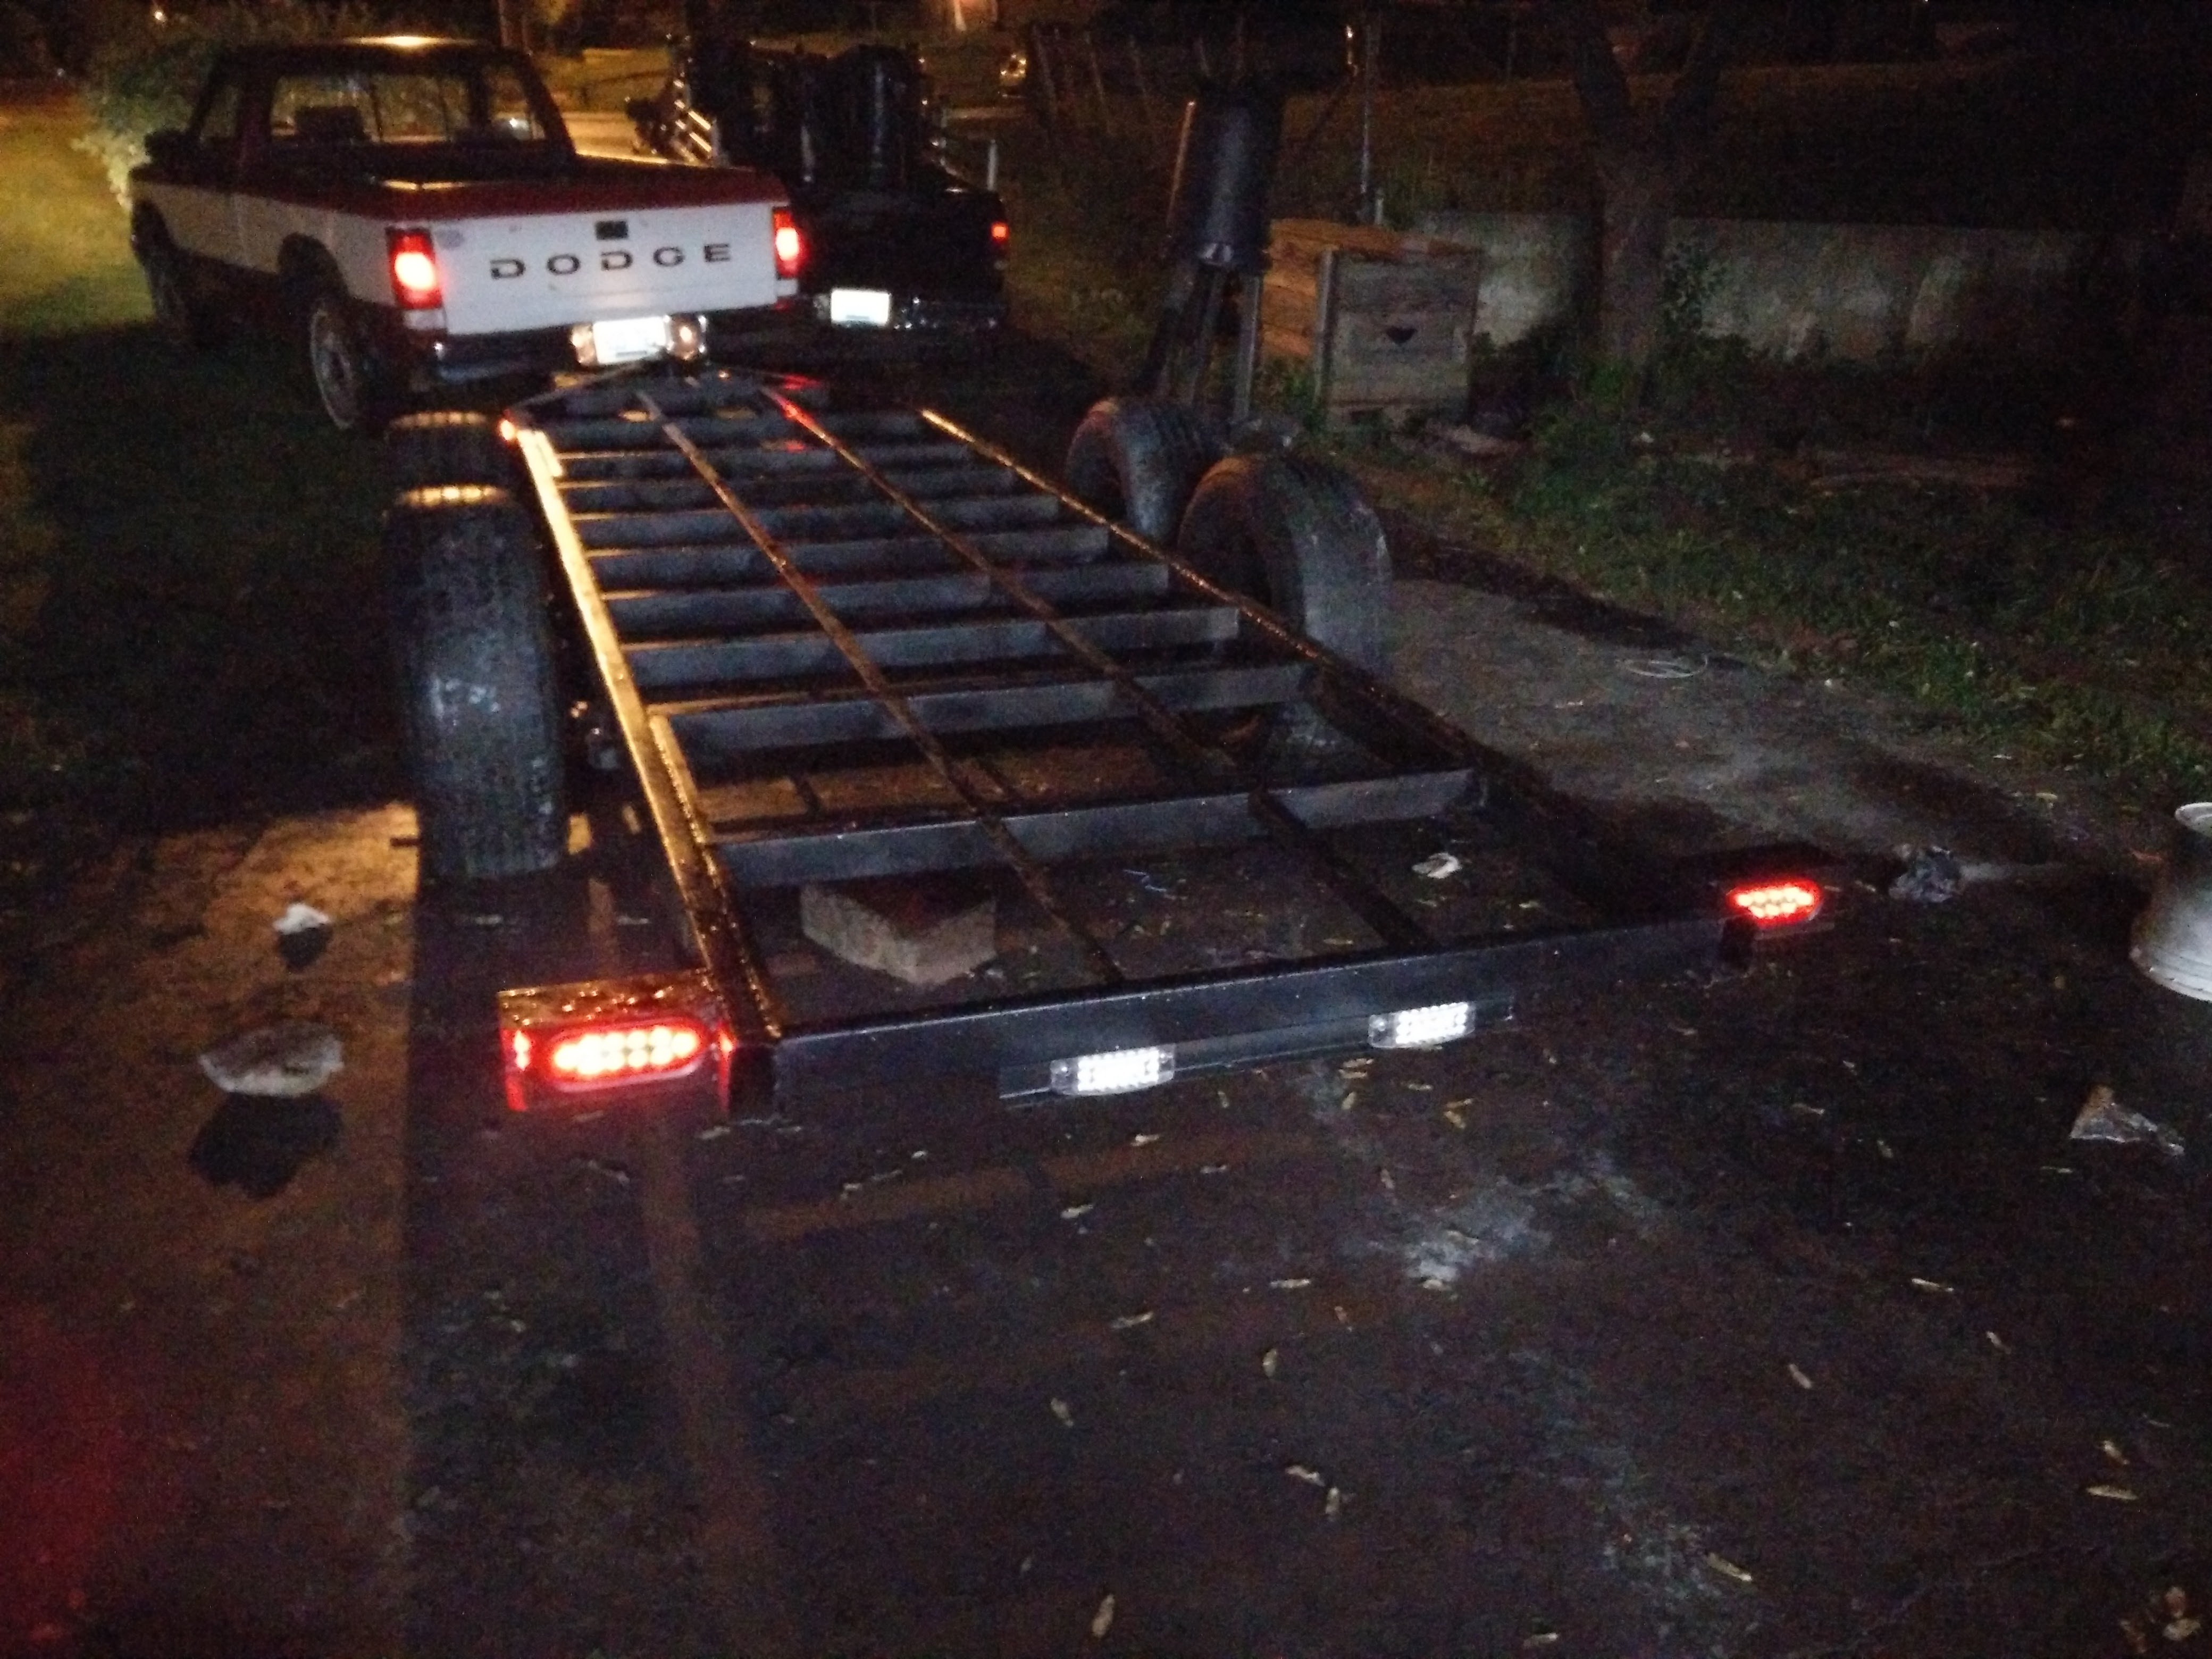
Even reverse lights…
=======================
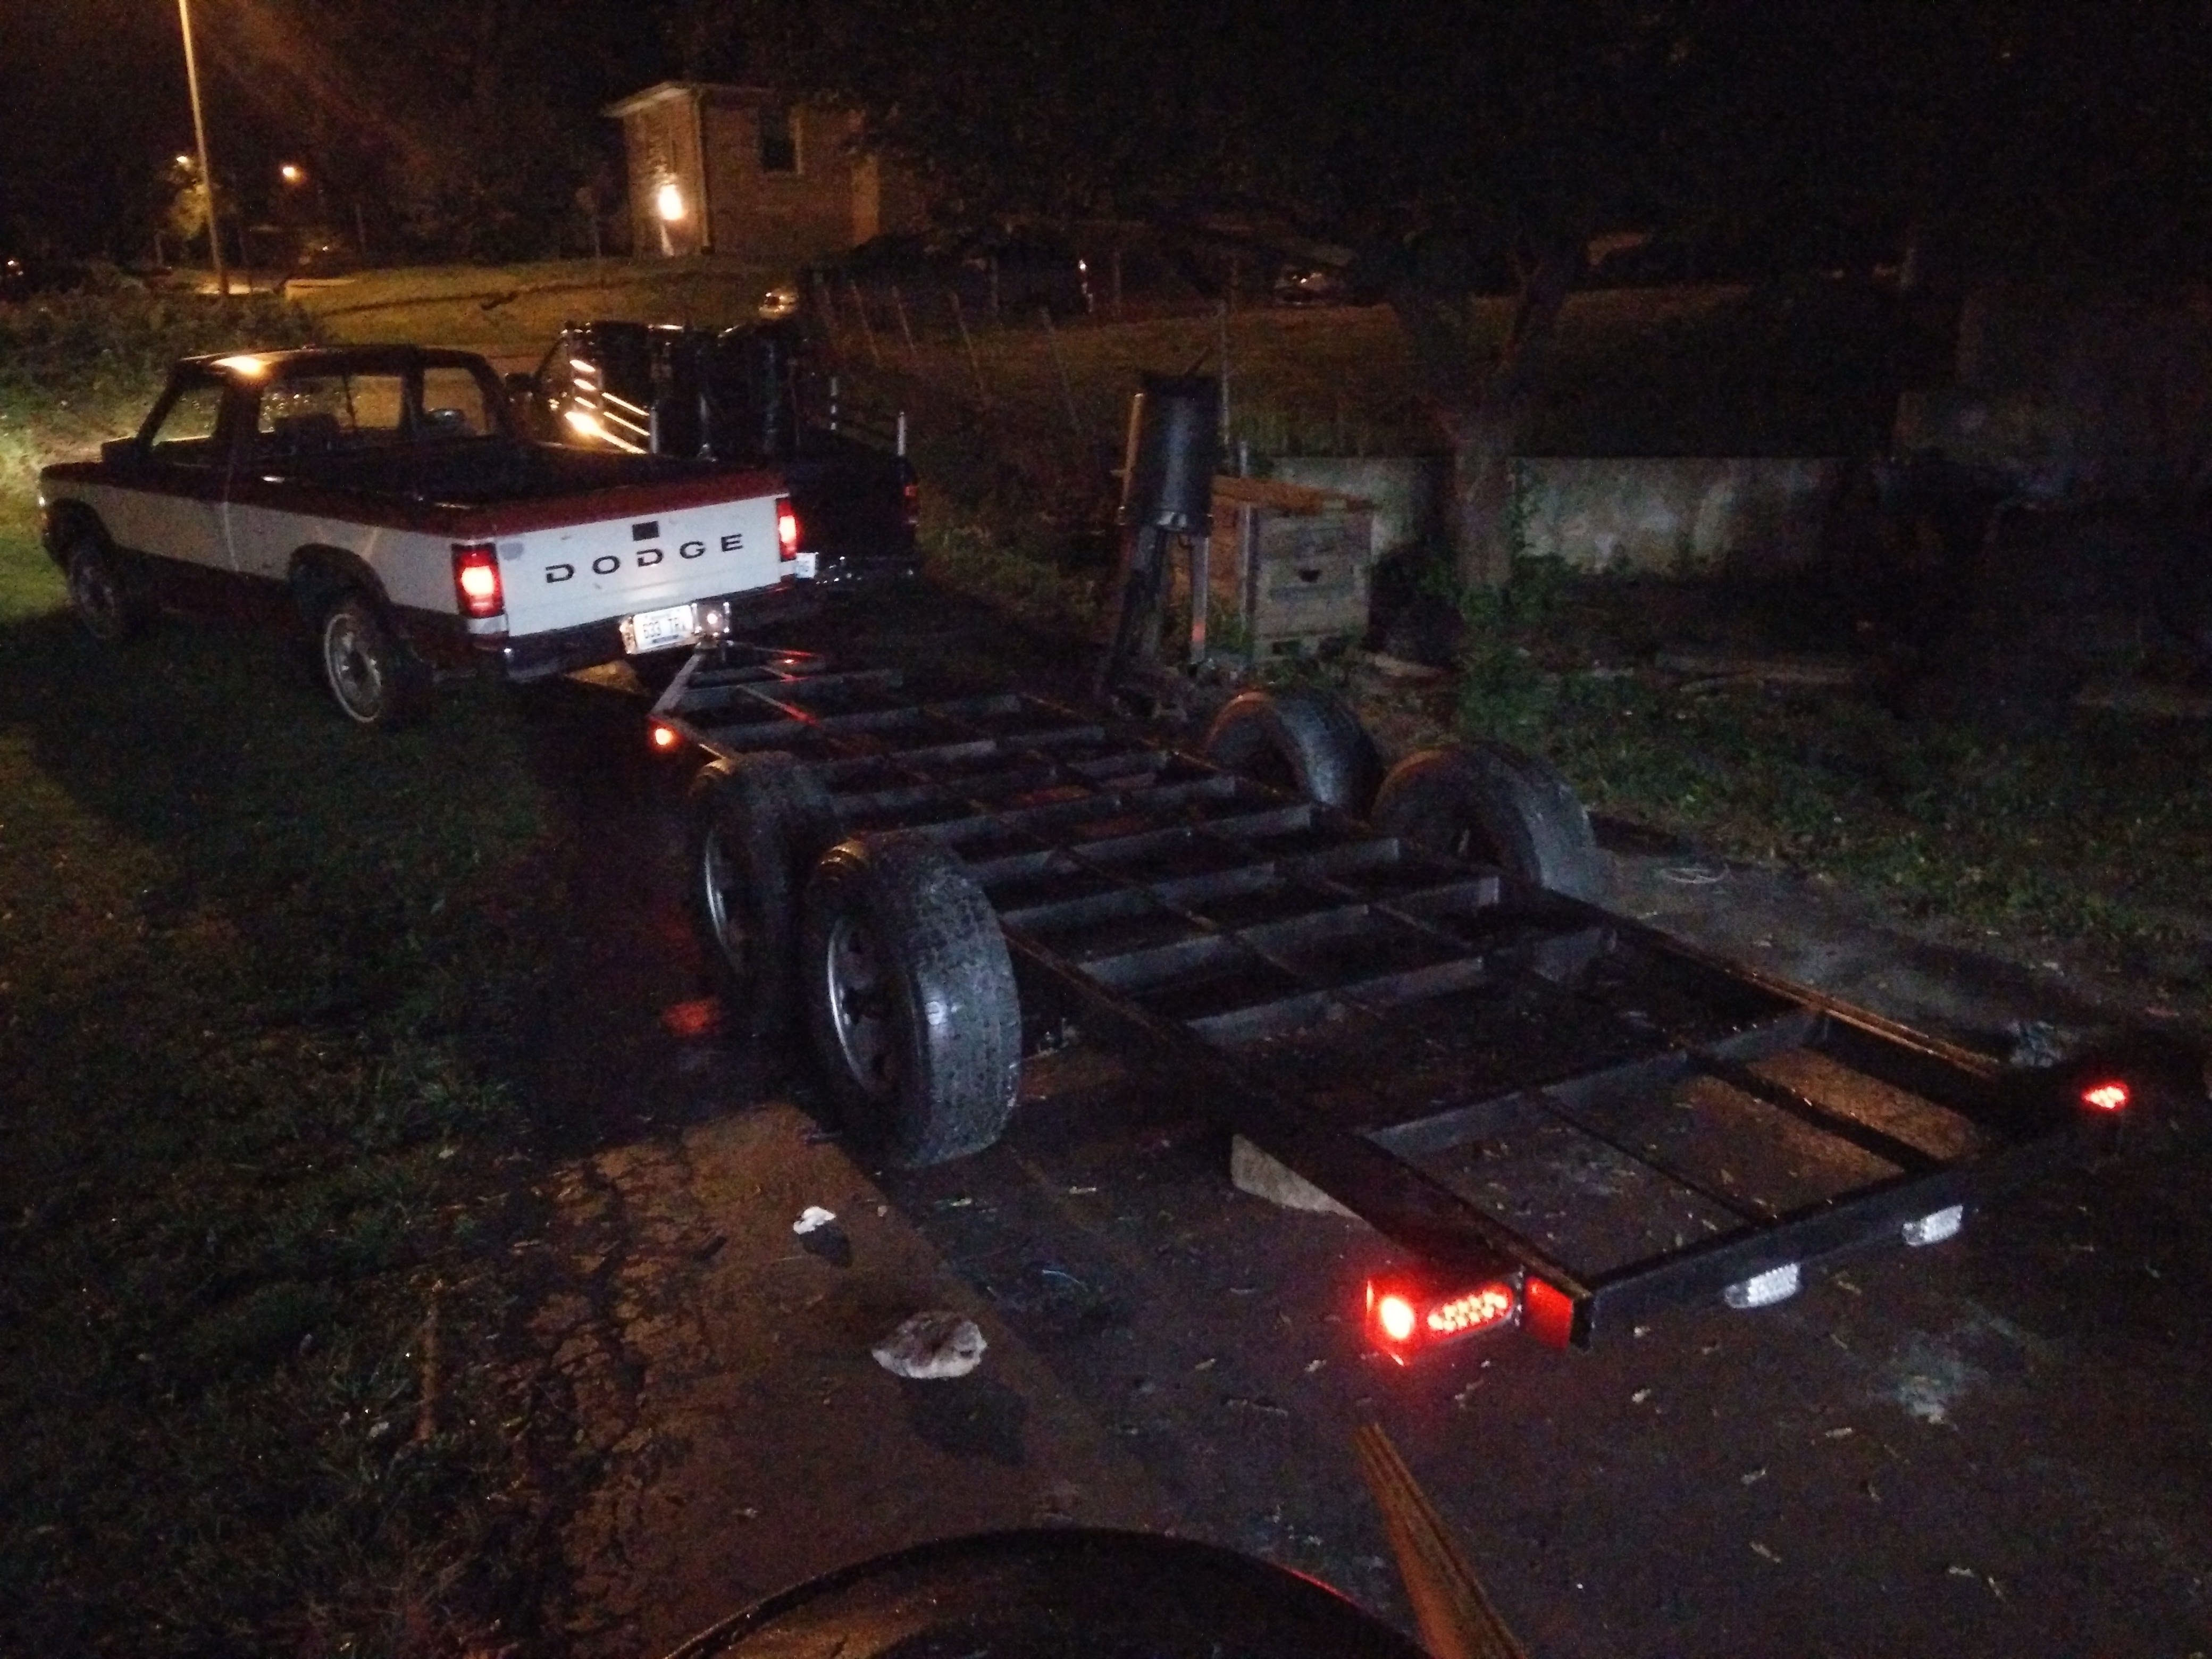
As of about 20 minutes ago, Stage 1 is done. Frame strengthened, painted, bearings repacked or replaced, brakes wired, lights wired, breakaway installed, truck wired, controller installed. I could hit the road now.
Stage 2 will have to wait for awhile, but will be a steel floor and side rails. For my current purposes, it will haul supplies just fine without a floor. In fact, some of the steel I bring home will be used to complete the trailer.
6 Likes
Nice Chris! Yes, the only way to wire is solder and shrink wrap, or will be contending with issues in a few years.
I really like the backup lights. Did you install a brake controller on the truck?
2 Likes
Yep. I did my usual, look around online for a consensus, and everybody seems to like the Tekonsha P3.
It was $90 “refurbished” on Amazon, so I figured it’s an investment right?
Plus this way I won’t confuse @wobigtd with the el-cheapo fuel pump brake controller later on… 
2 Likes
All our trucks have brake controllers and we have purchased cheap ones before and ended up buying better ones later on.
It’s a good investment.
Did you end up painting the frame black or is that the result of you iron oxide treatment (?) ?TomC
I painted it black. The phosphoric acid treatment did okay, but it’s no substitute for paint.
Substantial fenders, well supported diamond plate perhaps…seem to work better for general purpose. Stake side holders can be handy as hold downs or for stake sides (as if, you were carting a load of empty plastic barrels for example).
Retroflective side marker tape gives a lot of bang for the buck, and the good quality stuff lasts well.
Those rear work lights, might need a foolproof ‘lighted/indicated when ON switch’-- in the cab, those will be illegal if accidentally left turned ON, while using the highway. Proper standards can be found here & elsewhere: Regulations Section | Federal Motor Carrier Safety Administration
oliver
2 Likes
The picture is maybe misleading, they’re only turned on with the reverse lights. In the other pictures they’re catching some reflected light from the open shop door.
I’ll do fenders etc later on. Reflective tape is a very good idea.
2 Likes
looks good Chris. Personally I am kind of partial to wooden floors. Things tend to stay put much better and don’t rattle like objects on a steel floor.
3 Likes
It looks like you can go to Wayne’s house and back home on your own fuel
1 Like
Maiden voyage is tomorrow, headed to Sandusky Steel, 100 miles south.
Added some reflective stickers, and a spare tire. Woot!
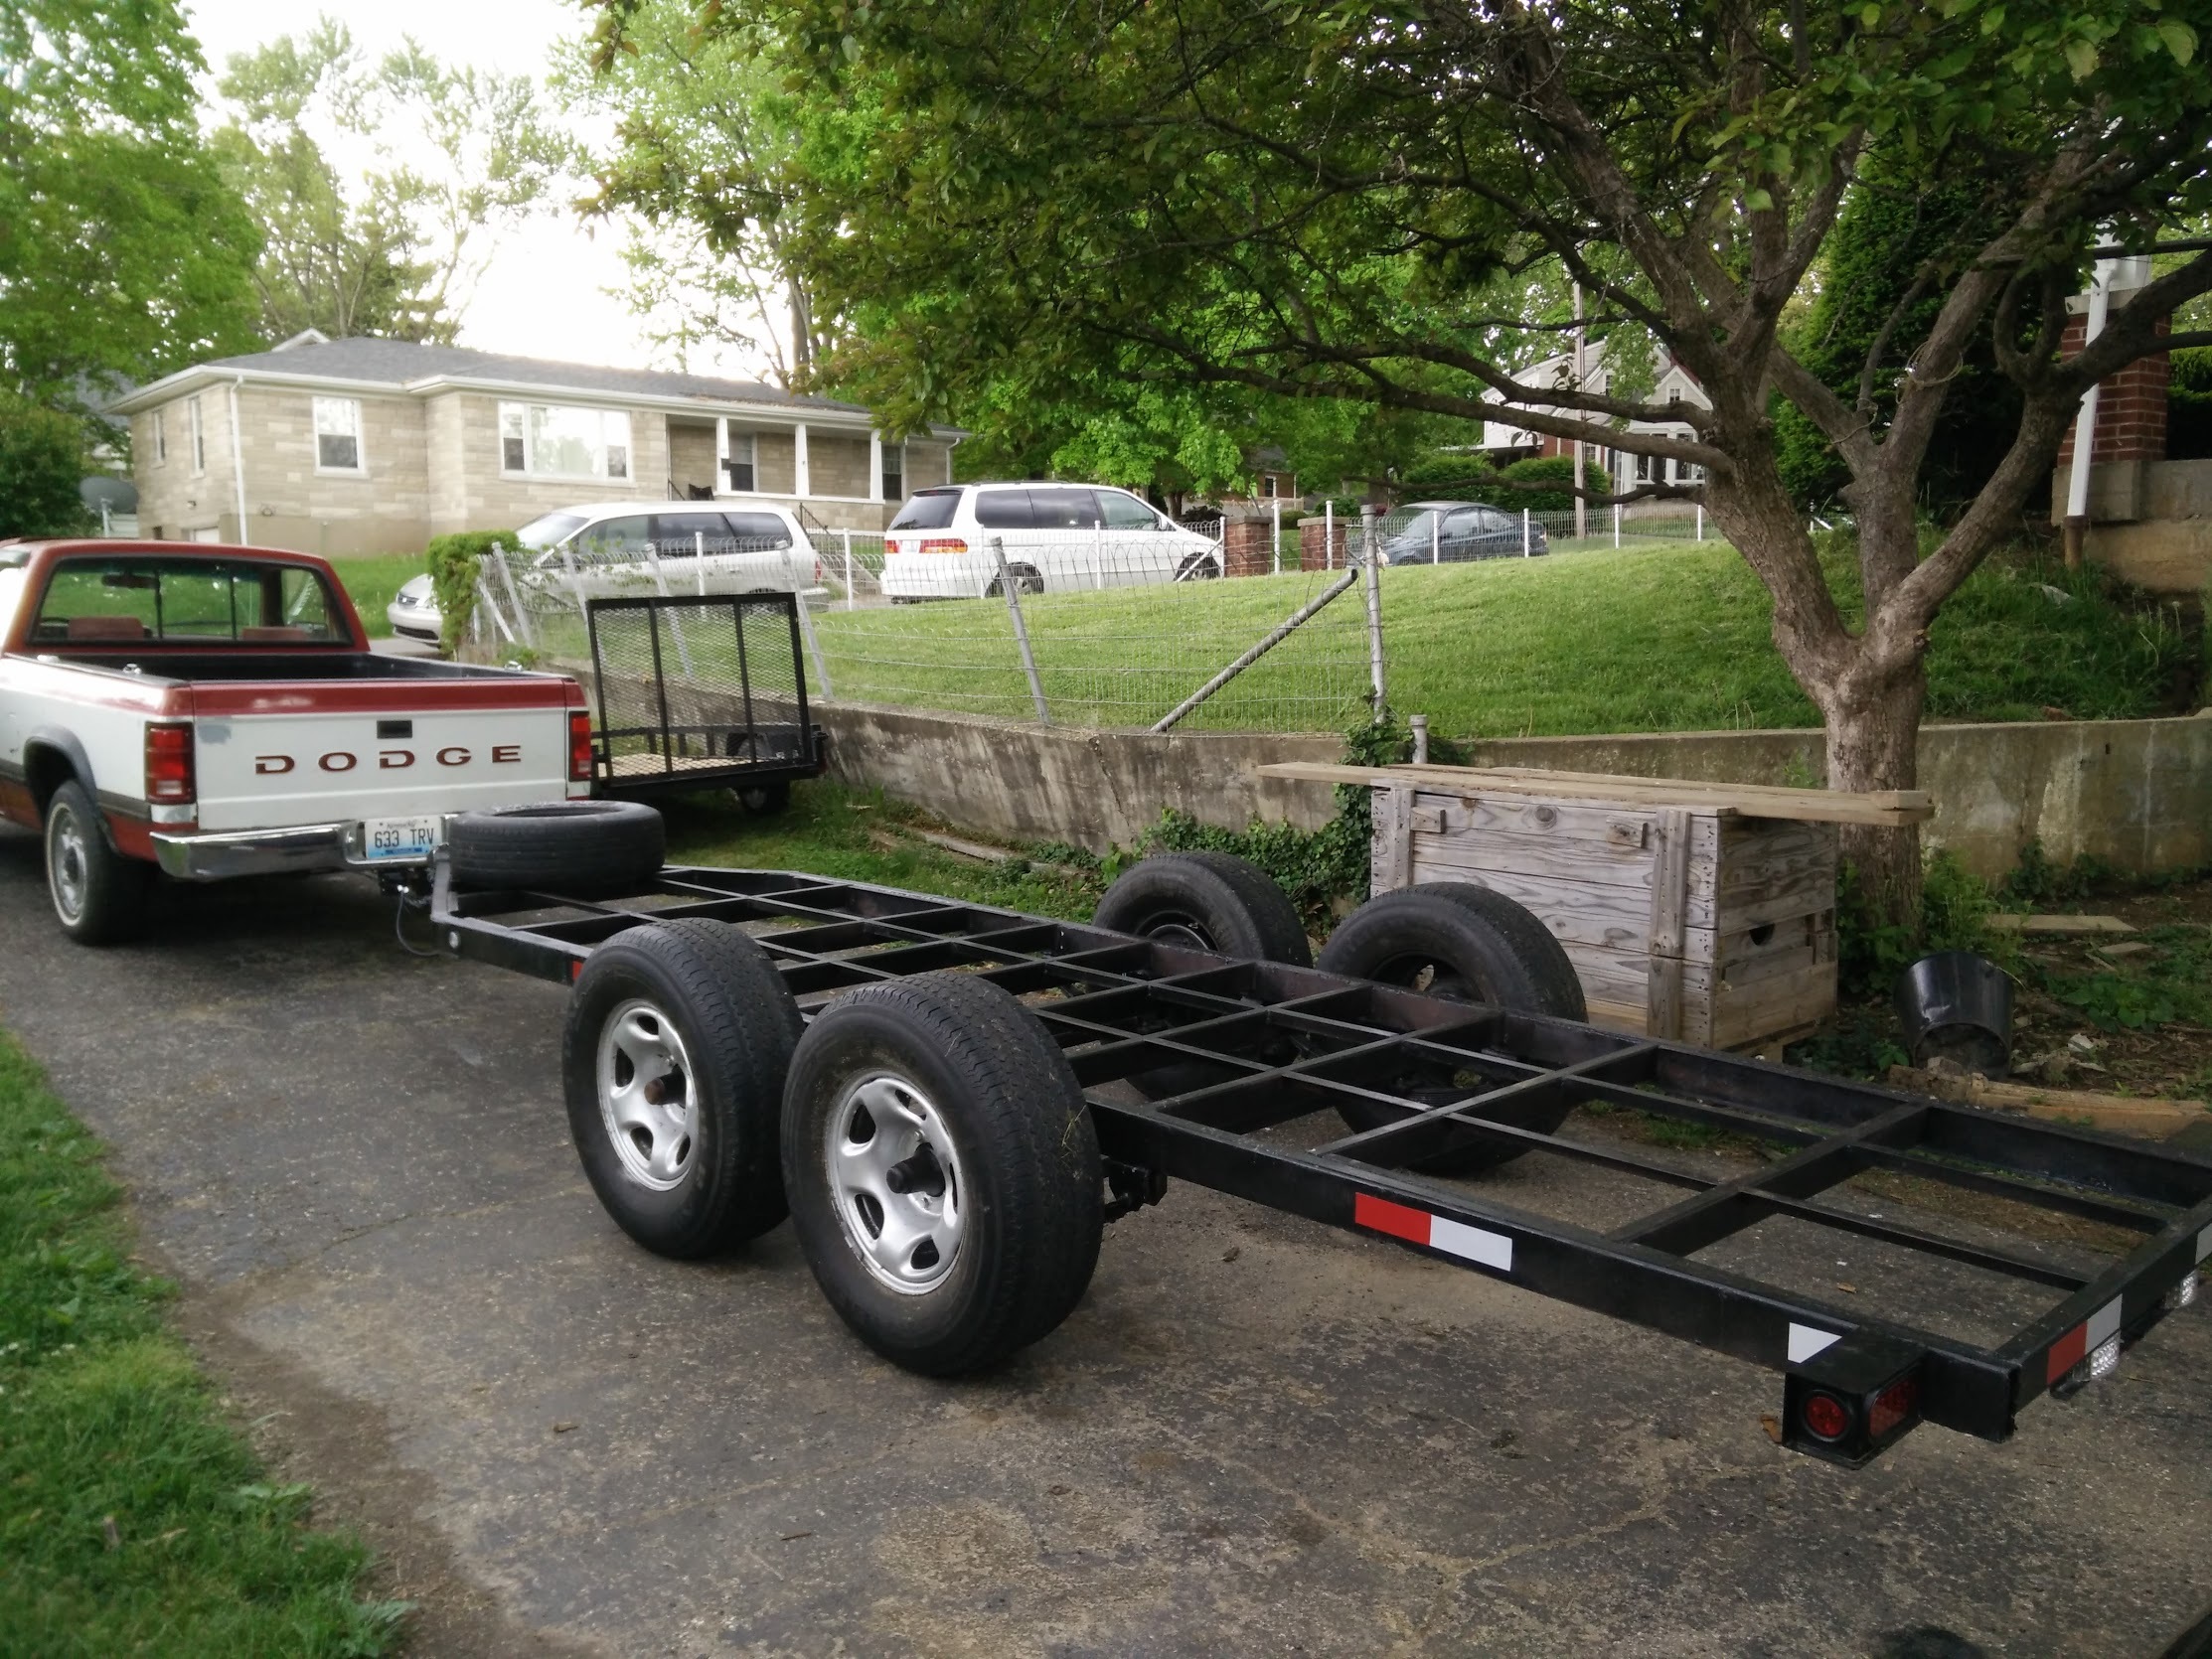
10 Likes
Nice job Chris, it should last you a good long time…
1 Like