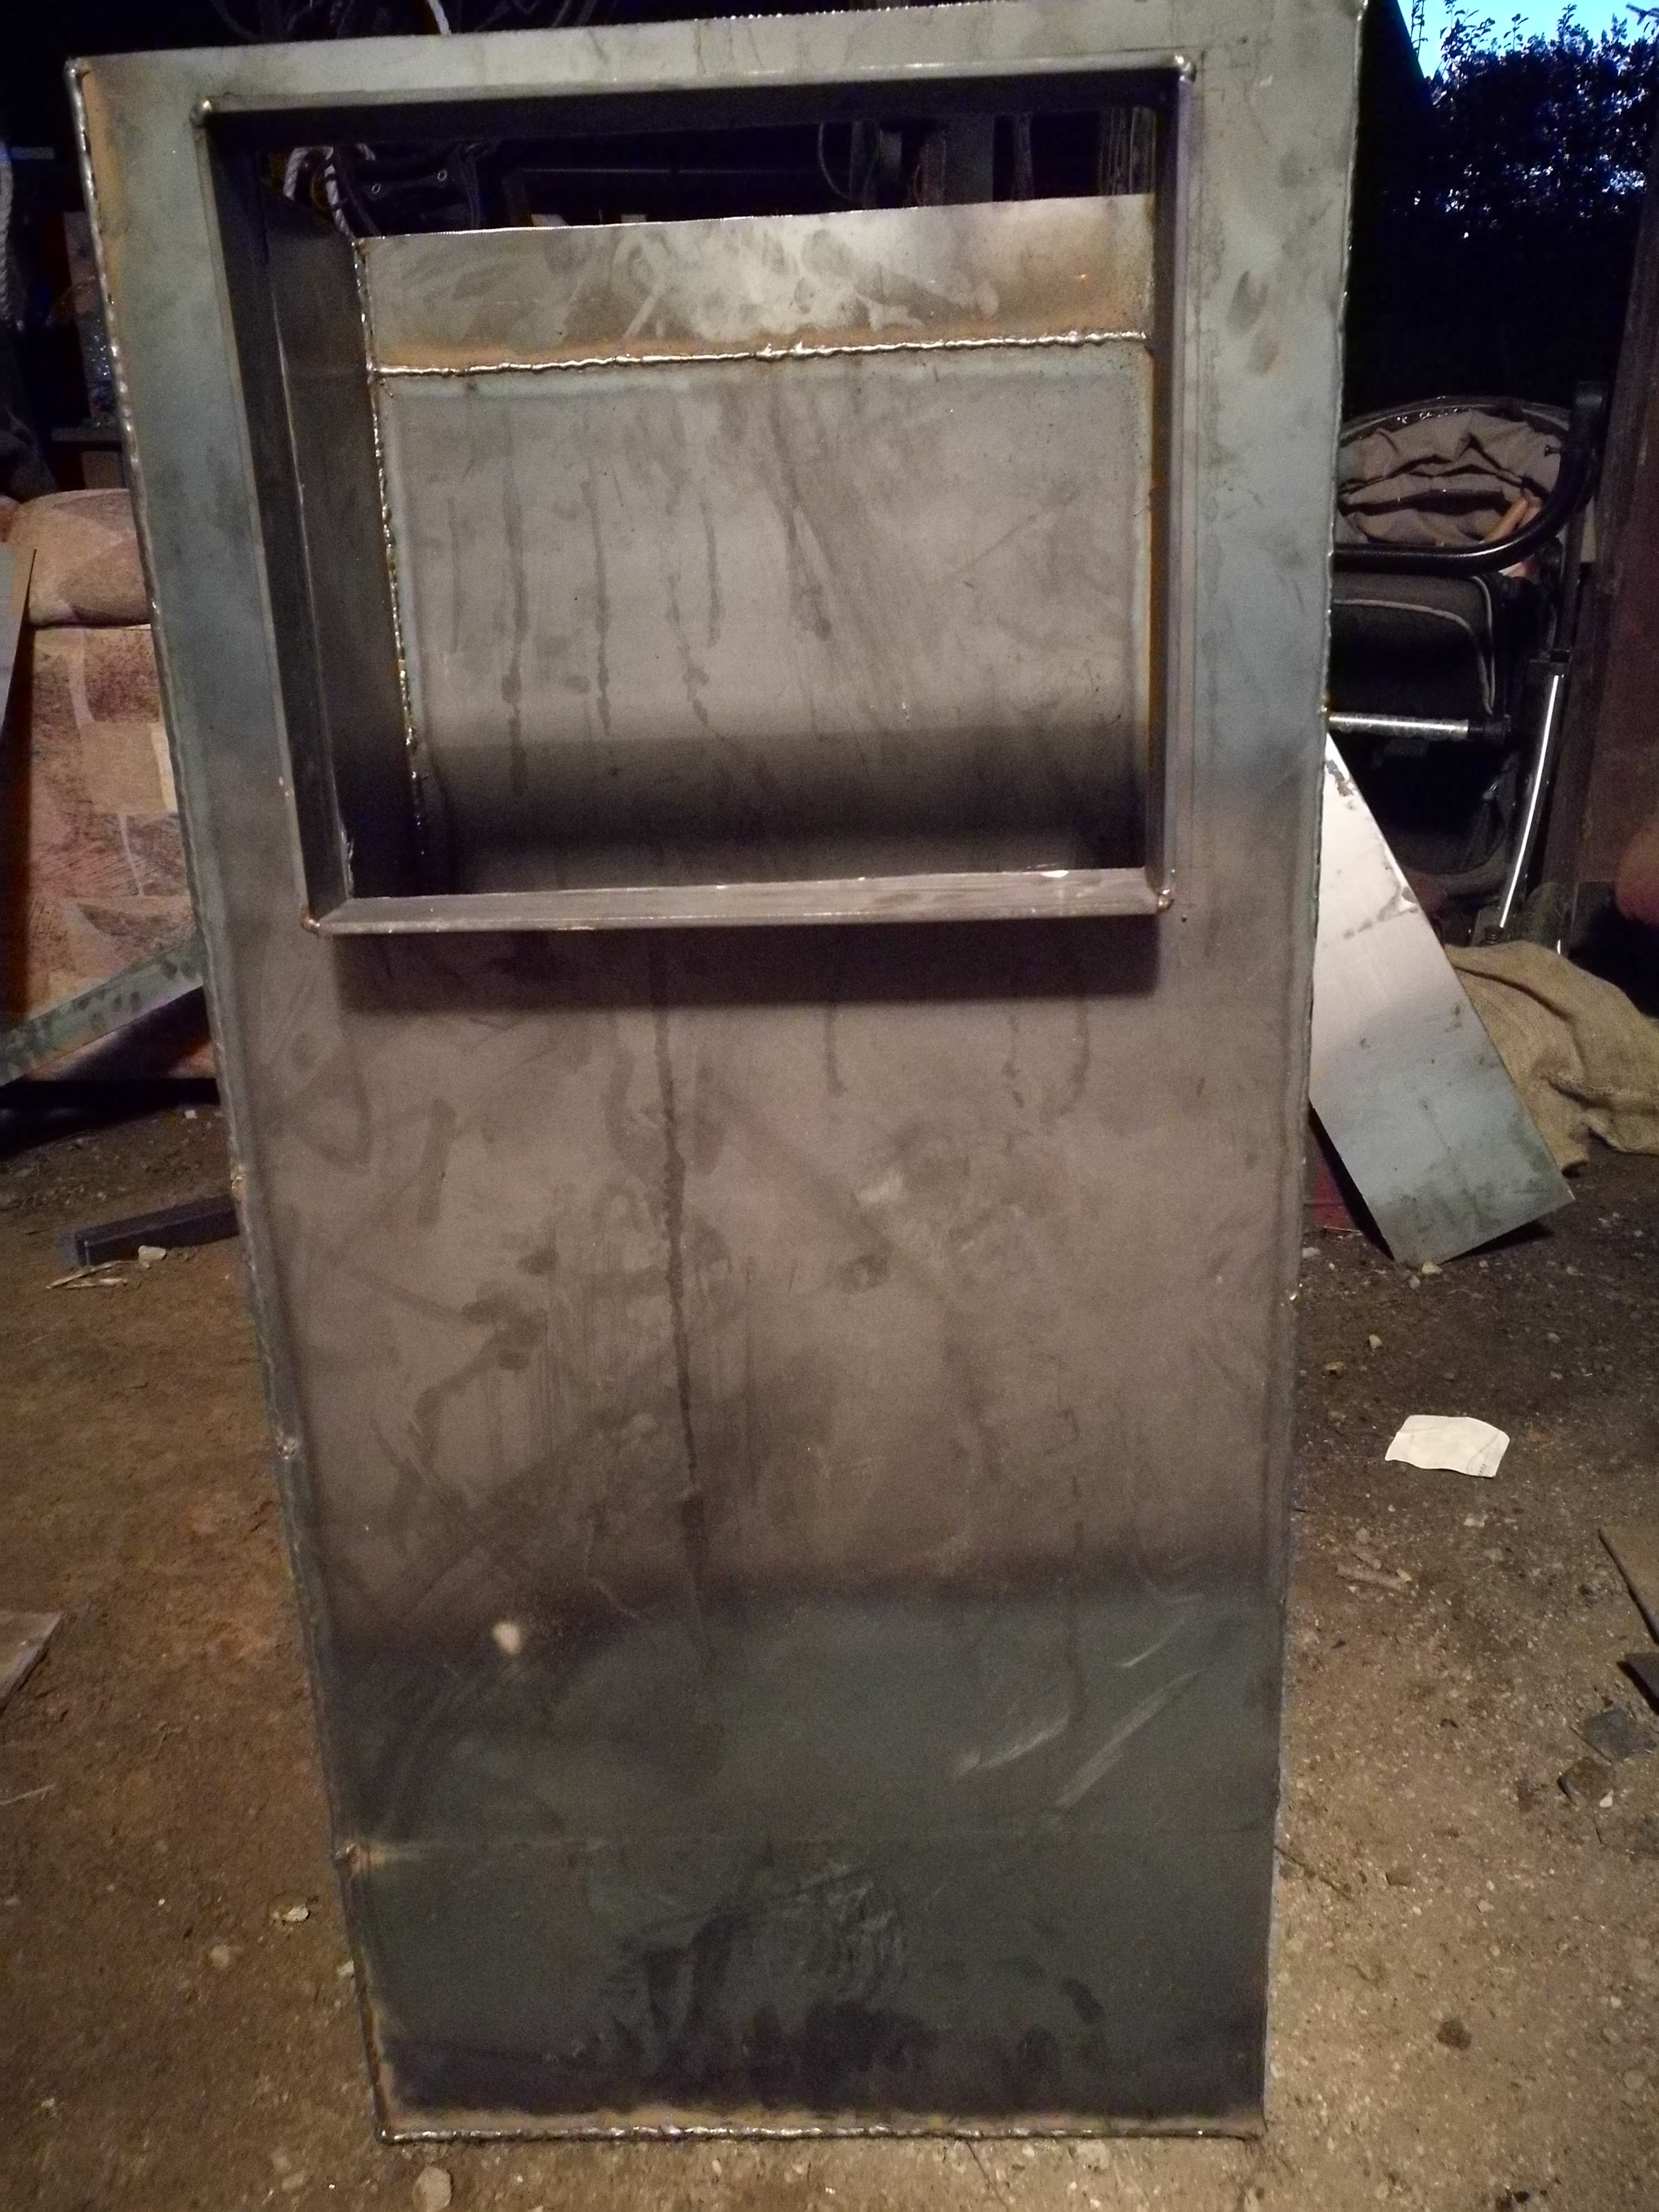
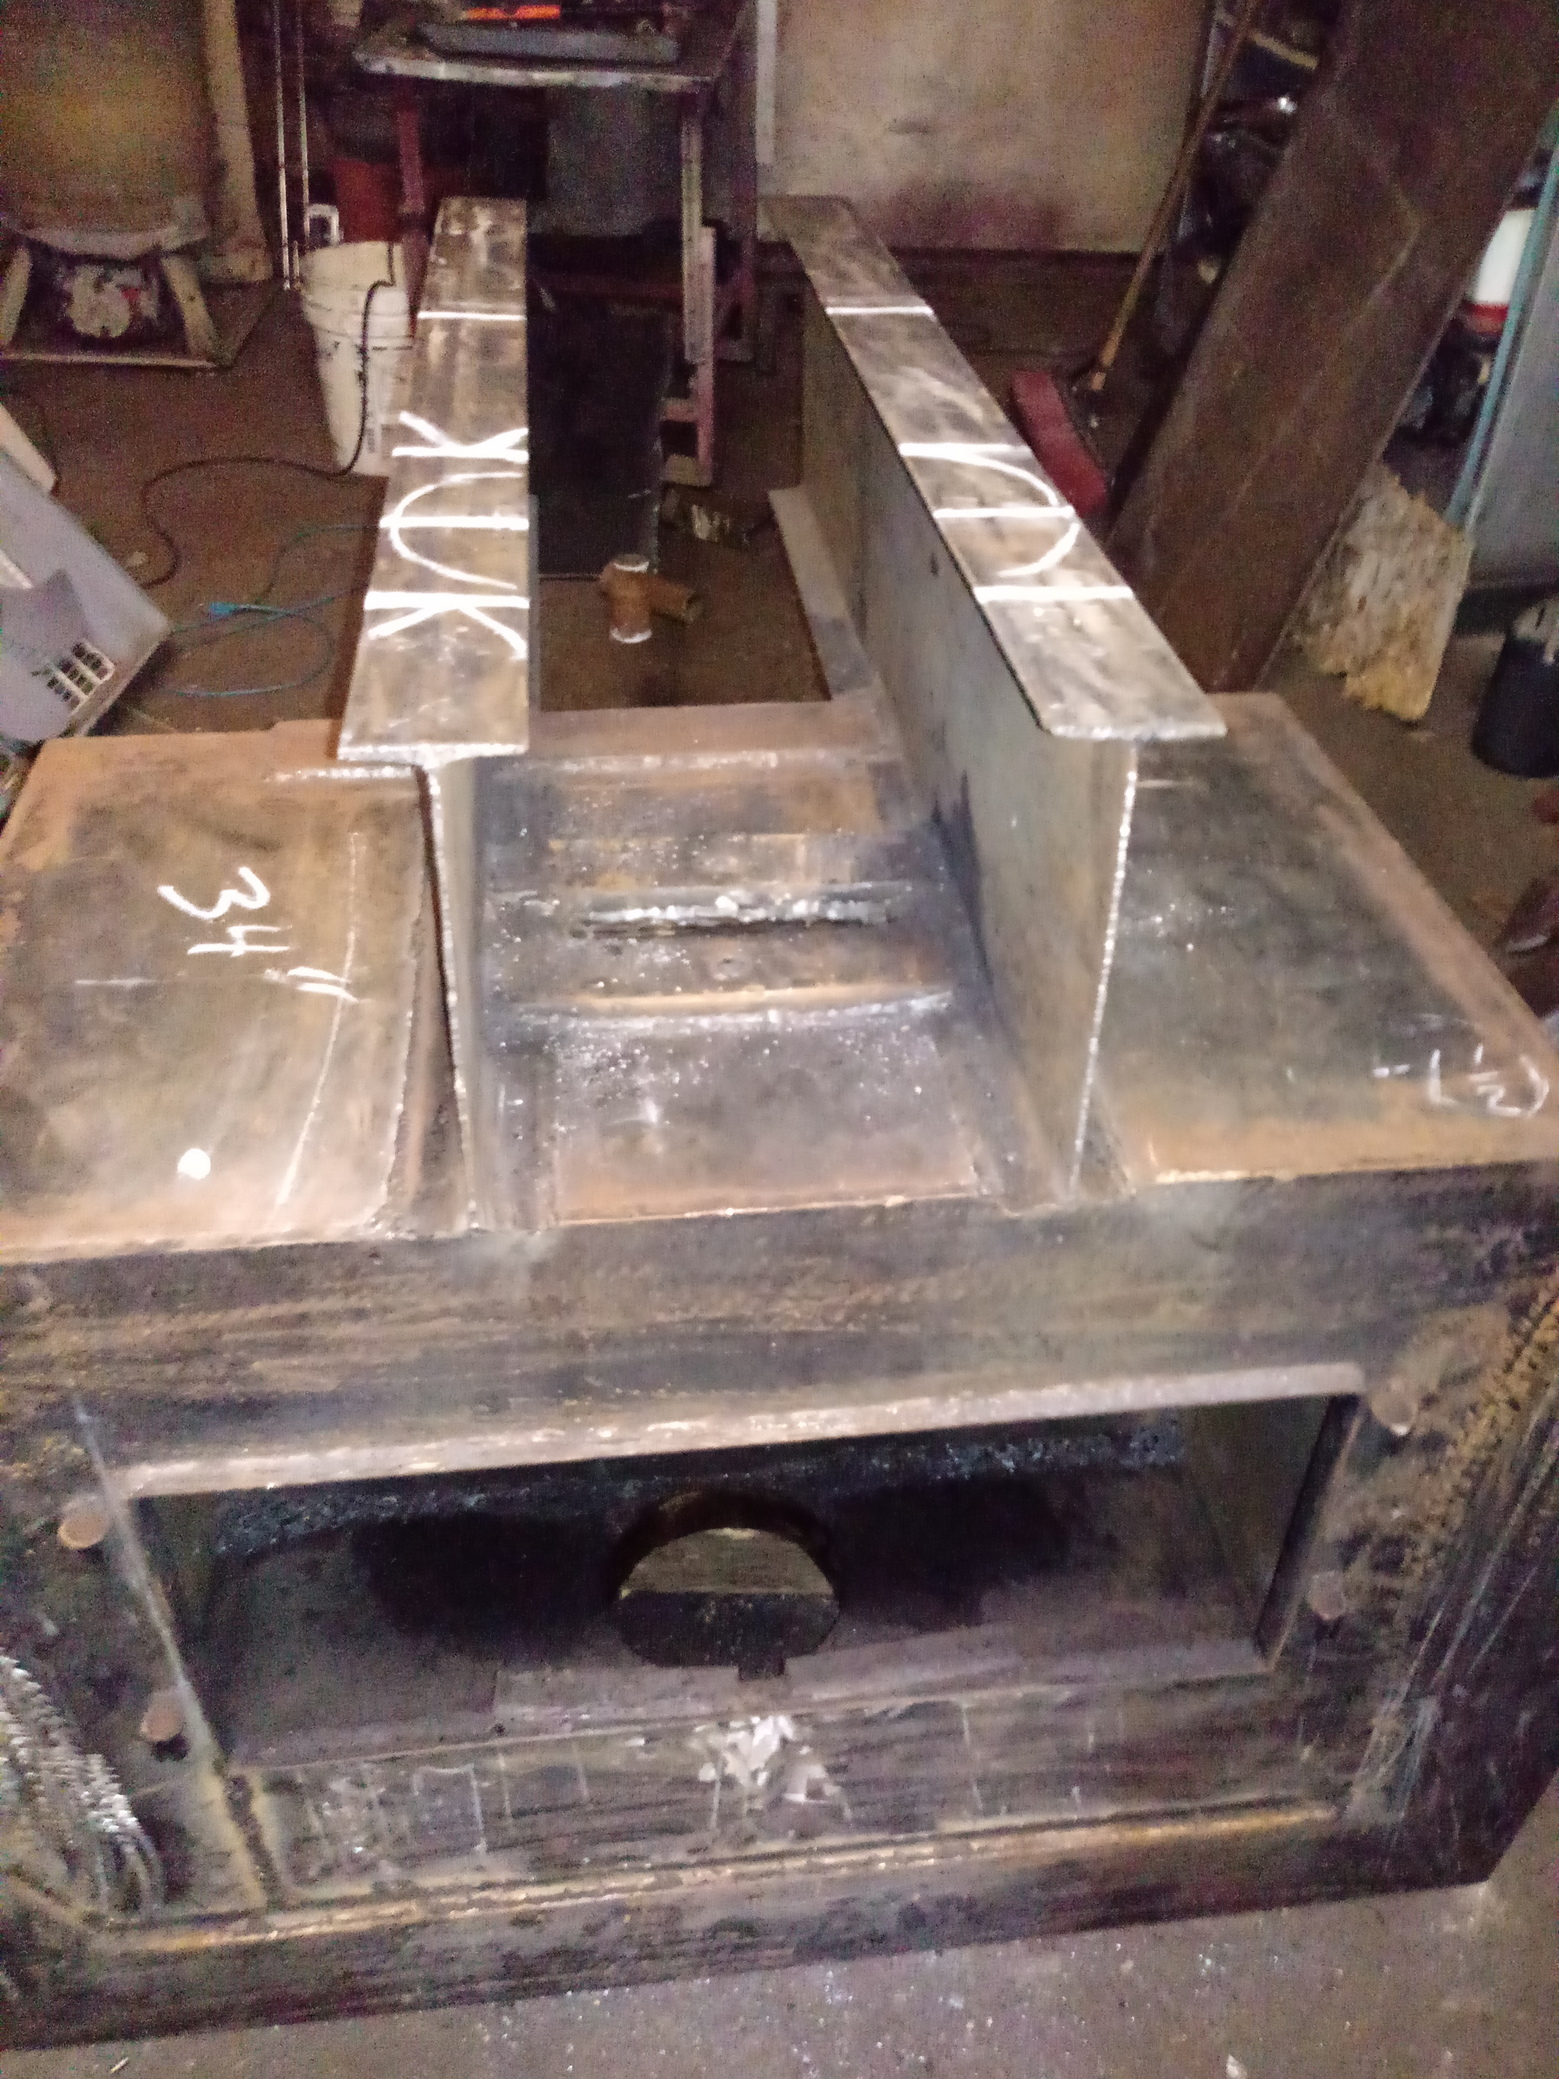
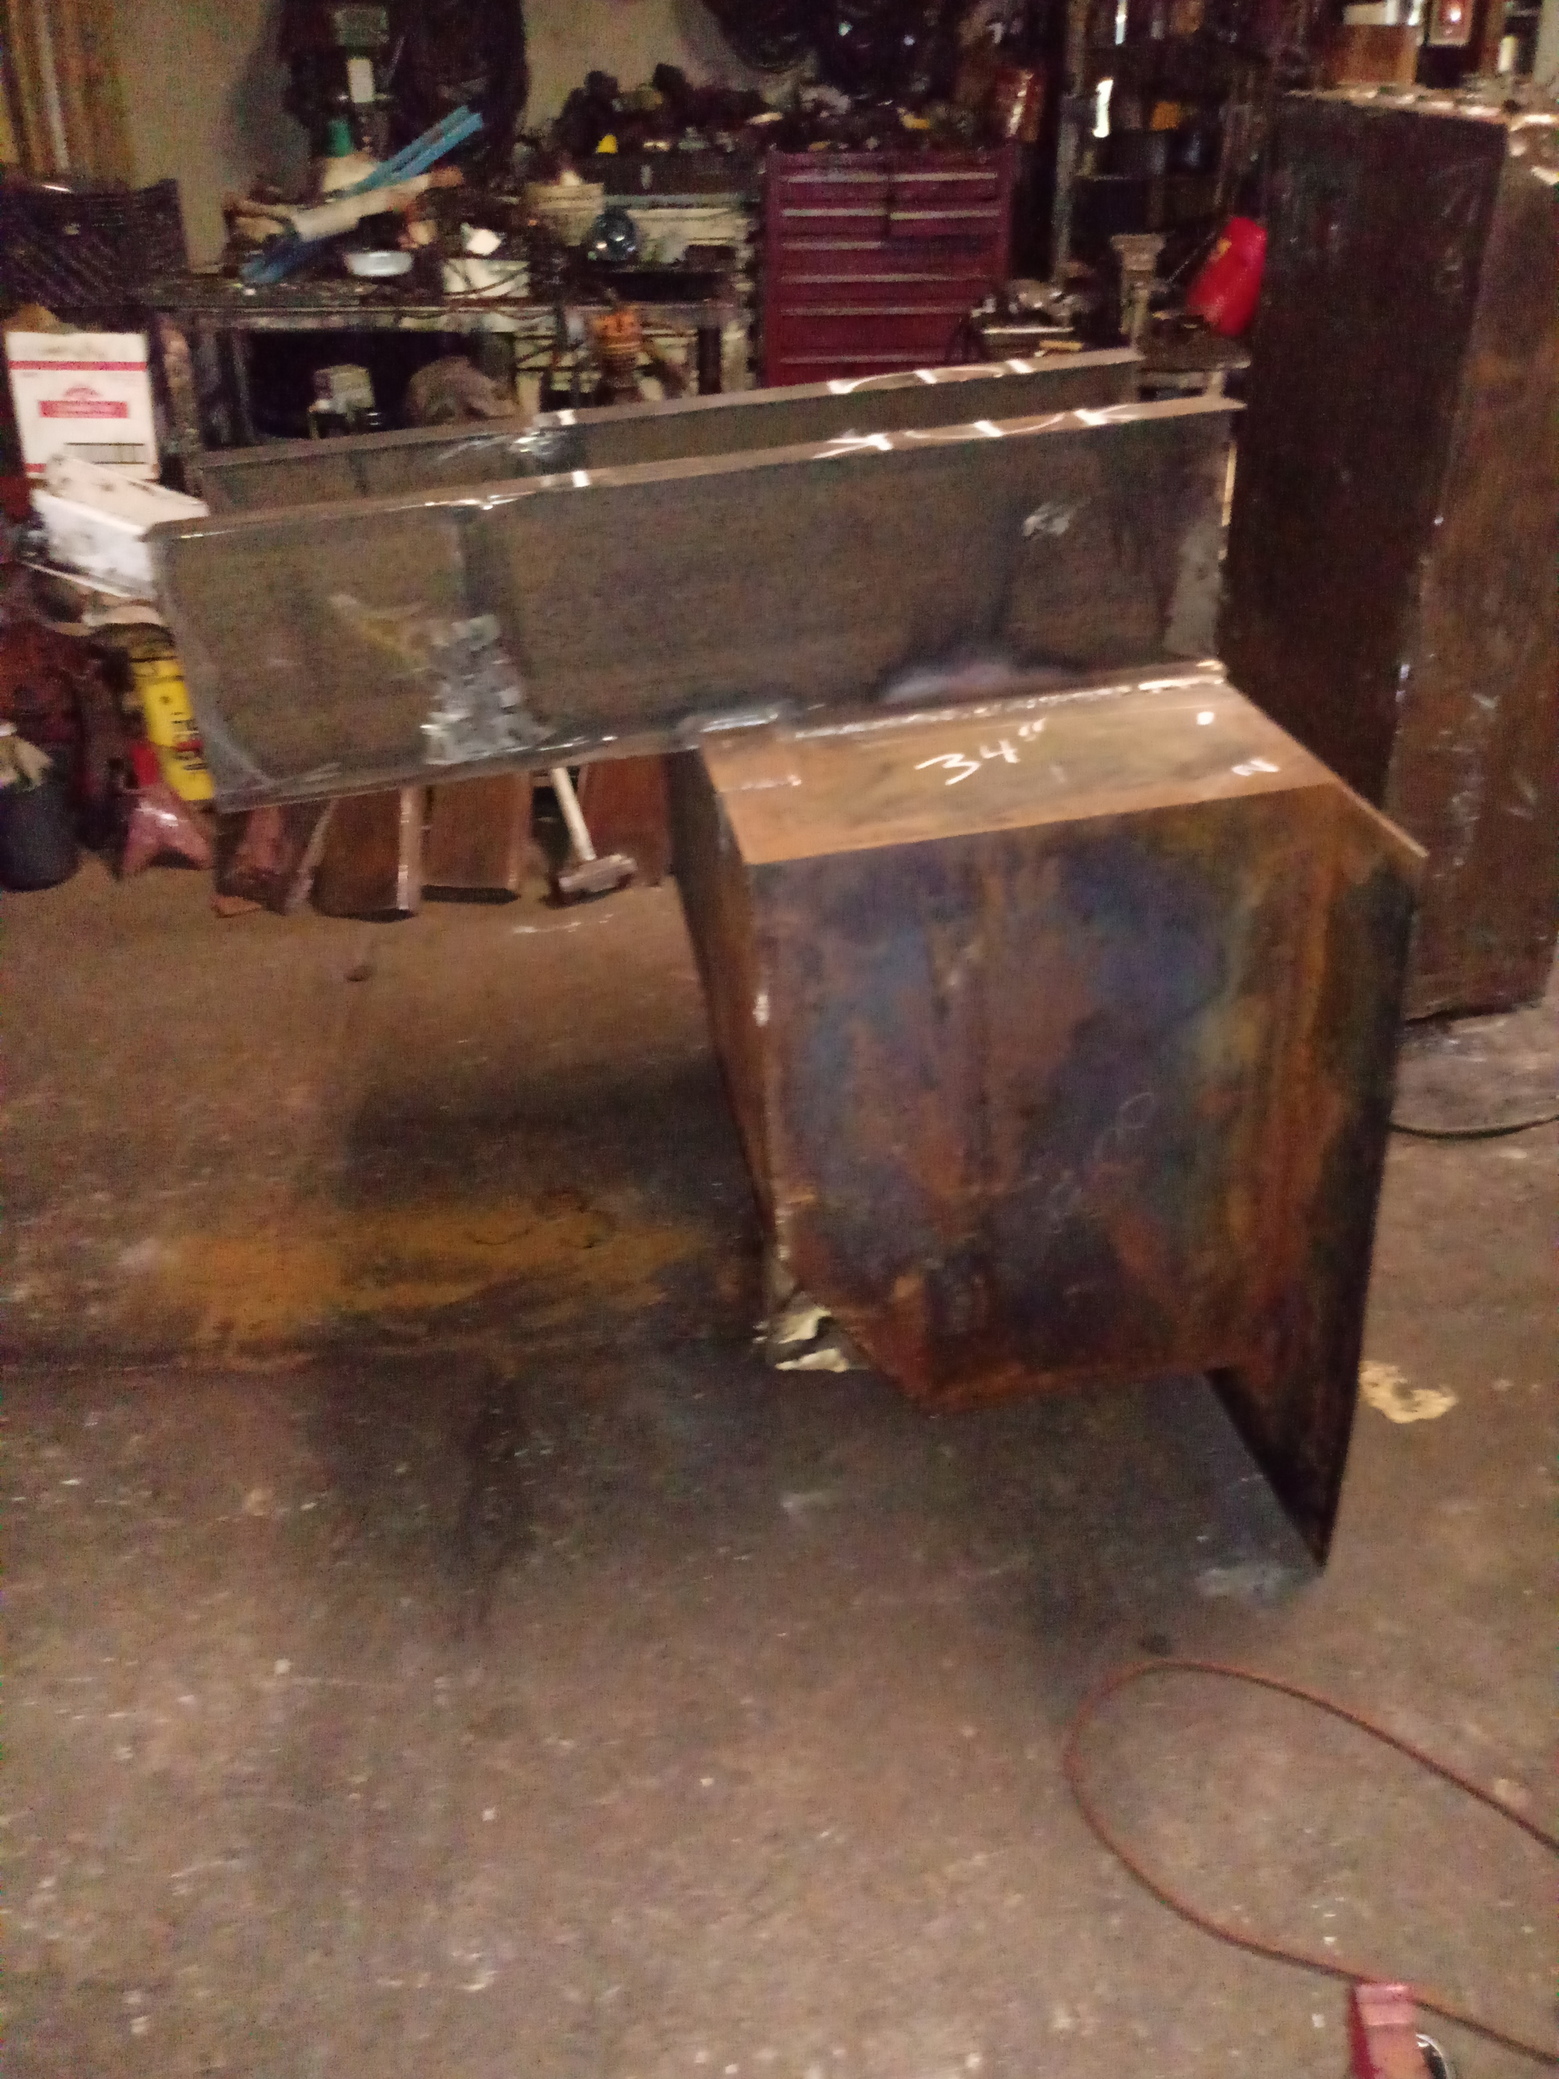
Back in to gasification after what feels like eternity. Started building a woodgas boiler a customer ordered, its gonna heat swiming pool water. Here are some pics in case anyone is interested
Still missing the lower ash cleanout hach and the water mantel, plus plumbing. This is the first build with my new MIG welder and it has for sure aided 50% to work time efficiancy.
Big thanks to @JO_Olsson for guidelines from his experiance on the feald of wood boilers.
That is a cool project. I had a Tarm wood boiler for a few years in my last home and loved it. It is amazing just how efficient a good gasification boiler is.
The deal with the customer was for me to build just the crude boiler unite but l guess he will need a way to make the boiler run at ~60c. Plus a heat exchanger to exchange heat from primary (boiler) water to pool water.
A downdraft gasifiing boiler like this shuld never produce tar, but runing too cool culd resault in water condensation, equals corrosion. So it shuld be avoided.
Not that I think you need it, but here’s some inspiration.
2.5 hours into the first burn this fall. Chimney is pulling somewhere between 1/8 and 1/4" of water. No fan. Water temp has reached 80C about half way down the 1,000 gallon storage tank.
I am just woundering if any of you gasification boiler builders think our 2" ceramic blanket would hold up for the sides of the bottom chamber. With fire brick on the bottom, or if all ceramic blanket would work.? ANY. Advise from this type system welcom, THANKS.
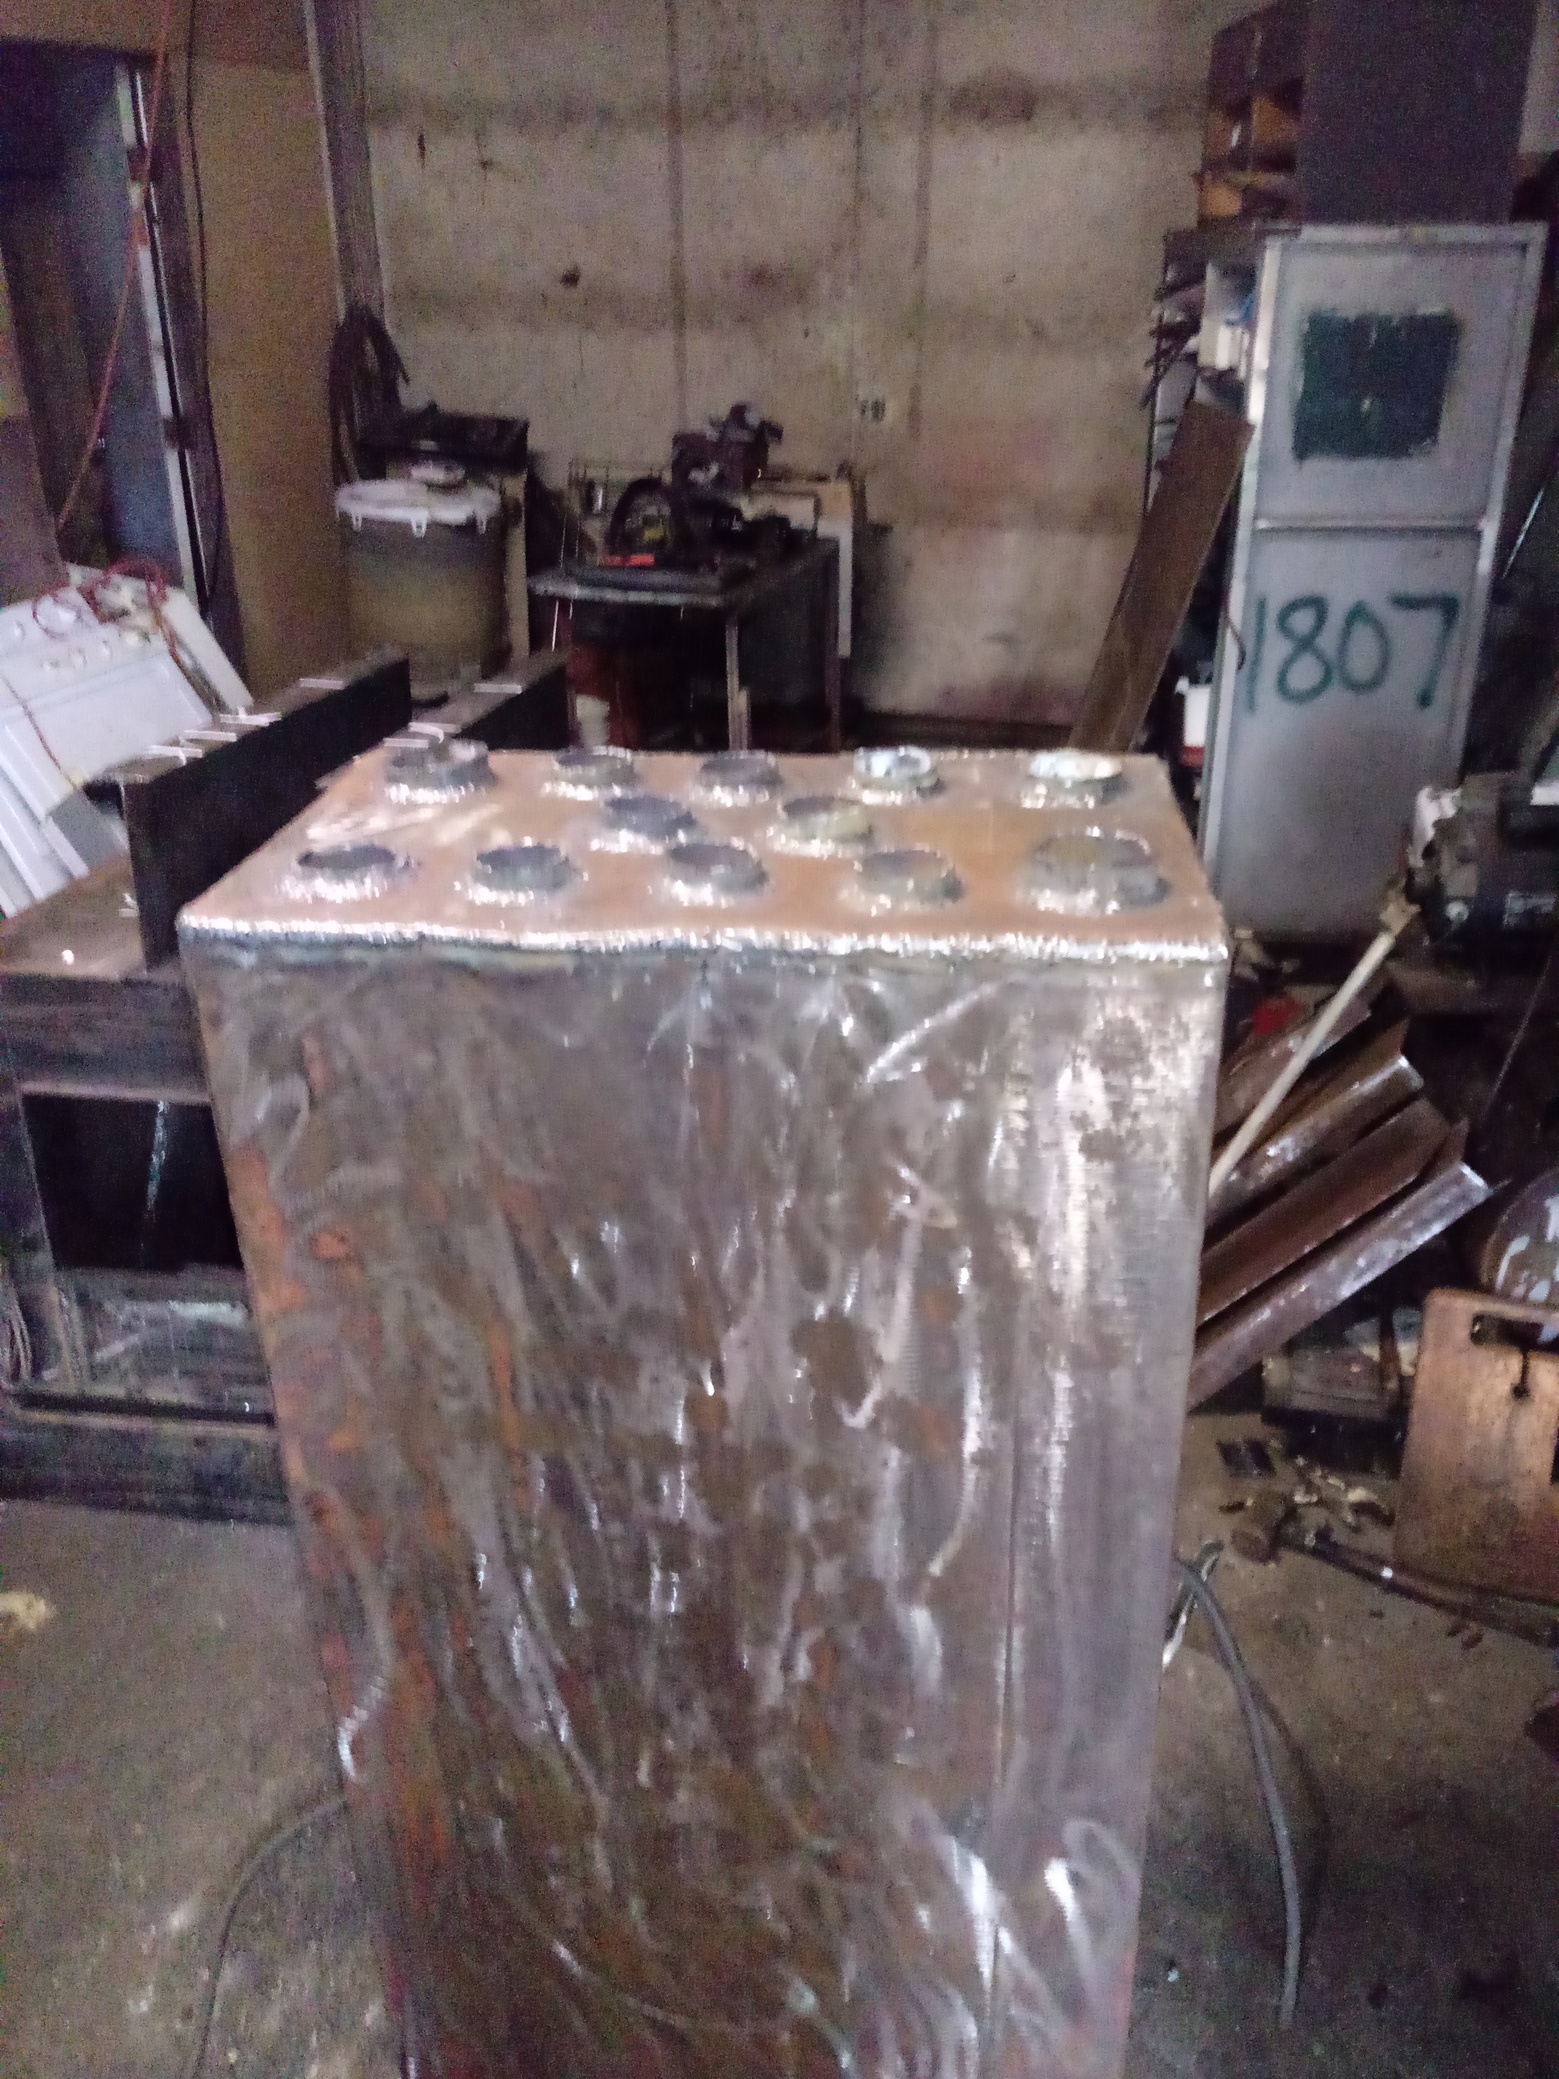
I am not up for a long thread thing, so thinking this pick might give someone an idea of what i am building from, I bought this bottom wood burner 3/16" thick plate double wall at an auction made for hot air push out the top front like a fire place insert stove.I lucked out when got home and seen it was thick wall plate, same as the fuel tank i am makeing my heat exchanger out of, can you see how it goes to gether when more flanges chanel and ash doors are built.Uploading…
Kevin I am not sure i understand what your asking about with cement blocks but here is a design i am considering building here if I redo the heating system. I have too many projects and never seem to get them done. Guess that is life on a farm infact I need to get back to unloading hay before it starts to rain again. http://heatkit.com/html/lopezs.htm
The problem I had with my Tarm boiler was once it got below 140F it was a devil of a job to get the fire started the thermal mass in the boiler itself would just quench the fire and it would smoke up the house trying to get it going. Once you got it hot it was great. I think this masonary design with the separate smoke path to start the fire and no thermal mass of water in the stove would solve this problem. It was really only a problem this time of year where you might want one fire and be set for a week without another one but it was really annoying. My work around was to use my on demand backup oil boiler to get the wood boiler up to 160 not ideal but it worked.
Kristijan have you considered adding an oil boiler for a backup in that design? The tarm has a spot right at the back below the heat exchanger where they put a oil backup. I often wished I had bought the boiler with that option but they charged a small fortune for it.
Hi dan i seen thoughs type designs years ago and look easy enough too design with a heat exchanger on top side of the wood hopper and hot gas burns out the bottom first then travels up and hits the heat exchanger, i thing the heat exchanger type i am building has better surface area, and leaves more room for wood in my relitivly small wood hopper, most of the heat exchangers of the type i am building are part of the back of the stove water jacket, this design has seperate heat exchanger and the water in and around the wood stove part will need good circulation in and out of the exillery heat exchanger too keep the heat equal and moveing.Though with good air control and few safty boil over controls should keep from over heating, this type of boiler is open so not a big problem with preasure build up, other than venting the steam outside if overheated.And yes i need too build the channel too add top chimmney at start up, it lines up perfect and still have room too put a top plate clean out seperate from the chimney flanges, in this configeration.The marks on the bottom are just measureing ware the top chimmney lines up when i flip the burner rite side up.
Looking good kristijan, i dont know if this thread is being invaded, or confused with my design above, if so sorry i dident plan on adding an idea too confuse, maybe i can let chris move seperate if you need, THANKS.
Kevin the issue I had with the tarm was related to the water jacket being on the other side if the metal wall which is the fire box upper chamber where you put the wood in. I don’t know if I follow your design well enough to understand if you have addressed this issue or not. But the tarm does have a flap at the top if the wood box which you open to let the smoke draft out the top when you are starting it. It is the only stove I have ever seen that you can fill with paper and light cold and the paper will actually go out even on a chimney with a good draft. A friend of mine bought the same boiler at the same time and we both had trouble with the cold start. Once it was hot it was great you could reload it up to 12 hours later and there would be enough heat in the fire brick to start the fire.
Hi Kevin,
I think with downdraft and wood on top of the combustion chamber, it has to be made like an arch. I don´t se how a ceramic blanket would hold up. However all cleanout doors on my boiler are dressed with similar blankets on the inside. They act both as insulation and door seals.
Dan, my boiler has that flap, but I don´t use it much at lightup. I might open a small gap to vent smoke out the chimney at a hot refill.
I do recomend a helper fan on the chimney. It makes the downdraft lightup procedure so much easier at a cold start.
JO The helper fan is interesting I considered it at the time but didn’t research what my insurance would allow me to put in the smoke path. They really don’t even like to insure you with wood heating any more around here.
The tarm does have a fan which blows in supply air. My best method of starting that boiler was to open the back flapper and crack open the clean out door at the bottom as a draft and leave the fan off. Using the fan would blow out a small fire. But let me tell you once that boiler was above about 140F or 60C it would light really easy.